
OVERVIEW
Students can begin by finishing the inaccurate painting from 2 weeks ago or creating another experimental work with acrylic paint. Pen and ink is used to copy the work and/or technique of another artist’s ink drawing that they choose. If time allows, early finishers can work with sticks dipped into ink for drawing gritty and dramatic line art of animals.Grades 3 – 5
Week of October 13 – 17
1 Hour & 45 Minutes
Lesson At A Glance
A brief overview of each step. Buttons jump to each section for detailed information.
5 Min – Set up for painting
35 Min – Finish any existing paintings or new expressive painting
5 Min – Clean up painting supplies
3 Min – Van Gogh Ink references
2 Min – for ink
5 Min – big shapes and the frame
30 Min – Early finishers can draw new ink drawing.
10 Min – Twigs and ink. Use animal shadow reference
2 Min – Everyone helps
SCROLL & TEACH
LESSONPLAN
Each section is a different color. Read over once and then you can SCROLL & TEACH using any device you like. It’s designed to work best with your phone.
LEARNING TARGETS

Students know how to make quick sketches.
M A T E R I A L S
- 14″ x 17″ Sketch Paper
- Compressed charcoal
- Still life items
Vine charcoal is cheaper, but not appreciably so, and there are two problems with it. Vine doesn’t adhere to the paper nearly as well as compressed charcoal, nor does it create strong blacks. We recommend using soft compressed charcoal sticks. You can break them in two for more versatility and to distribute to more students.
1.1 warmup
When students arrive, they will open to a clean page in their sketch book. They will be using charcoal in the warm up (students who can’t stand to touch charcoal can use their Ebony pencil).
Students will need to stand up and draw something quickly that they can see easily nearby. It can be a chair, a friend, or an object on the table.
1.2 Bookend
A bookend is at the beginning and the end of each lesson.
This is where you go over what the lesson is about and what the main learning points are.
Making this clear, helps students remember what they’ve learned and understand the processes they’re going through.
“Today is a full day with the three distinct sections.
You’ll begin with a warmup in charcoal, drawing from life. Standing up allows you to move your arm more freely and makes sketching more fluid and expressive.
The second section is about catching up on any painting project you haven’t finished. If all of your projects are done, I have some good reference to create a quick and expressive painting on paper.
Finally, we’ll look at some ink work by Vincent van Gogh. Then everyone will choose a reference and make your own version of one of his ink sketches.
CREATIONS - tap here to open
Use the Student Instructions printout below to distribute to your Creations students. Tap the image to open the PDF in a new window.
Quick Painting & Ink Drawing
Overview: Students will plan, practice draw, and paint a small expressive acrylic of buildings using photo reference and/or create a detailed ink in the style of Van Gogh, using reference photos.
Use a canvas board, or a sheet of canvas taped to a drawing board.
1. (10 minutes) Choose a reference photo from the provided PDF photographs of buildings in Foundations STEP 3 below. Use a pencil and sketchpad to create a practice drawing to familiarize yourself with the proportions of the FRAME and the BIG SHAPES.
2. (5 min) Set up for painting in acrylic.
3. (5) Paint some black areas, taking care to build up a nice compostion as you go.
4. Continue adding colors working from dark to light.
Be expressive and take some risks using color and shapes. What can you do to simplify this image and also make it more interesting? What can you add to it that someone else might not think of?
If you finish this painting, or if you’d rather work in ink today, move to the next steps.
1. (10 minutes) Choose a reference photo from the provided PDF photographs of buildings in Foundations STEP 3 below. Use a pencil and sketchpad to create a practice drawing to familiarize yourself with the proportions of the FRAME and the BIG SHAPES.
2. (5 min) Set up for ink drawing, and create some simple guidelines on a sheet of watercolor paper or sketch paper.
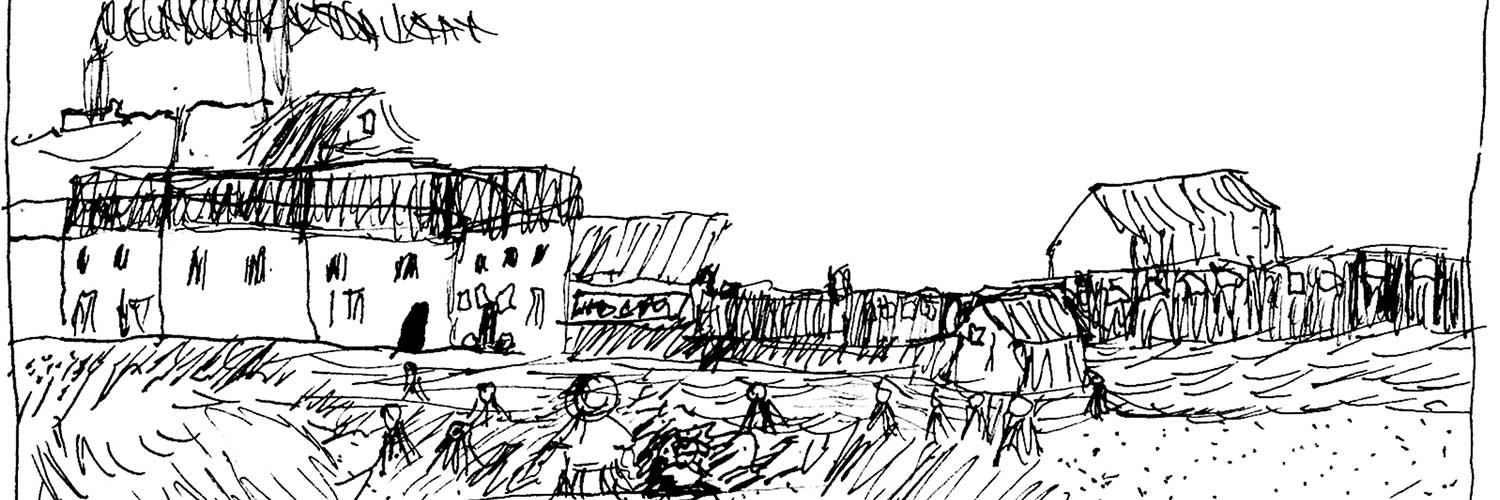
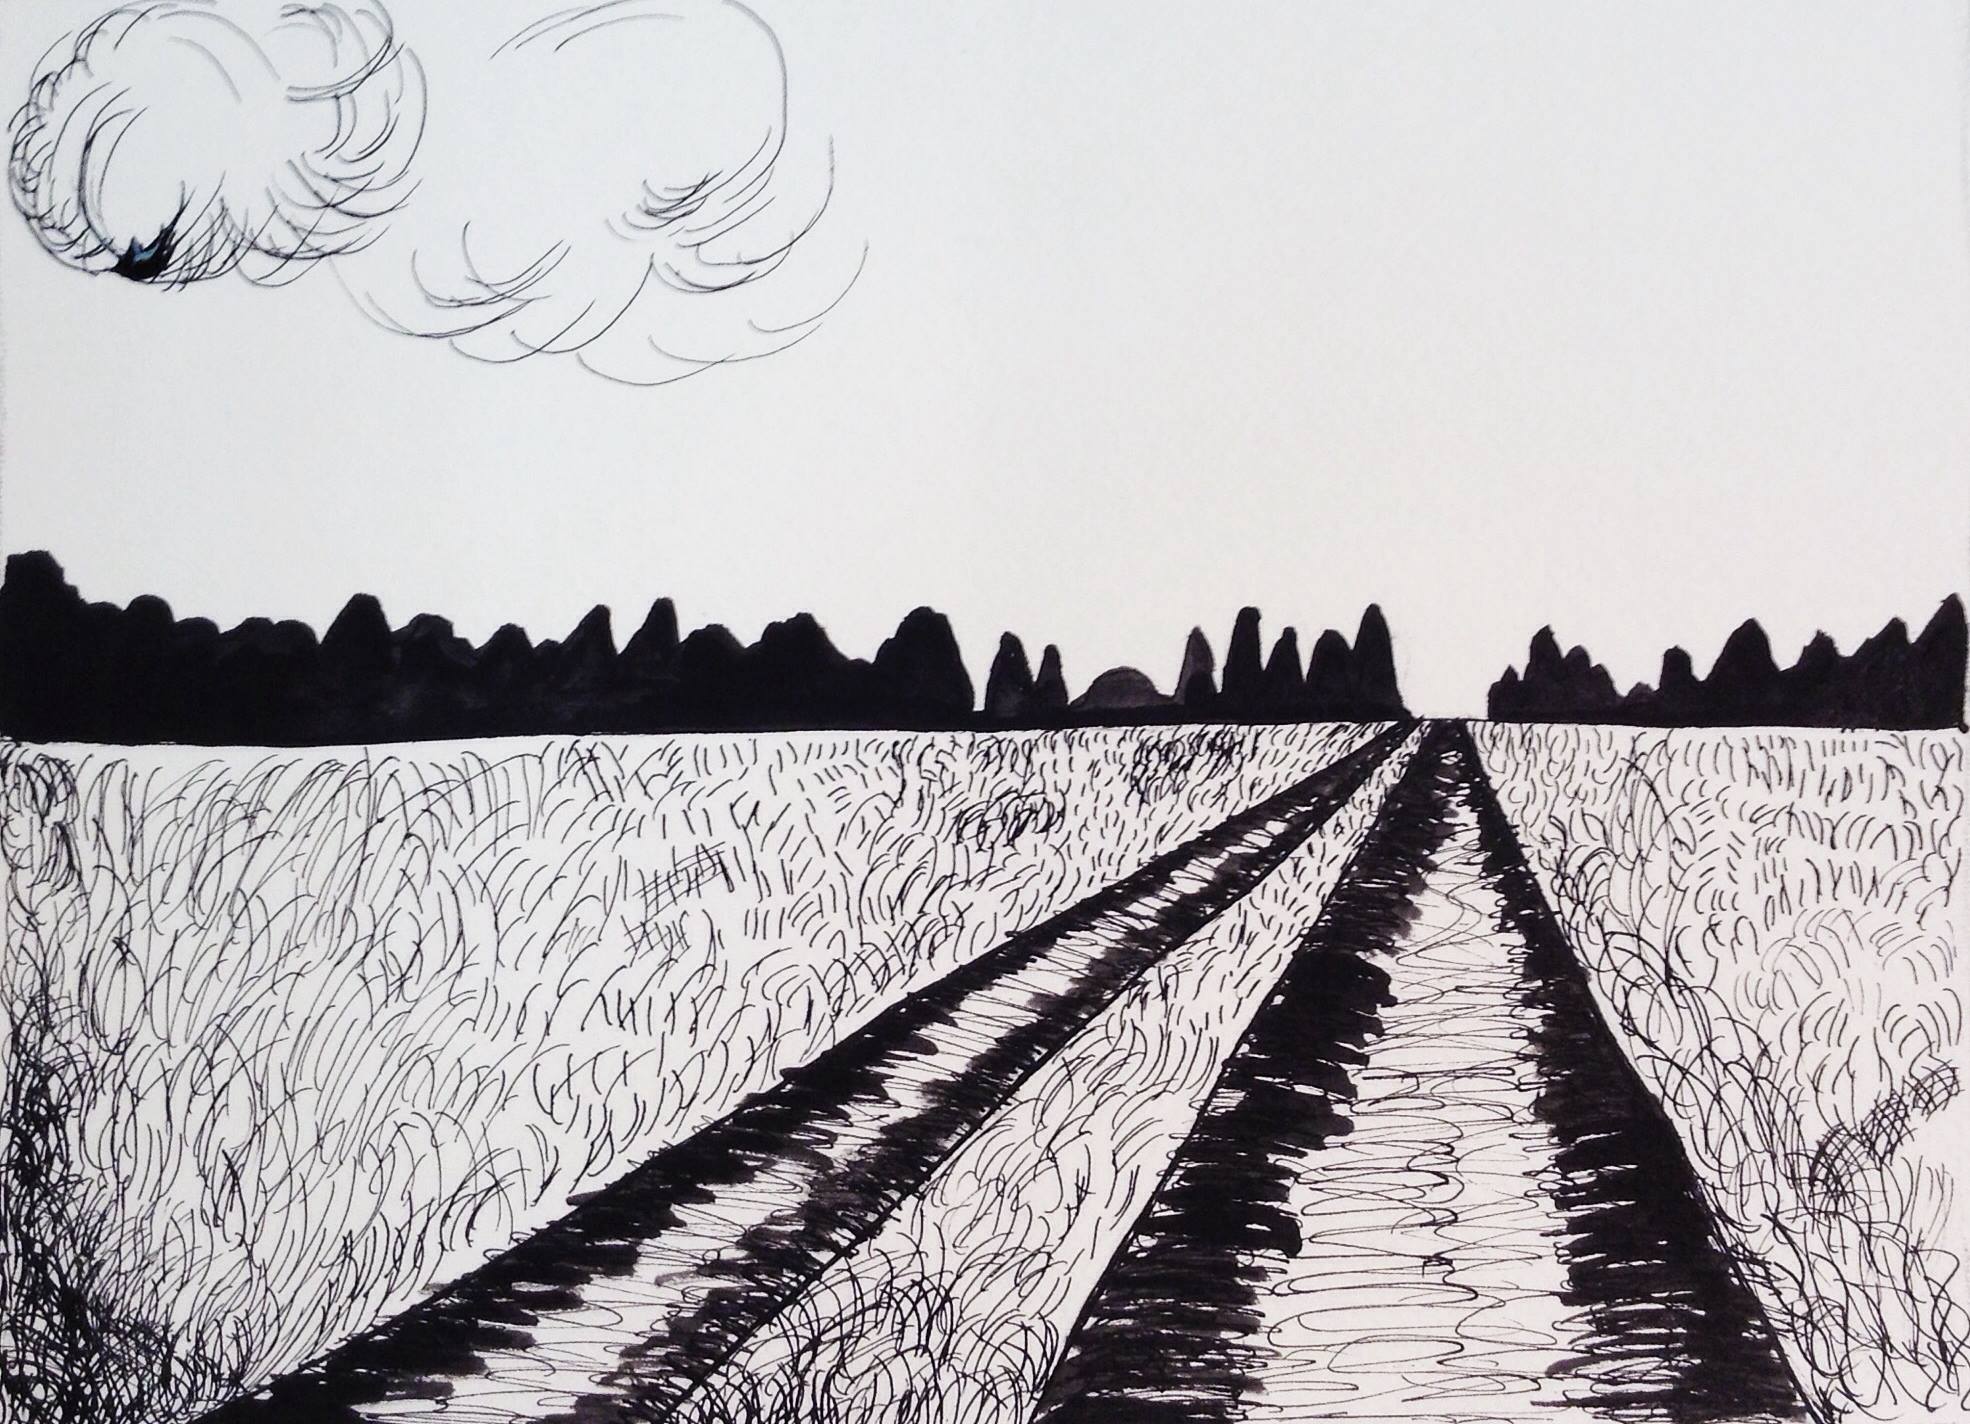
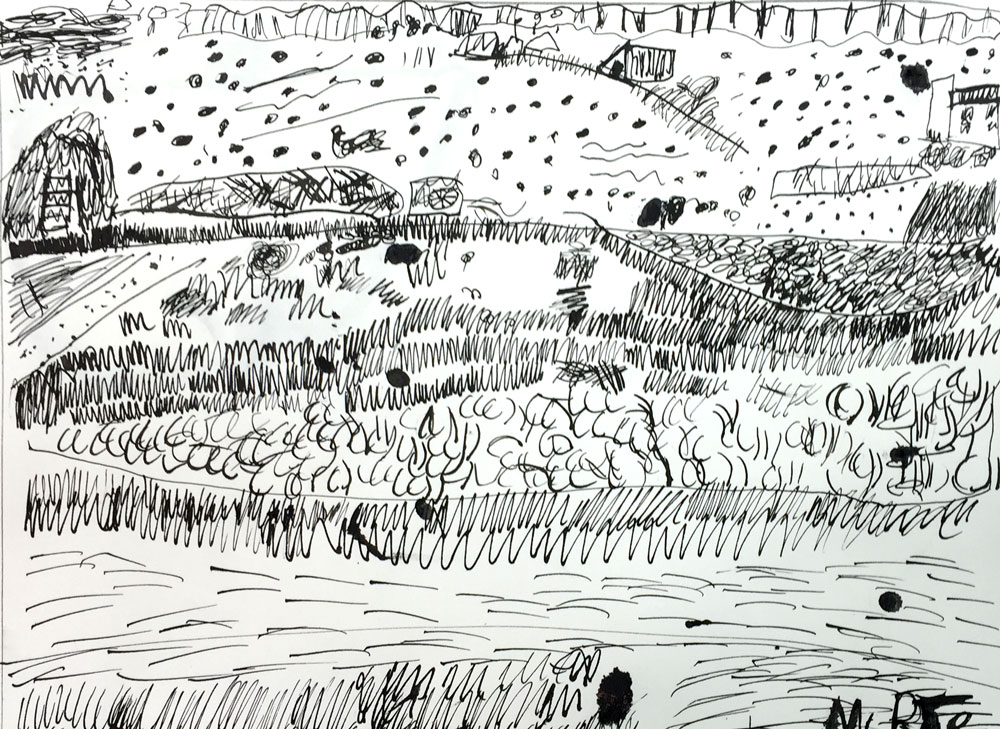
3. (5) Look at the two Van Gogh ink drawings provided on the printout (below). Think how you can use the same techniques of working with lines, dots, and other small strokes, to create textures and values.
4. Ink your buildings using Van Gogh-like techniques.
Tap images to open Creations Student Instructions and Reference Materials in new windows

Use this button to jump down to the preparation section.
LEARNING TARGETS
Students know how to set up their work area for painting with acrylics.
M A T E R I A L S
- Unfinished paintings from previous weeks
- Canvas Pad
- Brushes
- Water containers
- Acrylic paints
- Palette pad
- Paper towels
- Smocks
Brushes should be nylon for springiness and durability. Round brushes are the most versatile.
Paint pigment list:
- Napthol or Pyrrol Red
- Hansa or Light Yellow
- Pthalo Green (blue shade)
- Cyan or Cerulean Blue
- Ultramarine Blue
- Dioxazine Purple
- Magenta
- Burnt Umber
- Raw Sienna
- Titanium White (professional grade only)
2.1 setup
NOTE: this first half of the lesson is to help slow painters catch up and not feel like they can’t get their work done. It’s important to explain that this part of the lesson is FOR FINISHING, not for beginning a new project. The new project is designed for fast workers, so it should help everyone get to where they want – and need – to go. If you have no unfinished paintings, just use the new project.
Once students set up for painting, they need to get their unfinished paintings from red underpainting or inaccurate day. If they have completed both paintings, they can choose to work from watercolor paper or a new canvas.

Use this button to jump down to the preparation section.
LEARNING TARGETS
Students know how to finish a painting.
M A T E R I A L S
- Unfinished paintings from previous weeks
- Canvas Pad
- Brushes
- Water containers
- Acrylic paints
- Palette pad
- Paper towels
3.1 Prints
Reference
Buildings Photos
Use for the New Project reference and/or Creations (advanced students).
Hand out reference prints. Set all of the images out on a table or counter, and let groups of students come choose what they want.

3 Pages – Opens in new window
3.1 plan
New Project
Students who are finished with all paintings, will plan a small, expressive, somewhat abstract painting on watercolor paper using acrylics. Find your own reference in ONE minute. You can call it a reference race if you have students who are mature enough to keep this civil. Then push through these steps as quickly as possible:
- Find reference from life, book, photo files OR use the Buildings PDF prints above (it’s from the KidsART lesson but can work great for this to save time).
- Set up reference on table – photos should be on a cheasel
- Thumbnails (2 of them) for the painting composition in sketch pad with pencil – 3 or 4 big shapes only
- Choose 3 or 4 colors and black
- Canvas pencil drawing of big shapes – no details (if they choose watercolor paper, they can use a regular pencil on the paper)
- Plan for some large black areas even if not in the reference
Use this button to jump down to the preparation section.
LEARNING TARGETS
Students know how to paint with acrylics.
M A T E R I A L S
- Unfinished paintings from previous weeks
- Canvas Pad
- Brushes
- Water containers
- Acrylic paints
- Palette pad
- Paper towels
4.1 Paint

Find any existing unfinished paintings (inaccurate or red underpainting) and finish them today!
If doing the New Project, follow these steps:
- Begin by painting the black areas. Spread paint out so it dries quickly.
- Paint the big shapes in the colors to finish first layer
- Add paint layers and details, making sure to work from dark to light (sunrise technique)
- Be very expressive. Take time to plan what to do, but then do it pretty quickly
This is the only time students will have to work on the expressive paintings so they should be working quickly. Turn on soft music and encourage minimum talking to ensure less distractions. The good news is that these are all of your fast workers.
While students work, display images of Van Gogh’s ink drawings.

Pinterest Gallery – Van Gogh Ink
Tap the icon to the left to open our special Pinboard showing examples of artwork to display to your class. See our Article for making Pinterest work on larger displays. You can also use a laptop or large tablet and gather everyone around like you’re using a book.
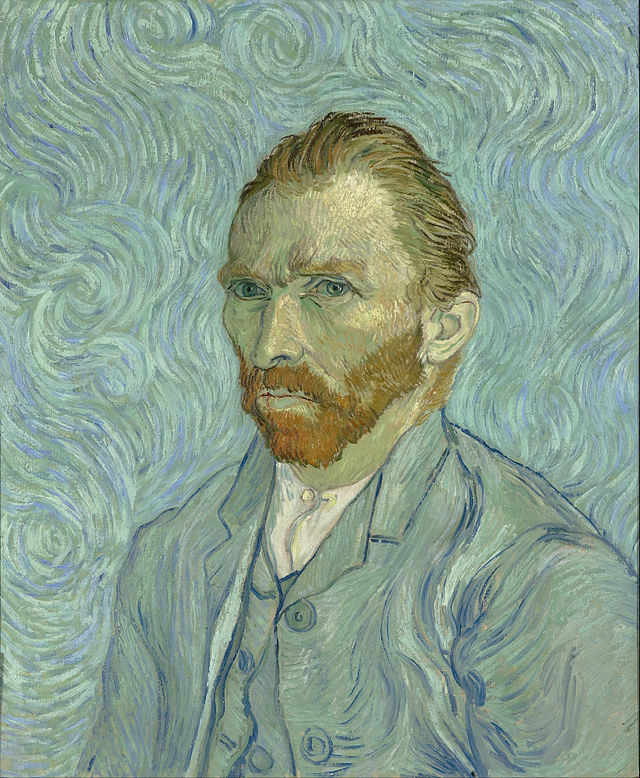
Vincent Van Gogh, Dutch Artist, 1853-1890
Vincent Van Gogh is one the world’s most well known artists. He is best known for his bright, colorful, and thickly painted landscape and portrait paintings. Today’s profile will focus on Van Gogh’s use of pen and ink.
Van Gogh’s ink drawings were usually studies for future artworks he would later paint. He could sit outside and capture a landscape in person with ink and then take the drawing back to his studio and use it as his reference (this was before cameras!).Van Gogh had a very unique pen and ink style. He used all different kinds of lines (long, short, wavy, diagonal, thick, thin, etc.) and marks (dashes, dots). His use of different techniques created textures in his drawings.
Use this button to jump down to the preparation section.
LEARNING TARGETS
Students know the importance of cleaning up
M A T E R I A L S
- Paper towels
5.1 tidy
Clean up all painting materials: water containers should be emptied, brushes cleaned, paints put away, tables wiped down, and dirty paper towels thrown away.
Use this button to jump down to the preparation section.
LEARNING TARGETS
Students know how to choose a reference.
M A T E R I A L S
- Van Gogh Ink PDFs
6.1 Prints
Reference
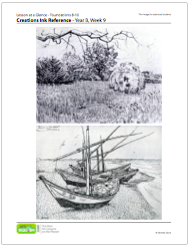
Van Gogh Ink Drawings
Cut images apart and print enough for each student to choose from several.

3 Pages – Opens in new window
6.2 choose
Use this button to jump down to the preparation section.
LEARNING TARGETS
Students know how to set up their work area for using ink.
M A T E R I A L S
- 14″ x 17″ Sketch Paper
- Ink
- Ink Pen with nib
- Container to hold ink
- Paper towels
- Smocks
7.1 Prints
Reference
Ink Techniques
Print enough so each student can view one or keep one for their own reference.
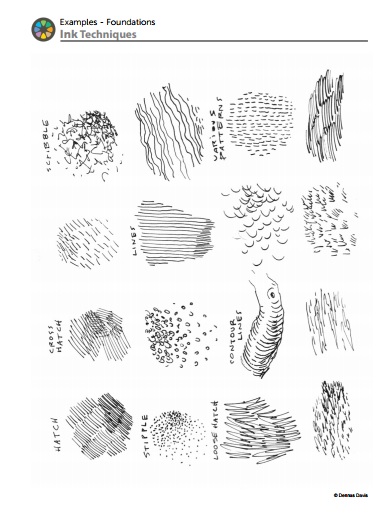
1 Page – Opens in new window
7.2 setup
If you are new to The Art Instructor, please view and teach a DEMO using this Slide Show about Pen & Ink

The base also helps keep the cap from rolling away. Do not use the dropper to draw with.
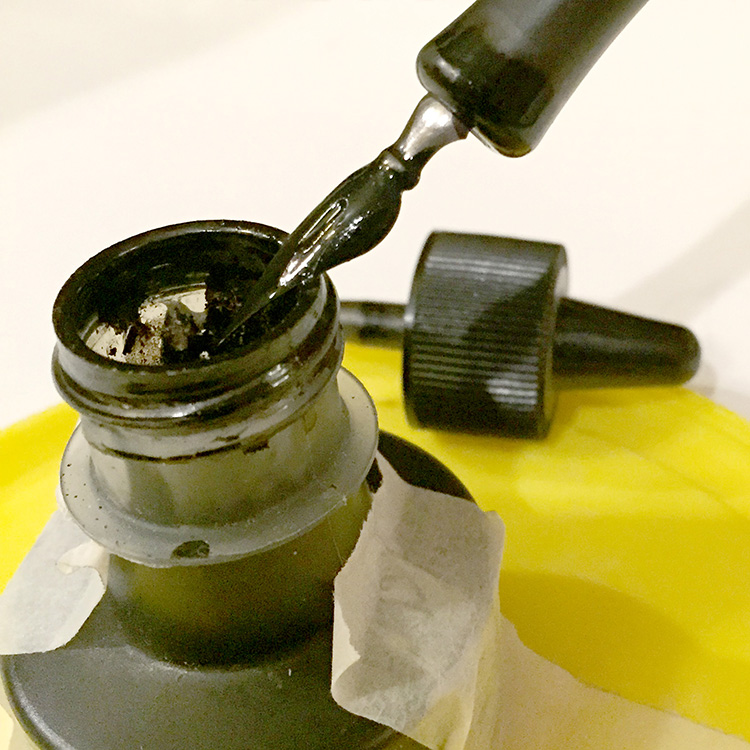
Tap the nib against the bottle to remove some excess ink.

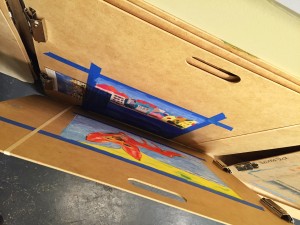
Taping your ink bottle to a base stops most spills before they happen! We use modeling clay to stick our bottles onto a plastic plate.
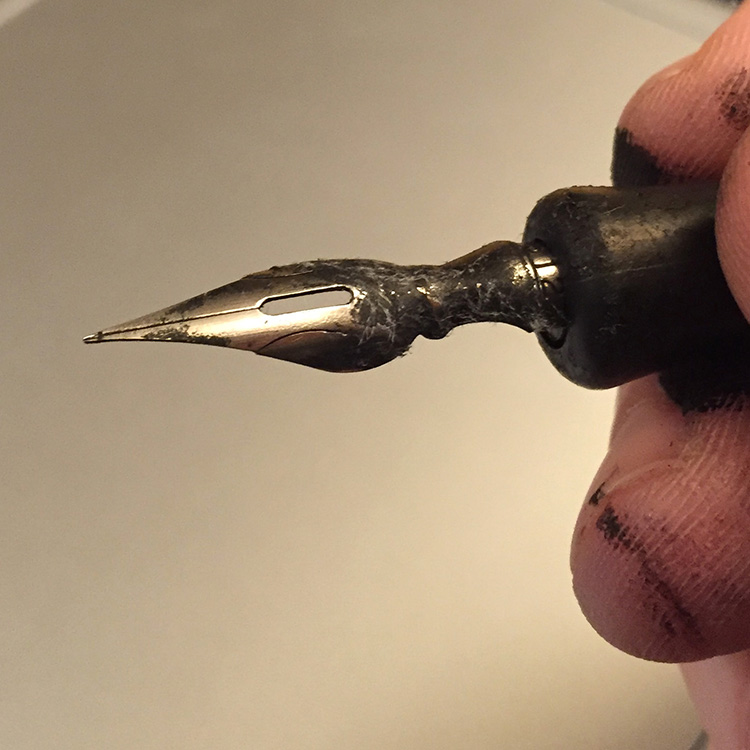
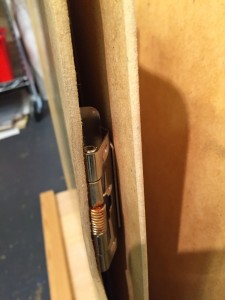
The nib has a rounded top and should be held like this. It can be bent, and that ruins it, so be gentle. If you notice a split in the nib, that is how the ink travels to the tip, and all nibs are split like this.
Use this button to jump down to the preparation section.
LEARNING TARGETS
Students know how to draw guidelines.
M A T E R I A L S
- 14″ x 17″ Sketch Paper
- 2B Pencil
- White Eraser
8.1 draw
Use big shapes and the frame with touch points to map out the basic 4 or 5 biggest areas on your paper. Be sure students keep the pencil lines very light. These are just guide lines and can be erased after the ink is dry (completely dry! wait until the next day at least).
Use this button to jump down to the preparation section.
LEARNING TARGETS
Students know how to create an ink drawing.
M A T E R I A L S
- India ink
- Ink dip pen with metal nib (not too sharp a point)
- Container or flat tray to secure ink
- Small piece of clay or tape to secure bottle
- Paper towels
- Smocks
9.1 Inking
- Dip to bottom
- Tap off excess
- Go slow
- Rounded side of nib is up
- Work from TOP to BOTTOM so you don’t smear any ink under your hand
Enjoy!
9.1 Extra
To tear a wet sheet out, pull at an angle from the loose end but keep the paper flat on the pad as you pull so ink doesn’t run. Slide off to the side to dry.
Encourage but don’t require, a reference image for these small ink drawings. You can also move early finishers to the next step.
Use this button to jump down to the preparation section.
LEARNING TARGETS
Students know how to experiment with different ink techniques.
M A T E R I A L S
- India ink
- Ink dip pen with metal nib (not too sharp a point)
- Container or flat tray to secure ink
- Small piece of clay or tape to secure bottle
- Paper towels
- Smocks
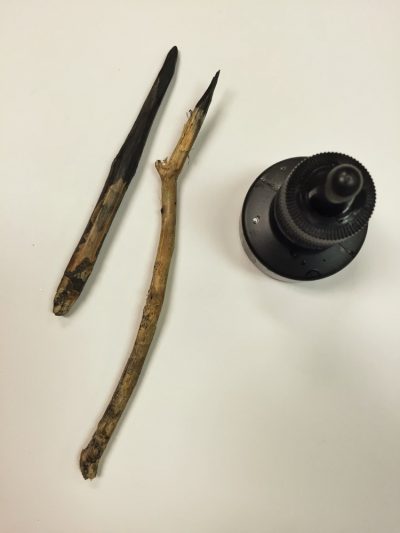
- Twigs – around the size of a pencil
10.1 Print
Reference
Expressive Animals
Cut images apart and print enough for each student to choose from several.
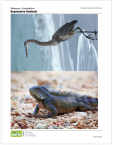
3 Pages – Opens in new window
10.2 draw
Students will be using a new page in their sketch pad. Have them choose an animal for the animal shadow reference page. Use the twigs and dip the tip in the ink, to draw expressive animals. Use a pencil to draw the big shapes/guide lines first if you want to. Splatters and drips should also be added.
10.3 Bookend
A bookend is at the beginning and the end of each lesson.
This is where you go over what the lesson is about and what the main learning points are.
Making this clear, helps students remember what they’ve learned and understand the processes they’re going through.
Today was fun!
We started out sketching from life, Which is always a good way to start your art time. Then we caught up on projects, or you might have created a quick expressive work on paper.
Small expressive works are always fun to do, and help you stretch your ideas, because they don’t require a huge investment in time, or materials.
Then we got to finish up with ink drawings inspired by one of the greatest artists of all time.
Use this button to jump down to the preparation section.
LEARNING TARGETS
Students know the importance of cleaning up
M A T E R I A L S
- Paper Towels
- Cleaning wipes
- Sink
- Waste baskets
- Well-lit spot for photos
- Camera or phone-camera
11.1 Clean
- Wash hands
- Super-wash brushes if used
- Put art supplies away
- Wipe tables & toss trash
- Remove any smocks (last)
- Check for items on floors and tables
Be sure to close all of the India ink bottles as your first step in starting clean up. Firmly but gently; over-twisting a plastic cap can warp the seal and create a leak.
This is important because it is easy to accidentally spill the ink on the table or artwork laying out! Hand each student a ziplock sandwich bag to put their ink in. Be sure to secure the zipper. Sometimes, the ink can leak and keeping it in a bag will insure that ink doesn’t spill all over the art supplies or leak out on the floor.
Studies have shown that nearly 40% of all ink bottles allow ink to escape. (We made that statistic up, but you should believe it anyway)
11.2 photo
OBJECTIVES
- Practice and improvement using shading
- Understanding how shadows are formed and used in artwork
- Accomplishment in drawing an animal with shading
- Fulfillment by choosing the animal they want to draw & paint
ART WORDS
India ink – a liquid that is much runnier than paint, but also much darker, stains everything, and is waterproof when dry. India ink is a beautiful medium, but if not handled correctly, it can be a problem. If it spills, it seems to be nearly uncontainable and can ruin clothing and stain hands. It can even seep through a smock. We have precautions in the room prep below, that help prevent problems.
Texture – When an artist uses many separate small dots or strokes of media that call attention to the technique itself, it is called visual texture. It makes the drawing or painting look very much like things that have real texture, like rough fabric, tree bark, grates, bricks or stones, etc..
TROUBLESPOTS
Evil Ink spills – Nothing is quite as messy, insidious, or staining as india ink. Have paper towel rolls all over the place ready to cleanup. A tub of water should also be handy.
The best way to clean up ink is to avoid a spill in the first place! So, make sure no one gets their ink out before you are ready to secure the bottles to the plates. Make sure people hold bottle with one hand and open the cap with the other.
Drips and spots – most students will have a drip or two at some point, and it may make them think they have ruined their work. Encourage them by showing how splatters and drops can look cool, and how creating new patterns and black areas can hide things you don’t want. Also explain that splatters will be a deliberate part of the work today, so it’s not a problem, it’s expression.
Not holding the pen correctly – be on the lookout for upside-down ink nibs when students are holding the pens. This happens even after students have learned the proper way to hold it. Always be checking on them.
Speedsters – Pen and ink somehow gets translated as “go really fast” for many artists. You’ll see scratchy scribbles if you don’t nip this in the bud. It’s not always due to haste, but rather, because they think of ink like a marker, and markers tend to be used fast. So tell everyone that this is very different than using markers. Pen and ink looks best if done in Slooooow moooootion.
Monkey Biz – Artist’s choice can create a mistaken sense of play time for some students. That’s why we don’t like the term, “free draw”. When students feel like it’s play time, they can use art materials like toys, and instead of attempting to create art, they doodle and dilly-dally. For instance, painting your favorite cartoon character’s name in a wad of paint straight out of the tube is a waste of art time and materials. Call it what it is: Monkey Biz!
Monkey Biz is most common when you give artists too much freedom. The choices are overwhelming, so the natural response is to simply play around. They will ask for total freedom all the time, but boundaries are essential. Adult artists learn to create their own limitations, which helps them focus. It helps if you explain this to students. They feel like you respect them if you explain an adult viewpoint openly.
If you talk to your students like you talk to adults, they will act more mature. If you treat them like small children, well… sometimes you have to put your foot down, but still, speak plainly and with respect.
Note: In reference to the third rule, “no mistakes allowed”. That only pertains to genuine attempts to make actual art, not Monkey Biz. Students can play with toys and doodle at home. Everyone knows what Monkey Biz is, so do not let anyone pull you into an argument about it. If all else fails, remember that you are the commander (king, queen, whatever works), of your room, and if you say it’s Monkey Biz, then that is what it is.
CLASSROOM
PREP
STICKS: Before class, collect a bunch of short twigs that are not too bendy or soft from decay. Use a sharp knife to whittle the ends into wedge-shaped and/or slightly rounded points. These are used to draw with ink in STEP 10.
Print all of your PDFs from the lesson plan and cut any references apart as needed.
What your room needs
Here are your printable lists and room prep instructions.
Opens in new window
CLASSROOM
MATERIALS
- Still Life Objects
- Unfinished Paintings from previous weeks
- Water containers
- Paper towels
- Smocks
- Van Gogh PDF
- Container to hold ink
- Twigs – around the size of a pencil
STUDENT’S
MATERIALS
- 14” x 17” Sketch Paper
- 2B Pencil
- 4B Pencil
- White eraser
- Charcoal
- Canvas Pad
- Brushes
- Acrylic paints
- Palete Pad
- Ink
- Ink pen with nib
PREVIEW
Week 9: Shading & Blockiness
Students learn or review the basic techniques involved in pencil shading using various textures and movement. Blocks and cubes are looked at, as an introduction to artist’s perspective and understanding of one of the 3 basic geometric forms.
Week 10: Artists’ Perspective
Students will use the simple form of a cube to learn the basics of artists’ perspective. Any artwork that includes a man-made object will be improved after understanding how to translate what you see into what you draw. Several handouts and analogies help the lesson be informative, understandable, and interesting.