OVERVIEW
Students will create paintings of familiar subjects using colors that are not realistic. They will also learn about using guidelines, or whisper lines, to help in creating accurate paintings, and use bold lines to outline areas of color.– – –
Grades 1 – 2
Week of February 27 – March 3
1 Hour & 30 Minutes
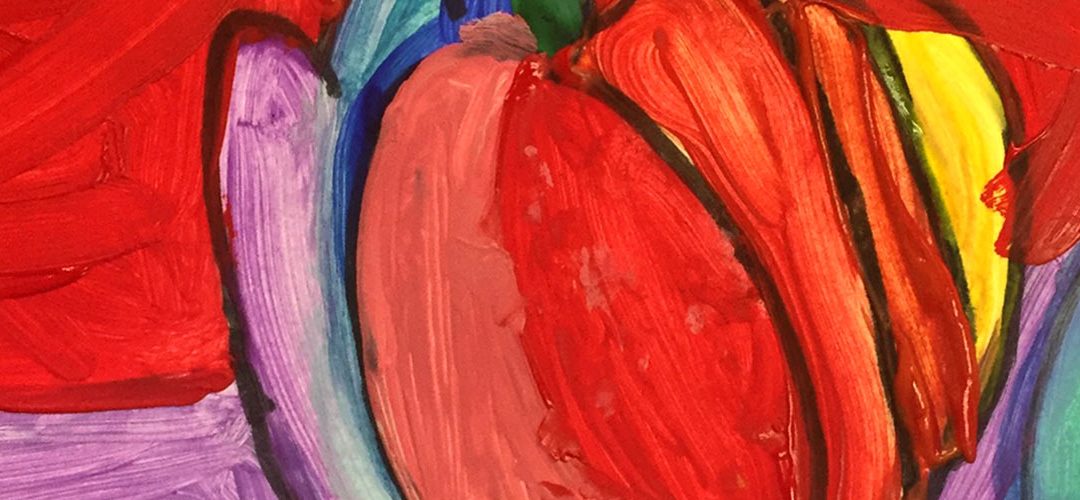
Student Work


Lesson At A Glance
Here’s a brief overview of the complete lesson. It’s also on your prep page in the Ready, Set, Go! section (below the lesson).
Colored buttons jump to each section in the full lesson plan below.
15 Minutes – Artists’ Choice. Intro Lesson
10 min – Demo drawing/shadows too
5 min – Choose photos
5 min – Students complete lines
10 min – Marker lines
5 min – Set up for painting
15 min – Paint the dark areas with cool colors
15 min – Paint the light areas with warm colors
7 Min -Add finishing touches
3 Min – Everyone helps
Use this button to jump down to the preparation section.
SCROLL & TEACH
LESSONPLAN
Each section is a different color. Read over once and then you can SCROLL & TEACH using any device you like. It’s designed to work well with your phone.
LEARNING TARGETS

Students know how to use their imagination
M A T E R I A L S
- 8.5″ x 11″ copy paper
- 2B Pencil
- White Eraser
All materials are suggestions and may be modified as you see fit. We have tried many items, and these seem to allow the most versatility for the cost.
1.1 Greet
Greet students as they come in and help them choose a chair.
Kneel down so that you are on their level. Bending over emphasizes the differences in your height, while kneeling makes them feel more important. Have tape and marker ready so you can stick some tape on the table by each student and write their name on it as they sit down.
1.2 Choice
Encourage students to work with one piece of paper for a while. If someone uses the phrase, “free draw”, explain that artists’ choice is something only artists can do, while free-draw is something anyone can do. You want to use the phrase to elevate the students’ expectations of their work.
Everyone should take their time with the work and make a finished piece of art. Limiting the paper can also help kids focus on the work. If someone finishes in super-fast time, ask them what more they can do to the existing paper. Ask again several times – unless they appear overly frustrated; then you can allow them to move on to a new work.
“We’re going to make paintings today, but we’re going to use crazy colors.
Sometimes artists use realistic colors, but sometimes we like to do something a little different! Our crazy colors will make our paintings look very unusual and expressive. That means that the artist has made decisions that change the picture from the normal realism that we see. You can have a little expression, or you can go crazy with a lot of expression.
One important thing though, is that expressive artwork looks good when we use reference, so today we’ll draw realistically, and then we’ll get wild and crazy with the colors. It’ll be a lot of fun!”
Use this button to jump down to the preparation section.
LEARNING TARGETS
Students know how to listen to instructions
M A T E R I A L S
- Giraffe reference photo (below)
- Giraffe starter page (below)
- 2B pencil
- White eraser
- Black marker – Super tip allows a bold thick line
- Reference stand & clip
How to make reference stands

Make your own DIY reference stands by applying cardboard self-stick easel-backs to old backs of art pads. Use art clips or clothespins to secure artwork.
2.1 Print
Reference
Guideline Starter Pages
Print these on cover stock or card stock paper so kids can paint right on it. Cut the instructions off the first page.
Pair these with the reference prints below.

3 Pages – Opens in new window
2.2 Print
Reference
Crazy Color Reference
Cut images apart and print enough for each student to choose from several.
Do not Hand out reference prints yet. Set the 3 images with their matching guideline pages out on a table or counter. You’ll let groups of students come choose the picture they want in the next step (STEP 3).

2 Pages – Opens in new window
2.3 prep
2.4 demo
“If you take your finger and tickle the back of your hand, that’s how you should try to draw guidelines; very very lightly. It’s like your tickling the paper. If you press too hard, it hurts the paper. Not like when we get hurt, but it damages it a little bit and makes it hard to erase.
Don’t worry if you have trouble drawing lightly today. Just keep practicing!
See how the lines have already been started on the paper? These are called guidelines. They are light for two reasons. One is so you can erase them and redraw them more accurately if you want to. The other reason is that the guidelines are not the real art work. They are only there so you can draw your artwork on top of them.
I only have to finish the guidelines. See. Now watch how I keep looking at my photograph reference. I have to look at it very closely to know where to draw the rest of the picture. If I don’t look carefully, I will draw from my imagination, and then it won’t look accurate. It’s ok to draw from imagination sometimes, but today we want to be realistic, so look at the picture all the time.”
2.5 demo
“I’m not just drawing the lines at the edges of things. Sometimes I’m drawing the shapes of the shadows. That’s so we can know where to paint the shadows.
The giraffe is the hardest of the 3 pictures you’ll get to choose from, but it’s a lot of fun. You don’t have to worry if your lines are not in the exact place where the shadows are. It will look good no matter what.”
2.6 demo
2.7 demo
Use this button to jump down to the preparation section.
LEARNING TARGETS
Students know how to choose a reference
M A T E R I A L S
- Reference PDF printed and cut out (above in STEP 2)
- (have enough extras so each student gets to choose from several)
- Guideline starter page PDF printed out (also above)
3.1 setup
3.2 choose
You can have the students all come up, or in smaller groups, and choose one of the 3 for their painting. We sometimes say, “come on up to the picture store and buy a picture!”
Make sure students get the matching starter page printed on card stock. It’s a good idea to place the matching starter pages with each photo so they don’t get the wrong one.
Use this button to jump down to the preparation section.
LEARNING TARGETS
Students know how to draw a practice sketch
M A T E R I A L S
- Starter page printout
- Reference photo on stand
- 2B pencil
- Eraser
4.1 draw
Use this button to jump down to the preparation section.
LEARNING TARGETS
Students know how to draw a final sketch
M A T E R I A L S
- Starter page printout
- Reference photo on stand
- Black marker with a bold tip (super tip or comparable – not a fine liner)
5.1 draw
Use this button to jump down to the preparation section.
LEARNING TARGETS
Students know how to set up their work area for painting.
M A T E R I A L S
- Starter page with marker lines
- Reference on stand
- Water tubs
- Brushes – medium and small
- Palette, tray or plate
- Getting plate (for placing paint from bottles)
- Mixing plate (a separate place to invent new colors)
- Tempera paints
- Smocks
- Paper towels
Brushes should be nylon for springiness and durability. Round brushes are the most versatile.
Paint pigment list:
- Bright Red
- Bright Yellow
- Green
- Turquoise Blue
- Deep Blue
- Purple
- Magenta
- Brown
- Black
- White

Use this button to jump down to the preparation section.
LEARNING TARGETS
Students know how to mix cool colors
M A T E R I A L S
- Starter page with marker lines
- Reference on stand
- Water tubs
- Brushes – medium and small
- Palette, tray or plate
- Getting plate (for placing paint from bottles)
- Mixing plate (a separate place to invent new colors)
- Tempera paints
- Smocks
- Paper towels
7.1 mix
Mix some cool colors & paint them into the different dark areas that look like shadows on the photo reference. look closely at the reference to see where the shadows really are. The crazy color can be any hue, but encourage your students to be unusual, and not use realistic colors.
Cool Colors
- Purples
- Blues
- Aquas
- Greens
7.2 paint
Students may have a hard time staying inside lines and have clean edges to their colors. Show individual students how to point the tip of the brush at the lines so that the tip makes a nice edge. If the edge is underneath the brush, the paint won’t be as clean and neat.
If a student doesn’t care, then you don’t need to help them with this! Just let them have a good time.
Move around the room, asking permission to help and encouraging your students.
Use this button to jump down to the preparation section.
LEARNING TARGETS
Students know how to mix warm colors
M A T E R I A L S
- Starter page with marker lines
- Reference on stand
- Water tubs
- Brushes – medium and small
- Palette, tray or plate
- Getting plate (for placing paint from bottles)
- Mixing plate (a separate place to invent new colors)
- Tempera paints
- Smocks
- Paper towels
8.1 paint
Use this button to jump down to the preparation section.
LEARNING TARGETS
Students know how to add details to their paintings
M A T E R I A L S
- Starter page with marker lines
- Reference on stand
- Water tubs
- Brushes – medium and small
- Palette, tray or plate
- Getting plate (for placing paint from bottles)
- Mixing plate (a separate place to invent new colors)
- Tempera paints
- Smocks
- Paper towels
9.1 paint
Use this button to jump down to the preparation section.
LEARNING TARGETS
Students know the importance of cleaning up.
M A T E R I A L S
- Paper Towels
- Cleaning wipes
- Sink
- Waste baskets
- Well-lit spot for photos
- Camera or phone-camera
10.1 CLEAN
Students set up their work area.
- Wash hands
- Super-wash brushes if used
- Put art supplies away
- Wipe tables & toss trash
- Remove any smocks (last)
- Check for items on floors and tables
10.2 PHOTO
Try to get photos of your student’s artwork. Find a good spot for quick lighting without highlights or shadows from your hands and device. Ideally in-between two strong lights on each side.
10.3 CONNECT
Make sure you see the kids connect with parents and tell them about the class if you can!
OBJECTIVES
- Practice and improvement in drawing accurately
- Understanding how the use of light lines, or guidelines, help to draw accurately
- Accomplishment in finishing a painting
- Fulfillment in choosing subject matter and expressive colors to paint it
TROUBLESPOTS
Difficulties drawing accurately – Sometimes students will want to make their work look more accurate than they are able. This can be extremely frustrating to a young student who can see inaccuracy. Tell them it’s ok to be frustrated, and that they are able to see what they want because they’re an artist. If they looked at it and didn’t want to change it, they would not be as perceptive as they are right now. It just takes more practice to get to where you want to be. Then point out something that you like that is accurate somewhere on the work.
ART WORDS
Whisper lines – very light lines, or guidelines, that artists use to figure out where the real lines will go. By drawing lightly, whisper lines can be erased and move around until they’re where you want them.
Expressive – When an artist does something that’s not like it looks on purpose. Art can be a little bit expressive and still look realistic, or it can be more expressive and stylized. Art can even be so expressive, that it doesn’t look very much like the subject at all.
Mixed colors – Right out of the bottle or tube, colors can be ok, but they can also be too strong. Not only that, but you only have a few of them. By mixing, you get thousands of colors instead of only a few.
CLASSROOM
PREP
Print all of your PDFs from the lesson plan and cut any references apart as needed.
What your room needs
Here are your printable lists and room prep instructions.
Opens in new window
CLASSROOM
MATERIALS
- 8.5″ x 11″ copy paper
- 8.5″ x 11″ card stock
- 11″ x 17″ copy paper
- Markers
- Reference stands
- Tempera paints
- Plates, trays for paints
- Pencils
- Erasers
- Scissors
- Water containers
- Paper towels
- Smocks
PREVIEW
Week 29: Trees & Leaves
Artists make trees by twisting pipe cleaners, and paper leaves are attached. Then everyone designs and creates a tiny tree house to go onto their tree sculptures. The whole thing is glued together and onto a base for a fun project to take home.
Week 30: Cats in Hats
Students have a lot of fun working with air-dry clay to create cat sculptures using a follow-along slide show. They’ll also make little hats for the sculptures, and take them home the following week. There is a drawing and painting done from reference as well.