
OVERVIEW
Students will spend the whole day creating and working with lines: line inventing; color line art; charcoal line art; backwards line art (white on black paper); and a line art game.Grades 1 – 2
Week of October 20 – 24
1 Hour & 30 Minutes
Lesson At A Glance
A brief overview of each step. Buttons jump to each section for detailed information.
10 Min – Draw lines on paper in shower position. Follow steps.
20 Min – Talk about texture. Draw city from reference, using oil pastels.
10 Min – Expressive animals using charcoal.
10 Min – Draw elephant on black construction paper using white oil pastel.
15 Min – Draw when music plays. Freeze when music stops. Follow steps
5 Min – Discuss abstract art. Show Kandinsky pinterest.
5 Min – Everyone helps
SCROLL & TEACH
LESSONPLAN
Each section is a different color. Read over once and then you can SCROLL & TEACH using any device you like. It’s designed to work best with your phone.
LEARNING TARGETS

Students learn to express themselves through creating from their imagination.
M A T E R I A L S
- 11″ x 17″ Copy Paper
- 4B pencil
- Eraser
- Markers and/or oil pastels
- Blenders (stumps)
- Paper Towels
1.1 Greet
Greet students as they come in and help them choose a chair.
Kneel down so that you are on their level. Bending over emphasizes the differences in your height, while kneeling makes them feel more important. Have tape and marker ready so you can stick some tape on the table by each student and write their name on it as they sit down.
1.2 Choose
Encourage students to work with one piece of paper for a while. If someone uses the phrase, “free draw”, explain that artists’ choice is something only artists can do, while free-draw is something anyone can do. You want to use the phrase to elevate the students’ expectations of their work.
Everyone should take their time with the work and make a finished piece of art. Limiting the paper can also help kids focus on the work. If someone finishes in super-fast time, ask them what more they can do to the existing paper. Ask again several times – unless they appear overly frustrated; then you can allow them to move on to a new work.
Use this button to jump down to the preparation section.
LEARNING TARGETS
Students know how to create different types of lines.
M A T E R I A L S
- 14″ x 17″ Sketch Paper
- 2B Pencil
2.1 Draw
Give each student a sheet of regular copy paper and a 2B or 4B drawing pencil. This activity begins as a teacher-led step-by-step exercise. Tell your students to wait for you and make each line together and then stop to wait for the next line. After the first few lines, they’ll get to invent their own new line ideas.
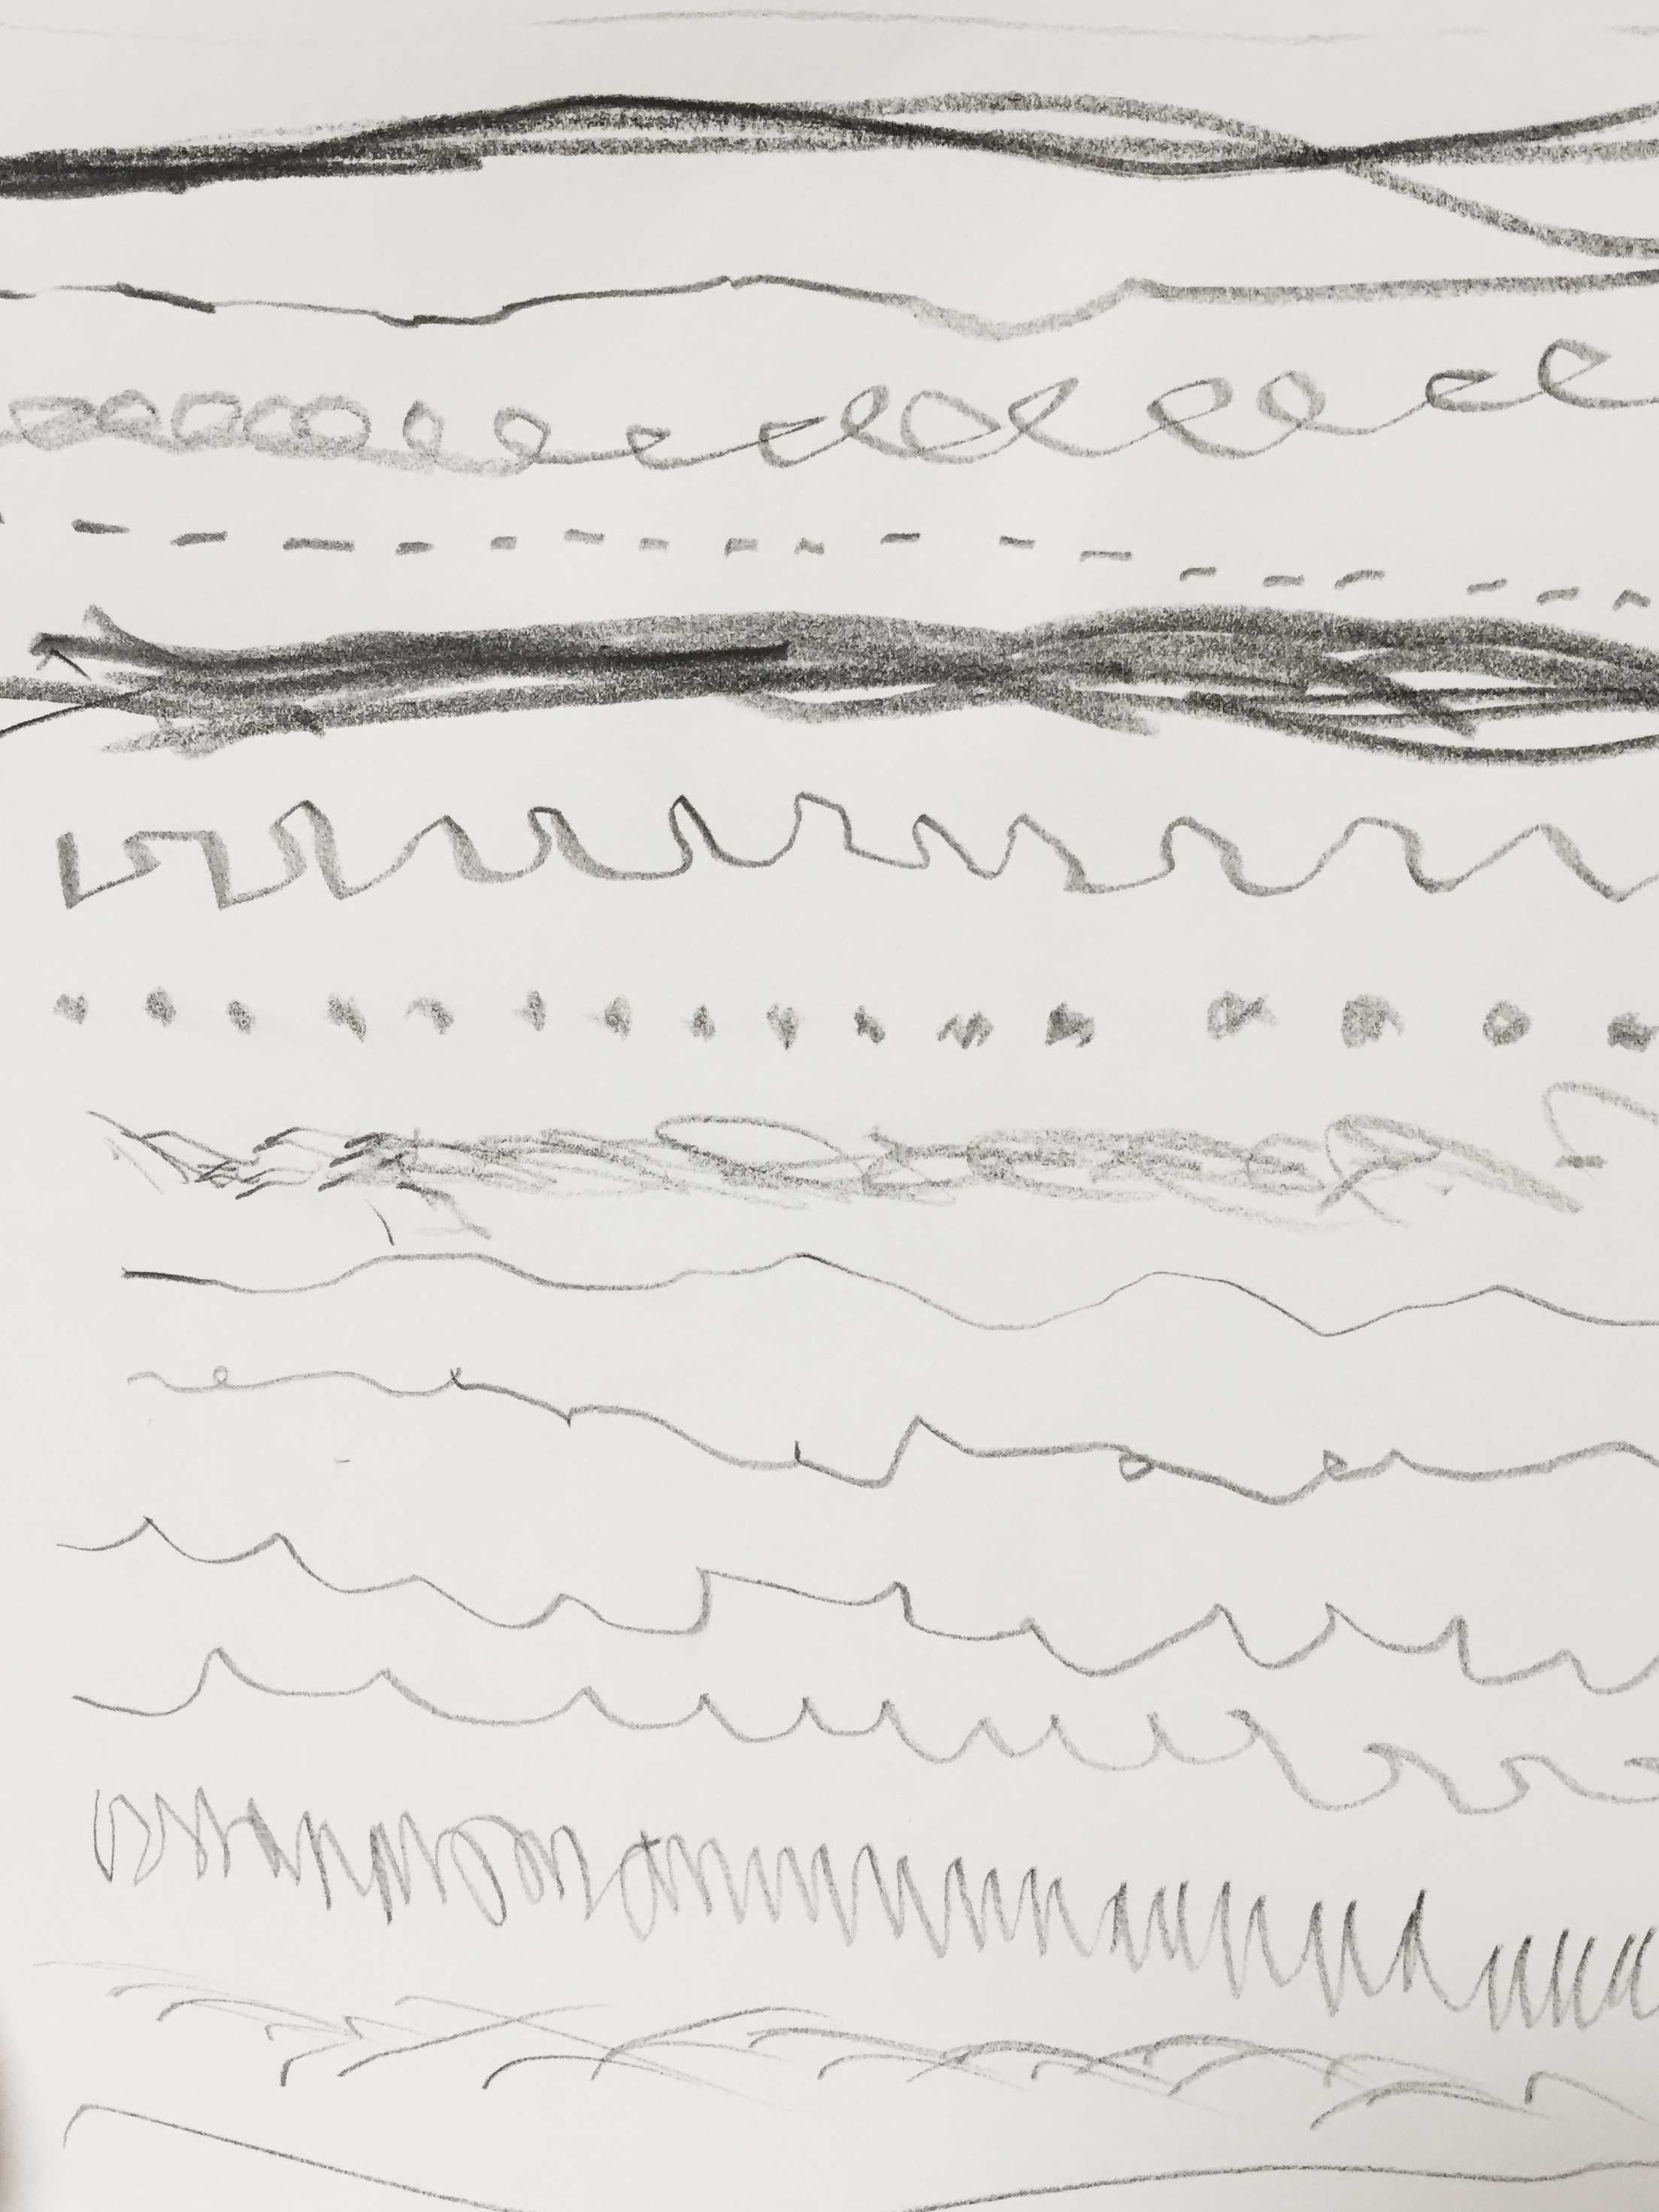
- Have students place their paper in shower position. They will begin at the top and invent lots of new kinds of lines. Below are some lines to start with:
- Make a line from left to right across the very top
- Make a line right under it, pretty close, but lighter
- Make an even lighter line under that
- Now make a fat dark line using the side of the pencil lead
- Invent new line ideas! Keep going down the page, making a new kind of line every time
- Help students with suggestions when they get stuck: wavy, sketchy, doubled, dashed, dotted, twirling your pencil a bit as you draw, pressing hard then soft, and back and forth, etc.
Use this button to jump down to the preparation section.
STEP 3. Color Drawing
Students will create city drawings using different lines and texture. 20 MinutesLEARNING TARGETS
Students know how to use different types of lines to create texture.
M A T E R I A L S
- 14″ x 17″ Sketch Paper
- 2B Pencil
- Oil Pastels
- City Reference PDFs
3.1 Print
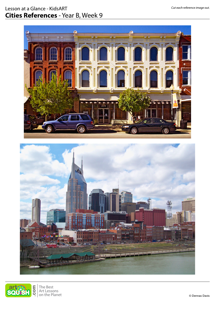
Reference
Cities Reference
Cut the 6 images apart and print enough for each student to choose from several.
Hand out reference prints. Set all of the images out on a table or counter, and let groups of students come choose what they want.
You can do this at the beginning of STEP 3 or wait until the PREPARE time in STEP 3.3
3 Pages – Opens in new window
3.2 explain
Creating texture with lines. Explain the meaning of both physical, as well as visual, texture. Display and discuss texture with a slideshow and then in Van Gogh’s artwork using a Pinterest Link.
Read the teacher talks below verbatim, or practice and paraphrase.
Students can view their chosen reference print and there is also a city to display and some pictures of texture in the slideshow below.
“Look at one of these pictures of cities around the world. All the buildings are made up of many kinds of lines. Can you find different lines? (curved, straight, thick, thin, diagonal, vertical, etc). Some lines work together to create a texture.
Who knows what I mean by texture? (Display the slides below, and allow answers and discussion)
That’s right, texture is the way things feel when they are bumpy or rough. There are two kinds of textures, real texture and art texture. Real texture is when you touch something and you can feel roughness. If you touch the table, it is fairly smooth and hard. It doesn’t have much texture. If you touch the sidewalk outside, it is rough and has texture. A brick, or sand also has a lot of real texture.
Real texture can also be seen in things that are really big but really far away, like buildings. When we draw or paint a huge thing like a building, it’s like we are making it tiny. That means all those windows seem more like bumps, or like Real Texture, because they look tiny.
Now let’s look at the other kind of texture. (switch to the Pinboard below)
Art Texture can’t actually be touched and felt. Art Texture is pretend texture. It only looks like it could be rough, or bumpy, or have ridges. Artists use art texture to make us think we are seeing rough things, or seeing things that are so far away they look like a rough surface. Like lots of tiny windows.
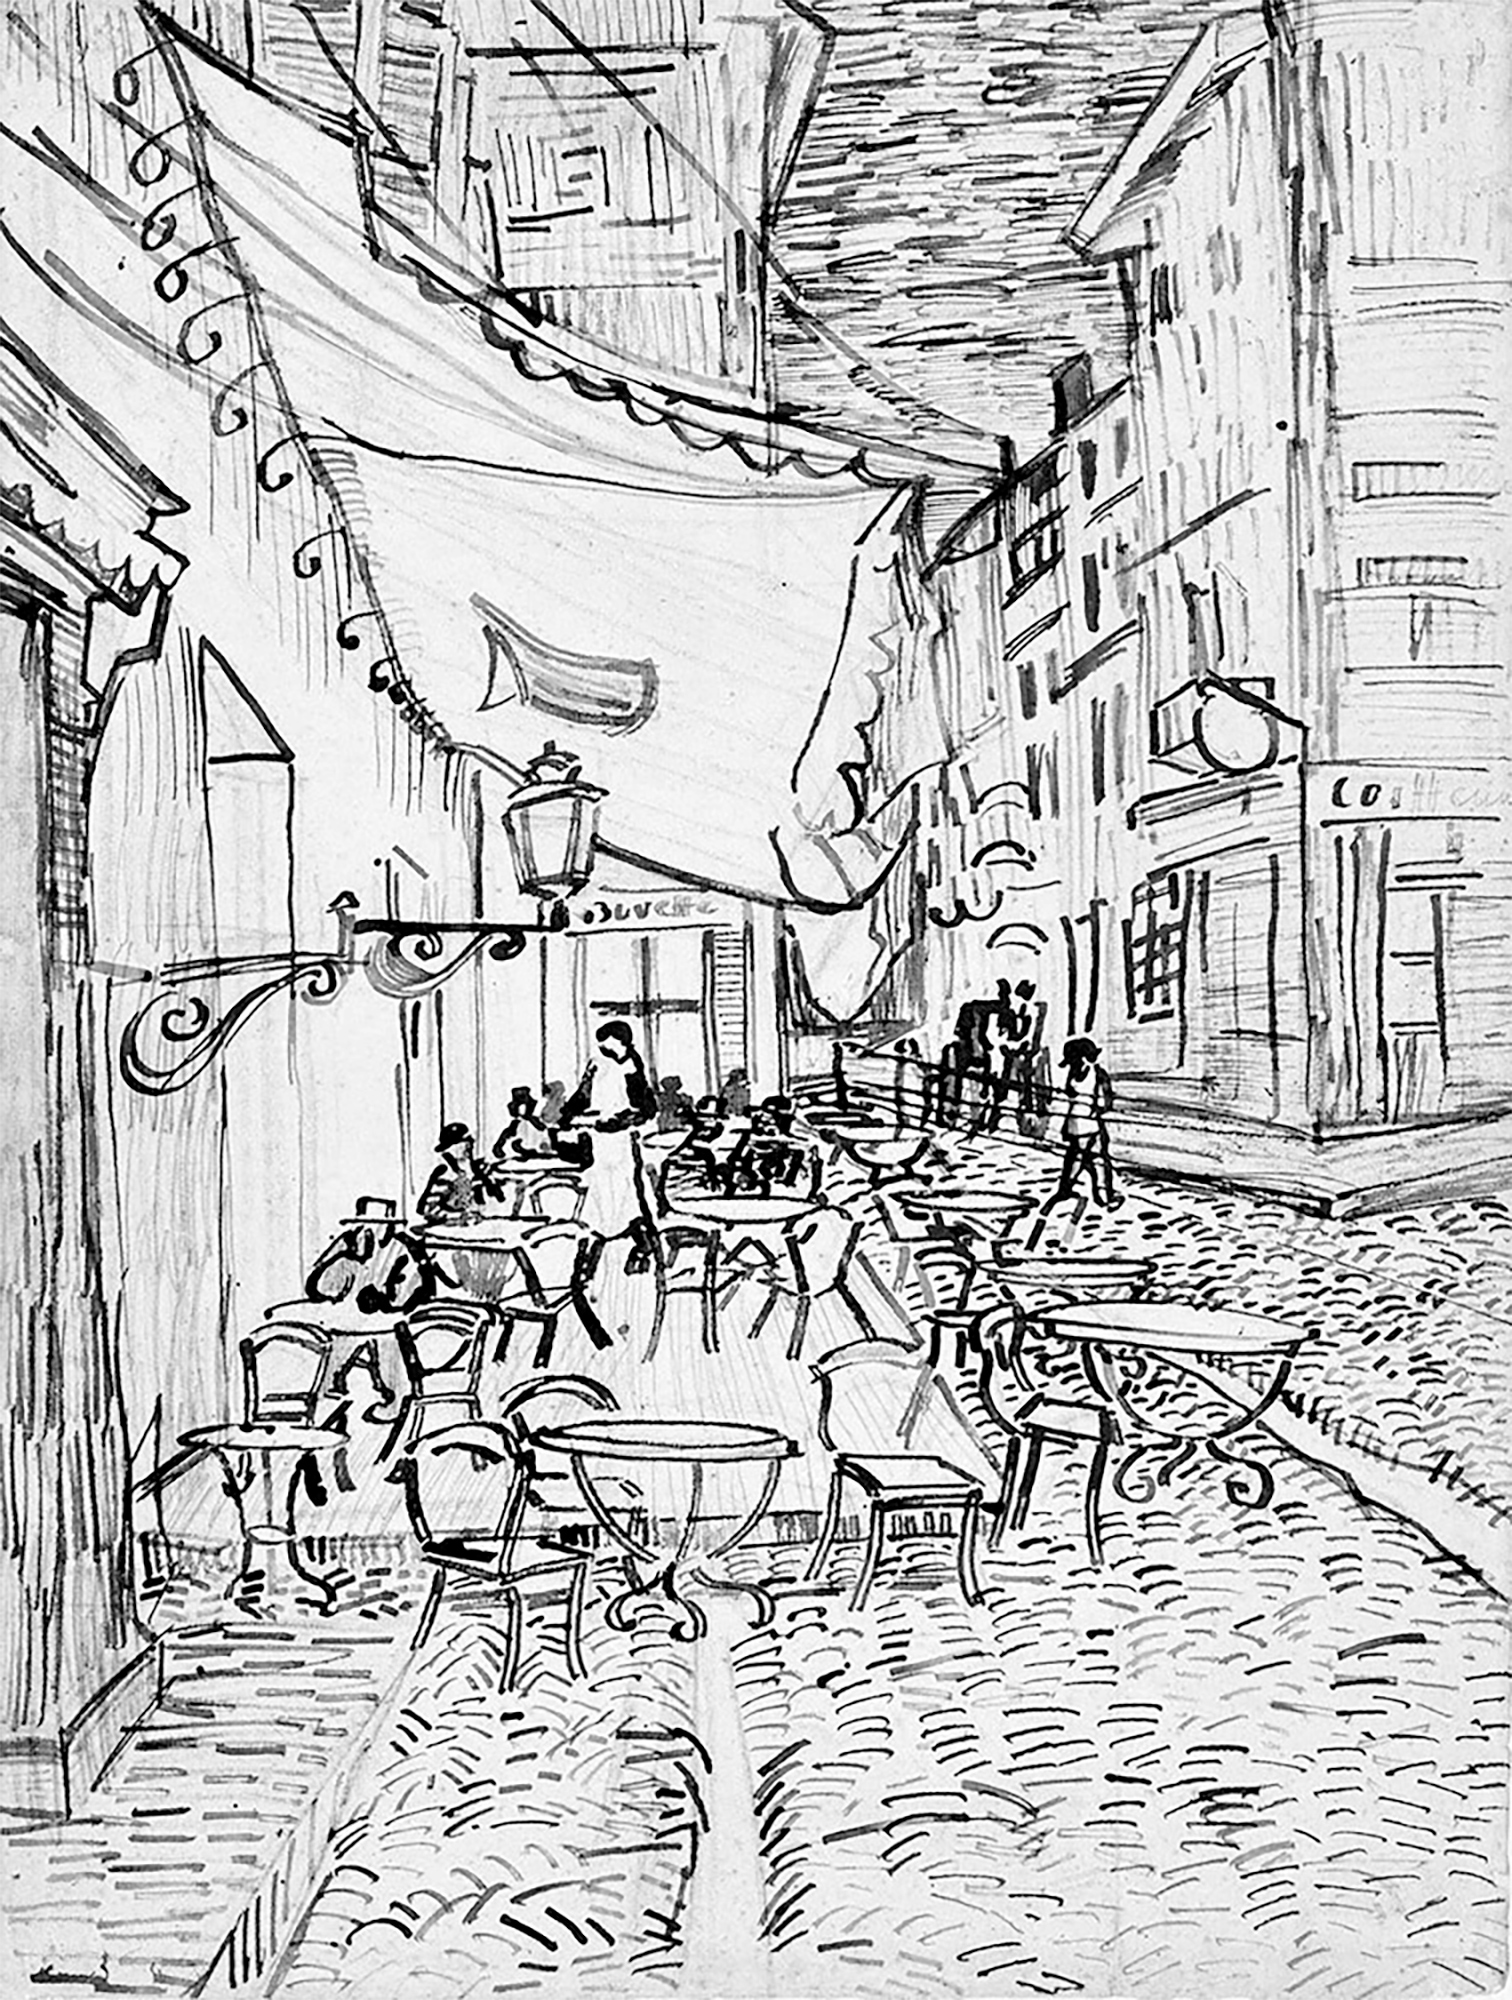
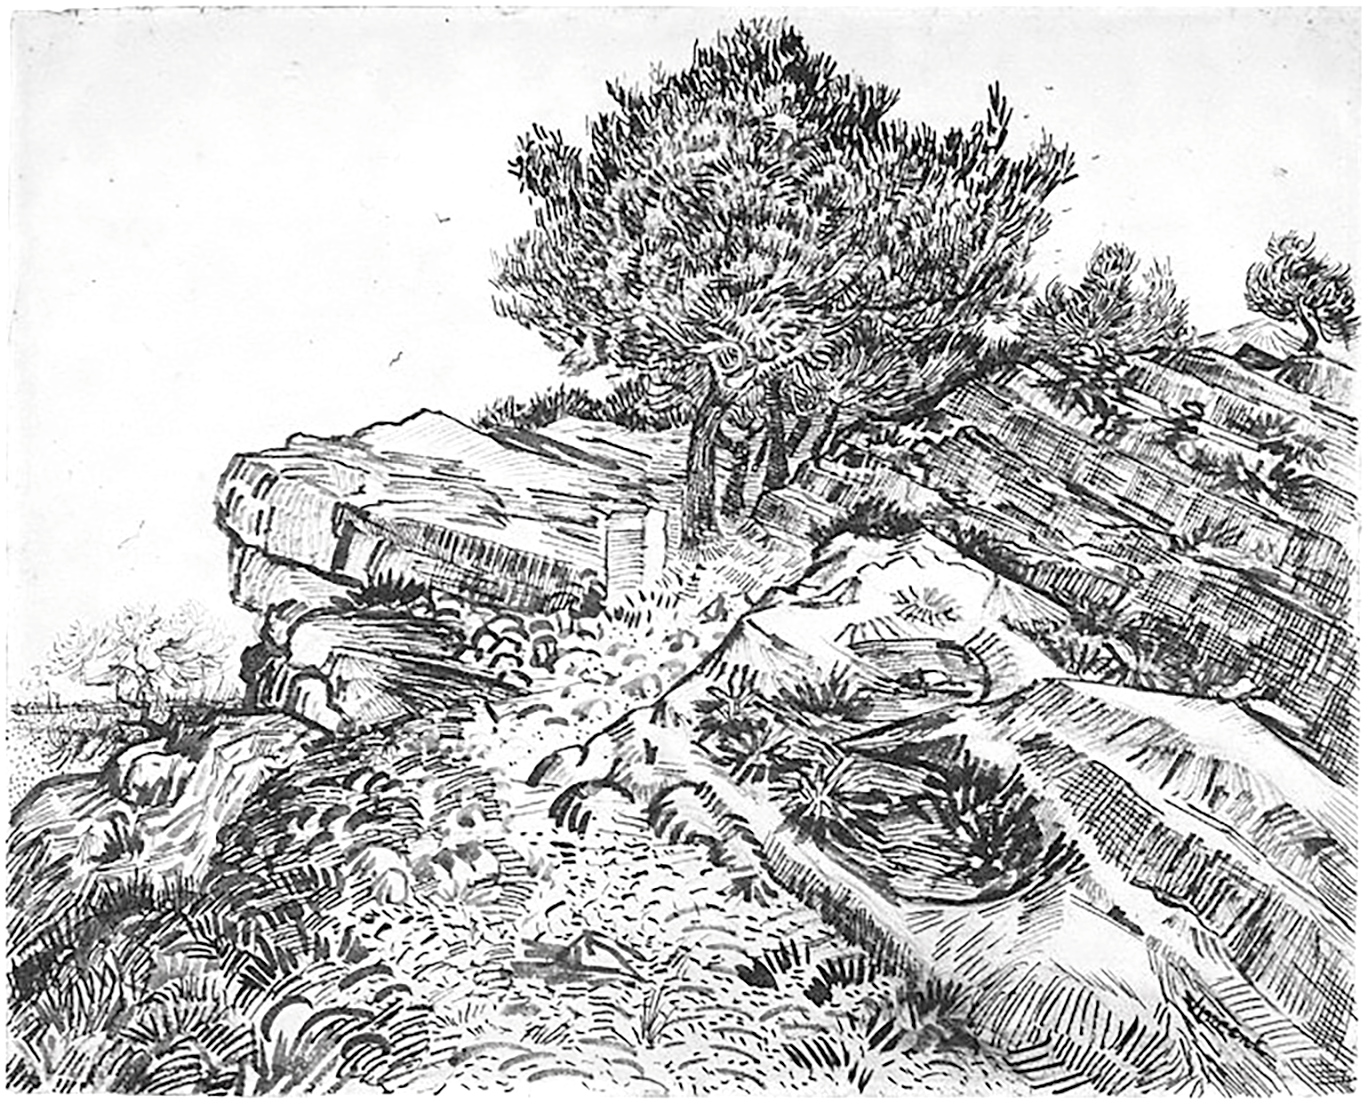
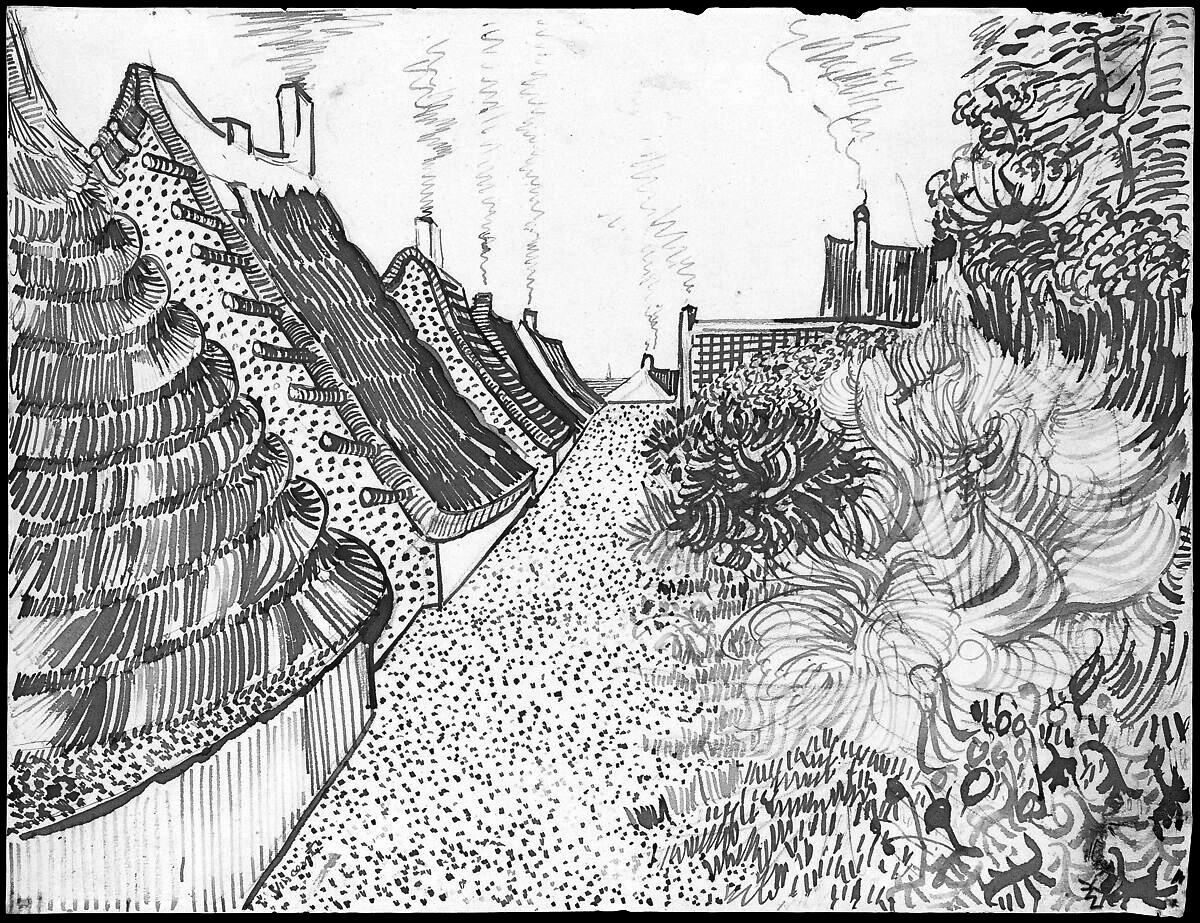
For example, the thin horizontal and vertical lines that create the shading in many of these pictures (by the artist, Van Gogh), look like they could be bumpy or rough even though we can’t actually feel it “
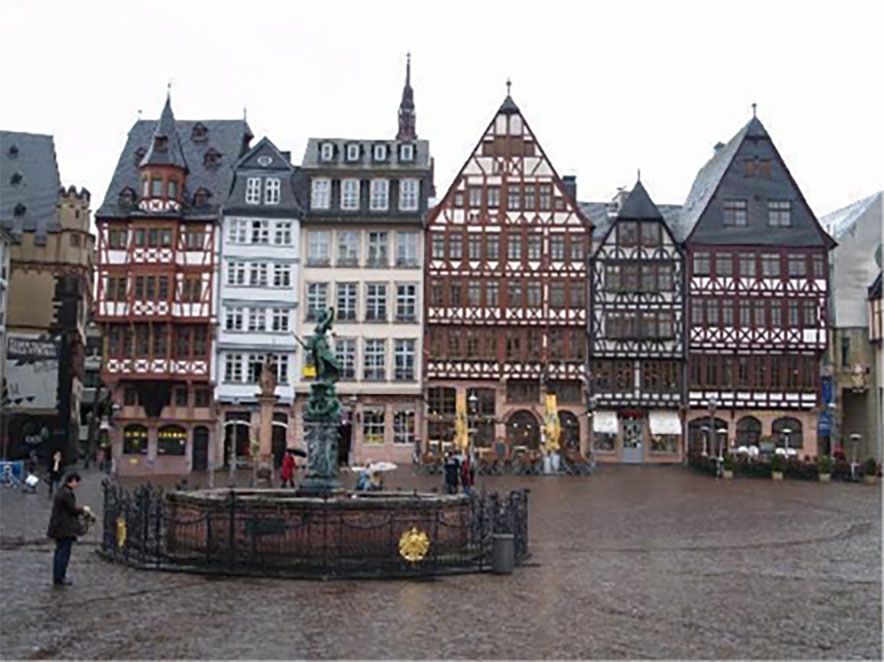
European town

Brick Wall
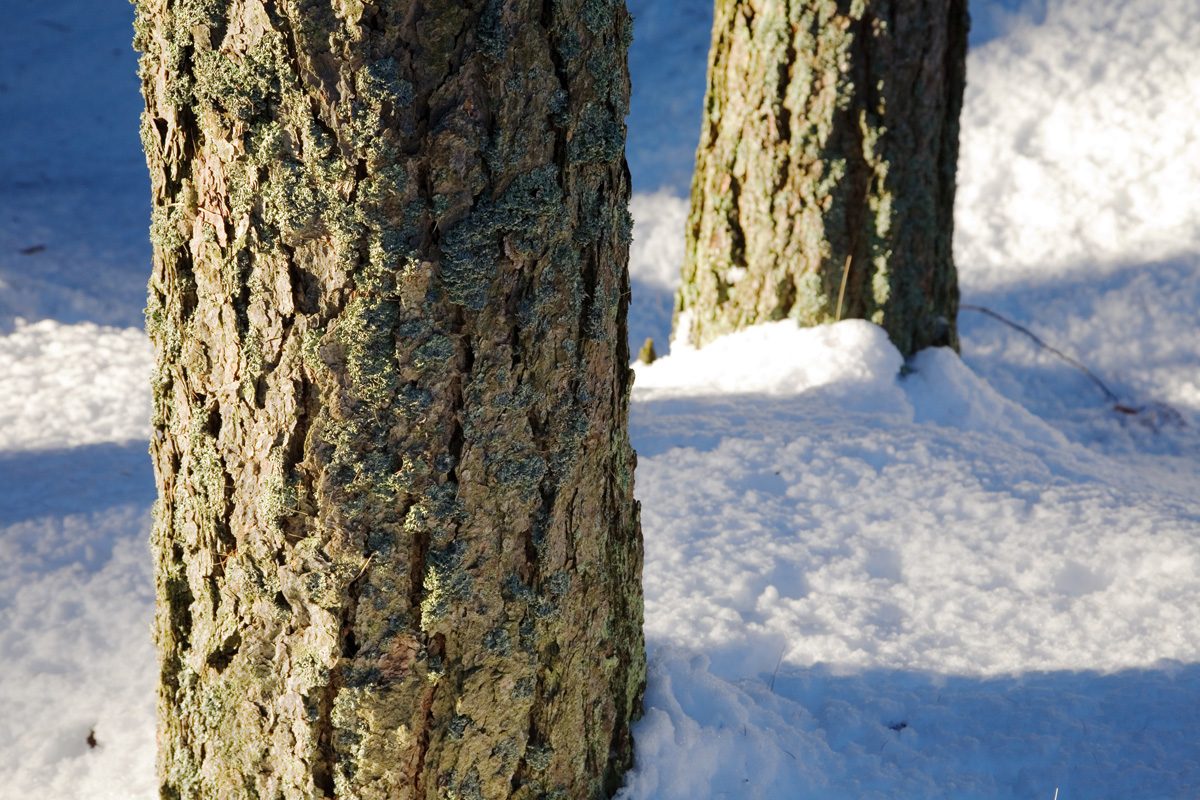
Rough tree trunks
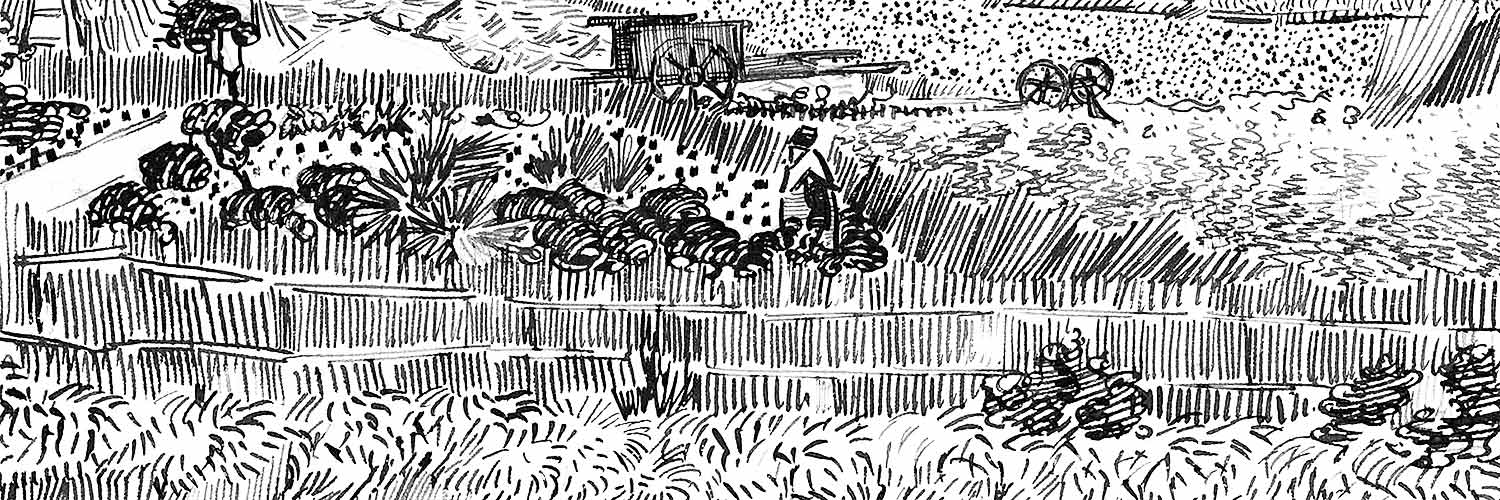
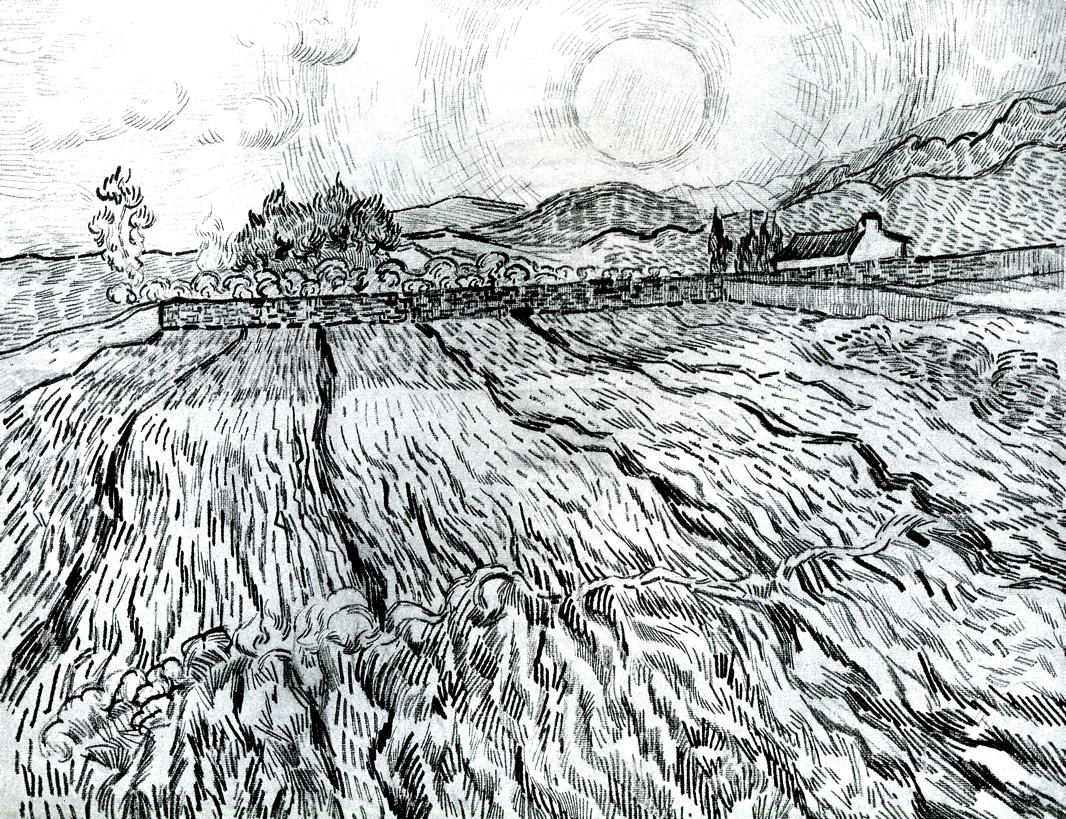
Van Gogh ink (tap any image to open viewer)
Show these examples of Van Gogh ink drawings using lots of lines. Talk about how all the lines and dots work together to make it look like texture.
3.3 prepare
Have students pick a reference from the 6 photos, and go through the following steps as a class:
- Pick 3 oil pastel colors (but not white or black yet).
- Then pick two alike colors to go with each one. (If you don’t have a big selection, use 4 colors and then one alike color for each). Alike colors are almost the same color. Like a light blue and a blue green to go with your original blue pastel. You’ll have 3 sets of 3 colors for 9 pastels.
- Also get out white, black and gray. Now you have 12 pastels to work with.
3.4 draw
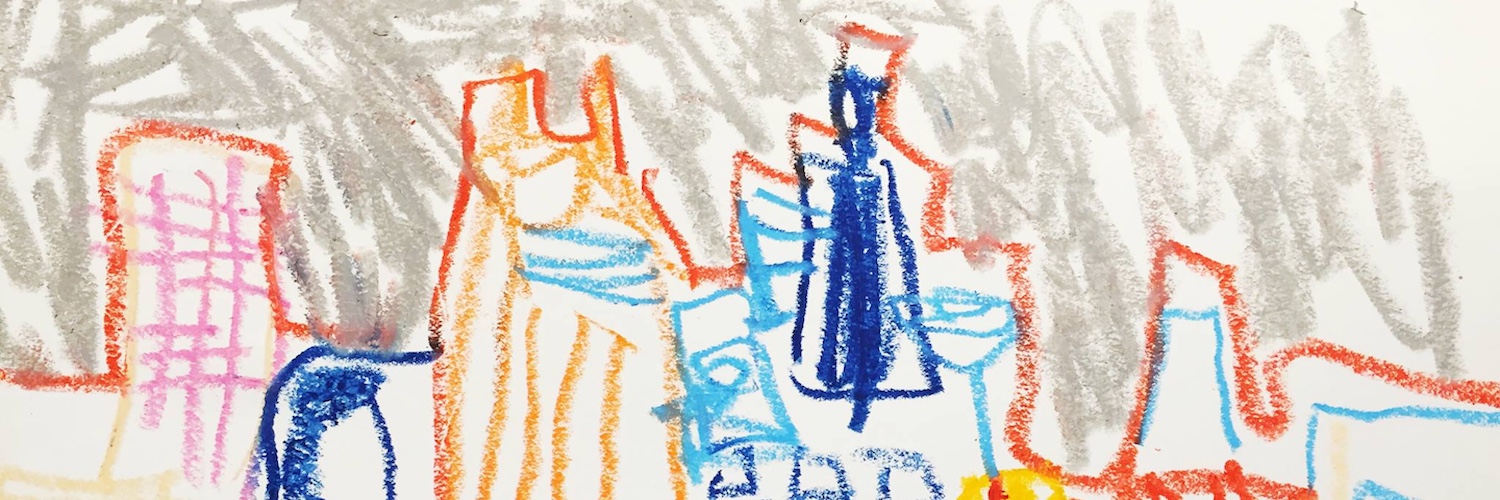
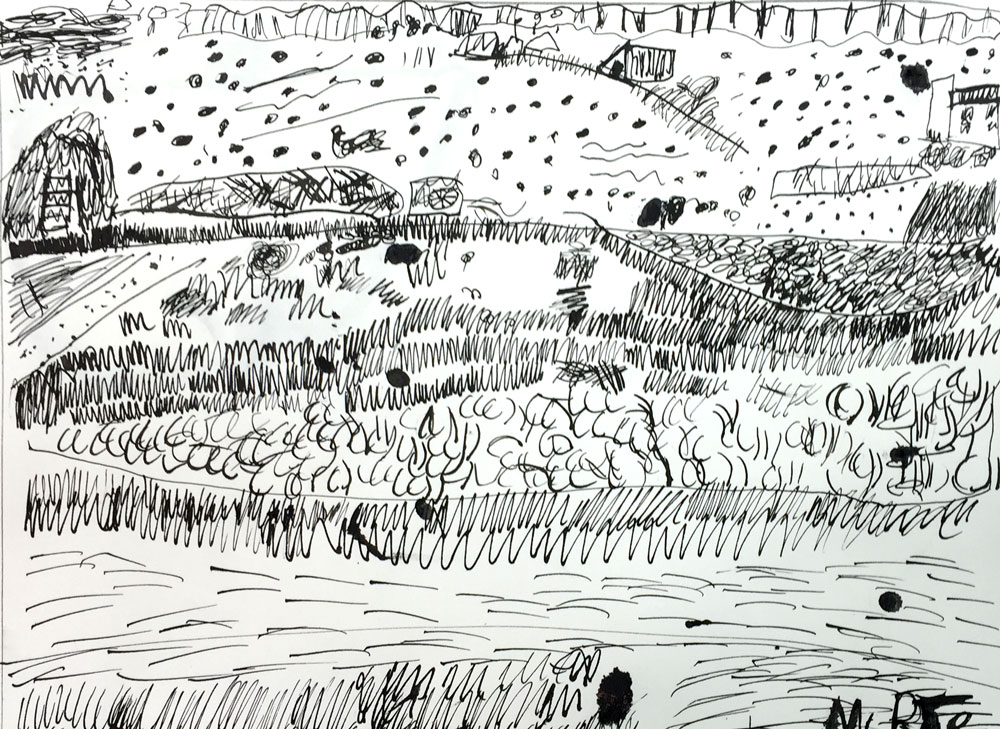
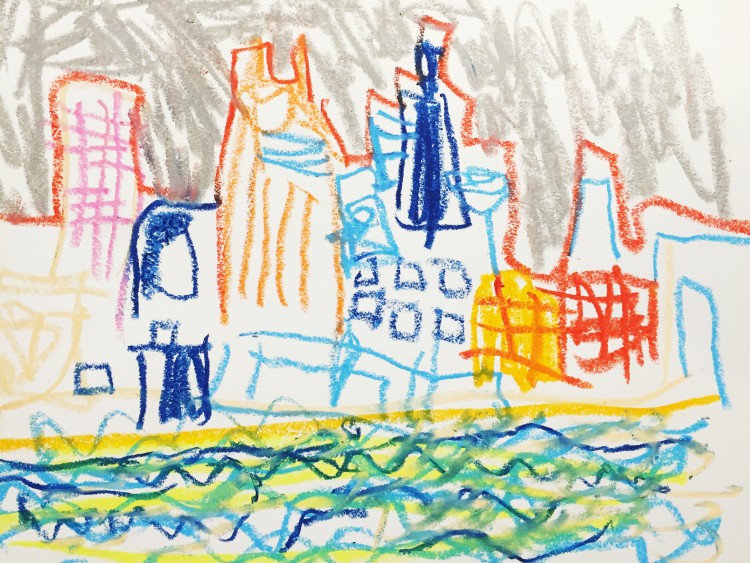
“Choose one of the town images and draw the town or city buildings ONLY using lines. Instead of coloring in an area, you draw lots of lines that are close, but don’t touch each other. This makes art texture like Van Gogh did.
The buildings should be very colorful. You can make them any color you like and even more than one color. Add lots and lots of lines for details and more texture.
Draw the lines slowly. If you did the circles drawing last week with lots of colors and lines, think about how you did those lines. This is like that, but this time you’re making a picture of the town with the colorful lines.
Use this button to jump down to the preparation section.
LEARNING TARGETS
Students know how to use charcoal.
M A T E R I A L S
- 14″ x 17″ Sketch Paper
- OR 11″ x 17″ copy paper
- Compressed charcoal sticks – soft
- Paper towels
- Kneaded Eraser
4.1 print
References
Expressive Animals
Cut the 6 images apart and print enough for each student to choose from several.
3 Pages – Opens in new window
4.2 draw
Let students choose an animal photo for a reference. Give a piece of charcoal and large 11″ X 17″ white paper, or 14″ x 17″ sketch pad sheet of paper, to each student.
Early finishers: Encourage shading with the side of the stick. You can break the sticks into shorter pieces if that helps.
There are no expectations or goals for this drawing; it’s just about experiencing the charcoal.
Before moving on to the next step, make sure names on on work and set artwork aside. Wash hands, and wipe down table. Make sure everyone keeps their animal prints for reference.
“Now that we’ve drawn with colorful lines, lets use a new kind of drawing tool, charcoal, which is very black. It’s a little bit messy, but when we’re through, we’ll wash it right off at the sink, so don’t worry about it. It smudges but that’s ok. You can smudge on purpose!
This will be a black on white drawing.”
Use this button to jump down to the preparation section.
LEARNING TARGETS
Students know how to draw in reverse values.
M A T E R I A L S
- Black construction paper
- White oil pastel
- Animal print reference from previous Step
5.2 draw
Give each student a piece of black construction paper and a white oil pastel. Draw the animal again, but this time using the white pastel on a sheet of black paper.
For advanced or early finishing students, suggest making light areas on the lightest side of the animal by shading backwards. Don’t put any lines or shading on the dark shadowy side. The background will be black instead of white. Note that shadows are not very visible to many students in this age range, so take care with this suggestion. You might just point out exactly where the light parts are, or skip the idea.
Students sign the work with the white pastel.
Use this button to jump down to the preparation section.
LEARNING TARGETS
Students know how to take time to examine their own artwork.
M A T E R I A L S
- 11″ x 17″ Copy Paper
- Oil Pastels
- Music to play during game
6.1 Prepare
Students will create a follow-along abstract drawing. Each student will need a new sheet of copy paper and their choice of 6 oil pastels. You will need to have music ready to start and stop during the drawing so students don’t do too much at each step. Make sure students understand that it’s a game with rules.
You will say a step out loud and the students will draw it when the music starts (steps are listed below).
Remember to stop the music and pause for consideration after each step. State the instructions for the next step but let them have time to think about what and where to do it BEFORE they begin. There should be no drawing until the music begins. The music is a great way to keep them focused on waiting and examining their work.
The purpose of music and stopping, is to help them take the time for self-evaluation, and be disciplined about drawing, without having to use self-control. It’s also a fun freeze game that they’ll enjoy.
Remember to have students think about the idea after each instruction and not to begin until you play the music.
“Now we’re going to play the Freeze-line game. We’ll make a design with lines and shapes.
When the music stops, FREEZE. Don’t make any more lines. I’ll tell you the next step, and then you’ll take a moment to look very closely at your work. Take time to decide where and how you want to draw each step.
Decide where the most important spot is. Do you like it? How can you change it so you like it more? How can you make the most important spot more important, or change where it is? Change colors with each step. Don’t start drawing until you hear music!
6.2 PLay!
Steps for the game:
- Several long lines up and down, close together on one side of the paper
- 10 small circles in a group somewhere
- Add something you like to the circles with another color (very short time)
- Make another group of short lines. they can be curved or straight, or both.
- Make your own idea with the next color
- Last color: Make a blob shape that you like and you think your artwork needs to have.
- Fill in the blob with lines from all the colors, or just a few.
- Continue on your own with any of the colors now, but remember to freeze when the music stops, and think about what is next.
Use this button to jump down to the preparation section.
LEARNING TARGETS
Students know how to identify abstract art.
M A T E R I A L S
- Student’s Finished Artwork
7.1 Show
Use this button to jump down to the preparation section.
LEARNING TARGETS
Students know how to keep their work space tidy.
M A T E R I A L S
- Sink
- Waste baskets
- Well-lit spot for photos
- Camera or phone-camera
- Paper towels
- Cleaning wipes
8.1 clean
- Empty water containters
- Super-wash brushes if used
- Put art supplies away (sop up runny paint before disposing of palette paper)
- Wipe tables & toss trash
- Remove any smocks (last)
- Check for items on floors and tables
8.2 photo
Try to get photos of your student’s artwork. Find a good spot for quick lighting without highlights or shadows from your hands and device. Ideally in-between two strong lights on each side.
OBJECTIVES
- Practice and improvement using line to create artwork
- Understanding how lines can be more than you think at first
- Accomplishment in finishing several drawings
- Fulfillment by choosing subject matter & playing a game
TROUBLESPOTS
Big wacky line ideas – As students invent lines they tend to make shapes in the lines. It begins with wavy lines, then zig-zag, and pretty soon you have a bunch of lines that look like the top of a castle. This is ok, but the shapes should be very small. Try to catch them early on and encourage them to make the zig-zags get smaller and smaller.
Charcoal “allergies” – Just kidding! But some people do get the heebie jeebies when they handle charcoal. Let them switch to an Ebony pencil if you see someone who is visibly uncomfortable with it.
ART WORDS
- Line – One of the things we can use to make artwork.
- Expressive – When you make your art look different than real life, and use techniques that are noticeable. When people can see how you were moving when did your artwork, then you are being expressive.
- Texture – Things that feel bumpy or rough have texture. You can see the bumps and ridges in textured things. In art, things that have lots of small lines and dots are said to have art texture, or visual texture. That’s because it looks a lot like the surface of textured objects.
- Abstract – When art doesn’t look like things you can recognize, it’s called abstract art.
CLASSROOM
PREP
Have all your materials ready to go. Queue up some music for the game, and have a display ready for showing images.
Print all of your PDFs from the lesson plan and cut any references apart as needed.
What your room needs
Here are your printable lists and room prep instructions.
Opens in new window
CLASSROOM
MATERIALS
- 11″ x 17″ Copy Paper
- 14″ x 17″ Sketch Paper
- 2B & 4B pencils
- White Erasers
- Markers and/or oil pastels
- White Oil Pastels
- Soft Compressed Charcoal sticks
- Blenders (stumps)
- Paper Towels
- Kneaded erasers
- Black construction paper
- Smocks
PREVIEW
Week 10: Leaves & Trees
Students have fun using the classic straw and blow technique to create ink tree branches. Then they learn how to “grow” a tree as you draw, mimicking the nature of the tree trunk and branches. Watercolors are used to create a soft fall foliage work using warm colors, and neutral colors are introduced.
Week 11: Fall Funnies
Students will have tons of fun learning the parts of cartoon faces and practicing how to put them all together. After creating their own original character, they get to create a silly cartoon head using fun-dough.