
Style
Each lesson Plan focuses primarily on one of the 4 Cornerstones of Art:
Drawing | Painting | Color | Style
OVERVIEW
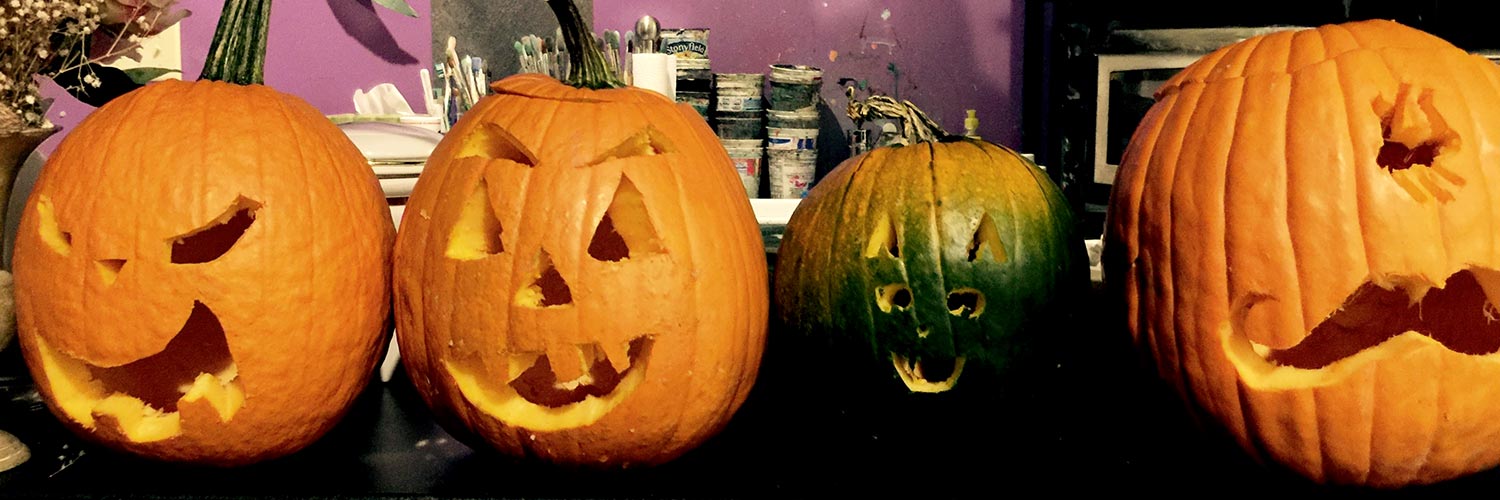
For this week, we have a fun party break, and your artists get to show their skills doing a more traditional “craft” like project. This is always very popular, and our students often dress up and bring party food.– – –
Grades 3 – 5
Week of October 21 – 25
1 Hour & 45 Minutes
Lesson At A Glance
A brief overview of each step. Buttons jump to each section for detailed information.
15 Min – Explain Simple holes with Slideshow, while students draw 3 – 4 sketches of ideas
7 Min – Tape drawings to pumpkins and modify
5 Min – Show tracing with pushpin, and then carving technique
45 Min – Have fun! Early finishers can enjoy party food and visiting
5 Min – Everyone helps clean up the room.
SCROLL & TEACH
LESSONPLAN
Each section is a different color. Read over once and then you can SCROLL & TEACH using any device you like. It’s designed to work best with your phone.
LEARNING TARGETS

Students know how to have fun
M A T E R I A L S
- Party food & drink
- Sketch pad
- Pencil & erasers
- Pumpkin carving tool to show
1.1 party
Suggest drawing their costume or a cartoon version of it. If they’re dressed up, they could draw each other’s costumes.
Display one of the small cutting saws and explain safety.
CREATIONS - tap here to open
Use the Student Instructions printout below to distribute to your Creations students. Tap the image to open the PDF in a new window.
Choice of projects
Overview: Students will usually choose to create a cut pumpkin, but if anyone has a project they’re working on and want to do instead, that is a great way to use the class time. Be aware if you have anyone working like this, and make sure to visit them and ask questions as much as you can.
No Creations Student Instructions or Reference Materials today.
LEARNING TARGETS
Students know how plan a design
M A T E R I A L S
- 14″ x 17″ Sketch Paper
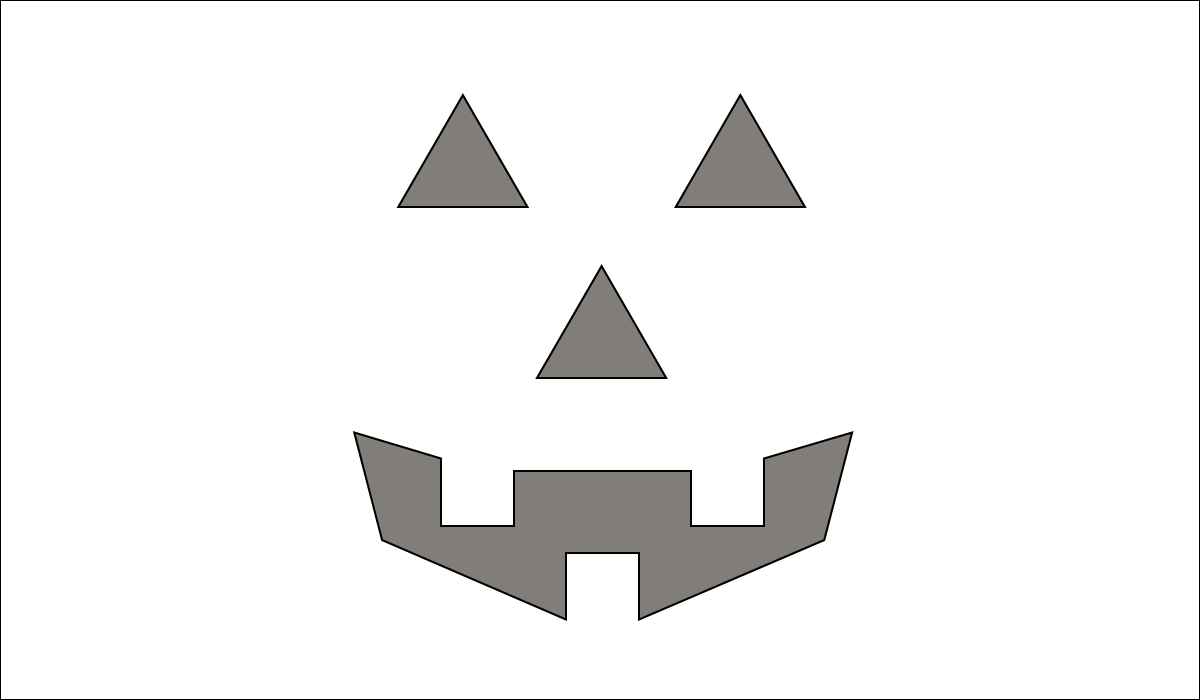
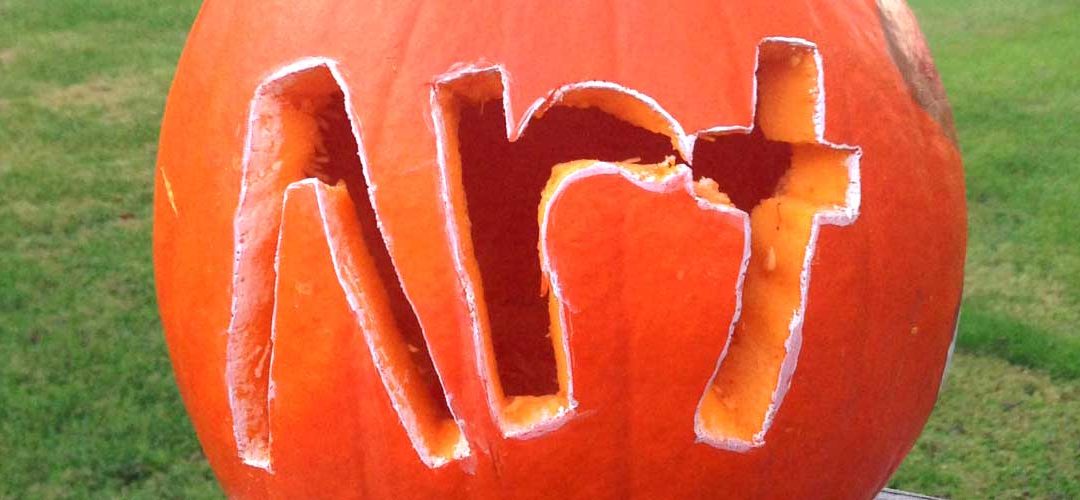
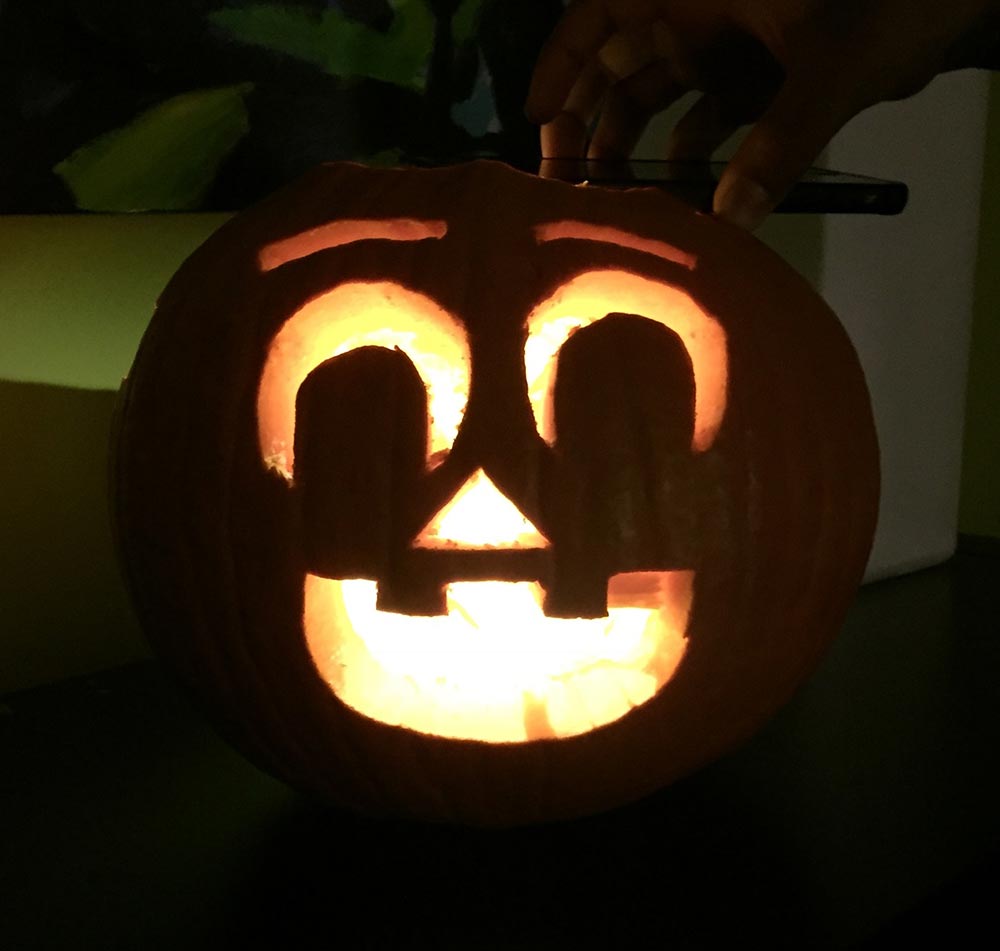
The traditional pumpkin face has straight lines because big knives can’t cut curves. This is a very simple set of 4 holes
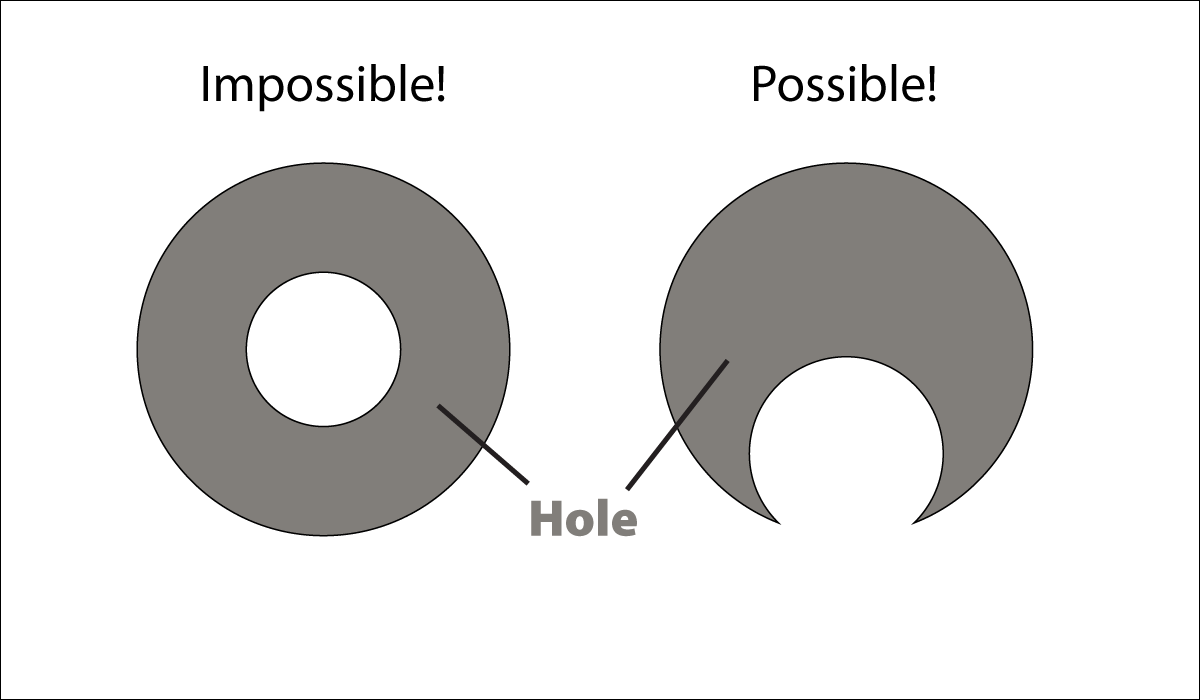
You can’t have a solid shape floating inside a hole, like the image on the left. Instead, you have to connect the solid to the edge of the hole, as shown on the right.
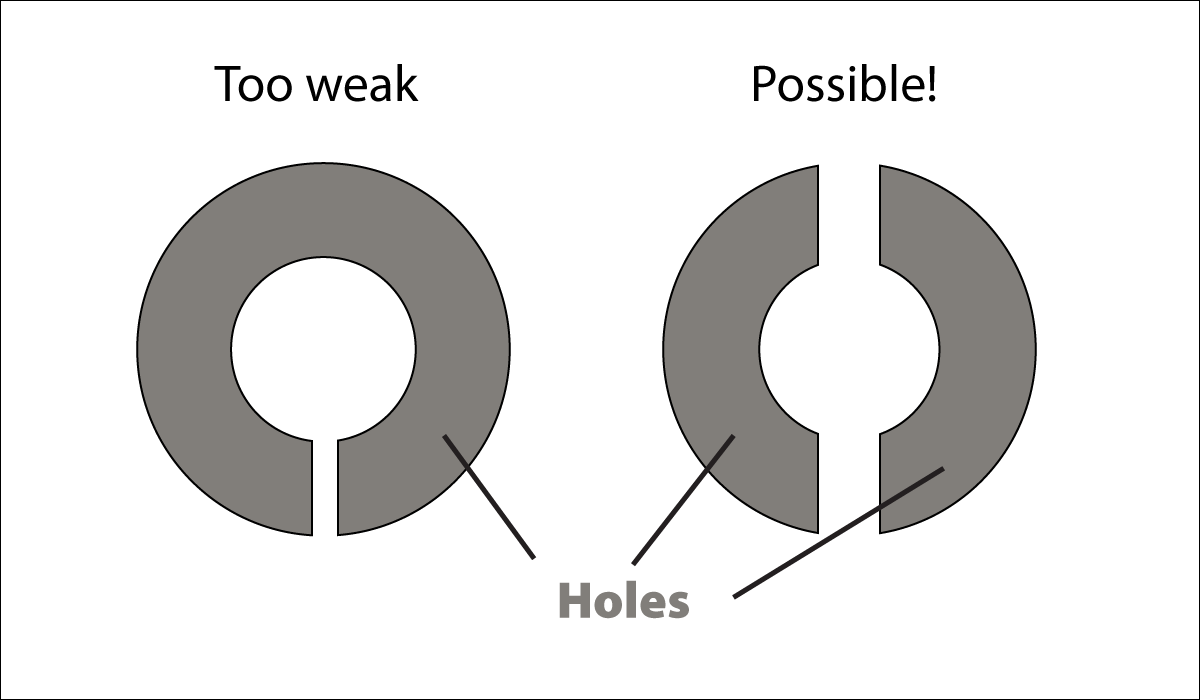
sometimes you can make a bridge to support a shape, and make it look like it floats, but you have to have thick bridge supports as shown on the right.
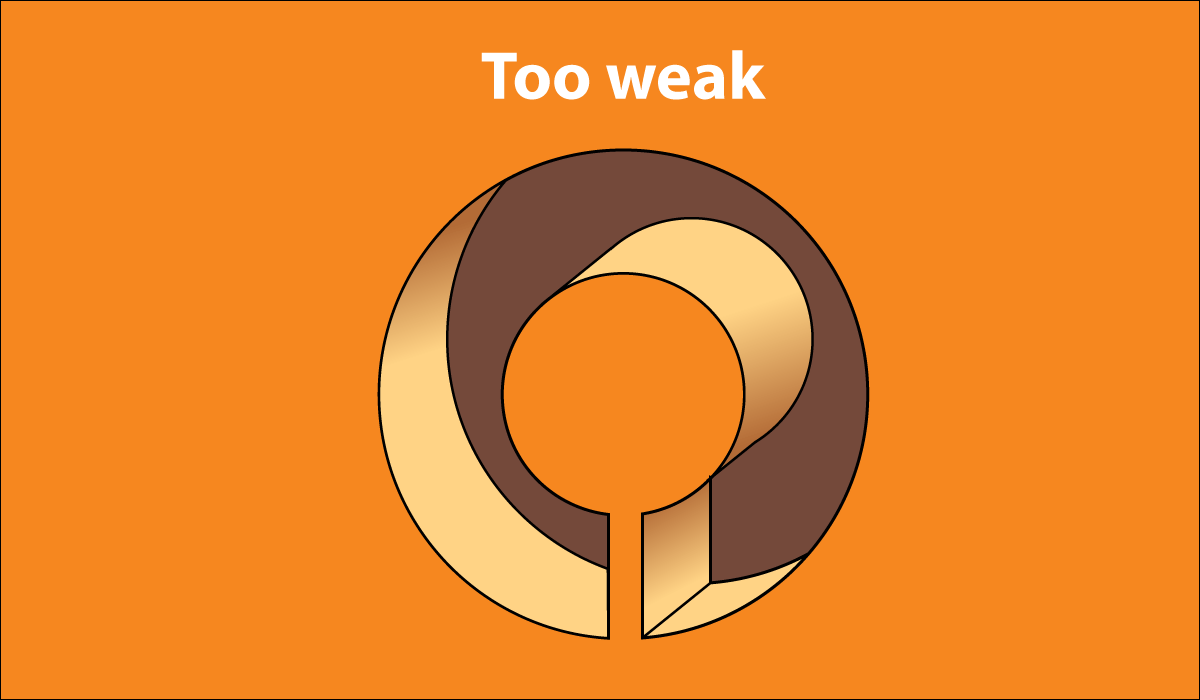
This is what some people try, but it breaks because the upright piece is too small to support the inside circle.
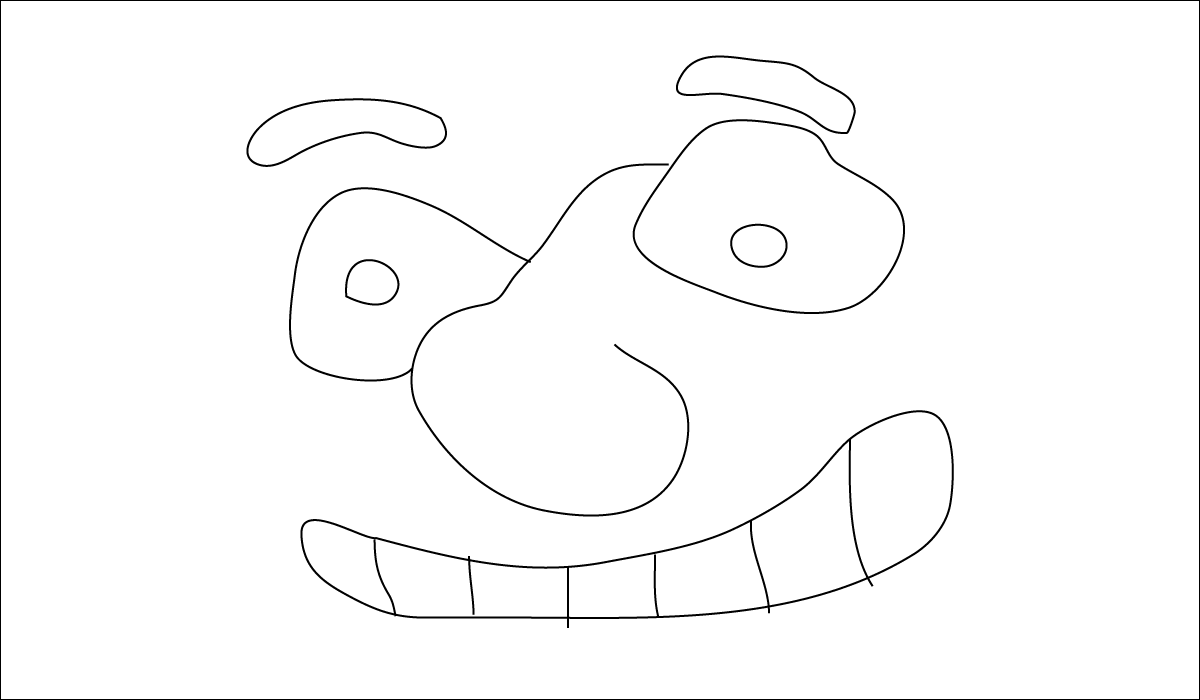
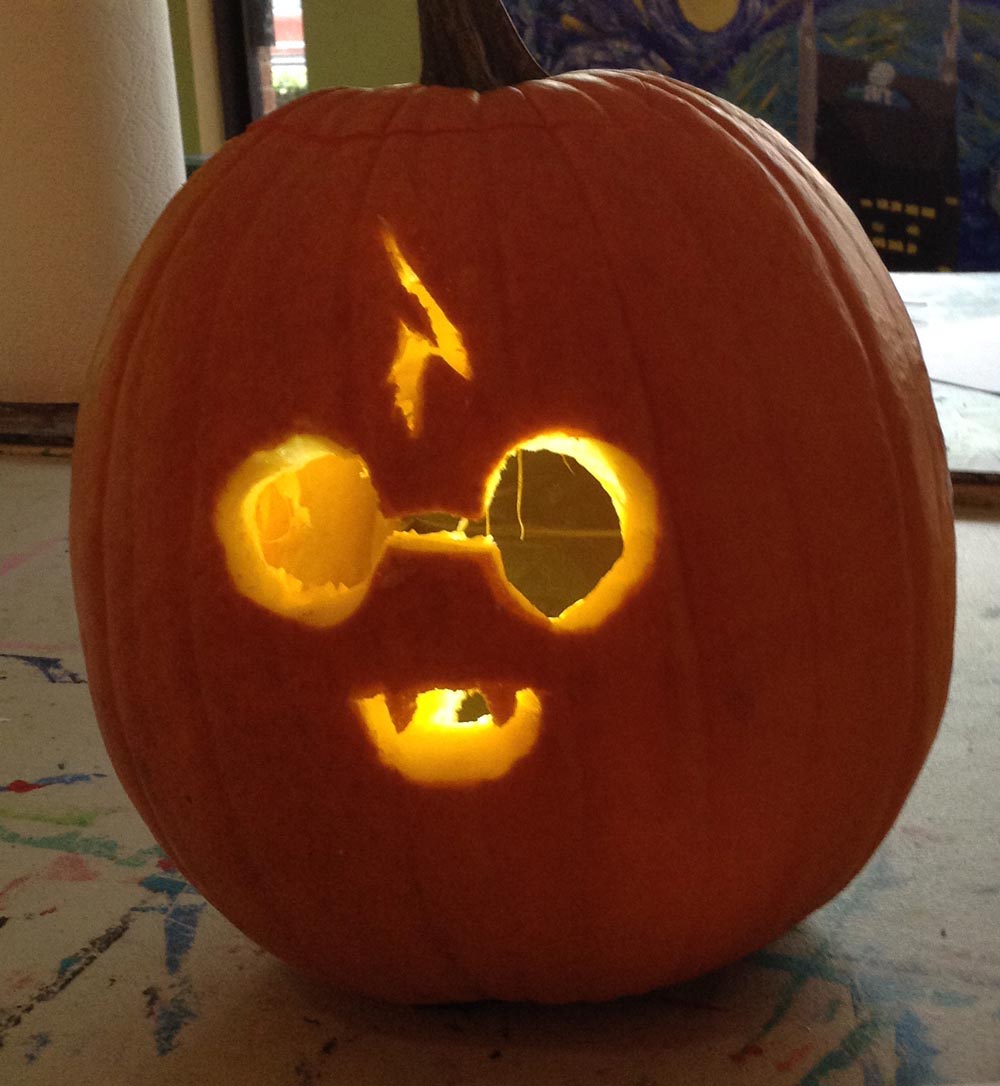
Here is a fun cartoon face that looks like it could be great on a pumpkin…
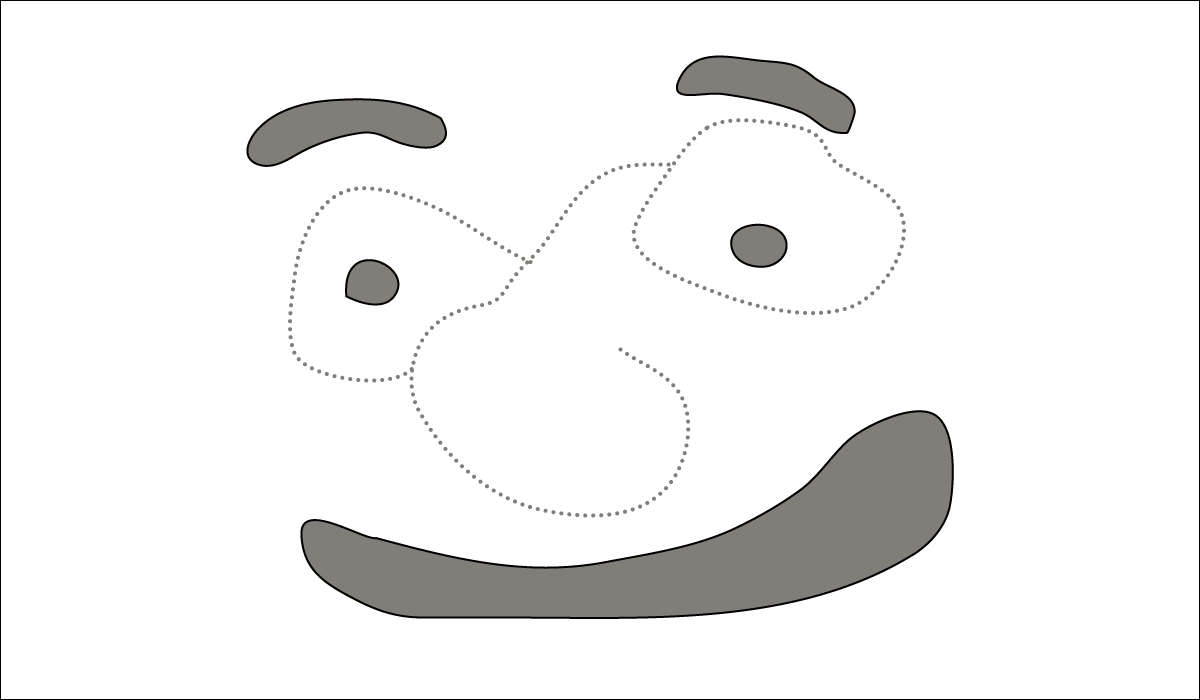
But the holes won’t show the drawing properly. You have only the small shapes as holes or large shapes that delete the details. The dotted lines cannot be cut or you’ll get the next picture …
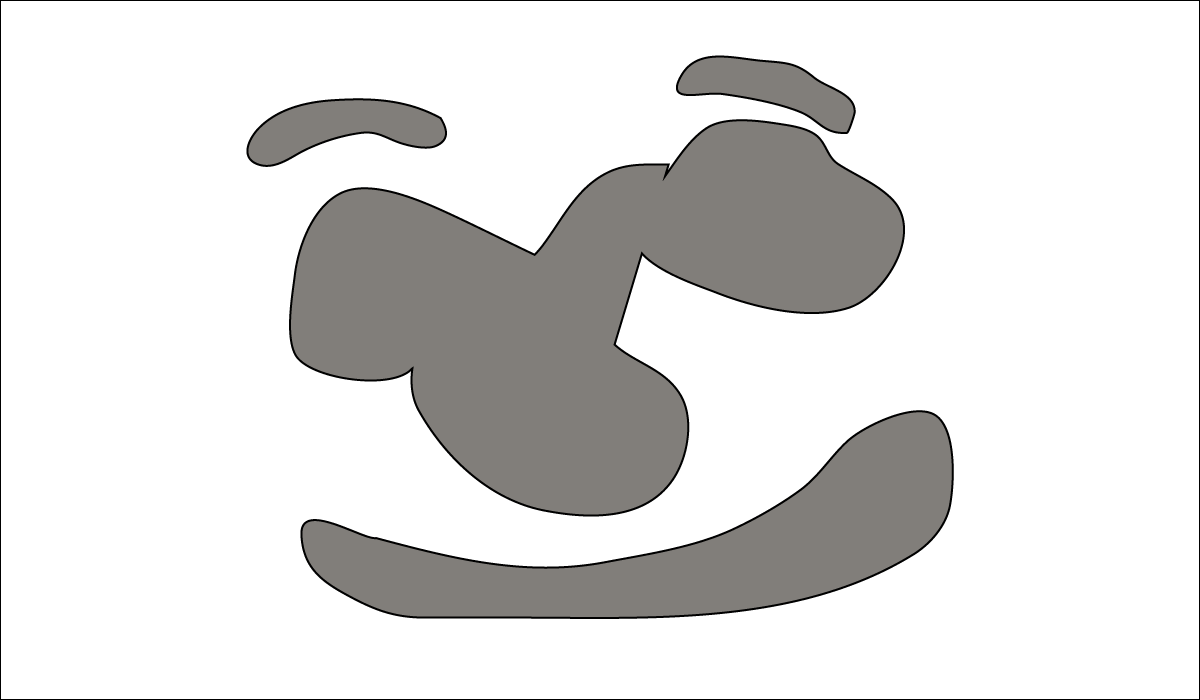
The whole thing falls out! Either way, you lose the drawing because it’s not based on simple holes.
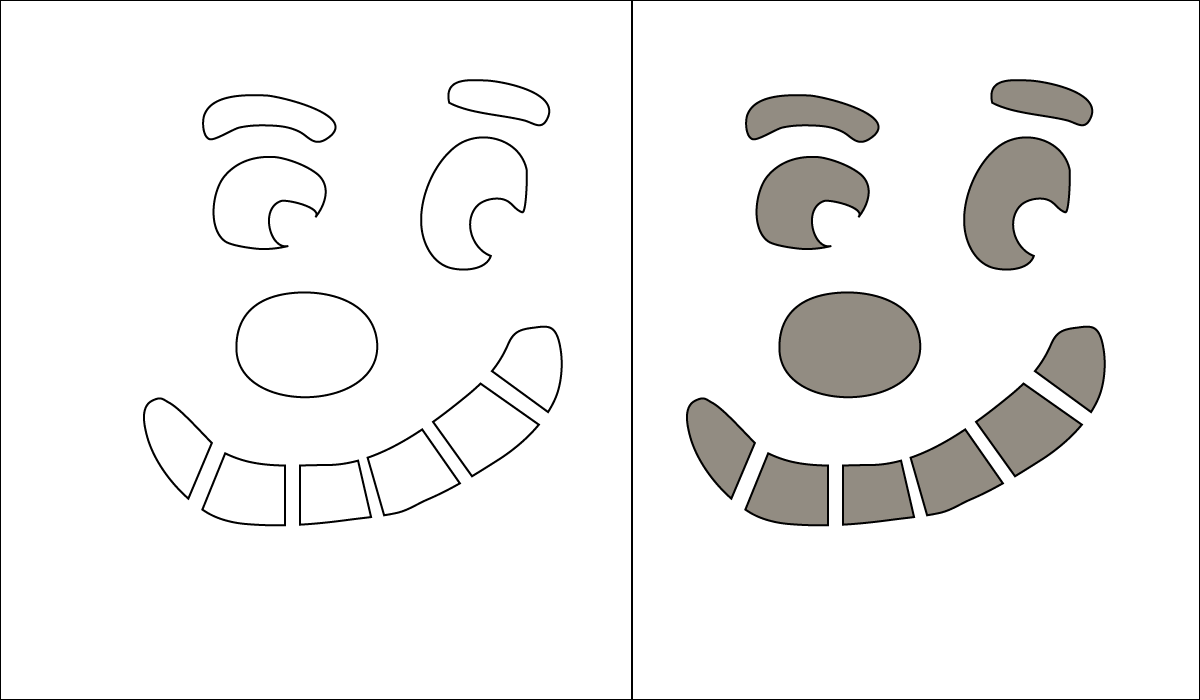
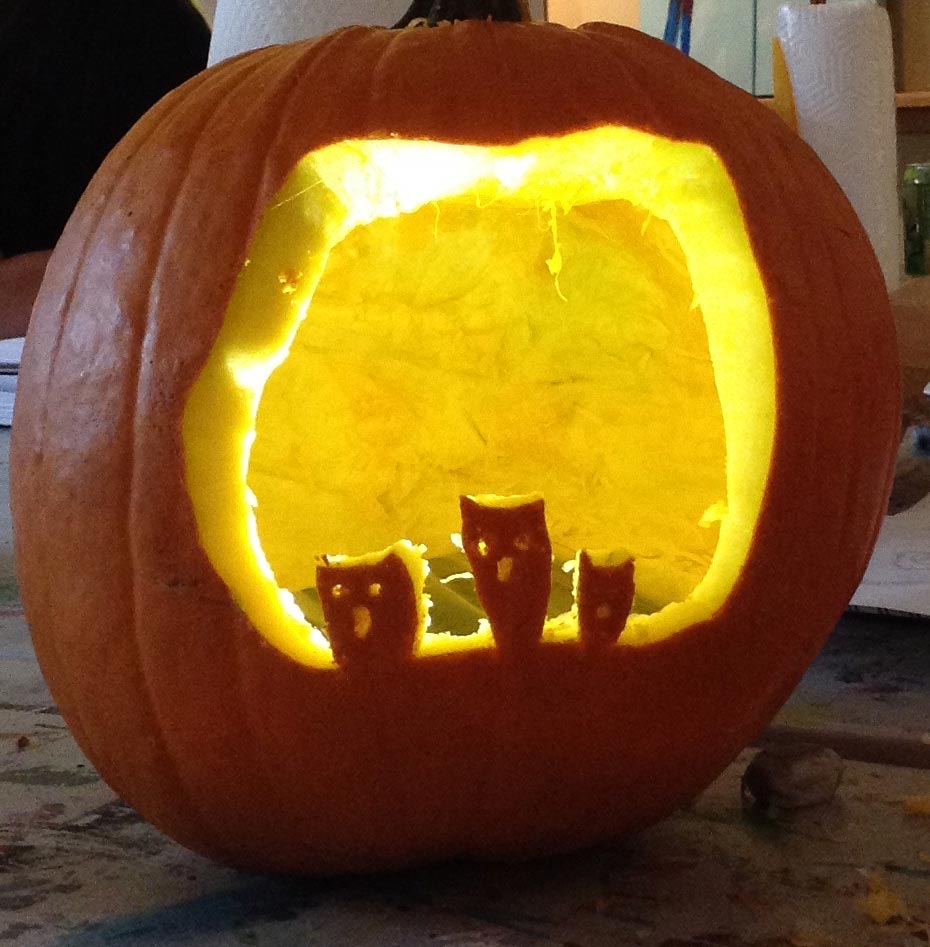
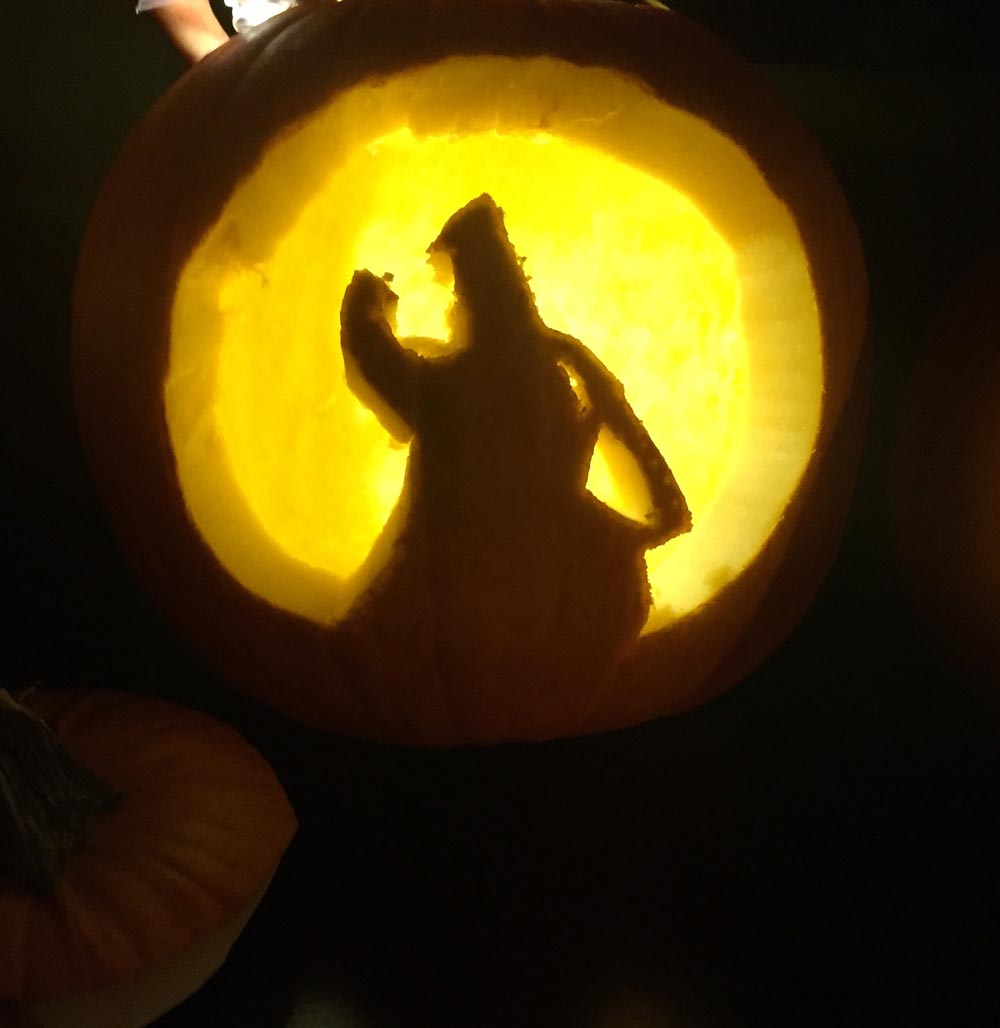
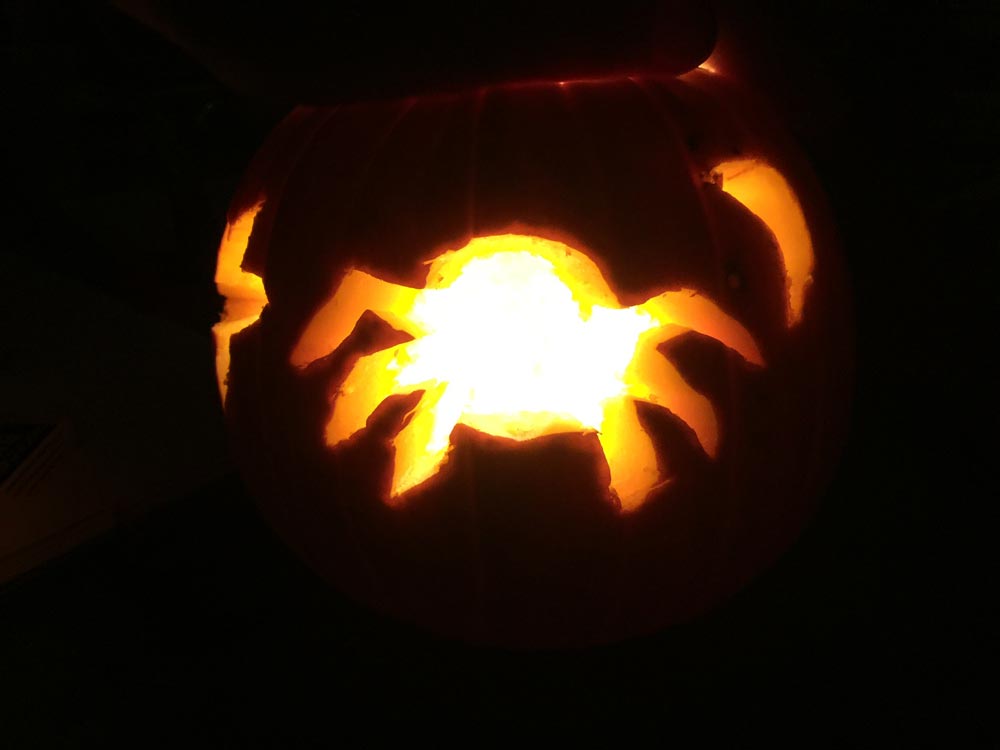
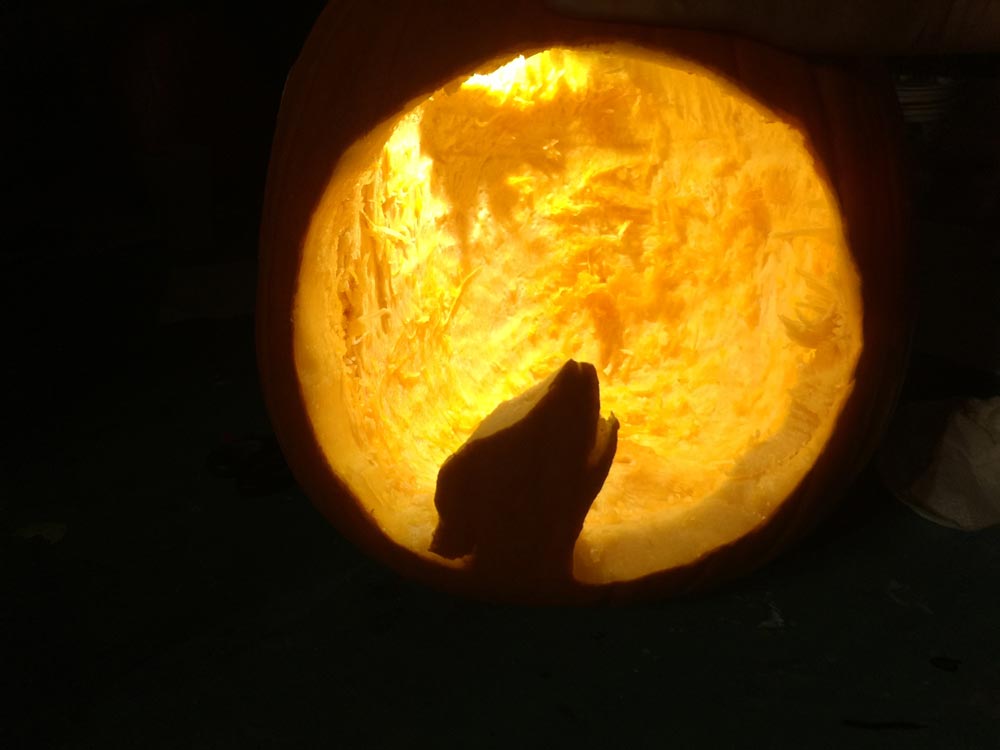
Instead of drawing in the regular way, make your drawing a series of simple holes, that work together to create something.
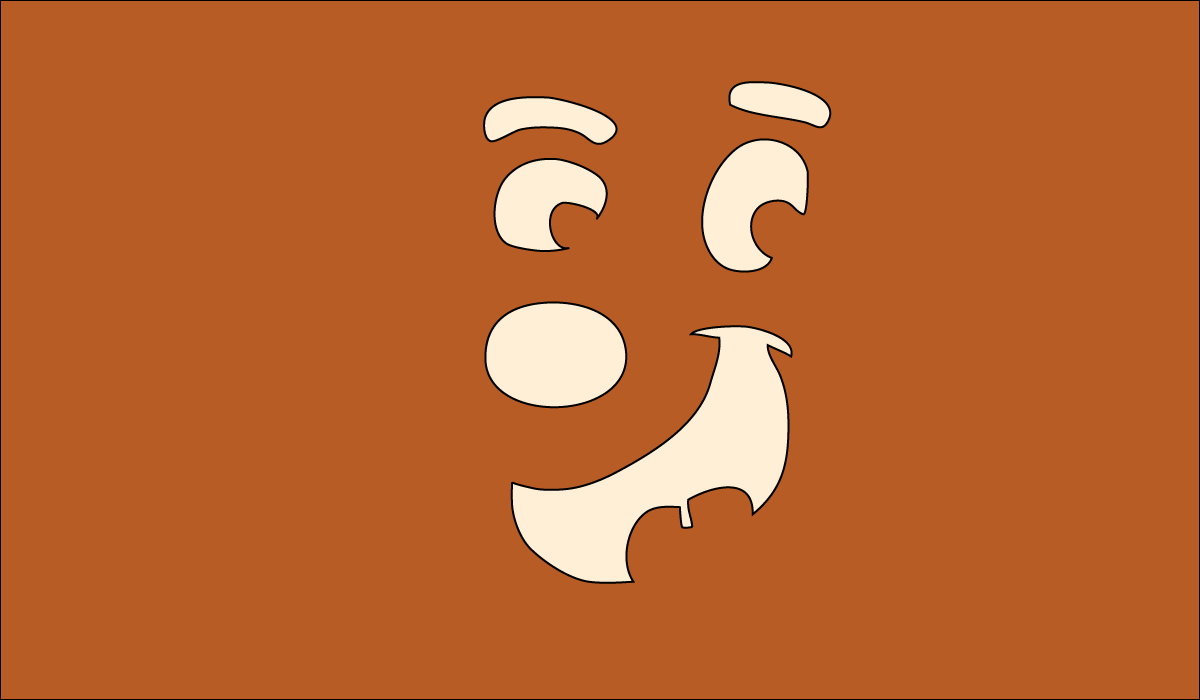
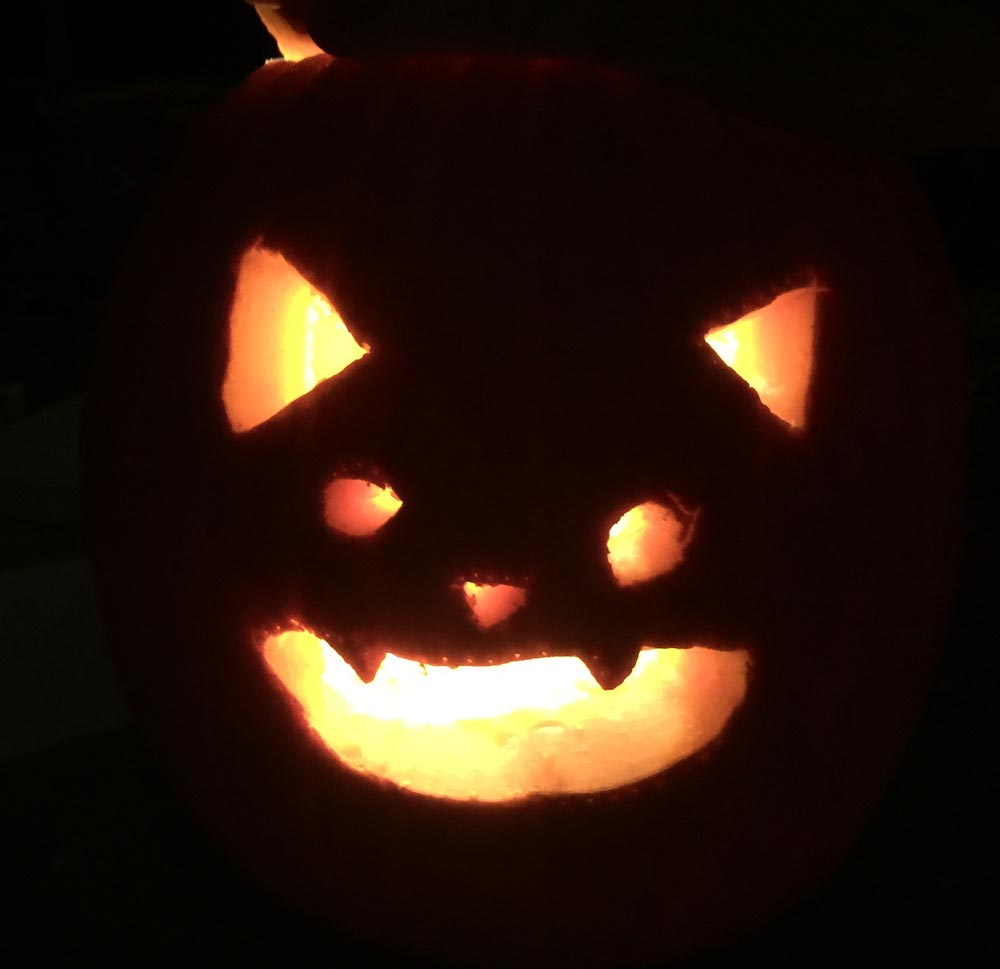
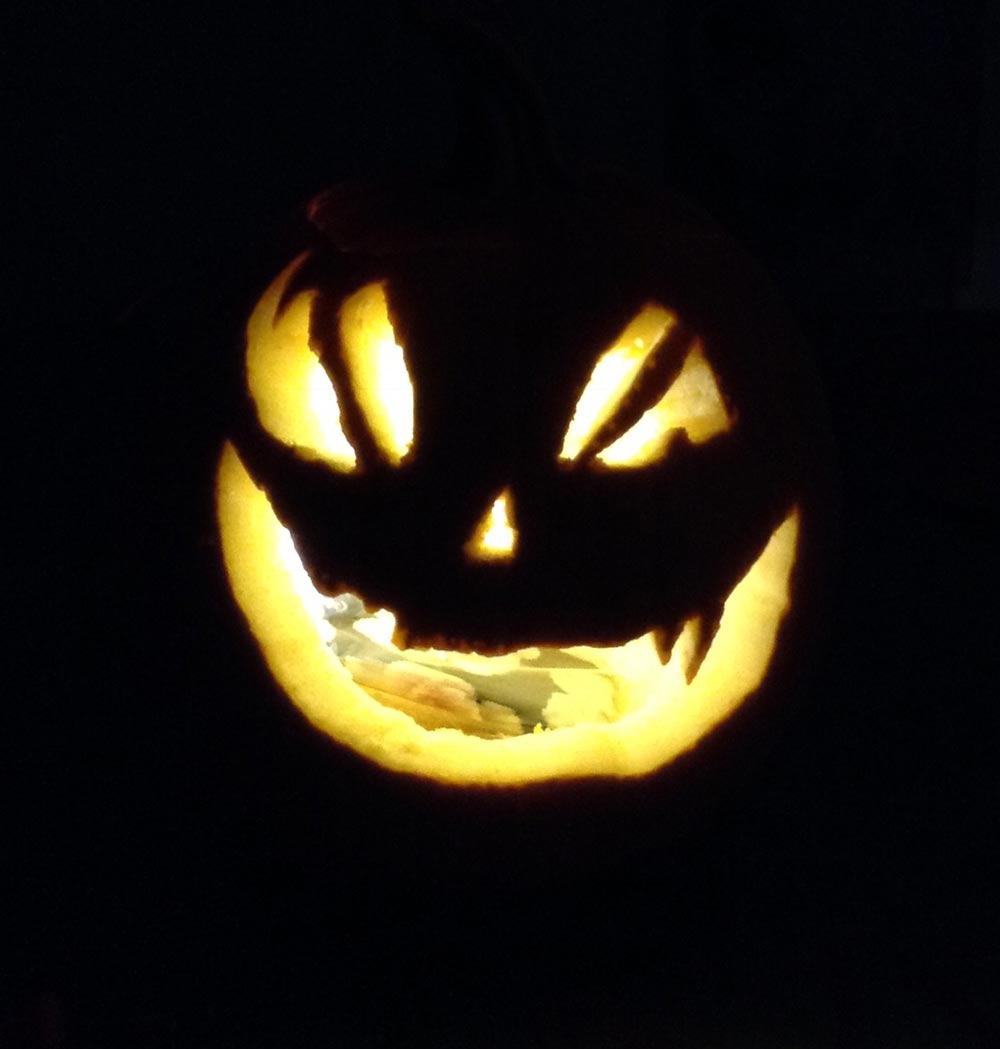
When you light it up, the holes will be bright light, and the pumpkin will become dark.
2.1 Plan
Students should get out their sketch pads and begin drawing ideas for their pumpkin design. It’s important to have more than one idea. Choice is always good, so try for 3 or 4 designs. They can draw them any size that they like, but they should be square or vertical. Wide designs will not all be visible at one time, and should be avoided.
Another thing to avoid is creating a picture based on thin lines to try and “draw” the image. It seems like it will work but it just doesn’t.
Make sure you go through the slides carefully. The idea of simple holes seems so obvious, but when they start getting creative, it can bend the mind a bit.
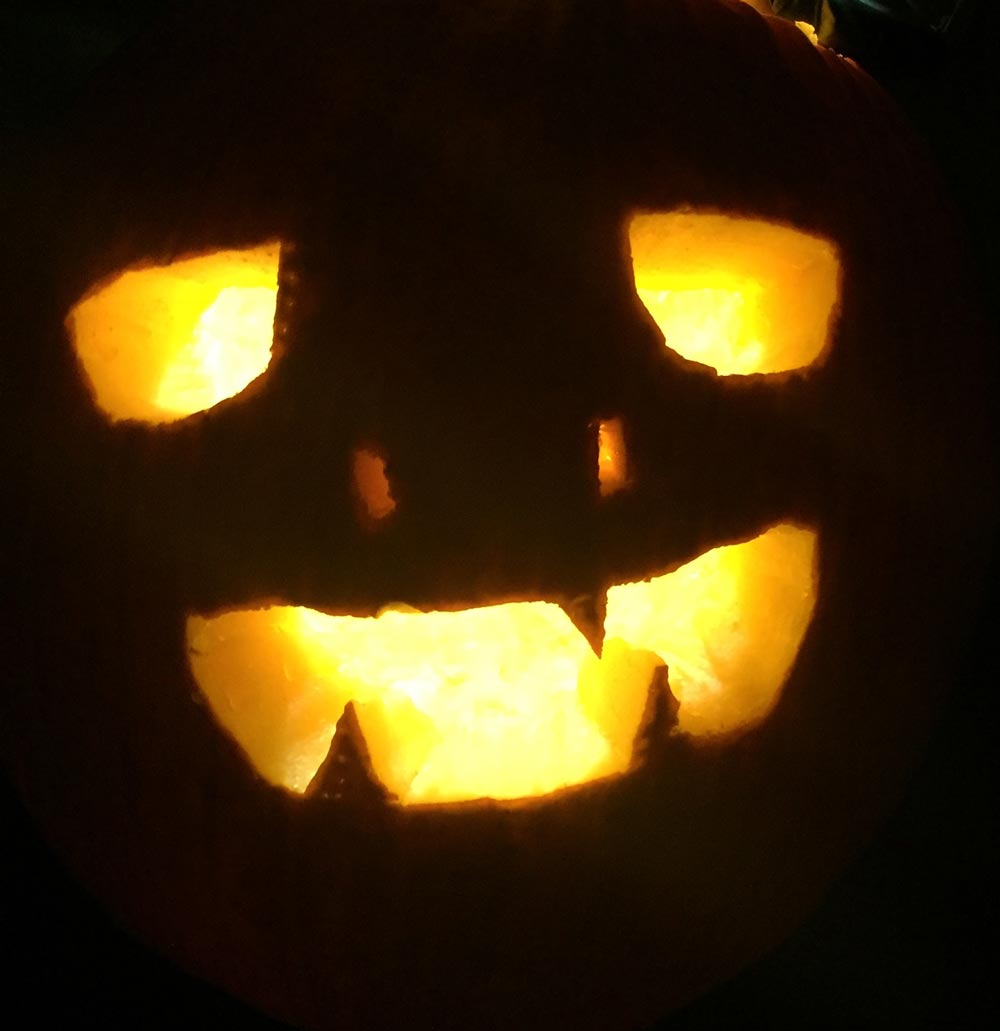
A line of sorts can be made by cutting a long skinny shape.
One other thing you MUST think about, is that cutting too much away will make your design fall apart. There has to be enough pumpkin, or undesigned areas, that can support the shapes that are in your design. Let’s look at this slideshow and I’ll show you what I mean.”
LEARNING TARGETS
Students know how to create a design
M A T E R I A L S
- 8.5″ x 11″ copy paper
- Pencil
- Eraser
3.1 draw
We use the copy paper because it is a great size to transfer to the pumpkin. Larger papers tend to make designs that can’t be viewed all at once, because they wrap around the pumpkin to far. Explain to your students that the design should be square in shape, not too wide.
Walk around and help students modify their work so that they are all made with simple holes.
LEARNING TARGETS
Students know how to set up their supplies for sculpting
M A T E R I A L S
- Design (on copy paper)
- Blue painter’s tape
- Pencil & eraser
- Scissors
4.1 setup
Clean and dry off the pumpkins if needed with paper towels. Placing the paper onto the pumpkin takes a bit of finesse. First, cut off any blank spots to make the paper smaller. The corners can be folded to conform to the rounded shape. Use plenty of tape to secure the edges.
The design may need some modification after attaching.
LEARNING TARGETS
Students know how to carve a pumpkin
M A T E R I A L S
- DEMO pumpkin
- Push pin
5.1 demo
There are two stages in the pumpkin carving process. The first is to transfer your drawing, and the second is the actual carving.
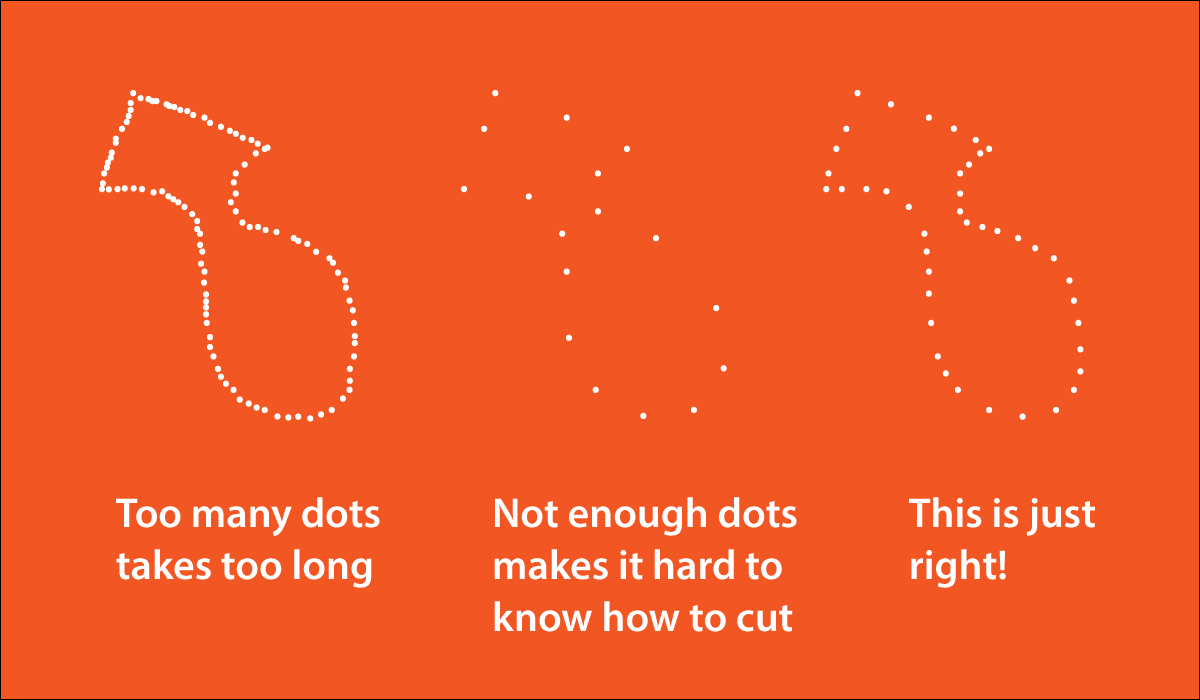
Transferring the drawing is done with a push pin. You can create a dotted path, by sticking a tiny hole, or dot, through the paper every 1/8″ or so.
Lift the paper to show everyone the dots. They’re more visible than you would think.
OPTION: With older and more advanced artists, they can draw their design right on the pumpkin using a light marker. This is tricky, and a dark marker like a sharpie can leave a lot of lines showing, but some like to do it this way. Don’t advertise this option, but use it if you need to.
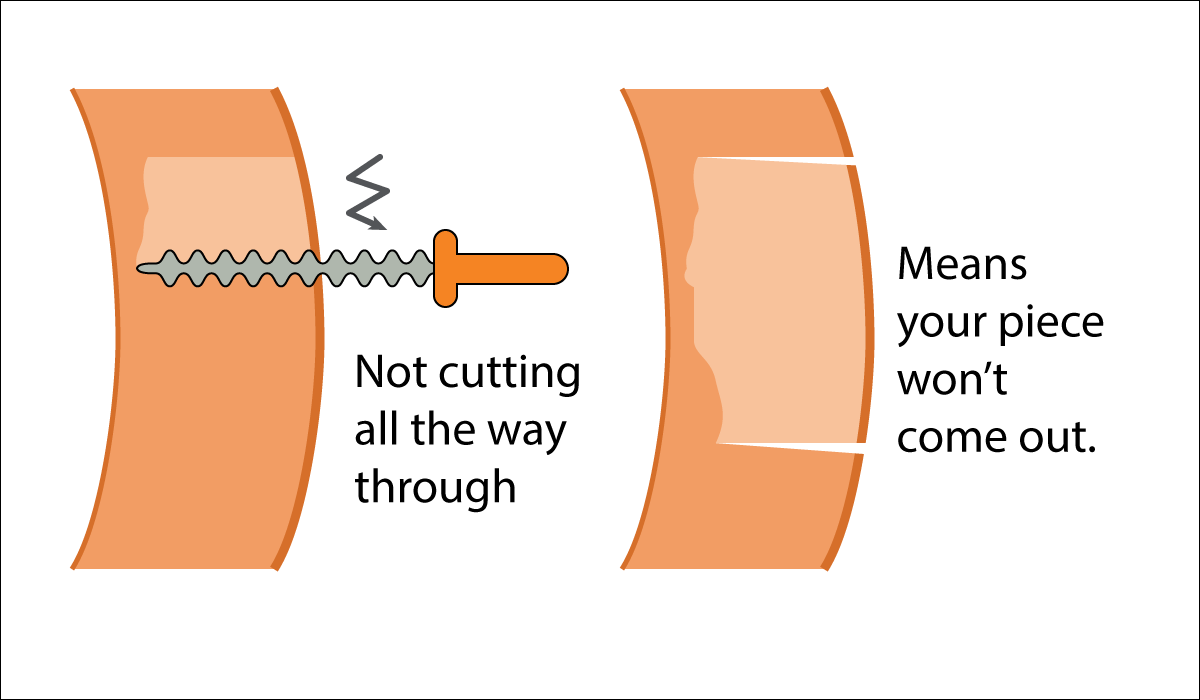
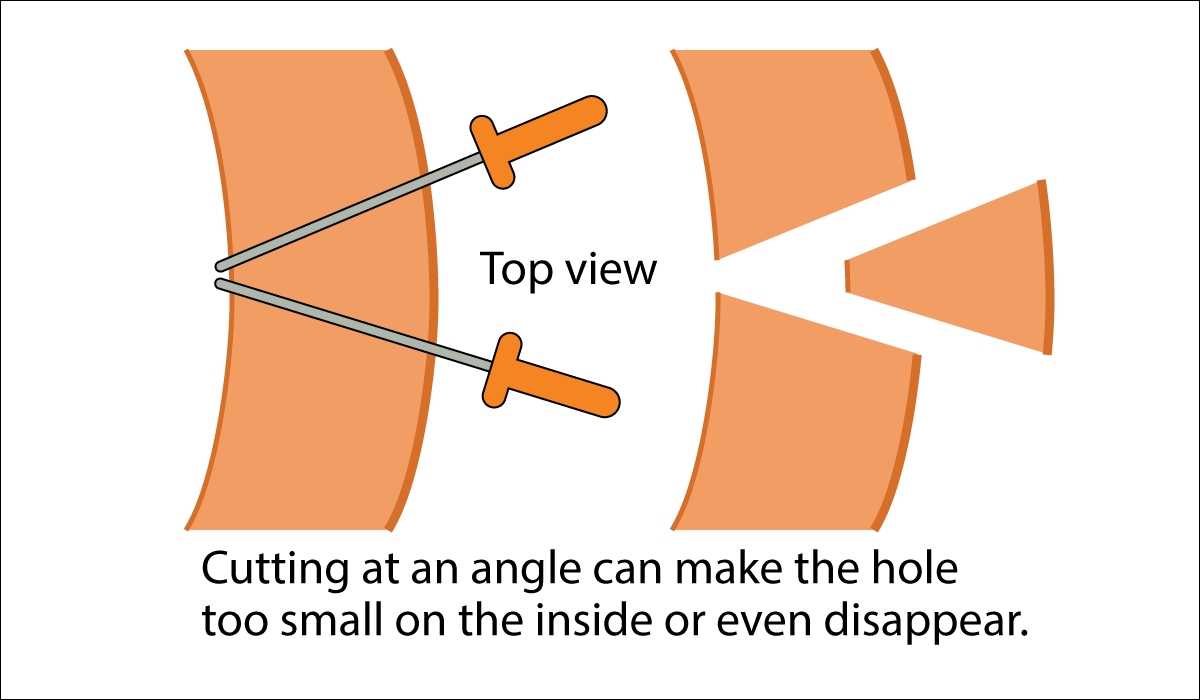
Carving. Then we use the little saws to carve. Because they’re not sharp, the sawing motion is critical to making a cut. If you’re pushing hard, then you are not doing it right. Sawing in and out will allow the blade to slowly move through the pumpkin. Take it easy, or you can break the little saw.
Display the slide show after your DEMO, and read the captions. You can study the slides, and then make a demo of each of the problems for your students, which is even more helpful.
LEARNING TARGETS
Students know how to have fun
M A T E R I A L S
- Push pins for every student
- Pumpkin saw for every student
- Paper towels
- Toothpicks for fixing broken pieces
- Scrapers for cleaning up the inside
6.1 carve
Go around your room and help as needed. Be encouraging! Watch for problems, especially large solid areas that are held in place by tiny supports.
LEARNING TARGETS
Students know the importance of cleaning up
M A T E R I A L S
- Paper Towels
- Cleaning wipes
- Sink
- Waste baskets
- Well-lit spot for photos
- Camera or phone-camera
7.1 clean
- Wash hands
- Super-wash brushes if used
- Put art supplies away
- Wipe tables & toss trash
- Remove any smocks (last)
- Check for items on floors and tables
7.2 photos
OBJECTIVES
- Practice and improvement in critical thinking & design
- Understanding how that having fun, and less “serious” art, is good for artists
- Accomplishment in creating a pumpkin lantern
- Fulfillment in their own creative designs
TROUBLESPOTS
Complicated Designs pumpkin designs are made of simple holes. Lines and complex drawings just don’t work.
Unsupported chunks of pumpkin can break. Try to visualize the solid shapes in and around the holes, and the weight they’ll have.
ART WORDS
CLASSROOM
PREP
Make sure every student has a pumpkin, and you have supplies ready before time.
What your room needs
Here are your printable lists and room prep instructions.
Opens in new window
CLASSROOM
MATERIALS
- Party food & drink
- Pumpkin saw for every student
- Scissors
- Push pins
- Toothpicks
STUDENT’S
MATERIALS
- 14 x 17” Sketch Pad
- Pencil & erasers
- 8.5 x 11” copy paper
- Blue painter’s tape
- Pumpkin
PREVIEW
Week 13: Animal Shadows
Students will learn about the basic nature of shadows using familiar round shapes as an example. Then, they’ll apply this information to a drawing & watercolor painting of an animal using photo reference.
Week 14: Artists’ Choice
Students will have a day of artist’s choice, where they can do whatever they want. We often hear, “I never get to do what I want to!” Our answer to that is that coming soon, there will be a day of artists’ choice – and here it is! Total freedom can be overwhelming, so there we have techniques that help students stay on track and plan their way quickly.
Use this button to view our parent’s blog. Share the link: http://parentart.org, with your student’s parents so your they can read about the lesson each week.