

Drawing
Each lesson Plan focuses primarily on one of the 4 Cornerstones of Art:
Drawing | Painting | Color | Style
OVERVIEW
Students will use the simple form of a cube to learn the basics of artists’ perspective, which have been reduced to three innovative, concrete, and simple concepts. Several visual tricks and analogies help the lesson be informative, understandable, and interesting.Grades 6 – 12
Week of October 18 – 22
1 Hour & 45 Minutes
Lesson At A Glance
A brief overview of each step. Buttons jump to each section for detailed information.
15 Min – Quick sketch of feet in charcoal.
10 Min – Tree drawing
7 Min – Discuss The Amazing Shrinking Finger!
10 Min – Use color-border square
15 Min – Use tricks to draw cube
25 Min – Draw using viewpoint
2 Min – Everyone helps
Preface
Today we’re teaching how to draw one of the most basic shapes, the cube. However, this is really about perspective, and seeing past the preconceptions our brains put in our way and that prevent accuracy.
While the system of artist’s perspective is a great tool, it is very complex, and uses the analytical, non-creative part of the brain. It is extremely difficult for artists to truly understand perspective drawing.
Why is that? I believe it’s because it is nearly impossible for anyone to work out of both the creative and the analytical parts of the brain at the same time. So, to use the system takes training and discipline to jump back and forth between these two modes of thinking, at just the right times. Learning it takes time and dedication on a level that is simply not possible for most young people. Even the most ambitious and brilliant kids will not be able to try this until the age of 15 or more.
So we just don’t go there. What we want to do though, is to help young artists draw more accurately, as easily as possible, and to prepare them for perspective when they are ready to learn such a complex system. Our approach is concrete and simple, using ideas that are familiar, and with visual demonstrations that are fun and sometimes surprising.
There are 3 core concepts
1. VIEWPOINT
First, we have re-named perspective as viewpoint drawing, and placed an emphasis on the specific position of the eye in relation to the subject, as the source of every viewpoint. This is a much more concrete way to think about the idea of perspective.
Most people believe that you draw things from your knowledge of them, and the idea that drawing “without even looking” is more impressive than careful observation, persists against all evidence to the contrary. Every subject has millions of different viewpoints in the 3-dimensional space around it. Your eye can move near and far, up and down, and also right and left. Even a small change in viewpoint can significantly change how an object is drawn. The problem is that most artists draw from memories of multiple viewpoints, and also incorporate misconceptions about objects – such as the fact that a cube has a perfectly square side instead of seeing the diamond shape in front of you.
It can be a real battle to overcome these drawing obstacles. Kids will do this in their own time, not yours. Just be patient today and lay some groundwork.
2. THINGS GET SMALLER (when they are farther from your eye)
Everyone intuitively knows this, so it’s a great starting point. Our brains compensate for perspective though, and we cannot quite see the amount of difference without training. We show how things actually get much smaller than you think. Then we apply this easy to remember concept to drawing shapes accurately.
3. THINGS GET FLATTER (when they are closer to the height of your eye)
Another thing that our brains compensate for when we look at things, is how much things get flatter the higher they are (until they are the same height as our eyes and become a flat line). Add to this, the fact that the ground, and tables, are all flat. This causes us to flatten things backwards, making things flatter the closer they are to the flat ground, and less flat when they are close to our eye height. Even the old masters struggled with this one!
Together, these 3 concepts will be much more likely to improve the accuracy of your student’s drawings than trying to teach 1-point, 2-point, vanishing points, horizon lines, and divisions. We’ve tried to make it as fun as possible.
Because the world needs happy artists.
Dennas Davis
SCROLL & TEACH
LESSONPLAN
Each section is a different color. Read over once and then you can SCROLL & TEACH using any device you like. It’s designed to work best with your phone.
LEARNING TARGETS

Students know how to draw a cube
M A T E R I A L S
- 14″ x 17″ Sketch Paper
- 2B Pencil
- 4B Pencil
- White Eraser
1.1 Print
Reference
Cube Warmup
Provide one for each student – place on a stand such as a Cheasel.

1 Page – Opens in new window
1.2 sketch
Everyone uses the picture (or a real cube), to make a large sketch in ONLY 5 MINUTES.
On a blank horizontal (bathtub position) page in their sketch pads, have students divide the page in two with a line down the center. Then they will draw a quick large sketch of a clear cube on the left side (either from life or from the reference above). Tell students to make the cube about 5 or 6 inches high and don’t worry if it doesn’t look perfectly accurate, just to do the best they can right now.
When finished, make sure these stay intact because the other side of the page is used in STEP 7. Late arrivals will need to do this first instead of the feet sketch in STEP 2.
CREATIONS - tap here to open
Our Creations lessons are for students who have completed the two years of Foundations and are ready to begin using all that they have learned to create new work. These more challenging versions of the same concepts and techniques are easily taught along-side students in the Foundations course. This allows for excellent review, and is encouraging for students to see progress from each viewpoint.
Use the Student Instructions printout below to distribute to your Creations students. Tap the image to open the PDF in a new window.
Watercolor Viewpoint/Perspective Painting
Overview: Advanced students should review and take the time to practice cube drawings and viewpoint (perspective) drawing.
The warmup cube above should be drawn 3 or 4 times over the course of 20 – 30 minutes, improving accuracy each time. Use the tricks handouts in STEPS 3 and 7 as guides.
When ready, advanced students can move on to STEP 8 to draw one of the references.
- Create a practice sketch to get the FRAME and BIG SHAPES more accurate.
- Erase and modify the sketch to make the cube shapes more accurate.
- Draw guidelines on Watercolor paper.
- Paint in watercolors. Work light to dark, keeping the paper as your white. Do not use any white paint. Keep your brush from touching the paper and use plenty of water in the paints.
Tap images to open Creations Student Instructions and Reference Materials in new windows

LEARNING TARGETS
Students know how to draw a charcoal sketch
M A T E R I A L S
- 14″ x 17″ Sketch Paper
- Charcoal
- Paper Towel
2.1 draw
Students will draw a quick sketch of their feet in charcoal, one smaller than the other.
Have everyone draw a quick sketch of their left foot in charcoal on the left side of the paper (barefoot or with shoes on, you can choose which you are comfortable with, but young students like to take their shoes off). The sketch needs to be as large as possible. To shade, students can use hatch shading. Now draw the right foot to the right on the same page, but make it smaller than the first. Doesn’t it look farther away?
Clean up all charcoal before moving on to the next step. Students should wash their hands, put their charcoal away, and wipe down tables with the wet paper towel.
LEARNING TARGETS
Students know how to understand perspective
M A T E R I A L S
- 14″ x 17″ Sketch Paper
- 2B Pencil
- 4B Pencil
- White Eraser
3.1 Print
Reference
Cube Info
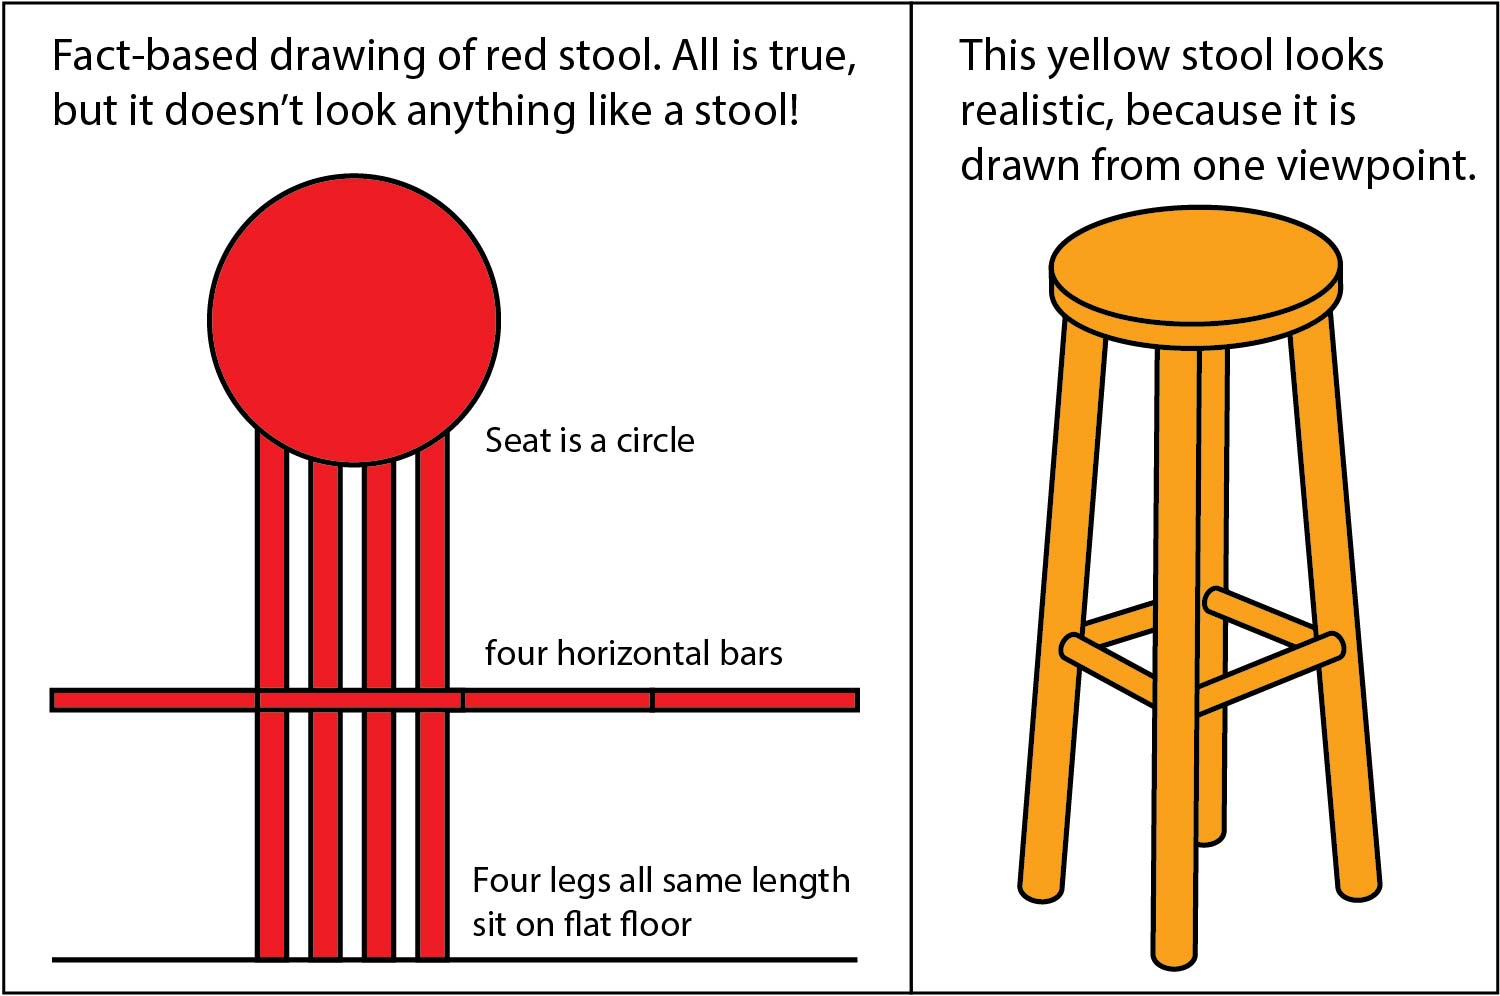
A teaching handout showing the difference between a fact-based cube drawing and a viewpoint cube drawing.

1 Page – Opens in new window
3.2 Discuss
Use the handout to discuss Fact-based drawings vs Viewpoint drawings.
Start without the handout, having students follow your instructions, not looking at the pictures. If you give the page out ahead of time, have everyone turn it over for the first drawing.
“Let’s make a fact-based cube drawing. This can be in pencil and can be small, in a corner of any page. The facts are:
- A cube has six perfectly square sides,
- All 12 edges are the same exact length, and
- Every angle is a perfect 90 degrees.
Let’s try to draw that. follow these steps:
- Draw one square. This is the top of our cube.
- Draw another square underneath for the front.
- Draw a side square. It should be connected to both the top and the front.
- This is not working.
Because we used facts to try and draw our cube, it’s not only weird looking, it’s impossible to finish. We need a better way.
Let’s try a better type of fact-based cube. You have probably done this before. Your handout has step by step instructions for this across the top.
(Students can use the handout now)
- Draw a square
- Find the center of the square and make a dot
- Draw a second square, the same size, but using the dot as one of it’s corners so they overlap.
- Connect all four corners of one square with the same four corners of the other one, using 45 degree angled lines.
This looks a lot more realistic, but it is still not a viewpoint drawing. In your viewpoint things get smaller when they are farther away, but the back of this cube is the same size as the front. They can seem to switch places, because our brain can’t figure out which is farther away.
An artistic drawing is made from a VIEWPOINT. A viewpoint is what the world looks like from one spot, where your eye is. A Viewpoint drawing of a cube is completely different from a fact-based drawing. It has no perfect squares at all, no right angles, and no edges are the same length!
What is the difference between drawing a building the size of telephone poles, and a cube on a table? No difference at all actually, because the viewpoint is the same.
So there are 2 kinds of drawings. Fact-based drawing and viewpoint drawing. These two ways of drawing don’t mix. They are like oil and water, pigs and flying, peanut butter and pickles. They just do not go together.
- A fact-based drawing will NEVER be visually accurate
- A viewpoint drawing will NEVER be factually true”
Look at this picture showing a fact-based stool compared to a viewpoint stool.
LEARNING TARGETS
Students know how to identify viewpoint
M A T E R I A L S
- 14″ x 17″ Sketch Paper
- 4B Pencil
- White Eraser
4.1 draw
Show students that “Things Get Smaller” by having them draw 2 trees.
Have everyone find a clean sheet of sketch paper in their pad. Then have them draw a tall and skinny simple cartoon tree, and imagine that it is 50 feet high. Now draw another 50 foot tree just like it, that is way, way, way off in the distance.
“Did you draw it the same size? Of course not. Since it’s far away, you made it smaller, because we know that things far away look smaller.
- FACT: the trees are the exact same size
- VIEWPOINT: the trees are completely different sizes.
So the fact and the viewpoint are at total odds with each other. Only one can work in a drawing, and the best one is the viewpoint. Your brain knows that things get smaller by appearance if they are farther away. You cannot change the way that works.
Things get smaller.”
LEARNING TARGETS
Students know how to understand perspective
5.1 amaze!
“Now let’s do some magic using sleight of hand. Here is a trick where we make our finger shrink to half its size.
Have everyone hold up their two pointing fingers together in a vertical position about 8-12 inches in front of their face. Even up the tops, and the knuckles so they are right next to each other. Now you have two fingers, or “lines” that are the same height. Close one eye.
Now slowly move one finger away from your eye, just 2 inches. See how fast it shrinks! Now move it away another few inches or so, until it appears to be half the height of the closer one. Don’t move your fingers, but open both eyes. Wow! it’s crazy how much smaller it seems to get in just a few inches, isn’t it?
So you’ve always known things get smaller, but now you know that they get REALLY smaller. This is the viewpoint secret that artists learn for drawing accurately.”
LEARNING TARGETS
Students know how to see perspective
M A T E R I A L S
- Cube PDF
6.1 Print
Reference
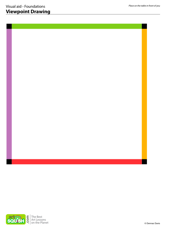
Color Sided Square
Print enough for each student to have one – on CARD STOCK.
1 Page – Opens in new window
6.3 examine
Use a color-sided square to demonstrate how “things get flatter” the closer they are to eye level.
Have students follow your instructions using the prints and closing one eye.
“Now we’re going to try another trick. Set the Color-border square on the table in front of you with the red line closest to you and the green farthest away. Close one eye.
Notice the shape of the square from your viewpoint. It’s a little flatter than a square, isn’t it? Now let’s make the square levitate. Take the square with one hand, and move it slowly straight up, keeping the paper level and your one eye closed. Stop at the height of your shoulders. You now see a flatter shape. The red and green lines are much closer together.
Finally, slowly raise it up until it is the height of your nose. It appears to get extremely flattened, doesn’t it?
As you get closer to the height of your eyes, things get flatter.”
LEARNING TARGETS
Students know how to draw a cube
M A T E R I A L S
- 14″ x 17″ Sketch Paper
- 2B pencil
- 4B pencil
- White eraser
- 3D cubes to draw, or the PDF cube print from STEP 1 above
7.1 Print
Handout
Cube Tips & Tricks
3-hole punch the prints and give one of these handouts to each student to keep in their notebooks.

1 Page – Opens in new window
7.2 draw
Students will get some tips and tricks to draw a new cube on the page from STEP 1.
Walk the class through the handout and the tips & tricks.
“Artists draw accurately, by looking at their subject from one viewpoint. But it is still very hard, because the fact-based part of your brain keeps talking to you about how things should be, and it will really mess you up. You have to learn to ignore these facts, and learn to draw what you see from one single viewpoint.
Looking at the new handout, you see we have a couple of fact-based cubes at the top. These are called isometric drawings. Below those are several viewpoint drawings of cubes, that look much more realistic.
There are two things to always remember about drawing viewpoints accurately, and 3 special tricks for drawing cubes. First look over to the right at the bottom of the page.
Things Get Smaller – when they get farther away from your eye
Things Get Flatter – when they get closer to your eye’s height
You can see the green side edge of the cube is quite a bit smaller than the front red edge, which is closer to your viewpoint. Below that, you can see how the top of A cube is flatter than the bottom, or floor. That’s because the top is up closer to the height of the eye in this viewpoint. It gets flatter.
Another way that can help you think about cube shapes, is to look at the telephone pole progression on the first handout. You know that those poles get smaller in the distance. We can use that knowledge and apply the poles to the corners of a giant cube… which is exactly what a building is!
Now let’s get our our drawing of a cube from the beginning of the lesson and apply some cool tricks to it.
7.3 tricks
3 cube tricks.
Have students take out their first sketch of the cube and get ready to draw a new one on the right side, using these tricks. If the drawing gets really hard to see from erasing and old lines, they can use an oil pastel to redraw the final lines bolder.
You can talk them through the 3 tricks, or let students study themselves for a moment before beginning. Don’t skip it though!
Encourage plenty of erasing and adjusting for accuracy.
- Lower the bottom point
We almost always draw the front bottom middle point too high. lower it a bit. You are fighting the fact that your brain says to you, “the table is flat”. - Lower the top point
We almost always draw the back middle point too high as well. Make it lower, so your top is flatter. It is closer to your eye height, so it gets flatter. - Raise the right and left bottom corners.
We almost always draw the vertical sides too big. They are farther away, so make them smaller by raising the bottom points.”
Let everyone spend a few minutes drawing a cube or two on their own, using the two handouts and the tricks they have learned. Remind them to start lightly and erase and redraw until it looks more accurate. They can also use measuring with their pencil to make sure they draw smaller lines when they are farther away, and flatter shapes when they are closer to their eye height.
Walk around and help students as they work. When finished, tell students to compare the first drawing to see how much they’ve improved.
LEARNING TARGETS
Students know how to draw using perspective
M A T E R I A L S
- 14″ x 17″ Sketch Paper
- 2B Pencil
- 4B Pencil
- Charcoal
- Kneaded Eraser
- White Eraser
- Ebony Pencil
8.1 Prints
Reference
Viewpoint Drawings
Cut images apart and print enough for each student to choose from several.

3 Pages – Opens in new window
8.2 Draw
Students will make guidelines using a pencil with no shading. Then switch to charcoal and make a nice sketch using hatch shading technique. The underlying structure of the guidelines using the concepts learned today, will allow a loose sketch to look awesome. Make sure they don’t smudge away all of the shading technique, and create good light and dark areas.
If a student has significant discomfort handling charcoal, they can use the side of an Ebony pencil tip instead. Early finishers may have artists choice or try a pencil drawing of another viewpoint reference.
LEARNING TARGETS
Students know the importance of cleaning up.
M A T E R I A L S
- Paper Towels
- Cleaning wipes
- Sink
- Waste baskets
- Well-lit spot for photos
- Camera or phone-camera
9.1 clean
Students clean up their work area.
- Wash hands
- Put art supplies away
- Wipe tables & toss trash
- Remove any smocks (last)
- Check for items on floors and tables
9.2 photo
OBJECTIVES
- Practice and improvement using visual techniques for creating depth and realism in drawing and painting
- Understanding how accuracy is sabotaged by logic and facts
- Accomplishment in seeing improved viewpoint drawings
- Fulfillment by applying new information and skills to artwork
TROUBLESPOTS
Slanted verticals – many artists try to create more depth by applying random angles. On any rectangular solid in basic perspective you will have perfectly vertical lines (2- point perspective). Connect the verticals in student’s minds by saying they are parallel to the paper edges.
Losing attention – you are going to be talking a lot. Have student take notes and /or draw doodles while you talk. Concentric square doodles are good for focus while keeping it simple enough that they listen well.
ART WORDS
CLASSROOM
PREP
Print all of your PDFs from the lesson plan and cut any references apart as needed.
What your room needs
Here are your printable lists and room prep instructions.
Opens in new window
CLASSROOM
MATERIALS
- Paper towels
- PDFs
- 3D Cubes to draw
- Cleaning wipes
- Sink
- Waste Baskets
- Well-lit spot for photos
- Camera or camera phone
STUDENT’S
MATERIALS
- 14″ x 17″ Sketch Paper
- 2B Pencil
- 4B Pencil
- White Eraser
- Charcoal
- Kneaded Eraser
- Ebony Pencil
PREVIEW
Week 13: Birdhouse Drawings
Students will create a detailed drawing of an old weathered birdhouse. If possible, the birdhouses used should be real-life objects, but photos are provided. Steps for preparing, using the 3 steps to accuracy, making guide-lines, and pencil techniques are all practiced to create a finished work. A few fun short projects for early finishers are also included.
Week 14: Little Patches Watercolor
Students will create a square-shaped watercolor, that is divided into a grid design. Each smaller area (rectangles and squares), becomes a tiny little painting, drawn and painted in watercolors. This will employ the small glaze technique, and makes it easy since there are no large areas to worry about. The whole work is made up of painting patches, and each painting is made up of patches of color.