

Painting
Each lesson Plan focuses primarily on one of the 4 Cornerstones of Art:
Drawing | Painting | Color | Style
OVERVIEW
Students will learn about the basic nature of shadows using familiar round shapes as an example. Then, they’ll apply this information to a drawing & watercolor painting of an animal using photo reference.
Grades 3 – 5
Week of November 4 – 8
1 Hour & 45 Minutes
Lesson At A Glance
A brief overview of each step. Buttons jump to each section for detailed information.
7 Min – 2 fast sketches for Big Shapes
10 Min – Slideshow about shadows
15 Min – Finish drawing – Hatch shading shadows
5 Min – Set up for Watercolor
5 Min – Two watercolor secrets explained
40 Min – Watercolor painting over drawing
2 Min – Everyone helps
SCROLL & TEACH
LESSONPLAN
Each section is a different color. Read over once and then you can SCROLL & TEACH using any device you like. It’s designed to work best with your phone.
LEARNING TARGETS

Students know how to warm up with a sketch
M A T E R I A L
- 14″ x 17″ sketch pad
- 4B pencil
- White and kneaded erasers
- Cheasel reference stand & clip
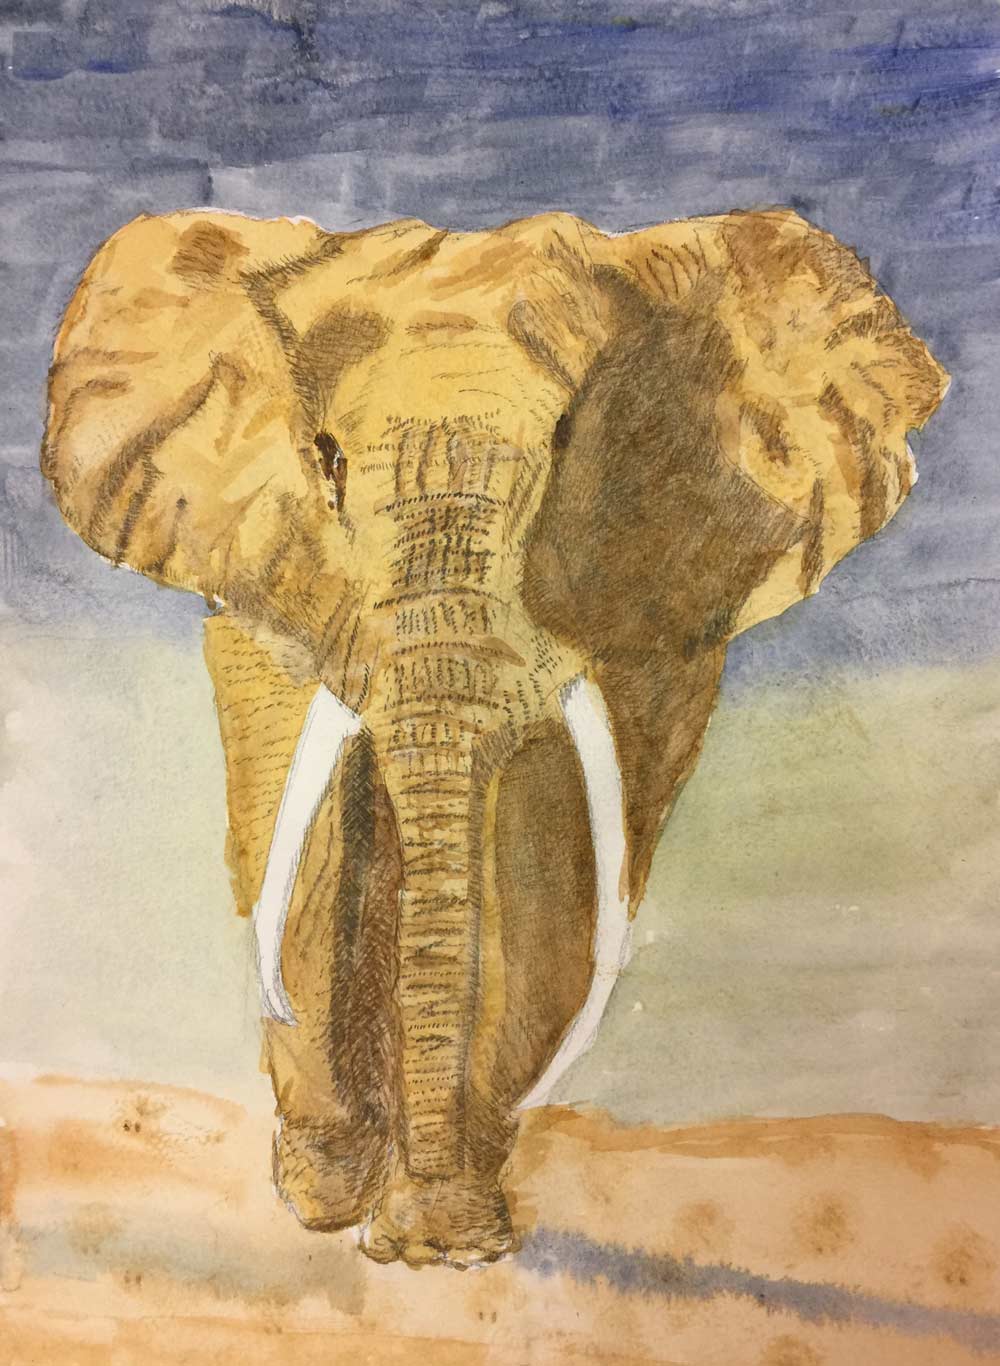
1.1 Print
Reference
Animal Shadow
Cut images apart and print enough for each student to choose from several.
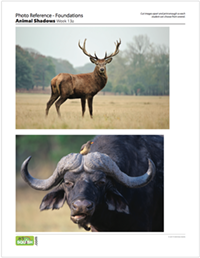
3 Pages – Opens in new window
1.2 draw
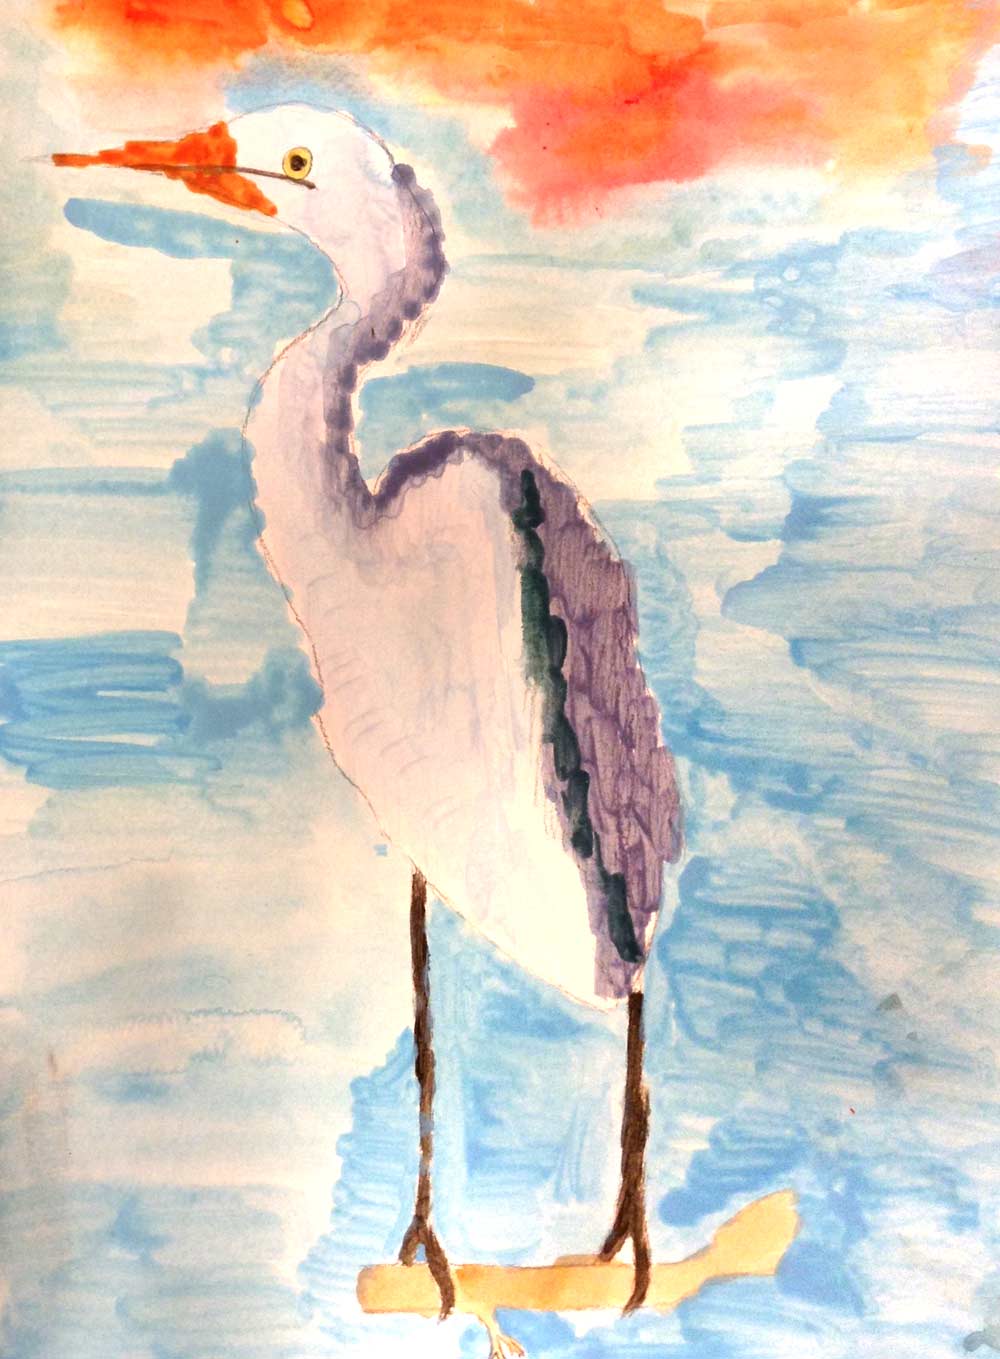
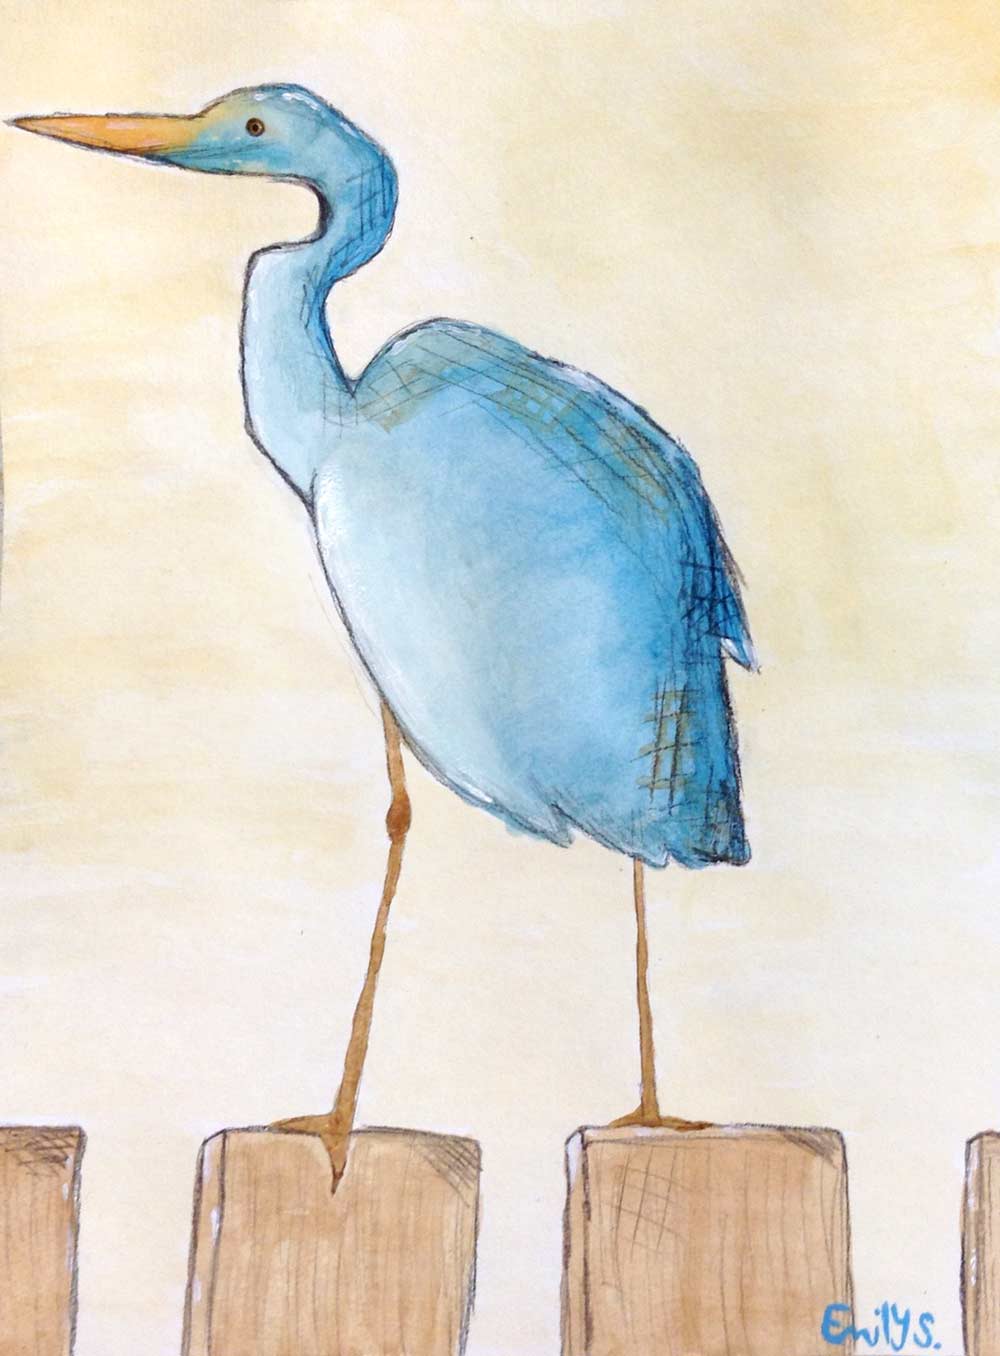
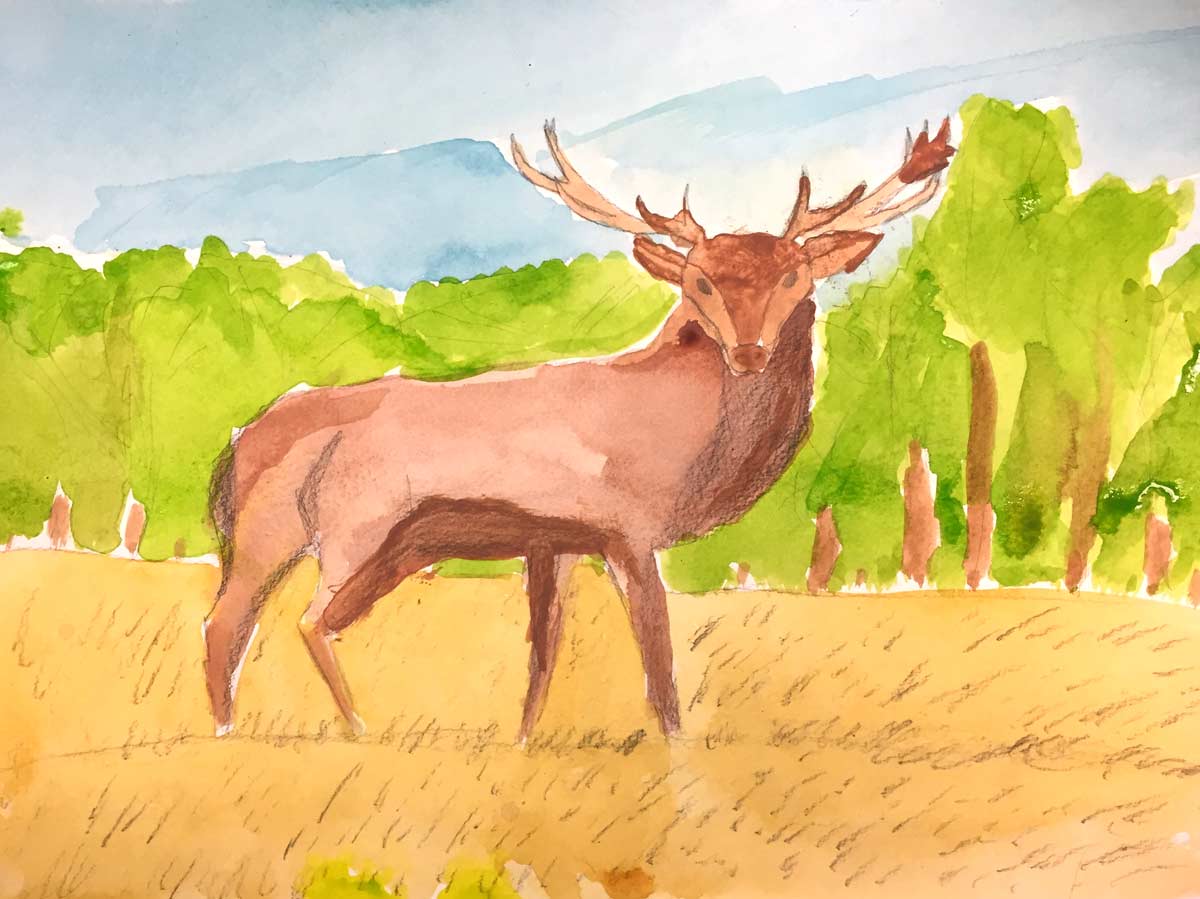
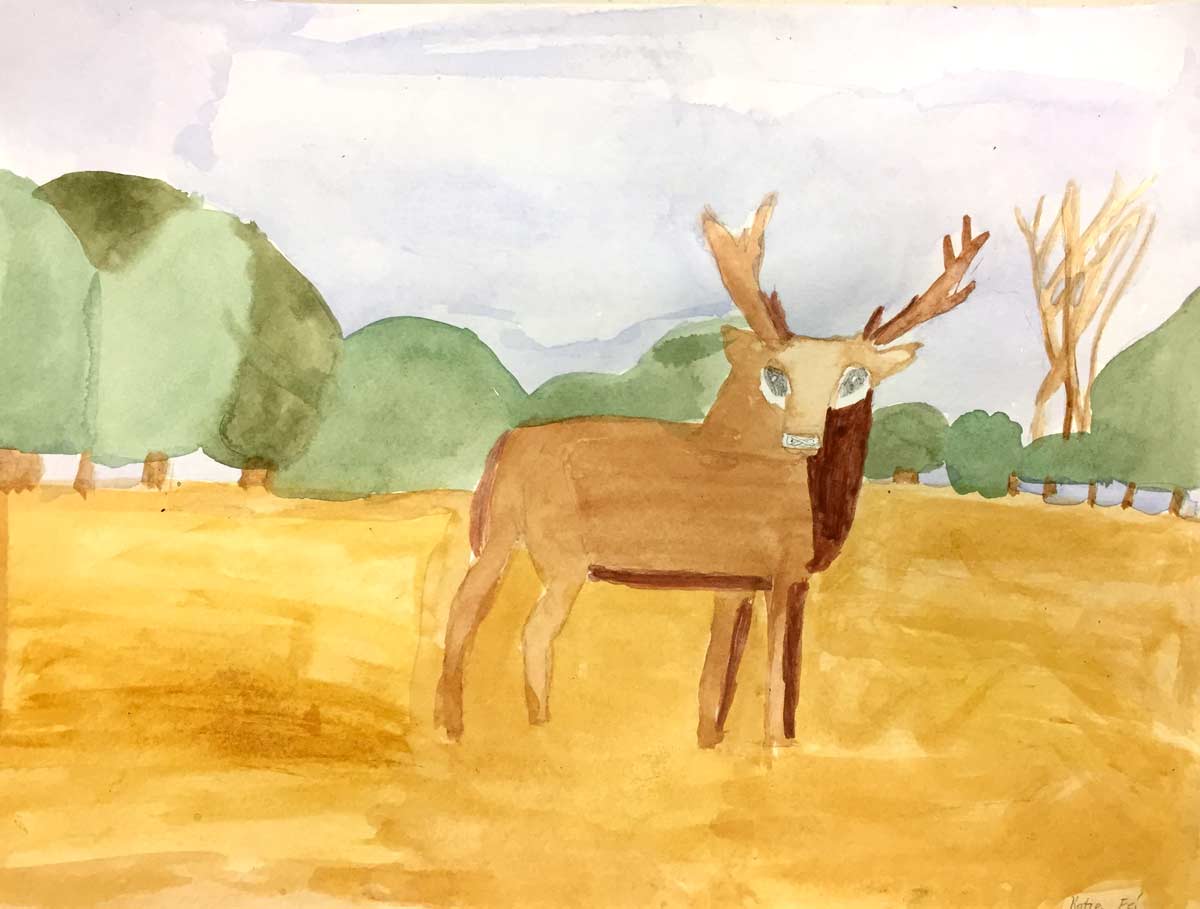
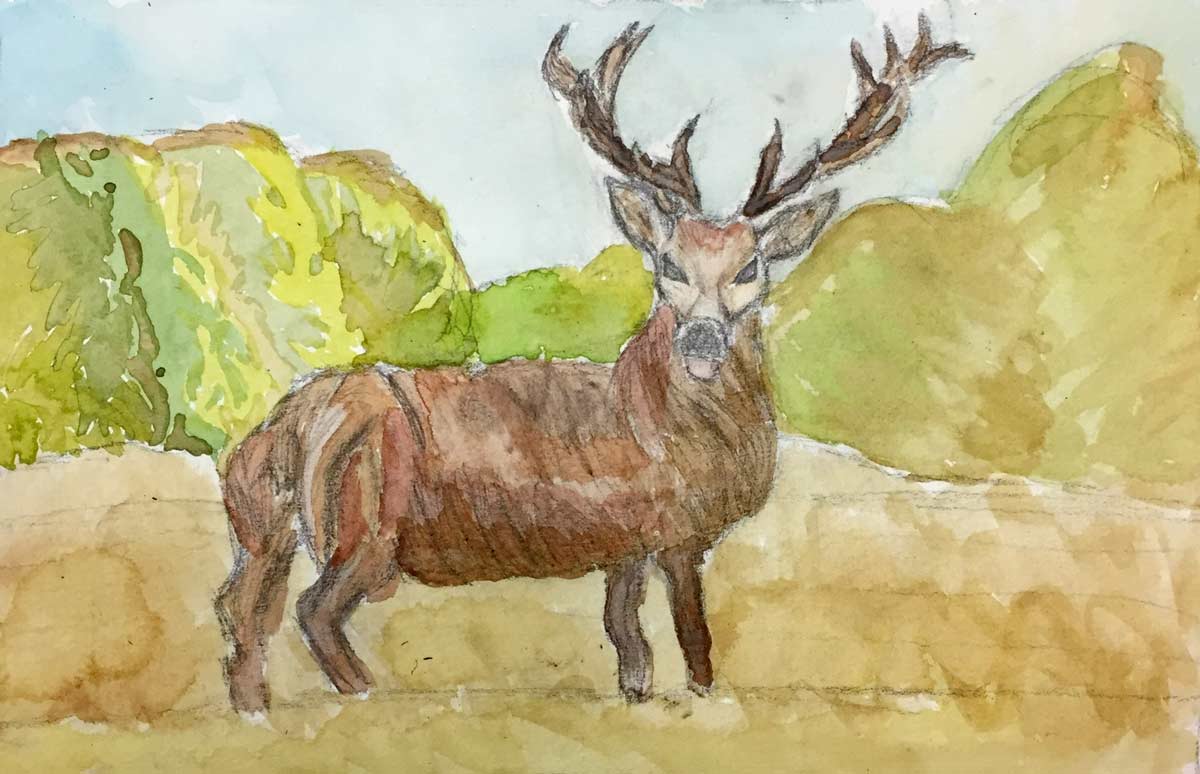
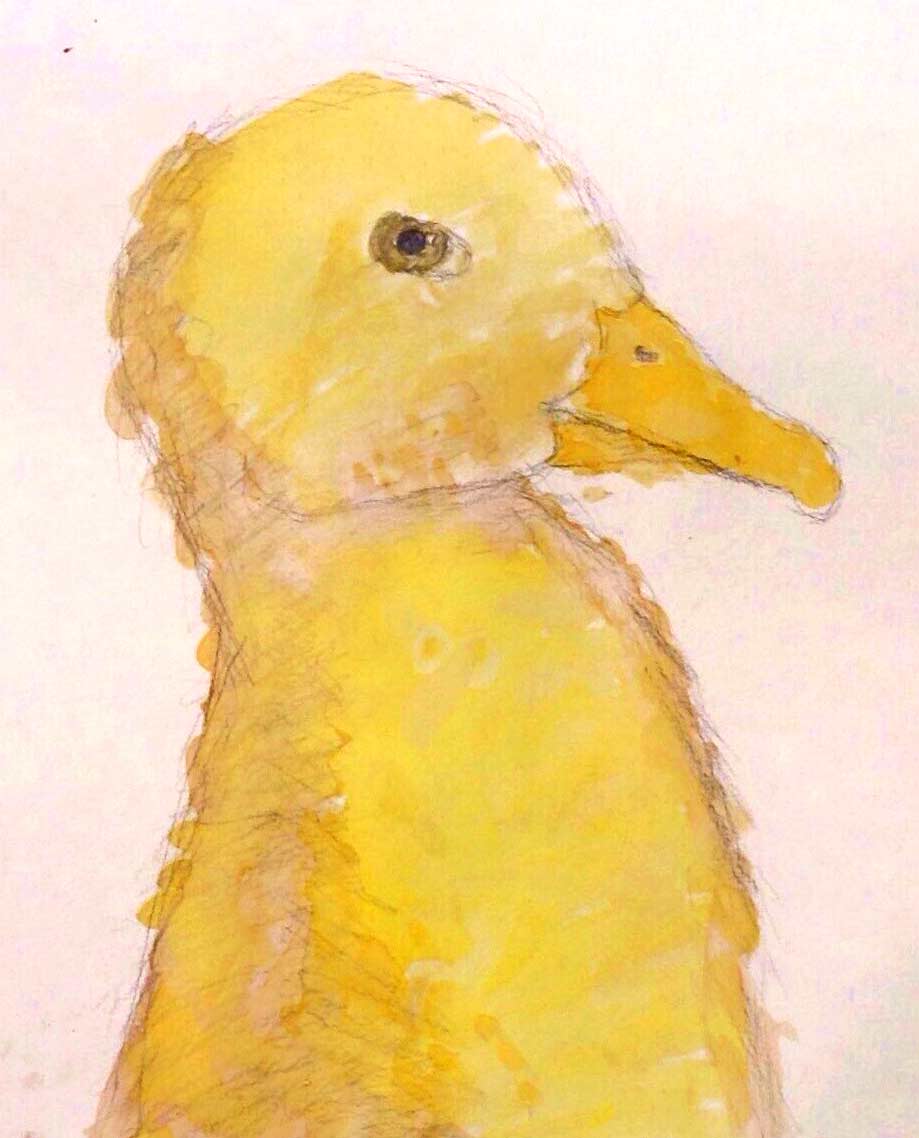
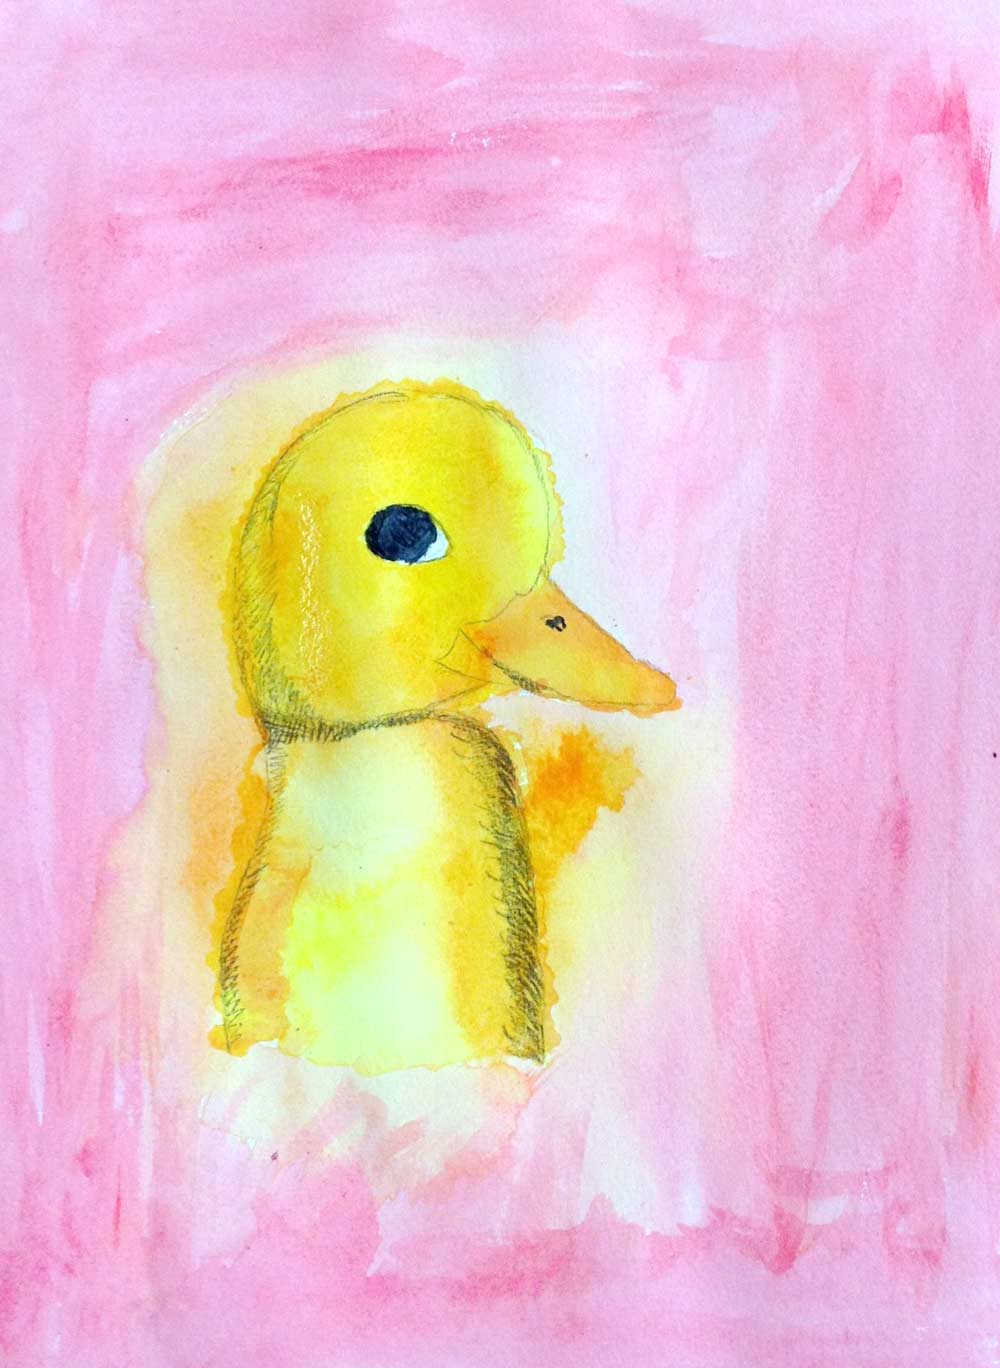
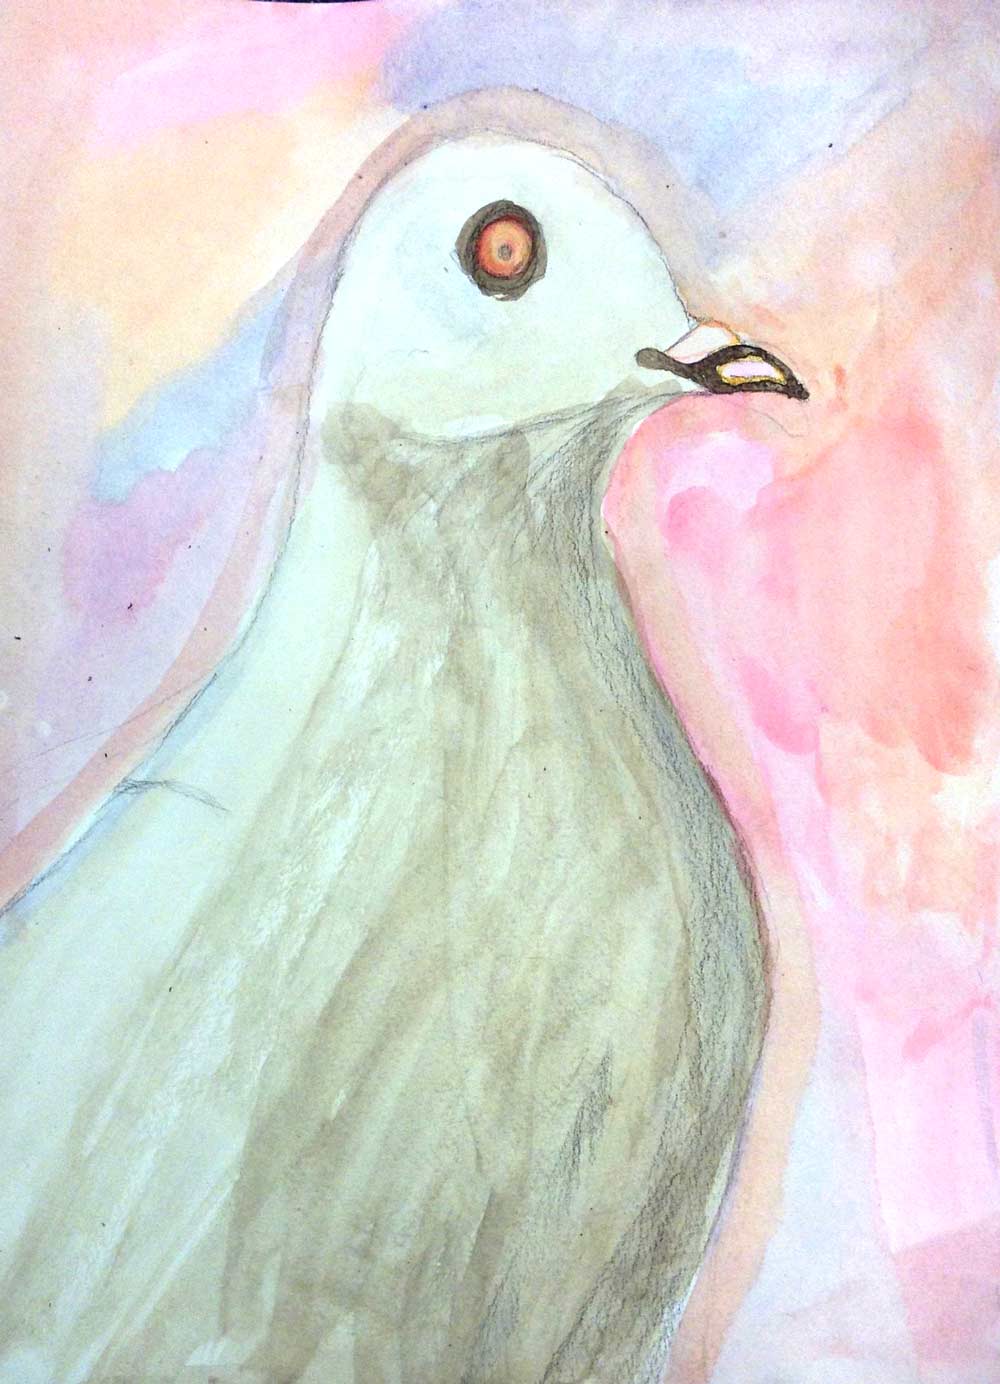
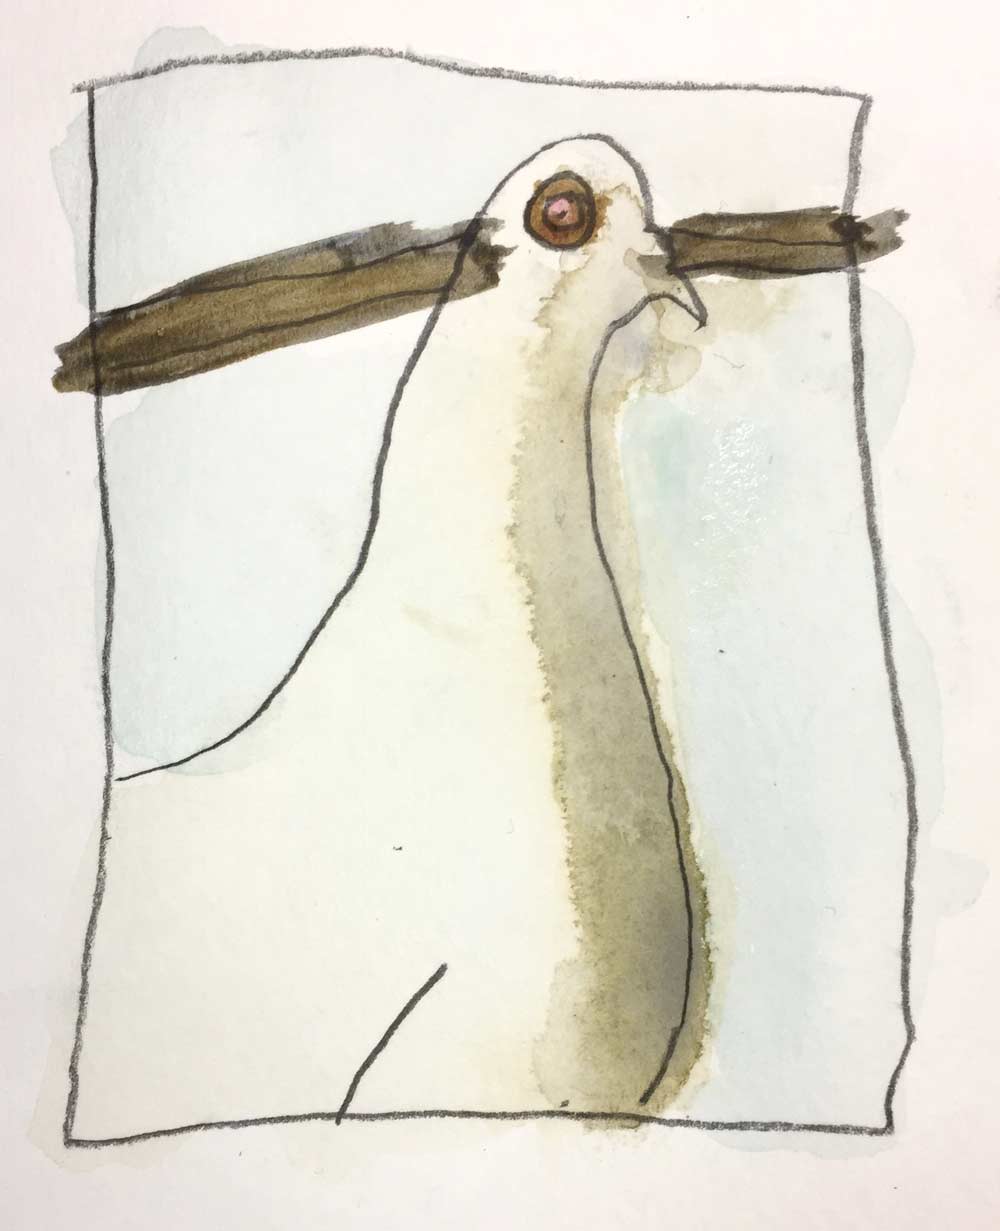
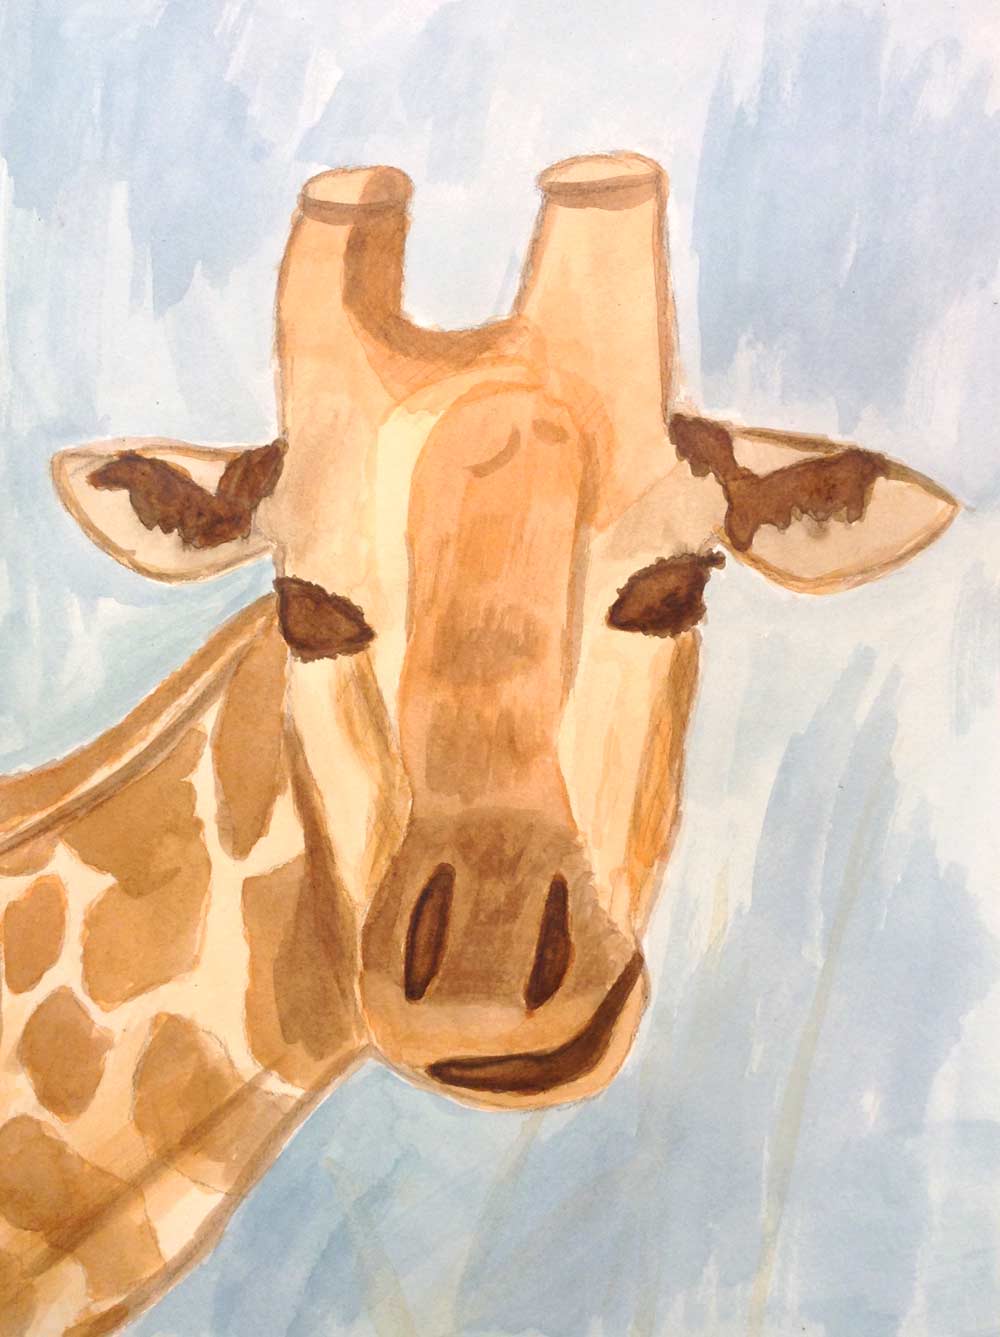
As students enter, they should choose a photo of an animal to draw for today’s lesson. Let them know they will use this same photo for the entire lesson, and that they can’t change their mind and exchange it or they won’t be able to practice enough. Take the first 10 minutes to sketch the animal as students want. Walk around and encourage them to look at their reference photos more often, and to try and draw the big overall shapes before working on details.
Ask who knows the 3 steps to accuracy. Emphasize that this is one of the most important things you can ever learn as an artist.
1.3 Show

As your class works, show some work by an artist who makes great animal shadows. Click on the logo to link to one of her portfolio pages in a new window.
Show these examples of artwork and talk about how the artist has found an audience for her work. Note the ON-shadows that are on two sides, on the left or the right, and also the bottom of the animals. Then discuss the OFF-shadow underneath them (also called a cast shadow).
Biography
Marina Dieul is a French artist who lives in Canada. Her work has received many international awards, and is known for it’s whimsical style. She is using a technique that tries to fool the eye into believing there is a 3-dimensional aspect to the work, but it’s simply painted to look very realistic. This is called, trompe-l’oeil, which is french and means to fool the eyes.
CREATIONS - tap here to open
Use the Student Instructions printout below to distribute to your Creations students. Tap the image to open the PDF in a new window.
Animal Artwork using shadows
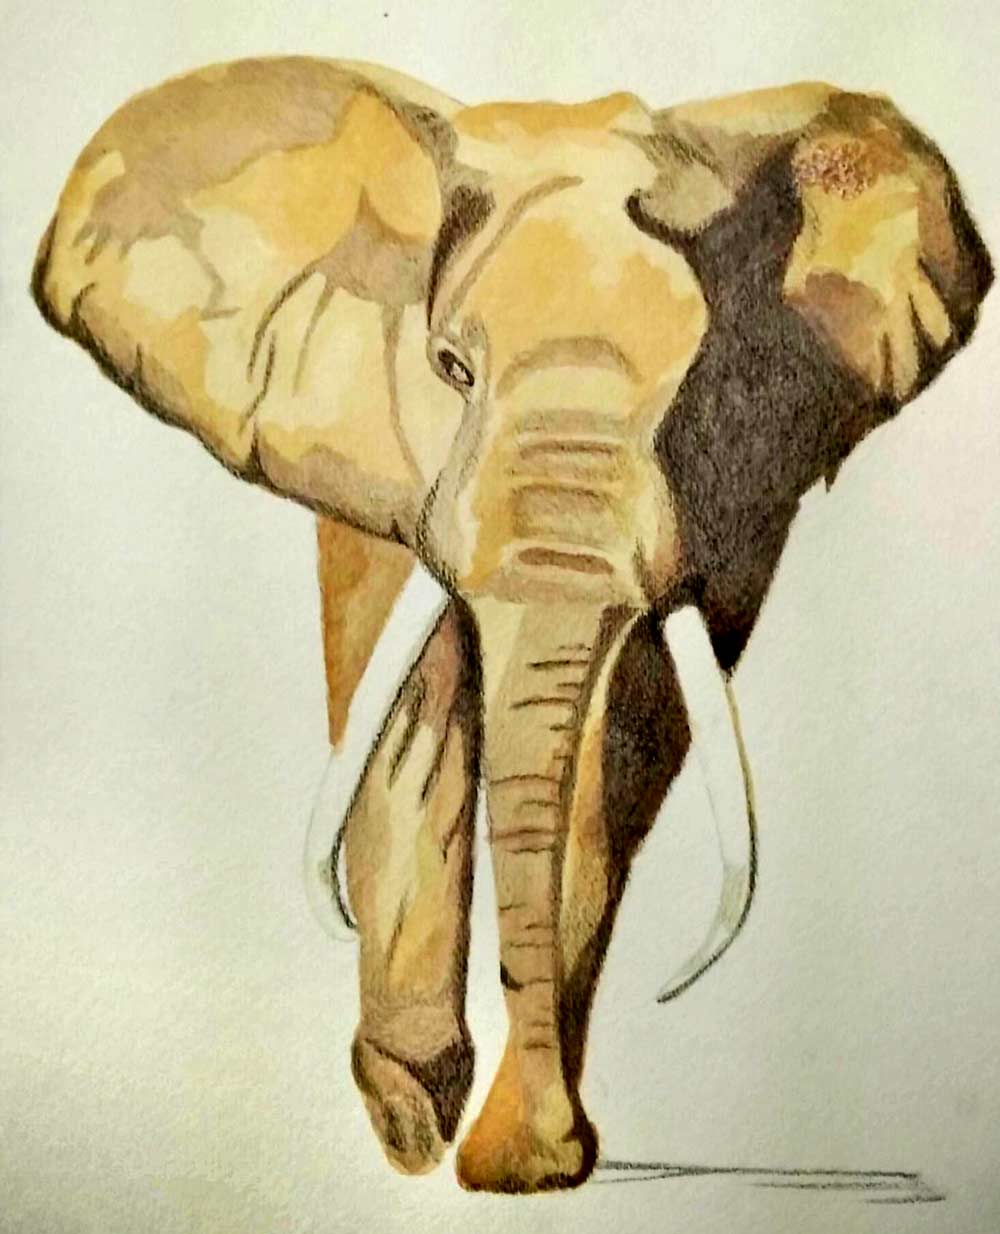
Overview: Students will create a drawing or painting of their choice using an animal for reference and paying attention to creating realistic shadows.
- Choose one of the animals from the references that you haven’t used before. Then draw the animal as large as possible in your sketch book using charcoal. Draw it at least 3 times, and up to 5, to learn the shapes.
- There are 3 choices of medium to create the finished work.
- Watercolors on watercolor paper
- Instead of using the pencil to create the shadows and painting over them, advanced students should create all of the shadows using only the watercolor.
- Acrylic on canvas
- Work dark to light, and feel free to create a thin layer of color as an underpainting, such as a brown or bright red.
- Graphite pencil – very detailed
- The shading technique is very important, and should be done in hatch shading with as little obvious pencil strokes as possible.
- Watercolors on watercolor paper
- Draw guidelines on watercolor paper, canvas, or good drawing paper.
- Paint or draw the animal in your preferred medium, paying special attention to the shadows.
Tap images to open Creations Student Instructions and Reference Materials in new windows

Use this button to jump down to the preparation section.
LEARNING TARGETS
Students know how to do gesture drawings
M A T E R I A L S
- 14″ x 17″ sketch pad
- Ebony pencil
- White and kneaded erasers
- Cheasel reference stand & clip
2.1 draw
After the first 10 minutes, have them divide a page in their Sketch Pad – 14″ x 17″ with a line across the middle (side to side if in shower orientation) so they have 2 rectangles to draw in. They should use their Ebony pencils (8 or 10 B soft graphite) turned to the side of the lead, to speed-draw the animal in each section. Give them about 2 minutes for each speed drawing.
Time your 2 drawings and encourage students to enjoy the fact that these are not artwork. They should look for things they’ve learned and might need to change next time, and then they can throw this paper away if they want.
Oops! I have not said to begin yet.
Speed drawings take a little bit of concentration, and should not look very good when you’re finished. That’s right, these won’t look good. We are learning about the animal, not depicting it. This is not art, it’s practice. It’s like playing scales on the piano.
You should draw fast, but not hasty, concentrating on getting the overall big shapes, and big shadow shapes, as accurate as possible. You’ve already practiced the details, so now you will not draw any of the details – Just the big shapes. You’ll only have a couple of minutes, so you cannot even think about drawing details. Think about the simple big shapes only, and you’ll learn a lot about your animal in a very short time.”
Use this button to jump down to the preparation section.
LEARNING TARGETS
Students know how to make guidelines
M A T E R I A L S
- Watercolor paper – 11″ x 15″ or so
- Reference photo on stand
- 2B pencil
- Kneaded eraser
3.1 sketch
Everyone should imagine the size their animal should be on their paper. The paper is large, so don’t draw a small animal. Neither should they squeeze a giant animal into it. Just fill the page nicely, like the photo reference. Use the 3 steps to accuracy:
- Frame first – proportional
- Big Shapes – simple
- Details
Walk around and encourage your people to draw lightly at first, so they can erase and modify. Watch out for shading so you can stop it.
Use this button to jump down to the preparation section.
LEARNING TARGETS
Students know how to identify shadows
M A T E R I A L S
- iPad or Computer to show slideshow
4.1 Intro
Begin with the 2 types of shadows:
Cast shadows can then be referred to as OFF shadows. This is the dark area underneath or near an object – it is made by the object, but not on it. It is also shaped like a silhouette of the object but may be stretched and/or squashed. This shadow must touch the object where the object touches the surface it is sitting or standing on.”
4.2 Show
The main point: shadows are on half of every object or shape. That means from looking at the four sides (Top, Bottom, Left, Right), two of them are light, and two of them are dark.
Make sure you have your class’s attention for this slideshow. Project or display on a large screen, or have students gather around for a book-reading style demonstration, and use a computer or iPad to display. Read each caption carefully.
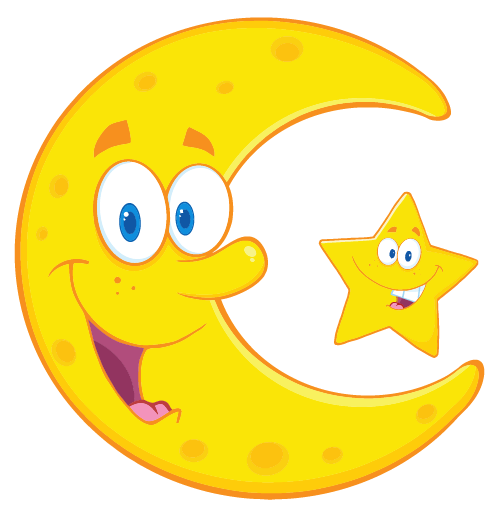
The moon is not really a banana shape like this silly cartoon
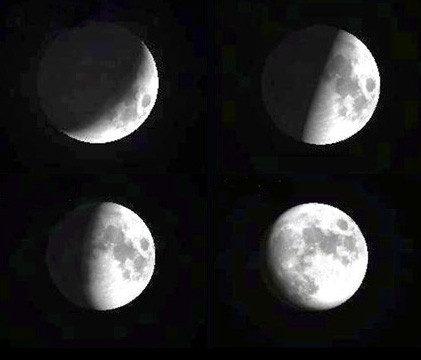
The actual moon is a ball. half is in light, and half in dark. It only looks different because we’re looking the halfway line from different angles.

Here’s a simple ball. Half is in light and half in dark. Notice that the edge-line between the two sides is like an equator – it’s right around the center.
If you could see through it with x-ray vision, you’d see that the line between the two halves goes all the way around.

Here is another sphere, a red ball. You can see the line goes around dividing the ball between the light half and the dark half.
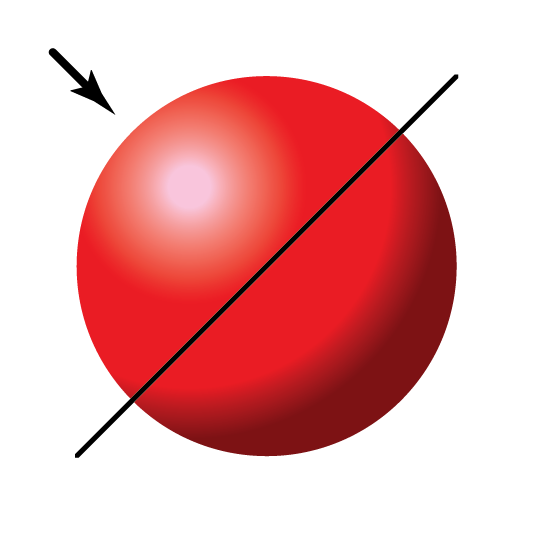
The shadow crescent always reaches to the half-way point. Not more. Not less.

That means that if you look at it as having 4 sides, two are in the light, and two are in the dark.

Here’s the same ball but viewed from a very different angle with mostly shadow.

What’s interesting, is that even looking at the dark side, it’s exactly the same…

Two sides are in light, and two in dark. Every object or lump on an object, has a top, bottom, right and left.

The horns and face of this water buffalo has shadows on all the right edges, and all the bottom edges.
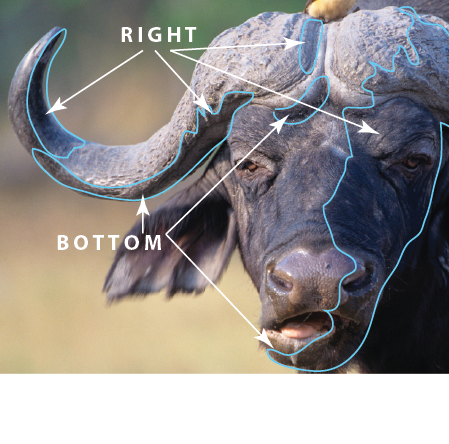
Here you can see the two dark edges on each part. The other two edges, the top edges and the left edges are all light.
Use this button to jump down to the preparation section.
LEARNING TARGETS
Students know how to create shadows
M A T E R I A L S
- Watercolor paper with drawing
- Reference photo on stand
- 2B and 4B pencil
- Kneaded eraser
5.1 DEMO
Tap the 4 arrows icon to enlarge the video to full screen.
Review the demo video and demonstrate to your students, or you can simply display the video on a larger screen for them to watch.
5.2 draw
Returning to the watercolor paper with the guidelines, students should sketch in the entire animal, including all of the shadows. have them build up the darker areas that they can see on their reference. Ask everyone to use hatch shading, and if anyone doesn’t know exactly how, do a quick demo for them.
Explain that when the watercolor goes over the pencil drawings, the shading will show through because the watercolor is translucent.
Use this button to jump down to the preparation section.
LEARNING TARGETS
Students know how to set up their work area for painting with watercolors
M A T E R I A L S
- Watercolor paper with drawing
- Reference on stand
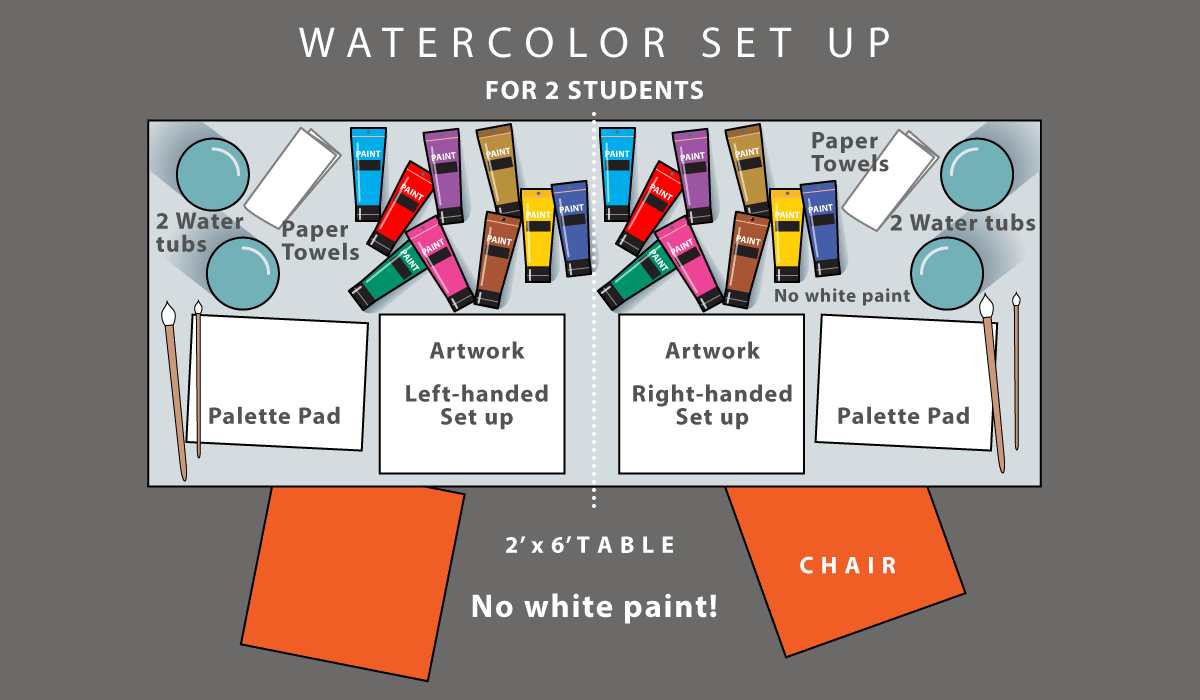
- Water tubs (2 of them)
- Brushes – smaller, pointy
- Palette or plate
- Acrylic paints (no white), or watercolor paints
- Smocks
- Paper towels
Paint pigment list:
- Napthol or Pyrrol Red
- Hansa or Light Yellow
- Pthalo Green (blue shade)
- Cyan or Cerulean Blue
- Ultramarine Blue
- Dioxazine Purple
- Magenta
- Burnt Umber
- Raw Sienna
- Titanium White (professional grade only)
6.1 Setup
Encourage students to keep a neat and orderly work area.
Watercolor set up reminders:
- 2 tubs of water are needed. One is the paint, which needs to be kept clean. The other is for washing brushes.
- No White – white paint is not normally used for watercolor painting. Do not allow white to be mixed in, because the water is actually the white “paint”, allowing the paper to show through as more clear water is added to a color.
- Test Strip – It’s important to have a test strip of watercolor paper, or an area on the artwork paper that is outside the boundary. Testing a color is very important, since the deeper puddle of water looks darker on the palette when mixing.
Use this button to jump down to the preparation section.
STEP 7. Watercolor Painting
Students learn how to hold their brush to make watercolor work 5 MinutesLEARNING TARGETS
Students know how to paint with watercolors
M A T E R I A L S
- Display to project the slideshow
7.1 Explain
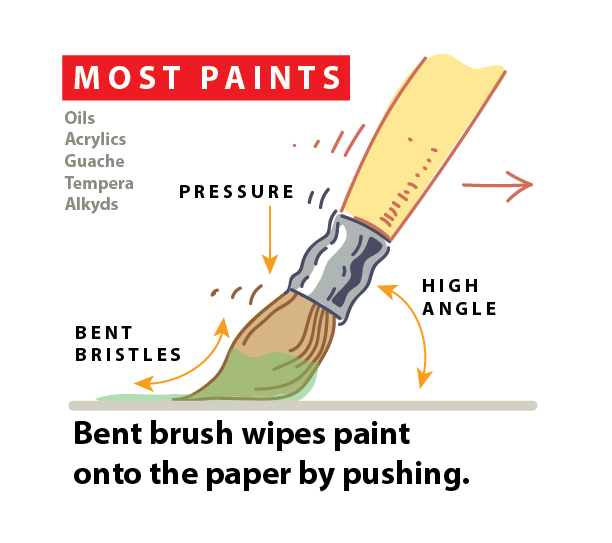
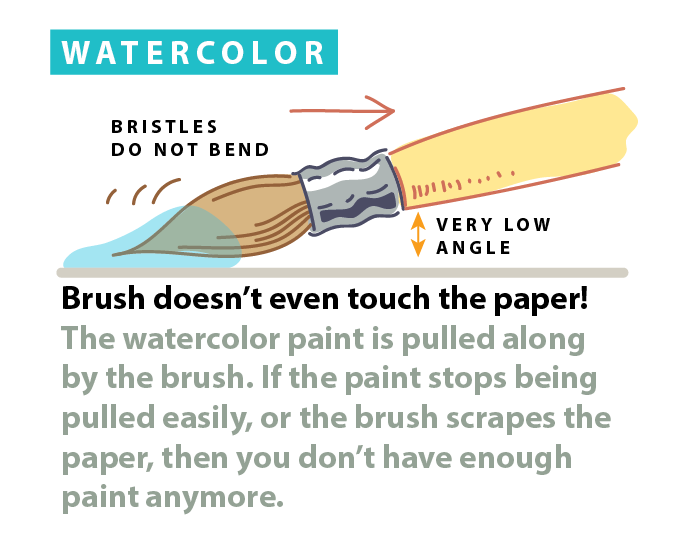
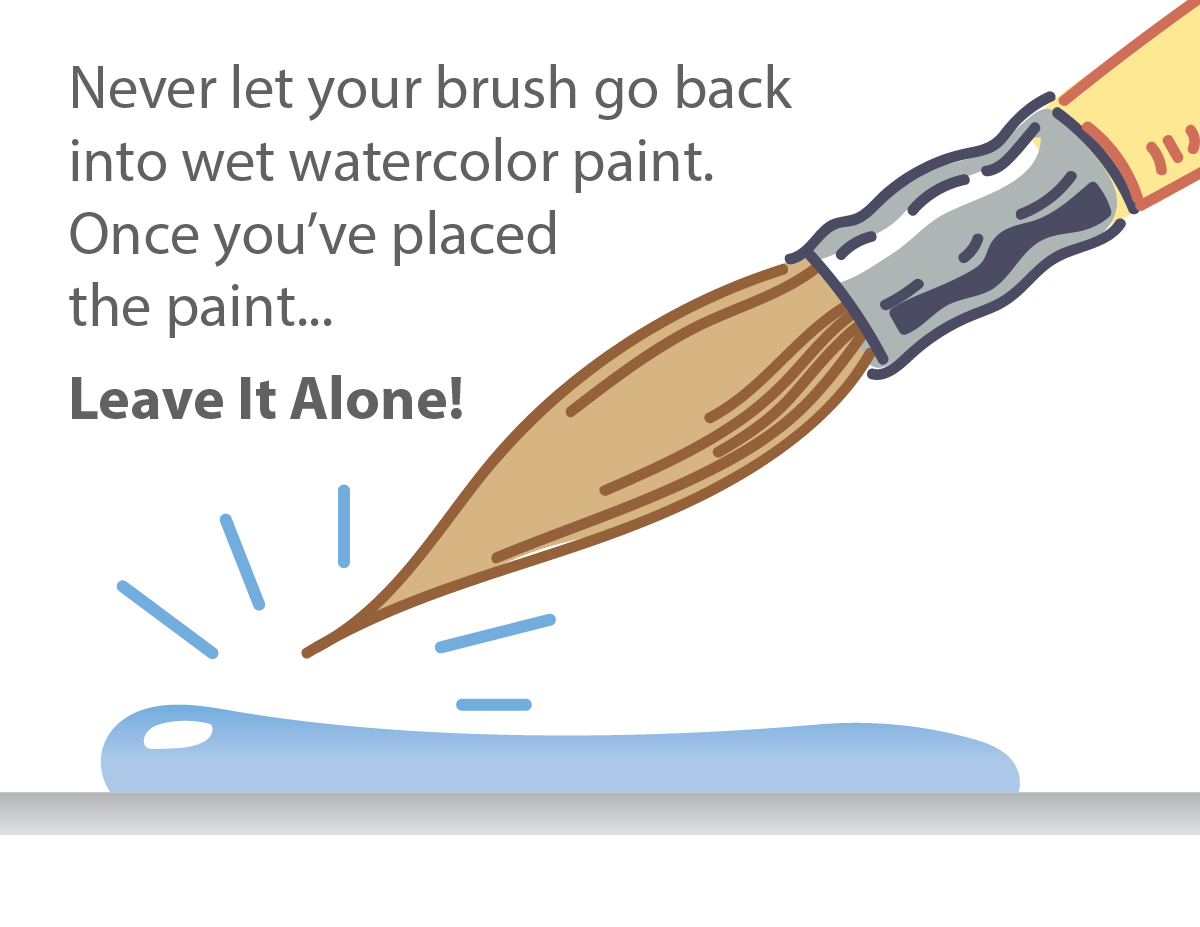
Display the slideshow and read the captions. Emphasize these 2 tricks:
- Don’t let your brush touch the paper, (or bend the bristles)
- Leave it alone!

Use this button to jump down to the preparation section.
LEARNING TARGETS
Students know how to paint with watercolors
M A T E R I A L S
- Watercolor paper with drawing
- Reference on stand
- Water tubs (2 of them)
- Brushes – smaller, pointy
- Palette or plate
- Acrylic paints (no white), or watercolor paints
- Smocks
- Paper towels
8.1 paint
Walk around and encourage students. Point out when they are using the brush correctly and leaving the paint alone.
They may also add layers of watercolor shadow at the end if they have time and want to enhance their shadows. The paper must be dry before they add another layer.
Early finishers can add splatters. Do not move wet paintings without a board to slide them onto. Travel around the room, asking permission to help and encouraging your students.
Use this button to jump down to the preparation section.
LEARNING TARGETS
Students know the importance of cleaning up.
M A T E R I A L S
- Paper Towels
- Cleaning wipes
- Sink
- Waste baskets
- Well-lit spot for photos
- Camera or phone-camera
9.1 CLEAN
- Wash hands
- Super-wash brushes if used
- Put art supplies away
- Wipe tables & toss trash
- Remove any smocks (last)
- Check for items on floors and tables
9.2 PHOTO
9.3 CONNECT
OBJECTIVES
- Practice and improvement using shading
- Understanding how shadows are formed and used in artwork
- Accomplishment in drawing an animal with shading
- Fulfillment by choosing the animal they want to draw & paint
TROUBLESPOTS
Trouble with shadows in general & Scribbling shadows haphazardly – There are several reasons you’ll see shading that doesn’t fit the shadow area and is very rough or haphazard. If a student isn’t comfortable or doesn’t like doing shadows (usually the same thing), or if he or she simply doesn’t know much about shadows yet, you’ll see patchy scribbling that has little to do with a shadow. It may not touch the edges and has no distinct placement. The shadow will not define the form at all, being more of a distraction instead of helpful. The student may be very aware of this and feel embarrassed. They may act disrespectful though, instead of embarrassed.
The problem is that your artist may not be able to see the shadow like you do. The brain processes shadows in a completely different way than other visual information. It is not visually clear. Our brain tells us about colors and shapes as distinct elements, but with shadows, the brain doesn’t actually process the shadow. Instead, we use shadows to interpret the 3-dimensional form, ignoring the rest of the information about light and dark areas. For many people, shadows are almost invisible if they’re not well defined.
Our brain’s interpretation of shadows makes them difficult. So, try to not be negative at all when you see these problems and students acting out, because while it may seem like laziness or disrespect, it’s most likely not. The shame of not being able to perform well, can be covered up by pretending that shadows are not important, or by affecting a lazy attitude. It’s a coping mechanism. It can take time to learn to see where shadows are, and our lesson today is a great start for that training. Be positive and offer help:
Here’s something you can try. Ask students one-on-one if you can show them a cool technique, and then draw part of their animal, adding a small shadow using soft hatch shading – emphasizing careful coverage and going to the edge of the object. A good way to explain shadow coverage is that even though shadows are soft where they meet the light in the center of objects, it helps to think of them as a color towards the outside edge of an object. Color goes all the way to the edge and so do shadows. Note: variations within shadows are not important at this point with a struggling student – because it will confuse them. Save it for another time.
ART WORDS
On Shadows – An Art Instructor term for Form shadows. Shading that is ON the dark sides of an object. Usually with a soft edge where the light side meets the dark side.
Off Shadows – An Art Instructor term for cast shadows. The shadow underneath or near an object – it is made by the object but not ON it. It is also shaped like a silhouette of the object but may be stretched and/or squashed. This shadow must touch the object where the object touches the surface it is sitting or standing on.
Reflected Light – (for older students) Light that bounces off of a surface and shines back onto an object, brightening the edge of the ON shadow, but not as bright as the light side of the object. Reflected light is very important for showing roundness. If there was no light shining on the shadow side of an object, then it would be pitch black. Even the moon’s dark side can often be seen due to the earth’s reflected light shining back into the shadow.
CLASSROOM
PREP
Have PDFs printed and supplies ready for students.
What your room needs
Here are your printable lists and room prep instructions.
Opens in new window
CLASSROOM
MATERIALS
- 8.5″ x 11″ copy paper
- 8.5″ x 11″ card stock
- 11″ x 17″ copy paper
- Rulers
- Scissors
- Box cutter (teacher only)
- Large Drawing boards with clips
- Water containers
- Spray bottles
- Water droppers
- Paper towels
- Smocks
STUDENT’S
MATERIALS
- 14×17” sketch Paper
- 4B Pencil
- White and kneaded erasers
- Ebony pencil
- Watercolor paper – 11” x 15” or so
- Acrylic paints (no white) or watercolor paints
- Brushes – smaller, pointy
- Palette or plate
PREVIEW
Week 15: Artists’ Choice
Students will have a day of artist’s choice, where they can do whatever they want. We often hear, “I never get to do what I want to!” Our answer to that is that coming soon, there will be a day of artists’ choice – and here it is! Total freedom can be overwhelming, so there we have techniques that help students stay on track and plan their way quickly.
Week 16: Colorful Shadows
Students learn that shadows are not gray, or made by adding gray to colors. Instead, they learn that opposite colors are added to create shadow colors that are vivid and more like real life. After a warmup exercise, a still life is painted of a red paper-wrapped gift with a green ribbon. Each color is used to create the shadow color of the other one, since reds and greens are opposites.