
OVERVIEW
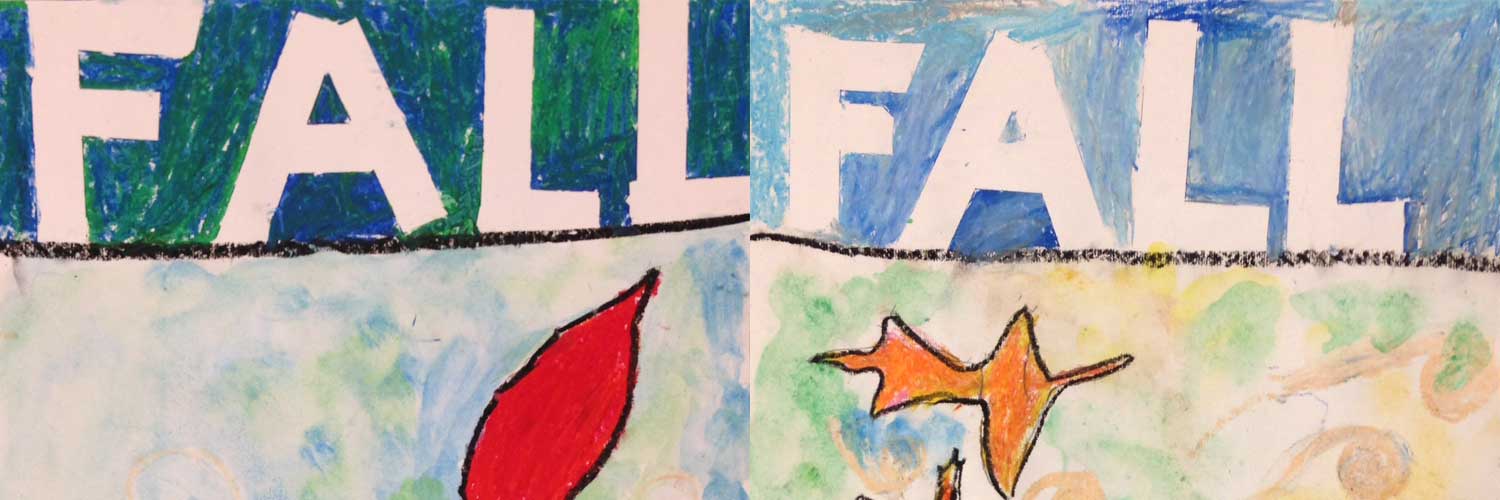
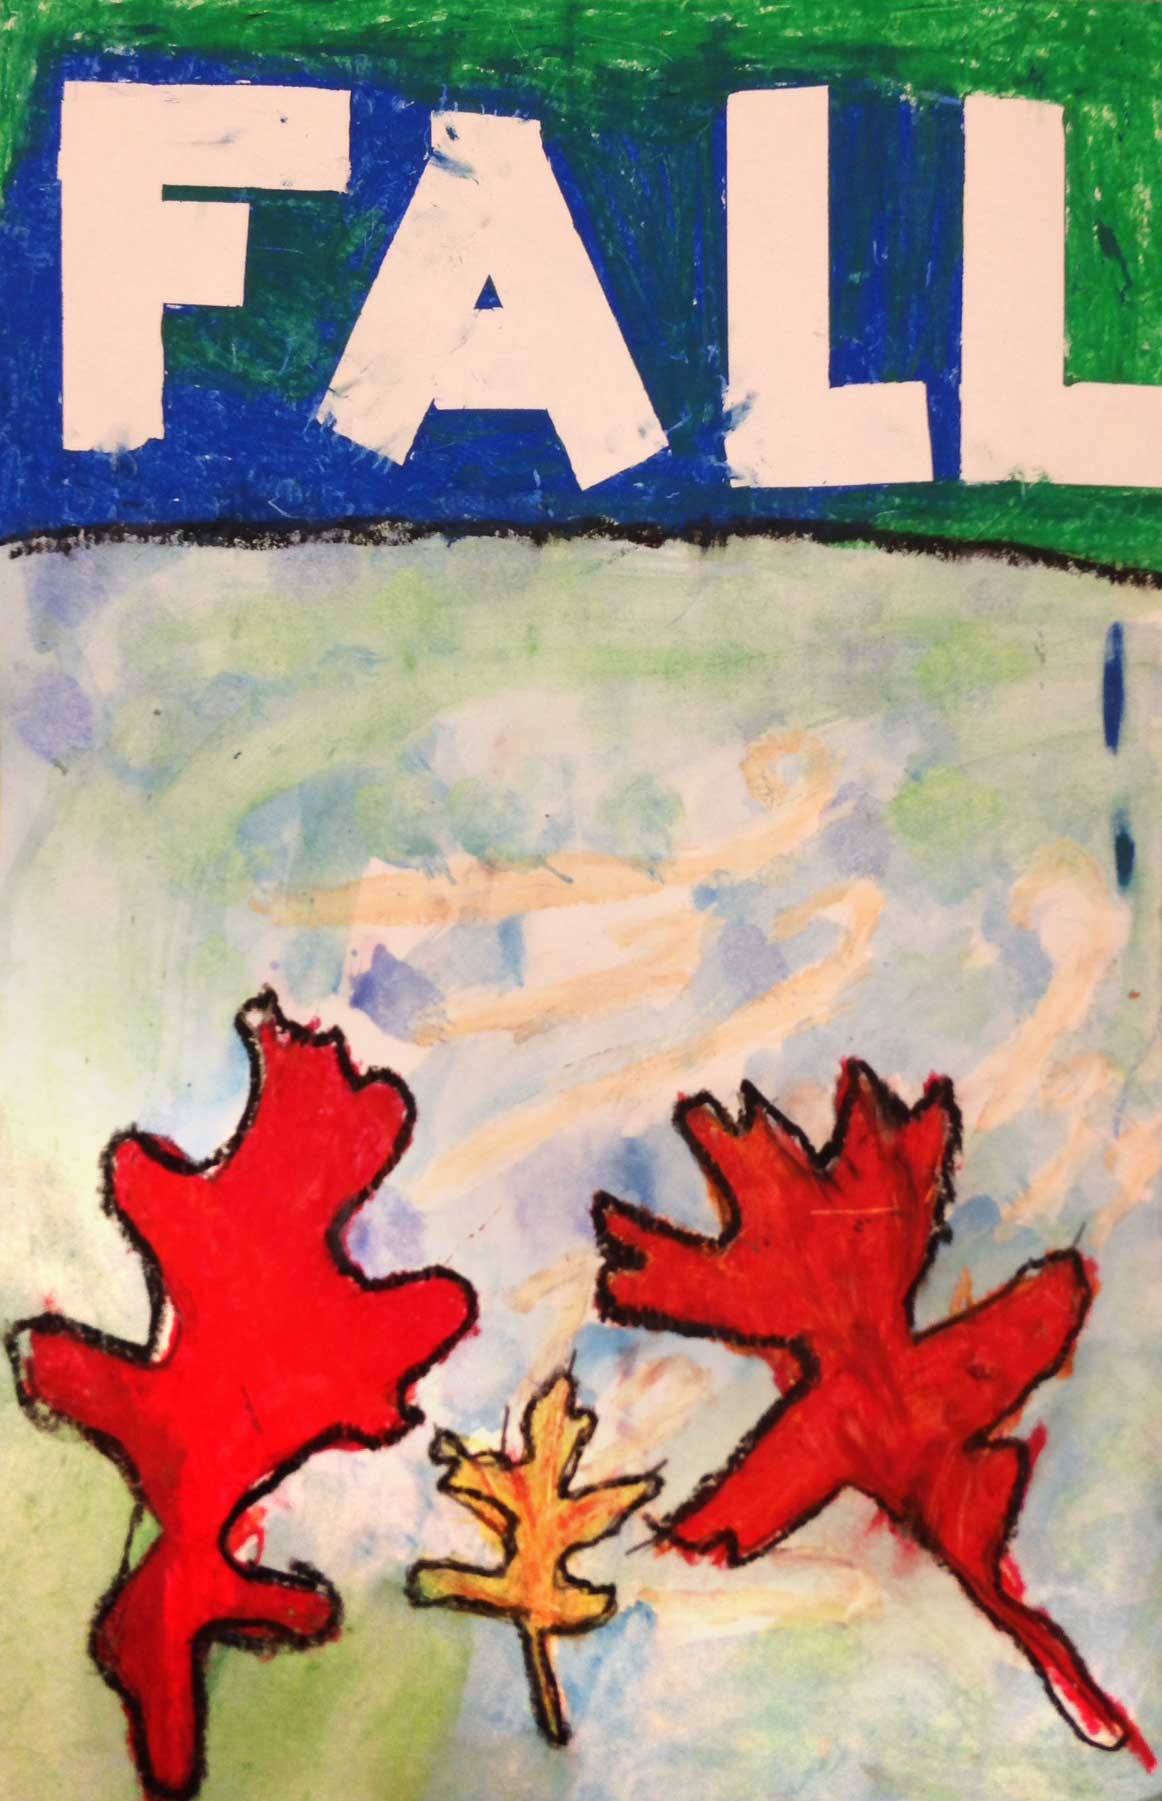
Students create a fun and colorful poster announcing fall, using tape-resist and oil pastels for the lettering, and leaf reference for the picture.– – –
Grades K – 2
Week of November 4 – November 8
1 Hour & 30 Minutes


Lesson At A Glance
A brief overview of each step. Buttons jump to each section for detailed information.
10 Min – Students learn the difference between imaginative drawing and realistic observation drawings.
15 Min – Color the cartoon with watercolors.
15 Min – Use tape to create letters across the top of a poster.
15 Min – Make a blended warm color background around letters
13 Min – Finish the poster using cool colors in the background around the leaves.
If Time – More artists’ choice with either cartoons or realism
2 Min – Everyone helps
SCROLL & TEACH
LESSONPLAN
Each section is a different color. Read over once and then you can SCROLL & TEACH using any device you like. It’s designed to work best with your phone.
LEARNING TARGETS

Students know how to use their imagination and warmup with artists’ choice
M A T E R I A L S
- 8.5″ x 11″ copy paper
- 2B Pencil
- White Eraser
1.1 Greet
Kneel down so that you are on their level. Bending over emphasizes the differences in your height, while kneeling makes them feel more important. Have tape and marker ready so you can stick some tape on the table by each student and write their name on it as they sit down.
1.2 choice
Everyone should take their time with the work and make a finished piece of art. Limiting the paper can also help kids focus on the work. If someone finishes in super-fast time, ask them what more they can do to the existing paper. Ask again several times – unless they appear overly frustrated; then you can allow them to move on to a new work.
Use this button to jump down to the preparation section.
LEARNING TARGETS
Students know the difference between drawing from imagination and drawing realistically from observation
M A T E R I A L S
- 11″ x 17″ copy paper
- Pencil
- Eraser
- Markers
2.1 draw
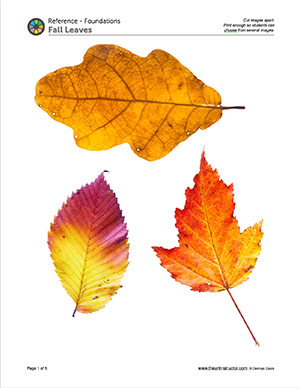
Have students draw a leaf from memory. Explain the difference between a cartoon (from imagination), and realism, (from looking at real life.)
Sometimes though, artists want things to look realistic. To do realism, we have to be looking at a real thing or a photograph of it. The idea that an artist is better if he or she can draw ‘without looking’ at something is a silly idea. All the best artists look at what they’re drawing while drawing it.”
2.2 Print
Reference
Leaf Photos
several pages of 3 leaves each. Print and either cut leaves apart and let each student choose a couple, or use the whole page for two students to share between them.
4 Pages – Opens in new window
2.3 draw
Have students look carefully at the long or short big shapes, and then at the details at the edges. It’s ok if no one really gets these concepts but it is very important to mention big shapes first and details last. We use these concepts all through our curriculum.
2.4 Change
Read the teacher talk or paraphrase.
So lets draw some cartoon eyes and a smiling mouth on one of your leaf drawings. It’s Larry Leaf! Add arms and legs to Larry.”
Use this button to jump down to the preparation section.
LEARNING TARGETS
Students know how to draw a fun cartoon
M A T E R I A L S
- 1/2 sheet watercolor paper (cut 11″ x 15″ to 11″ x 7.5″)
- Pencil & eraser
- scissors
- Watercolor sets and water dropper to prep for the next step
3.1 draw
Have students use a pencil to draw outlines of cartoons – but no add shading at all, since they’ll be coloring with watercolors in the next step. Take a moment to “wake” up the watercolor cakes by adding a few drops of water to each one while the students are working.
Give everyone these instructions:
Does Larry Leaf like to leave licorice lollipops on his lawn for his pet ladybug to lick? Maybe so! Draw Larry’s family and his house.
If you don’t think you know how to draw something as a cartoon, just try your best, raise your hand, and I’ll come and help you.”
3.2 Teach
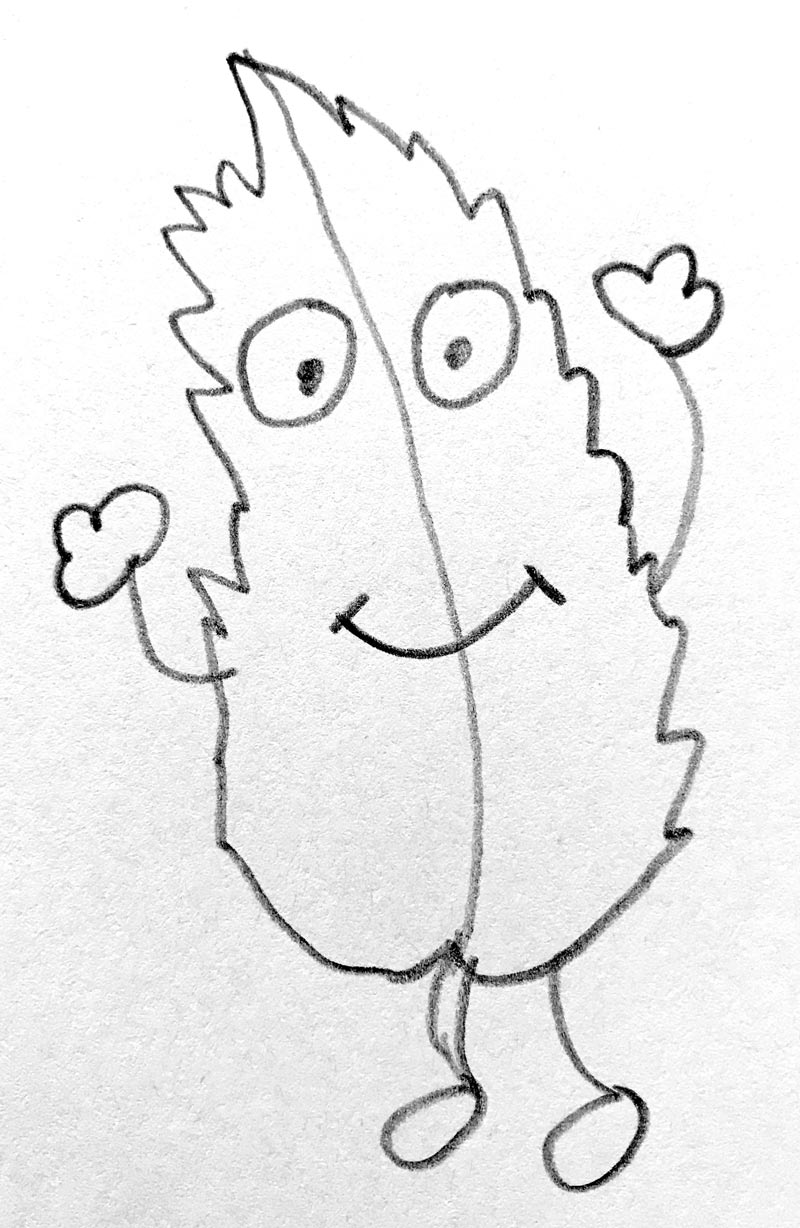
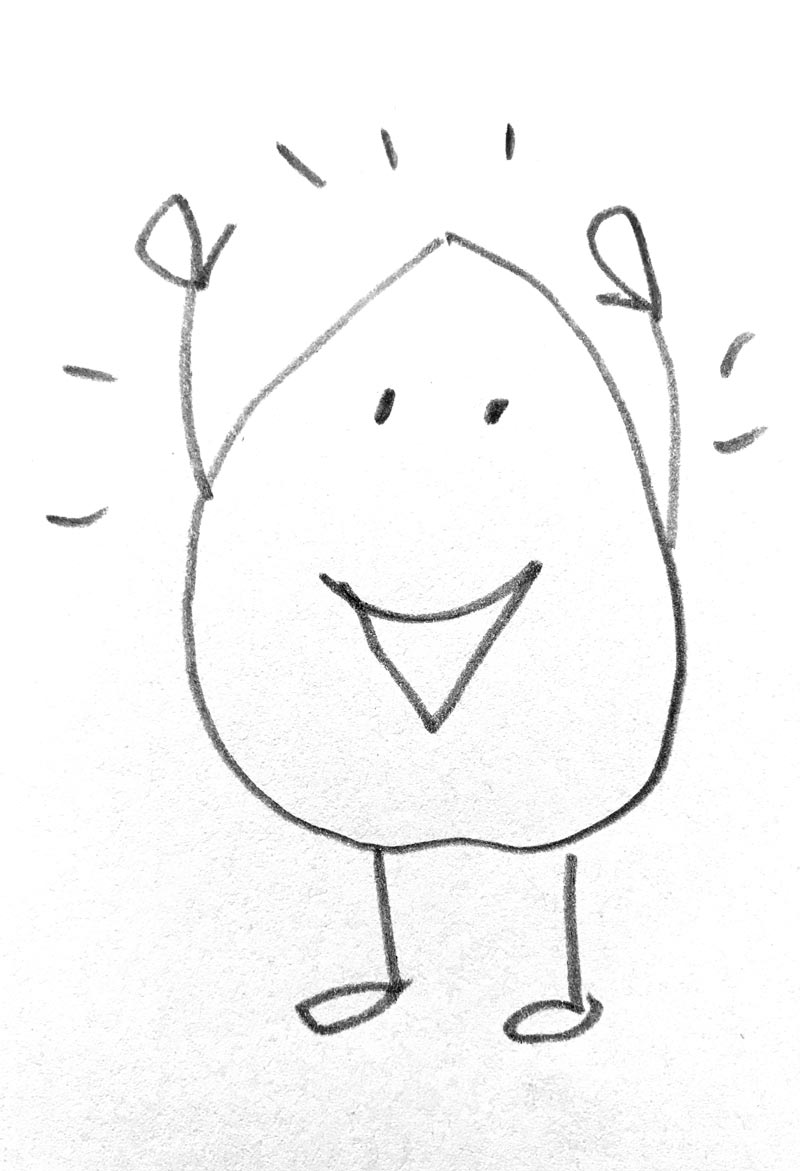
The reason anyone might be hesitant to draw a cartoon is mainly fear. You can alleviate this fear by giving them clear and simple instructions. The way to create a cartoon is to put a series of symbols together.
Eyes can be circles with dots or just two dots. These are symbols for eyes just like a letter O or a period. They’re simplified. Large eyes are also exaggerated.
A mouth is a line. It can curve up on each end for a smile, and drawing another curved line below can make the mouth look open if you connect the two ends so it’s a sideways crescent moon shape. A mouth can also be shown by drawing a simple straight line and then a V underneath to make an upside-down triangle.
Legs and arms can just be stick figure versions attached to the leaf. Feet can be circles, and hands can be simple puffy cloud-like shapes on the ends of the arm lines.
These are the simplest versions of a cartoon, and anyone can learn them easily. It’s just like writing a word. Cartoonists add to their “vocabulary” of symbols to make more and more interesting characters.
Use this button to jump down to the preparation section.
LEARNING TARGETS
Students know how to paint with watercolors
M A T E R I A L S
- Watercolor paints
- Smocks
- Paper Towels
- Small/medium brushes
- Mixing plates
- Drawings from previous step
Paint pigment list:
- Napthol or Pyrrol Red
- Hansa or Light Yellow
- Pthalo Green (blue shade)
- Cyan or Cerulean Blue
- Ultramarine Blue
- Dioxazine Purple
- Magenta
- Burnt Umber
- Raw Sienna
4.1 paint
Hand out supplies and encourage mixing colors that are alike. Mixing a warm color with a cool color makes a brownish dull color and most students this age don’t usually want those colors.
Fall colors can be used for Larry and his family instead of greens.
Use this button to jump down to the preparation section.
LEARNING TARGETS
Students know how to use mixed media
M A T E R I A L S
- 11″ x 17″ card stock paper
- 1/2″ blue painters tape
- Rulers
- Safety scissors
5.1 tape
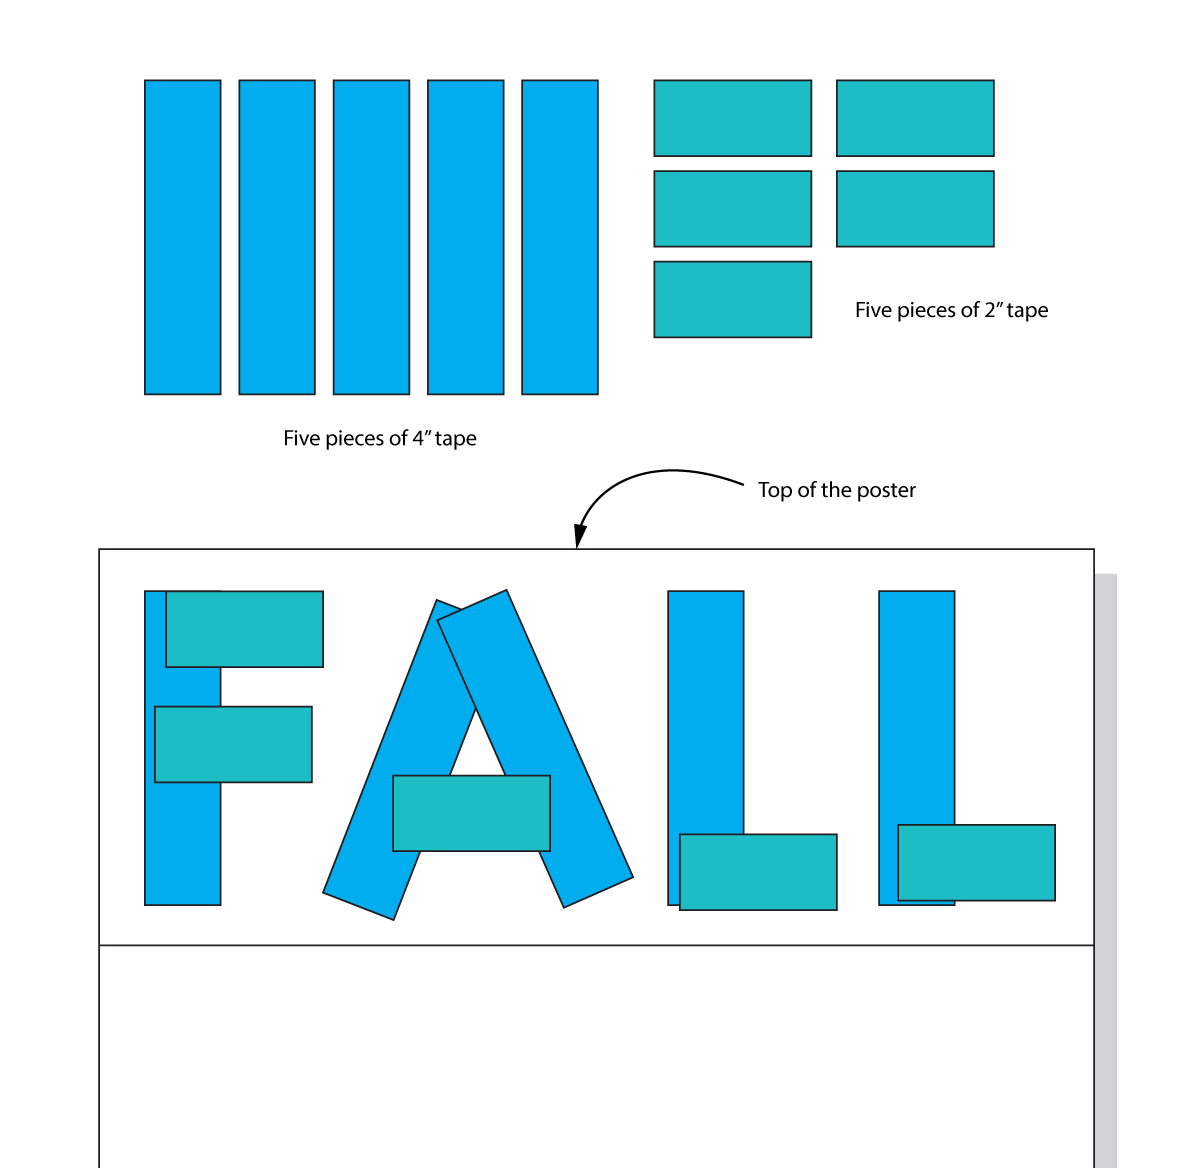
This top section will be the lettering banner for the poster. There are 4 simple letters to make the word, FALL in capitals. 10 pieces of tape will do the trick. Start with the first letter, F, at the very top and left side of the paper.
Easy way to cut tape:
- Place ruler with the numbers going left to right.
- Holding the roll to the left, pull the end of the tape to the right, and place the end of the tape on the number you want the tape to be. ie: right at the 4″ mark for a 4″ piece of tape.
- Gently pull the tape to the left, several inches past the beginning of the ruler.
- Cut the tape at the end of the ruler.
Make Letters
Make sure you and any helpers work quickly to assist your students, as this is fairly difficult. See the diagram below. Display it to your students or you can print the PDF to help your students see how to make the letters.
You need 5 long pieces of tape: 4 to 4 & 1/2″
You need 5 short piecers of tape: 2 to 2 & 1/2″
- The F: Use scissors to cut a piece of tape that is 4″, and 2 more that are 2 & 1/2″. Use the 4″ piece to make the up & down part of the letter F, and use the other 2 pieces to make the rest of the letter.
- The A: Cut 2 pieces of tape that are 4 & 1/2″ to make the A. Use a short piece for the middle line.
- The Ls: Make the two Ls with 4″ pieces for the uprights, and short pieces for the bottoms.
OR:
We usually cut these lengths ourselves and then set them on the table for young artists to place on their posters. This is best to do if you have a younger or a larger-sized class!
5.2 print
Instruct
Lettering Diagram
Print one for each student or for two students to share between them.
1 Page – Opens in new window
Use this button to jump down to the preparation section.
LEARNING TARGETS
Students know how to use oil pastels
M A T E R I A L S
- Leaf Reference PDF
- Pencil
- Oil pastels in warm colors (reds, oranges, & yellows)
- White oil pastel (for background blending)
- Blending sticks/stumps
- Paper towels to blend the background
6.1 draw
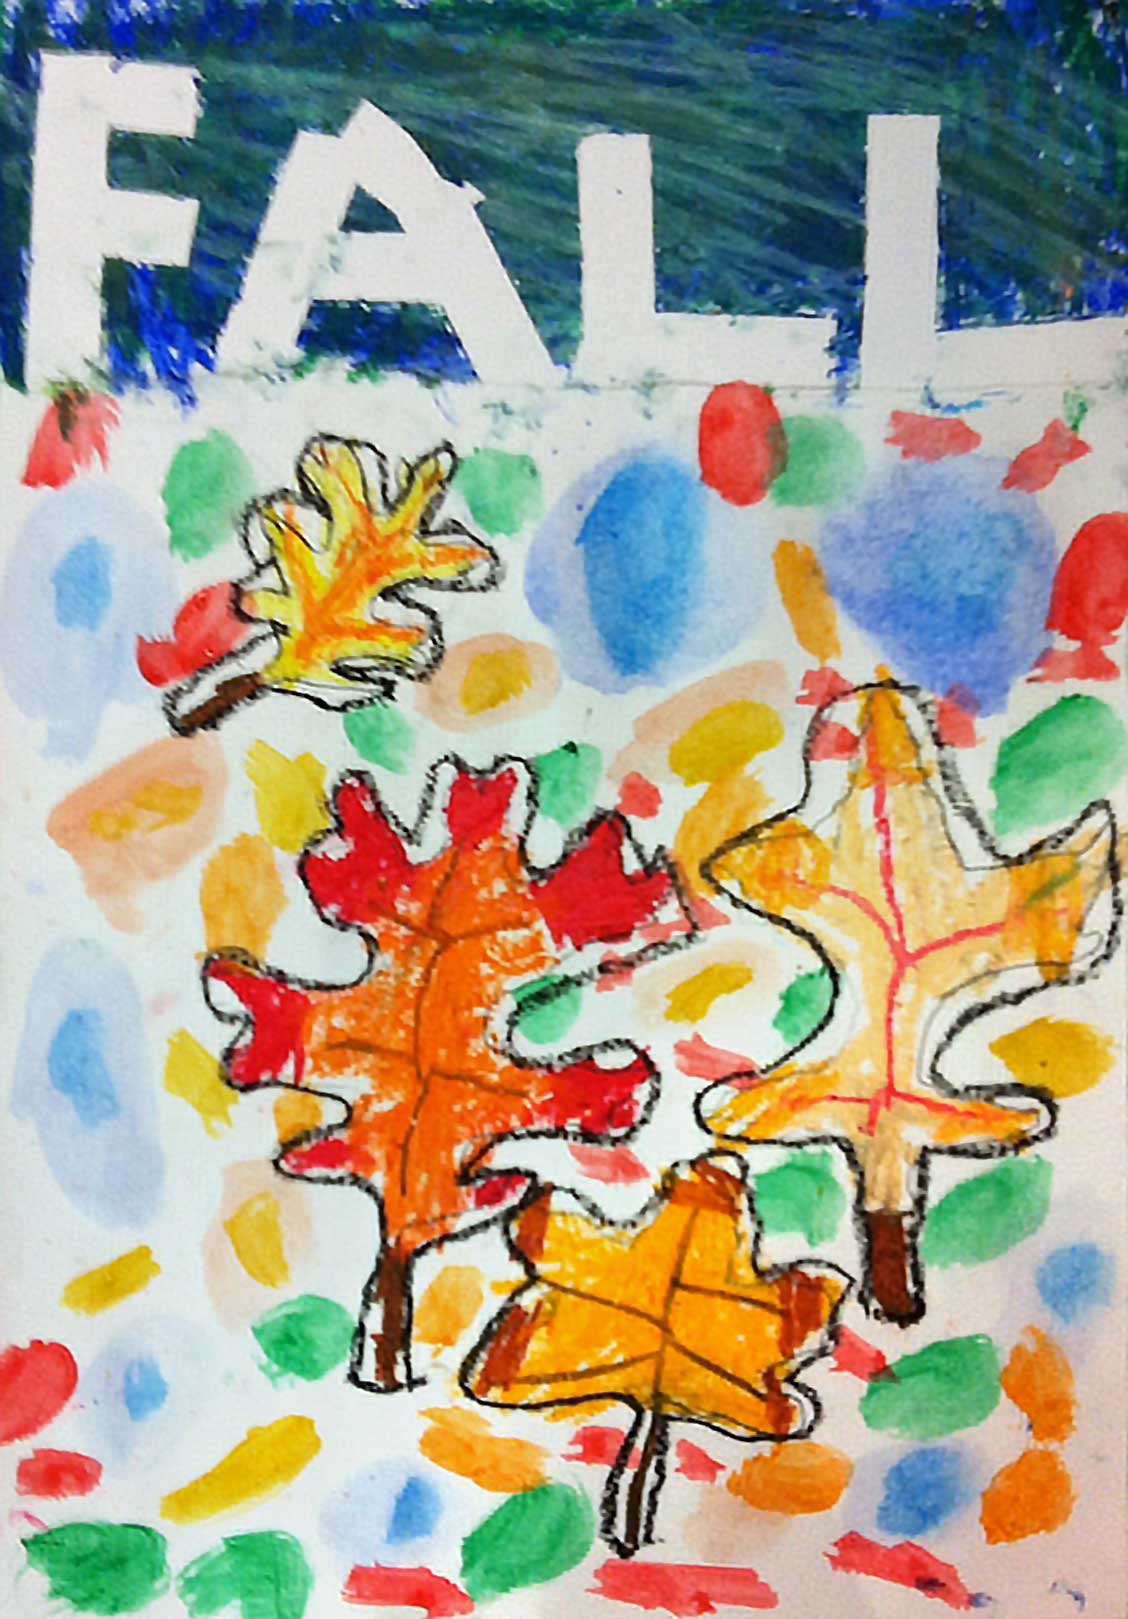
Explain how to make the main part of the poster, underneath the lettering. Students should make the leaves very rich with warm colors and not use any white to blend the leaves.
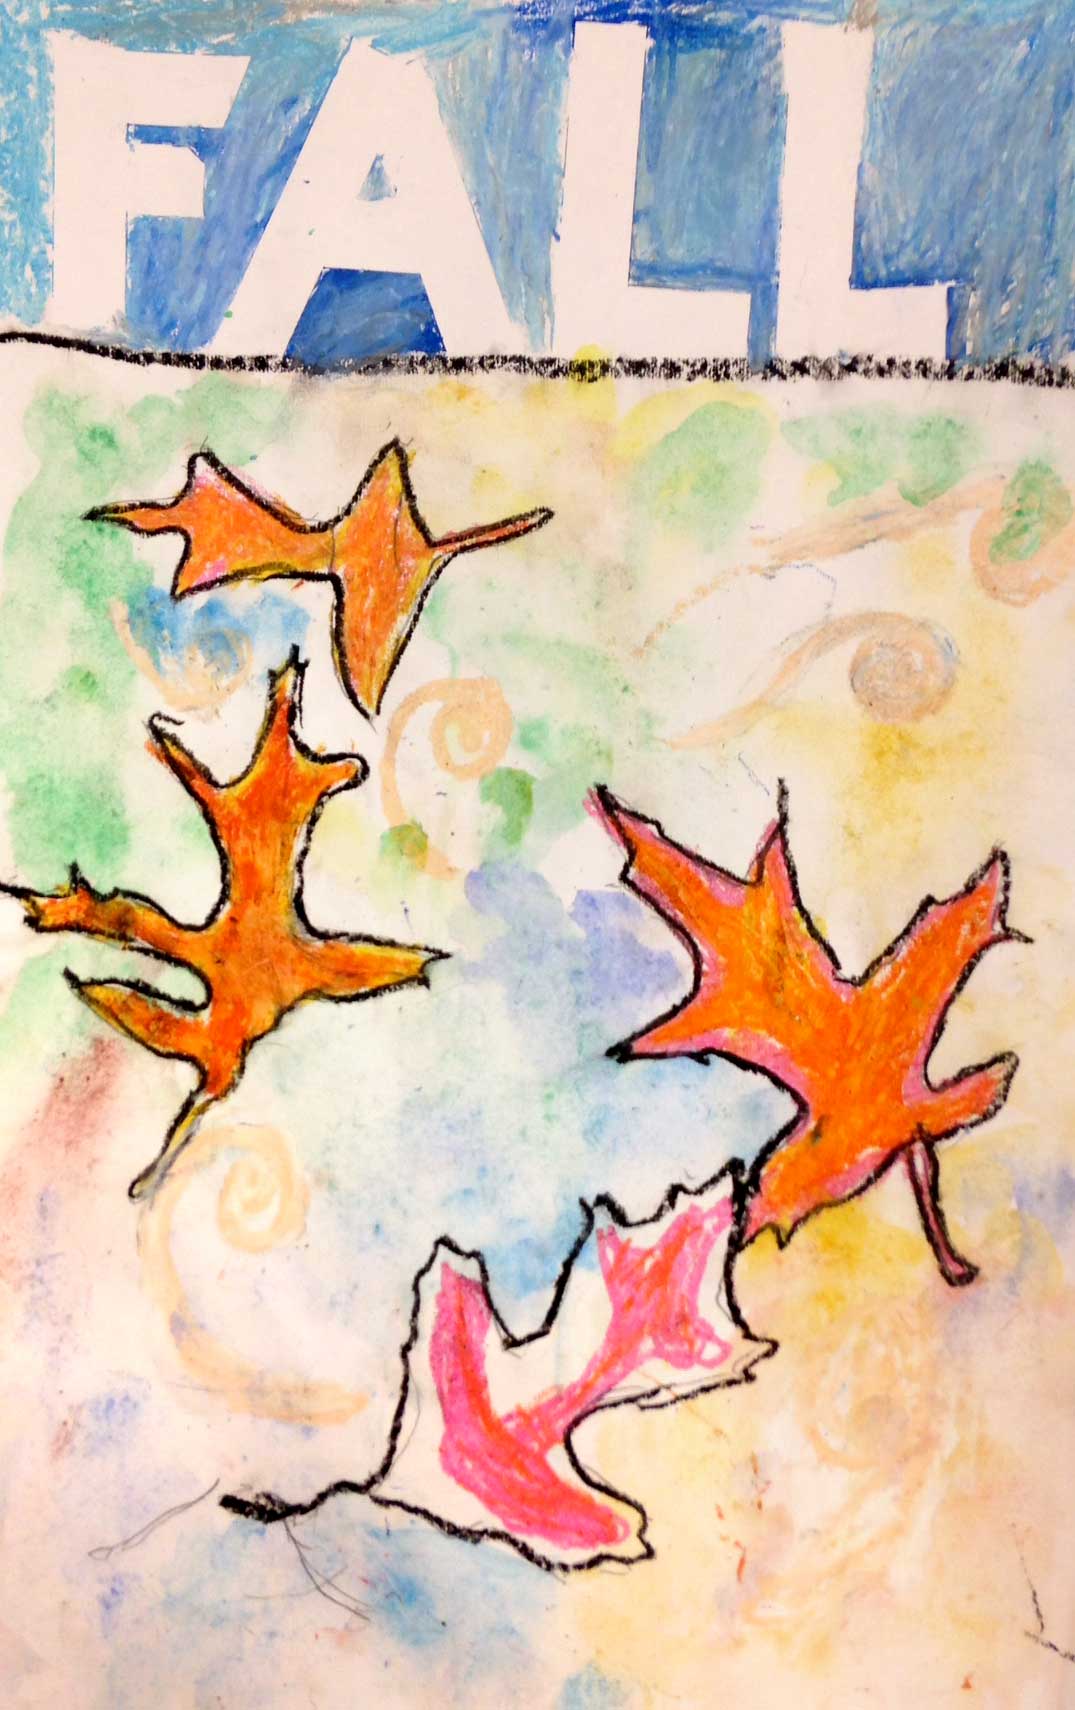
In the bottom section, you’ll use the photo references from earlier to draw several leaves in bright fall colors.
So first, think about where you want your leaves to be, and how big you want them. Remember that you’re the boss of your shapes! Use your pencil to draw the outlines of 3 or 4 leaves or up to 6 or 7 of them. Pretend they’re falling from the trees, or laying on the ground.
Look at the pictures so you can make your leaves look more realistic. Don’t shade with your pencil though. Instead, use your oil pastels to make bright bold fall colors. Mix reds, pinks, orange and yellows in your leaf shapes.
Blend your colors using blending sticks, and make them completely full of color.”
6.2 color
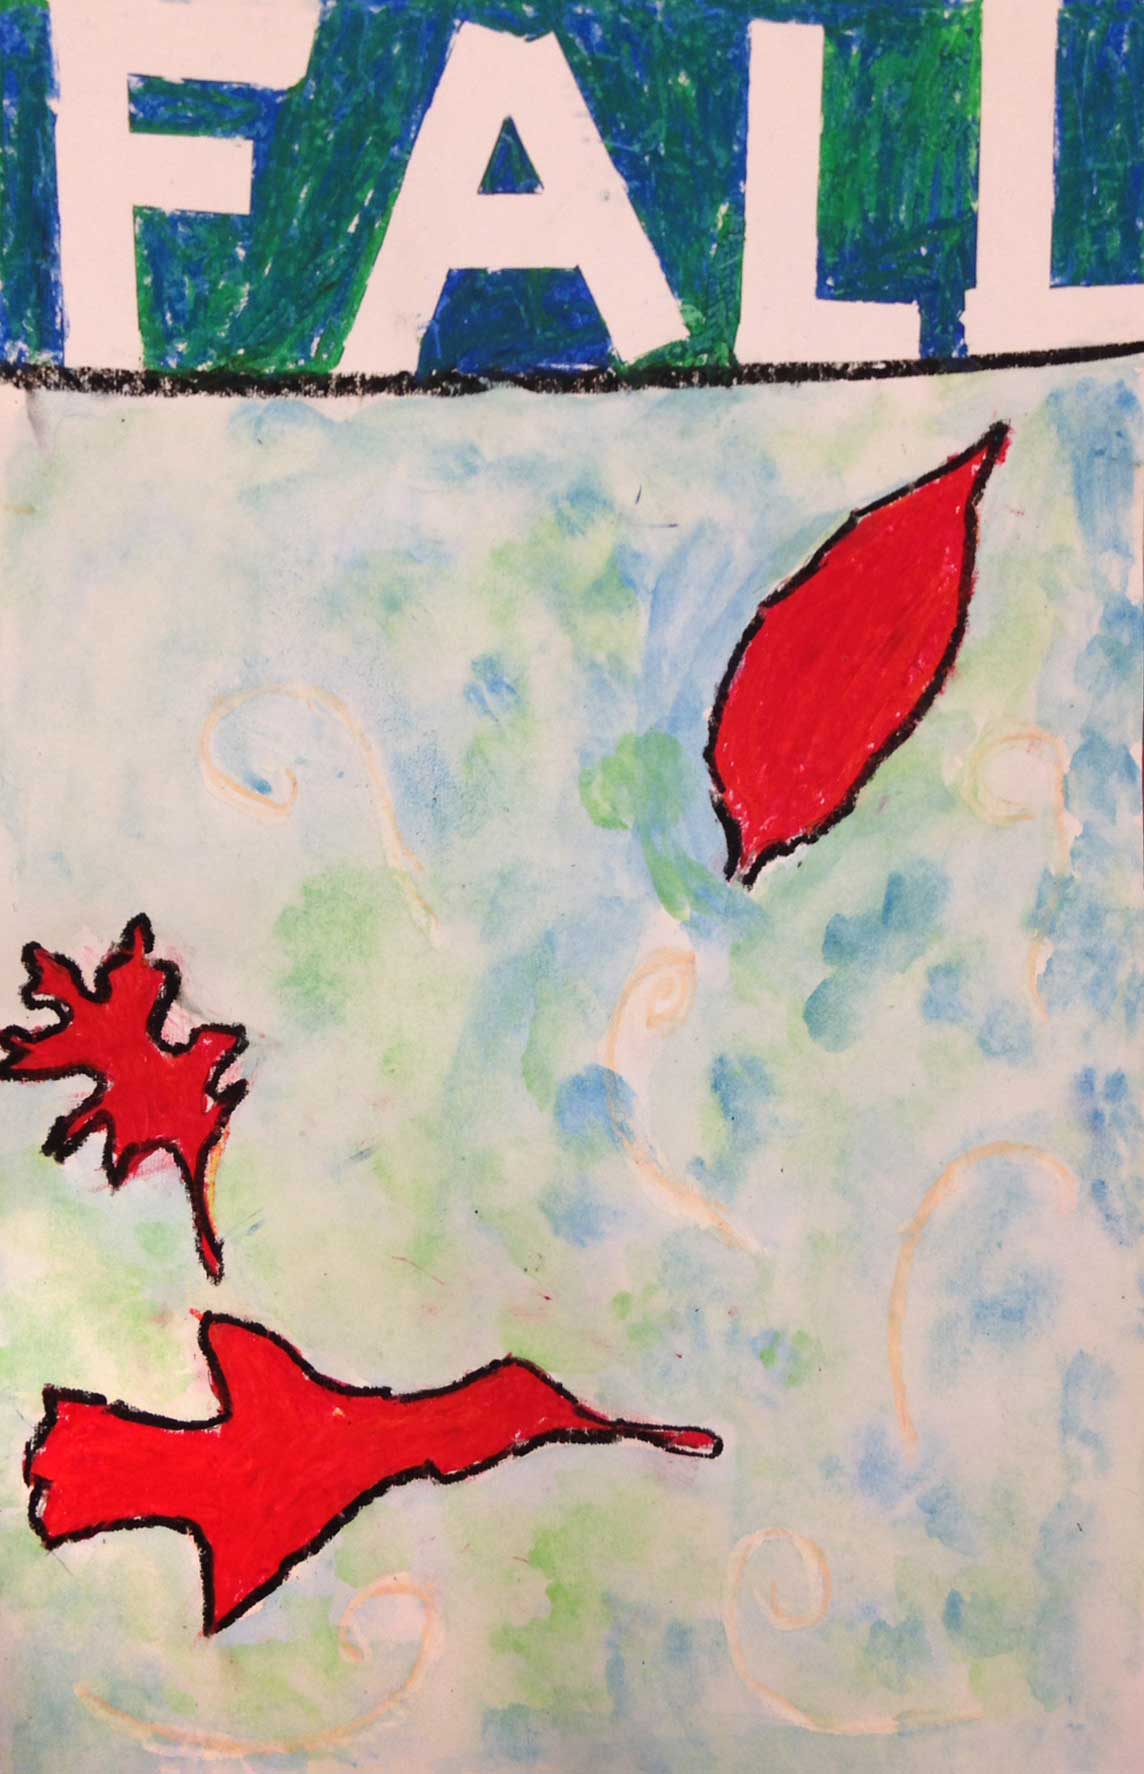
Have the entire class stop for a moment so everyone will know what to do for the background, which will be much lighter.
You’ll make a lighter version of the colors using more yellows and a little orange or pink. The way to do it is to hold the pastel on it’s side, and gently rub it across the paper so that only a little bit rubs off, but cover the entire background, using several different colors.
[you can demonstrate this while you talk]
Then, use your white pastel on it’s side, and rub white all over the colors to blend them some.
Finally, you’ll use a paper towel wadded up to rub and blend the background all smeary and lighter. Leave the leaves alone!”
Use this button to jump down to the preparation section.
LEARNING TARGETS
Students know how to use oil pastels
M A T E R I A L S
- Oil pastels in cool colors (purples, blues & greens)
- White oil pastel
- Blending sticks/stumps
7.1 color
Have everyone put away their warm colors and get 4 or 5 cool colors they like. They can make several different colored areas and fill in the area above the line and around the taped letters.
It looks good to have chunks of different cool colors or stripes.
After they finish, help your students pull up the tape carefully, to reveal the white lettering. Be very cautious! The 11″ x 17″ paper we use has a soft surface, so it tears easily. A good way to avoid that is to not pull the tape straight up. Instead, peel it off slowly, pulling the loose end of the tape backwards and veryd close to the surface of the paper.
It may pull up a little bit of the surface, depending on the finish your paper has, but just try not to rip up the color background.
Students can finish the poster by adding black across the line that separates the top and bottom sections. Also add black or colored outlines of the leaves if desired.
Sign names and it’s done!
Use this button to jump down to the preparation section.
LEARNING TARGETS
Students know how to create with their imagination
M A T E R I A L S
- Pencil & eraser
- Oil pastel
- Markers
8.1 draw
Use this button to jump down to the preparation section.
LEARNING TARGETS
Students know the importance of cleaning up.
M A T E R I A L S
- Paper Towels
- Cleaning wipes
- Sink
- Waste baskets
- Well-lit spot for photos
- Camera or phone-camera
9.1 CLEAN
- Wash hands
- Super-wash brushes if used
- Put art supplies away
- Wipe tables & toss trash
- Remove any smocks (last)
- Check for items on floors and tables
9.2 PHOTO
OBJECTIVES
- Practice and improvement in both cartoons and realistic drawings
- Understanding the difference between imagination drawings, and realism
- Accomplishment in making a colorful Fall poster and cartoon scene
- Fulfillment in making decisions and creating your own designs
TROUBLESPOTS
Torn paper – Smooth card stock in 11″ x 17″ is hard to find. Sometimes we end up with a softer surface, and the tape can tear off some of the surface when being pulled up. It doesn’t change the look, so it’s ok. Be careful though, and try not to let it pull up the part that has the oil pastel color on it.
ART WORDS
Resist – Today we use a technique called tape resist. Anything that protects the paper from a medium that is being applied is called a resist. If you draw with white oil pastel on white paper, you won’t see it, but then if you go over it with watercolors, the white shows because it resists the water. Our tape resist does the same thing by blocking the oil pastels.
Cartoon – A simplified drawing that is often from imagination or memory, and that exaggerates features to look humorous.
CLASSROOM
PREP
Print all of your PDFs from the lesson plan and cut any references apart as needed.
What your room needs
Here are your printable lists and room prep instructions.
Opens in new window
CLASSROOM
MATERIALS
- 8.5″ x 11″ copy paper
- 8.5″ x 11″ card stock
- 11″ x 17″ copy paper
- Rulers
- Scissors
- Box cutter (teacher only)
- Large Drawing boards with clips
- Water containers
- Spray bottles
- Water droppers
- Paper towels
- Smocks
STUDENT’S
MATERIALS
- 14″ x 17″ Sketch Paper
- 11″ x 15″ watercolor paper
- 2B Pencil
- 4B pencil
- Ebony pencil
- Black Sharpie
- Markers
- India ink
- Ink dip pen with metal nib (not too sharp a point)
- Soft compressed charcoal sticks (not pencils)
- Canvas pencil (dark gray colored pencil)
- White erasers
- Kneaded erasers
- Acrylic paints
- Oil pastels
- Blender sticks (stumps)
- Sandpaper boards (to clean blenders)
- Paper palette pad, or disposable trays/plates
- 11″ x 14″ Canvas (loose or from real canvas pad)
- Canvas boards (optional)
- Tape – blue painter’s tape
- Brushes – All sizes
PREVIEW
Week 15: Zig Zag Art
Students will create an interactive color oil pastel work that changes from day to night when you change your viewing angle. They’ll use their memory to draw their own home and yard, so it’s a personal piece. This also takes away any worries about content, so students can focus on the colors and different day and night versions of the scene. We’ll use this fun project to learn about viewpoints, lighting effects, 3D artwork, interactive artwork
Week 16: Cartoon Faces
Your class will enjoy learning how cartoon faces are put together with parts, like combining words and phrases to make sentences and stories. A metal food can is used and covered to make a pencil cup. Face parts cut from craft foam are cut and glued to make the cup look like a cartoon face. Expressions in cartoon faces are also explored.