
Style
Each lesson Plan focuses primarily on one of the 4 Cornerstones of Art:
Drawing | Painting | Color | Style
OVERVIEW
Students will have a day of artist's choice, where they can do whatever they want. Anyone who is not finished with the little patches watercolor should do that before they move into their artist's choice. Total freedom can be hard to handle, so there are plans that help students stay on track and not become overwhelmed with options.Grades 3 – 5
Week of November 17 – 21
1 Hour & 45 Minutes
Lesson At A Glance
A brief overview of each step. Buttons jump to each section for detailed information.
5 Min – Watercolor set up
10 Min – Make a plan using handouts for help
10 Min – Draw practice thumbnails in sketchpad
40 Min – Choose medium, set up & go to work!
2 Min – Everyone helps
SCROLL & TEACH
LESSONPLAN
Each section is a different color. Read over once and then you can SCROLL & TEACH using any device you like. It’s designed to work best with your phone.
LEARNING TARGETS

Students know how to warm up when starting to create works of art
M A T E R I A L S
- 14″ x 17″ Sketch Paper
- 2B Pencils
- White Eraser
1.1 draw
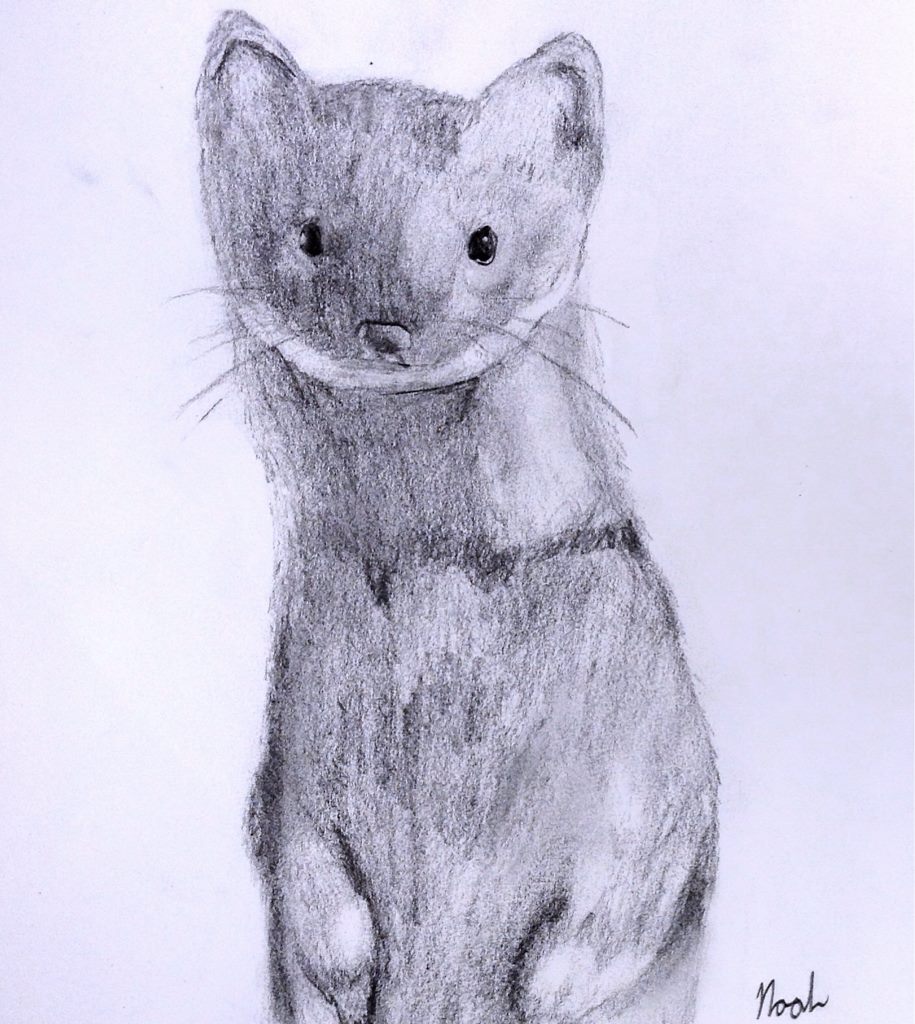
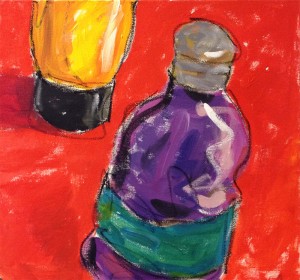
Students will draw art supplies.
Have students take a moment to arrange a few of their art materials in front of them. Ink bottles, paint tubes, and oil pastels look pretty nice as a quick still life. Then everyone should draw their art materials using a 2B pencil and color expressively with oil pastels. Use lots of colors and blend. Every area should have at least 3 blended colors. Save the black oil pastel for the very last thing.
1.2 choose
“With total freedom to choose it can become overwhelming for any artist to decide what to do. Imagine that you had a tv with a magic remote. Now imagine that you could watch 200 million different channels and all of them were excellent. Every time you changed the channel you saw something new and amazing!
You would never stop. If you stop changing channels you’re missing something great!
That’s kind of what it’s like if you have 200 million different choices to paint. It makes it impossible to decide on one thing. So you have to learn to limit your choices and you grow as an artist. All artists learn how to do this, and if you were here during the “inaccurate painting day”, you remember we had to figure this out this then too. Here are 3 ways to keep your choices from making you crazy.
- Limit the direction you take: Imagination or Observation; Realism or Surrealism.
- Limit the subject matter: Still life, landscape, people, animals, or a combination
- Limit the time you have for deciding. Set a timer or ask me to set one for you.
CREATIONS - tap here to open
Our Creations lessons are for students who have completed the two years of Foundations and are ready to begin using all that they have learned to create new work. These more challenging versions of the same concepts and techniques are easily taught along-side students in the Foundations course. This allows for excellent review, and is encouraging for students to see progress from each viewpoint.
Use the Student Instructions printout below to distribute to your Creations students. Tap the image to open the PDF in a new window.
Artists’ Choice
Overview: Students have freedom to choose a project of their own, and/or to finish their current work in progress.
Having freedom does not mean they get to play or skip the normal steps needed to create artwork. Use the PDFs in the lesson if they do not have these in a notebook already.
Be on the lookout though. One of the things you’ll often see advanced students do, is to start painting on a canvas with no plan and no guidelines. Or even to start guidelines but drawing right on canvas or watercolor paper before any kind of warm up or practice drawing. Don’t berate anyone for this. Instead, understand that they are just jumping ahead to the fun stuff and are under the mistaken impression that being advanced means, “I no longer need all that preparation stuff”.
Have them get out their 7 Steps to Making Art or print new ones by using the link below. Make sure every student follows these steps and that you explain to them how the most advanced artists always go through these steps. Being advanced means you do them automatically, not skip them. The foundations are things you always build your work on.
Tap images to open Creations Student Instructions and Reference Materials in new windows


LEARNING TARGETS
Students know how to set up for watercolors.
M A T E R I A L S
- Little Patches Watercolor
- Brushes – All sizes
- Acrylic Paint
- Palette Paper
- Water containers
- Spray bottles
- Water droppers
- Paper towels
- Smocks
Brushes should be nylon for springiness and durability. Round brushes are the most versatile.
Paint pigment list:
- Napthol or Pyrrol Red
- Hansa or Light Yellow
- Pthalo Green (blue shade)
- Cyan or Cerulean Blue
- Ultramarine Blue
- Dioxazine Purple
- Magenta
- Burnt Umber
- Raw Sienna
2.1 organize
Help students get ready and stay organized.
Try to stay alert and catch students using white paint or only getting one tub of water. Two is needed. Remind students to use the watercolor points handout from last week.
If students are already finished with their Little Patches painting, they can move on to Artists’ Choice, beginning with STEP 4 below.
LEARNING TARGETS
Students know how to add final details to a watercolor painting.
M A T E R I A L S
- Little Patches Watercolor
- Brushes – All sizes
- Acrylic Paint
- Palette Paper
- Water containers
- Spray bottles
- Water droppers
- Paper towels
- Smocks
3.1 paint
Make your rounds helping and encouraging students to finish their Little Patches Watercolor.
All artists should finish the little patches. Some will not quite finish even after the whole class period. That’s ok because there will be other artist’s choice times later. Students can keep their unfinished painting secure in their watercolor pad after it dries, until there is another time to work on them.
LEARNING TARGETS
Students know how to organize their thoughts in preparation for creating artwork
M A T E R I A L S
- 14″ x 17″ Sketch Paper
- 2B Pencil
- White erasers
4.1 print
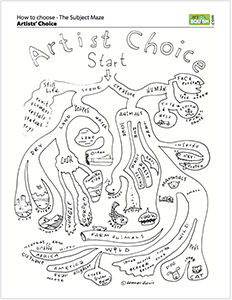
Guide
Choosing Subjects
A fun maze that helps students quickly narrow down their ideas..
1 Page – Opens in new window
4.2 Choose
Students use a PDF printout to focus on their first choice of the day: subject matter.
Having total freedom with no contraints is overwhelming. Give your students the Subject Maze and they can quickly find make decisions without getting lost. If a student doesn’t want to choose, you can choose for them (this often results in a quick choice on their own).
Set timers for each choice. This should only take one minute to decide, so they can move into the next choice.
4.3 print
Guide
Choosing Reference
An information handout with 4 ways to find reference.
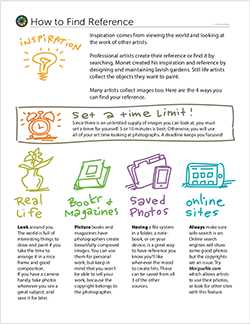
1 Page – Opens in new window
4.4 choose
Students use a PDF printout to focus on their search for reference materials.
This part usually takes the most time. Try to keep this to 5 minutes and no more than 10.
If a student is have a very hard time with this, have them copy another artists work from a book or one of our Pinterest pages.
4.5 print
Guide
Choosing Media
Another fun maze that helps students get started quickly.
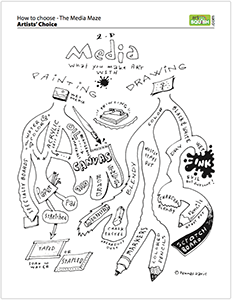
1 Page – Opens in new window
4.6 choose
Students use another maze to decide on their media.
No more than a couple of minutes is needed.
LEARNING TARGETS
Students know how to plan and practice their drawings.
M A T E R I A L S
- 14″ x 17″ Sketch Paper
- 4B Pencil
- White Eraser
5.1 Practice
Students need to draw in their sketch book first.
Everyone will need to draw their practices in their sketchpad and not on their final paper. Remind the students that they will make several learners, so do them on regular paper and get them out of the way.
Walk around and help students when needed. Ask for permission to make suggestions. Find out what their plans and reasonings are. You will often be surprised.
“If you’ve worked on an artwork before, you know that you’ll erase things over and over, and will redraw your subject trying to get it to look more accurate. You will practice. You can do that practice drawing right on your original artwork and erase it several times, or you can do it on paper you can just throw away. It’s much better to do this practicing on other paper and keep your final work clean.
Remember to use the 3 steps to accuracy if you are doing anything from reference.
3 Steps to Accuracy:
- Frame – proportions are essential
- Big Shapes – just a few: 3 or 4 very large shapes. This only takes a moment to figure out.
- Details last – wait for it…. wait… ok, now. Details are most of doing artwork, and most of the fun. They are, however, much less fun when you don’t have the big shapes accurately drawn.”
LEARNING TARGETS
Students know how to independently create artwork.
M A T E R I A L S
- 14″ x 17″ Sketch Paper
- 11″ x 15″ watercolor paper
- 2B Pencil
- 4B pencil
- Markers
- India ink
- Ink dip pen with metal nib (not too sharp a point)
- Soft compressed charcoal sticks (not pencils)
- Canvas pencil (dark gray colored pencil)
- White erasers
- Acrylic paints
- Oil pastels
- Blender sticks (stumps)
- Paper palette pad, or disposable trays/plates
- 11″ x 14″ Canvas (loose or from real canvas pad
- Brushes – All sizes
- Water container
- Paper towels
- Smocks
6.1 work
Encourage students while they work on their art.
The timer is for 30 minutes, but use the rest of class to create art (with an exception of the last few minutes for clean up).
Choose a medium, get set up, and go to work!
STEP 7. Clean Up
2 MinutesLEARNING TARGETS
Students know the importance of cleaning up.
M A T E R I A L S
- Paper Towels
- Cleaning wipes
- Sink
- Waste baskets
- Well-lit spot for photos
- Camera or phone-camera
7.1 clean
Students clean up their work area.
- Wash hands
- Super-wash brushes if used
- Put art supplies away
- Wipe tables & toss trash
- Remove any smocks (last)
- Check for items on floors and tables
7.2 capture
OBJECTIVES
- Practice and improvement making decisions about self-expression
- Understanding how to budget time and create your own limitations
- Accomplishment in seeing a work-flow that results in finished artwork
- Fulfillment by freedom to self-express
TROUBLESPOTS
Decision Angst – “I don’t know what I want to do!” This is pretty common, even with adults. Use our handy subject guide, which makes choosing a subject into a game. It gets artists moving along a lot faster because it reduces the overwhelmingness of it all.
The Black Hole of Reference – Often artists get absorbed in the beauty of the reference photos and stay there looking at imagery too long. If you have magazines, this is even more tempting because there are stories to read as well. Alway limit your time for the search, and use timers if you can. Remind students that the subject is not as important as what you do with it. Almost anything can be used for a great work of art. If you don’t have a message that you’re trying to convey, then move on into choosing using this proven method from Dennas:
- Choose the first 3 things that you like and then put away all the other references.
- Pick the one out these 3 things, that you can live without. Put it away.
- Let someone else take one of the remaining 2 away from you.
- If you don’t like their choice, then you use the one they took. If you’re ok with it, then you use the one they left for you.
- Get the student to move forward before they decide to try again.
We also have a handout in the Showcase and in the lesson, How to choose a reference PDF
Changing course – If you make several course changes you begin to go in circles (turn to the right, turn to the right, etc). Limit the number of times you can change your project to ONE. This simply makes it more important to choose something permanent. It doesn’t help to pre-empt this problem, because if you say you can change your mind once, in some rooms, everyone will suddenly want a change-your-mind contest. So don’t explain this until you have someone asking to change their mind and then quietly say that they can only do so this one time. Unless you’re having a meltdown incident, changing course & starting over should only be done in the first 10-15 minutes of preparations.
ART WORDS
CLASSROOM
PREP
What your room needs
Here are your printable lists and room prep instructions.
Opens in new window
CLASSROOM
MATERIALS
- Paper towels
- Water Droppers
- Cleaning Wipes
- Sink
- Smocks
- Water Containers
- Waste Baskets
- Well-lit spot for photos
- Camera or camera-phone
STUDENT’S
MATERIALS
- 14” x 17” Sketch Paper
- 2B Pencil
- 4B Pencil
- White eraser
- Charcoal
- Kneaded Eraser
- Ebony Pencil
- Little Patches Watercolor
- Acrylic Paint
- Brushes – All sizes
- Palette Papers
- Ink dip pen with metal nib (not too sharp a point)
- Soft compressed charcoal
- Oil Pastels
- Palette Pad
PREVIEW
Week 14: Thanksgiving Break
Week 15: Color Journals: Red & Green
Our first 2 Color Journals of the year are Reds & Greens. These are fun and easy for students, because they just follow the instructions to mix 25 versions of one color-type. All of the colors are useful and the most common variations artists need. The journals are designed to help students understand the process of mixing and the effect that colors have on each other. The pages are printed on cover stock and should be saved in a binder.