
OVERVIEW
Students create a simple and delightful printmaking image, and use papers and ink to create a series of prints. can create many images that are all a bit different since they are hand-created. They make great gifts!– – –
Grades 3 – 5
Week of December 15 – 19
1 Hour & 45 Minutes
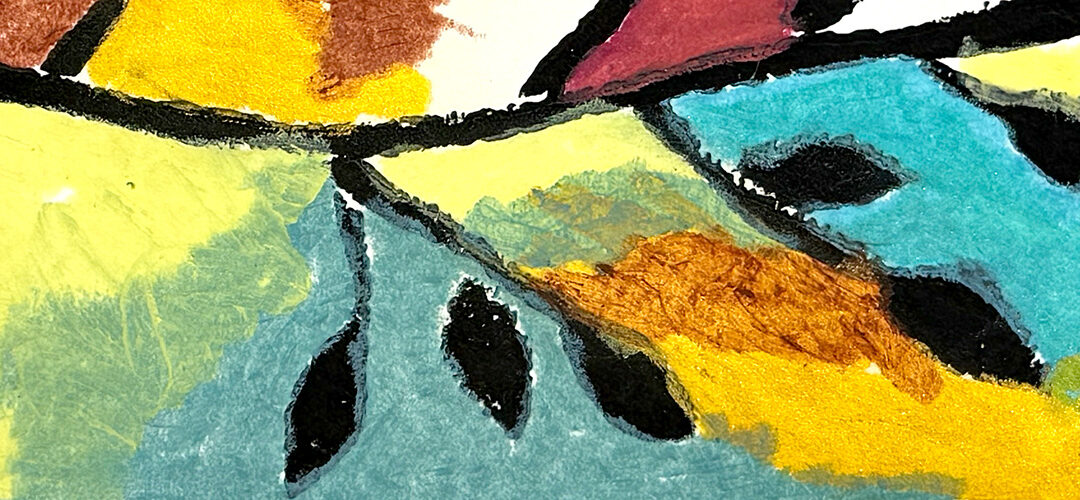
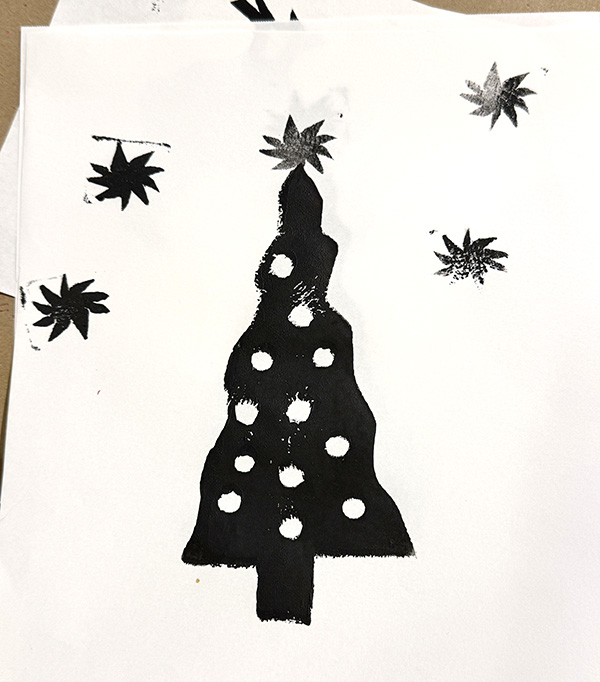
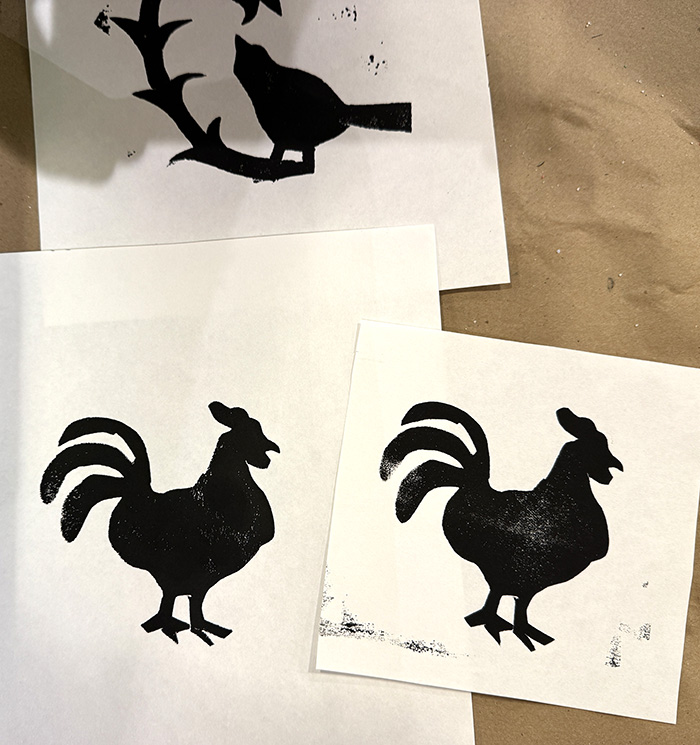
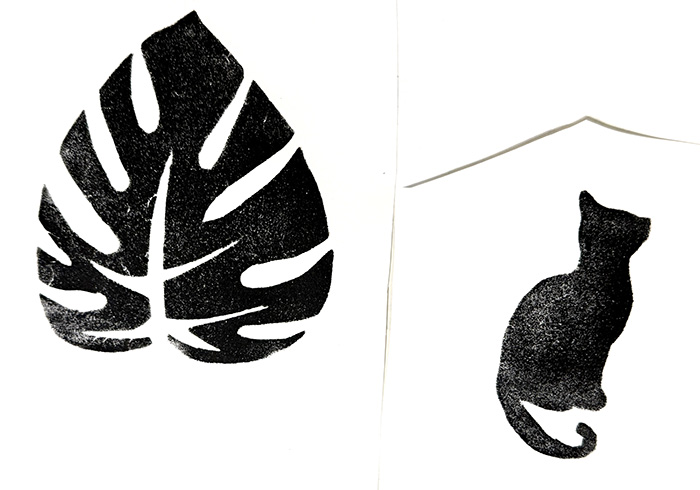
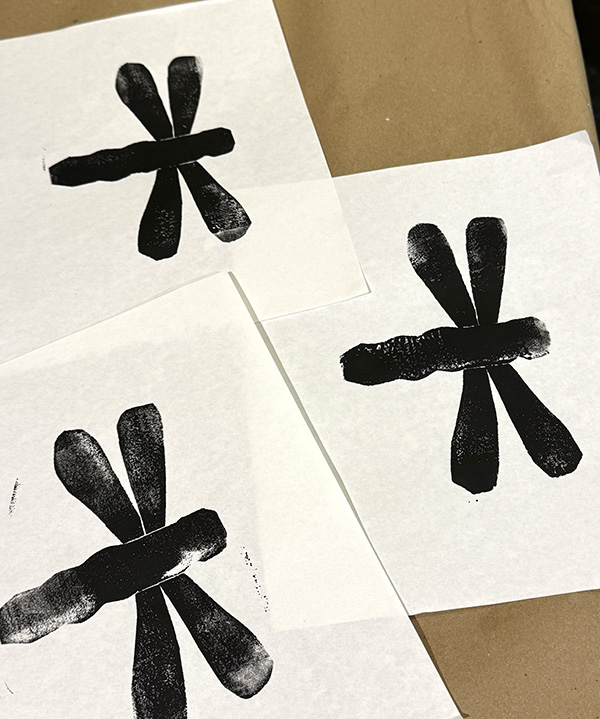
Student Work


Lesson At A Glance
Here’s a brief overview of the complete lesson. It’s also on your prep page in the Ready, Set, Go! section (below the lesson).
Colored buttons jump to each section in the full lesson plan below.
10 Minutes – Students draw design motifs
10 Min – Cut and name printing papers
10 Min – Make 4 to 6 Thumbnails
15 Min – Trace block and draw final (w/erasing)
5 Min – Cut, tape, and transfer drawing to foam
20 Min – Cut foam and glue to base block
25 Min – Inking and printing on papers (name!)
10 Min – Clean and organize
Use this button to jump down to the preparation section.
SCROLL & TEACH
LESSONPLAN
Each section is a different color. Read over once and then you can SCROLL & TEACH using any device you like. It’s designed to work well with your phone.
LEARNING TARGETS

Students know how to begin creative time with simple sketching
M A T E R I A L S
- 14″ x 17″ Sketch Paper
- 2B Pencil
- 4B pencil
- White erasers
- Kneaded erasers
1.1 Print
Reference
Motif ideas
There are 2 sets to print.
Cut images apart and print enough for each student to choose from several.
BIRDS & PATTERNS
3 Pages – Opens in new window
FLOWERS
2 Pages – Opens in new window
1.2 Sketch
Students set up for sketching. Have everyone choose several references to create motif sketches from. This is practice sketching, and the purpose is to learn shapes and experiment.
While they work, explain that artists often use nature as an inspiration for their own stylized versions of images. You can copy directly from some designs, or use the photo reference to learn shapes of birds and flowers.
Encourage simplification of the photos. There is NO WRONG WAY to experiment. If you don’t like something, that’s good because it gets it out of your way.
“We’re going to be using the next two weeks to explore stylized designs, printmaking, and using paint to create abstract like backgrounds for some of our prints.
The easiest and most common imagery is of birds, plants, and flowers. For learning a new technique, it will be helpful to use our simple references.”
Advanced Student Lesson
CREATIONS - tap here to open
Our Creations lessons are for students who have completed the two years of Foundations and are ready to begin using all that they have learned to create new work. These more challenging versions of the same concepts and techniques are easily taught along-side students in the Foundations course. This allows for excellent review, and is encouraging for students to see progress from each viewpoint.
Use the Student Instructions printout below to distribute to your Creations students. Tap the image to open the PDF in a new window.
Personal Work
Artists choice or follow the regular printmaking lesson and make a new set of prints.
Use this button to jump down to the preparation section.
LEARNING TARGETS
M A T E R I A L S
- 14″ x 17″ Sketch Paper
- Papers with painted color background, from previous lesson if you have these
- Rulers
- Scissors or Cutting Board
- Box cutter (teacher only)
2.1 Cut
Students cut or tear large sketch papers. Fold the 14 x 17 paper in half twice, to create 4 sheets of 7 x 8.5 sized papers. Use at least two pages to create 8 or more printing sheets. Write your name in corner very small and save these for later.
Use this button to jump down to the preparation section.
LEARNING TARGETS
Students know stuff.
M A T E R I A L S
- 14″ x 17″ Sketch Paper
- 2B Pencil
- 4B pencil
- White erasers
- Kneaded erasers
3.1 Sketch
Students make thumbnail sketches.
You need to plan your print design, so start with thumbnail sketches. (Small and only big shapes inside a frame). It’s important to draw these so small that we cannot get into any details. The mind can design so fast that we have to make these simple layouts in 15-30 seconds, just using basic shapes to imagine a design. It isn’t art. It’s only a visual plan. There are usually only 4 or 5 big shapes. Don’t do details. Don’t add shading except as light and dark areas.
Make the design a silhouette – shapes and thick lines that can be cut out. Create 5 or 6 thumbnails of your ideas.
It’s a good rule of thumb… make thumbnails no longer than 1.5″ on any side.
It’s also good to demo how to do a thumbnail.
Use this button to jump down to the preparation section.
LEARNING TARGETS
Students know how to draw a simple line-drawing of a silhouette.
M A T E R I A L S
- 14″ x 17″ Sketch Paper
- 2B Pencil
- 4B pencil
- White erasers
- Kneaded erasers
- Print base block
P R E P
Before class, cut 1″ insulation foam sheets into 4″ x 6″ blocks – one for each student
4.1 Choose
Students choose one of their thumbnail designs. Make sure to choose something you know you can cut out of a sheet of foam. Make note of your orientation of the rectangle – horizontal or vertical.
4.2 TRACE
Students place their base block on paper and trace the rectangle. Place it so you can make 2 or 4 of them on the page so you can start over if needed without wasting a whole sheet for one attempt.
4.3 Draw
Students work on their drawing. Only draw lines to indicate the edges of each solid shape.
Students should erase and correct often, or start over if needed.
Go around the room and help students simplify and make good design decisions.
Use this button to jump down to the preparation section.
LEARNING TARGETS
Students know how to set up their work area for painting with acrylics.
M A T E R I A L S
- 2B Pencil
- Tape – blue painter’s tape
- Scissors
- final drawing from Step 4
- 7″ x 10″ Craft foam (any color)
5.1 Cut
Students cut out their final drawing. Tear out the paper with the drawing from the pad, or rough cut around the drawing. Then carefully cut along the rectangle lines that were traced around the print block, so you have the 4″ x 6″ sketch.
5.1 Tape
Students tape their final drawing face down onto the craft foam.
5.1 Transfer
Students transfer the drawing. Pressing firm but not enough to tear the paper, draw all over the back of the original drawing. This will transfer the graphite of the drawing onto the foam – in reverse. You can lift a section of the paper before removing completely, to make sure the drawing is fully transferred.
Use this button to jump down to the preparation section.
STEP 6. Block Making
Students cut out all of their shapes and recreate the design on the print block base by glueing them down. 20 MinutesLEARNING TARGETS
Students know how to create a reverse-image design for printmaking.
M A T E R I A L S
- Scissors
- Glue sticks (handheld)
- 4″ x 6″ base block (insulation foam)
6.1 Cut
Students carefully cut out their design shapes. If a piece is accidentally cut in two, it is fine. Just glue them down where they go and it will look correct in the final print.
NOTE: Rough cut each smaller shape, and then cut it carefully along the lines. It is much easier to handle a small piece, rather than a large one, to get details.
6.1 Paste
Students paste each piece of their design in it’s place – IN REVERSE of the original. This means placing the glue on the side of the craft foam without the pencil lines from the transfer. The pencil line side, which is a reverse of the original drawing, will be FACE UP on the base block. The entire design should be in reverse of the original drawing. Use the drawing as reference to get the placements.
USE A LOT OF GLUE! Cover the entire back of each piece, and have a scrap paper underneath so glue won’t get all over the tables.

Thumbnails and transferred design.

Rough cut shapes away from bulk of foam sheet so they’re easy to manage

Keep scraps and image shapes separate

Glue stick and final print block
Use this button to jump down to the preparation section.
LEARNING TARGETS
Students know how to set up their work area for painting with acrylics.
M A T E R I A L S
- Print block with design
- Printing ink (water soluble)
- Print rollers – rubber
- glass or mirror
- Oversized printmaking papers with NAME on reverse or in corner.
7.1 Set up
Students set up their work area. Everything should be put away except for pencils and all the papers they created for printmaking. More papers can be made if there is time.
7.2 Plan
Students make decisions.
What color ink will be used for this print?
Which paper will you use?
Have everything ready, and clean hands.
7.3 Roller
Show students how to add ink to the rollers. Roll a lot, to make sure the ink is smooth and even all over the roller. Do not get too much ink! If it’s too thick, just roller more to spread it out.
7.4 Inking
Show Students how to ink the plate. Roller all over in several directions, keeping the roller level. If ink gets on the base, either wipe it off before printing, or cut those parts away from the base, or make deeper areas so that the ink doesn’t get on it.
7.5 Press
Once the plate is fully inked and ready, carefully set a sheet on it without letting it slide around at all. Press firmly all over the paper where the image shapes are using your hand and fingers. Peel up a corner to see how it’s going and press more if needed.
Too much pressure can wrinkle the paper and/or transfer too much ink.
Remember, the ink process is not supposed to look perfect. A faded area or two can be really cool for your prints. Each one will be slightly different.
7.6 Place
Students arrange printed paper at their own area. Then start the next print, taking turns at different inking stations.
Use this button to jump down to the preparation section.
LEARNING TARGETS
Students know how to stop when needed and clean up their workspace.
8.1 Work
Students clean up their work area. Make sure everyone helps.
PRINTS should be dry pretty fast. If you need to, use a hair dryer. KEEP PRINTS AWAY FROM WATER!
Water based ink is a little messy but will clean up with water even after it dries.
Most or all of the prints should be able to go home today. They can be stacked up as soon as they’re dry to the touch.
Use this button to jump down to the preparation section.
OBJECTIVES
- Practice and improvement using shading
- Understanding how shadows are formed and used in artwork
- Accomplishment in drawing an animal with shading
- Fulfillment by choosing the animal they want to draw & paint
TROUBLESPOTS
There are many objectives that can be stated here for the purpose of stating objectives that need to be puposely objectified.
ART WORDS
Paper – That stuff you draw on.
Pencil – That thing you draw with
Paint – Messy stuff
CLASSROOM
PREP
Have a bunch of amazing supplies ready, and cut a few things apart before-hand in a way that make you look amazing.
Print all of your PDFs from the lesson plan and cut any references apart as needed.
What your room needs
Here are your printable lists and room prep instructions.
Opens in new window
CLASSROOM
MATERIALS
- 8.5″ x 11″ copy paper
- 8.5″ x 11″ card stock
- 11″ x 17″ copy paper
- Rulers
- Scissors
- Box cutter (teacher only)
- Large Drawing boards with clips
- Water containers
- Spray bottles
- Water droppers
- Paper towels
- Smocks
STUDENT’S
MATERIALS
- 14″ x 17″ Sketch Paper
- 11″ x 15″ watercolor paper
- 2B Pencil
- 4B pencil
- Ebony pencil
- Black Sharpie
- Markers
- India ink
- Ink dip pen with metal nib (not too sharp a point)
- Soft compressed charcoal sticks (not pencils)
- Canvas pencil (dark gray colored pencil)
- White erasers
- Kneaded erasers
- Acrylic paints
- Oil pastels
- Blender sticks (stumps)
- Sandpaper boards (to clean blenders)
- Paper palette pad, or disposable trays/plates
- 11″ x 14″ Canvas (loose or from real canvas pad)
- Canvas boards (optional)
- Tape – blue painter’s tape
- Brushes – All sizes
PREVIEW
Week #
Month 1 – 5
Students will learn cool stuff.
Week #
Month 1 – 5
Students will learn cool stuff.
Use this button to view our parent’s blog. Share the link: http://parentart.org, with your student’s parents so your they can read about the lesson each week.