
Style
Each lesson Plan focuses primarily on one of the 4 Cornerstones of Art:
Drawing | Painting | Color | Style
OVERVIEW
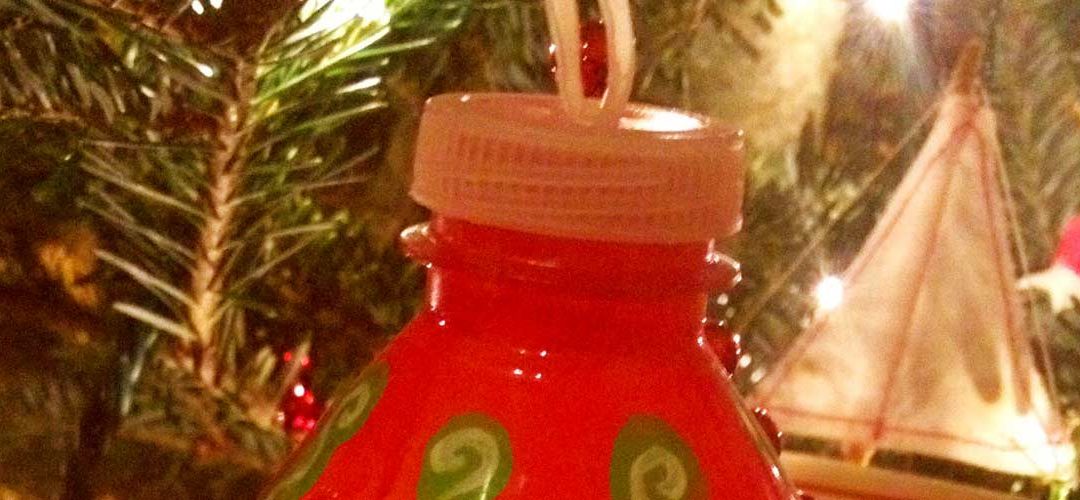
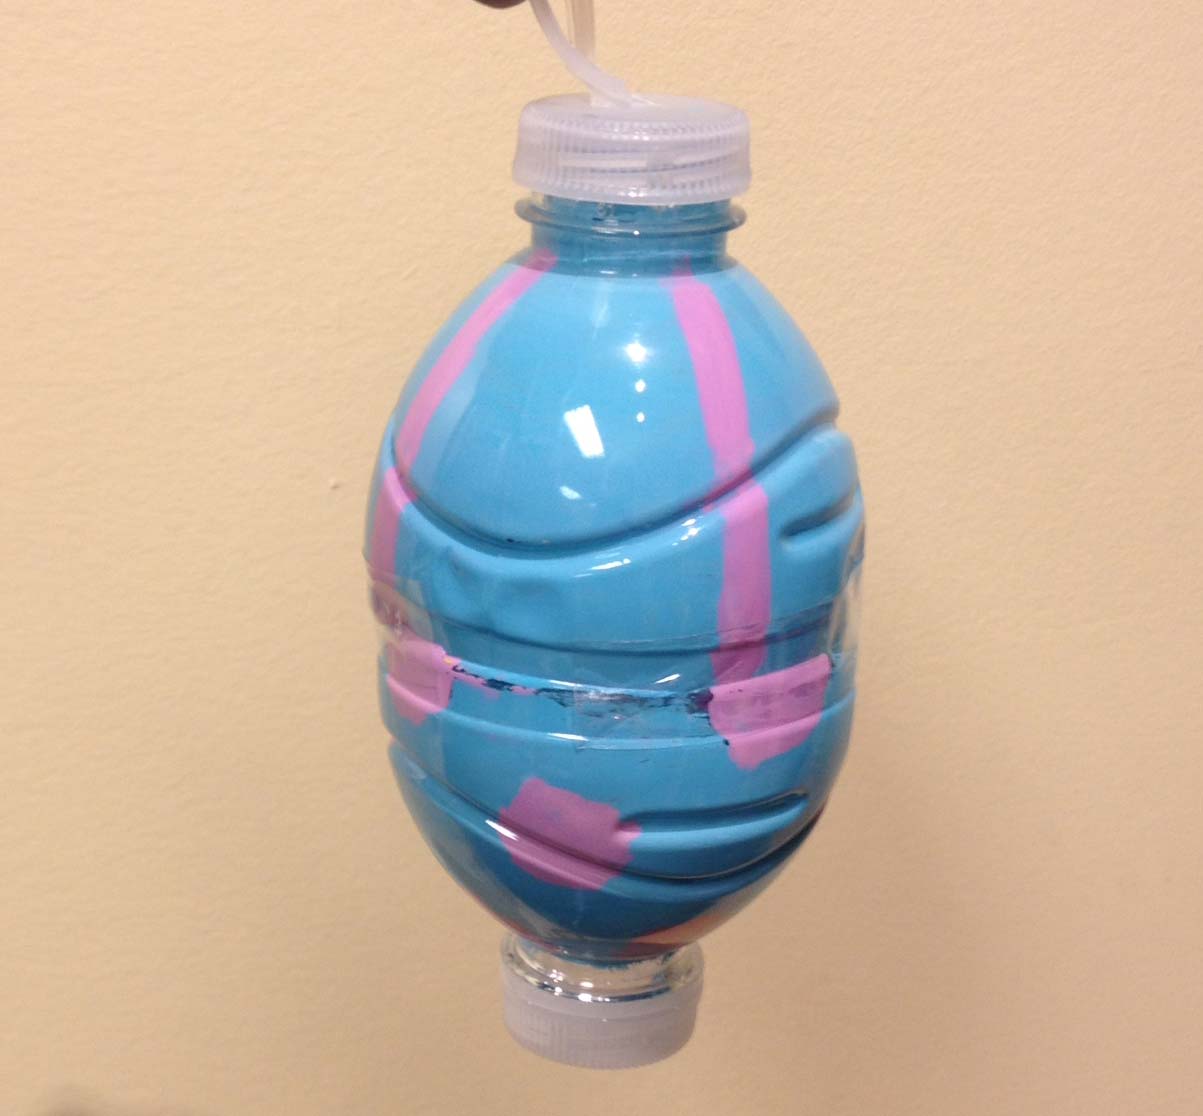
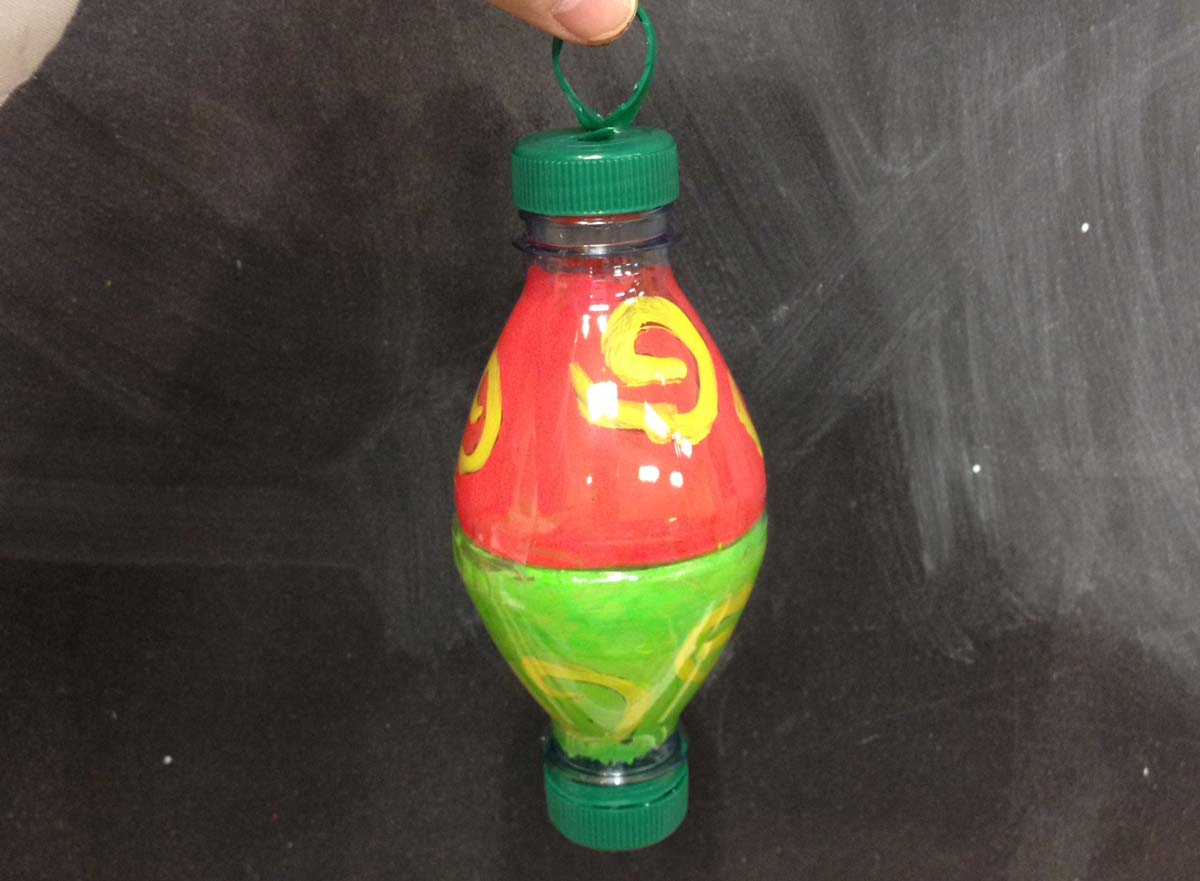
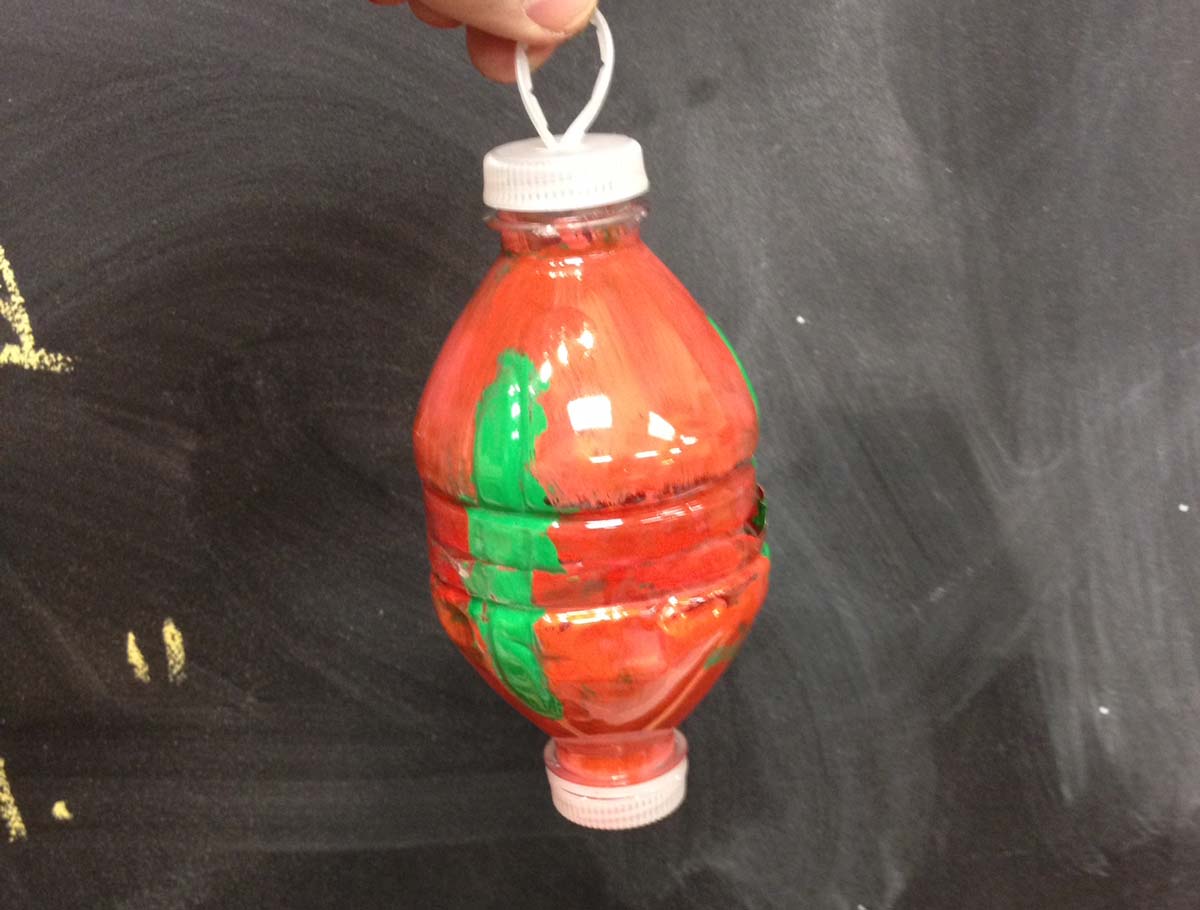
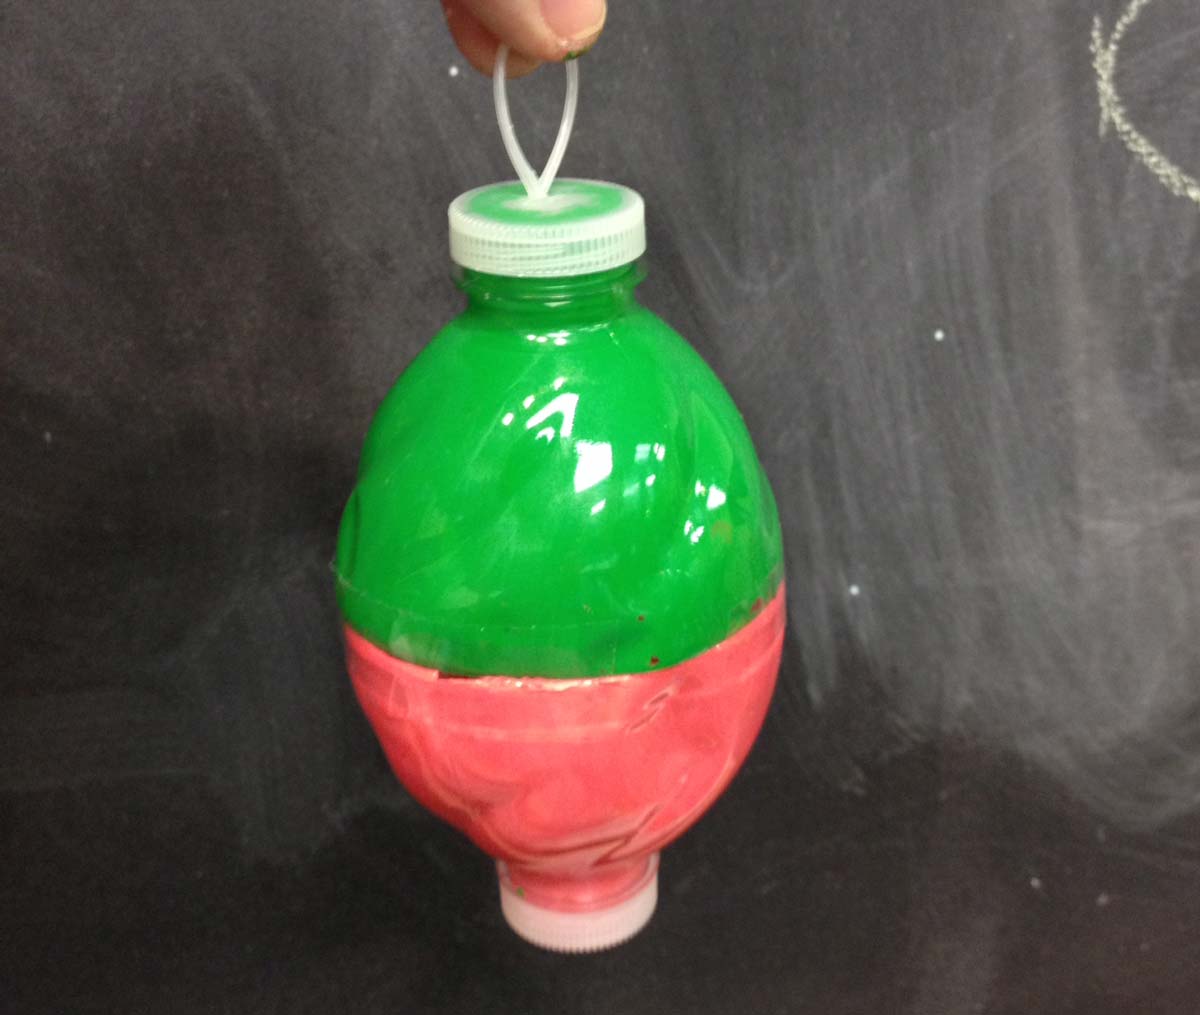
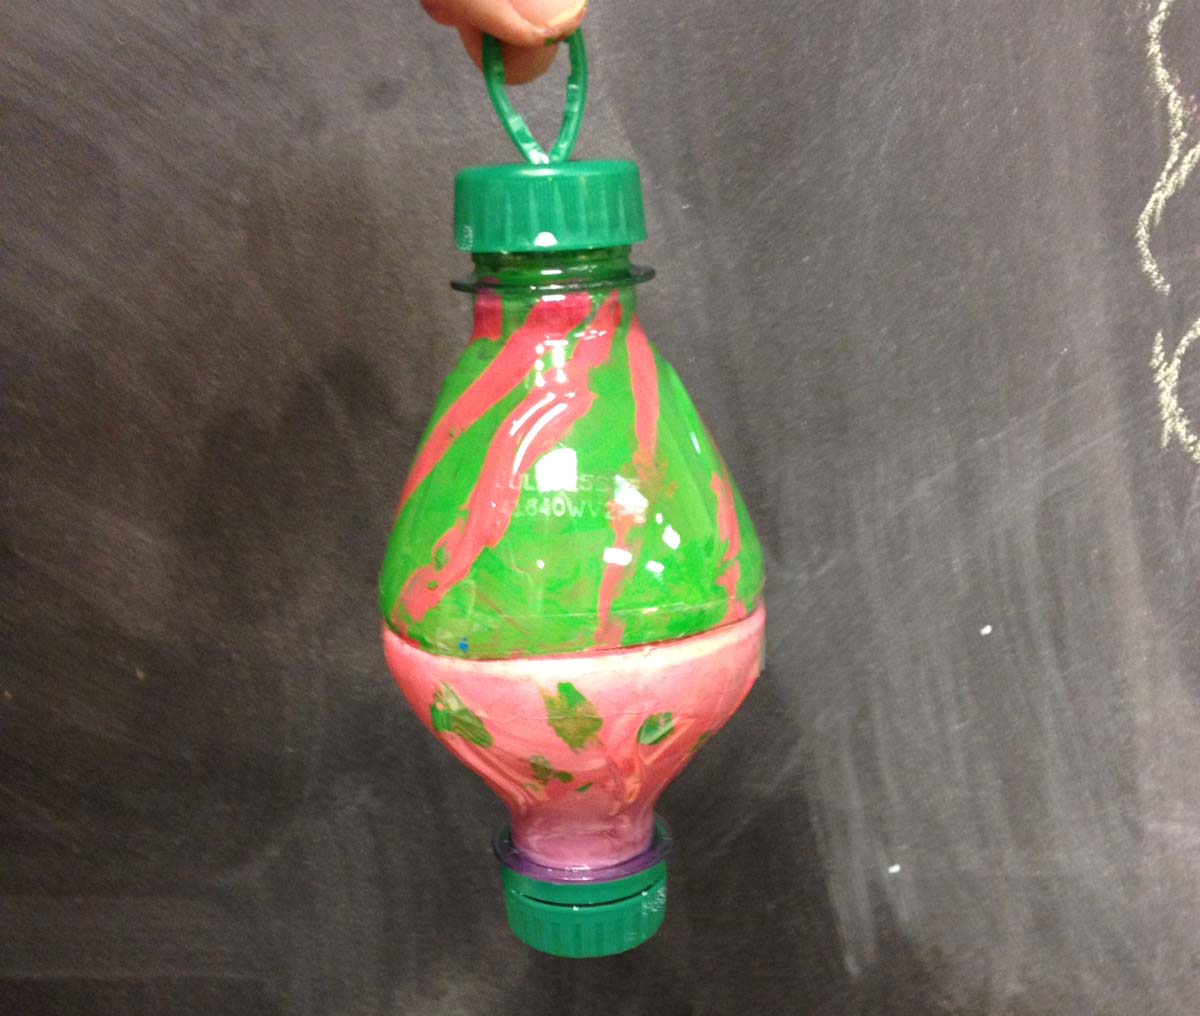
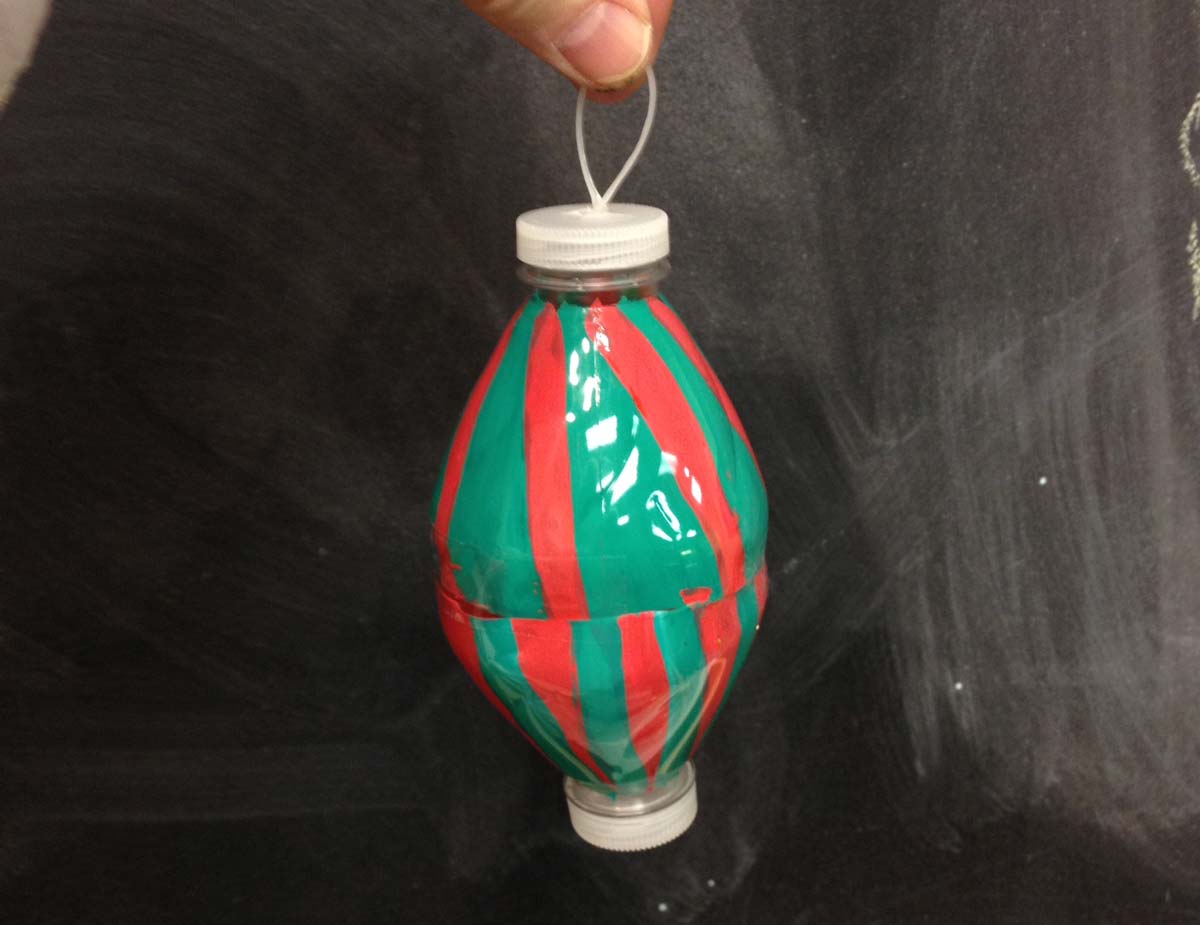
Overview: Students enjoy a fun and artistic project along with a holiday party. Used plastic water bottles are re-used to create a unique, environmentally friendly, hand-painted Christmas tree ornament. The tops of two bottles are cut off and the artists paint the inside using acrylic paints. The exterior looks like beautifuly colored glass, and when the two pieces are taped together, they make a nice classic ornament shape. Even the cap ring is used for a hanger.– – –
Grades 6 – 12
Week of December 9 – December 13
1 Hour & 45 Minutes
Student Work


Lesson At A Glance
Here’s a brief overview of the complete lesson. It’s also on your prep page in the Ready, Set, Go! section (below the lesson).
Colored buttons jump to each section in the full lesson plan below.
15 Minutes – Artists’ Choice and/or Color Journals
10 Min –Change focus to party
7 min – Show and explain project
10 min – Draw designs – pencil on paper
10 min – Cut tops, caps & set up paints
30 min – Work and fun!
10 min – Connect with tape
10 min – Other ideas with plastic leftovers
2 Min – Everyone helps
Use this button to jump down to the preparation section.
SCROLL & TEACH
LESSONPLAN
Each section is a different color. Read over once and then you can SCROLL & TEACH using any device you like. It’s designed to work well with your phone.
LEARNING TARGETS

Students know how to create art independently
M A T E R I A L S
- 14″ x 17″ sketch pad
- 4B pencil
- White and kneaded erasers
- Oil pastels or charcoal
- Acrylic paints and setup if doing journal
- Reference or still life objects
- Paper towels
- Smocks if painting
All materials are suggestions and may be modified as you see fit. We have tried many items, and these seem to allow the most versatility for the cost.
Brushes should be nylon for springiness and durability. Round brushes are the most versatile.
Paint pigment list:
- Napthol or Pyrrol Red
- Hansa or Light Yellow
- Pthalo Green (blue shade)
- Cyan or Cerulean Blue
- Ultramarine Blue
- Dioxazine Purple
- Magenta
- Burnt Umber
- Raw Sienna
- Titanium White (professional grade only)
1.1 create
Advanced Student Lesson
CREATIONS - tap here to open
Our Creations lessons are for students who have completed the two years of Foundations and are ready to begin using all that they have learned to create new work. These more challenging versions of the same concepts and techniques are easily taught along-side students in the Foundations course. This allows for excellent review, and is encouraging for students to see progress from each viewpoint.
Use the Student Instructions printout below to distribute to your Creations students. Tap the image to open the PDF in a new window.
Artists’ Choice
Overview: Students can choose any project to work on, including the ornament project.
No Prints
Use this button to jump down to the preparation section.
LEARNING TARGETS
Students know how to have fun
M A T E R I A L S
- Do not use art materials while eating – especially paints. Put away all materials.
- Party Supplies
2.1 Party
Use this button to jump down to the preparation section.
LEARNING TARGETS
Students know how to listen to instructions
M A T E R I A L S
- Pre-made ornament (make one if possible)
3.1 view
3.2 teach
- OPAQUE – White in every color makes it opaque, which looks like blown glass. Without white, the colors are translucent (see-through), and it will look like plastic. Real glasswork can be colored and translucent, but plastic just doesn’t look like glass this way.
- BACKWARDS – You have to paint what’s on top FIRST! The paint has to be layered in the opposite order you would normally paint. For instance, snow must be painted first, instead of last, or it will be on the inside of the sky color and not visible at all. Walk them through this.
- SMALL – Use a small brush, and KEEP IT SUPER SIMPLE! This is a very tiny piece of art.
Use this button to jump down to the preparation section.
LEARNING TARGETS
Students know how to design a 3D project
M A T E R I A L S
- 14″ x 17″ sketch pad or other paper
- 2B pencil
- Eraser
4.1 sketch
Have students draw ornament shapes and make design ideas on them. At least 2 ideas should be drawn. It can be a simple picture or pattern, but a pattern is easiest and the best option for young students in grades 3 – 5.
Suggest Stripes, Dots, Stars, Snowflakes, Candy stripes, Simple colors: top one color/bottom another, etc.
These Ideas may not actually be used, but thinking before-hand makes a huge difference.
4.2 plan
“Think of it like this. If you wanted a target store logo, you paint the red bullseye first, then the white ring around it, and finally the large red ring last. So, if you want a candy stripe with thin white stripes on a red background, paint the thin white stripes first. When they’re dry, you then paint the whole thing the red background color. Which color is first in your design?”
Use this button to jump down to the preparation section.
LEARNING TARGETS
Students know how to set up for a project
M A T E R I A L S
- Two empty water bottles – at least one with a cap
- Scissors
- Acrylic paints
- Plastic tray or palette pad
- Small brush
- Water tub
- Paper towels
- smocks
5.1 demo
Demo the project
As students get ready, show a quick demo of how to cut a bottle:
- Remove cap and save it (not removing makes it hard to puncture the side)
- Cut across the label and pull it off. It’s ok if some sticks.
- Find your cut line: above where the label was, and around the first or second ridge
- Pinch the bottle and snip into it to create the beginning of the horizontal cut
- Cut the bottle all the way around.
- Place the two tops together and trim excess if needed.
Help young students. Each student gets two bottle tops. Save the bottoms for extra projects later!
Use this button to jump down to the preparation section.
LEARNING TARGETS
Students know how to paint a 3d project
M A T E R I A L S
- Acrylic paints
- Plastic tray or palette pad
- Small brush
- Water tub
- Paper towels
- smocks
6.1 paint
TIP
6.2 prep
While students work, go around and prepare their caps and make the hangers. Make sure they are gentle with the hangers or they’ll come loose:
- Use a box cutter to cut a small X in the middle of the cap
- Use cutter or scissors to snip the plastic safety ring off
- Bend the ring and insert the two ends into the X-hole
- Twist the ends so they’re secure under the cap and you have a loop above.
Use this button to jump down to the preparation section.
LEARNING TARGETS
Students know how to create a 3D project
M A T E R I A L S
- Clear packing tape
- Scissors
- Hot glue (optional)
- Hanging ribbons (optional)
7.1 cut
“I’m going to give you two pieces of tape to connect your two bottle tops. It will take both of them to go all the way around, but a long piece is much harder to handle. This tape is very sticky so be careful. It’s hard to remove and change where you place it.”
Use this button to jump down to the preparation section.
LEARNING TARGETS
Students know how to use their imagination to create 3d projects
M A T E R I A L S
- Same acrylic paint set up
- Remaining plastic bottle parts
- Scissors
- Clear packing tape
8.1 create
Students can enjoy the party, make another ornament, and also make other things out of the bottle leftovers for themselves and/or for gifts.
The plastic doesn’t cut fingers any easier than paper does, but snip corners off so there aren’t sharp pokey spots.
I D E A S :
- Wrist bands: cut a 1/2” to 3” wide circle and wear it as a bracelet or wrist band. Paint the inside just like the ornaments for all kinds of designs.
- It’s hard to reach the bottom of a bottle, but if you make the bottom all one color you can paint an entire bottom piece. Do this if you want to make a pencil cup. Put rice in the bottom for weight when you get home.
- The bottoms can be cut into flower petals, bent flat, and painted on the back side.
Use this button to jump down to the preparation section.
LEARNING TARGETS
Students know the importance of cleaning up.
M A T E R I A L S
- Paper Towels
- Cleaning wipes
- Sink
- Waste baskets
- Well-lit spot for photos
- Camera or phone-camera
9.1 CLEAN
Students set up their work area.
- Wash hands
- Super-wash brushes if used
- Put art supplies away
- Wipe tables & toss trash
- Remove any smocks (last)
- Check for items on floors and tables
9.2 PHOTO
Try to get photos of your student’s artwork. Find a good spot for quick lighting without highlights or shadows from your hands and device. Ideally in-between two strong lights on each side.
OBJECTIVES
- Practice and improvement in design and planning
- Understanding how to think in different ways (layering) and in 3D
- Accomplishment in creating a great-looking ornament
- Fulfillment in creating the design for it and using recycled materials
TROUBLESPOTS
Painting on the outside instead of the inside. The whole idea is to paint on the reverse side of the plastic, keeping it super glossy and glass-like on the outside. If someone begins to paint on the outside, it should be wiped and/or washed off. Be extra alert right at the beginning for anyone who doesn’t listen and gets the paint on the wrong side.
ART WORDS
CLASSROOM
PREP
Print all of your PDFs from the lesson plan and cut any references apart as needed.
What your room needs
Here are your printable lists and room prep instructions.
Opens in new window
CLASSROOM
MATERIALS
- Party supplies
- Pre-made ornament
- Two empty water bottles – at least one with a cap
- Water tub
- Paper towels
- Smocks
- Scissors
- Clear packing tape
- Hot glue (optional)
- Hanging ribbons (optional)
STUDENT’S
MATERIALS
- 14” x 17” Sketch Pad
- 2B Pencil
- Eraser
- Scissors
- Acrylic paints
- Palette pad
- Small brush
PREVIEW
Week 20: Balancing Act
Students will learn about design, illustration and lettering in a light-hearted magazine project. Older students use watercolors, and will not finish this week, but will continue with final line art outlines next week after the color has dried.
Week 21: The Secret Plate
Students will learn how to draw one of the most fundamental forms, a cylinder, much more accurately, by learning how to think about it differently. There is a fun way to teach and remember this important concept. Then they’ll apply the information to a still life; creating a line-drawing of bottles and striped fabric.
Use this button to view our parent’s blog. Share the link: http://parentart.org, with your student’s parents so your they can read about the lesson each week.