
OVERVIEW
Students will learn about snowflakes, first drawing some snowflake designs, and then painting a large snowflake in tempera paint. They’ll end their lesson with a choice of working on some holiday cartoons or doing a pastel of lights at night.Grades K – 2
Week of January 5 – 9
1 Hour & 30 Minutes

Lesson At A Glance
A brief overview of each step. Buttons jump to each section for detailed information.
10 Min – Wet-on-wet watercolor for background
15 Min – snowflakes, use PDF handout
5 Min – Set up for painting
15 Min – Paint 3 snowflakes
20 Min – Tape snowflake design, paint over tape
5 Min – Everyone helps
SCROLL & TEACH
LESSONPLAN
Each section is a different color. Read over once and then you can SCROLL & TEACH using any device you like. It’s designed to work best with your phone.
LEARNING TARGETS

Students learn to express themselves through creating from their imagination.
M A T E R I A L S
- 11″ x 17″ Copy Paper
- 4B pencil
- Eraser
- Markers and/or oil pastels
- Blenders (stumps)
- Paper Towels
1.1 greet
Kneel down so that you are on their level. Bending over emphasizes the differences in your height, while kneeling makes them feel more important. Have tape and marker ready so you can stick some tape on the table by each student and write their name on it as they sit down.
1.2 Imagine
If you have a student who doesn’t celebrate Christmas, they can draw a picture of something they enjoy doing with their family (or another holiday that they might celebrate, like Hanukkah).
LEARNING TARGETS
Students know how to watercolor.
M A T E R I A L S
- 11 x 15″ Watercolor Paper
- Water container
- Brushes (Large)
- Watercolor Pan Set
- Paper towels
- Smock
Brushes should be nylon for springiness and durability. Round brushes are the most versatile.
Paint pigment list:
- Napthol or Pyrrol Red
- Hansa or Light Yellow
- Pthalo Green (blue shade)
- Cyan or Cerulean Blue
- Ultramarine Blue
- Dioxazine Purple
- Magenta
- Burnt Umber
- Raw Sienna
2.1 Setup
Each child will need to “wake up their paints” by dipping their brush in water and tapping a color cake to get it wet. Get more water for each color, so that the cake is covered well. The goal is to have the watercolors soak up the water and soften.
Before students begin painting, have them write their names on the back of their paper.
2.2 Soak
We’re going to use the wet-in-wet technique, so begin by painting the whole paper with clear water. Go around to each student and wet their paper by quickly brushing a lot of water on. As you move on, let students pick up their papers and turn them over. You’ll keep going around a second time to wet the back.
Once the paper is fully wet, it will stop wrinkling up. Make sure it’s flat. Then students will dip their brushes in a color from the watercolor pan, (scrubbing around on the cake to get the brush full of paint color).
2.3 paint
Now tap the brush gently in one spot on the wet paper. The color should spread out into the wet paper. You can tap 2 or 3 times in the same spot for a stronger effect. Try a few more spots with this color, but no more than 3 spots. Rinse out your brush now, and grab a new color. Make sure to keep the colors away from each other! Only tap color into new blank areas on your paper. Continue adding colors until the paper is covered in color. It’s important to only tap once or twice in one spot, and not wipe your brush on the paper at all. Stop adding paints as soon as the paper is mostly colored.
When finished, set these aside onto some paper towels, which will help pull the moisture out so they dry faster.
LEARNING TARGETS
Students know how to understand snowflake patterns
M A T E R I A L S
- Ipad or screen to look at Pinboard
3.1 discuss
Unique snowflakes (tap any image to open viewer)
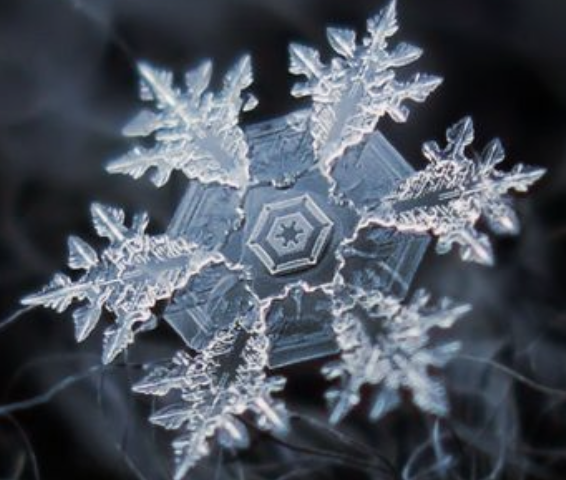
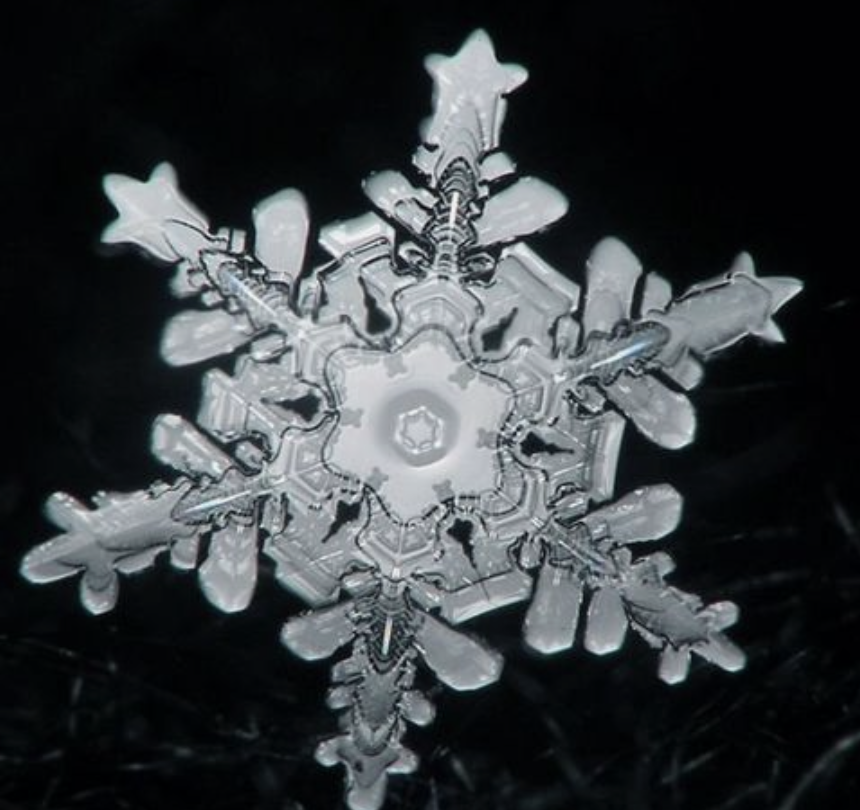
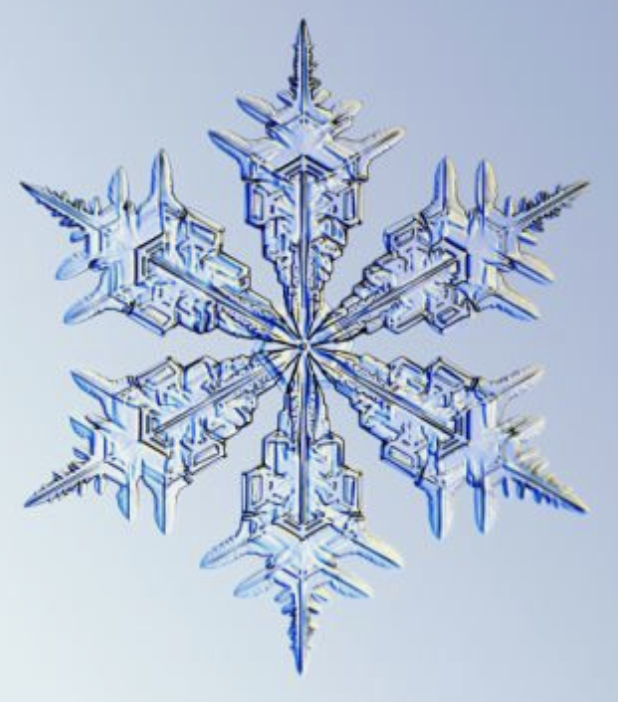
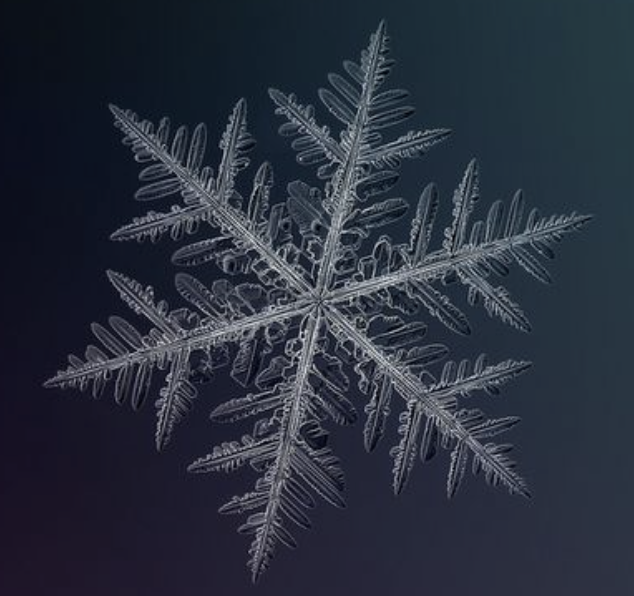
You might also notice how many points every snowflake has. That’s right; six points. See how each point looks the same as all the other points, or very nearly so. Some of them look like little trees.”
LEARNING TARGETS
Students know how to draw a snowflake
M A T E R I A L S
- 11″ x 17″ copy paper
- Pencils
- White Erasers
- Snowflake PDF
4.1 print
Snowflake Ideas
Short description goes here for the information printout.
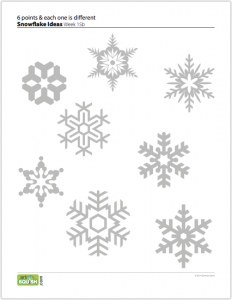
1 Page – Opens in new window
4.2 draw
- Divide your papaer into 4 sections: Draw a line from top to bottom down the center, and another side to side across the center so it looks like a window pane.
- Show how to create a star by making 3 lines for the structure of a snowflake. Make a tall capital X in one of your “window panes” with the first 2 lines.
- Then make a third line across the middle side to side. You’ll see that you made a simple star with 6 points. Try to keep the “sticks” all the same length so that if you drew a circle they would all touch the edges of the circle. They can draw a circle to see and erase or add, because these are mainly for practice.
- Now look at the bottom stick. Pretend that the center of the star/snowflake is the top of a Christmas tree. Draw branches that are small, medium and large. You can mix the order where they go. Then put a diamond, circle or square at the “bottom” of the “tree” which is the end of the snowflake point.
- After you finish, turn the page so that you have a new stick and do exactly the same thing. repeat for all of the sticks until you have a snowflake!
- In the last 3 “window panes”, draw 3 new snowflakes but make them slightly different. You can draw a circle on the ends of each stick, or make a circle around the center of the star. Remember, no two snowflakes are alike!
LEARNING TARGETS
Students know how to set up for painting with tempera.
M A T E R I A L S
- Background paintings from Step 2
- White tempera paint
- Small brushes
- Paper towels
- Water containers
- Cups or bowls for paints
- Smocks
5.1 prepare
Ask your artists what color would be best for painting snowflakes – (white). White will look good on their watercolor backgrounds, which are full of mostly pale colors. Have your students line up to get cups or bowls and let you put some white paint in it. Then they can take this back to their seats and get a brush, and a paper towel. Praise them for helping set up. Artists must learn to set up, and also to clean up.
LEARNING TARGETS
Students know how to paint white snowflakes on a watercolor background.
M A T E R I A L S
- Background paintings from Step 2
- White tempera paint
- Small brushes
- Paper towels
- Water containers
- Cups or bowls for paints
- Smocks
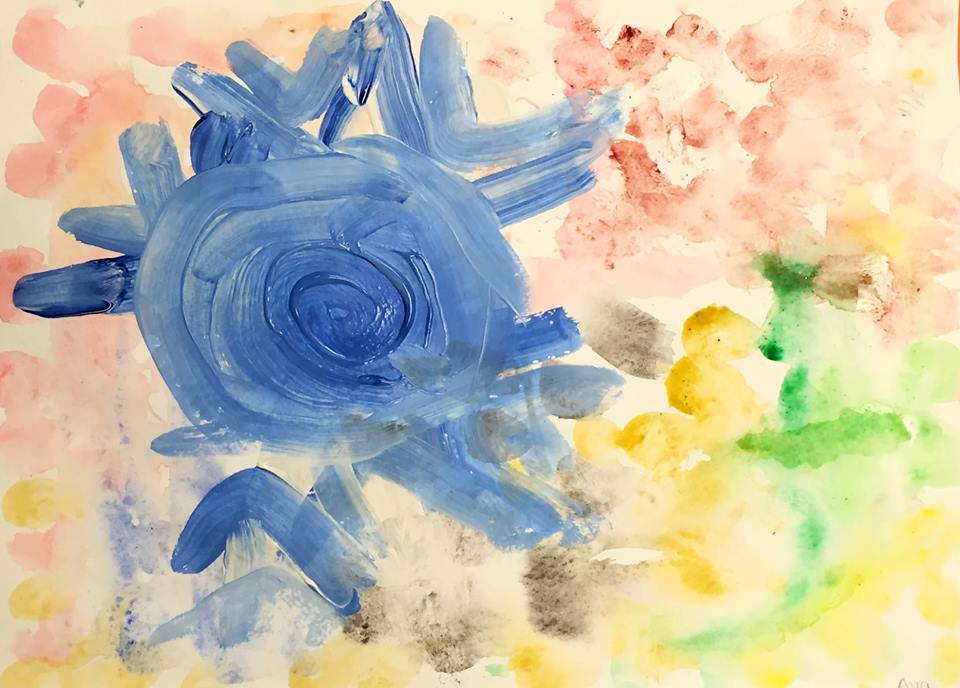
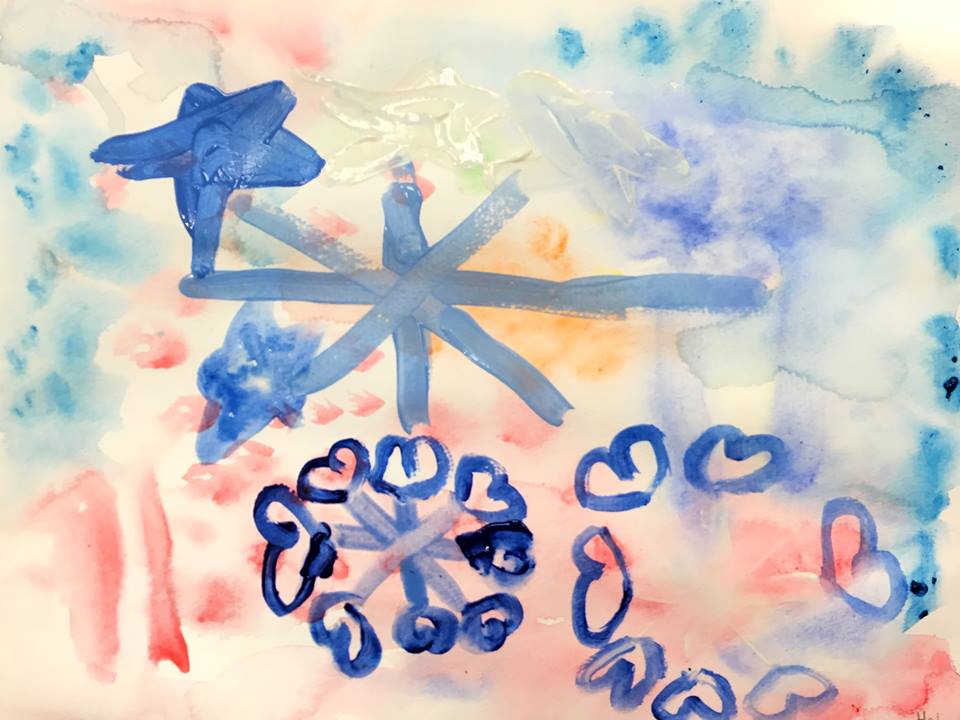
6.1 paint
Give students the watercolor background they made earlier. It should be dry enough by now to add the white paint on top.
Artists can now start painting snowflakes on their paper. Remind them of the steps they took to make a snowflake in pencil. It’s easier to make thin lines by barely touching the paper and going slowly (but the small brushes should help a lot). If you have early finishers, set their paintings aside and have them help clean up their area.
Students will be painting in the next activity but not with tempera paints, and first they’ll need a dry table. Collect the paint trays as each child cleans their brush and wipes up any spills with paper towels.
LEARNING TARGETS
Students know how to make a negative space painting.
M A T E R I A L S
- 8.5″ x 11″ cover stock
- Watercolor pans
- Large brushes
- Painter’s tape
- Kids’ Scissors
7.1 tape
Before showing the steps, write the names of each student on the back of their paper!
All students will need to put their paint brushes down as you demo the steps to a taped snowflake. It is important that no one puts any paint on their paper before the tape step! The paints will look a little bit streaky, because it’s not real watercolor paper, but this project looks really good on the card stock.
Do not press the tape really hard or it will tear up the paper when you remove it.
Use the slide show above to help everyone get this to look like a snowflake.
- Cut or tear off four 7″ to 7.5″ strips of painters tape, and one 12″ strip, for each student. Place 3 of the first 4 tape strips next to their work area so they can handle it easily (three quarter inch tape will work great).
- This is a lot like our first pencil snowflake. Take one strip and make a side-to-side line in the center of your paper.
- Take another strip and place it diagonally through the horizontal line, pointing at the top right corner and the bottom left corner but a little more towards the top and bottom rather than the actual corner.
- Take one more strip and go diagonally in the opposite direction (these two lines should make an “X” through the middle line).
- Carefully take the 4th tape strip and cut it into six pieces just over 1″ each (1 and 1/4″). Try your best to make them the same length. If it isn’t perfect, thats ok! All snowflakes are different!
- Tape the small pieces to the ends of each large piece for the snowflake tips.
- Cut the 5th tape strip into 6 pieces as well that are 2″ each.
- Tape the small pieces across each point, far enough from the center so they don’t touch each other.
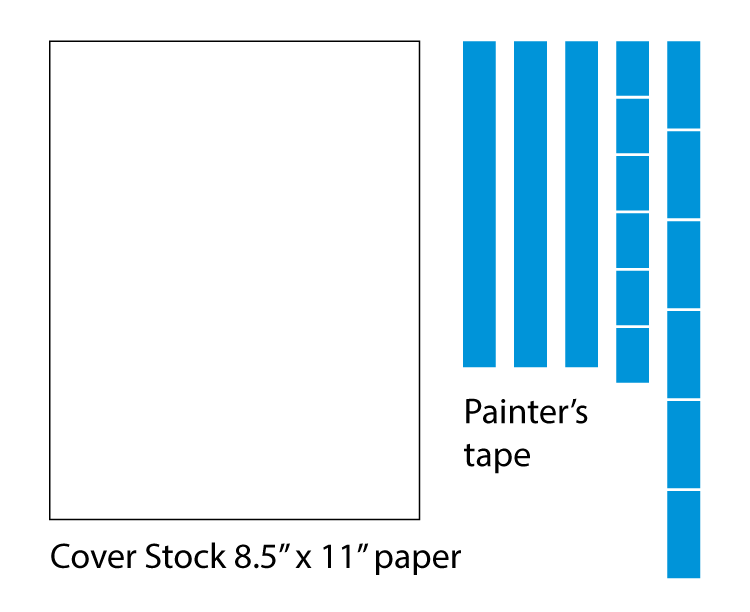
One sheet of card stock and tape. 3 long “spokes”, 6 short, & 6 fairly short
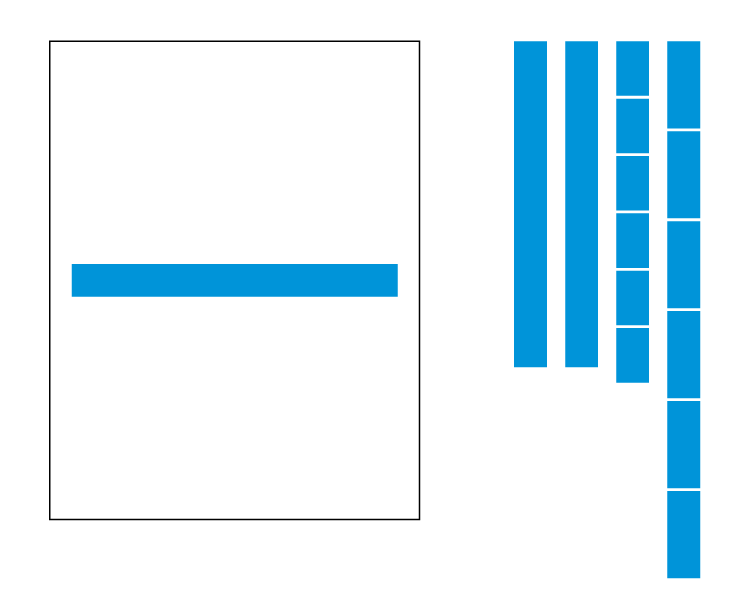
Place the first long piece across the middle

The next 2 make an X to complete the 6 spokes

Add the short pieces on each end. Then place longer pieces closer to the middle.

The tape should look like this.
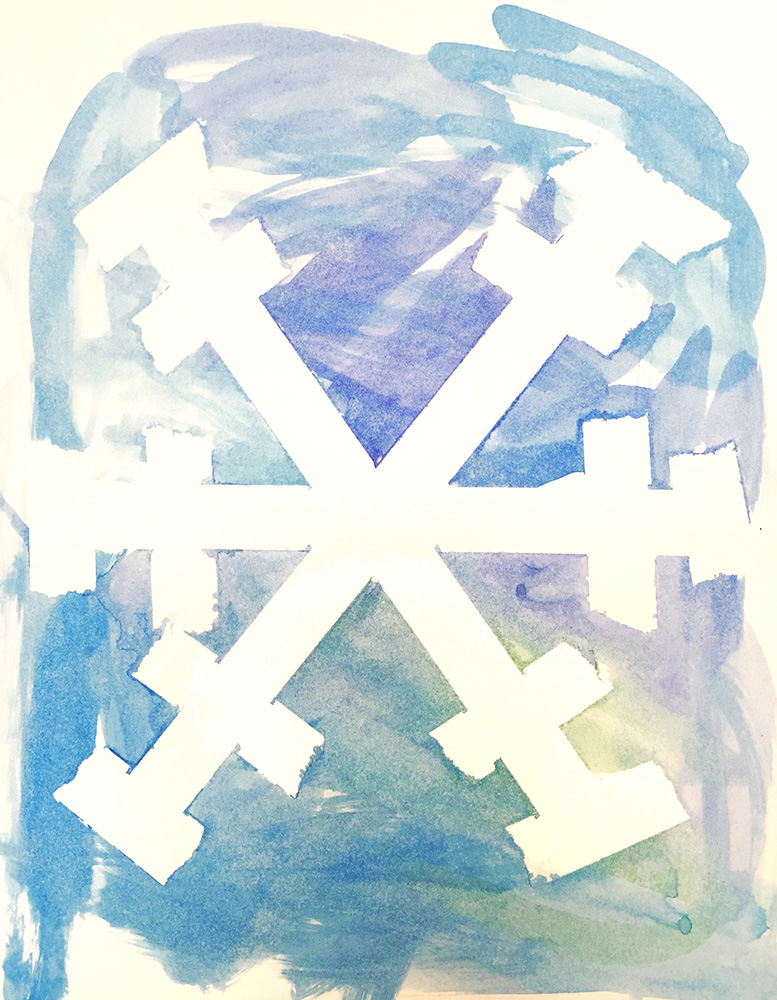
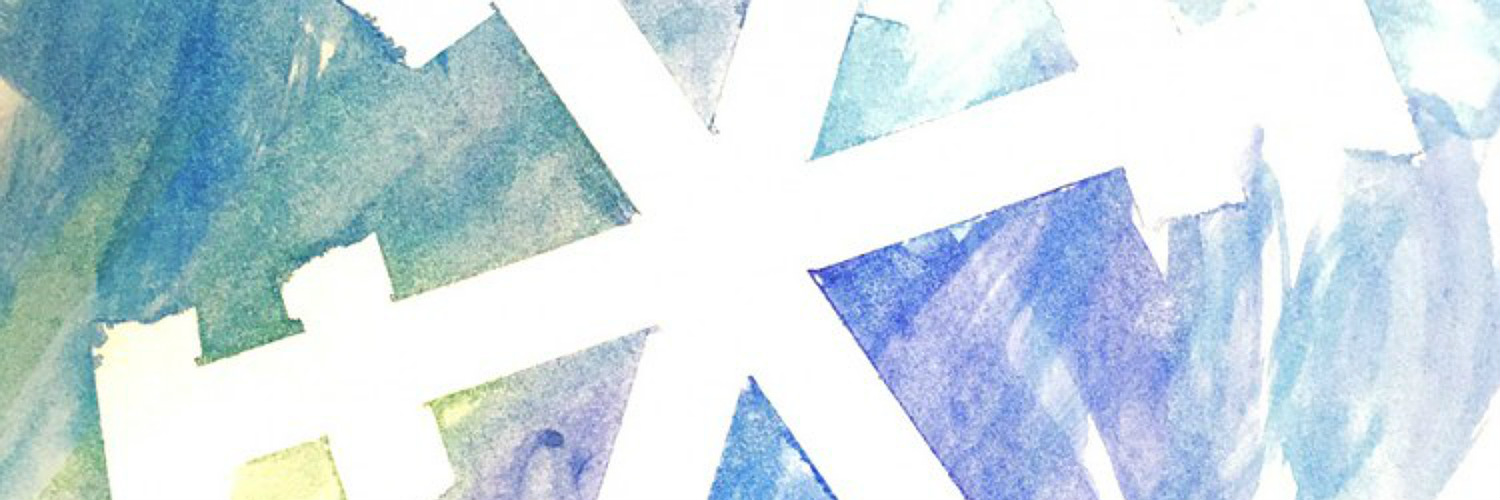
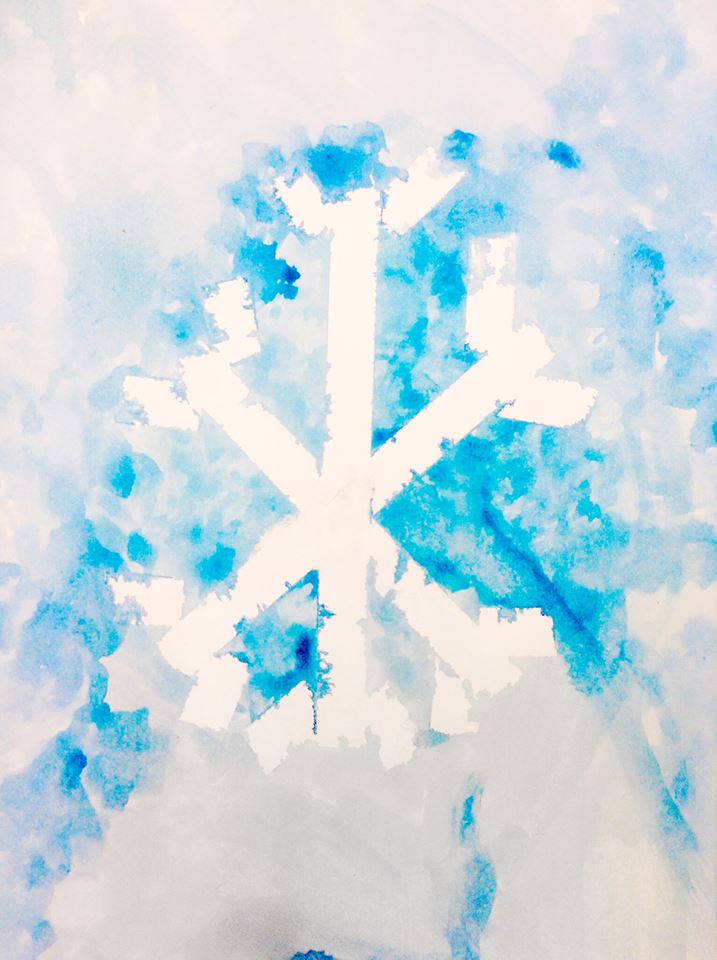
Here is the final snowflake painting with tape removed after painting.
7.2 Paint
LEARNING TARGETS
Students know the importance of cleaning up.
M A T E R I A L S
- Paper Towels
- Cleaning wipes
- Sink
- Waste baskets
- Well-lit spot for photos
- Camera or phone-camera
8.1 clean
- Wash hands
- Super-wash brushes if used
- Put art supplies away
- Wipe tables & toss trash
- Remove any smocks (last)
- Check for items on floors and tables
8.2 photo
OBJECTIVES
- Practice and improvement using watercolors and design skills
- Understanding how to visualize & what snowflakes look like
- Accomplishment in making holiday artworks
- Fulfillment by helping out, and designing artwork ideas
TROUBLESPOTS
Stuck tape – Tape is pretty much toast when it gets stuck to itself. By dangling the tape off the edge of the table, even a 7 inch piece may be workable with small hands. However, if they’re having trouble, go ahead and place the 3 “star” pieces of tape for your students. Then let them place all of the smaller pieces.
Not enough water in the watercolors – It can be hard to keep the watercolors wet. It’s a great idea to have some fast water power you can carry around. We like spray bottles and eyedroppers for moving water easily.
ART WORDS
Resist – Today we’re doing a tape-resist. We’ll put down tape, and when we paint over it, the tape keeps the paint off of the paper where it is stuck. It resists the paint.
Watercolors – Watercolor paints are kind of see-through, which is different than most other paints.
CLASSROOM
PREP
Print all of your PDFs from the lesson plan and cut any references apart as needed.
What your room needs
Here are your printable lists and room prep instructions.
Opens in new window
CLASSROOM
MATERIALS
- 11×17” Copy Paper
- 11 x 15” watercolor paper
- Water container
- Brushes (large and small)
- 4B Pencil
- Eraser
- Markers and/or oil pastels
- Blenders (stumps)
- Paper towels
- Watercolor pan set
- Smock
- iPad or screen to look at Pinboard
- Snowflake PDF
- White tempera paint
- Cups or bowls for paints
- Blue painters tape
PREVIEW
Week 18: Winter Break
Week 19: Bird Day
Using some simple big shapes and line, artists will draw and paint a bird. There is a background done with streaked colors and then the bird is drawn, glued to the background, and painted to match. During part of the lesson, we discuss and learn about different viewpoints, showing a bird’s eye viewpoint, of course!