

OVERVIEW
Students have fun mixing up a bunch of variations of greens. They learn that colors are not simple and basic, but that there are thousands of versions of just greens alone. A geometric abstract design is drawn, a mixing game is played, and then the colors are used to fill in the drawing with all kinds of greens.– – –
Grades K – 2
Week of January 20 – 24
1 Hour & 30 Minutes
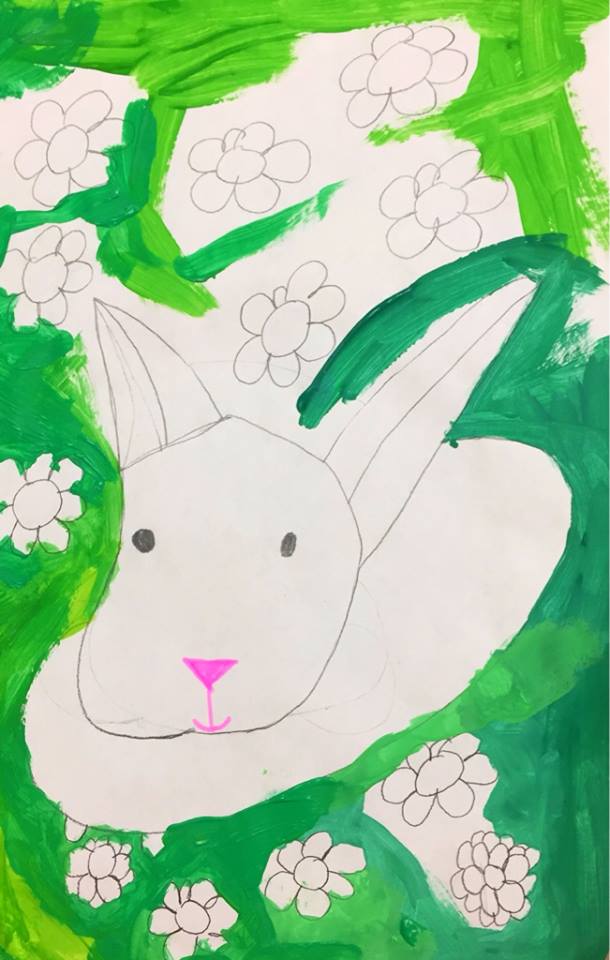
Student Work
Lesson At A Glance
Here’s a brief overview of the complete lesson. It’s also on your prep page in the Ready, Set, Go! section (below the lesson).
Colored buttons jump to each section in the full lesson plan below.
15 Minutes – Artists’ Choice
10 min – Green stuff
15 min – Use PDF – students draw design
5 min – Review & discuss greens
10 min – Paints shared – secret formulas
25 min – Paint to music stop & start
7 min – 2 special colors
3 Min – Everyone helps
Use this button to jump down to the preparation section.
SCROLL & TEACH
LESSONPLAN
Each section is a different color. Read over once and then you can SCROLL & TEACH using any device you like. It’s designed to work well with your phone.
LEARNING TARGETS

Students know how to use their imagination
M A T E R I A L S
- 11″ x 17″ copy paper
- Markers and/or oil pastels
- Blenders (stumps)
- Paper towels
All materials are suggestions and may be modified as you see fit. We have tried many items, and these seem to allow the most versatility for the cost.
1.1 Greet
Greet students as they come in and help them choose a chair.
Kneel down so that you are on their level. Bending over emphasizes the differences in your height, while kneeling makes them feel more important. Have tape and marker ready so you can stick some tape on the table by each student and write their name on it as they sit down.
1.2 Choice
Encourage students to work with one piece of paper for a while. If someone uses the phrase, “free draw”, explain that artists’ choice is something only artists can do, while free-draw is something anyone can do. You want to use the phrase to elevate the students’ expectations of their work.
Everyone should take their time with the work and make a finished piece of art. Limiting the paper can also help kids focus on the work. If someone finishes in super-fast time, ask them what more they can do to the existing paper. Ask again several times – unless they appear overly frustrated; then you can allow them to move on to a new work.
Use this button to jump down to the preparation section.
LEARNING TARGETS
Students know how to see different shades of green
M A T E R I A L S
- Color wheel PDF (optional
- Slideshow available
Green Things (tap any image to open viewer)
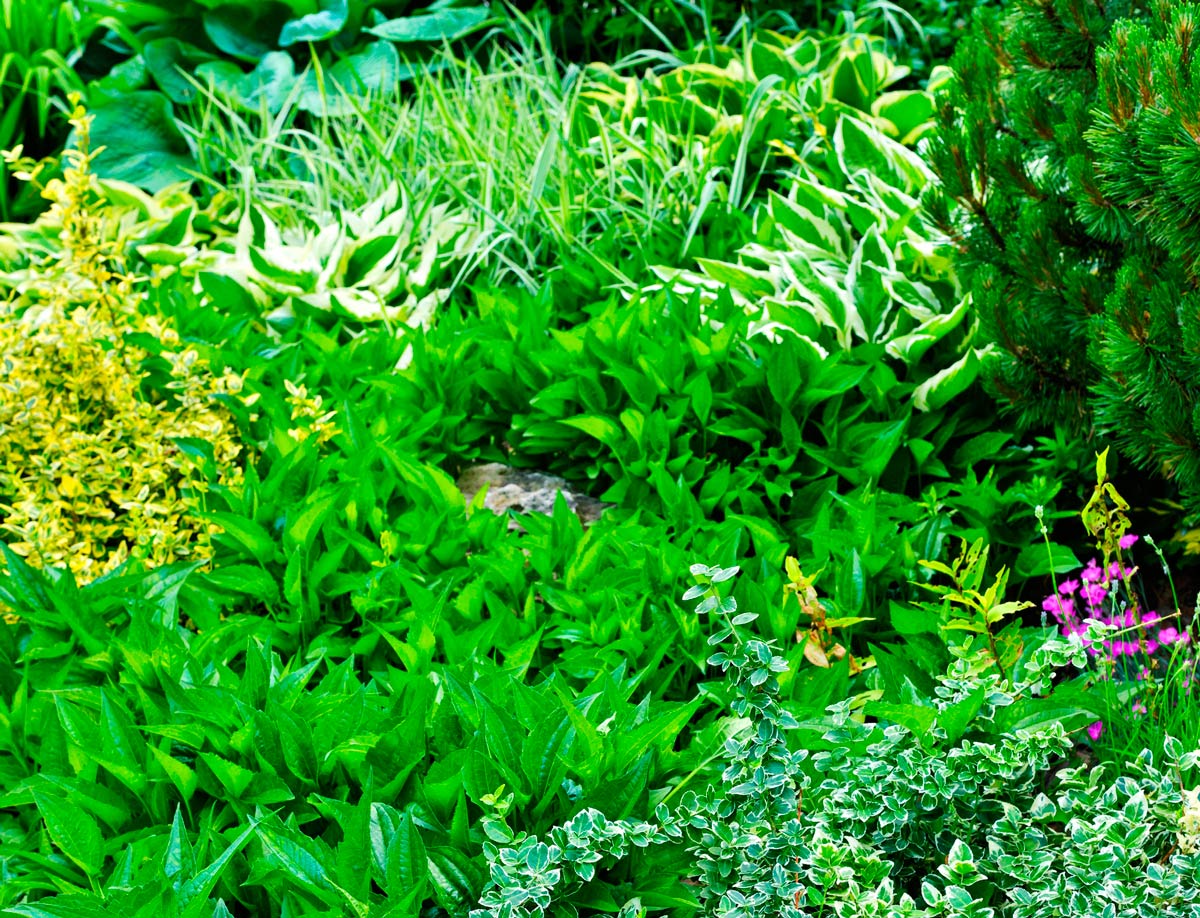
Here’s a small part of one garden. There are so many different greens!
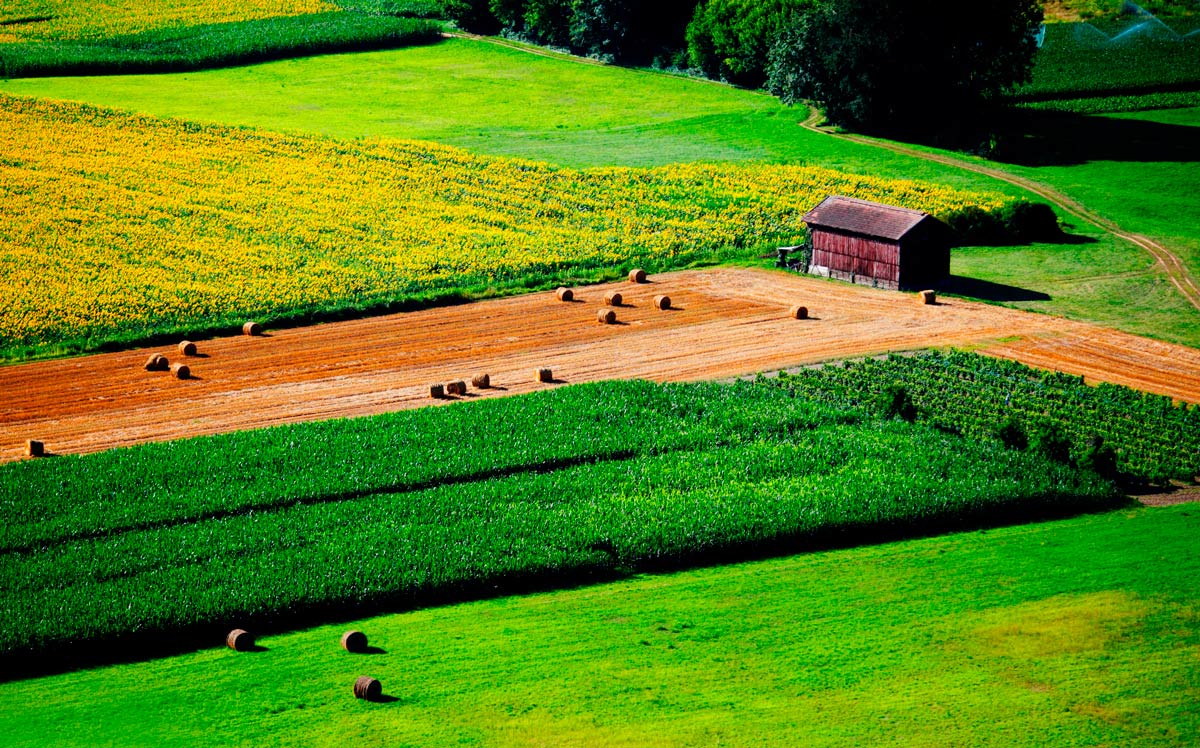
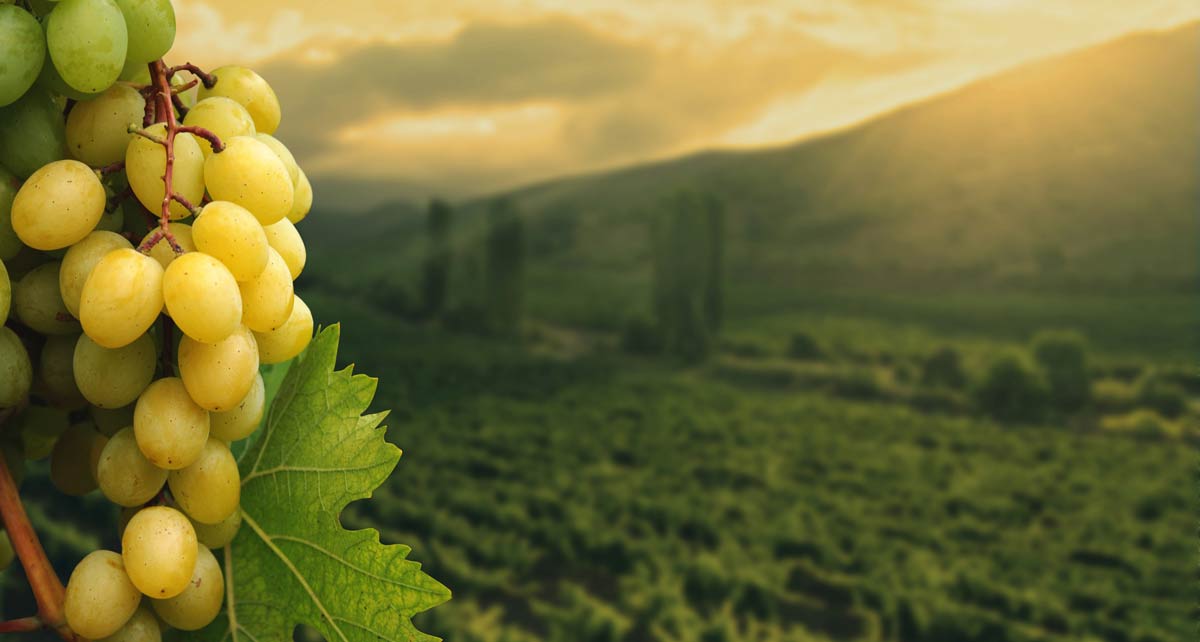
Here’s a green field. And a different green field. And look at the variations of greens inside each field! Lots of greens here.
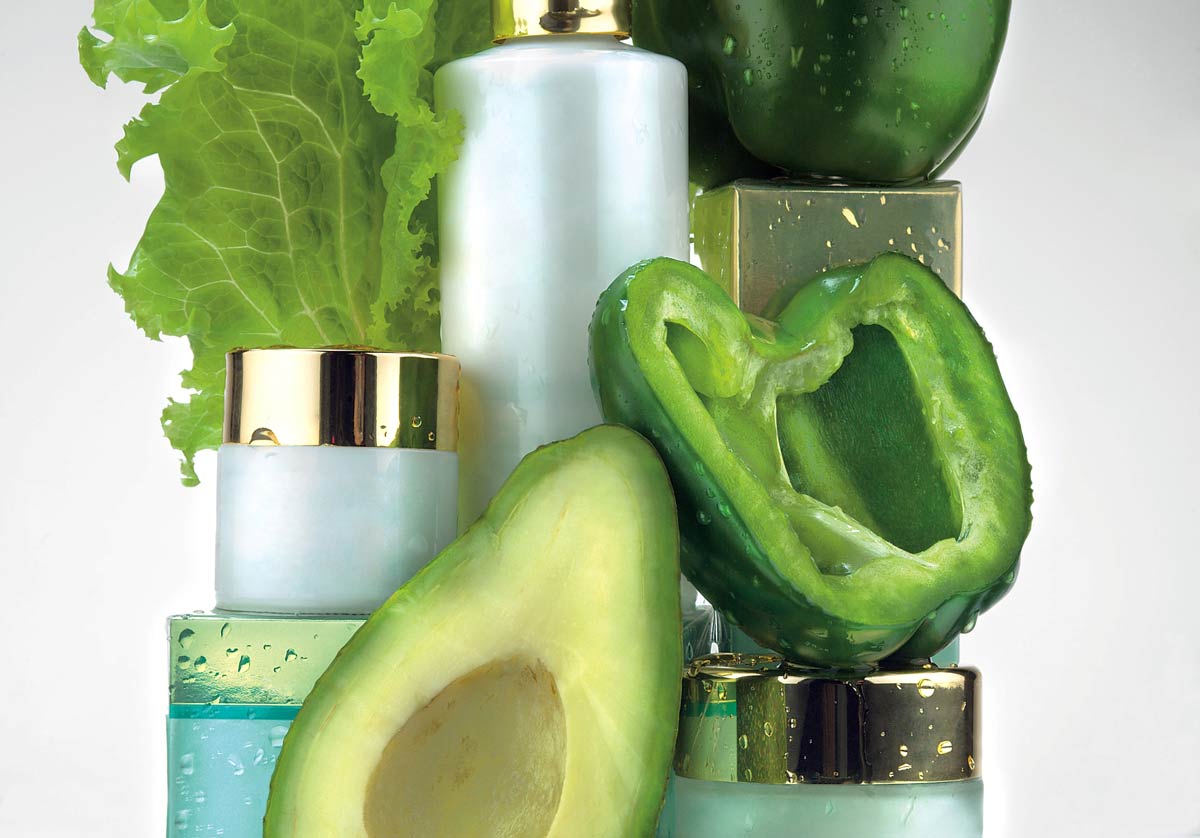
We say a pepper or avocado is green, but how many greens are there in just one green object? Shadows and highlights make lots of variations.
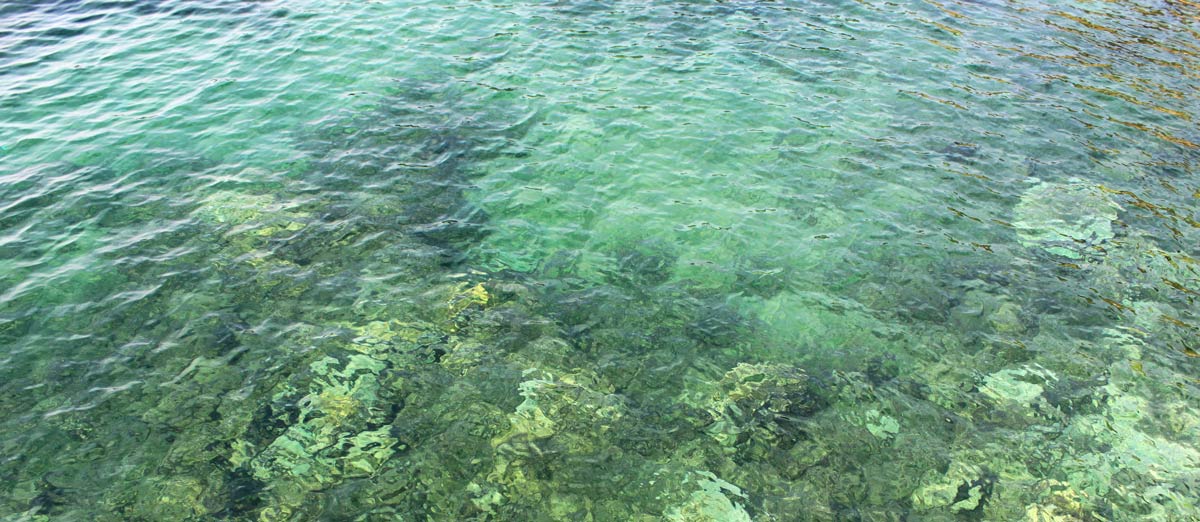
The ocean is also full of different green colors!
The greens in this picture range from dark and dull, to very light yellow-green
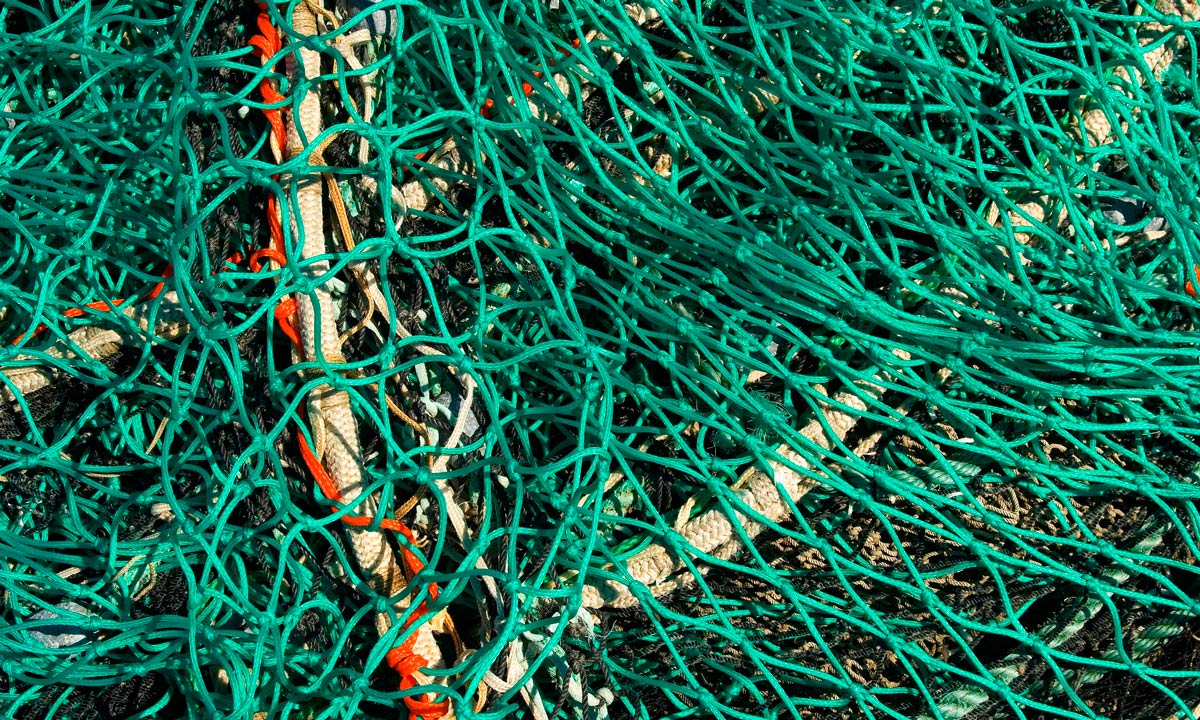
This fish net is another kind of green than all those plants.
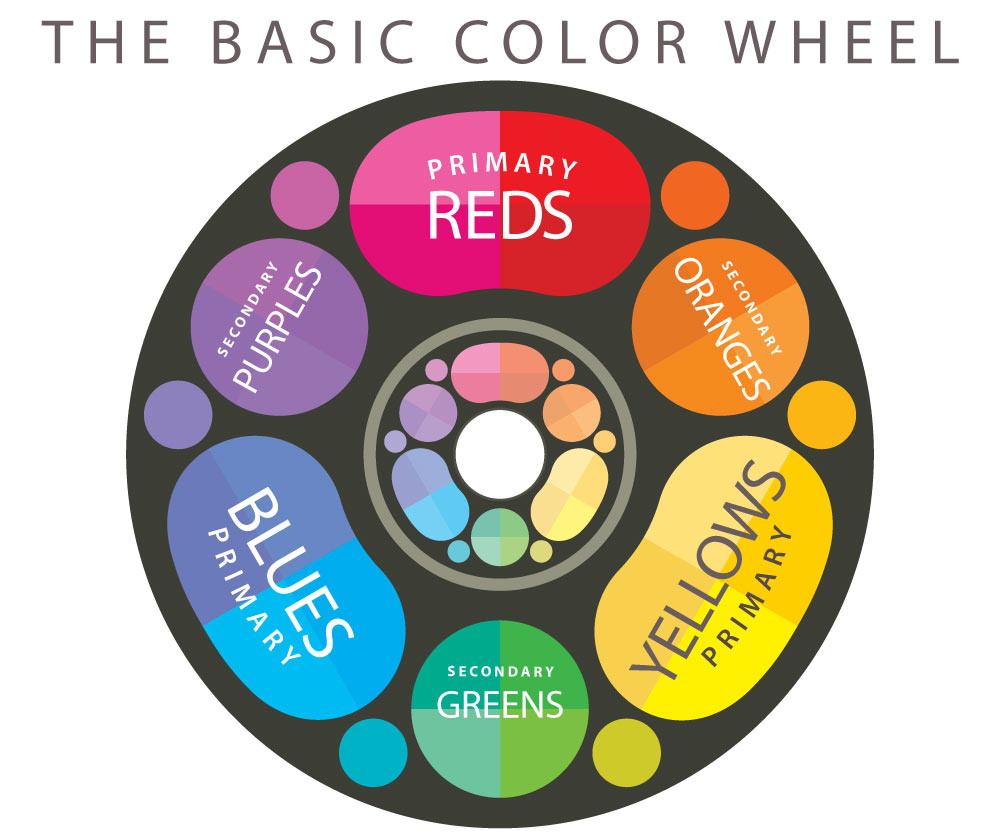
Most color wheels just say there is a green, but this one says there are variations of greens.
2.1 teach
Use this button to jump down to the preparation section.
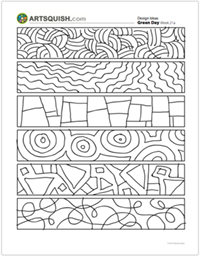
STEP 3. Design Drawing
Students draw a line-art design using reference from the Design Ideas PDF. 15 MinutesLEARNING TARGETS
Students know how to draw a design
M A T E R I A L S
- Watercolor paper – 11″ x 15″
- Reference photo
- Cheasels or stands for reference photos
- 2B or 4B pencil
- White eraser
3.1 Print
Reference
Design Ideas
Print enough for each student
Hand out reference prints.
1 Page – Opens in new window
3.2 design
“Try making up your own cool designs using just lines. Think about a coloring book you might have at your house. Do any of the pages look like the printout in front of you? See how all the lines connect and make it easy to fill in! Let’s pretend you’re making your very own coloring book pattern today.
Do you want to make all your lines curved, or all of them straight? Or maybe a mix of both? You can use some of the ideas you see here on the printout, and be creative!”
Use this button to jump down to the preparation section.
STEP 4. What’s Inside Greens?
Artists will discuss the color green and how other colors affect it using the color wheel as a reference. 5 MinutesLEARNING TARGETS
Students know how to identify what makes the color green
4.1 review
Review the crazy shadow color on the red box. If you remember, we found that we added the opposite color of the red, GREEN, to the red and that worked to make a shadow color. Use the color wheel slide or printout to show how green and red are opposite, and to find more colors that can change greens.
“What if the box was green? What color should be added to greens to make them dark and shadowy? (reds)”
4.2 teach
You can skip this step if you’re running low on time, or alternatively, spend more time with it if you need to.
Try a guessing game for what colors can be inside a green color (added to it so that it changes some).
The game will end with every single color you can think of – 100s of variations are possible. You can use objects or photos from slideshow to guess what colors made that green, slideshow will have answers.
“Which color would you use to change a green color?”
Use this button to jump down to the preparation section.
STEP 5. Mixing
Secret formulas are handed out and everyone will have fun adding colors together to make their own special variation of a green. 10 MinutesLEARNING TARGETS
Students know how to mix the color green
M A T E R I A L S
- Bowls with every paint color – tempera paint
- Each color will be needed for sharing among 3 or 4 students
- Make sure there is black and white too
- Formula printouts, cut out (PDF below)
- Brushes for each student
- Plastic spoons (regular disposable table ware)
- Smocks
- Mixing bowls for formulas
- Paper towels
Brushes should be nylon for springiness and durability. Round brushes are the most versatile.
Paint pigment list:
- Napthol or Pyrrol Red
- Hansa or Light Yellow
- Pthalo Green (blue shade)
- Ultramarine Blue
- Titanium White (professional grade only)
5.1 print
Reference
Secret Formulas!
Cut images apart and print enough for each student to choose from several.
Hand out reference prints. Set all of the images out on a table or counter, and let groups of students come choose what they want..
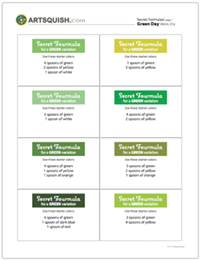
2 Pages- Opens in new window
TIP
Have students use large gloppy spoonfuls for a larger class, and small spoonfuls if you have fewer students.
5.2 teach
“Your empty bowl is for mixing up the secret green formula you have. Your formula is different from other students, so don’t try to help others. They all have their own formulas. When we’re all finished, we’ll have all these cool green colors for your artwork. Everyone will share their color with everyone else.
The color you make will probably not match your example perfectly, but that’s good. We don’t need it to be exact, just similar. There are so many different greens that it’s hard to find an exact match out of thousands!
So you’ll use the spoons to dip spoonfuls of the Starter Colors in the bowls. Keep the spoons in the bowls they are in now.
Share the bowls we have, and if someone is using the color you want, wait until they’re finished, or look at the next color you need and work on that one. I’ll have extra yellow and green bottles of paints if you need those fast.”
5.3 mix
Use this button to jump down to the preparation section.
STEP 6. Painting
Students will fill in their designs using their special greens by passing bowls when the music stops. 25 MinutesLEARNING TARGETS
Students know how to paint a design
M A T E R I A L S
- Watercolor paper with design drawing
- Brushes – small (and medium) sizes short-handle
- Bowls of all the paint formula colors
- Smocks
- Paper towels
- Music to play
- Water tubs
6.1 prep
You should have a brush in each bowl and help students switch brushes (instead of rinsing) to change colors. The colors are similar so accidentally mixing is fine, while getting a lot of water in the paints will make them lighter and less vibrant. You can hold the water tubs away until the end to keep them on track with this.
“Wait until the music plays before you start painting. Every time the music stops, you’ll finish up the area you’re painting, and then pass the bowl AND THE BRUSH to the right. You’ll get a new bowl and a new brush from the person on your other side!
Use each color in only a few areas. It’s even good to only do one area with one color sometimes. Look around at all the different greens you get to use!
Also, leave your favorite areas white for now. We are going to have some accent colors, which are exciting special colors that we’ll use after we do all the greens. The accent colors will be like dessert. Save room for dessert!”
6.2 paint
6.3 paint
Stop the music when most artists have done about the right amount of work OR after a time interval of one to one–and–a–half minutes. The right amount of work will be roughly a fraction based on the number of the bowls of paints you have (including black). So, if you have 12 bowls of paint, each color should fill around 1/12th of the overall paper.
Have everyone pass bowls with brushes. Remind students to be patient while people finish up, but also help students move on to a new color.
It’s hard to quit using a color you like. Try getting them excited about the next color.
Begin the music again when you’re ready.
TIP
If a student fills in a lot of the area in their design with one color and is going strong and fast, you might try slowing them down or getting them to stop early, and reminding them to save room for all the other colors.
6.4 paint
Make sure everyone leaves at least one or two spots for the accent colors! More areas than that is fine too. You can talk about using these colors for accents:
- Yellows
- Oranges
- Reds
- Purples
- Blues
- Black!
Have the helper mix up a couple of these colors for the next step, or have them ready before class begins.
6.5 paint
Encourage following the music and using all the colors, but don’t worry about it or stress the students. Paints can be covered with other colors, and some colors can be used more, so there’s no real rules for this project. Let the students enjoy working and see what they get. We have all the methods in place as a framework, to help ensure the best work and the most fun, but artists are supposed to be a little creatively crazy.
Use this button to jump down to the preparation section.
STEP 7. Accent Colors
Using 2 special accent colors, students will pick the last few important spots to fill in. 7 MinutesLEARNING TARGETS
Students know how to paint using an accent color.
M A T E R I A L S
- Bowls of accent color mixed up
- New brushes for each color
- Mixing plates (optional if you have time)
- Water tubs available
- Paper towels
7.1 paint
7.3 paint
7.4 paint
Use this button to jump down to the preparation section.
LEARNING TARGETS
Students know the importance of cleaning up.
M A T E R I A L S
- Paper Towels
- Cleaning wipes
- Sink
- Waste baskets
- Well-lit spot for photos
- Camera or phone-camera
8.1 clean
Students clean up their work area.
- Wash hands
- Super-wash brushes if used
- Put art supplies away
- Wipe tables & toss trash
- Remove any smocks (last)
- Check for items on floors and tables
8.2 photo
Try to get photos of your student’s artwork. Find a good spot for quick lighting without highlights or shadows from your hands and device. Ideally in-between two strong lights on each side.
OBJECTIVES
- Practice and improvement in mixing and using variations colors
- Understanding there are so many variations of colors there is no one basic “green”
- Accomplishment in making finished design paintings
- Fulfillment by having design freedom
TROUBLESPOTS
Control freaks – kids may try to “help” other students mix their formulas like their own, not realizing that they’re all different.
Mixing cool and warm colors – In Step 7 they’ll have to keep the brushes out of the other colors or they’ll turn muddy.
ART WORDS
Design – The plan you have for your artwork is called the design. If you plan to make a green artwork, then you have a green design.
Variations – When you have a green color, and then you make another one that is different, but still looks like a green color, we call that a variation of green.
CLASSROOM
PREP
Make sure to have enough bowls and lots of paint ready. Pre mix any paints you think you’ll need or have a helper during class to get ready.
Print the Secret Formulas PDF and cut out the 16 different formulas. Print more if you have more than 16 students and just have duplicate colors.
What your room needs
Here are your printable lists and room prep instructions.
Opens in new window
CLASSROOM
MATERIALS
- 11″ x 17″ copy paper
- Markers and/or oil pastels
- Blenders (stumps)
- Paper towels Watercolor paper – 11″ x 15″
- Cheasels or stands for reference photos
- 2B or 4B pencil
- White eraser
- Bowls with every paint color –
- tempera paint – Each color will be needed for sharing among 3 or 4 students so 12 students need 3 or 4 of each color to share – Make sure there is black & white too
- Brushes for each student – short handle
- Plastic spoons (regular disposable table ware)
- Smocks
- Mixing bowls
- Water tubs
- Music to play
PREVIEW
Week 22: Faces & Fishes
We start out with looking at the symmetry of a human face from the front. Then we move into a fun project where students all make a hangable painted fish to turn the room into a giant aquarium.
Week 23: Radial Balance
Students discover that a flower has a special kind of symmetry, magically being symmetrical in any direction! Then they work on creating their own radial symmetry artwork on 2 paper plates. To finish the day, the plates are joined like wheels using a toilet paper cardboard roll holder as an axle. The designs roll across the table and radial designs spin.