
OVERVIEW
Balance in real life is understandable, but what about visual balance? Students learn that people like to see things that look balanced so they don’t feel like they might fall over if they were real. Several exercises, a slideshow, and projects help with understanding and practice using balance in artwork.
Grades 1 – 2
Week of Jan 26 – 30
1 Hour & 30 Minutes


Lesson At A Glance
A brief overview of each step. Buttons jump to each section for detailed information.
10 Min – Fold paper for a two-part picture in oil pastels
5 Min – Finish the tree
5 Min – Use class objects to demonstrate
5 Min – Display slides & read captions
25 Min – Artists’ Choice with references and emphasis
15 Min – Early finishers work with oil pastels
5 Min – Everyone helps
SCROLL & TEACH
LESSONPLAN
Each section is a different color. Read over once and then you can SCROLL & TEACH using any device you like. It’s designed to work best with your phone.
LEARNING TARGETS

Students learn to express themselves through creating from their imagination.
M A T E R I A L S
- Markers
- 11″ x 17″ copy paper
- Pencil
- Eraser
1.1 greet
Kneel down so that you are on their level. Bending over emphasizes the differences in your height, while kneeling makes them feel more important.
1.2 draw
If someone uses the phrase, “free draw”, explain that artists’ choice is something only artists can do, while free-draw is something anyone can do. You want to use the phrase to elevate the students’ expectations and self-worth.
Students should take their time with the work and make a finished piece of art. Limiting the paper can also help kids focus on the work. If someone finishes in super-fast time, ask them what more they can do to the existing work. Ask again several times – unless they appear overly frustrated; then you can allow them to move on to a new work.
LEARNING TARGETS
Students know how to apply different movements to create different effects or techniques
M A T E R I A L S
- Oil Pastels
- 8.5″ x 11″ copy paper
- Paper towels
- Your own prepared paper
2.1 explain
You’ll use this demo in the next step too.
Use a pastel and paper to demonstrate while you talk. We use the analogy of dancing because artistic techniques are very similar in applying movement to your materials. Most technique involves a controlled, and sometimes varied, movement (as well as as knowledge of tools, media, and surfaces).
If a dancer only did one motion for the whole dance it wouldn’t be as interesting. We should think of our movement, which is also called artistic technique, like an interesting dance. Sometimes we make long slow flowing movements and sometimes we make short jumpy movements.
See how many different kinds of technique movements you can do. When the music sounds different, make your movement different to match.”
2.2 express
Find music that has lots of variation and contrast, such as Rossini or Mozart. You can also alternate between something slow and flowing like Enya and a rock dance piece.
Everyone should get all their green pastels, gray, and white.
Be on the lookout for anyone working in the bottom part or especially trying to make a tree trunk before the next step.
“Place the paper in a bathtub position and draw a rectangle frame all around the edge using a gray oil pastel.
Now fold the paper this way: pull the bottom edge up and align it with the top to get a side-to-side fold line in the middle. Unfold so you can see the border again. We going to work only in the top half to begin with, so leave the bottom half empty.
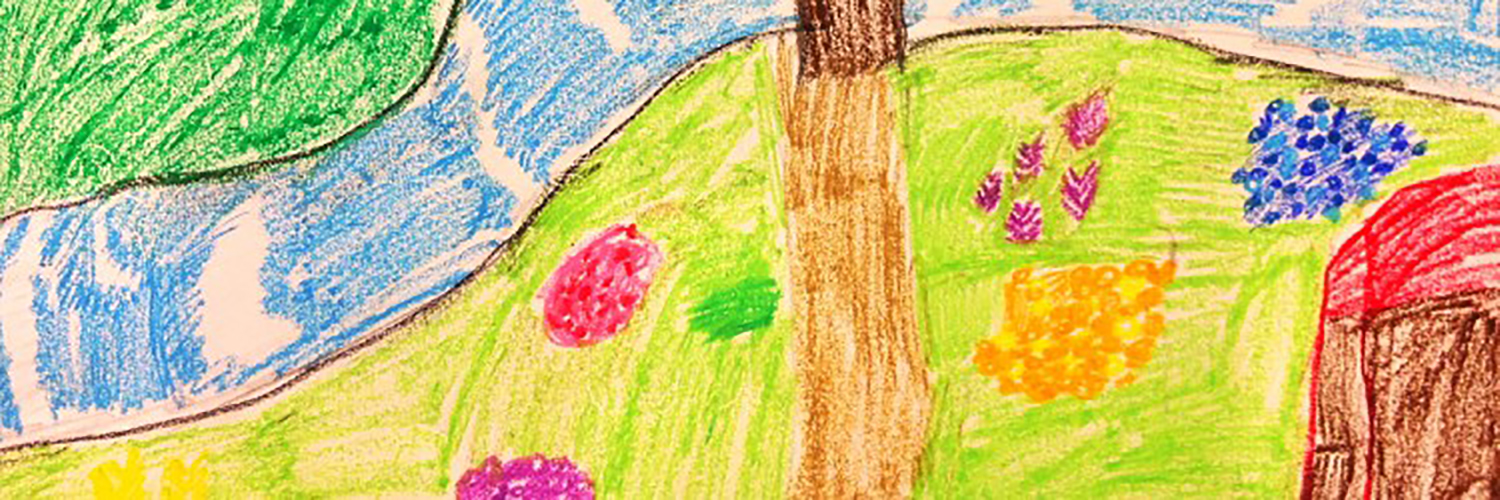
The top will be the leafy part of a very large and wide tree. Here is how to draw the outline of the tree shape. This is the BIG SHAPE, that is all the leaves together. We aren’t going to try and draw thousands of leaves because that would take too long. The big shape of the leafy top of the tree isn’t a circle, it’s more like a gumdrop.
When I tell you to begin, use your lightest green. The leafy part will look like a hill with a flattened bottom and round top. The bottom of the leaves will be along the folded line, and the rounded top will fill up the top half of the paper. It should be very big and it can have a wiggly edge if you want.”
(Encourage students to make their tree bigger if they draw the shape too small – it’s ok to have another line.)
“To make it look like there are lots of tiny leaves, we’re going to make lots and lots of lines, color dancing all inside the big leafy area. This is how artists make texture. Trees have a texture of leaves at a distance, and it’s hard to see each tiny little leaf when you’re farther away.
Make your big leafy shape now.
“When the music plays, use a green pastel to color dance inside the leaves. When the music stops, switch to a different green; blend them together when the music plays again. You can also use white to blend colors.
You can make the edges fluffy and more leaf-like by going outside the line just a bit.
Remember to move in different ways with the different music.”
LEARNING TARGETS
Students understand visual balance
M A T E R I A L S
- Oil Pastels
- Your own prepared paper you worked on in the last step
3.1 talk
No drawing tools should be out and hands should be in their lap so artwork is not changed until the next step.
As you talk, quickly draw a tree trunk way over the right, almost to the edge of the leaves.
But this is just a picture. It only seems like it might fall over in your mind. It looks kind of wrong, doesn’t it? Sometimes artists like to do crazy ideas like this, but most people enjoy art that seems more balanced. It feels more comfortable to look at.
You get to decide. You can draw your tree trunk in the middle so it looks balanced, or if you want to make a crazy drawing of a tree, you can draw the trunk way over to one side like I did.”
LEARNING TARGETS
Students know how balance affects their own artwork
M A T E R I A L S
- Oil Pastels – gray and brown
- 8.5″ x 11″ copy paper
4.1 express
Finish the tree
Color dance the trunk using one brown and some grays. Artists can finish by outlining their work in black at the end if they want to.
LEARNING TARGETS
Students understand balance
M A T E R I A L S
- Wooden ruler or paint stir stick
- Paint or water bottle
- 2 Cups of water
5.1 teach
Have a bottle of paint or maybe a water bottle in front of you on a table. Place a wooden ruler or paint stir stick, centered on it so that it is balanced. have 2 small objects of cups of water ready. Do not use very much water, but it needs to be about the same amount in each cup. You are about to spill one of these cups, so make sure there is nothing that will be damaged when it falls, and that you have a towel or something to clean it up with.
Students should not be close enough to touch your display or get wet when the water falls.
Ah, so you all know that the ruler will be unbalanced even before it happens. What if I balance out my one cup with a second cup on the other side (after you balance both cups, carefully let go). See, they are balanced now. If I take off the first cup, what will happen?”
5.2 Surprise
Make it fun. Not only does this demonstrate balance, and make them excited, but your coolness in letting a mess happen will help your artists not be as anxious if-and-when they spill things during regular work. Make sure you point out that you used a very small amount of water so we wouldn’t have a big mess to clean up and that making a spill on purpose was a one-time thing to make a point about balance.
LEARNING TARGETS
Students know how physical balance relates to visual balance
M A T E R I A L S
- Tablet or TV to display slideshow

1
Here’s a picture that is like what we just saw. A balanced stick on a bottle.

2
We couldn’t do this with a cup of real water! So it looks unbelievable to us.

3
This looks like it is beginning to fall! It’s only a picture, but because it looks like an accident, people want to change it and make it look balanced.

4
This picture has everything over to one side. It looks like something that is too heavy on one side.

5
In our imagination, art that looks heavy, feels like it might fall at any moment. That’s why people usually don’t like it that way.

6
Adding other parts to our picture makes it look balanced again, so it’s more pleasant.
6.2 display
LEARNING TARGETS
Students know how to create a visually balanced painting
M A T E R I A L S
- 11 x 15″ Watercolor Paper
- Water container
- Brushes (Large)
- Watercolor Pan Set
- Paper towels
- Smock
Place water on the watercolor cakes to “wake” them up for the this step. They should soak for 5 – 10 minutes.
Brushes should be nylon for springiness and durability. Round brushes are the most versatile.
Paint pigment list if you are using tubes to make your own watercolor palettes:
- Napthol or Pyrrol Red
- Hansa or Light Yellow
- Pthalo Green (blue shade)
- Cyan or Cerulean Blue
- Ultramarine Blue
- Dioxazine Purple
- Magenta
- Burnt Umber
- Raw Sienna
- Titanium White (professional grade only)
7.1 Print
Reference
Balance Photos
Cut images apart and print enough for each student to choose from several.
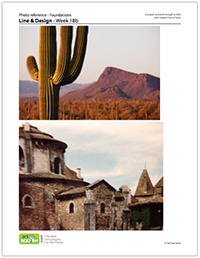
3 Pages – Opens in new window
7.2 paint
The above reference pdf was in the Foundations lesson 2 weeks ago, so you may have these pictures still on hand if you teach several age groups.
Have students put names on back of paper as you hand them out. Let them do a painting of anything they want, encouraging reference but letting them choose – imagination is ok too. You want to encourage, not discourage. It’s also fine to move things around in the artwork, and not just copy a photo.
Visual Balance (tap any image to open viewer)


LEARNING TARGETS
Students know how to create visual balance in their own work
M A T E R I A L S
- 8.5 x 11 Copy Paper
- Pencil
- Eraser
- Oil pastels
8.1 draw
First, they should draw a box all around the edges in pencil. Tell them that this is their art edge, or Frame. Then they’ll draw the person, pretty large on the page, but all the way over to one side, so that it feels like the picture is not balanced. Have them imagine what they can add to the picture. What would make it look balanced?
Have students add more elements to their work to balance it.
8.2 color
Play music while they work, and remind them to blend pastels together so they mix and look more like paints.
LEARNING TARGETS
Students know the importance of cleaning up.
M A T E R I A L S
- Paper Towels
- Cleaning wipes
- Sink
- Waste baskets
- Well-lit spot for photos
- Camera or phone-camera
9.1 clean
- Wash hands
- Super-wash brushes if used
- Put art supplies away
- Wipe tables & toss trash
- Remove any smocks (last)
- Check for items on floors and tables
9.2 photo
OBJECTIVES
- Practice and improvement using oil pastels & watercolors
- Understanding how visual balance is related to physical balance
- Accomplishment in finishing several art works
- Fulfillment by by having full Artists’ choice for the main painting today
TROUBLESPOTS
Jumping ahead – In the first half of the lesson, several steps require stopping and starting. Use the music to make sure everyone stops and listens when you need them to during step 3. Some students will want to make their tree trunk as fast as they can so they can win the imaginary art race. Don’t worry if it happens, but try to gently thwart these efforts if possible.
Getting behind – Keep your class moving ahead during the first half, which has several steps that are only 5 minutes each. Students may want to play around or talk about the surprise in step 5. Have the slideshow queued up and ready to go so you can take advantage of their interest, and move right into the lesson point.
ART WORDS
Balance – Visual balance is when things in an artwork look like they won’t tip over.
Technique – Movement of your hand and arm is like dancing, and is a large part of what we call, “artistic technique”.
Frame – The edges of your artwork, which usually create a rectangle or a square.
CLASSROOM
PREP
Set up for your balancing act in Step 5
Print enough copies of the 3-page PDF from STEP 7 and cut the reference photos apart.
What your room needs
Here are your printable lists and room prep instructions.
Opens in new window
CLASSROOM
MATERIALS
- 11″ x 17″ copy paper
- 8.5″ x 11″ copy paper
- Markers
- Pencil
- Eraser
- Oil Pastels
- Paper towels
- Your own prepared paper
- Wooden ruler or paint stir stick
- Paint or water bottle
- 2 Cups of water
- 11 x 15″ Watercolor Paper
- Water container
- Brushes (Large)
- Watercolor Pan Set
- Paper towels
- Smocks
PREVIEW
Week 22: Rainbow Flowers
Students learn how the concept of harmony applies to visual art just like music. A flower is drawn from reference and painted as a spectrum in watercolor for color-wheel flowers. The arrangement of the colors is used to show harmony, along with some games of harmony color designs.
Week 23: Elephant Day
Everyone loves elephants! Artists learn how to draw a cartoon version, which also helps them learn how to simplify. Then they will have a chance to draw and paint more realistically, and in the process learn how to mix blacks and grays.