
Drawing
Each lesson Plan focuses primarily on one of the 4 Cornerstones of Art:
Drawing | Painting | Color | Style
OVERVIEW
Artists learn how to practice and warm up, before getting into the proportions and shadows of the face. Then they will use the easiest way to draw a portrait from life - a mirror. Drawing something you can see in 3D allows a better understanding. Along with the prior 3 weeks of face anatomy, they should feel confident in their work.– – –
Grades 3 – 5
Week of February 27 – March 3
1 Hour & 45 Minutes
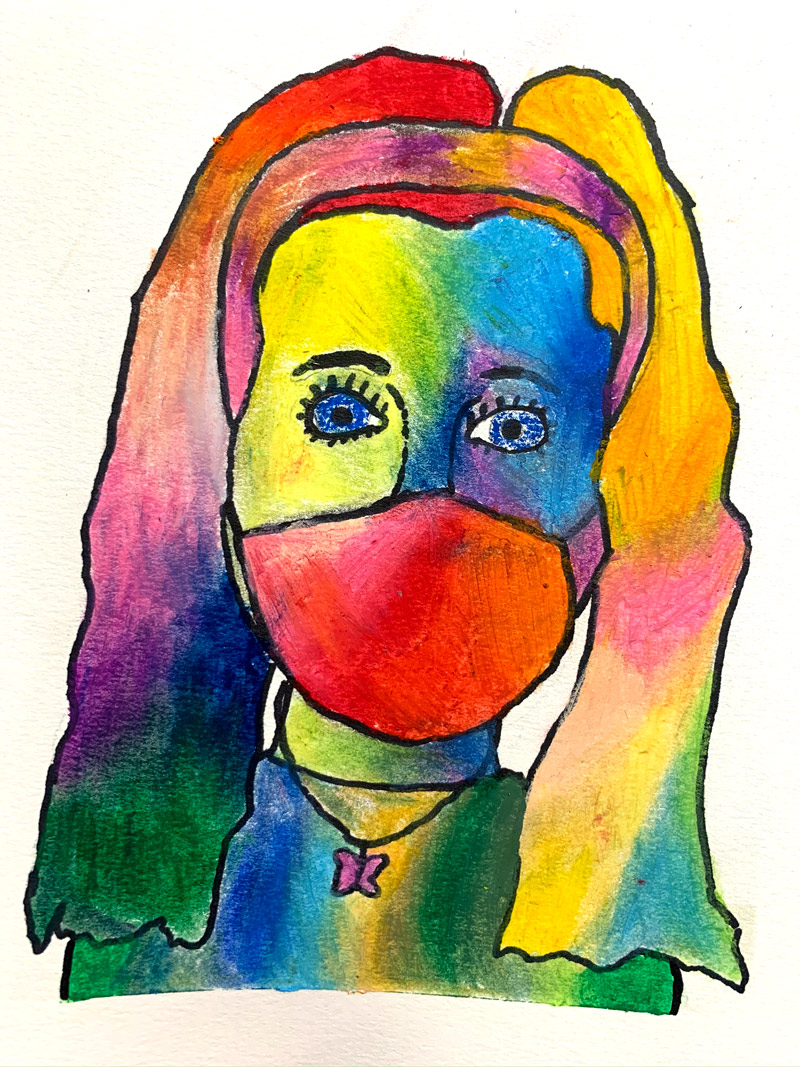
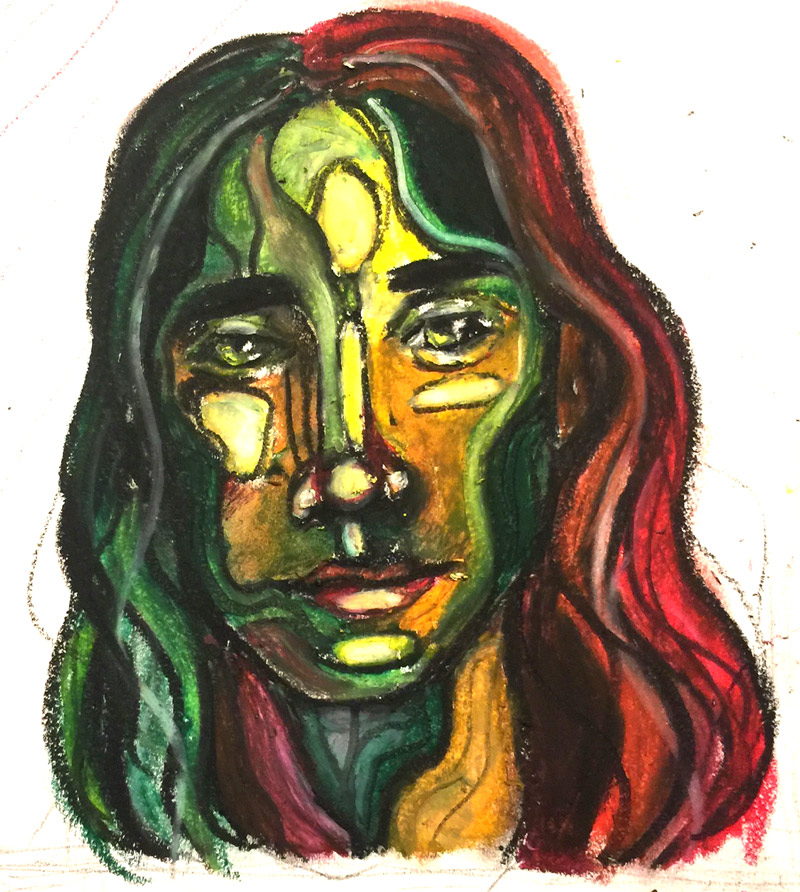
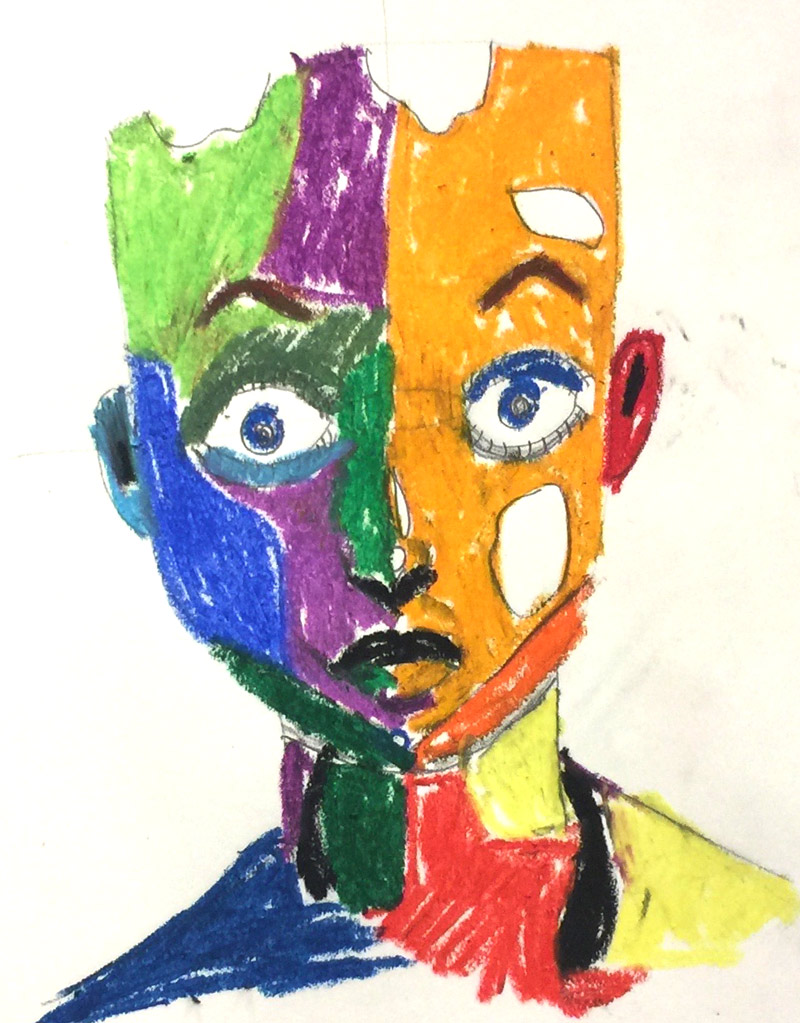
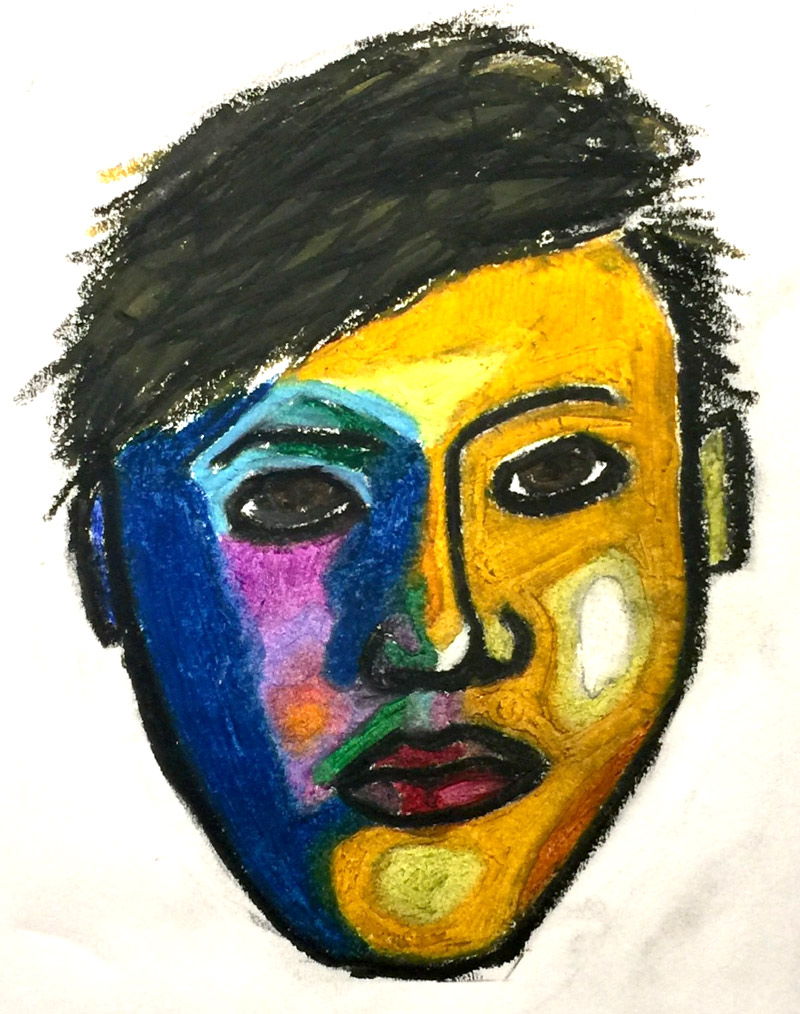
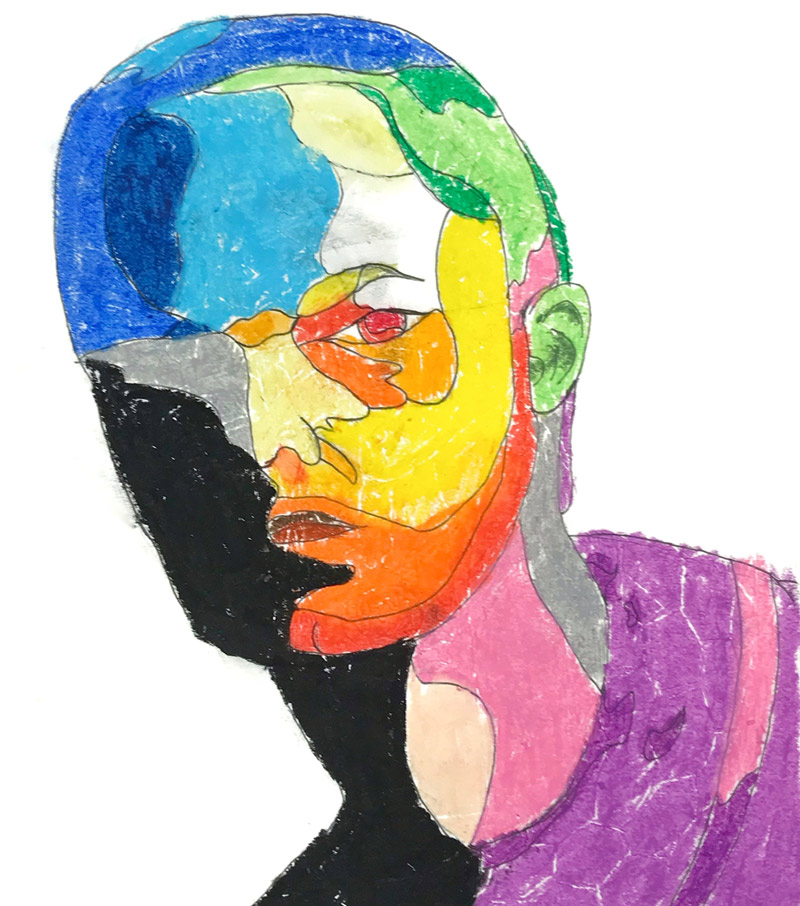
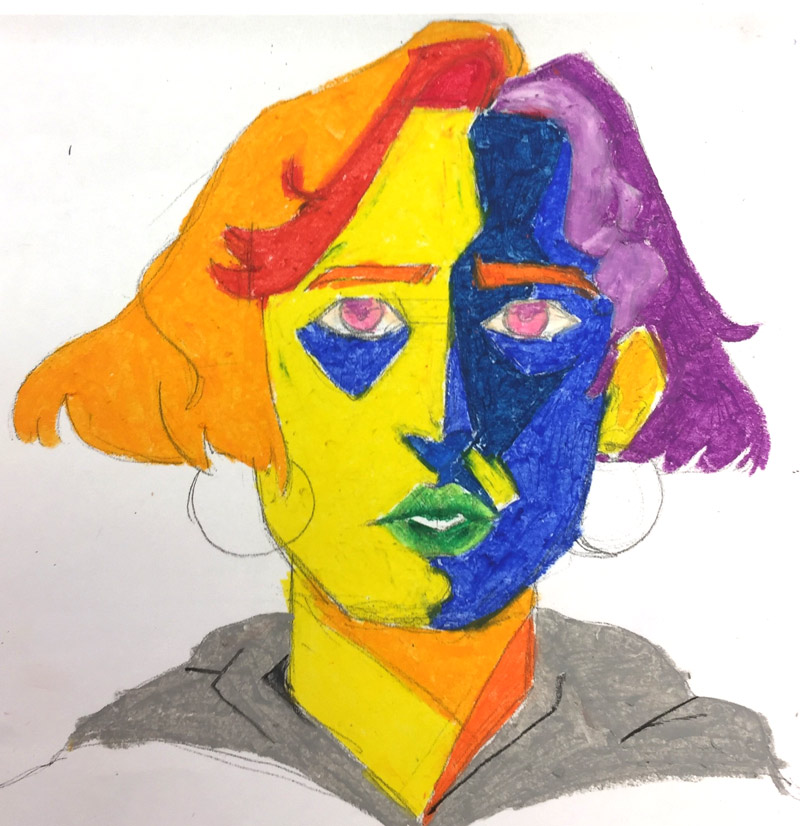
Student Work
Lesson At A Glance
Here’s a brief overview of the complete lesson. It’s also on your prep page in the Ready, Set, Go! section (below the lesson).
Colored buttons jump to each section in the full lesson plan below.
10 Minutes – Fun faces: pencil & charcoal
10 Min – Review face proportions & shadows
15 Min – Practice: squint & block in shadows
10 Min – Fast faces: in charcoal
12 Min – Super-light pencil Big Shapes
45 Min – Expressive bright colors in pastels
3 Min – Pack your things to go
Use this button to jump down to the preparation section.
SCROLL & TEACH
LESSONPLAN
Each section is a different color. Read over once and then you can SCROLL & TEACH using any device you like. It’s designed to work well with your phone.
LEARNING TARGETS

Students move into drawing in an easy and fun way
M A T E R I A L S
- 14″ x 17″ sketch pad
- 2B graphite pencil
- Compressed charcoal stick
All materials are suggestions and may be modified as you see fit. We have tried many items, and these seem to allow the most versatility for the cost.
“We’re going to warm up with some fun faces. You can make them more realistic, or silly and like cartoons. the more you exaggerate features, the funnier a face will look.
Do not create anything that seems violent, crude or otherwise would make a parent unhappy. This is for fun, but is also a serious art time warm up. Warm ups are really important to get you going.
The idea is to stretch your ideas beyond what you would normally do, and have a lot of artistic fun too.”
1.2 Sketch
Draw face features in pencil guidelines first if you want. Then switch to charcoal or an Ebony (8B graphite) pencil to create bold lines and shading.
“Make sure to add shading to the cartoon faces. Just do your best to figure out where shadows might be.”
Advanced Student Lesson
CREATIONS - tap here to open
Our Creations lessons are for students who have completed the two years of Foundations and are ready to begin using all that they have learned to create new work. These more challenging versions of the same concepts and techniques are easily taught along-side students in the Foundations course. This allows for excellent review, and is encouraging for students to see progress from each viewpoint.
Use the Student Instructions printout below to distribute to your Creations students. Tap the image to open the PDF in a new window.
3-Week Project: Professional Portrait Painting
Overview: Students will work on a self portrait in the same manner that professional painters do.
Step 1. (10 minutes) Set up for your portrait with a mirror at a good height for you to work, and a light for good shadows. Try moving the items around to look at your face from several angles and lighting effects. Don’t just settle for the first thing that happens. Make the world conform to your own viewpoint.
Step 2. (20 min) Warm up loose sketches. Create 10 different charcoal sketches on 4 sheets of 14″ x 17″ paper. Make 4 per page for the first eight sketches, and then make larger sketches with one per page. Use these sketches to specifically LEARN about the proportions of your face and how the shadows work.
Step 3. (22) Make two pencil sketches, beginning with big shapes and proportions before practicing some of the details. Take your time. One of the sketches should be small and have no shading because you’ll add oil pastels to it. the other sketch will become your final portrait, so make sure it is big enough to cover the canvas, and that you like the way it looks, getting everything as accurate as you desire. If you want to be more expressive, and less accurate, that is fine.
End of Part 1 (if dividing into two sessions)
Step 4. (5) Set up for acrylic painting. Tape a sheet of canvas to a board or use a stretched canvas.
Step 5. (15) Use your largest brush to cover the canvas with a thin coating of a warm color of your choice. Orange works well, but you can also try red or brown colors. Do NOT use any white, but add a little water to the paint to make it spread easily and cover well. Set aside to dry and put away acrylics.
TIP: If you want to get more creative with your colors, try using a cool color instead.
Step 6. (10) Use oil pastels to create a color practice version of your portrait over the pencil sketch you made in STEP 3.
Step 7. (20) If you can make a copy of your good sketch from STEP 3, that is helpful. Otherwise make a tracing of the outline and main features. You can tape the sketch and a new piece of paper on a window so you can see to trace it easily. Then cut out the copy or outline you’ve made so you can place it on the dry canvas (use a blow dryer if needed).
Trace the outline of your copy using your canvas pencil. You can then coat the back of your copy or tracing with some graphite (rub the side of the pencil lead over it – making sure it’s the back and not the actual drawing side). Re-position the cutout face on the canvas, lining it up with your outline, and then draw over the lines of the main features so you transfer the graphite, making guidelines for the bottom of the nose, eyes, and mouth.
TIP: place a book underneath a stretched canvas so you have a surface to press against.
Step 8. (5) Clean up your area and save your materials for next week.
Tap images to open Creations Student Instructions and Reference Materials in new windows

Use this button to jump down to the preparation section.
LEARNING TARGETS
Students know how to plan an artistic idea
M A T E R I A L S
- 14″ x 17″ sketch pad
- 2B pencil
- White and kneaded erasers
- Cheasel stand & clip with Face Facts PDF
2.1 Print
Reference
Face Facts
This PDF shows the basic proportions of a human face from the front, and where most shadows will be found.
Hand out reference prints. Everyone should get one. Do not allow students to write on them or keep them.
Note that this print is from a recent lesson and you may already have them.

1 Page – Opens in new window
2.3 draw
Use this button to jump down to the preparation section.
STEP 3. Block Shadows
Students will draw a 2-tone face with only the lightest & darkest areas 15 MinutesLEARNING TARGETS
Students know how to amplify shadows by squinting
M A T E R I A L S
- 14″ x 17″ sketch pad
- 2B pencil
- White and kneaded erasers
- Mirror & good lighting
3.1 Print
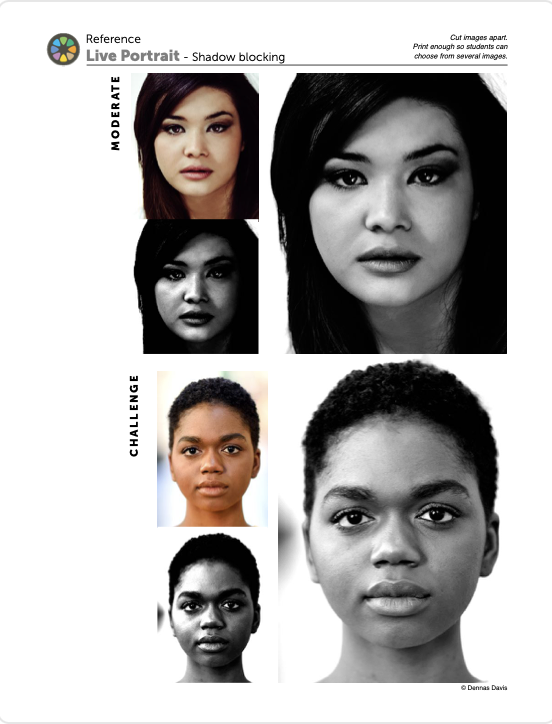
Reference
Face photos for Shadow Blocking Maps
Cut out each set (2 to 3 versions of one face together), and print enough for each student to use a set.
Hand out reference prints or let students choose which ones they want. Each set is labeled as
EASY
MODERATE
CHALLENGE
1 Page – Opens in new window
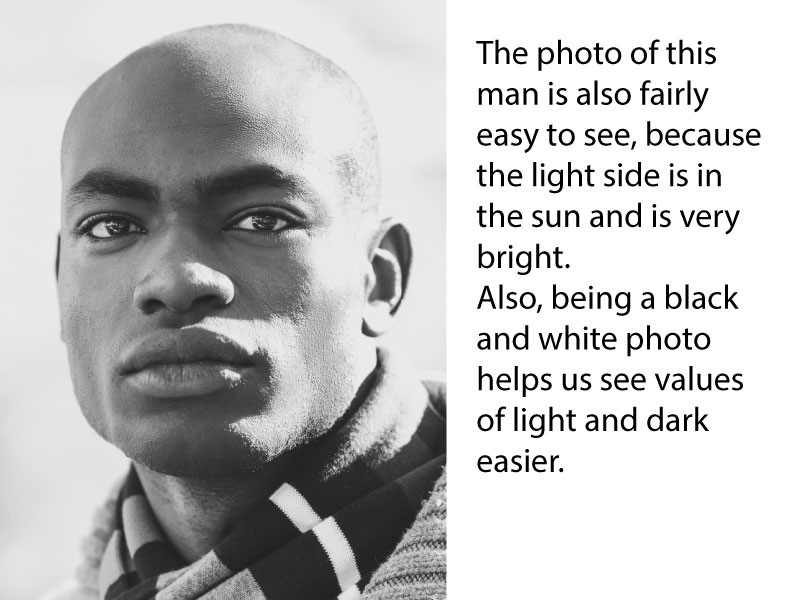
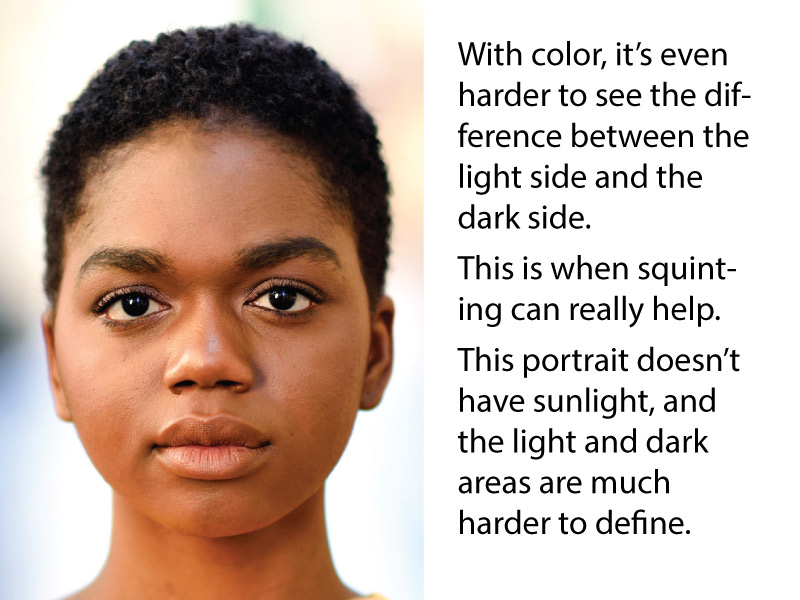
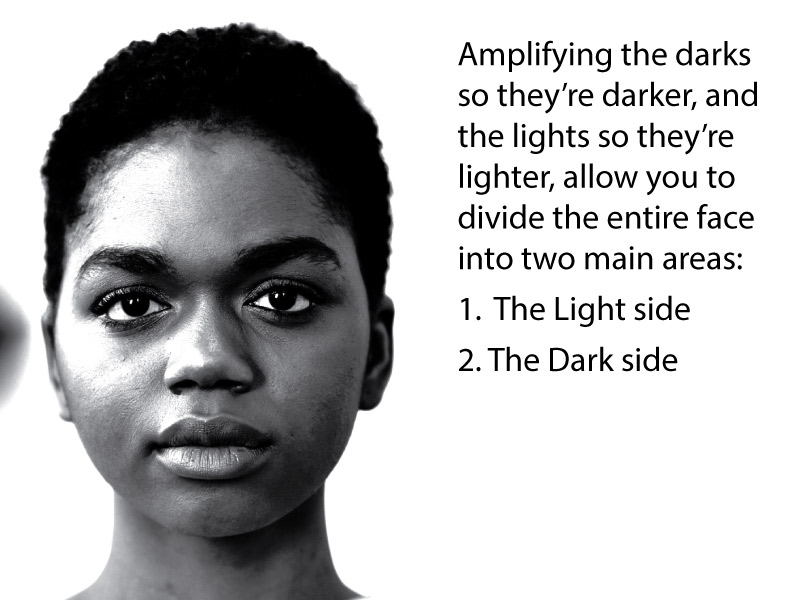
Dividing a face into lights and darks (tap any image to open viewer)
Read the text on each slide as you go.


3.3 Draw
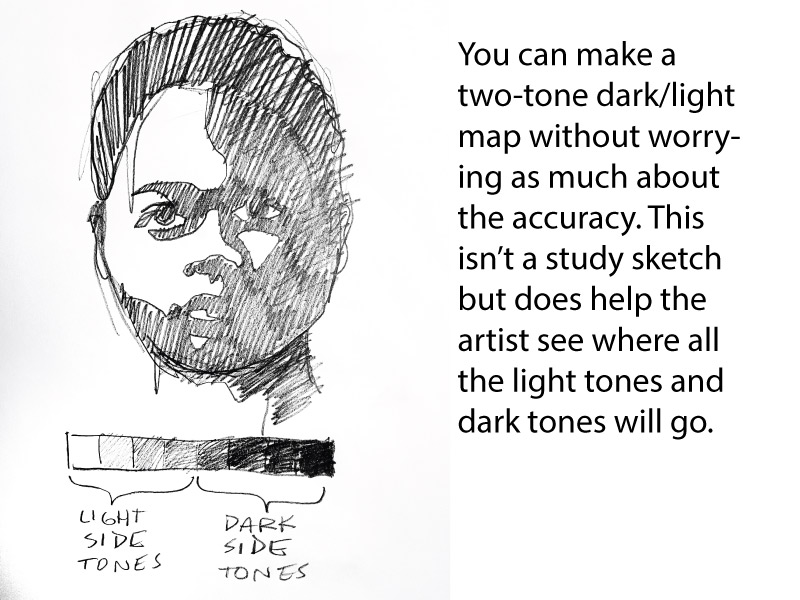
Encourage students to work quickly, simply finding out where the areas are. Accuracy of the face is not as important as the mapping.
Start with a quick outline of the entire face – The Big Shape.
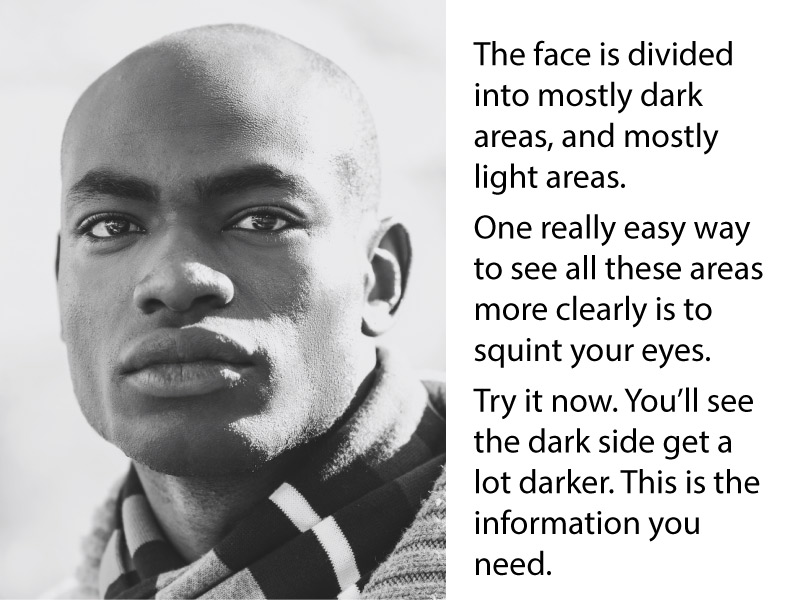
Then draw a line along the edge of all the shadow areas, dividing the face into light and dark.
Some references are in black and white only, and some challenge reference photos are in color, but all of the sets have a large black and white final reference, along with a black and white higher contrast version. This is an example of what squinting should help them see.
As students draw, make sure that mirrors are set up for the next step, as well as some good lighting.
Use this button to jump down to the preparation section.
LEARNING TARGETS
Students know how to sketch quickly to learn a subject
M A T E R I A L S
- Sketch pad
- Compressed charcoal stick OR
- Ebony pencil
- Kneaded eraser
- Mirror on a stand
- Light/desk lamp
Having a desk lamp for each student ensures a strong side light to the face, which is best for a self portrait. An overhead pendant light can also look good. Other, lesser lighting is good too, because it will add light to the shadows so they’re not overly dark.
4.1 Sketch
Use this button to jump down to the preparation section.
LEARNING TARGETS
Students know how to create light guidelines as a preliminary for artwork
M A T E R I A L S
- 11 x 17 Sketch pad
- 2B pencil
- Kneaded eraser
- Mirror on a stand
- Light/desk lamp
5.1 teach
This is where you do the accuracy!
These very light lines should be erased and redrawn several times, because this is about where everything goes, what size it is, and what different elements line up with each other.
Getting to the end, and seeing something that doesn’t look “right” to you, always, always, means that the guidlines were not accurate.
Take your time to draw a very light outline of your own face; the big shape of your head.
STOP and evaluate. Then erase it and redraw where needed.
Then add outlines of the eyes, bottom of the nose, and mouth.
That should be all you need, but you can add a few other details too. Just outlines, drawn very lightly so you can erase them and change as needed.
Remember to STOP and evaluate before you finish.
Make the portrait large on the sketch page so that it can be accurate and they can enjoy the next step in oil pastels.
Use this button to jump down to the preparation section.
LEARNING TARGETS
Students know how to be expressive using bright colors and to blend oil pastels
M A T E R I A L S
- Sketch pad with guidline drawing
- Oil pastels
- Blender sticks (stumps)
- Paper towels
- Sandpaper board
- Mirror
- Light

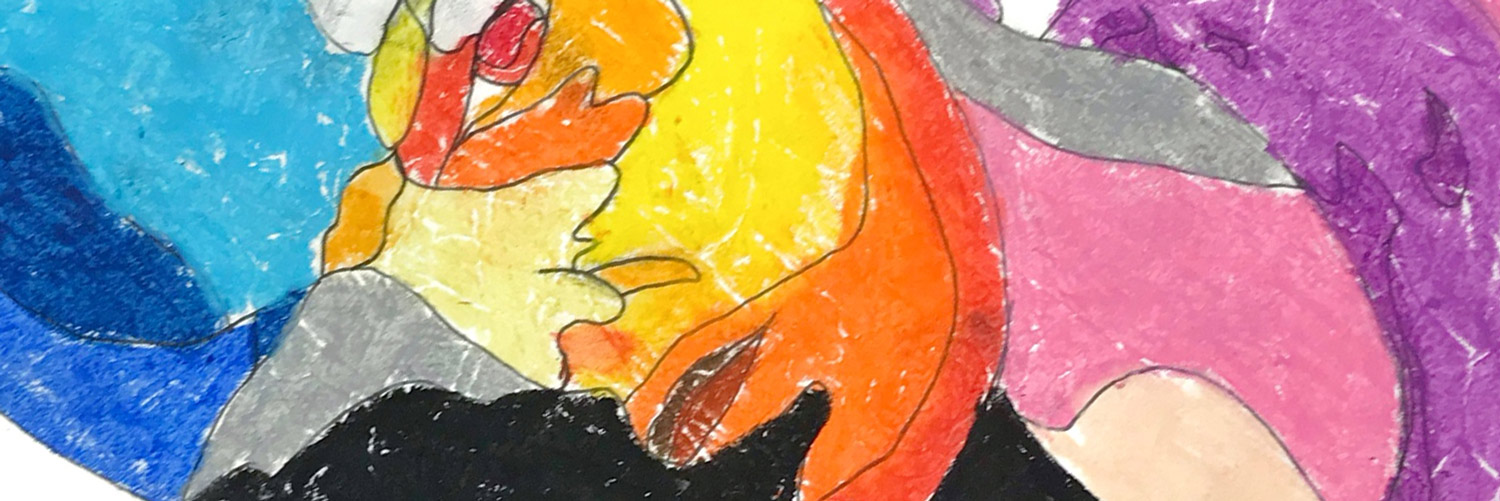
At first, oil pastels look a lot like bright crayons

You can layer the color and start to blend them. They mix more like paint than crayons.

Yellow has been layered over both sides so you can see the smearing effect on the red.

Mix colors that seem similar. Red and yellow are warm colors, and mix well. Blue and green are cool, so they mix well too.
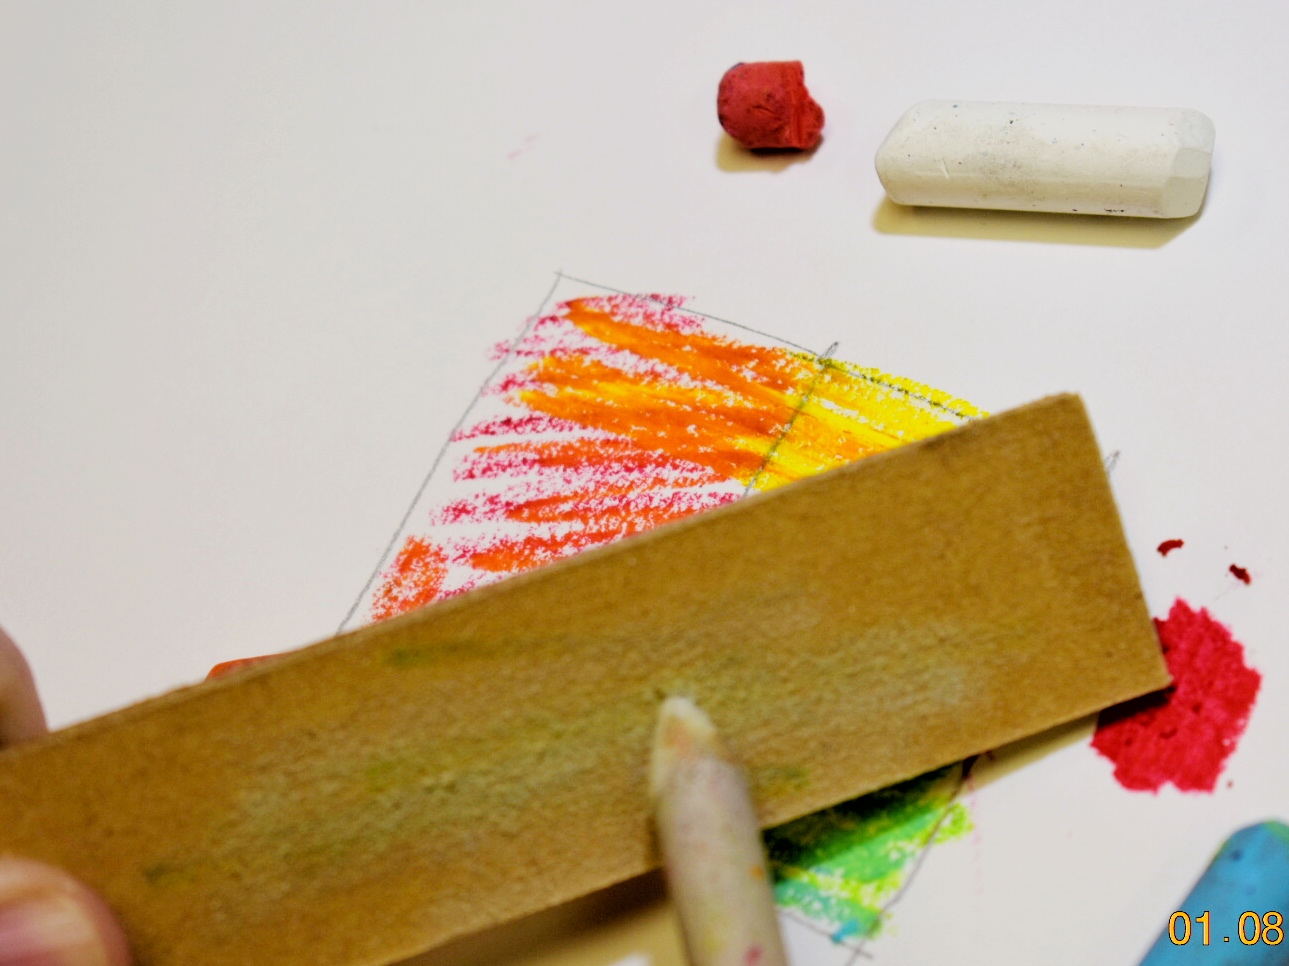
A paper stump (blender stick), can be used. Clean it off by rubbing on a sandpaper board

Smearing the colors together with the blender looks awesome!

White can also be used to blend, as well as lighten. Now the pastels look very much like paint
Use this button to jump down to the preparation section.
LEARNING TARGETS
Students know the importance of cleaning up
M A T E R I A L S
- Paper Towels
- Cleaning wipes
- Sink
- Waste baskets
- Well-lit spot for photos
- Camera or phone-camera
7.1 clean
Students clean up their work area.
- Wash hands
- Put art supplies away
- Wipe tables & toss trash
- Check for items on floors and tables
7.2 photos
Try to get photos of your student’s artwork. Find a good spot for quick lighting without highlights or shadows from your hands and device. Ideally in-between two strong lights on each side
7.1 connect
Make sure you see the kids connect with parents and tell them about the class if you can!
OBJECTIVES
- Practice and improvement in planning and using clay for 3D modeling
- Understanding how to work with air-dry clay
- Accomplishment from creating a finished sculpture of a face
- Fulfillment in having freedom of expression with the face project
TROUBLESPOTS
drawing with clay – Sometimes students will treat clay like a thick piece of paper instead of truly 3D. If their face is flat, or if the nose is drawn onto the surface, you need to help them realize the clay should look like real life instead of a drawing. Be patient. The easiest way is to make a small flat face and etch an L shape for a nose. Explain that this is a drawing in the clay. Then make a 3D egg shape, and add a triangular nose sticking out of it. This is 3D. Like a toy figurine.
ART WORDS
3D – Something that has 3 dimensions: It has width; it has height, and it has depth. A square and a circle are 2D shapes. A cube and a sphere are 3D
CLASSROOM
PREP
It’s a good idea to go ahead and do the two faces out of each kind of clay if you haven’t before.
Print all of your PDFs from the lesson plan and cut any references apart as needed.
What your room needs
Here are your printable lists and room prep instructions.
Opens in new window
CLASSROOM
MATERIALS
- Cheasel stand & clip
- Modeling clay – about 1/3 lb per student
- Toothpicks
- Smocks
- Paper towels
- Cups for water
STUDENT’S
MATERIALS
- 14” x 17” Sketch Pad
- Oil Pastels
- 2B Pencil
- White and Kneaded Erasers
- Palette Knife
- Palette pad for placemat
PREVIEW
Week 29: Paint Sculptures
Last week’s face sculptures have been drying all week. The first half of the lesson this week, is painting the sculptures with acrylic paints. The second half is artists’ choice with dreams: using the acrylics in an expressive painting of a happy dream.
Week 30: Color Journal – Skintones
Students will warm up with face sketches and create a flesh tone Color Journal of 25 colors (only 16 for younger grades). Then there is a slideshow about the different color areas of the face and some exercises to practice making flesh tones work together. Young grades have some fun with alien faces too.