

OVERVIEW
Students will start with an expressive and wild oil pastel of an elephant by looking at a photo. Then they learn how to see big shapes and draw it more realistically before painting in watercolors. The second half of the lesson is about exaggerating and simplifying to create a fun cartoon. They draw it and then sculpt their cartoon out of air-dry clay. A little hat is made out of paper to fit on it’s head for a bit of whimsey.– – –
Grades 1 – 2
Week of March 31 – April 4
1 Hour & 30 Minutes
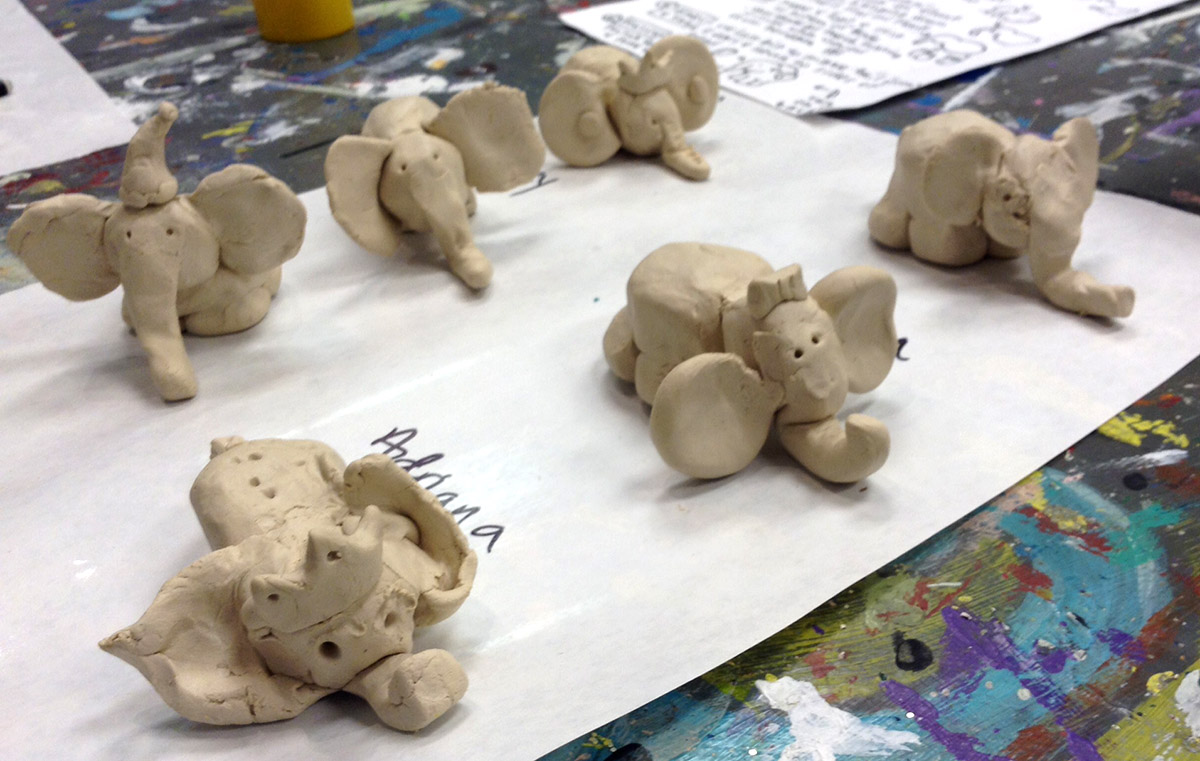
Student Work
Lesson At A Glance
Here’s a brief overview of the complete lesson. It’s also on your prep page in the Ready, Set, Go! section (below the lesson).
Colored buttons jump to each section in the full lesson plan below.
10 Minutes – Artists’ Choice
10 min – Draw and color expressive animal from reference
5 min – Slideshow about Big Shapes
20 min – Draw & paint a realistic animal from reference
5 min – PDF of cartoon animals
20 min – Use air dry clay to make a cartoon animal sculpture
7 min – Make a hat for the fun sculpture
10 min – Draw sculpture cartoon
3 Min – Everyone helps
Use this button to jump down to the preparation section.
SCROLL & TEACH
LESSONPLAN
Each section is a different color. Read over once and then you can SCROLL & TEACH using any device you like. It’s designed to work well with your phone.
LEARNING TARGETS

Students know how to use their imagination
M A T E R I A L S
- 8.5″ x 11″ copy paper
- 2B Pencil
- White Eraser
All materials are suggestions and may be modified as you see fit. We have tried many items, and these seem to allow the most versatility for the cost.
1.1 Greet
Greet students as they come in and help them choose a chair.
Kneel down so that you are on their level. Bending over emphasizes the differences in your height, while kneeling makes them feel more important. Have tape and marker ready so you can stick some tape on the table by each student and write their name on it as they sit down.
1.2 Choice
Encourage students to work with one piece of paper for a while. If someone uses the phrase, “free draw”, explain that artists’ choice is something only artists can do, while free-draw is something anyone can do. You want to use the phrase to elevate the students’ expectations of their work.
Everyone should take their time with the work and make a finished piece of art. Limiting the paper can also help kids focus on the work. If someone finishes in super-fast time, ask them what more they can do to the existing paper. Ask again several times – unless they appear overly frustrated; then you can allow them to move on to a new work.
Use this button to jump down to the preparation section.
LEARNING TARGETS
Students know how to sketch expressively
M A T E R I A L S
- 11″ x 17″ cover stock paper
- Black, grey, and white oil pastels
- Paper towels
- PDF of animal reference photos
- Cheasel for holding photo
2.1 Print
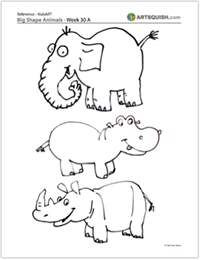
Reference
Big Shape Animals
Cut images apart and print enough for each student to choose from several.
Hand out reference prints. Set all of the images out on a table or counter, and let groups of students come choose what they want..
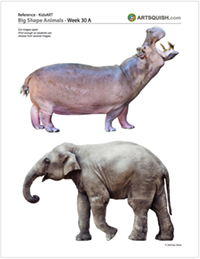
2 Pages – Opens in new window
2.2 Choose
TIP
Holding the pastels away from students until it’s time to begin helps them hear the directions before they start.
“Before you begin, I want you to draw this in an expressive way. That means making it more of your own special kind of animal drawing. You should still look closely at the picture, but draw it in your own fun way.
Look for the biggest shapes first and draw those BIG shapes, like circles or other blob-like shapes. Then add smaller shapes, like ears and legs.”
2.4 color
2.5 blend
Use this button to jump down to the preparation section.
LEARNING TARGETS
Students know how to identify big shapes
M A T E R I A L S
- TV or Ipad to view slideshow
Big Animal Shapes (tap any image to open viewer)
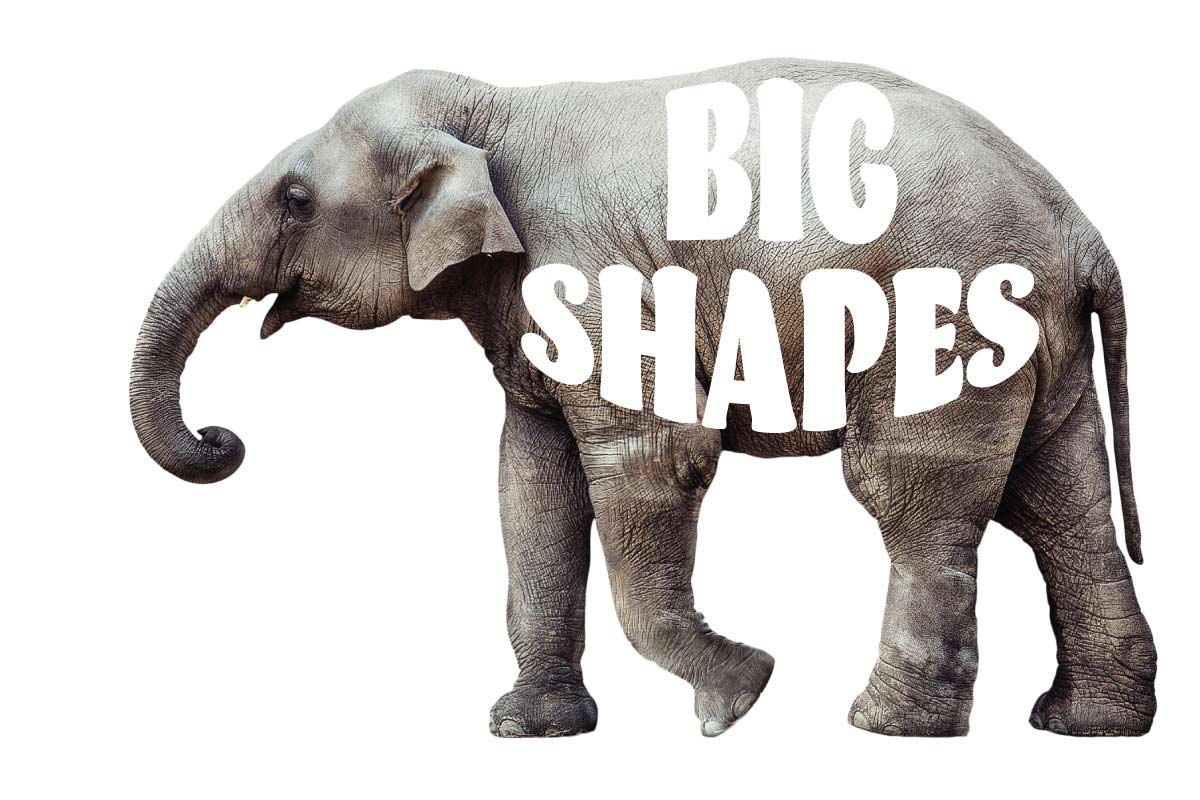
Big Animals have Big Shapes
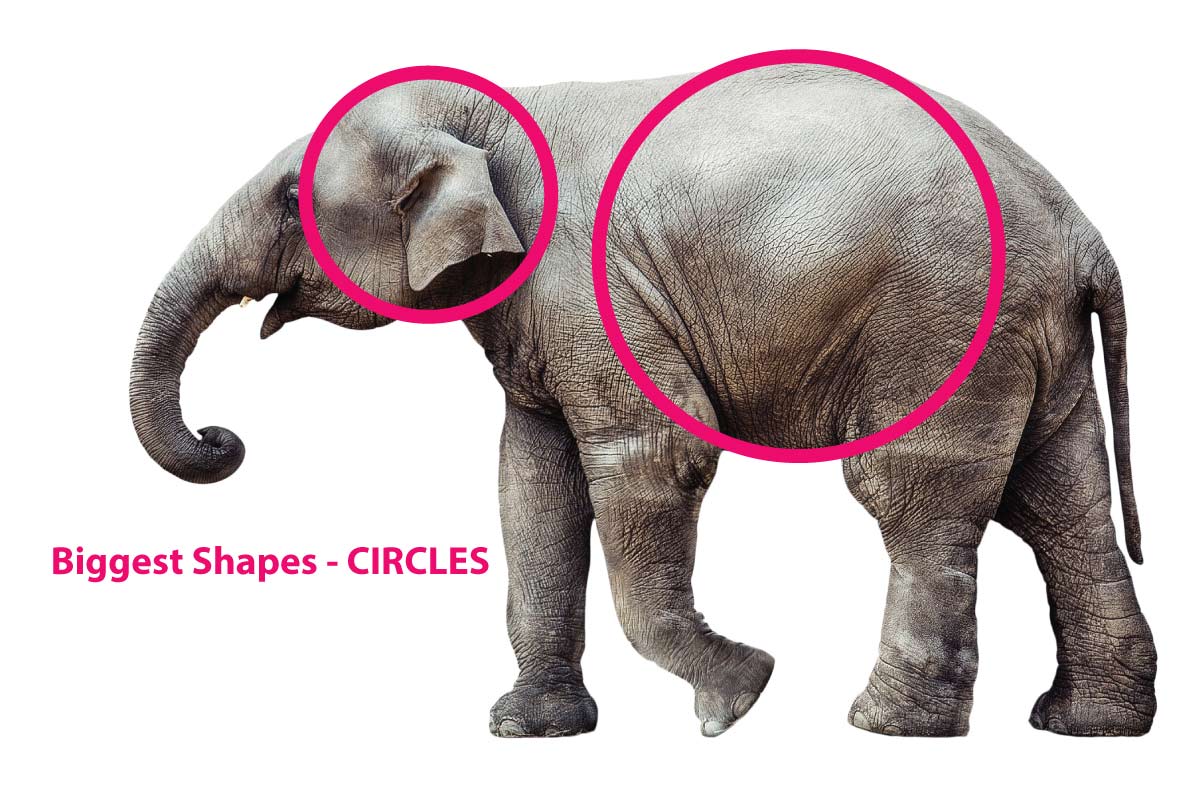
You can almost always find circles in animal shapes

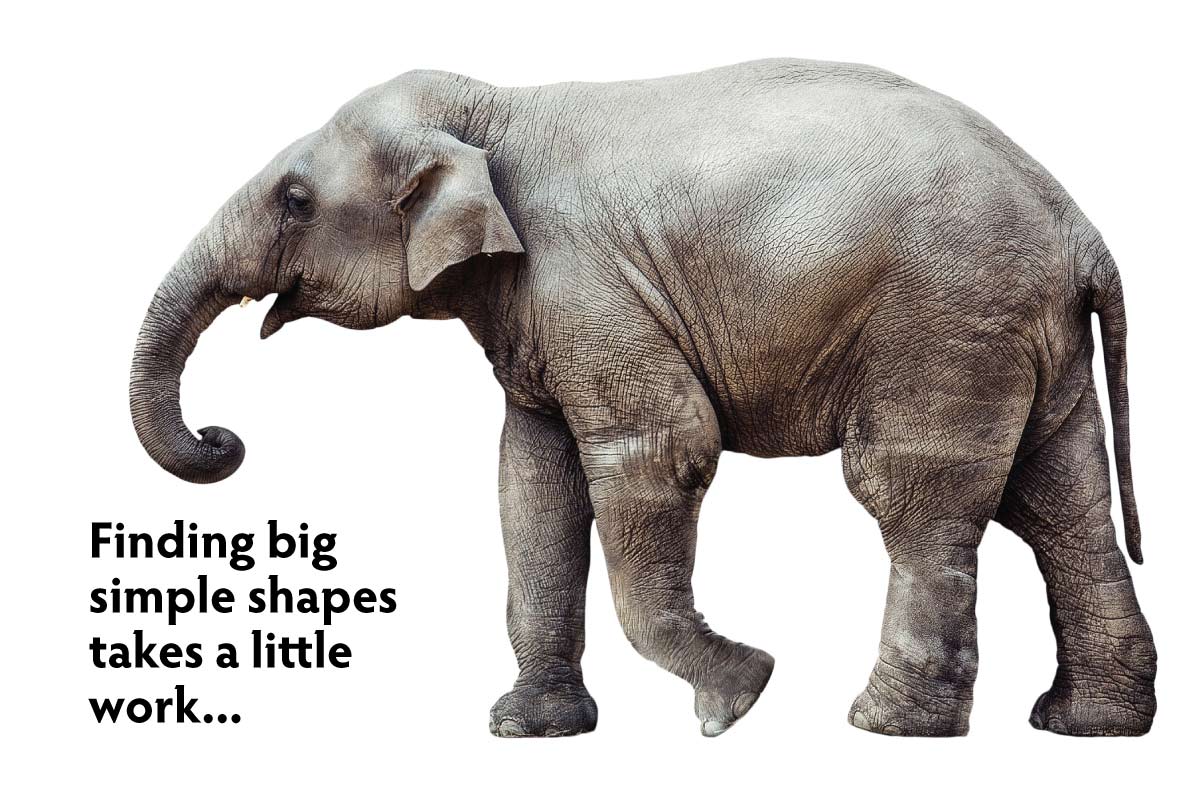
Here are some more shapes. These shapes are not the animal itself, but help us see what the animal shapes are like.
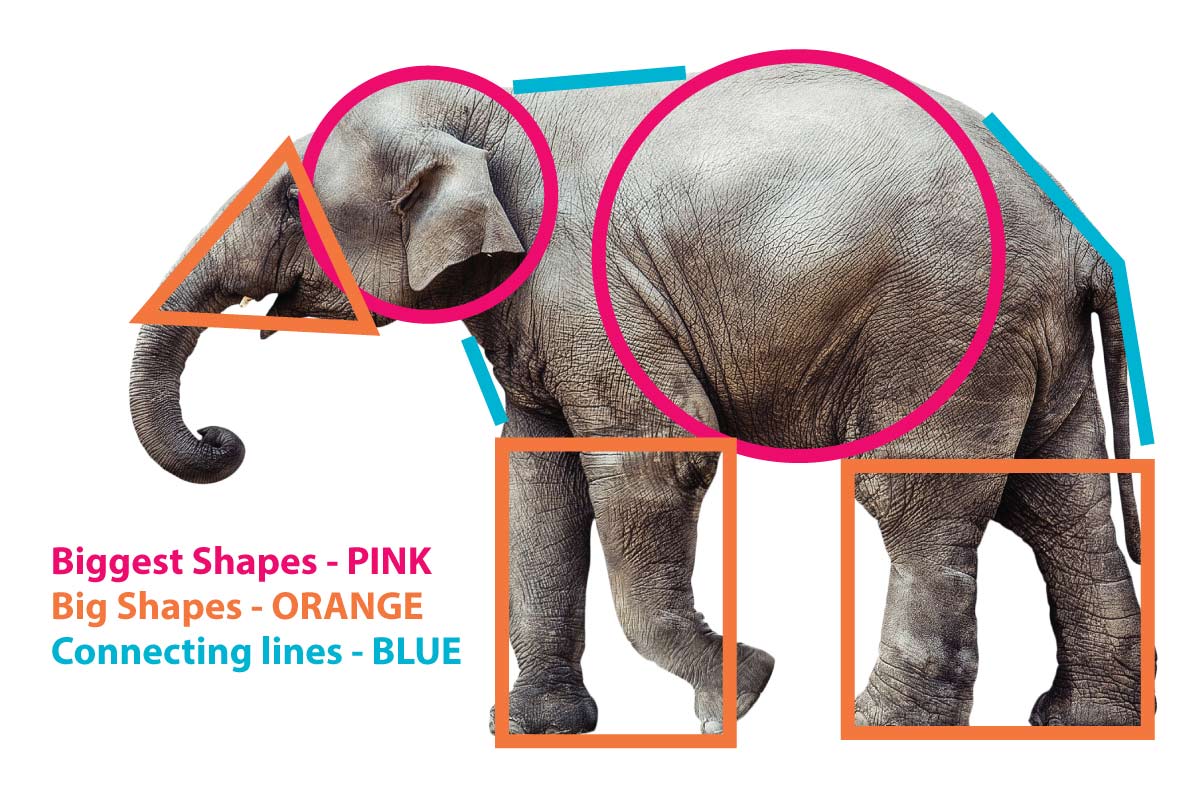
The blue lines connect all the shapes
These shapes don’t look very much like an elephant! But they do help artists know where to draw things like the head and legs. Do you see where you would draw the trunk?
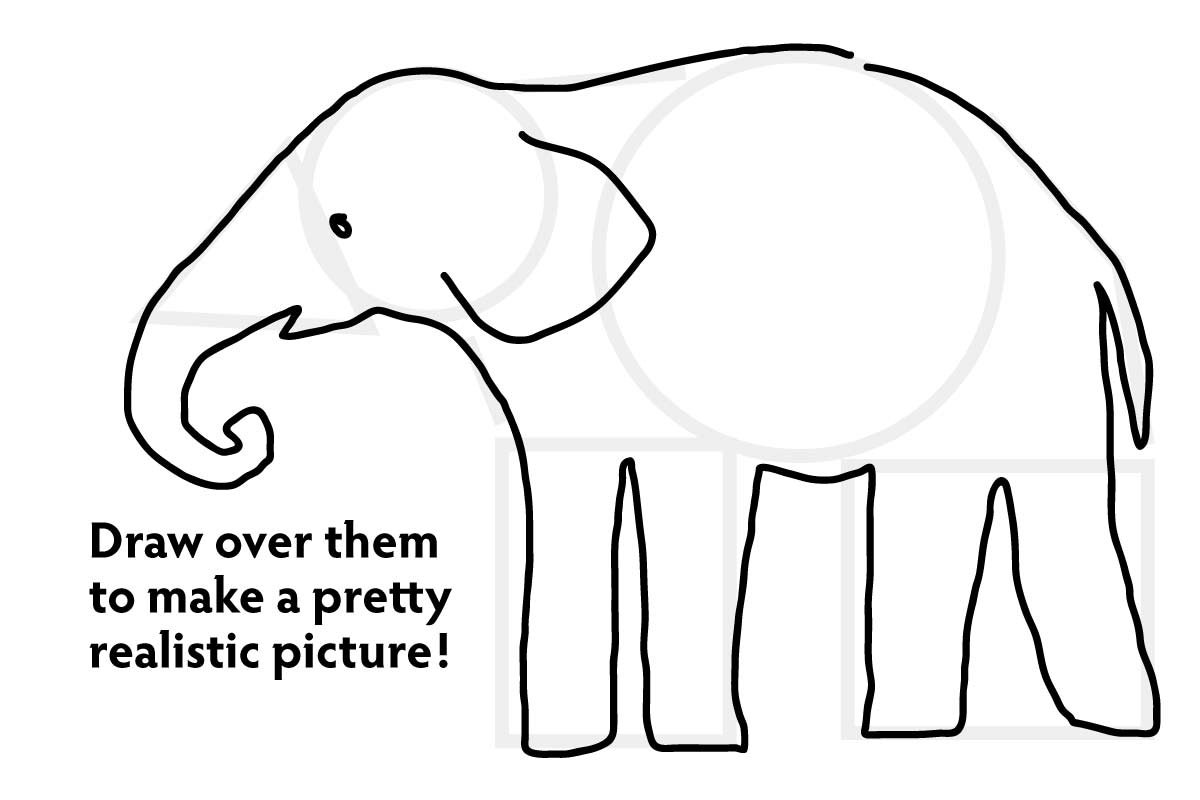
This drawing is not a tracing of the big shapes at all. That wouldn’t look like an elephant. You have to look at the picture to draw the animal realistically.
Use this button to jump down to the preparation section.
STEP 4. Watercolor
Students will draw and paint a realistic version of their chosen animal. 20 MinutesLEARNING TARGETS
Students know how to paint a realistic animal
M A T E R I A L S
- PDF of each animal printed on card stock or light watercolor paper (below)
- Reference photo on stand – the same animal they chose before
- 2B or 4B pencils
- Eraserss
- Watercolor paint trays
- Brushes – medium and small
- Smocks
- Water tub
- Paper towels
Brushes should be nylon for springiness and durability. Round brushes are the most versatile.
Paint pigment list:
- Napthol or Pyrrol Red
- Hansa or Light Yellow
- Pthalo Green (blue shade)
- Cyan or Cerulean Blue
- Ultramarine Blue
- Dioxazine Purple
- Magenta
- Burnt Umber
- Raw Sienna
- Titanium White (professional grade only)
4.1 print
Guidelines
3 Different Animals
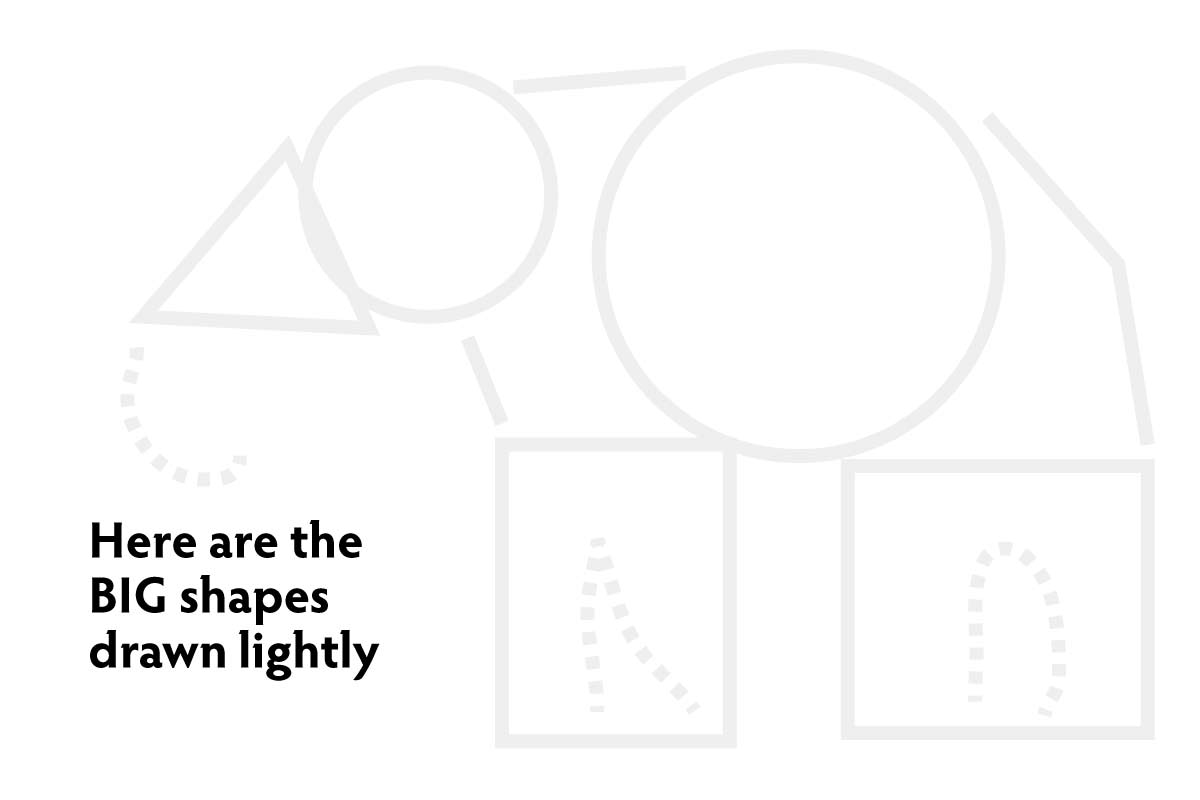
Each PDF is of a big animal guidelines shown in very light gray, so students can draw over them more realistically. PRINT on card stock for painting.
Hand out prints. Make sure each student gets one to keep. If your students keep notebooks or binders, you can 3-hole punch them ahead of time.
1 Page – Opens in new window
RHINO
1 Page – Opens in new window
ELEPHANT
1 Page – Opens in new window
HIPPO
4.2 EXPLAIN
“Look at the big shapes again in your picture. Think about how they’ll look on the paper as a realistic drawing. Take your finger and pretend to draw the animal. Where will you NOT draw? You may notice that some of the big shapes are lighter in places. That means there is an imaginary shape but you don’t draw the circle right there. Look at the animal, and draw it INSTEAD of the big shapes.
Now take your pencil and try to draw the animal as realistically as you can, by drawing the lines over and around the big shape guidelines. Remember, don’t just trace the guidelines because they don’t look like your animal. They only show you where to draw some of the animal’s parts, and how big to draw them.”
4.3 Draw
Students draw the realistic work over the guidelines.
Pencils are used to draw the animals to look like the photographs. The guidelines are only for size and placement. Do not shade at all!
4.5 paint
Start Painting.
“All of these animals are basically gray. Make gray with black and a lot of water.
If you look closely though, you can see more colors. It’s ok if you don’t see it though. It can be hard and takes practice. These animals, or parts of them, have a little brown or blue in them. A little bit of purple or green can also be added to the gray colors to make them more interesting even if you don’t see those colors.”
4.4 paint
“Add some ground underneath the animal and color behind it. Whatever colors you like. You can make grass, sky, plants, or dirt.
You can also make a pattern or multi-colored rainbow background if you want to be more creative. Have fun, and do whatever you think will look good for your painting.”
Use this button to jump down to the preparation section.

STEP 5. Big Cartoons
Students will use cartoon reference to draw their own cartoon animal. 5 MinutesLEARNING TARGETS
Students know how to draw a cartoon
M A T E R I A L S
- 8.5″ x 11″ copy paper or sketch pad
- 2B pencil and eraser (optional)
- Black marker
5.1 print
Reference
Big Cartoons
Cut images apart and print enough for each student to choose from several.
Hand out reference prints. Set all of the images out on a table or counter, and let groups of students come choose what they want..
1 Page – Opens in new window
5.2 draw
Use this button to jump down to the preparation section.
STEP 6. Toon Sculpture
Students will use air dry clay to make a fun sculpture they will paint next week. 20 MinutesLEARNING TARGETS
Students know how to make a sculpture out of clay
M A T E R I A L S
- Air dry clay
- Tape
- Pipe cleaners
- Water tubs
- Smocks
- Paper towels
NEXT WEEK:
These sculptures will be painted with acrylic paints next week. Make sure to set them up for drying all week.
Cartoon Sculptures (tap any image to open viewer)
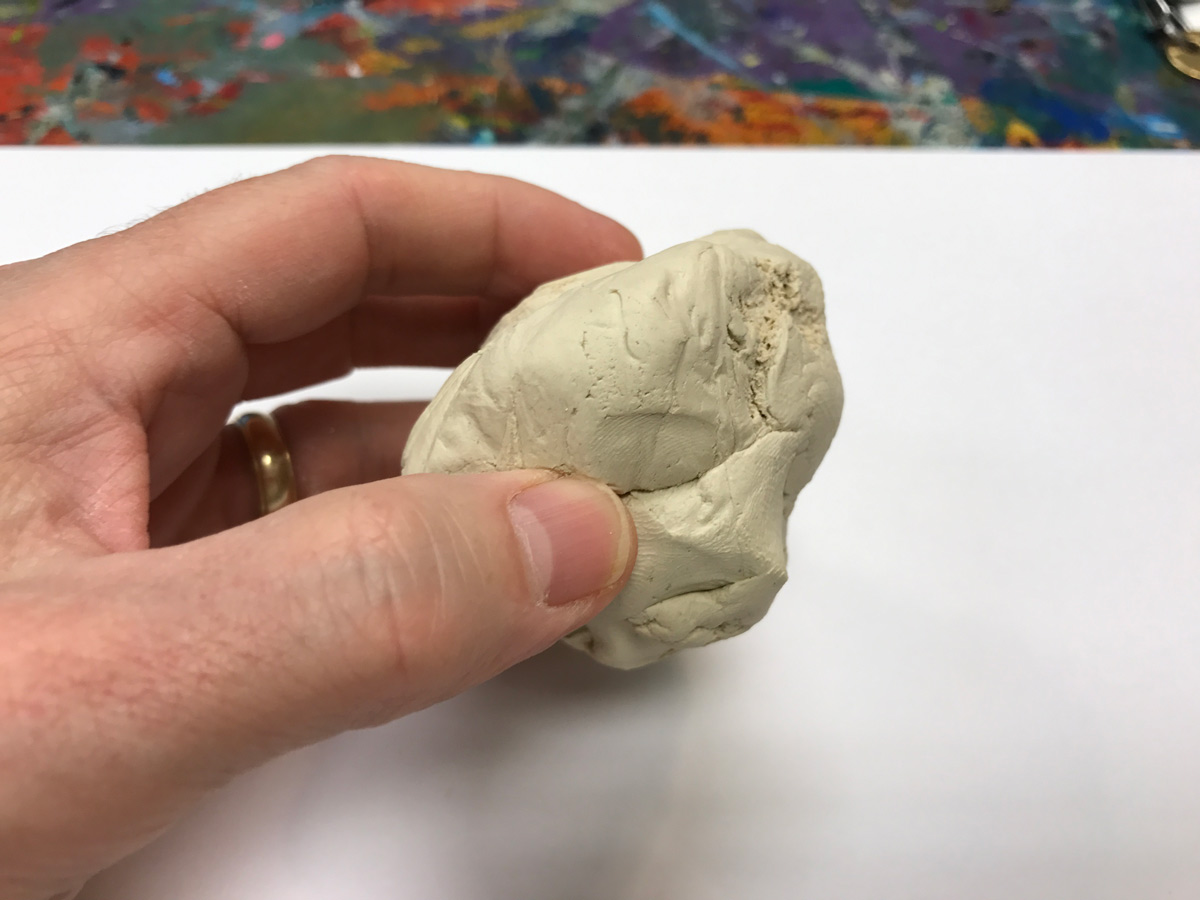
Everyone gets a ball about the size of a small orange
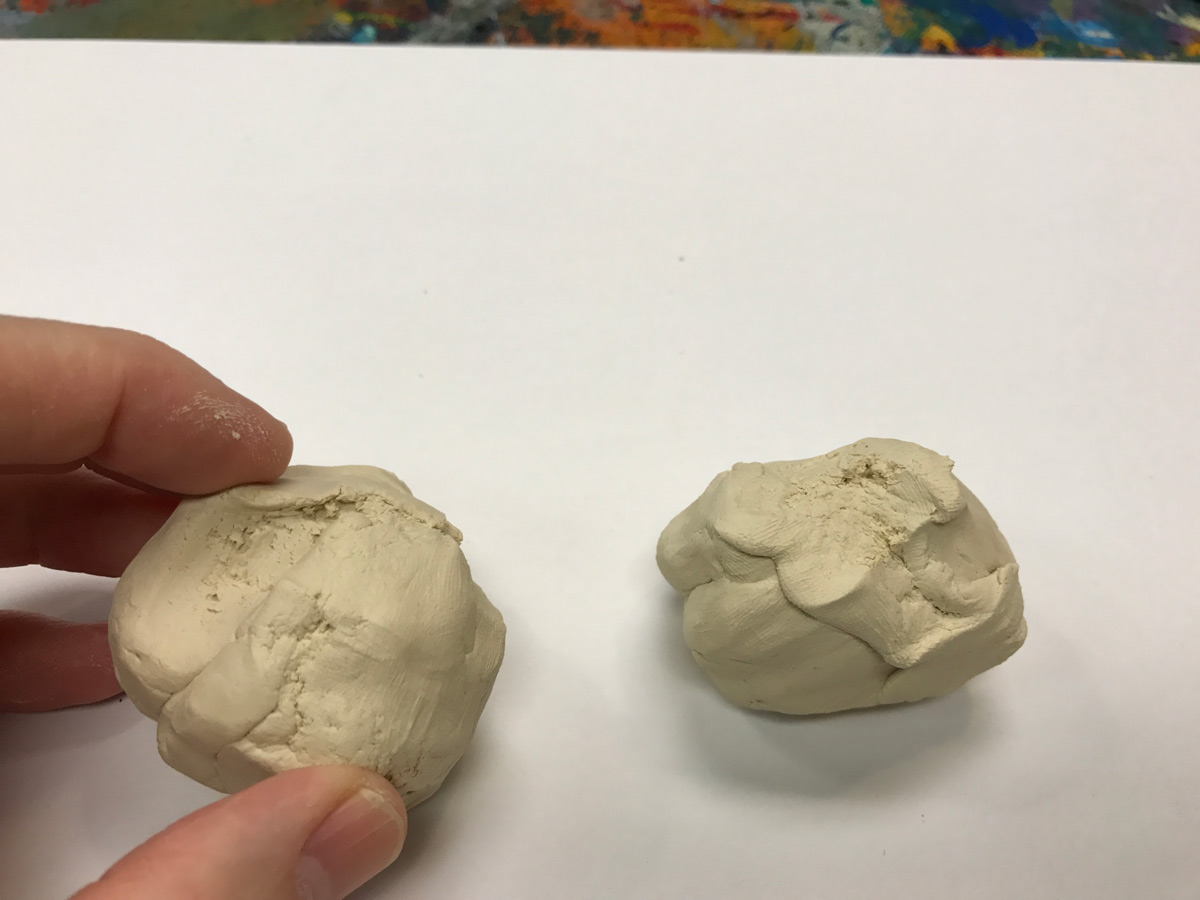
Divide it in two parts

Smooth and roll one part into a potato like shape. Elephants should be more round, and hippos and Rhinos are like this.
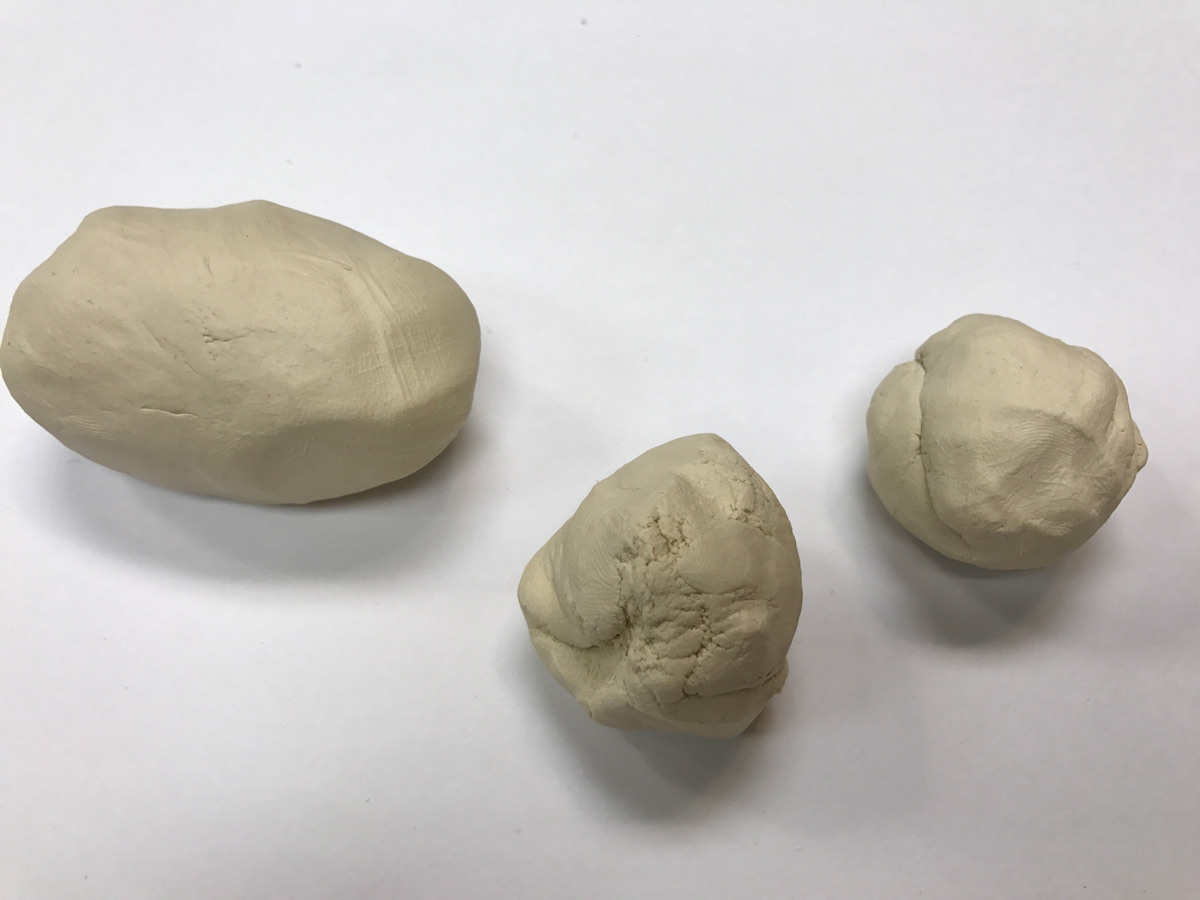
Divide the second ball in two parts and save them
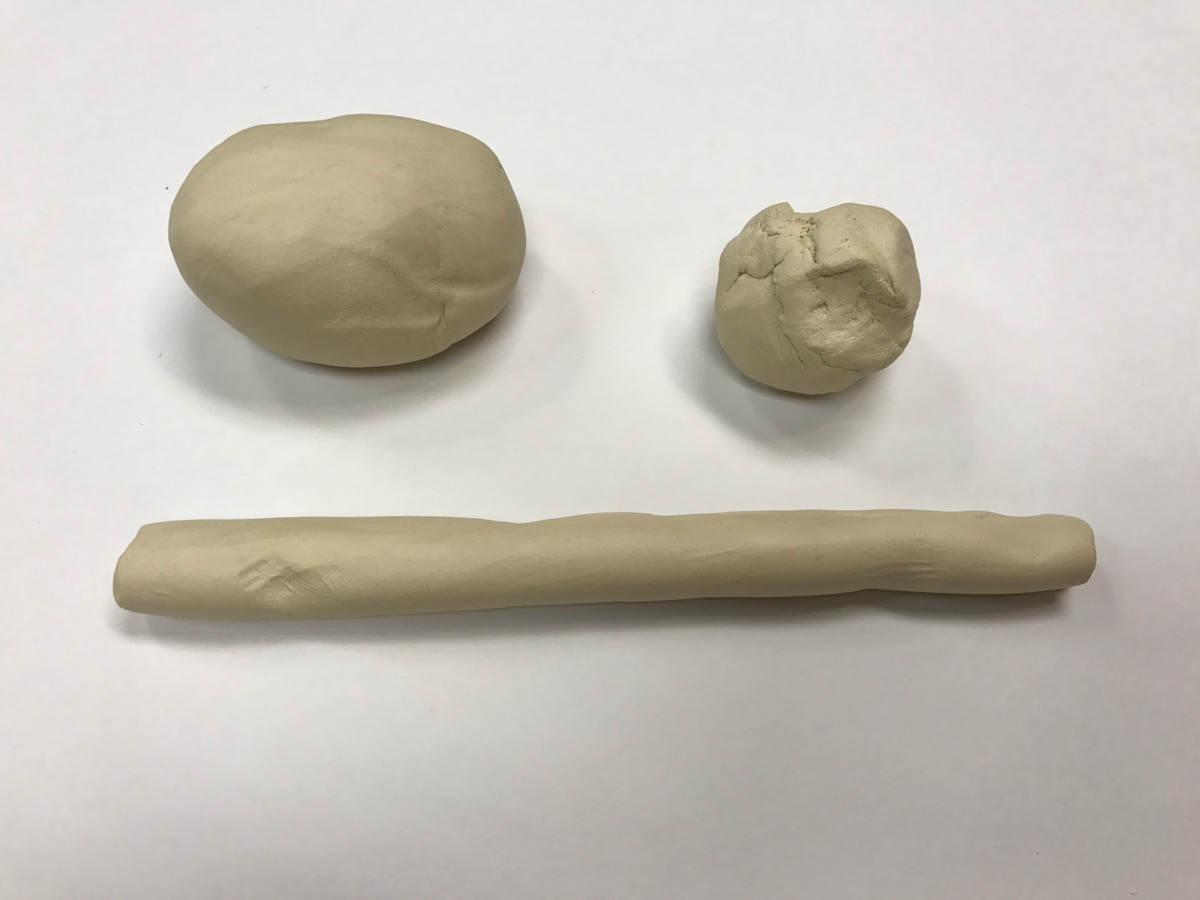
Roll one of them into a worm for legs

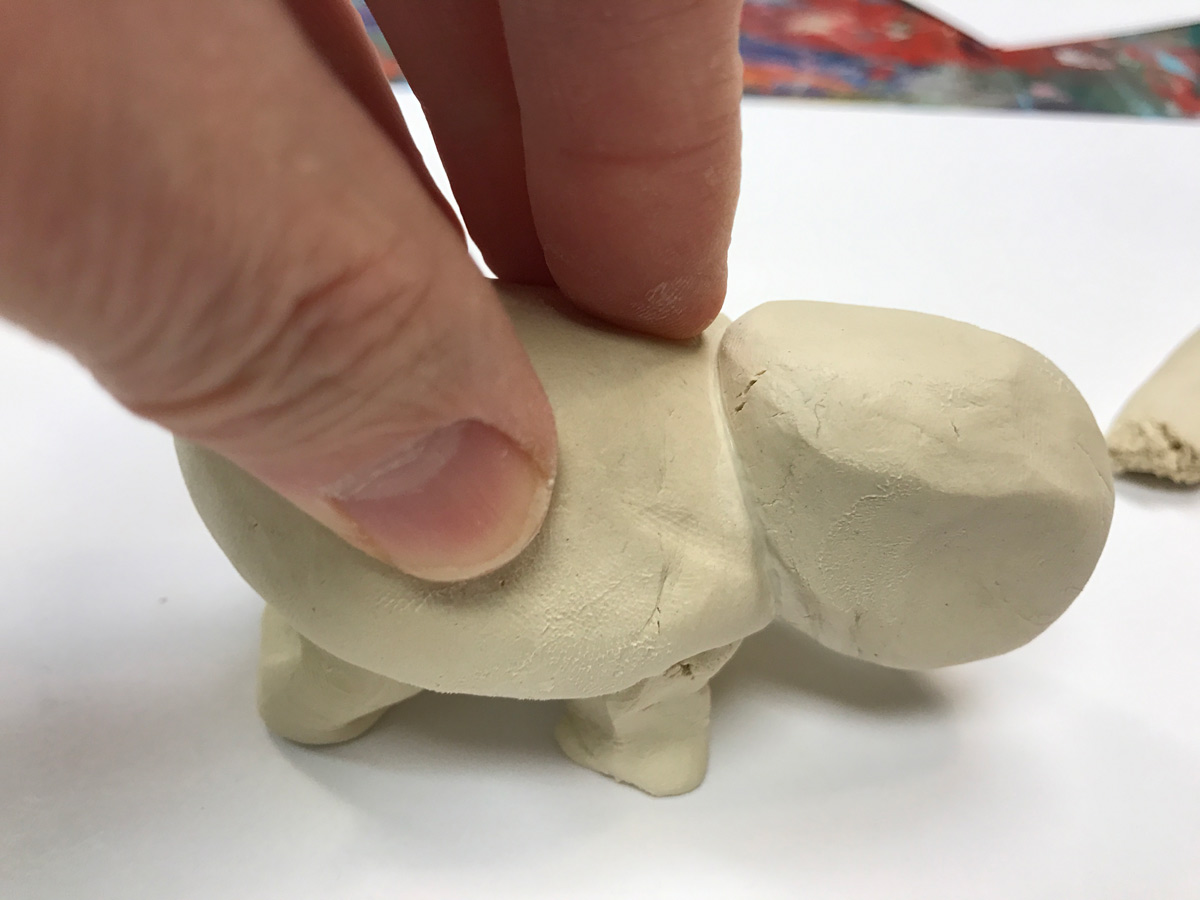
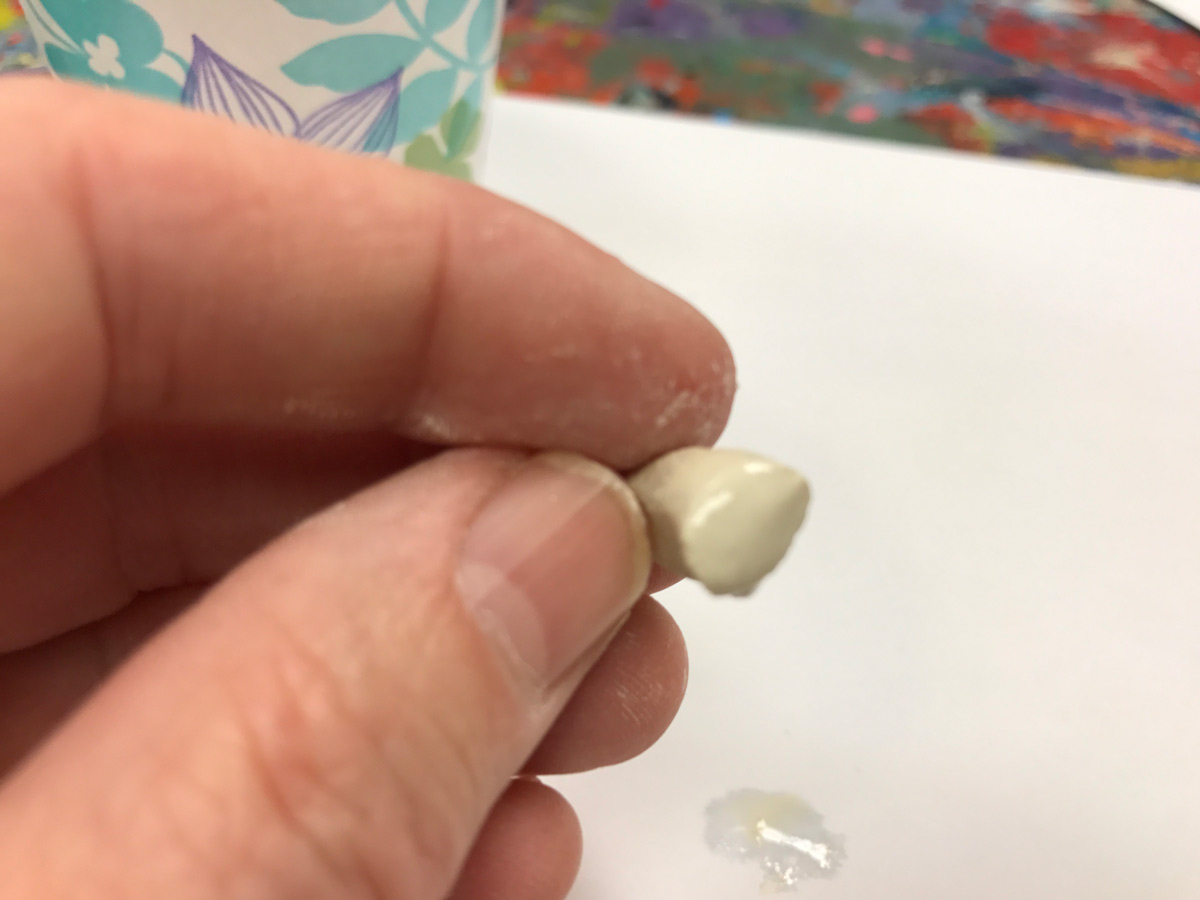
Use the second half and roll smooth into a head shape. Round for elephants,and oblong for the other two. Then use some water on your finger to moisten one end of the head, and also on the body where it will attach.
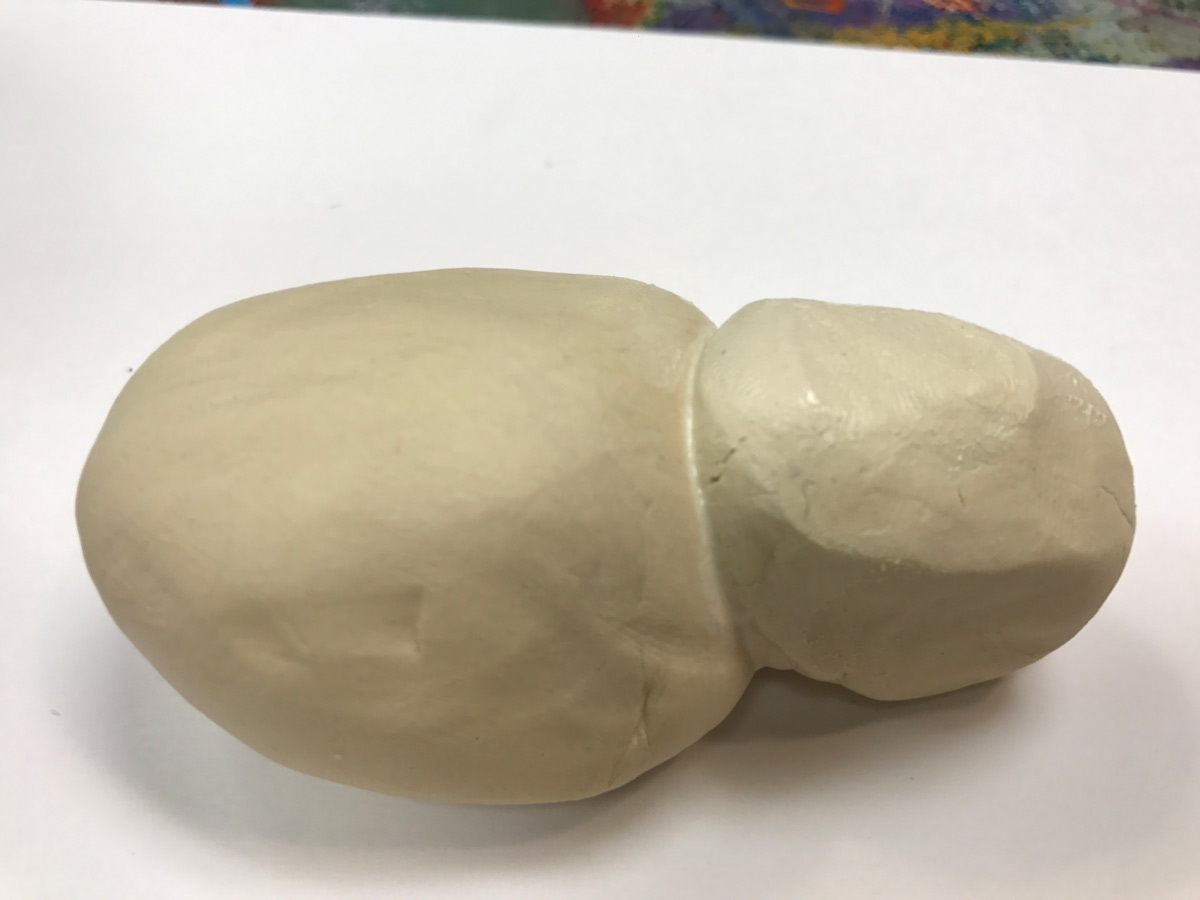
Press the two together very firmly, wiggling them so it’s a good bond. The water is what will hold it together, so make sure you don’t skip that step. Just don’t get too much or it gets all muddy and slippery.
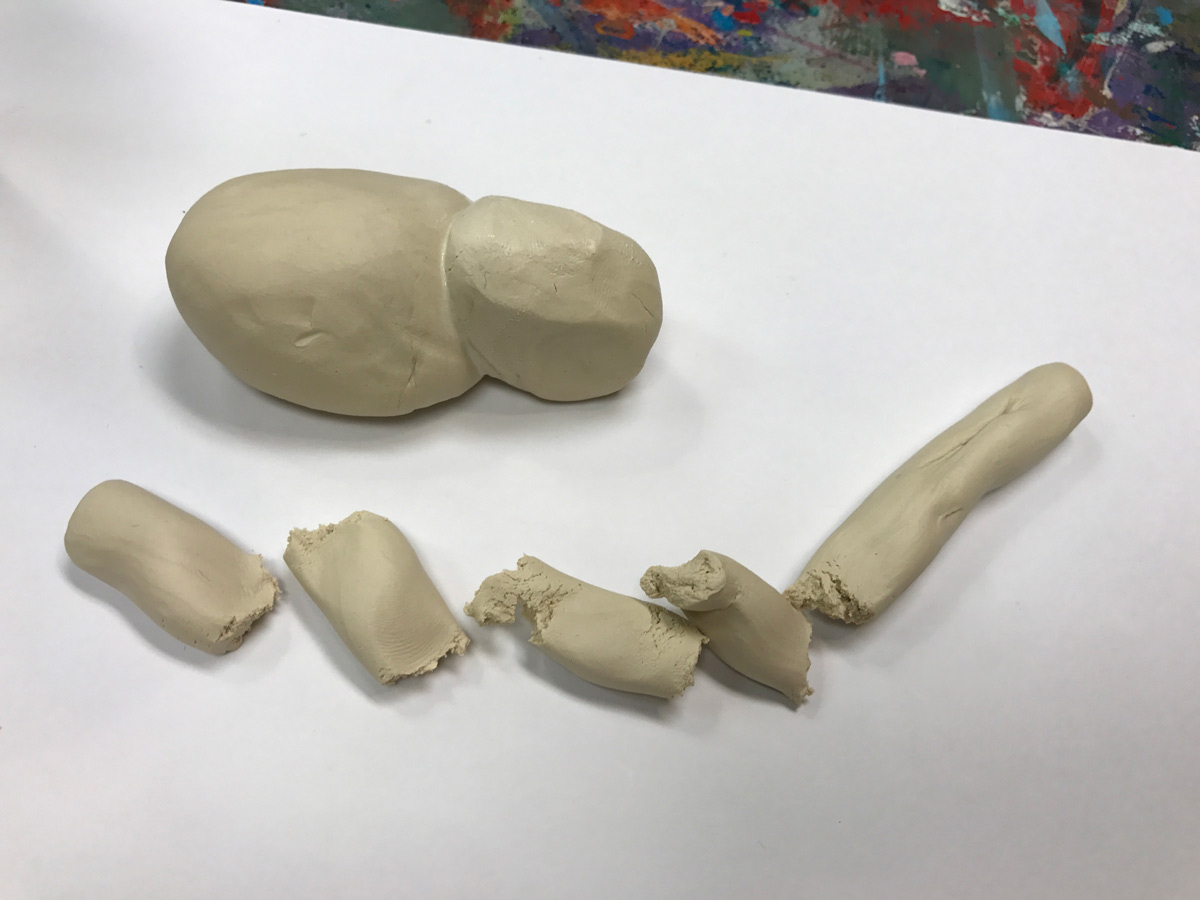
Pinch to divide the leg piece. Make them short for hippo and rhino. a little longer for elephant.
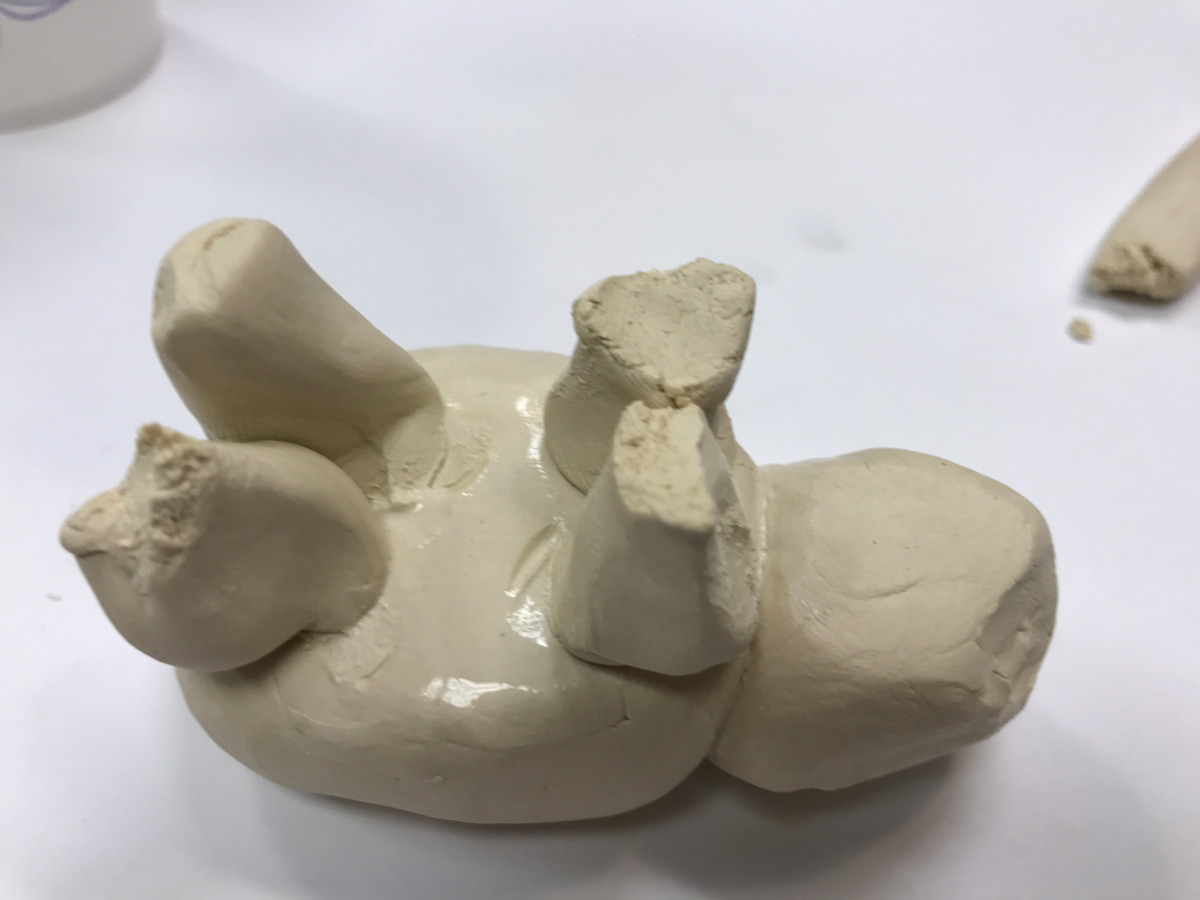
Stick all four pieces to the bottom, using some water for each join.
Press down to make them stick, and make the feet flat
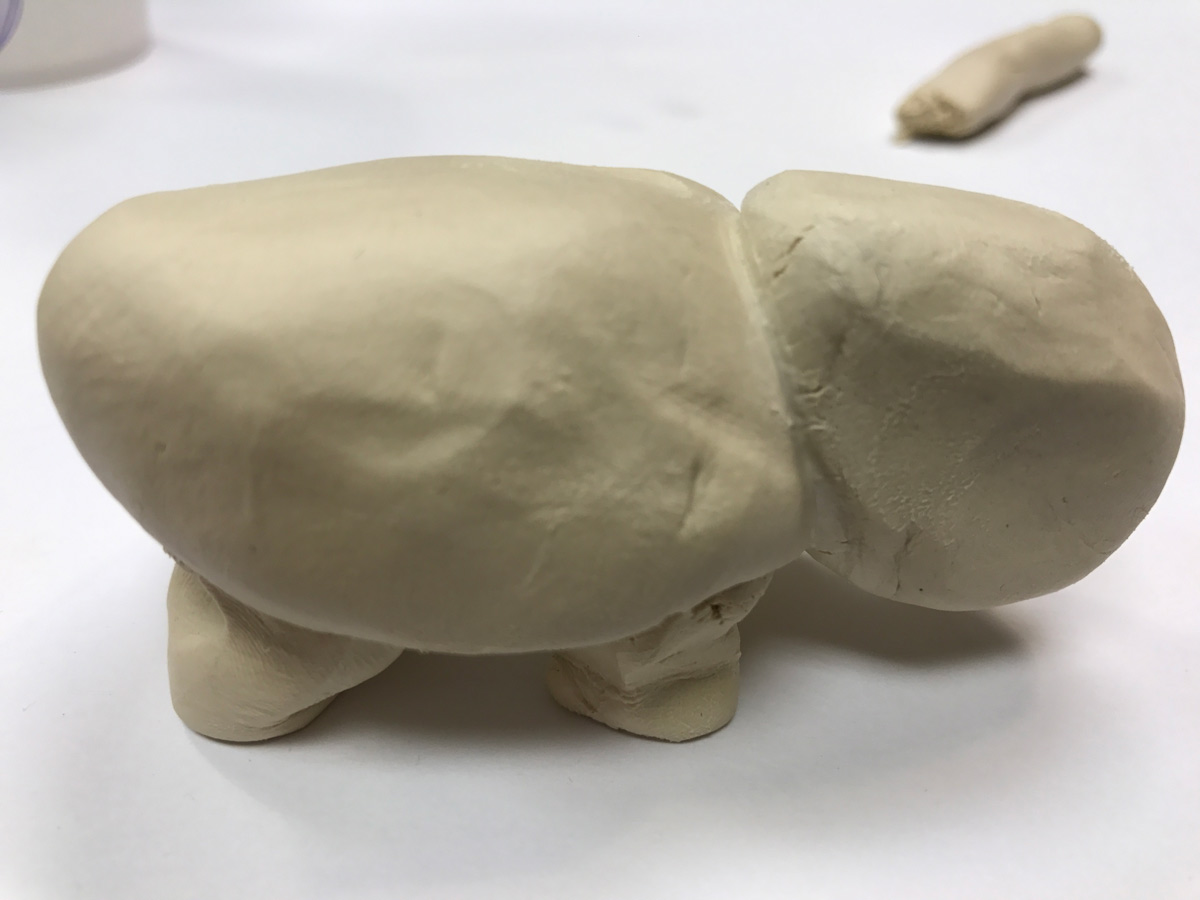
The main part is done!
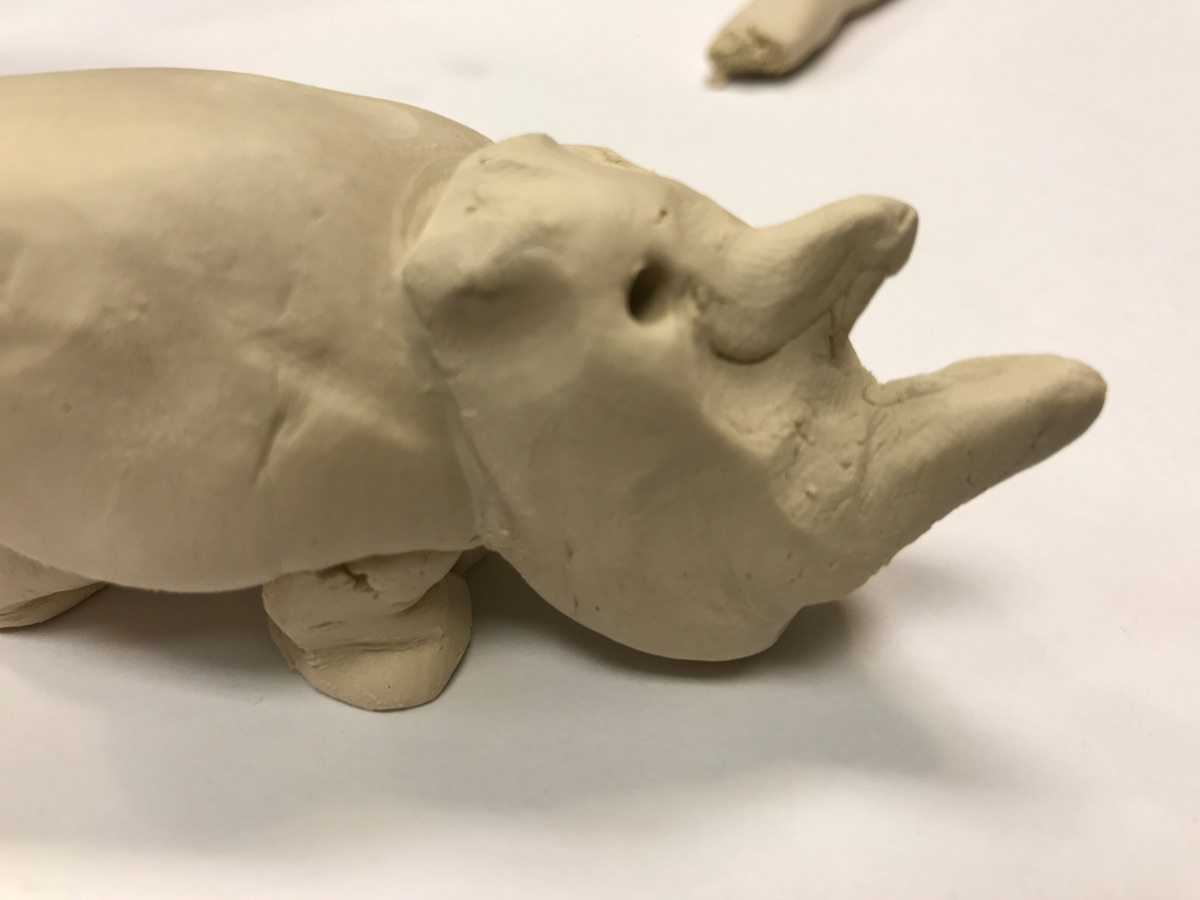
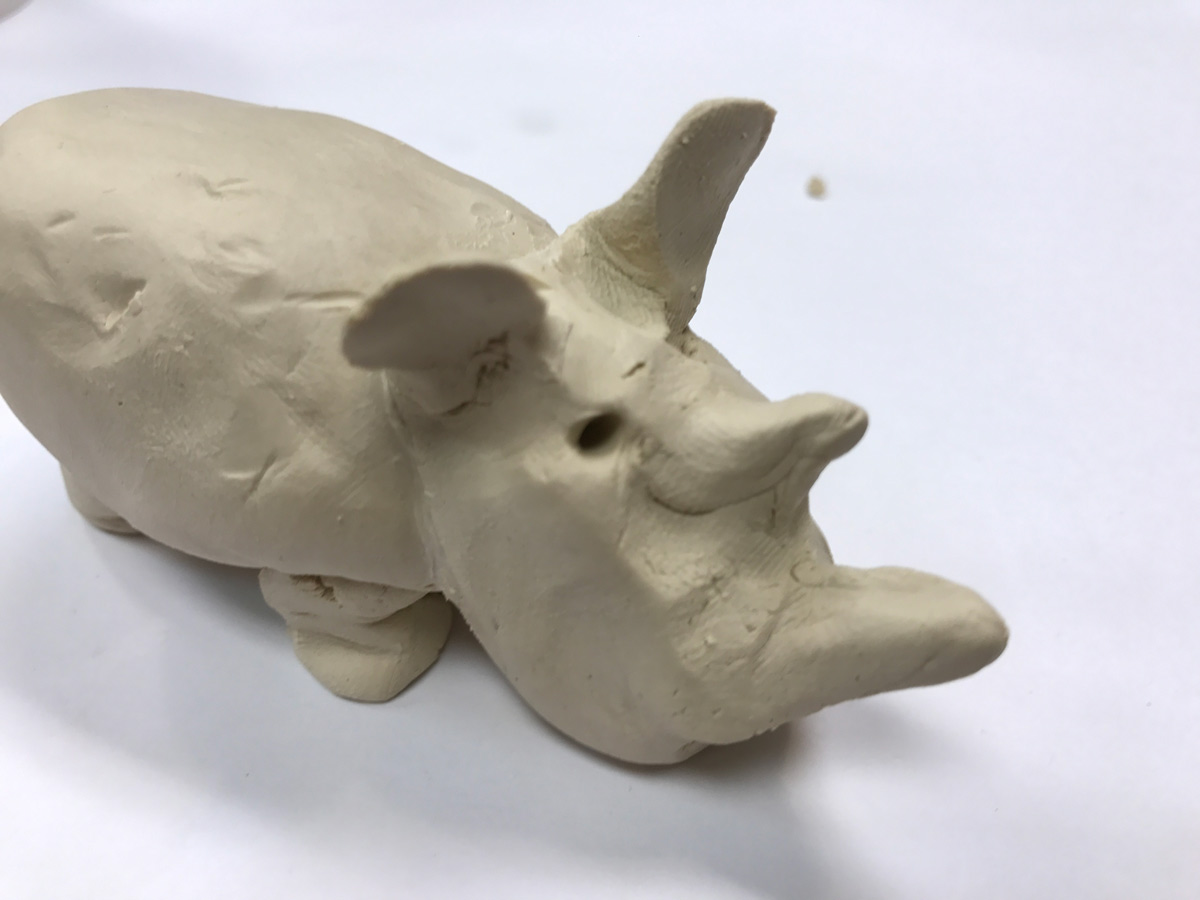
Poke eyes with a pencil, and pinch up some clay to make the horns on rhino
Use leftover to make and attach two ears and flatten them like this
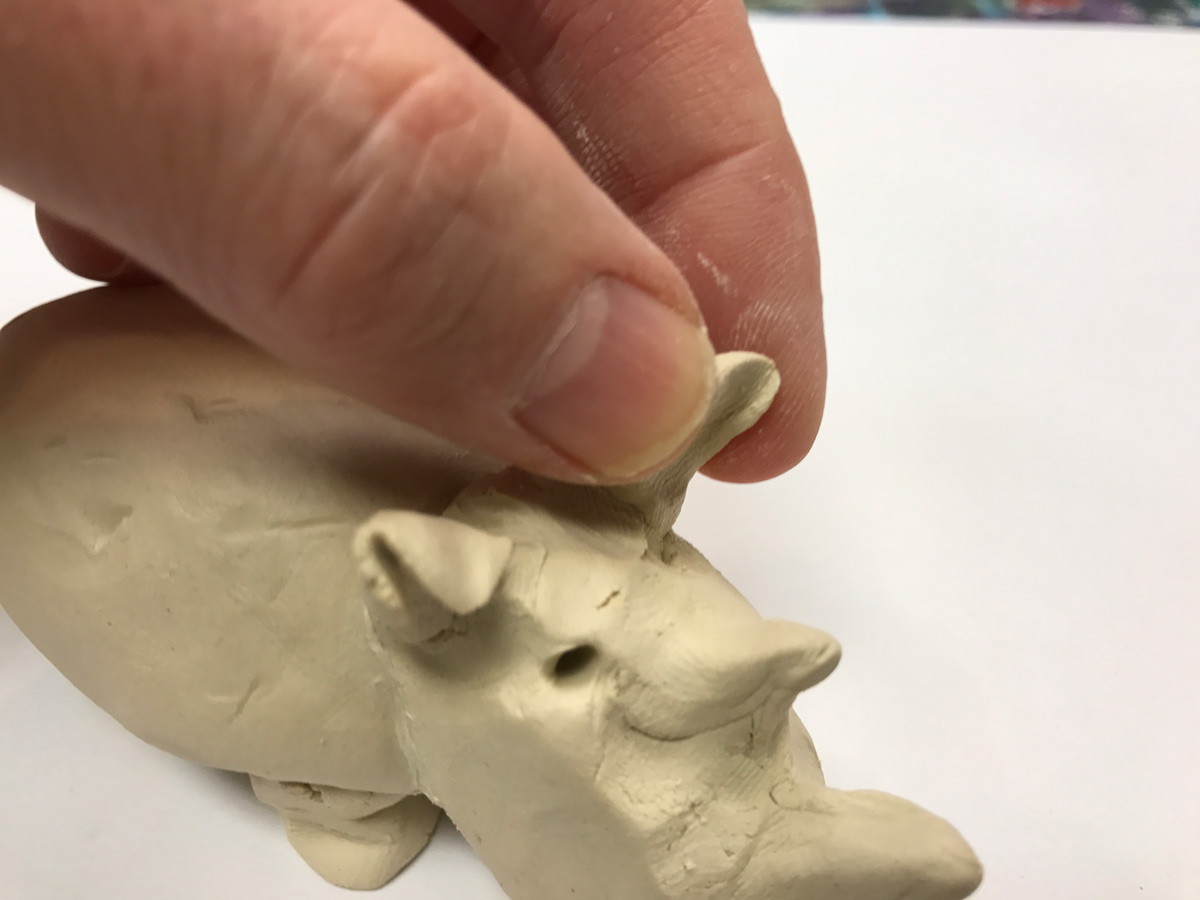
Gently roll the flat part into an ear shape like this
Remember to moisten every part. Make a tiny tail and stick to the back
shape the tail a bit
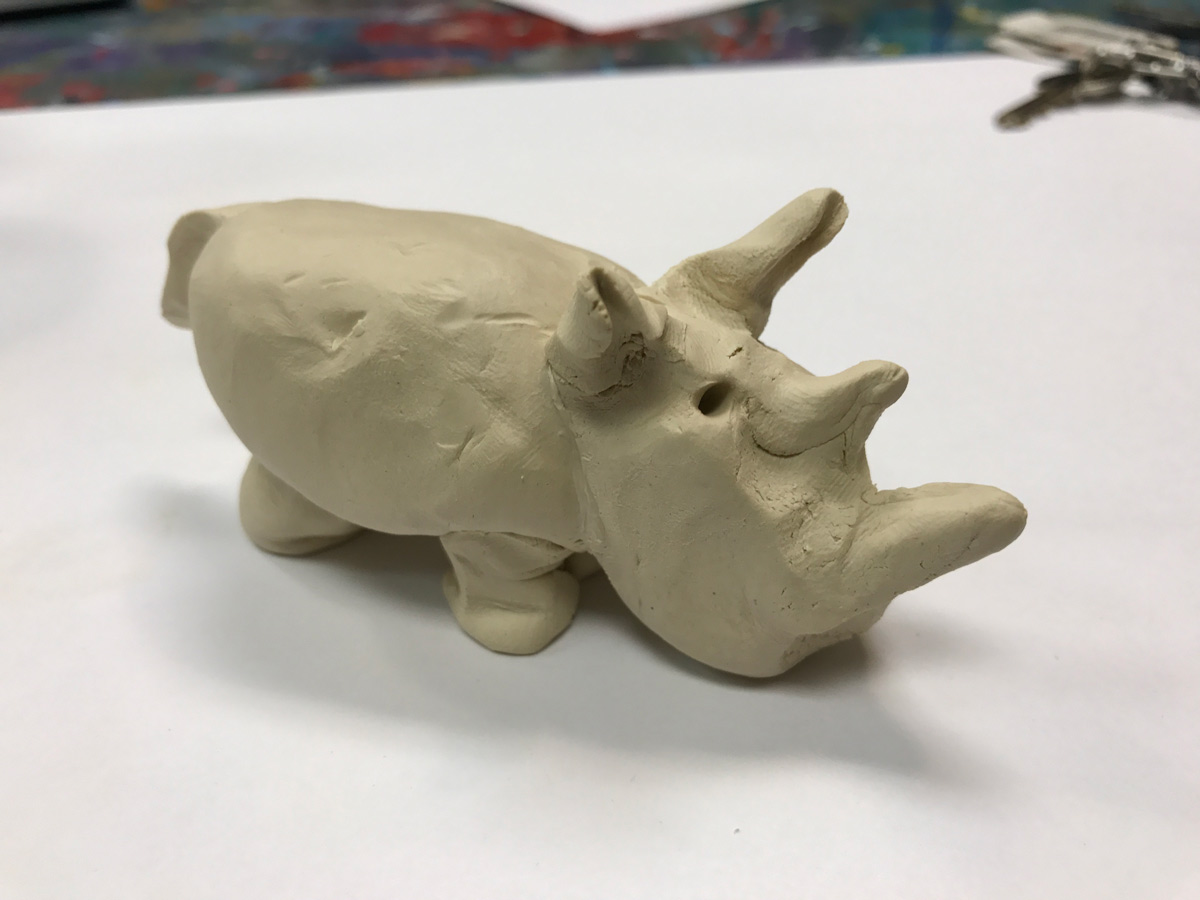
It’s a Rhino!

The hippo is about the same, but the head is like a peanut, and it has nose holes instead of horns. Also there are tiny little ears that you can just make from bumps.
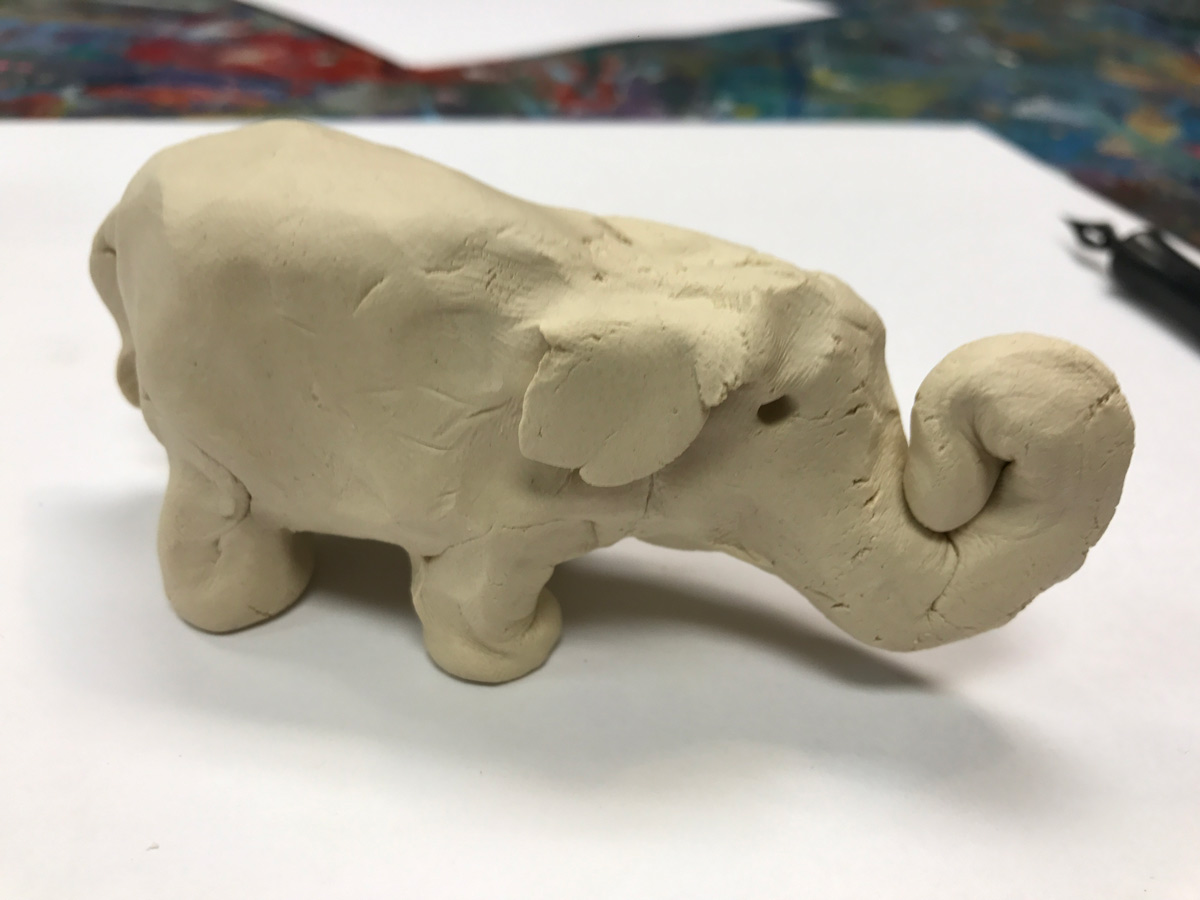
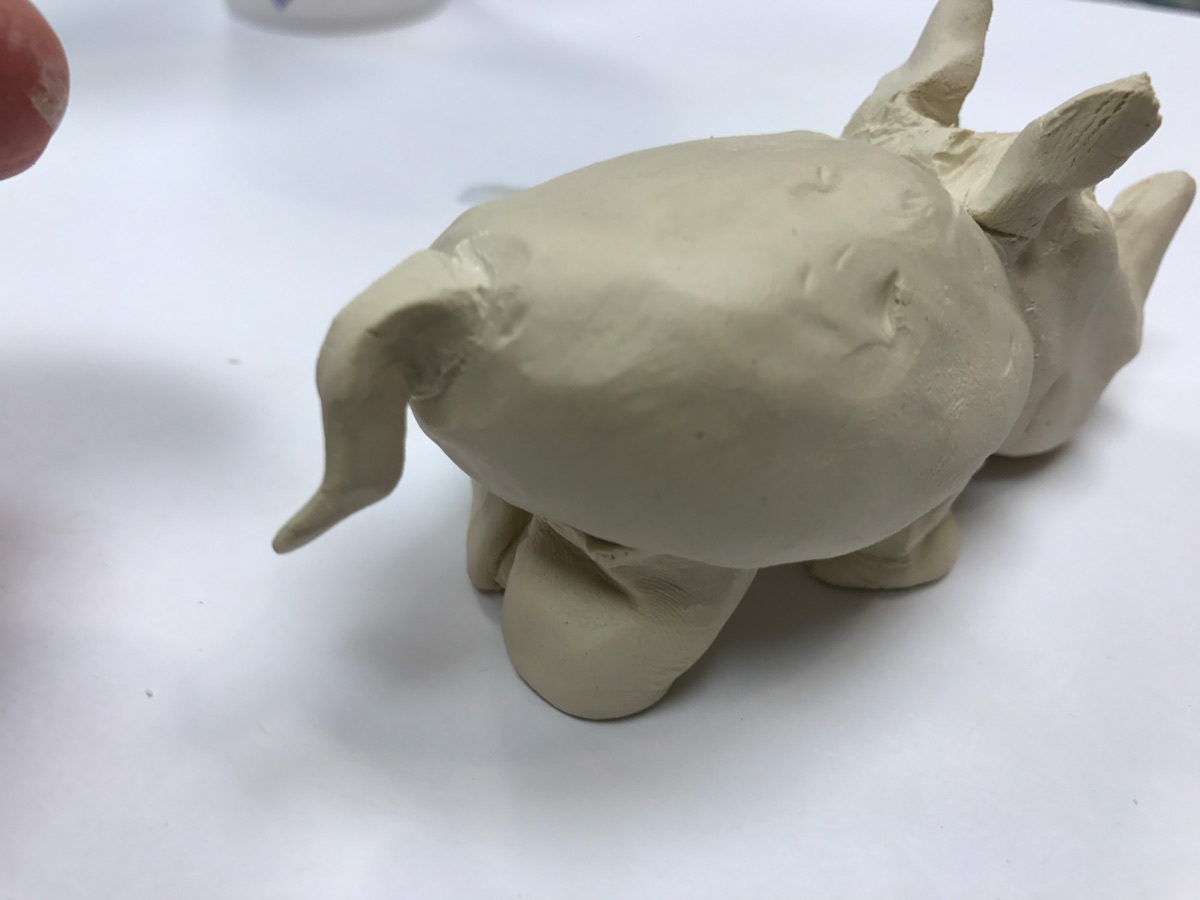
The elephant has flat ears you can pinch up and flatten. Make sure to lay them flat against the head so the don’t break off. Use the leftovers or pinch the head out to make a trunk.
6.1 Demo
6.2 teach
Use this button to jump down to the preparation section.
LEARNING TARGETS
Students know how to make a clay sculpture
M A T E R I A L S
- Colored paper
- Scissors
- 2B pencils
- Erasers
- Tape
- The animal sculpture close by
7.1 Cut
Make a little hat for the animal out of colored paper. Start by cutting out a small circle that will be the brim of the hat. Have students cut it out to fit on the head. Test it by seeing if it will sit there between their ears. It’s ok to mash the top of the head a bit to help the hat stay in place.
7.2 Tape
7.3 Glue
7.4 arrange
You can set the hat on top of the head for fun and to see how it looks – and to draw in the next step if there’s time. However, since the clay is wet, you’ll need to place the hat on the cardboard base to dry along with the clay. Otherwise the hat will soak up water from the clay and get wrinkly and discolored.
Use this button to jump down to the preparation section.
LEARNING TARGETS
Students know how to draw a still life
M A T E R I A L S
- 8.5″ x 11″ paper
- Elephant sculptures
- 2B pencils
- Erasers
- Markers
8.1 draw
Draw your sculpture cartoon from the front and/or the side too.
Use this button to jump down to the preparation section.
LEARNING TARGETS
Students know the importance of cleaning up.
M A T E R I A L S
- Paper Towels
- Cleaning wipes
- Sink
- Waste baskets
- Well-lit spot for photos
- Camera or phone-camera
9.1 CLEAN
Students set up their work area.
- Wash hands
- Super-wash brushes if used
- Put art supplies away
- Wipe tables & toss trash
- Remove any smocks (last)
- Check for items on floors and tables
9.2 PHOTO
Try to get photos of your student’s artwork. Find a good spot for quick lighting without highlights or shadows from your hands and device. Ideally in-between two strong lights on each side.
OBJECTIVES
- Practice and improvement using shading
- Understanding how shadows are formed and used in artwork
- Accomplishment in drawing an animal with shading
- Fulfillment by choosing the animal they want to draw & paint
TROUBLESPOTS
There are many objectives that can be stated here for the purpose of stating objectives that need to be puposely objectified.
ART WORDS
Paper – That stuff you draw on.
Pencil – That thing you draw with
Paint – Messy stuff
CLASSROOM
PREP
Print all of your PDFs from the lesson plan and cut any references apart as needed.
What your room needs
Here are your printable lists and room prep instructions.
Opens in new window
CLASSROOM
MATERIALS
- 11×17” Copy Paper
- 8.5 x 11” Copy paper
- 4B pencils
- Erasers
- Markers
- Oil pastels
- Blender sticks (stumps)
- Clipboards
- Paper towels
- Brushes
- Smocks
- Water tub
- Watercolor paint trays
- Tempera Paint
- Air dry clay
- Tape
- Pipe Cleaners
PREVIEW
Week 31: Big Shape Color
Artists get to paint their big animals using acrylic paints. They get to choose realistic color or crazy fun color. Then the Big Shapes idea is reinforced, along with review of The Most Important Spot. They’ll create artwork in oil pastels by drawing a big shape first, such as a circle, and then creating designs inside to color. One of these is a face inside the big head shape, which previews their self-portrait coming up next week.
Week 32: Self Portraits
Students learn insights about the face and then use mirrors to draw themselves. They paint right over the drawing in tempera paint for a fantastic self-portrait. Afterwards, a game of drawing in the round leads to some very crazy face drawings! Mirrors are needed for each student.
Use this button to view our parent’s blog. Share the link: http://parentart.org, with your student’s parents so your they can read about the lesson each week.