
OVERVIEW
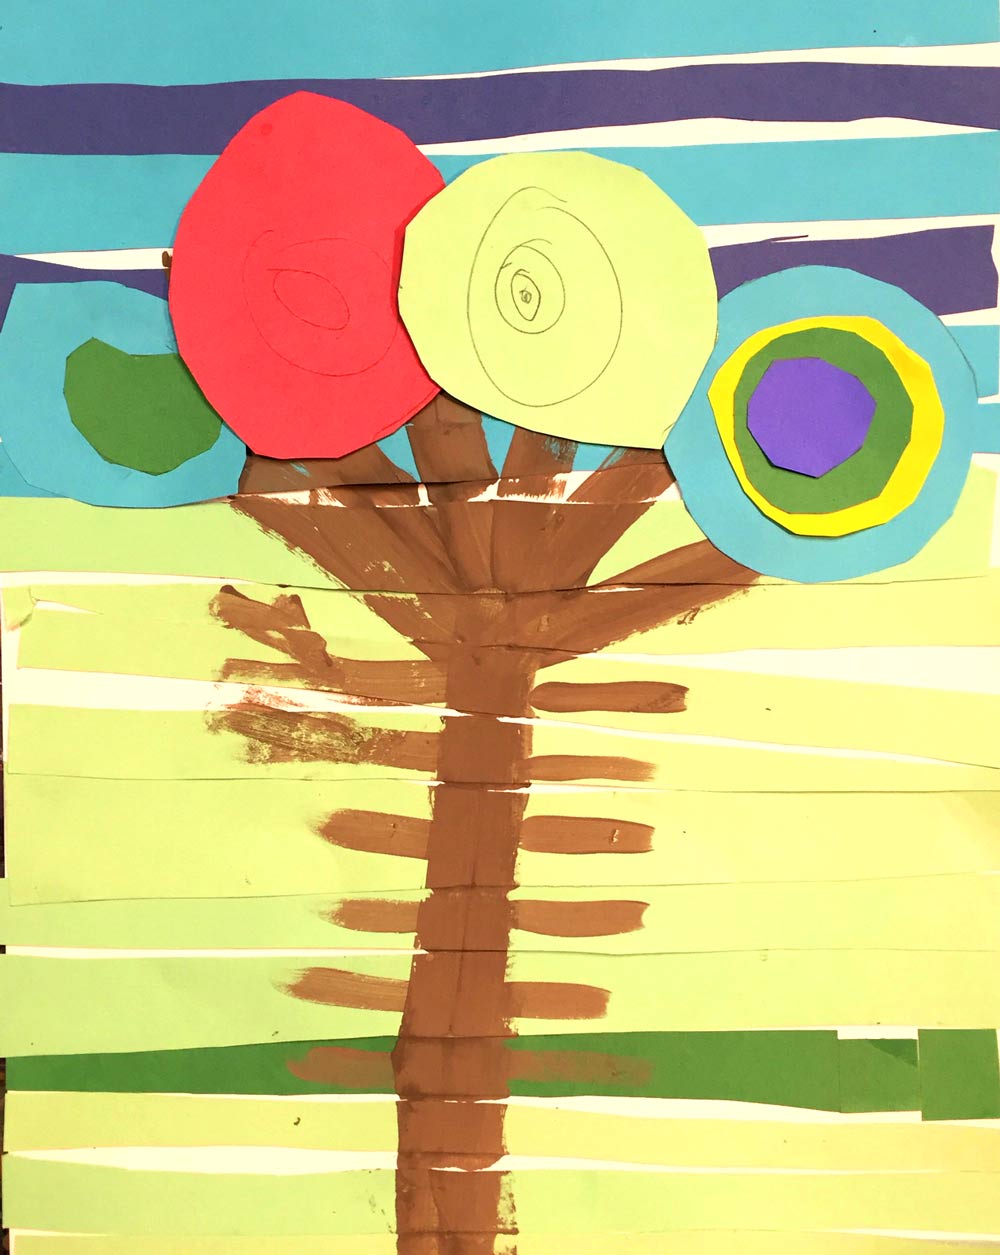
Students will use lots of layers of colored papers to create a wonderful landscape collage. Circles can be stacked for colorful clouds and hills. Cutting and pasting is always a great art project.– – –
Grades K – 2
Week of April 11 – 15
1 Hour & 30 Minutes
Lesson At A Glance
A brief overview of each step. Buttons jump to each section for detailed information.
10 Min – Demo clay tree, talk about branches
13 Min – Use long paper to create sky and ground
10 Min – Paint tree. Make branches smaller as they go
20 Min – Cut concentric circles, paste to tree
2 Min – Everyone helps
SCROLL & TEACH
LESSONPLAN
Each section is a different color. Read over once and then you can SCROLL & TEACH using any device you like. It’s designed to work best with your phone.
LEARNING TARGETS

Students know how to use their imagination to make art
M A T E R I A L S
- 11″ x 17″ Sketch Paper
- 4B Pencil
- White Eraser
- Markers
- Oil Pastels
1.2 draw
Encourage students while they draw.
Ask them to work with one piece of paper for a while. If someone uses the phrase, “free draw”, explain that artists’ choice is something only artists can do, while free-draw is something anyone can do. You want to use the phrase to elevate the students’ expectations of their work.
Everyone should take their time with the work and make a finished piece of art. Limiting the paper can also help kids focus on the work. If your child finishes in super-fast time, ask them what more they can do to the existing paper. Ask again several times – unless they appear overly frustrated; then you can allow them to move on to a new work.
Use this button to jump down to the preparation section.
LEARNING TARGETS
Students know how to model how a tree grows by using modeling clay
M A T E R I A L S
- Modeling Clay
- 11″ x 17″ paper
- dull knife (plastic)
- iPad or TV to display slideshow
2.1 explain
2.2 demo
Demo how trees are formed using modeling clay.
You will need a slab of oil-based modeling clay for this step; if it’s oil based it won’t dry out, and it allows you to take your time showing how the branches get smaller and smaller. You can also use play dough or regular clay.
You will need a large piece of paper to set the clay on so it stays clean and your table does too.
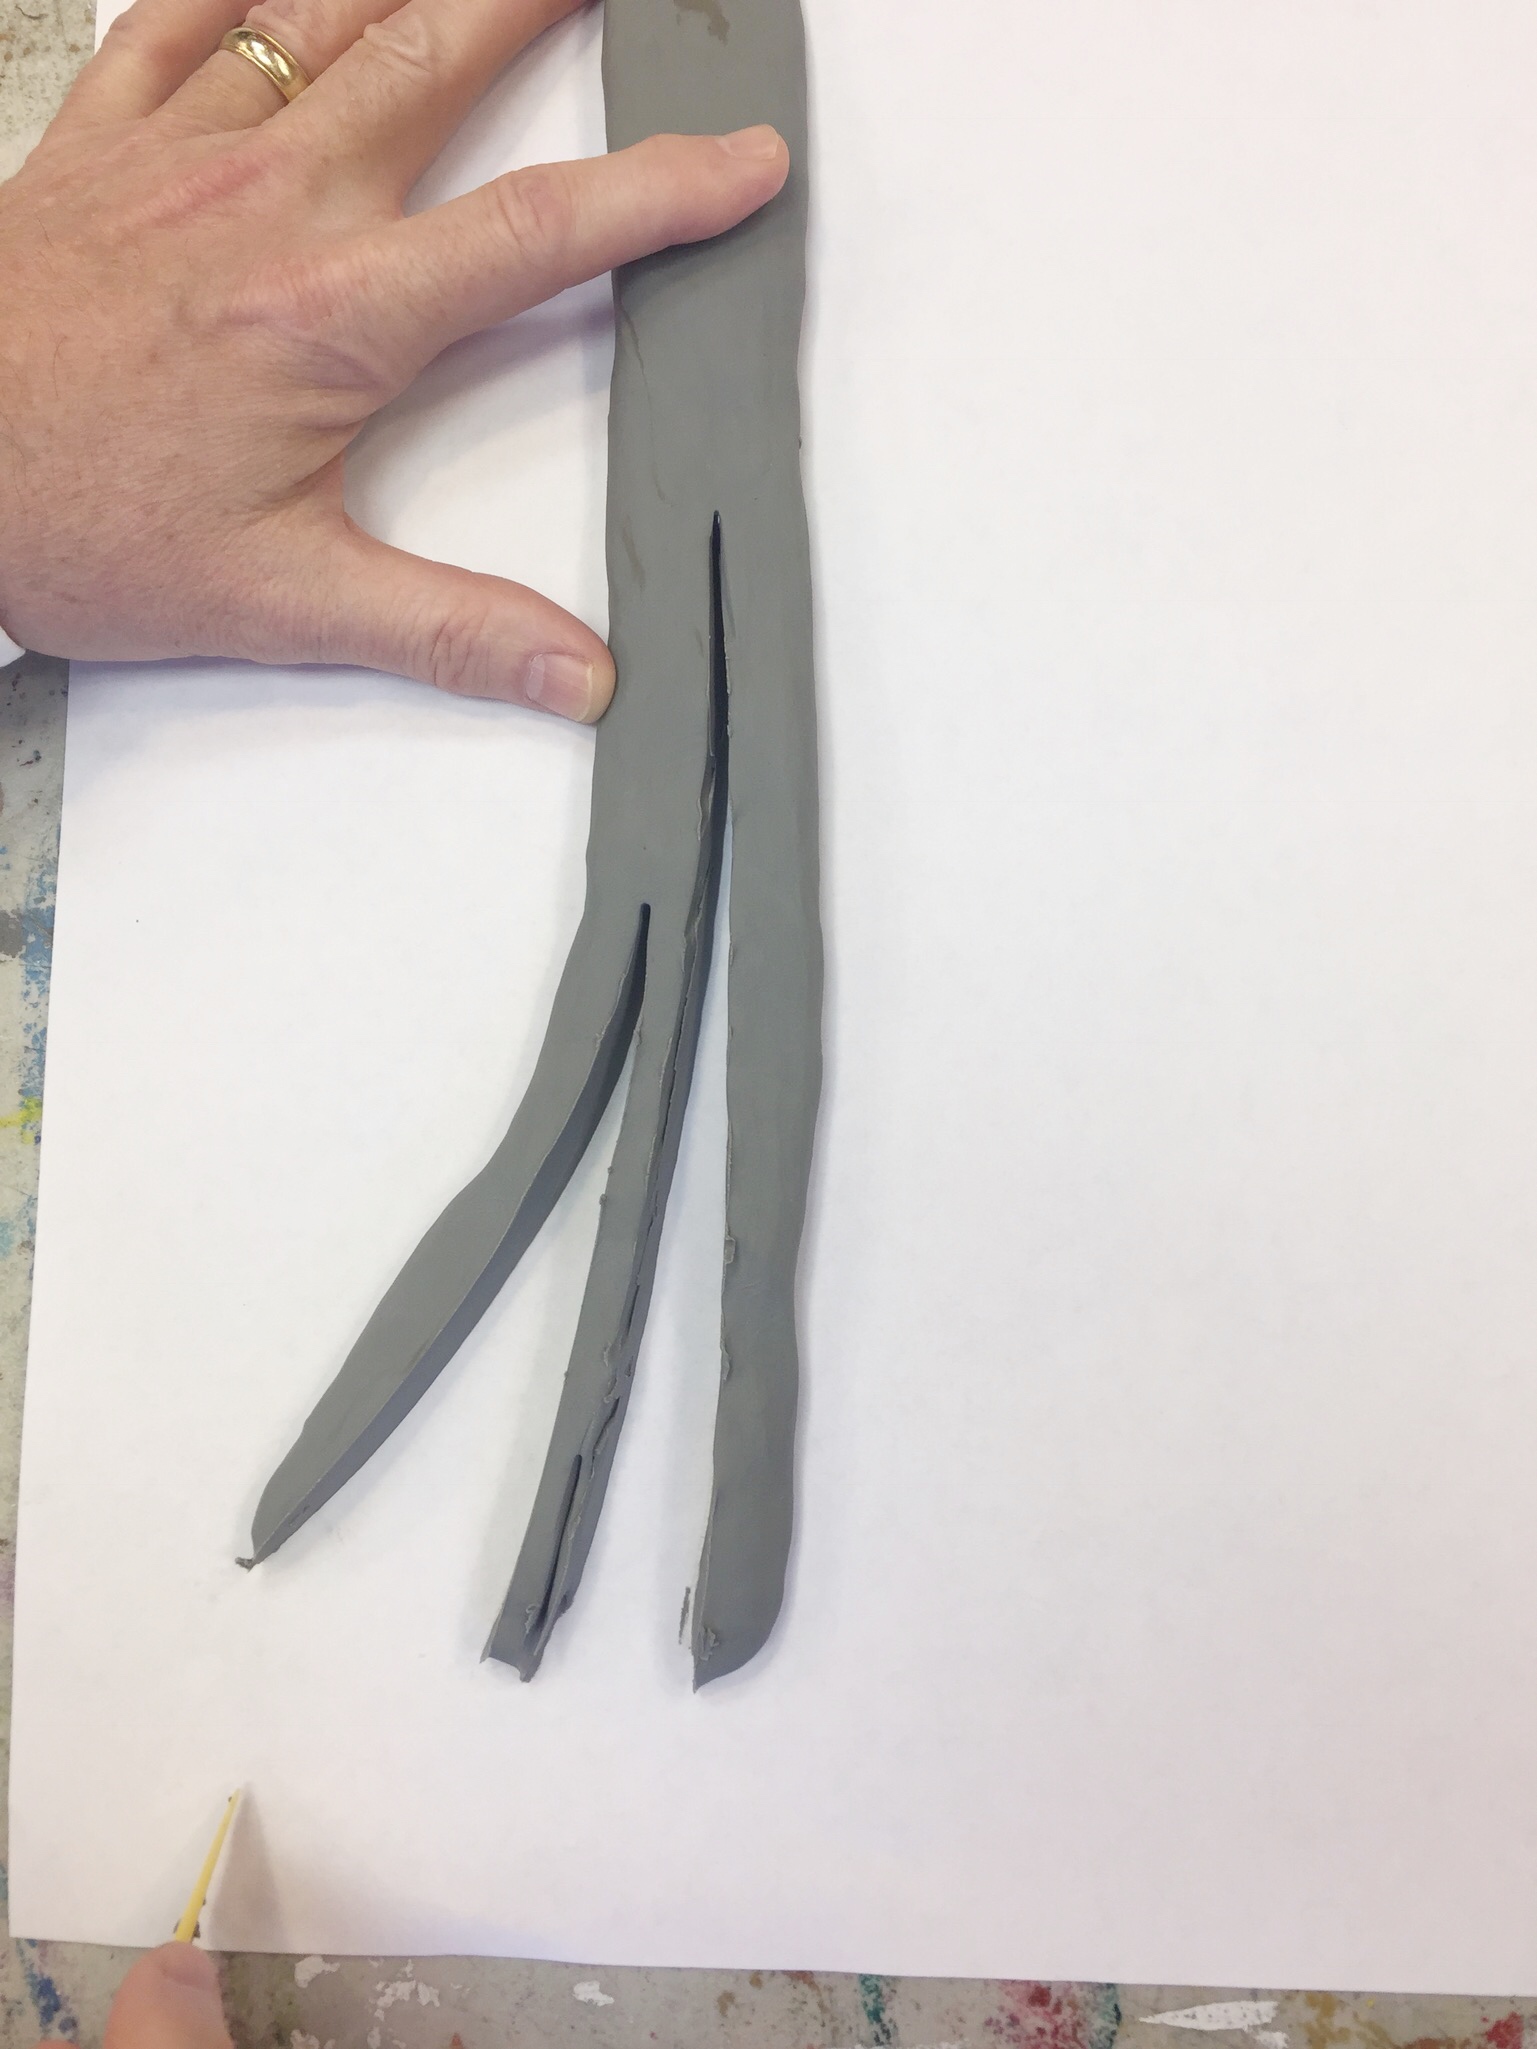
Take about a 15″ long “snake” of clay, and flatten it out. Use a palette knife or a different dull cutting tool to split the trunk into branches. Look at the slides below to see how this is done.
Do the demo upside down as shown, so the kids see the tree right side up. When you’re finished, you can arrange the branches a bit, and show how sometimes trees have curved branches and sometimes they are straight.
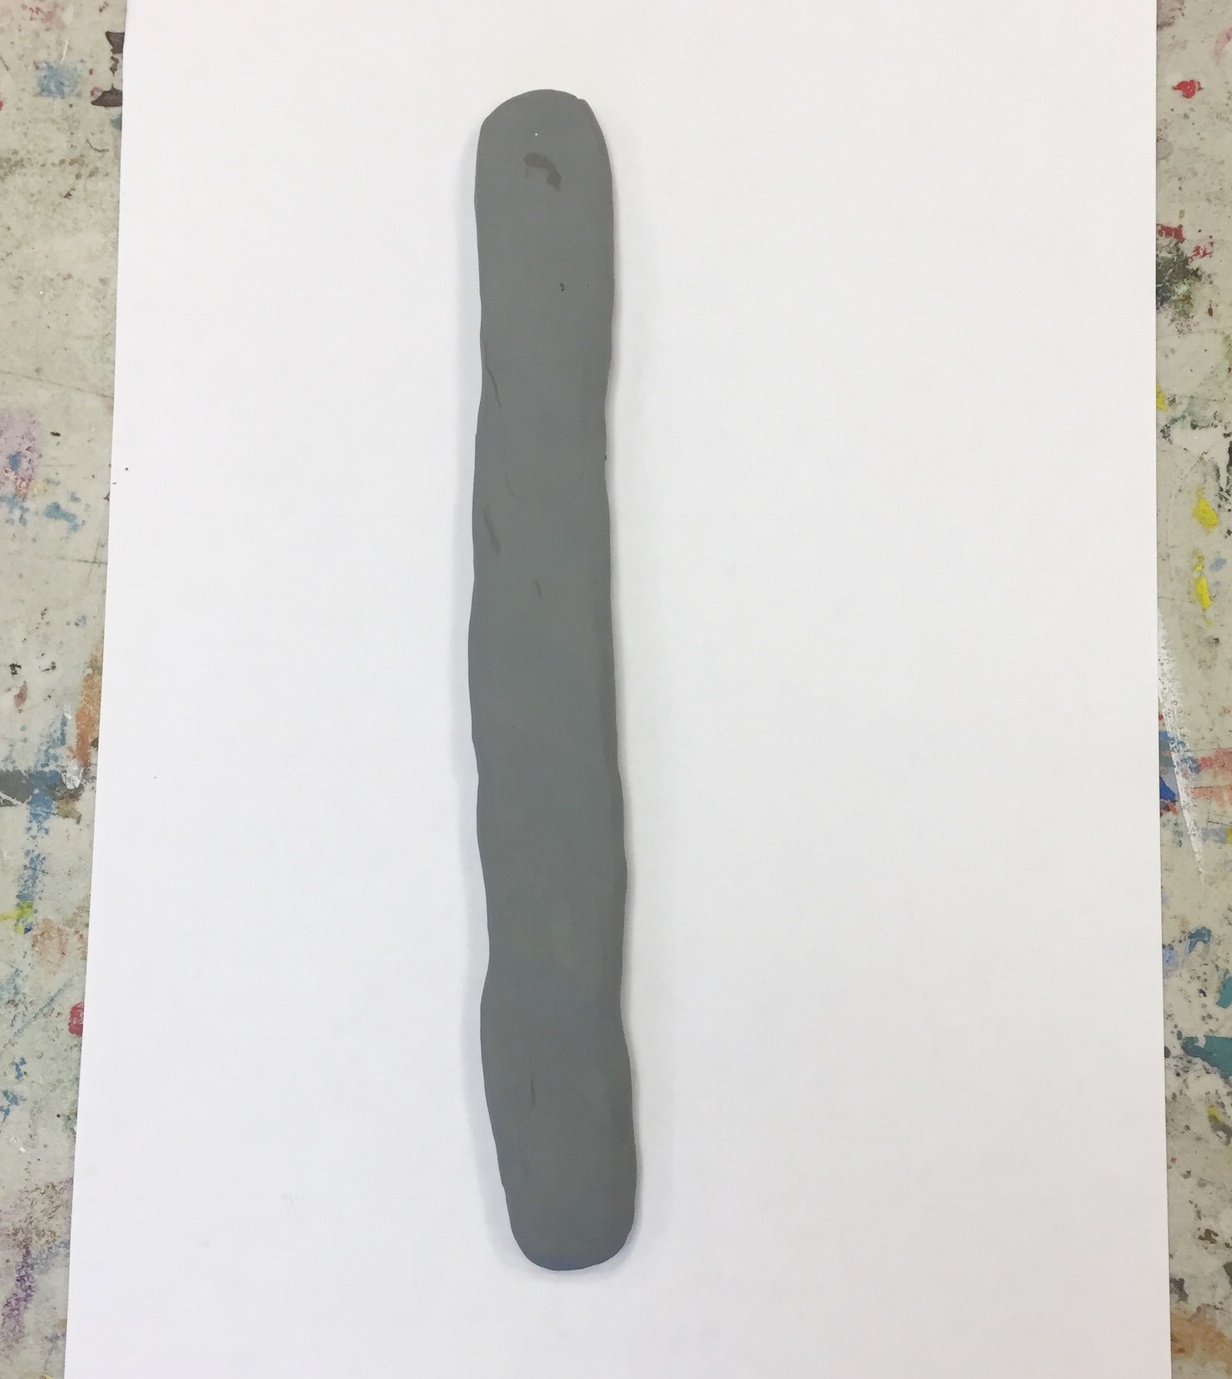
tree 1
Here’s a long flat tree trunk shape. It’s about 1.5″ x 9-10″
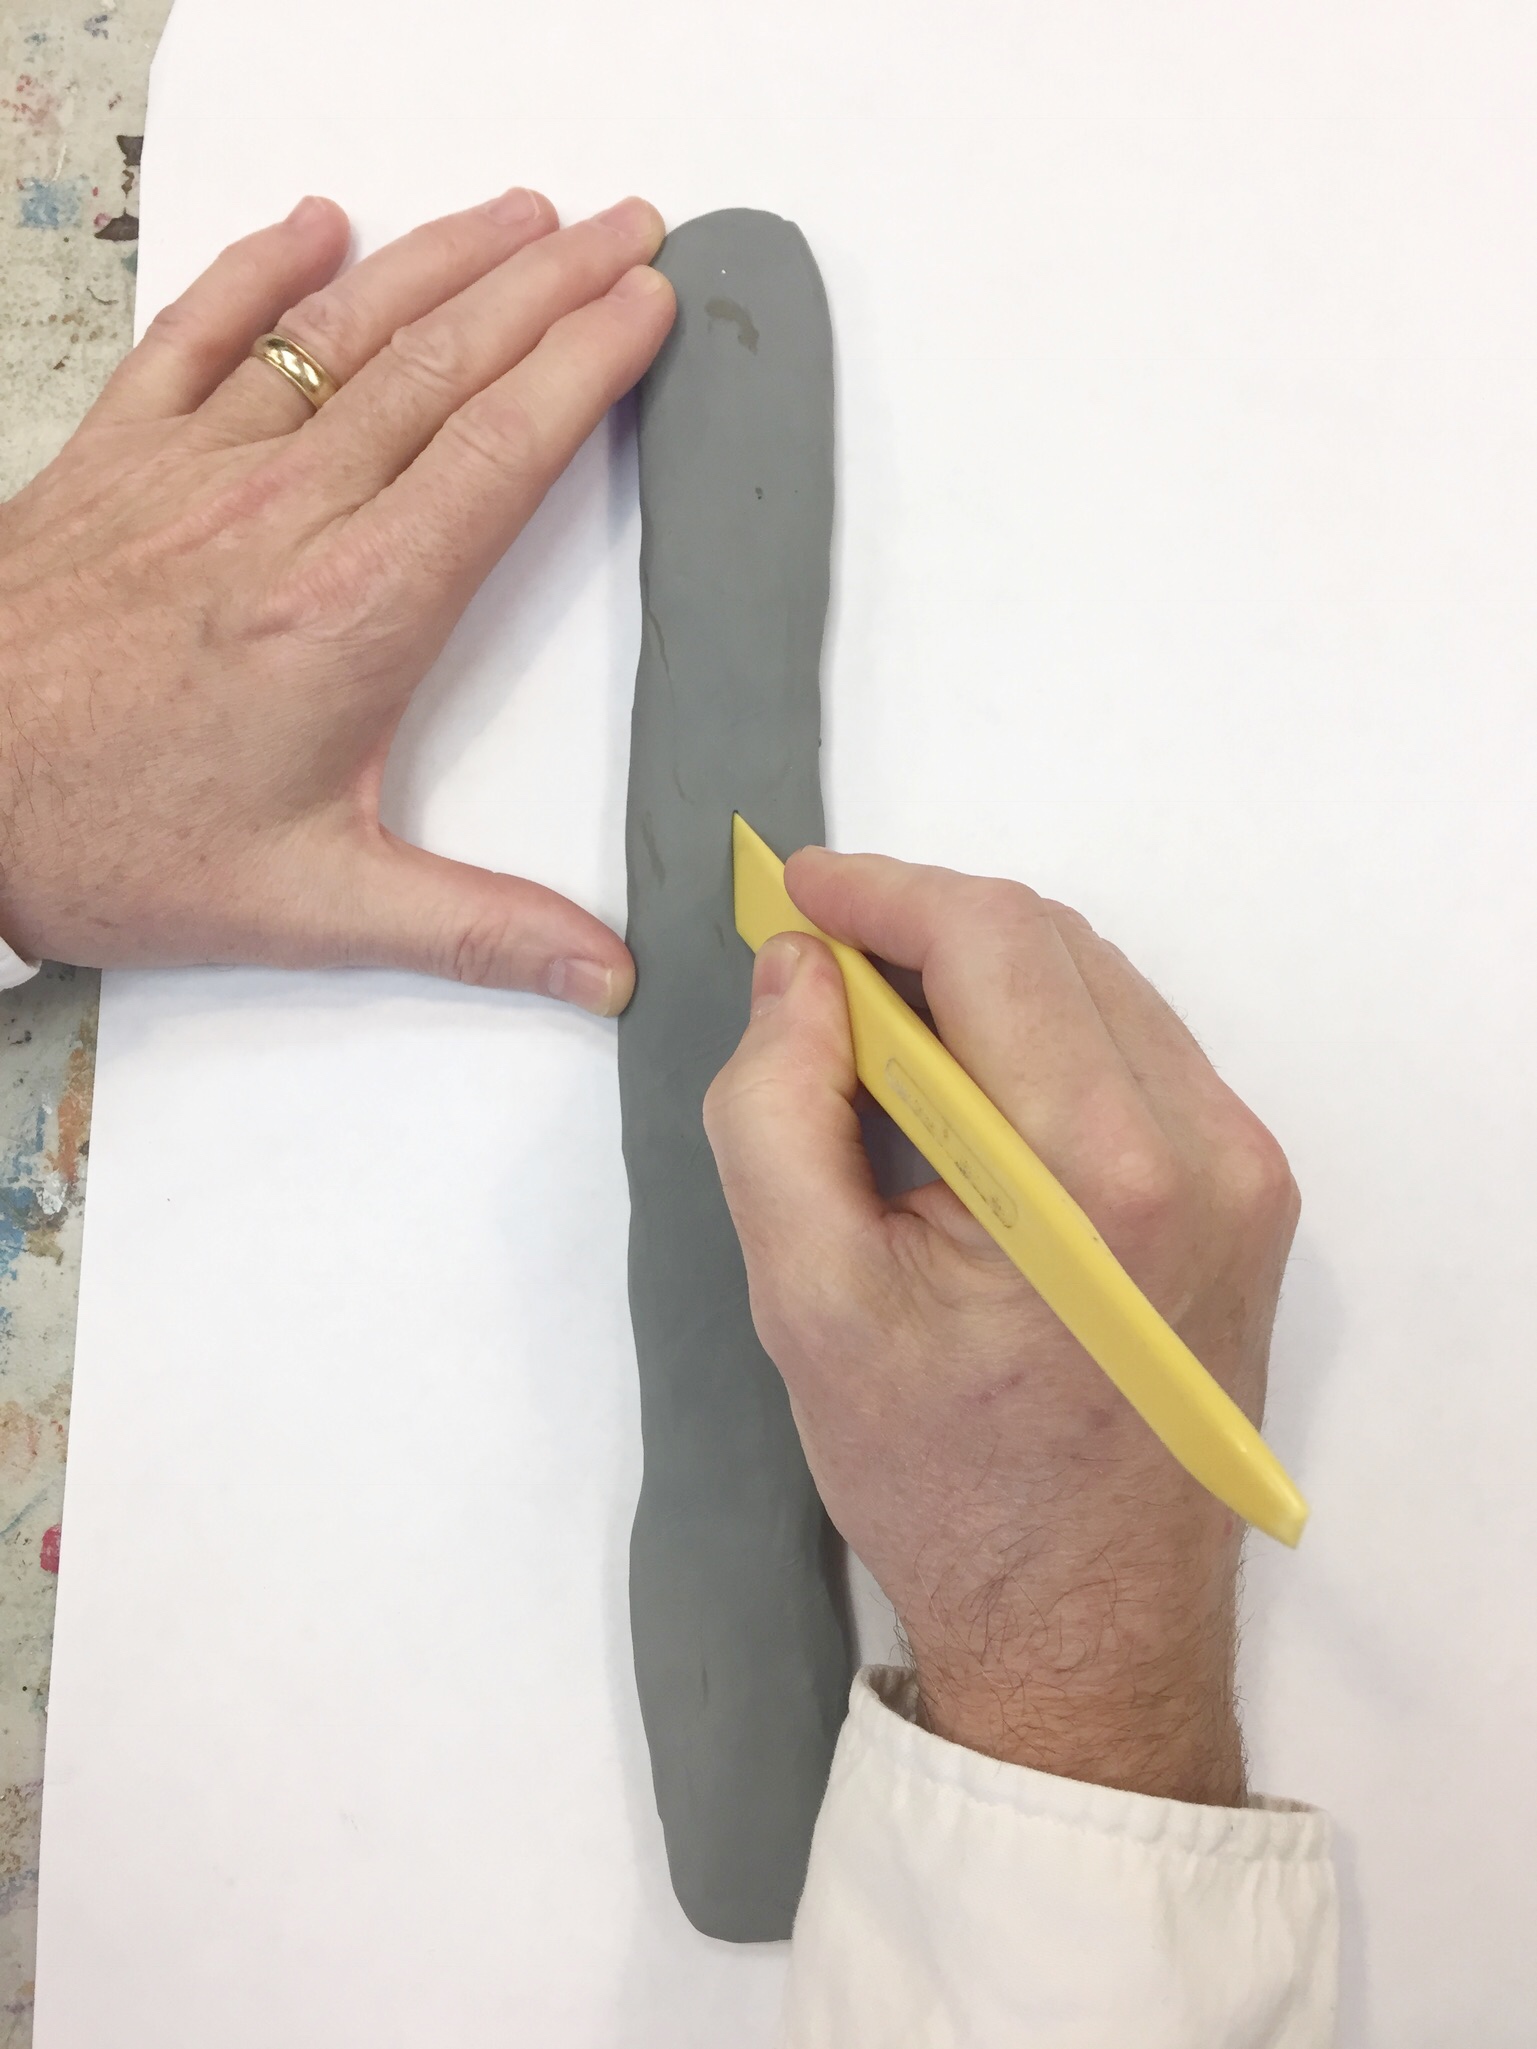
Tree 2
Use a clay tool, plastic palette knife or disposable knife. Start in the center about 1/3 of the way down from the top.
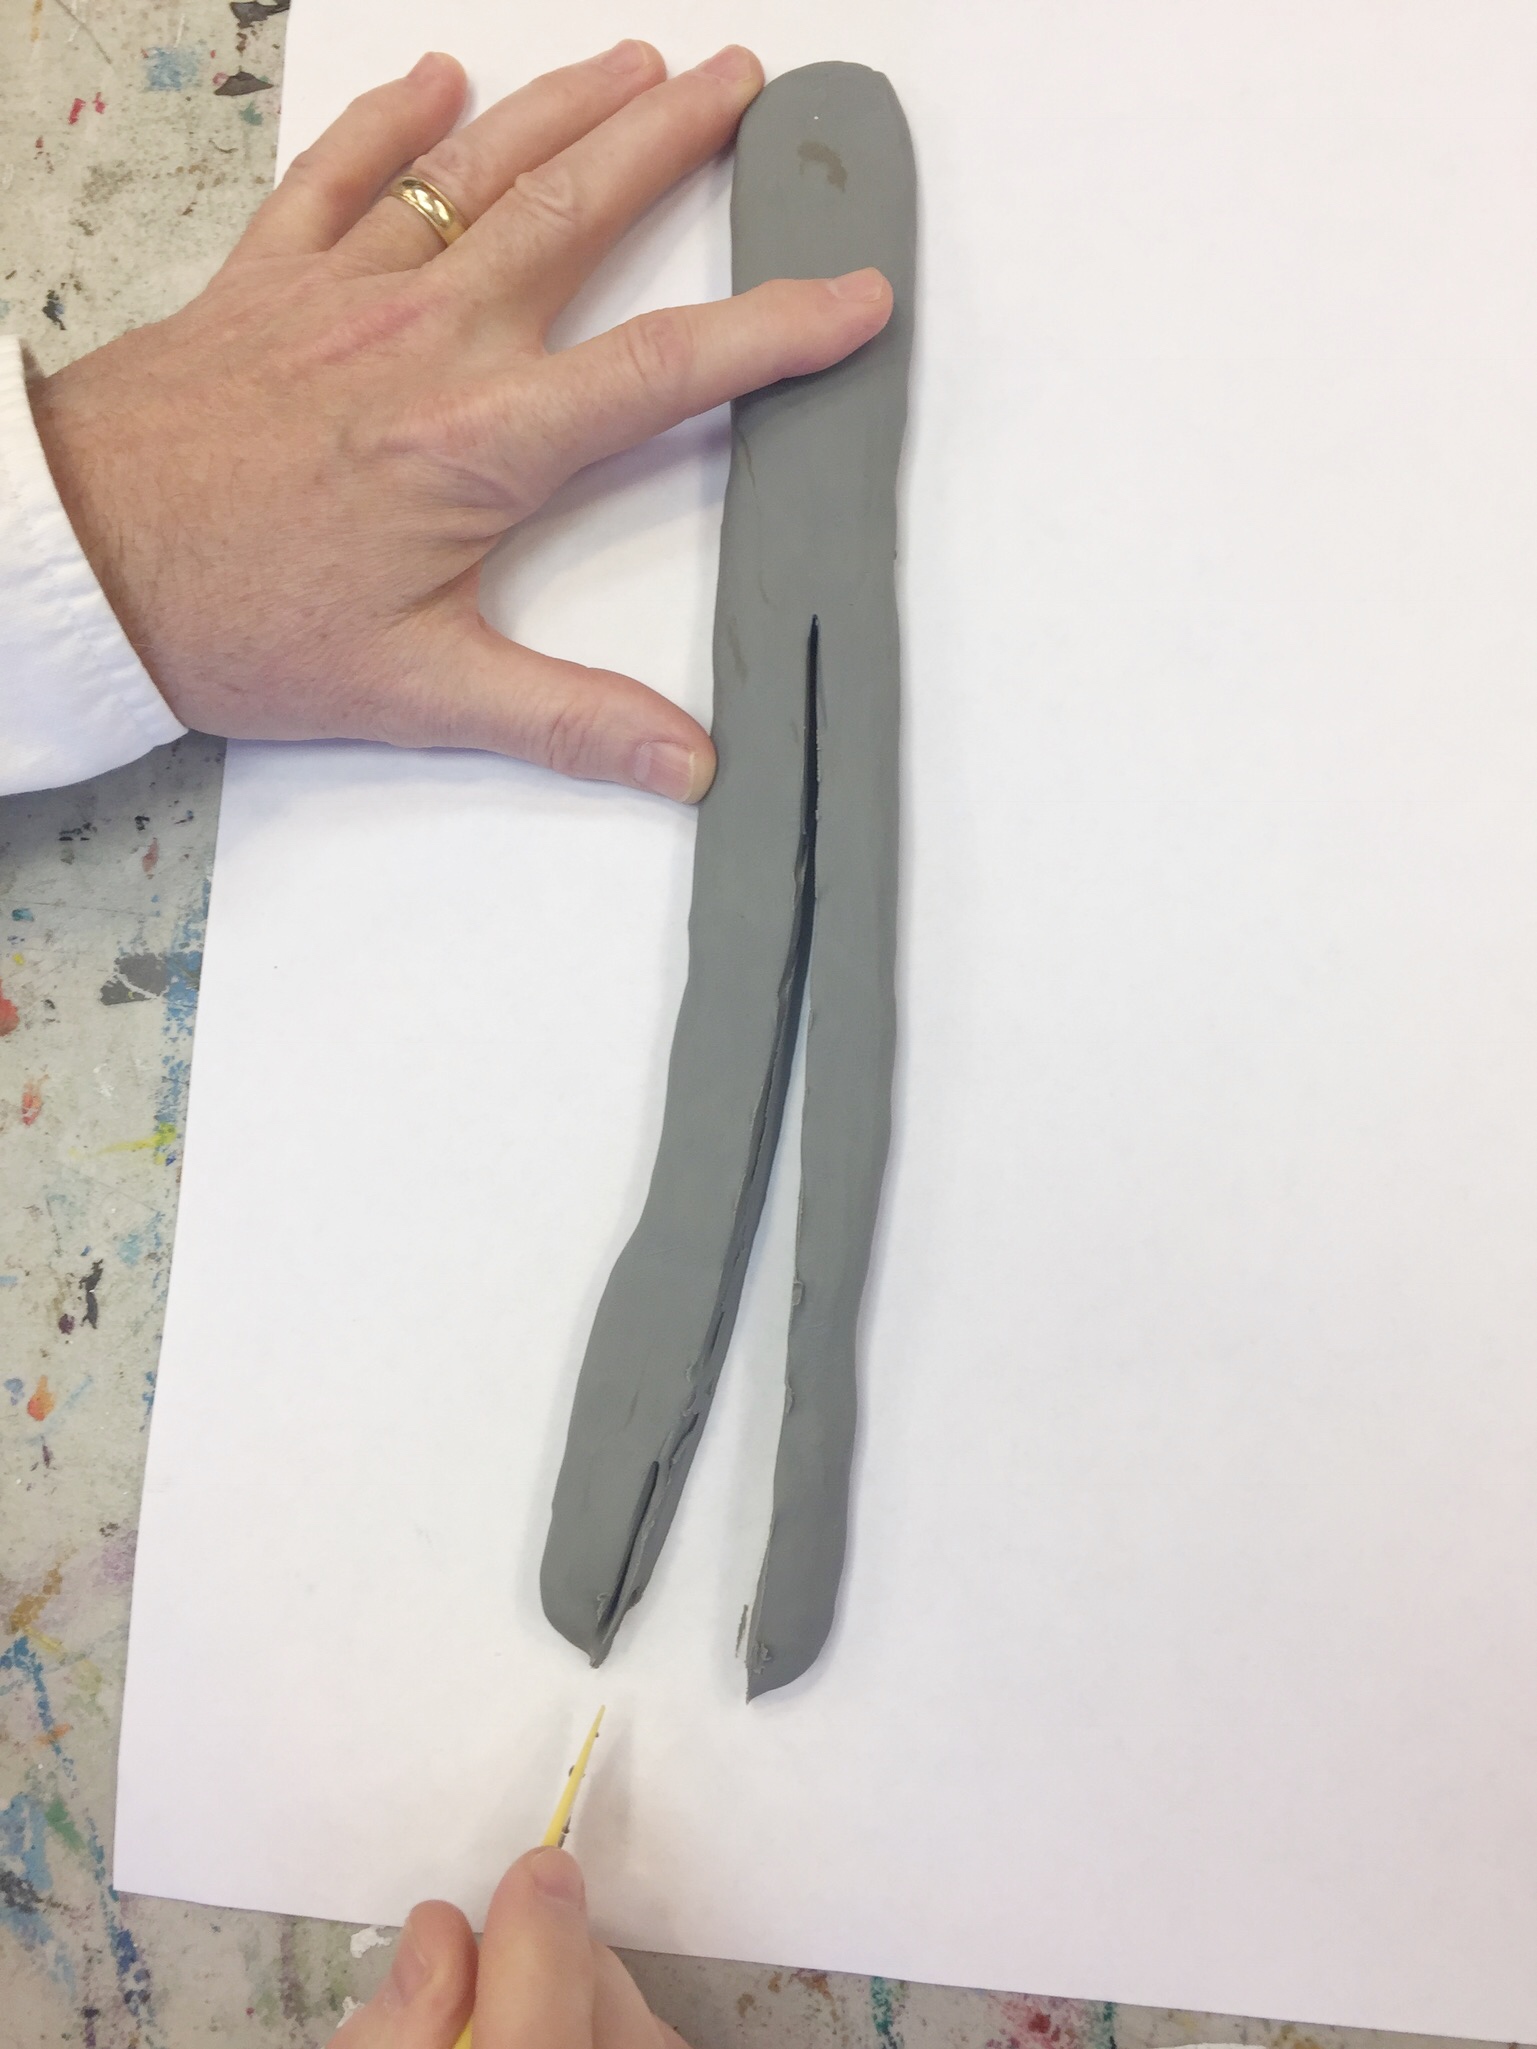
Tree 3
Pull the knife toward you, dividing the clay trunk into two main branches. Pull slightly apart.
Tree 4
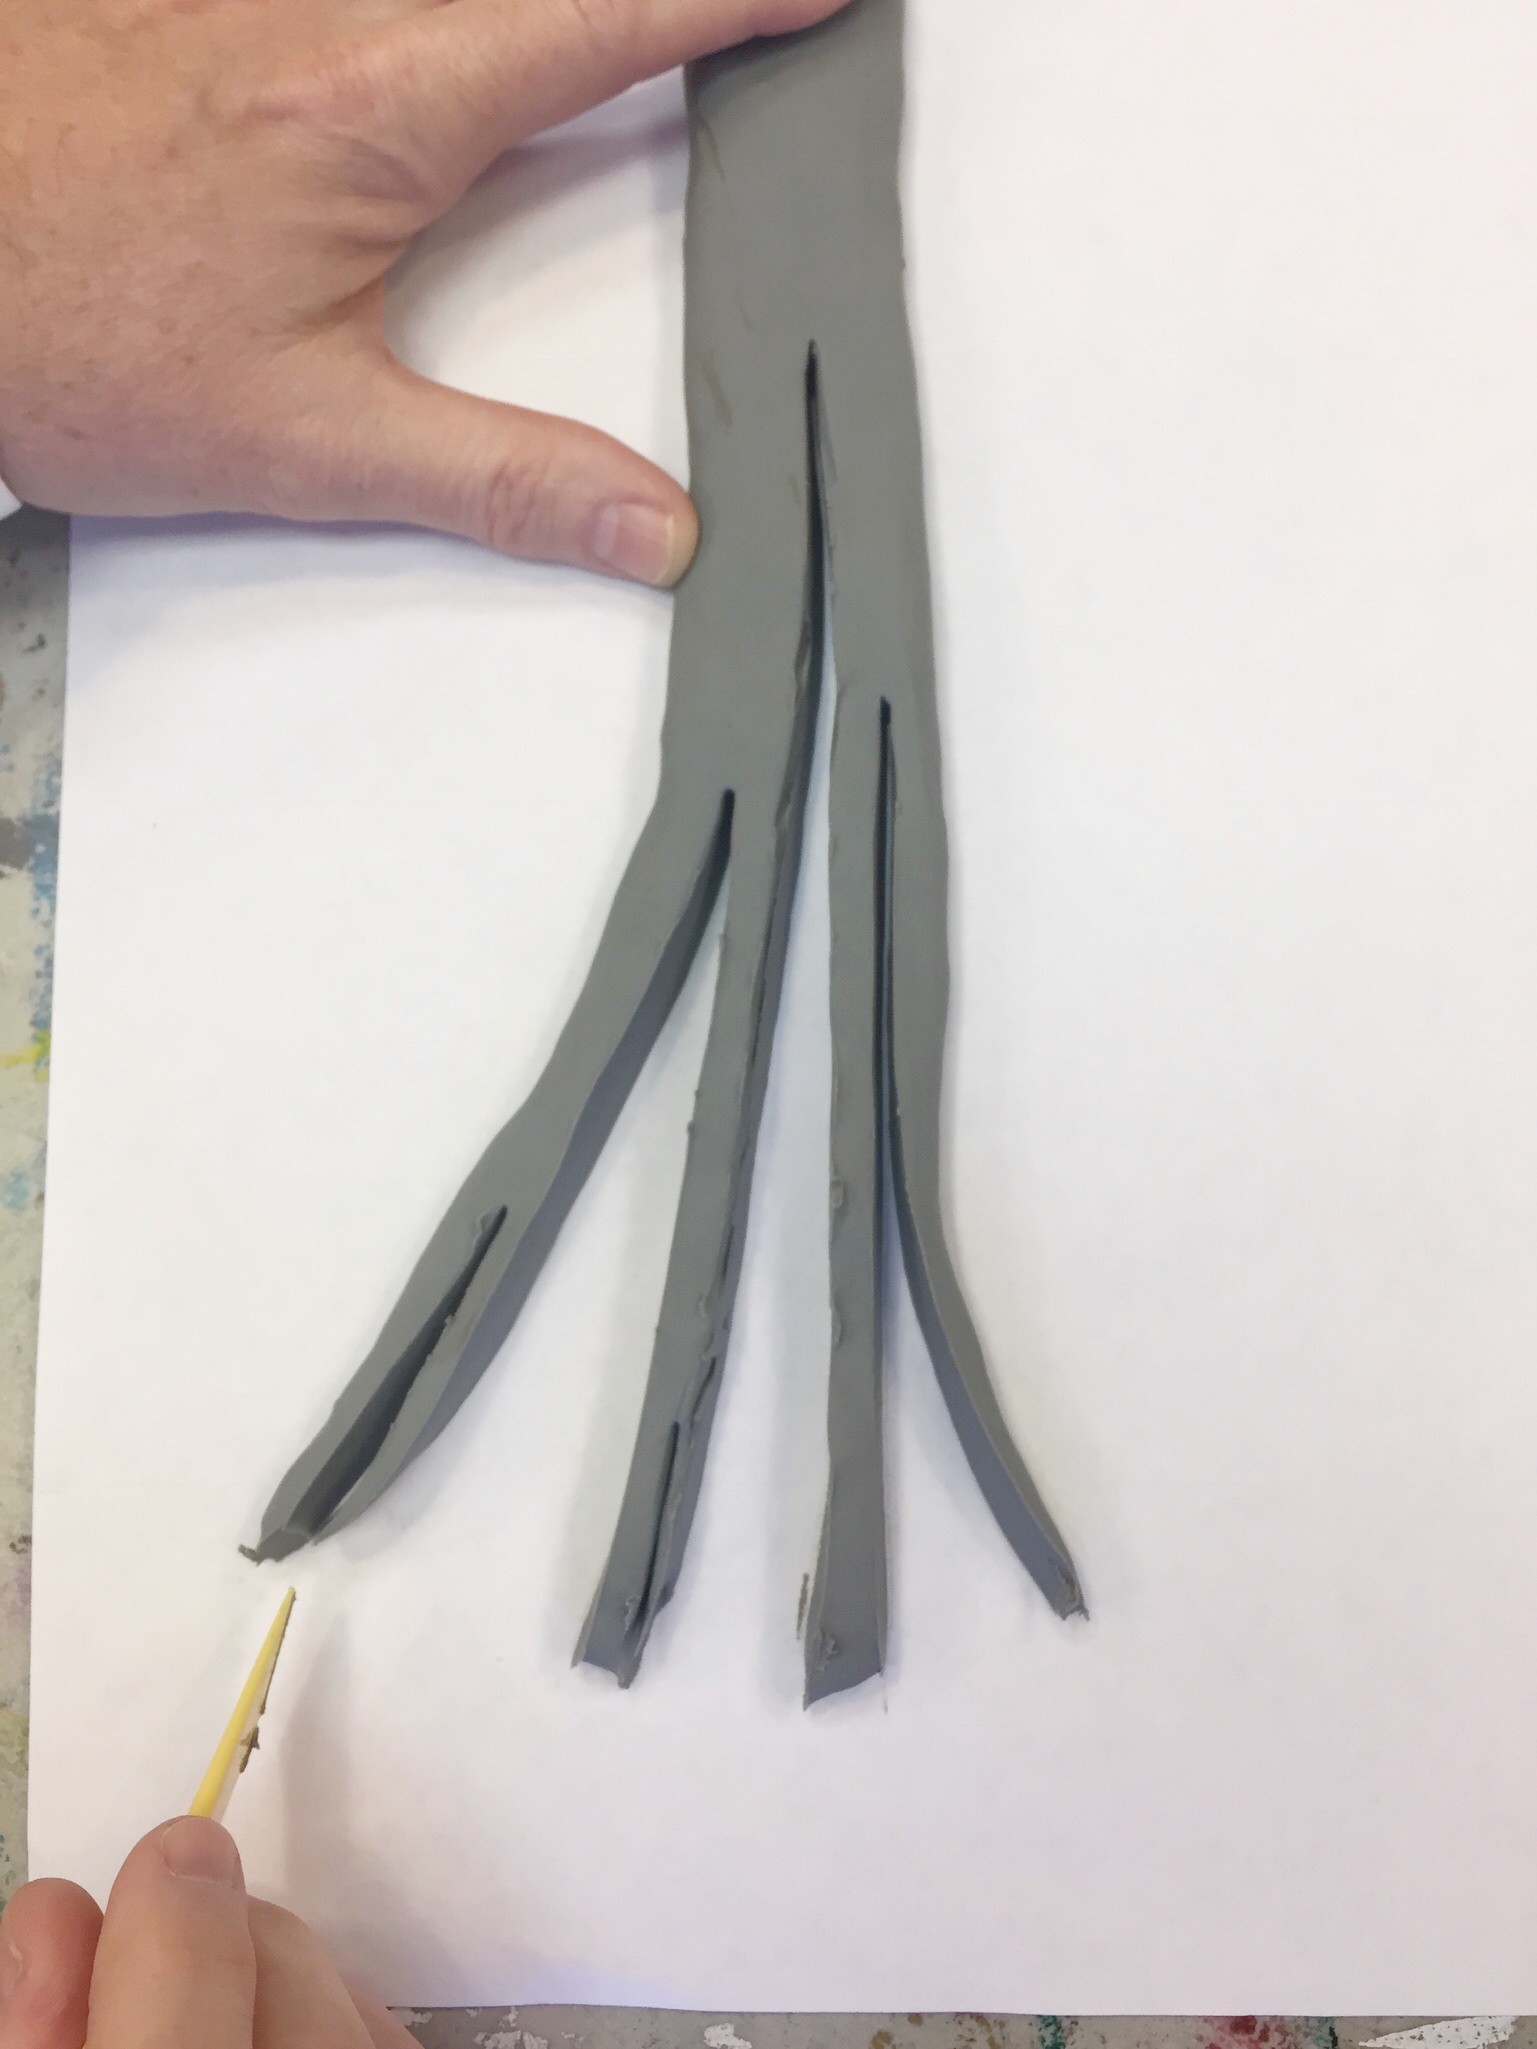
Tree 5
Then divide the main branches into smaller branches, moving further up the tree, (which is further down the page for you).
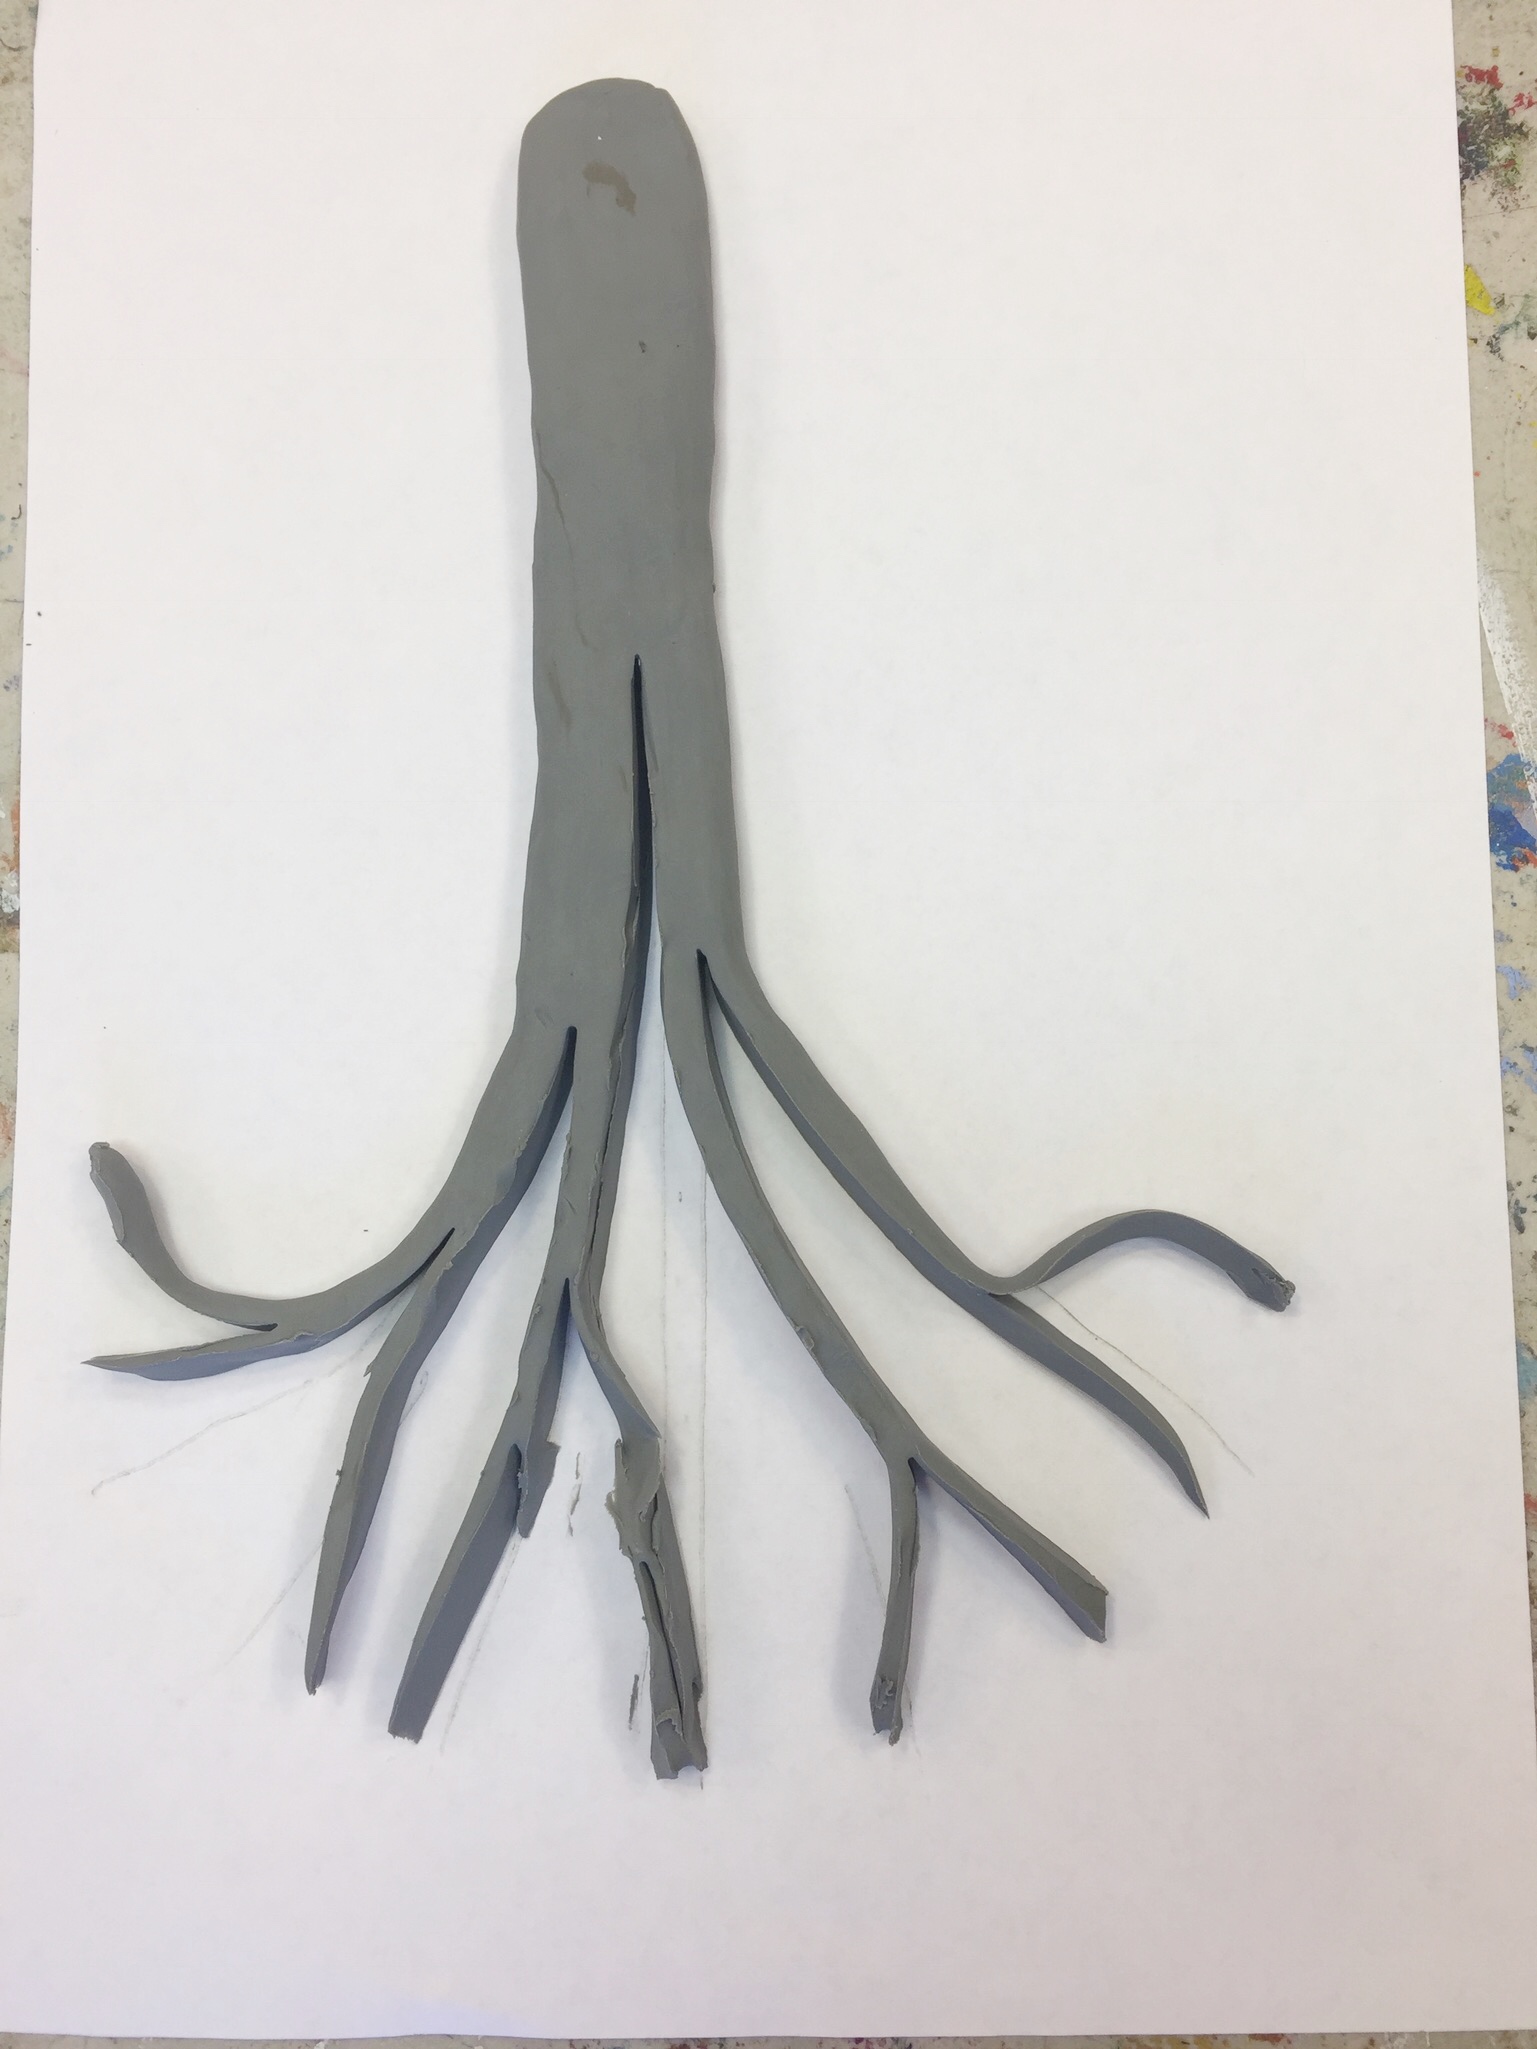
Tree 6
Almost done. To finish, arrange the branches to be more tree-like.
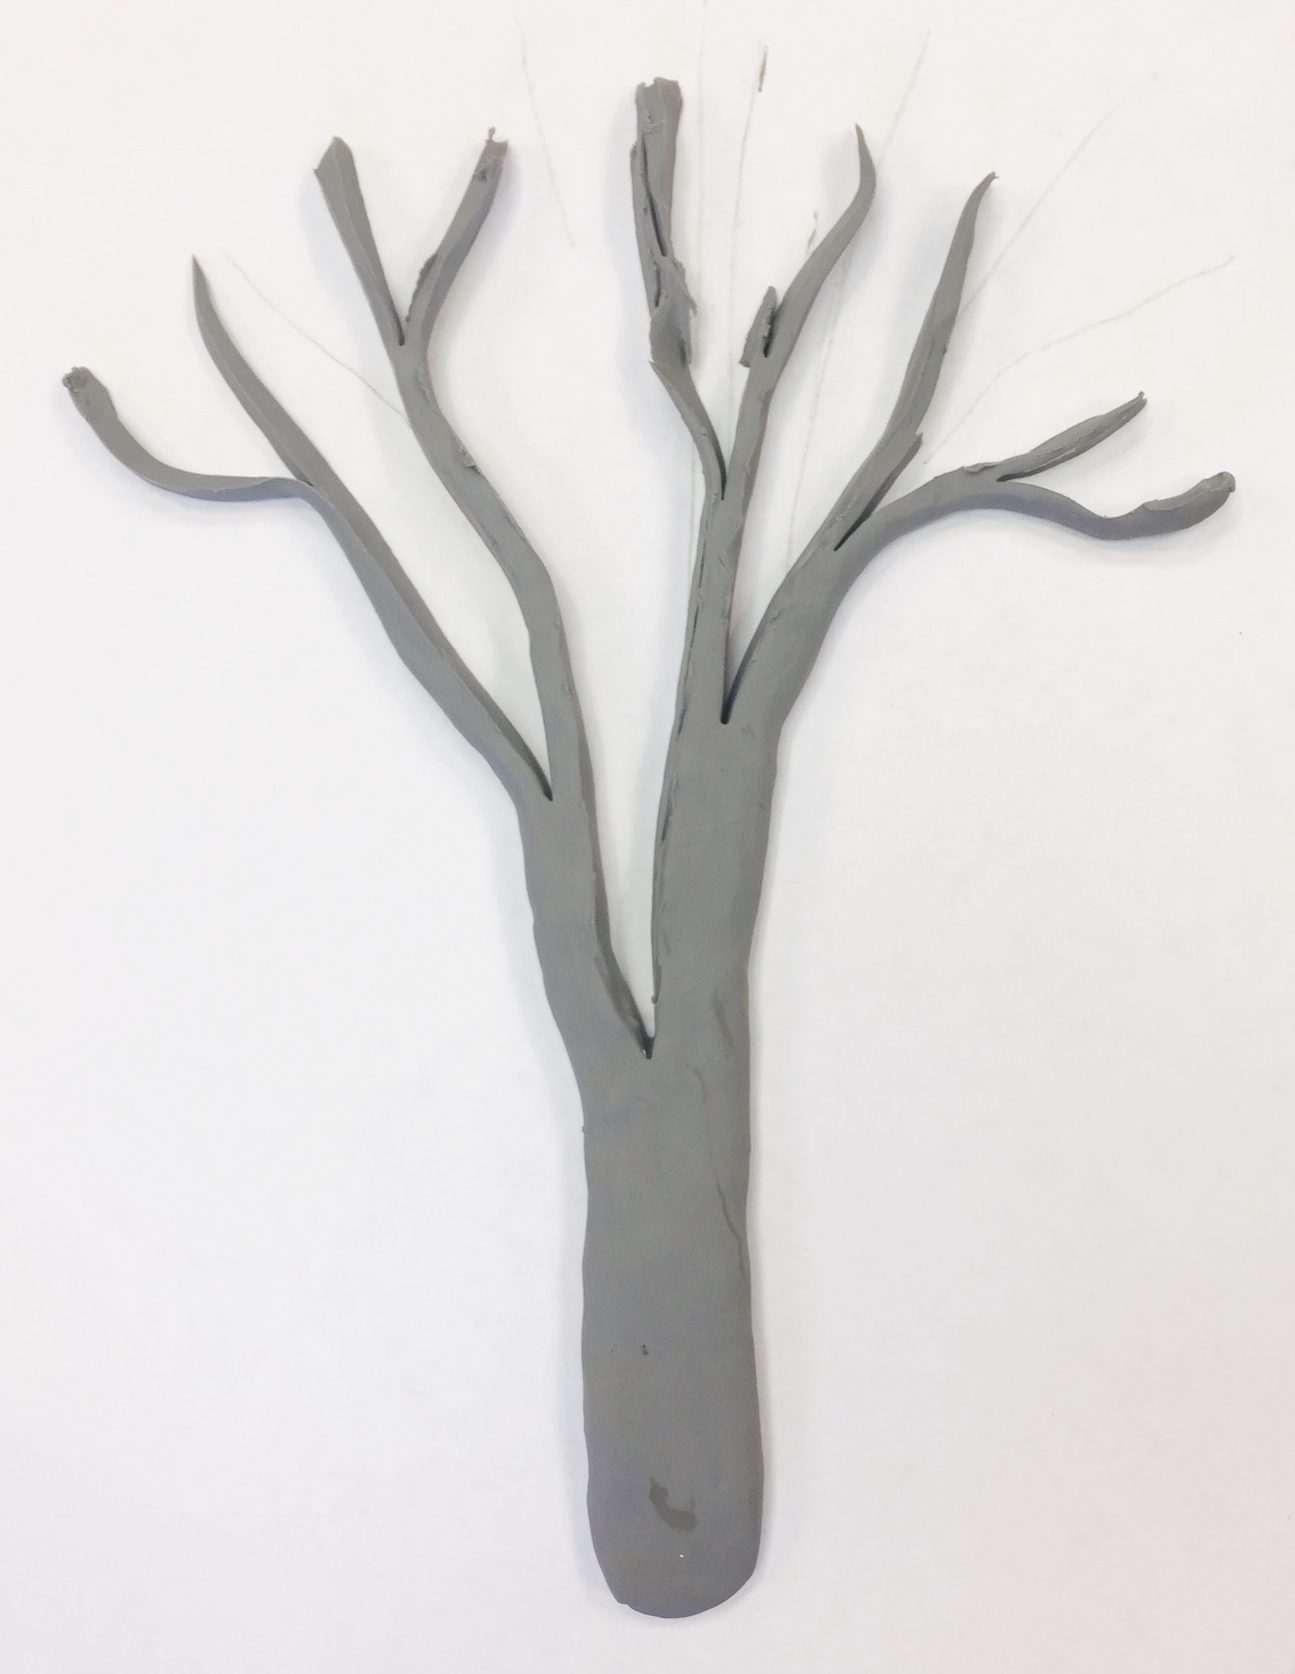
Tree 7
The finished clay tree will look like this to your students. You’ll make it upside down from your perspective.
The bottom here is where the trunk attaches to the ground using its roots. Then the thick trunk grows upwards. A little ways up, you have the first branches. Here I will cut the trunk into two large main branches (spread them out a bit). Now let’s split each branch farther up. Then we can split them again, and again to see more and more branches. Notice how each time the branch splits, it gets smaller. Why is that? (answer: because the branches can’t be bigger, or heavier than the trunk). If all the branches squeezed together (like when we started) were bigger than the trunk, then the tree would fall over. By the time you get to tiny twigs, there is a bunch of them. You’ll be able to see this in these pictures of bare trees.”
2.3 learn
Read the captions as you display the photos.
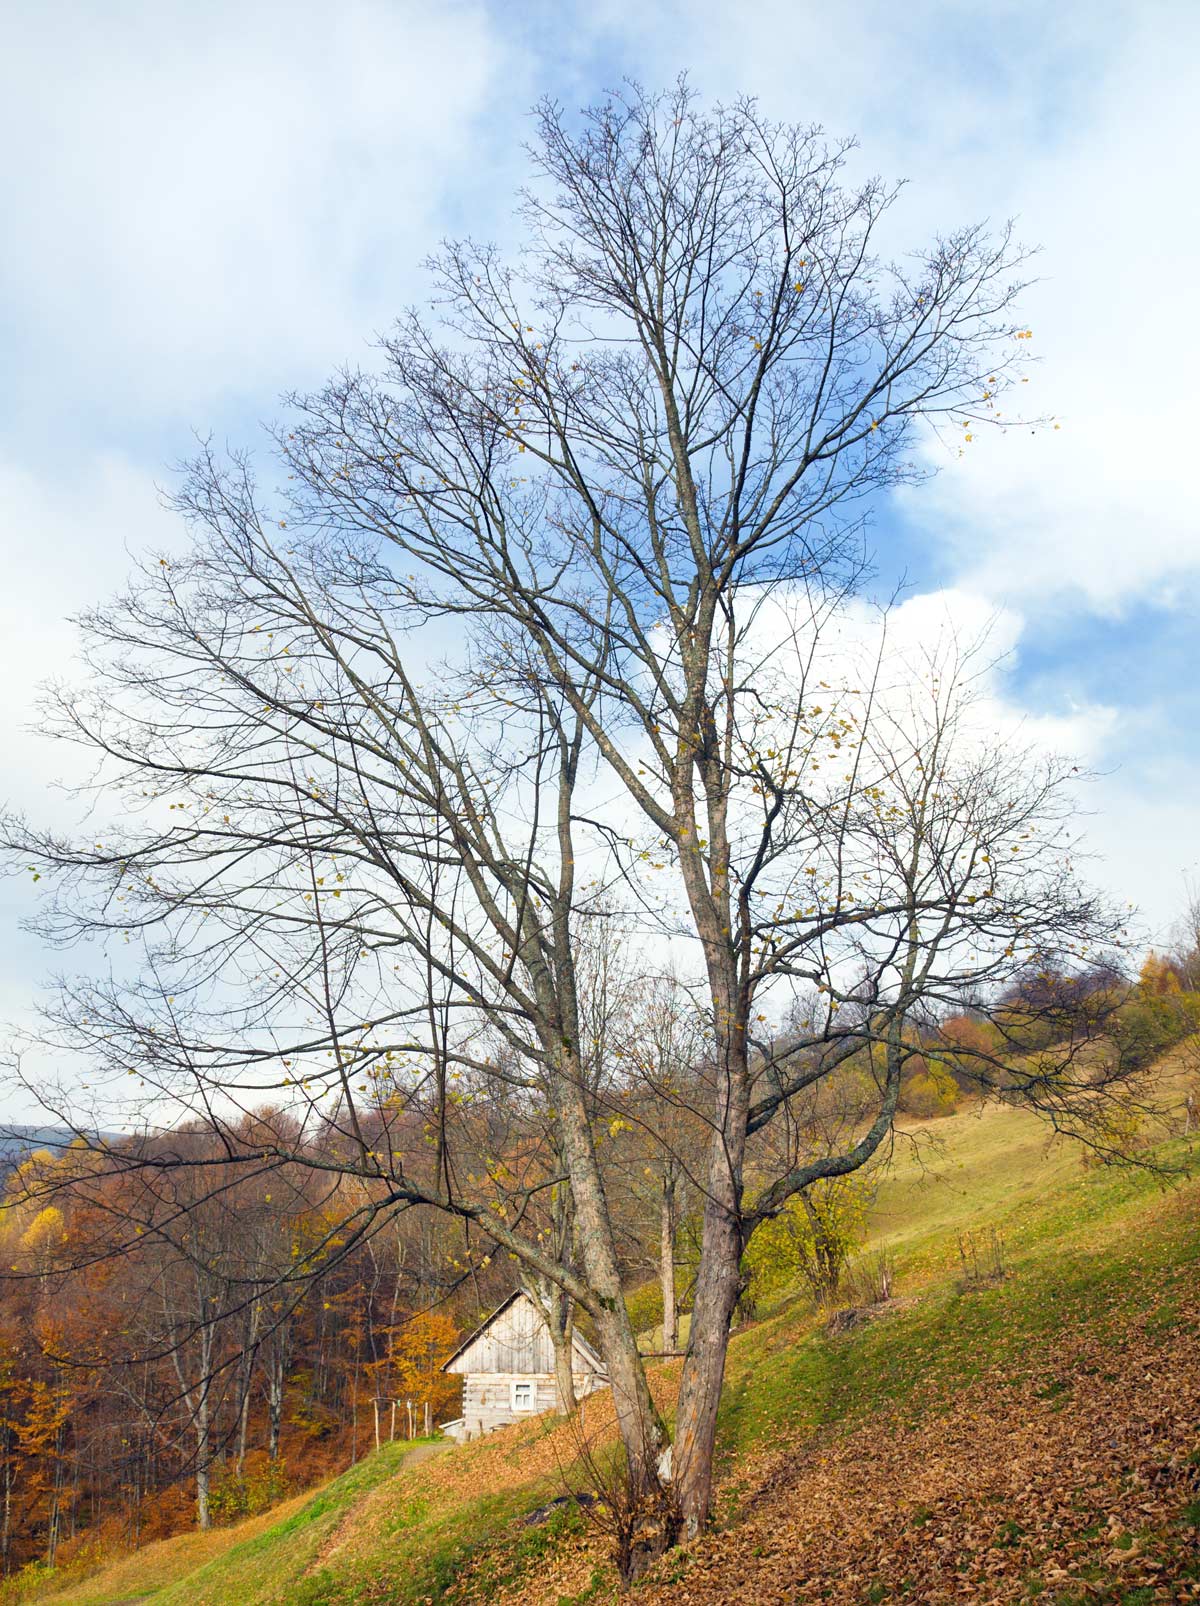
These mostly straight branches get smaller and smaller until there are many tiny twigs at the ends of all the branches.
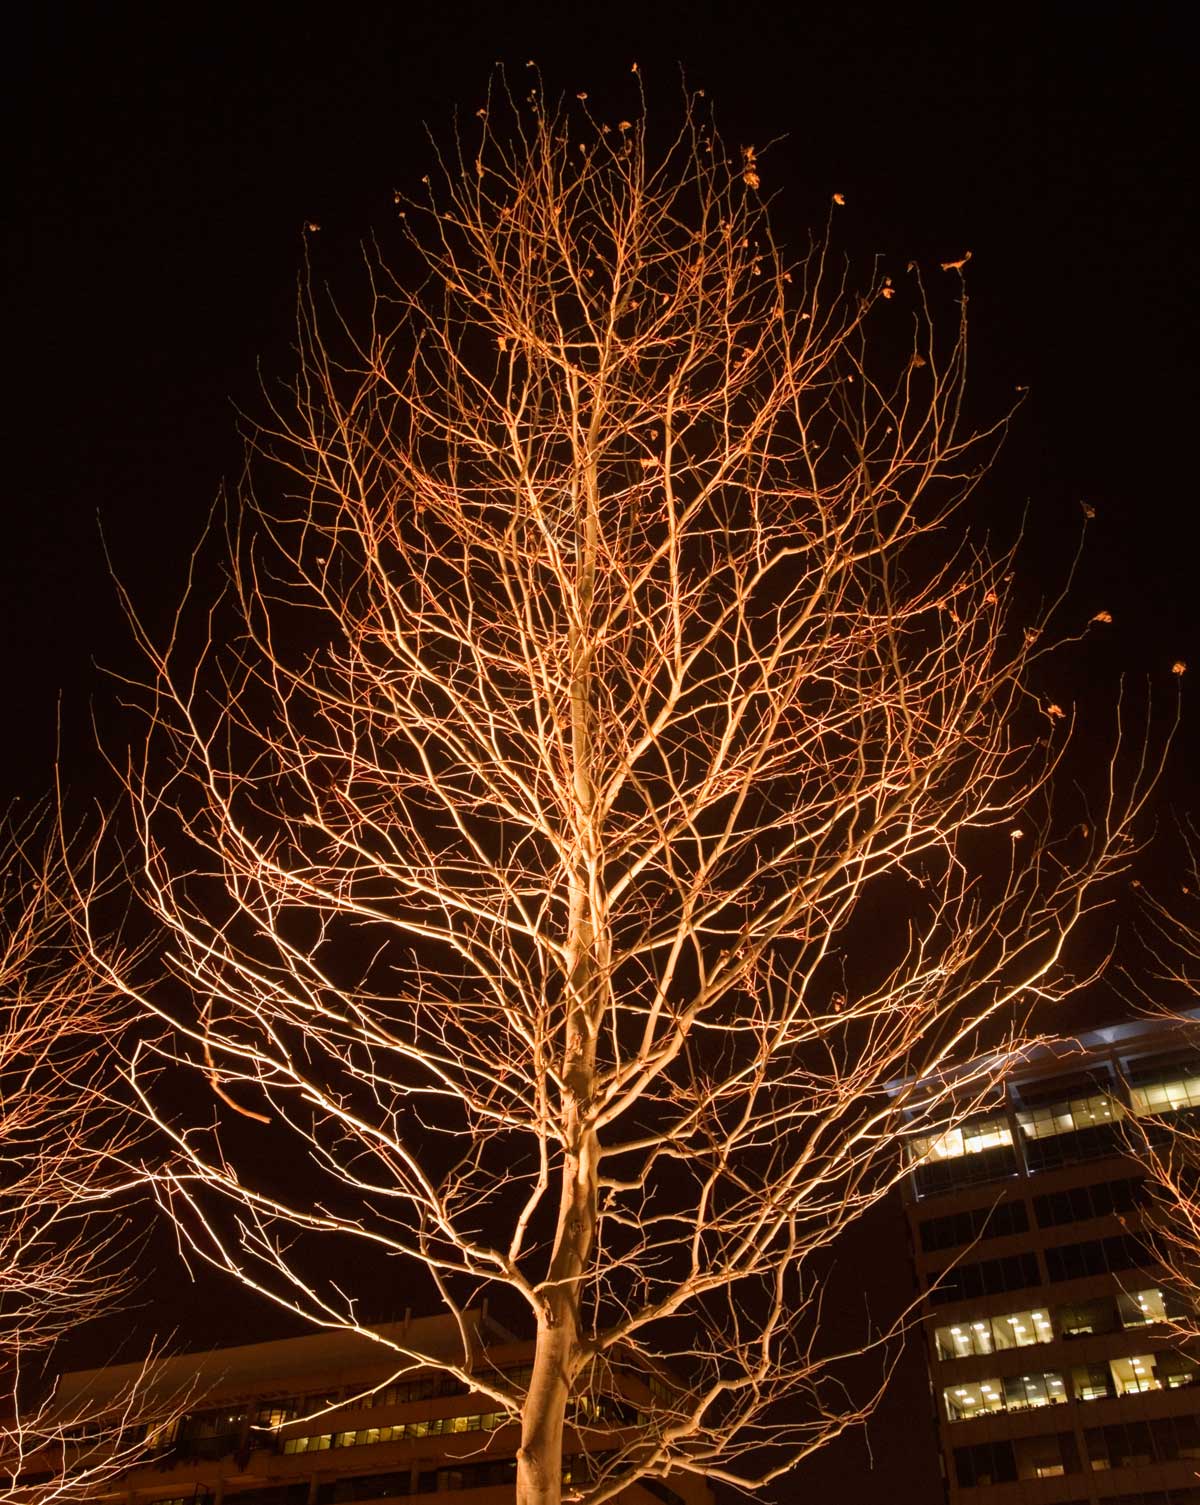
The curvy branches on this tree also end in many small twigs

TreeClumps
Here’s a tree that’s not bare. How would you draw the green parts?
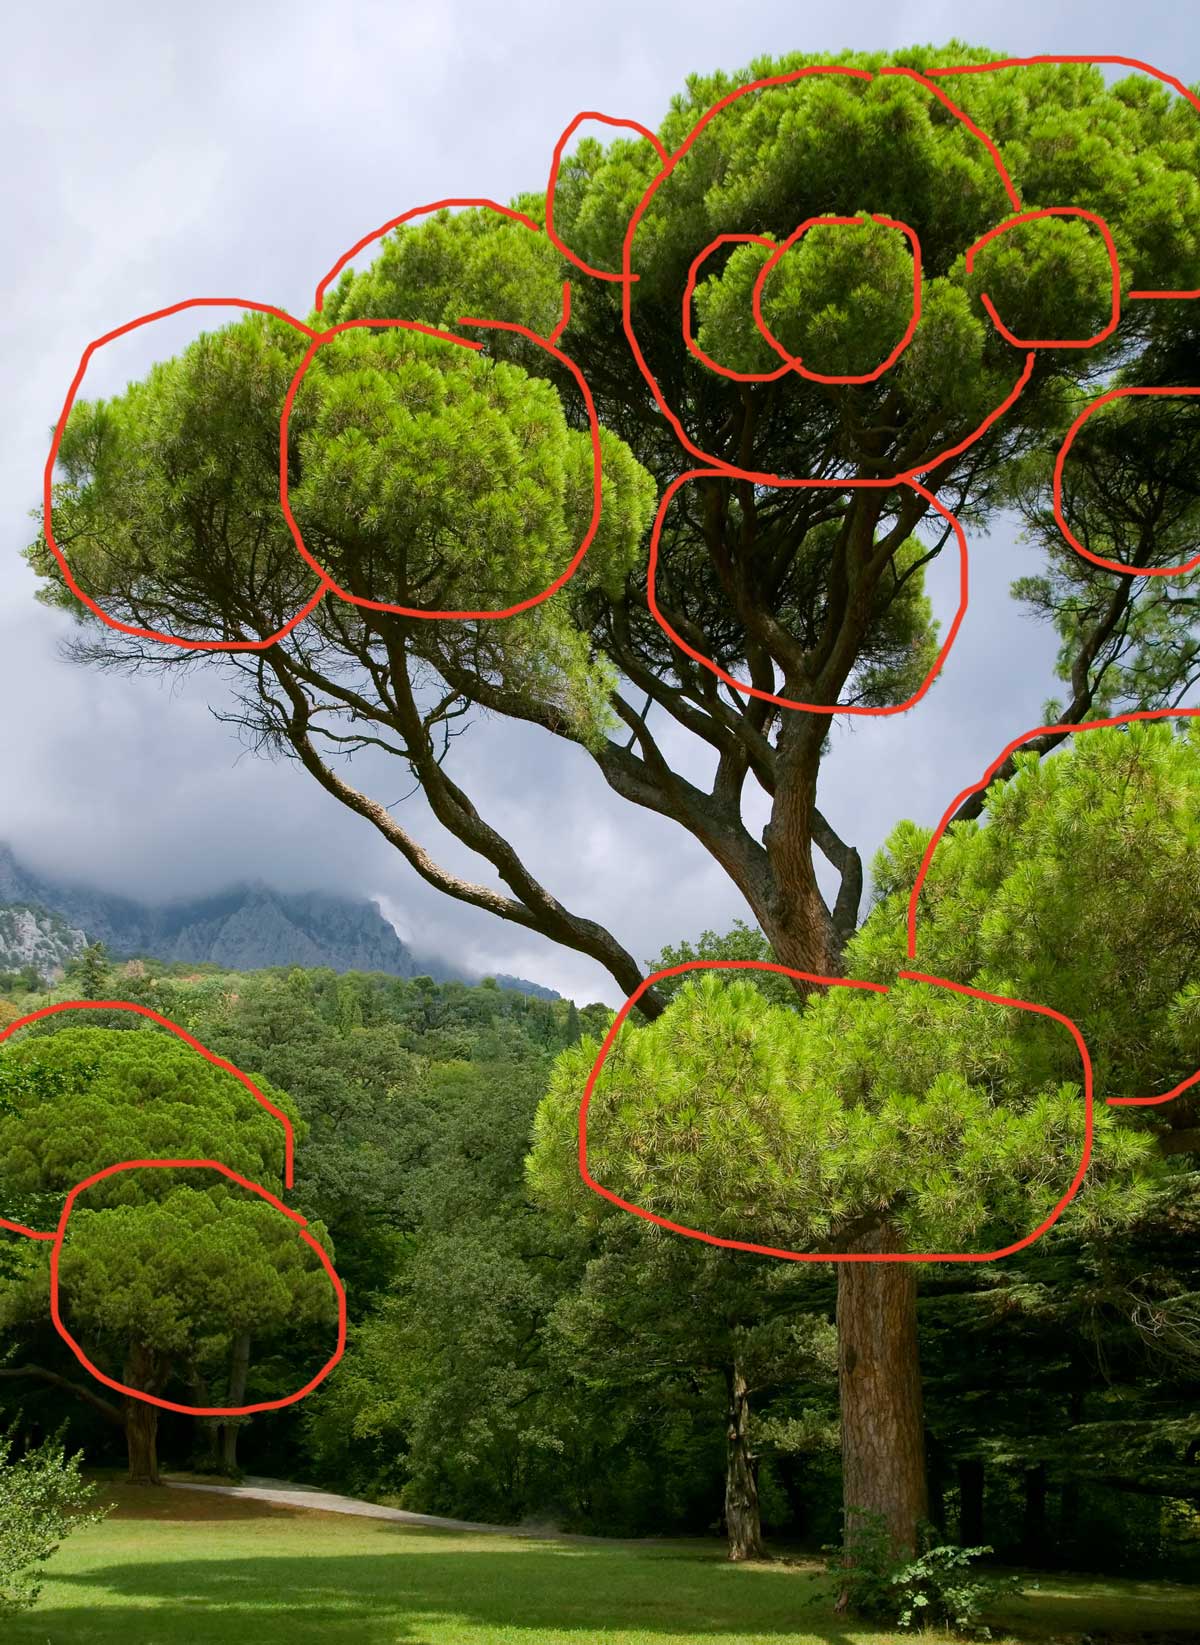
Many trees have lots of leafy clumps that are basically round shapes
Use this button to jump down to the preparation section.
LEARNING TARGETS
Students know how to identify different color schemes
M A T E R I A L S
- Colored Paper
- 11″ x 17″ White Card Stock
3.1 talk
Discuss color schemes.
Set up for painting then give your teacher talk. Use colored papers to illustrate your explanations and move along quickly.
You’ll be talking to your student about color schemes in this step, but make sure to not get into any names of color schemes. The reason for this is that any 3 or 4 colors almost always fall into one of the regular known schemes and memorizing the names of them can be boring at this age.
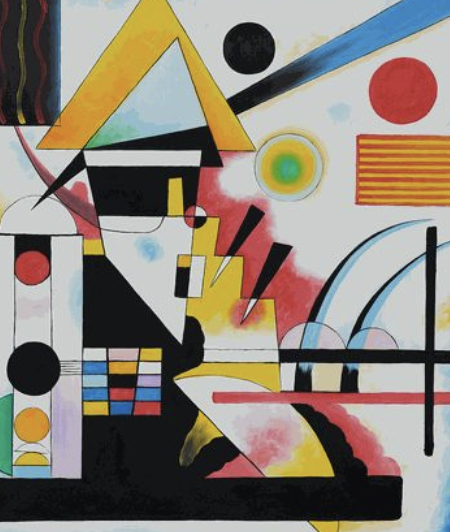
Also, take a moment if you can, and show some of Kandinsky’s work using the Pinterest Board (further below). You may only want to show the first few of these that have the famous circles artwork
“Today we will plan a Color Scheme. Have you heard of color schemes before? Great! (if not, we’ll talk about it in a minute!) “Scheme” is a pretty funny word! If you painted a truck with only cold colors, it would be an ICE SCHEME TRUCK!
There are many types of color schemes, but all you really need to know today is to not choose more than 4 or 5 main colors. Having more than 5 main colors is very hard for even grown up painters to manage. You can use light and dark versions of a color too, like pink, red and dark red are all versions of the same main color of red. Your art can look very nice if you have a lot of colors. It also looks good when you group the warm colors together, and then the cool colors together. Today we’re going to make an outdoor scene with a sky, some ground, and an awesome tree. We’ll use tons of fun colors that do not have to be normal outdoors colors. You can choose crazy fun colors for the different parts of your picture.”
Kandinsky Paintings (tap any image to open viewer)


3.2 choose
Have your student choose from the colored papers to develop their own color scheme of only 4, or maybe 5 main colors, but with variations of them so they have 7 – 10 different colors of paper. Then have your child group them into cool and warm colors. Artists will also get a sheet of 11″ x 17″ white card stock as their base for their landscape.
Finally, have your child decide if their background sky and ground will be cool or warm. The tree will be the opposite. Explain that if they have a cool background, then the tree will be all warm colors, and vice versa.
Use this button to jump down to the preparation section.
LEARNING TARGETS
Students know how to create a background using collage methods
M A T E R I A L S
- Colored Paper
- Kids’ Scissors
- Glue sticks
4.1 create
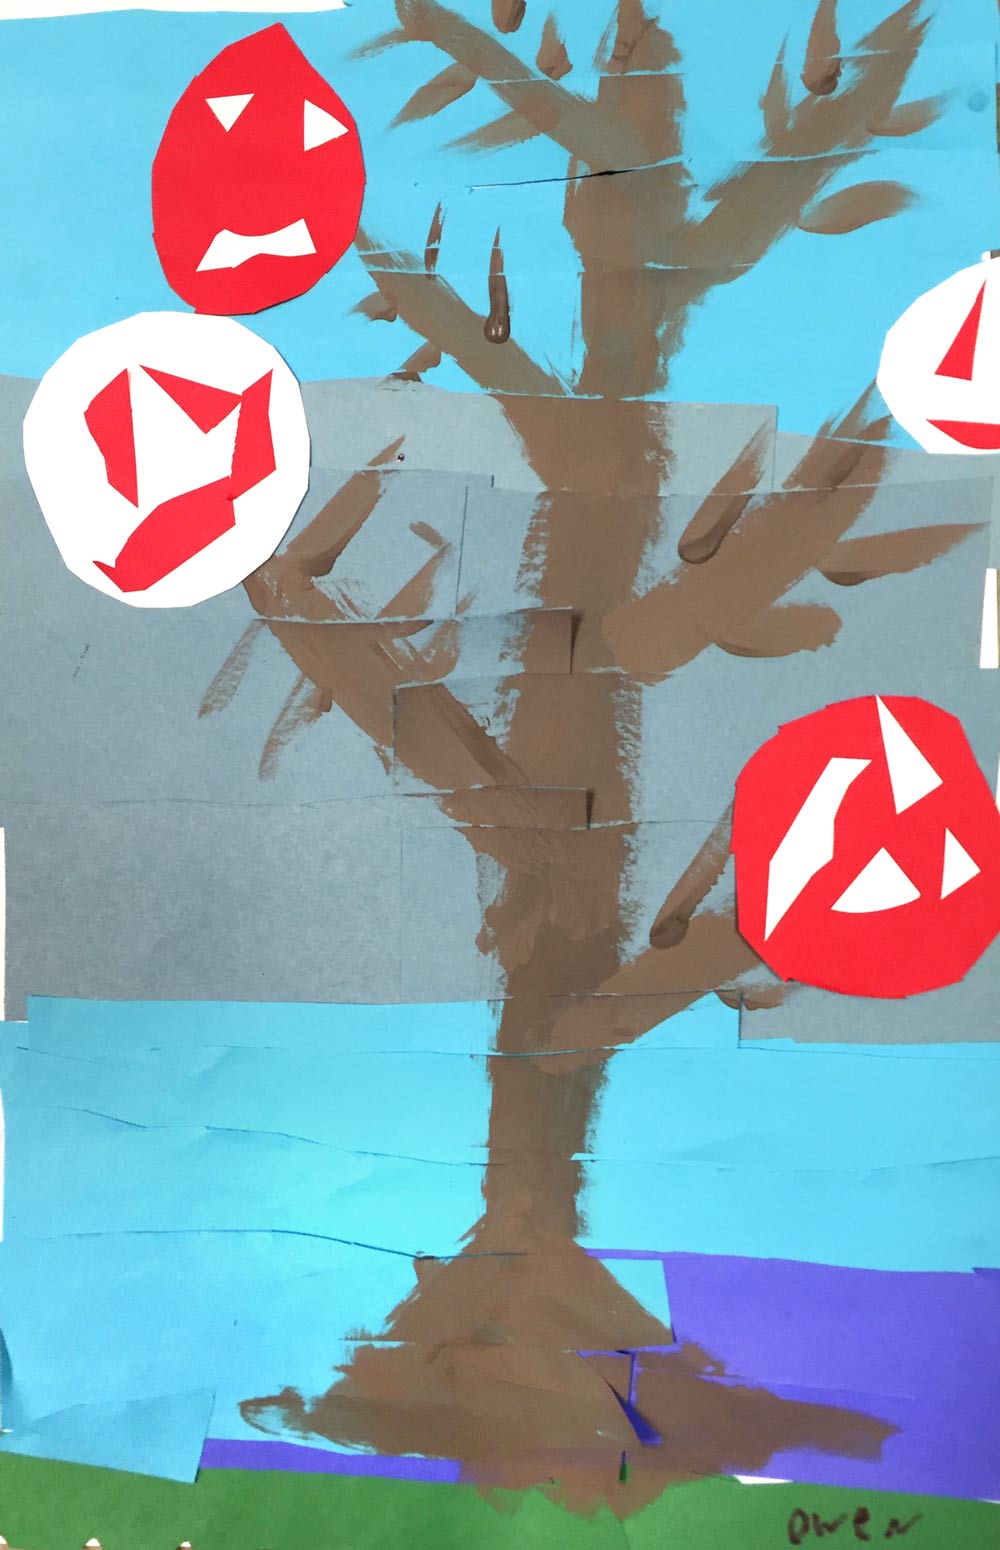
Pass out safety scissors for this step! Artists will need to cut the paper they chose into long horizontal (bathtub ways) strips.
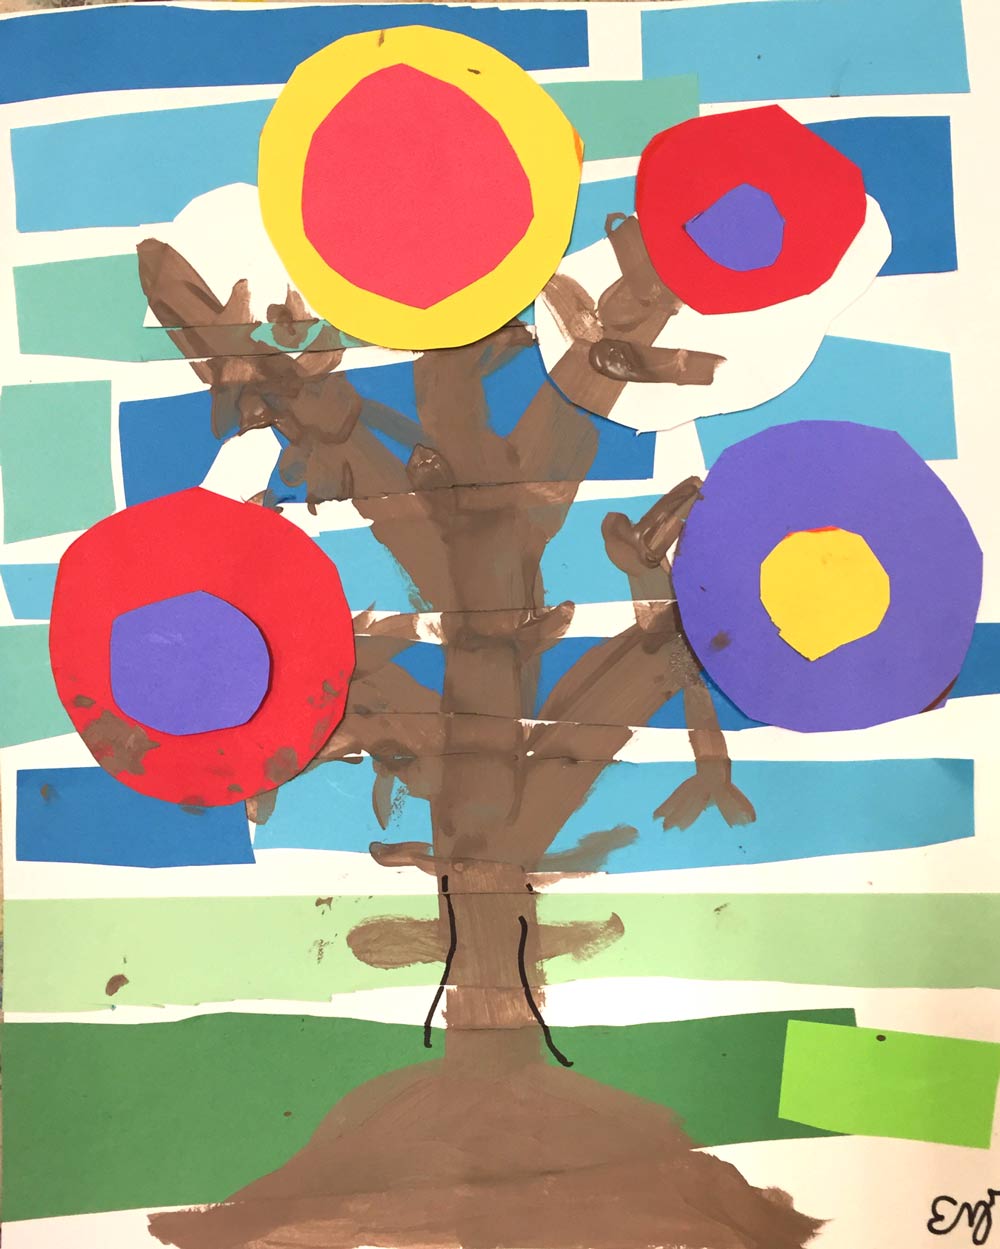
Use long horizontal strips of paper to create the sky and ground. These can be 1″ to 4″ and they can either not quite touch or they can overlap. To create interest, students should use more than one color for each area. Alternate between different colored strips in one section (such as light blue then dark blue in the sky, or light green, dark green and yellow for the ground).
Use this button to jump down to the preparation section.
LEARNING TARGETS
Students know how to paint a tree with the correct color
M A T E R I A L S
- Tempera Paint
- Brushes
- Water containers
- Paper towels
- Smocks
5.1 paint
Help students paint their tree.
Your student will be using tempera paint to paint the trunks and branches of their trees. Hand out mixing trays (we use styrofoam take-out containers) with paint already placed and let your child mix for themselves.
You’ll need white, brown, and black. Use a touch of brown to make a warmer gray.
Once they have their paint, kids can paint their trunk from the bottom up, growing their tree as they go, and making the branches get smaller and smaller. You want big trees, so make sure they begin on the ground and make the tree take up at least half the page and extend to the top. Remind them to make branches smaller and smaller by touching the brush lighter and lighter and switching to a smaller brush about half way through.
Use this button to jump down to the preparation section.
LEARNING TARGETS
Students know how to create Kandinsky-inspired leaves to their trees.
M A T E R I A L S
- Printed circle template
- Kids’ Scissors
- Pencils
- Glue sticks OR
- wet glue
- Paper towels
6.1 Print
Reference
Circle template
Print enough for each student .
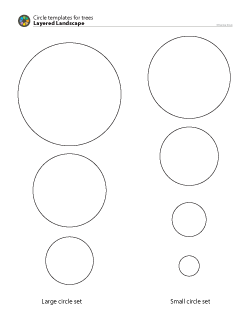
1 Page – Opens in new window
6.2 glue
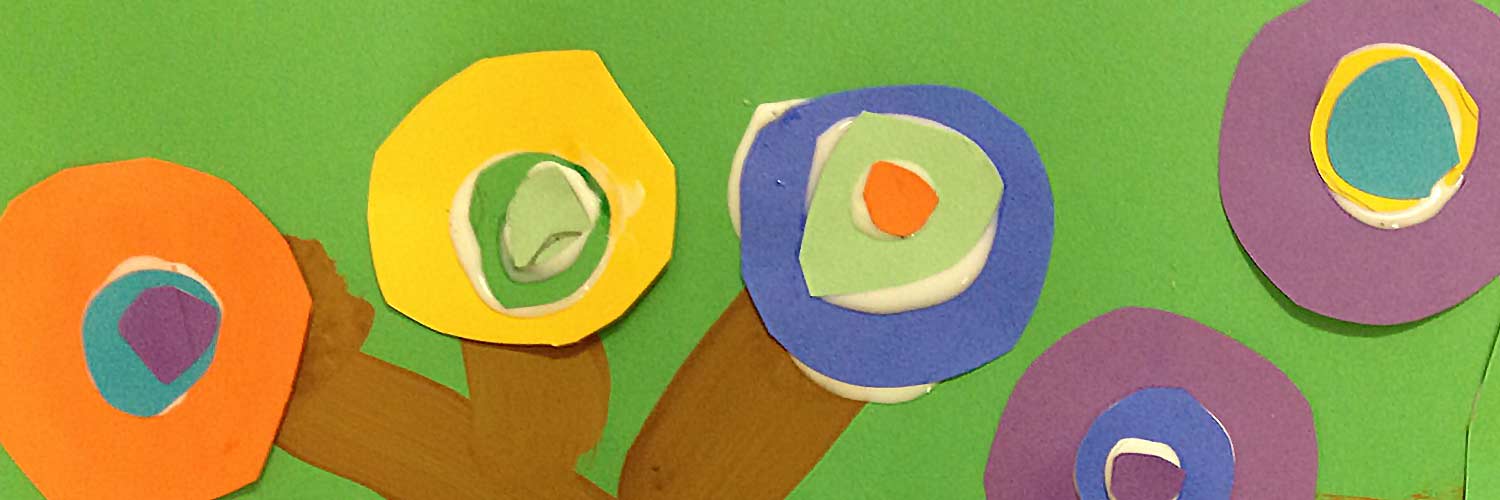
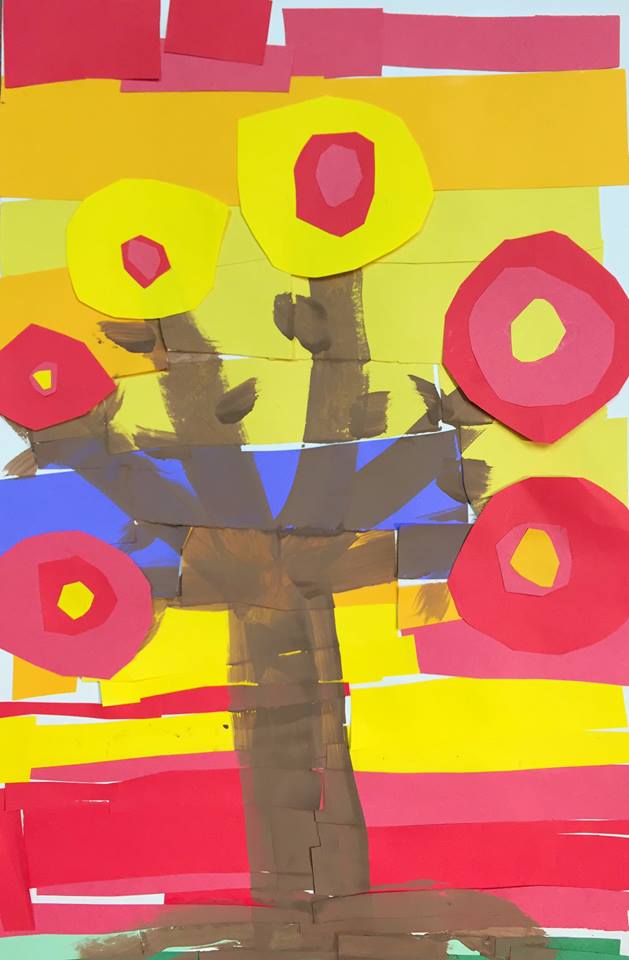
Have students cut and glue their circles onto their tree.
Do not let your student glue circles until they have placed a set of circles. Each set should be 2 – 3 concentric circles placed on their tree. This allows them to get the sizes and colors worked out before they make the final glue-down.
Remind your child that using glue sticks on the back of each circle works much better than gluing on the artwork first.
Then let them create large, medium and small circles. Begin by handing out the scissors and doing a quick demo. Make sure you’re checking their sizes and help them understand what a medium circle looks like. It should be about the size of their palm or a bit larger. Then a large circle is bigger, and a small circle is smaller. Use the circle templates from the PDF (above), and have a bunch pre-cut in white card stock so your child can use them as guides. It’s up to you if you want them to trace in pencil, or just look at the sizes and approximate the circles as they cut (and by having pre-cut squares!).
Note: let the kids make circles without squares once they get started so there is a lot of variation. Don’t try for very much uniformity.
Kids can use leftover paper from other sheets if it matches their color scheme. Gather up any un-used pieces for projects. Encourage your student to use lots of glue so everything stays put. Let them have a lot of freedom!
After you have 2 or 3 medium circles, cut some larger ones in different colors by making larger squares, and then smaller circles using a medium sized square. Begin stacking them up in colorful combinations that you like on your artwork background. After you get a few, we will start gluing them to your tree!”
Begin by letting the students arrange their colors for their tree circles, making sure that these are the cool colors if the background is warm, and warm if the background is cool. They can add an EXTRA accent color that is different if you want to make it a little more interesting and you have the time.
Use this button to jump down to the preparation section.
LEARNING TARGETS
Students know the importance of cleaning up.
M A T E R I A L S
- Paper Towels
- Cleaning wipes
- Sink
- Waste baskets
- Well-lit spot for photos
- Camera or phone-camera
7.1 CLEAN
- Wash hands
- Super-wash brushes if used
- Put art supplies away
- Wipe tables & toss trash
- Remove any smocks (last)
- Check for items on floors and tables
7.2 PHOTO
OBJECTIVES
- Practice and improvement choosing and planning color schemes that are expressive, not realistic
- Understanding how branches of trees grow and of color schemes
- Accomplishment by creating a finished work of colorful art suitable for framing
- Fulfillment in choosing their colors and picture
TROUBLESPOTS
Scissor dangers – It’s best to use rounded end children’s scissors, but good ones make it a lot more fun than cheap brands that don’t cut well.
Not enough glue – using glue sticks to create finished work needs a lot of stickiness. Encourage liberal application or use liquid glue and be more sparing.
Shrinking circles – sometimes young children will cut around and around until their circles are too small
ART WORDS
Concentric – when a shape such as a circle is surrounded by the same shapes in larger versions. All share the same center point. A target is made up of concentric circles. A donut and its hole are concentric circles.
• Color Scheme – when you have a set of main colors for your art, that is your scheme, or plan. 2, 3 or 4 colors make great color schemes, while only one, or more than five, are not usually as nice to look at.
CLASSROOM
PREP
What your room needs
Here are your printable lists and room prep instructions.
Opens in new window
CLASSROOM
MATERIALS
- 11×17” Copy Paper
- 11 x 17” Card stock
- 4B Pencil
- White eraser
- Markers
- Oil pastels
- Modeling clay
- Plastic knife (for teachers only)
- iPad or TV to display slideshow
- Colored paper
- Kids’ Scissors
- Glue sticks
- Tempera paint
- Brushes
- Water containers
- Paper towels
- Smocks
Next Week
Supplies you’ll need to find, or order:
- Charcoal
- Erasers
- Oil Pastels
- Paper
PREVIEW
Week 32: Freaky Flowers
In this lesson we’ll do several things backwards! Students begin by making their paper gray with charcoal, and then “drawing” light lines using a kneaded eraser. After a fun table-poster, they will draw flowers in pencil, and then use oil pastels – to do the background and leave the flowers white. Finally they’ll finish in the flowers too.
Week 33: Starry Nights
In this lesson the students learn how stars are not orderly but grouped in odd ways. We also use splatters to make stars look more random and natural. Then we look at expressive work and copy the starry night of Vincent Van Gogh in a tempera painting on colored paper.