
OVERVIEW
A Desert scene is created using oil pastel resist with watercolors. Then the students will draw and color a lizard using a mock bark-painting technique using kraft paper (brown paper bags) black marker, and oil pastels. They have a choice of placing the lizard cutout on the painting, or leaving it as two separate artworks.– – –
Grades 3 – 5
Week of May 6 – 10
1 Hour & 45 Minutes
Lesson At A Glance
A brief overview of each step. Buttons jump to each section for detailed information.
10 Min – Students draw outlines for their desert
15 Min – Make resist paintings.Display lizard slideshow
5 Min – Students make “bark” out of brown kraft paper.
5 Min – Draw lizard outline
15 Min – Make doodle designs inside the lizard shape
5 Min – Everyone helps
SCROLL & TEACH
LESSONPLAN
Each section is a different color. Read over once and then you can SCROLL & TEACH using any device you like. It’s designed to work best with your phone.
LEARNING TARGETS

Students learn to express themselves through creating from their imagination.
M A T E R I A L S
- 11″ x 17″ Copy Paper
- 4B pencil
- Eraser
- Markers and/or oil pastels
- Blenders (stumps)
- Paper Towels
1.1 greet
Kneel down so that you are on their level. Bending over emphasizes the differences in your height, while kneeling makes them feel more important. Have tape and marker ready so you can stick some tape on the table by each student and write their name on it as they sit down.
1.2 choice
Everyone should take their time with the work and make a finished piece of art. Limiting the paper can also help kids focus on the work. If someone finishes in super-fast time, ask them what more they can do to the existing paper. Ask again several times – unless they appear overly frustrated; then you can allow them to move on to a new work.
1.3 display
While students work, you can display the pictures below, and read the captions.
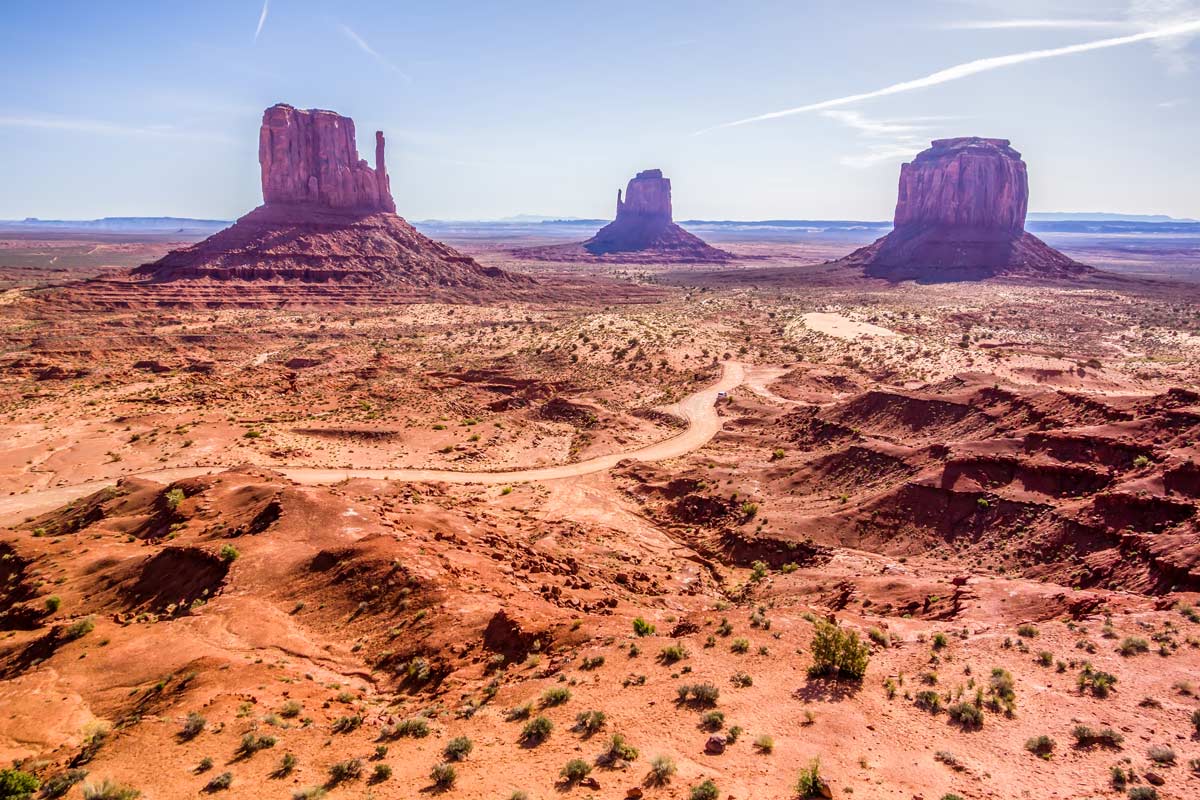
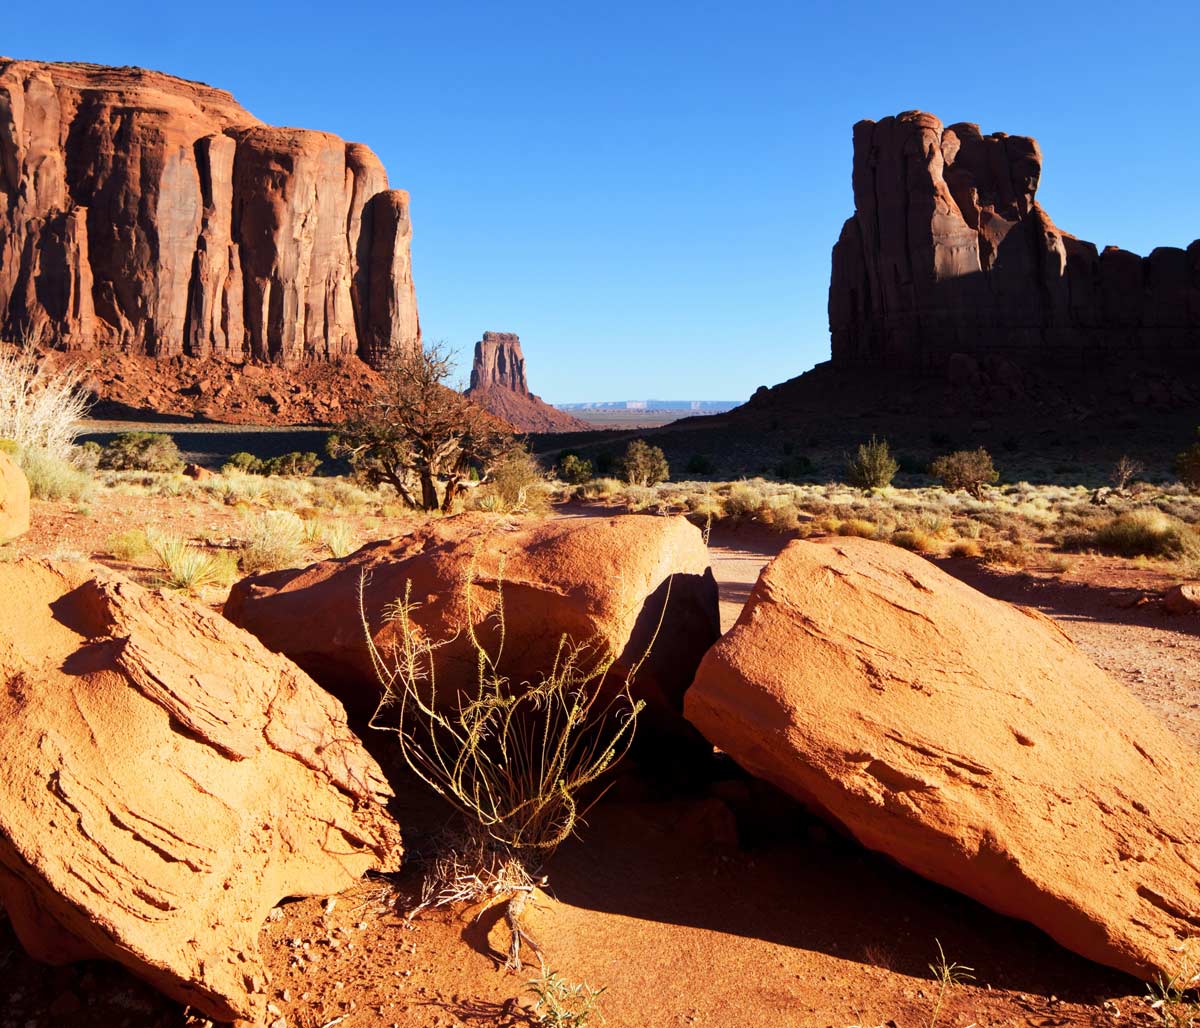
1. Here’s a nice desert scene.
We can divide this scene into 3 Big parts. In most outdoor scenes, there is a Back-ground (Sky), a Middle-ground, and a Foreground.
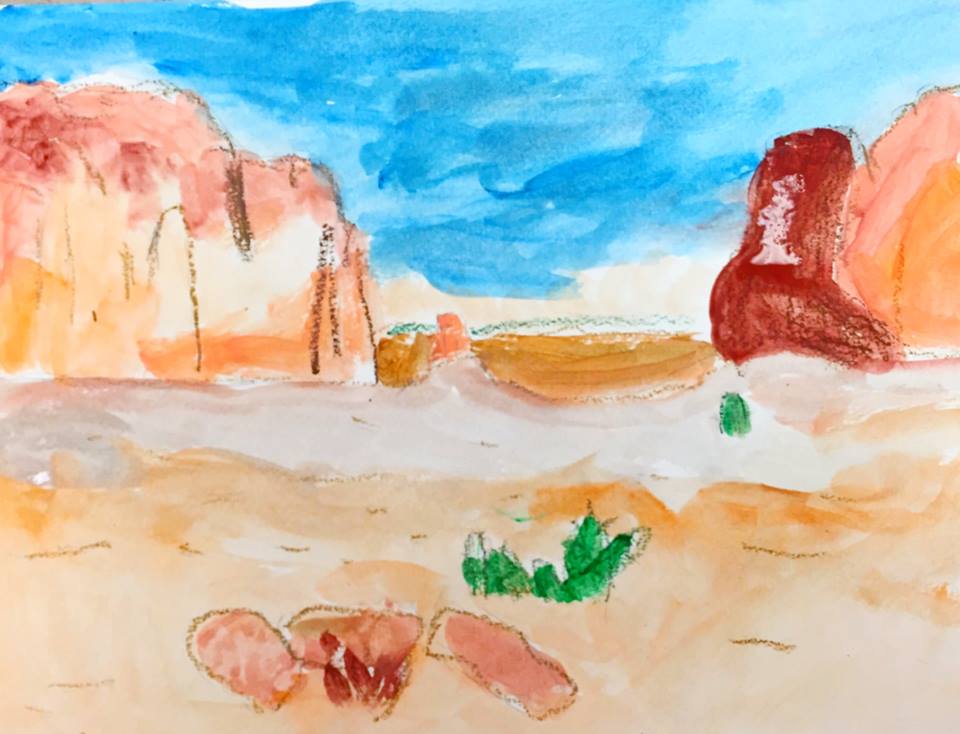
Here’s another scene. Can you see those same 3 Big parts?
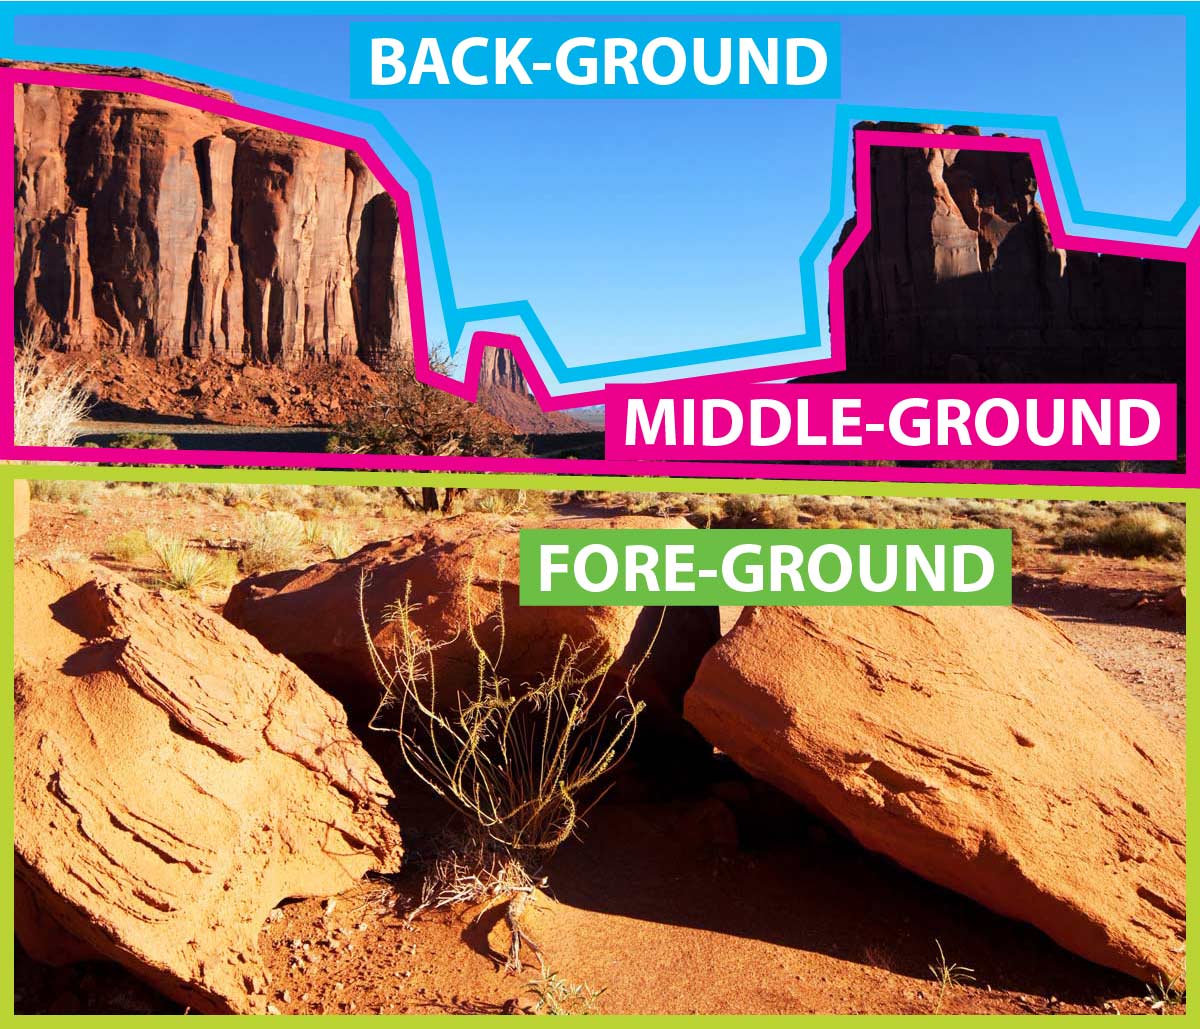
The Sky is the Back-ground

The Fore-ground is at the bottom.

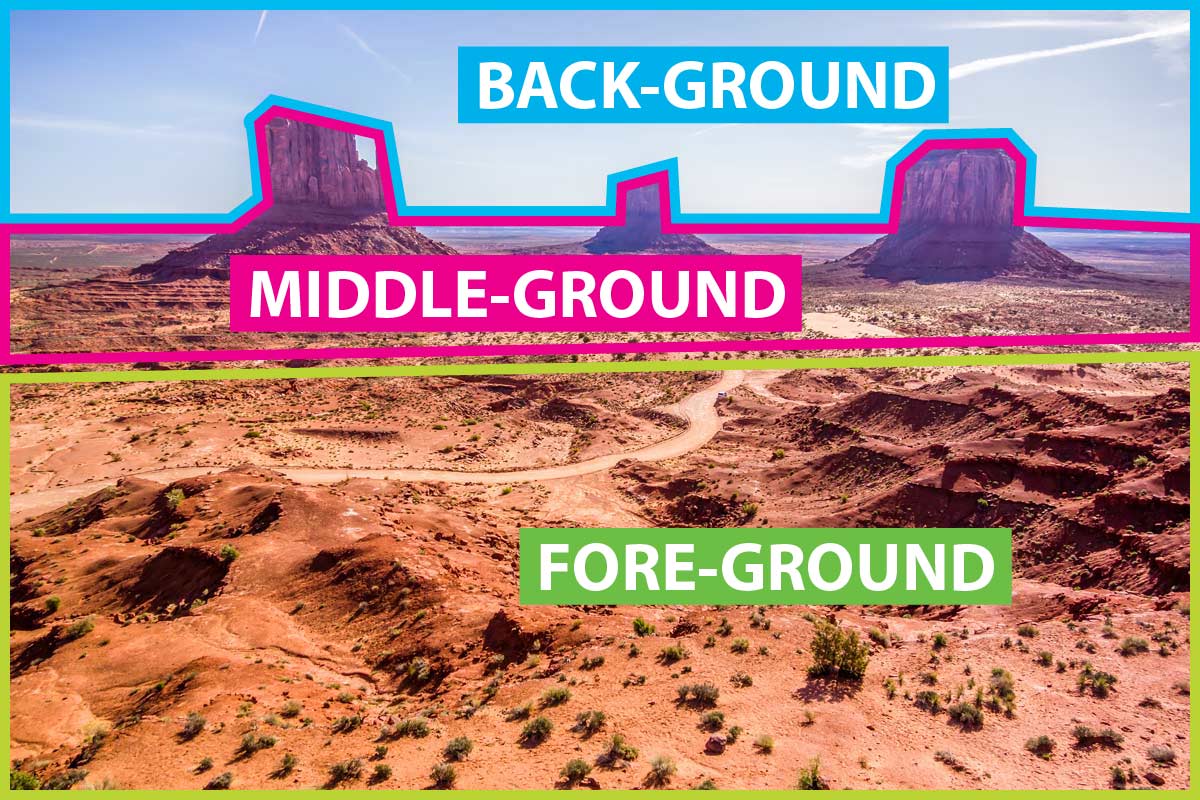
And here’s one more. Which part always seems to be in the middle?

The Middle-ground! It is far away, so it’s usually smaller than the foreground.
LEARNING TARGETS
Students know how to draw the main parts of a landscape
M A T E R I A L S
- 7.5″ x 11″ Watercolor Paper (11″ x 15″ cut in half)
- 2B Pencils
- White Erasers
2.1 Print
Reference
Desert Reference
Make sure every student gets a page.
1 Page – Opens in new window
2.2 Explain
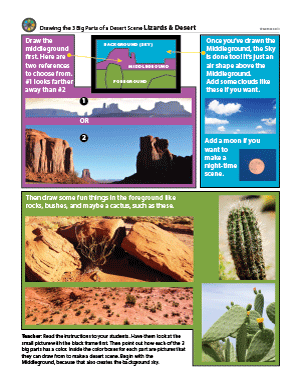
There are 3 big parts to draw as we just learned in the slideshow. Students should decide if they want a daytime sky, night time, or a sunset sky. Night time skies can have a moon in them.
Read the instructions on the PDF to your students, since many of them may not be able to read it well.
Have them look at the small picture with the black frame first. Then point out how each of the 3 big parts has a color. Inside the color boxes for each part are pictures that they can draw from to make a desert scene. Begin with the Middleground, because that also creates the background sky.
2.3 Draw
Remember to begin with the middle ground first.
Guidelines!
Artists draw outlines only, but no shading or details. These are just guidelines for our pastels and paint.
LEARNING TARGETS
Students know how to use oil pastels
M A T E R I A L S
- Landscape Drawings
- Light Color Oil Pastels
3.1 draw
ONLY USE LIGHT COLORS for your oil pastels today. We will use darker paints later, and the light colors will show up much better then. White is great even though you won’t see it now, and any of the very light colors. Go over colors that are medium toned, with white to make them lighter.
You can tell your students that this part of the art is almost like doing secret messages. You can’t see it or at least not very well, until we add the watercolor later. Then it will show up like magic!
Add these textures to your landscape with the light oil pastels:
- Dots and dashes in the sand, so it looks sandy and bumpy like rocks
- Clouds, swirls, sun or moon in the sky – think about the color it will be for either daytime or sunset.
- Curvy & straight lines on the mountains/buttes
- Spiky spines on the cactus!
Remind your students how Van Gogh painted his sky with whirls of lines and dashes. If you were here last week, you did that too! This is a lot like that, but with pastels instead of paint.
STEP 4. Watercolor
Students add watercolor and see the oil pastels show up as it resists the water.LEARNING TARGETS
Students know how to create resist paintings.
M A T E R I A L S
- Watercolor Trays
- Brushes – Small and Medium
- Water containers
- Paper towels
Brushes should be nylon for springiness and durability. Round brushes are the most versatile.
Paint pigment list:
- Napthol or Pyrrol Red
- Hansa or Light Yellow
- Pthalo Green (blue shade)
- Cyan or Cerulean Blue
- Ultramarine Blue
- Dioxazine Purple
- Magenta
- Burnt Umber
- Raw Sienna
- Titanium White (professional grade only)
4.1 paint
Bring all of the watercolor pans and brushes out. Also provide mixing trays or plates. Have tubs of water to clean and paper towels to wipe up messes.
Small bowls can be used to mix up a lot of watercolor ahead of time. It is always good to have plenty of watercolor paint.
Encourage your students to get a lot of color into the watercolors so that the colors are strong and vibrant on the paper. More layers can be added if it looks too light.
LEARNING TARGETS
Students know how to use textures to enhance their artwork
M A T E R I A L S
- Brown Kraft Paper
5.1 create
Making bark:
- Tear a piece off – tear all edges. It can be an odd shape or rectangular
- Crumple up, and flatten out – repeat 4 or 5 times to soften and wrinkle
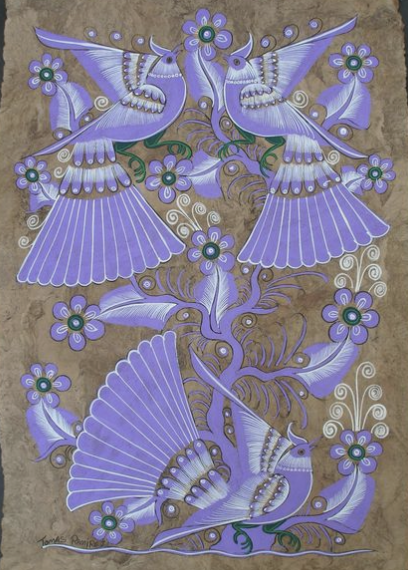
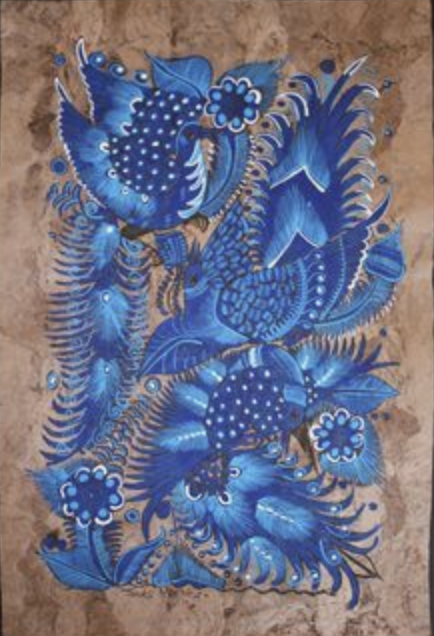
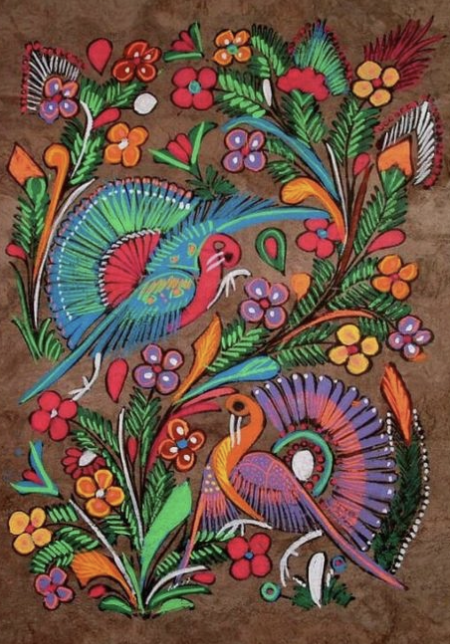
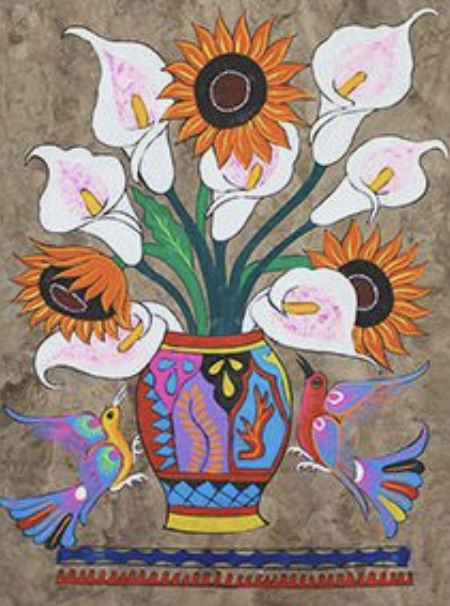
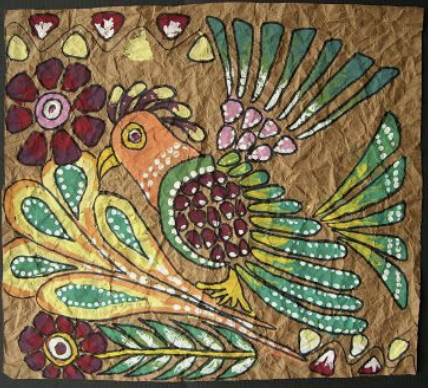
While students work, show the Pinterest page with Mexican Bark Painting examples.
Mexican Bark Paintings (tap any image to open viewer)


LEARNING TARGETS
Students know how to draw a complex shape
M A T E R I A L S
- “bark” paper from Step 5
- Pencils
- Markers
6.1 Print
Reference
Lizard Reference
Cut images apart and print enough for each student to choose from several.
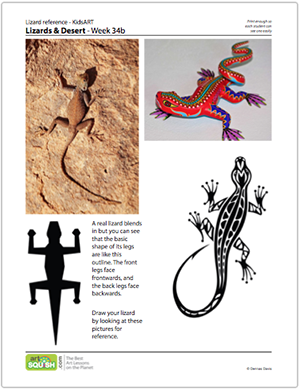
1 Page – Opens in new window
6.2 Print
Reference
Lizard Cutout
Print a few to cut out for templates if you have students who are intimidated by drawing complex shapes.
Cut out along the dashed line and then cut the gray shape out, carefully. Kids can trace around this if needed.
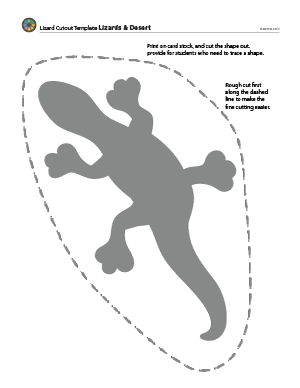
1 Page – Opens in new window
6.3 draw
Students should try drawing the lizard onto their wrinkly lizard bark. However, some of your students may be nervous about drawing the complex shape. Have some lizard shapes cut out from the gray lizard shape template PDF above, so students who are nervous about drawing can choose to trace the shape. Use pencils to trace, and then switch to a marker to re-trace, or for young artists, they can simply trace with the marker and skip the pencil. The goal is to enjoy the process and feel confident.
Artists will push themselves when they are ready to improve – you don’t ever have to.
LEARNING TARGETS
Students know how to add doodle designs to complete their drawing
M A T E R I A L S
- Lizard drawings
- Black Markers
- Oil Pastels
7.1 draw
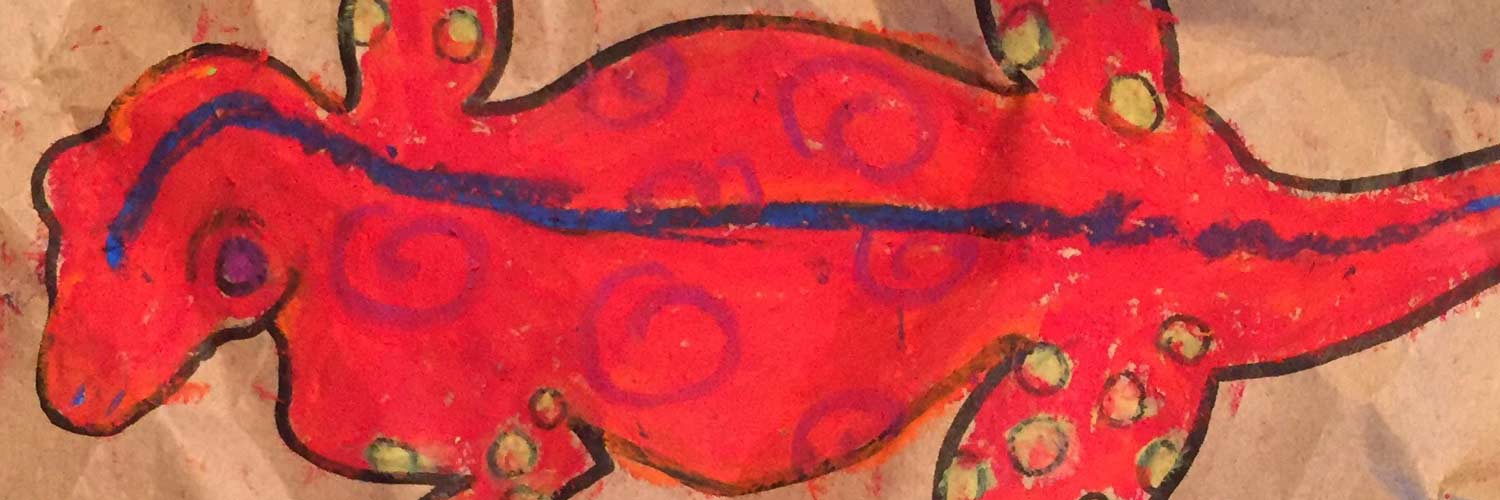
Students will draw then initially with black markers, and then switch to using oil pastels for adding bright warm colors in between the black lines. Use them like a marker, making boldly colored lines instead of shading or blending. Use the brightest warm colors like yellow, orange, and red. Then they can finish with a few touches of one cool color: either purple, blue, or green.
LEARNING TARGETS
Students know the importance of cleaning up.
M A T E R I A L S
- Paper Towels
- Cleaning wipes
- Sink
- Waste baskets
- Well-lit spot for photos
- Camera or phone-camera
8.1 CLEAN
- Wash hands
- Super-wash brushes if used
- Put art supplies away
- Wipe tables & toss trash
- Remove any smocks (last)
- Check for items on floors and tables
8.2 PHOTO
OBJECTIVES
- Practice and improvement using reference, watercolors, & oil pastels
- Understanding how oil and water resist works
- Accomplishment in finishing 2 color artworks
- Fulfillment by color and design choices
TROUBLESPOTS
Scrubbing or dry brush – Watercolor paint needs water to work well. Make sure your students don’t run out and begin to harm their paper, existing work, and brush, by forcing more paint out of a dry brush. Explain to them that watercolor should flow and when you find that your brush is rubbing the paper then you need more paint. Get paint often!
Tearing up the bark – The excitement of crumpling and almost destroying the kraft paper in step 5 may lead to vigorous activity and torn papers. Be on the lookout and explain that you’ll only provide one more paper so be gentler with this one. (Torn paper is ok for the project, so you can stick to your word if you need to). Remember though, any kind of shaming in the classroom can damage self-esteem and the love of art. Keep your guidance happy and private (if possible), even when being very firm.
ART WORDS
Texture – Visual texture is when you make small marks or lines that look a lot like things that have real texture that you feel with your fingers. Lines on a drawing can seem like the ridges on a potato chip, for instance.
Resist – When you put oil pastel on paper and then go over it with watercolor, the oil will push away, or resist the water. This creates a neat effect we’ll use today by making light oil colors and darker watercolors.
CLASSROOM
PREP
Purchase rolls of brown kraft paper at the paint section of big hardware stores. They sell it for drop cloths.
Print all of your PDFs from the lesson plan and cut any references apart as needed.
What your room needs
Here are your printable lists and room prep instructions.
Opens in new window
CLASSROOM
MATERIALS
- 11×17” Copy Paper
- 4B pencil
- Eraser
- Markers
- Oil Pastels
- Blenders (stumps)
- Paper towels
- Watercolor Paper (11” x 15” Cut in half)
- 2B Pencils
- Watercolor trays
- Brushes – Small and Medium
- Water containers
- Paper towels
- Brown Kraft Paper
- Cleaning Wipes
- Sink
- Waste Baskets
PREVIEW
Week 35: Big Box Painting
Students will cover a large cardboard box with butcher paper and masking tape, and then they paint it as a group, making up things along the way but collaborating so the box has a theme. Then we finish with artists’ choice in watercolors or oil pastels.
Week 36: Party Animals
Our last class of the year has students going to an animal party. Using blank masks to pretend they are animals, then everyone finds reference and paints their mask to match a chosen animal. Pretend play and a game take the middle of the class time, and then there is a marker drawing project of animals having a Summertime party.