
OVERVIEW
Students will be introduced to painting and the use of color. Mixing is emphasized and lines are also introduced as one of the parts of an artwork.Grades 1 – 2
Week of August 25 – 29
1 Hour & 30 Minutes


SCROLL & TEACH LESSON PLAN
Don’t worry about rewriting anything. Just spend a few minutes reading the lesson plan and printing out your PDFs. Then check out the READY, SET, GO! section and print your prep-page, which includes checklists and an “at a glance” outline of the lesson so you can stay on track when you’re teaching. Set out the materials from the list on your prep page and you’re ready.
That’s all you need to know. Use your smartphone to Scroll & Teach!
Lesson At A Glance
A brief overview of each step. Buttons jump to each section for detailed information.
10 Min – Intro to watercolor and mixing paints
5 Min – Wash brushes and clean up paint
10 Min – Practice wiggly lines with oil pastel
20 Min – Make coloring book pages
12 Min – Outline flower paintings with dark pastel
3 Min -Everyone helps
SCROLL & TEACH
LESSONPLAN
Each section is a different color. Read over once and then you can SCROLL & TEACH using any device you like. It’s designed to work best with your phone.
LEARNING TARGETS

Students enjoy self-expression.
M A T E R I A L S
- 11″ x 17″ copy paper
- 4B Pencil
- Eraser
- Markers and/or oil pastels
- Blenders (stumps)
- Paper towels
- Watercolors
- Watercolor spray bottle
1.1 GREET
1.2 CHOICE
Encourage students to work with one piece of paper for a while. If someone uses the phrase, “free draw”, explain that artists’ choice is something only artists can do, while free-draw is something anyone can do. You want to use the phrase to elevate the students’ expectations of their work.
Everyone should take their time with the work and make a finished piece of art. Limiting the paper can also help kids focus on the work. If someone finishes in super-fast time, ask them what more they can do to the existing paper. Ask again several times – unless they appear overly frustrated; then you can allow them to move on to a new work.
1.3 LINES
1.4 DEMO
1.5 PREP
While your students are working, get out a watercolor pan and a container of water. Dip your brush in the water and add a few drops to each color in the pan. Explain to the class that you are waking up the paint and getting it ready to use. Continue with more trays for the class to use later in step 3.
You can use an eye-dropper or spray bottle to go faster.
Use this button to jump down to the preparation section.
LEARNING TARGETS
Students know how to use watercolors.
M A T E R I A L S
- Watercolors
- Mixing plate or tray
- Water tub
- Brushes
- Piece of watercolor paper
- Paper towel
- Smocks
Brushes should be nylon for springiness and durability. Round brushes are the most versatile.
2.1 SETUP
2.2 SHOW
Tap the 4 arrows icon to enlarge the video to full screen.
Review the demo video and demonstrate to your students, or you can simply display the video on a larger screen for them to watch.
Key Points from video:
- Show how to use a mixing plate and move the paints over from the getting plate or tray.
- Emphasize washing brushes when changing colors because you have to swirl the brush around on the watercolor cakes to get enough paint from them.
- Remind how you wet them with a little dab of water to wake them up before you’re ready to use them.
- Mess up a yellow by adding a dirty blue brush to it and getting green. Talk about how not washing brushes out, will make dirty, messy colors in your getting plate. But you DO want to mix up the colors on the mixing plate. That’s why we have both. One is for keeping original colors clean and the other is for inventing bazillions of new and amazing colors! Have watercolor paper for showing several color results from your mixing.
- Talk about how watercolor is the gentle paint. We use a technique that is very unusual with watercolors. The brush should not barely touch the paper, almost not touching it at all!
Use this button to jump down to the preparation section.
LEARNING TARGETS
Students know how to use watercolors.
M A T E R I A L S
- Real or fake flowers for still life
- Flower PDF
- Pencils
- Erasers
- Watercolors
- Mixing plate or tray
- Brushes
- Water container
- Paper towels
- Smocks
- 11″ x 15″ watercolor paper
3.1 PRINTS
Reference
Flower Photos
Cut images apart and print enough for each student to choose from several.
Have some real flowers (or fake) ready on the table and/or several simple photos of flowers. Print enough so that everyone can have a choice.
The prints are there for students who are intimidated by the real flowers. It’s important to have both if you can.
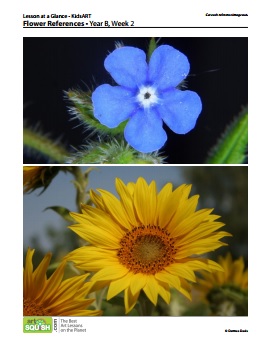
3 Pages – Opens in new window
3.2 SET UP
Students set up their work area. Ask several people to go get water tubs filled, and others to find smocks. That way you have two or three groups in different areas so you don’t get backed up with lines. Help your kids manage their work area to keep a neat space that won’t interfere with their neighbors.
3.3 PAINT!
Students enjoy self-expression. Walk around and encourage everyone as much as you can by pointing out things you genuinely like about their work.
Colors can turn brown and gray when mixed too much. It helps to have the students all use warm colors first, clean up the brush and mixing area, and then switch to cool colors.
Use this button to jump down to the preparation section.
LEARNING TARGETS
Students know how to clean their art materials.
M A T E R I A L S
- Paper towels
- Sink
4.1 WASH
Help students by showing them how to wash their brushes. Watercolor trays can be carefully dabbed with a paper towel if they are really wet.
4.2 DRY
Use this button to jump down to the preparation section.
LEARNING TARGETS
Students know design concepts.
M A T E R I A L S
- 11″ x 17″ copy paper
- Oil Pastels
5.1 TECHNIQUE
Explain to your students what the word technique means.
5.2 CHOOSE
5.3 PRACTICE
Play some music while they work, and explain how their hands and pastels are dancing to the music. Change the music several times with different kinds of beats.
Use this button to jump down to the preparation section.
LEARNING TARGETS
Students know how to create their own design.
M A T E R I A L S
- 8.5 x 11 copy paper
- Pencil
- Eraser
6.1 DESIGNS
Artists will make 2 line-art designs on copy paper for coloring. Use 8.5 x 11″ regular copy paper. Heavier weights work best.
The first is follow-along and the second is artists’ choice.
The first page will be a follow-along (show the pictures below with each step): Have students use a black marker – GENTLY. Paper should be in shower position (vertical), as opposed to bathtub (horizontal).


6.2 DRAW
Use a paper cup to draw a circle about the size of a golf ball someplace on your paper that you think a circle should be. Pretend that this will be a solid white golf ball for now, so that you don’t draw any other lines inside it. It is their choice where this circle should go
6.3 DRAW 2
Draw 5 lines from the very top of the paper to the very bottom. Do not draw inside the circle. Each one should be just a little bit wiggly, but not too much. Draw them slowly so you can control how you draw the lines. MAKE SURE to stop if your line touches the circle, and then start it up again on the other side, so it looks like the line went underneath the golf ball.
6.4 DRAW 3
Draw 7 lines across the paper from one edge to the other. These lines can be like the first slightly wiggly lines, or you can make some or all of them very wavy. But go in slow-motion again. That allows you to decide where you are going with your lines. Again, any lines that touch your circle should stop and begin on the other side.
You should have several wiggly box-shapes from all of your crossed lines. Try drawing a line inside 5 or 6 of these box-like shapes you made.
You’ve made a coloring page!
If you have a copier, make everyone an extra copy so they have two pages to take home.
6.5 CHOICE
Let kids design their own idea for a second coloring page using more circles, and different kinds of wiggly lines. Emphasize going slowly and not making too many lines, so there are some large spaces to color later. You can let them keep going with enough lines so that these are more detailed than the first one.
Use this button to jump down to the preparation section.
LEARNING TARGETS
Students will know how to use mixed media.
M A T E R I A L S
- Watercolor paintings
- Oil pastels or
- Black marker
If you have extra time, or if the paintings aren’t dry enough, let the students use oil pastels to color in one of their coloring pages they made earlier.
7.1 FINISH
Give each student their painting.
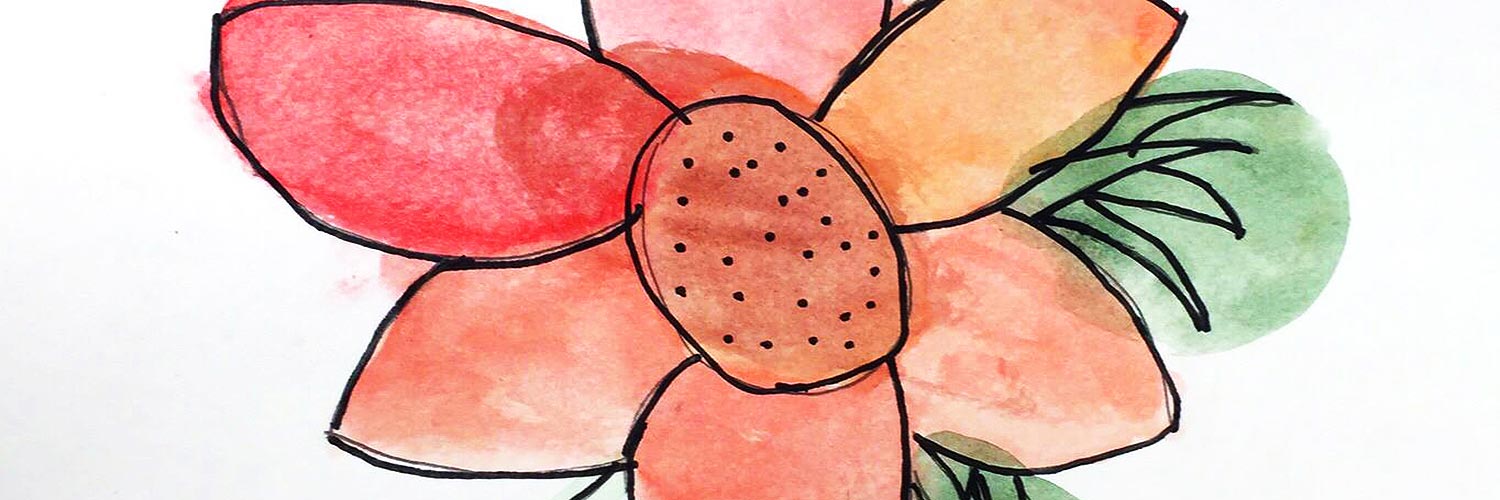
Have students draw the outlines on their flower paintings using a black or any strong color of oil pastel or marker. You can choose if you want everyone to be more creative (if you have more time) and supply oil pastels, or you can be expedient and just provide black markers.
Move around the room, asking permission to help and encouraging your students.
Use this button to jump down to the preparation section.
LEARNING TARGETS
Students know the importance of cleaning up.
M A T E R I A L S
- Paper Towels
- Cleaning wipes
- Sink
- Waste baskets
- Well-lit spot for photos
- Camera or phone-camera
8.1 CLEAN
Students set up their work area.
- Empty water containters
- Super-wash brushes if used
- Put art supplies away (sop up runny paint before disposing of palette paper)
- Wipe tables & toss trash
- Remove any smocks (last)
- Check for items on floors and tables
8.2 PHOTO
Try to get photos of your student’s artwork. Find a good spot for quick lighting without highlights or shadows from your hands and device. Ideally in-between two strong lights on each side.
8.3 CONNECT
Make sure you see the kids connect with parents and tell them about the class if you can!
OBJECTIVES
- Practice and improvement using lines and color
- Understanding that mixing paints gives you way more colors!
- Accomplishment in making a painting and a coloring book page
- Fulfillment from creating the design of a painting and choosing colors
TROUBLESPOTS
Messy colors – When “getting” colors, students will forget or not want to take the time to wash their brushes and keep the color cakes clean.
Mashing Brushes -Encourage students to be gentle, and that lines are thinner when you use the tip of the brush.
ART WORDS
Mixing plate– This is where you mix your colors to invent (create) zillions of new colors.
Getting plate– This is might be a plate or sometimes a tray like we’re using today, with a row of watercolor cakes. These colors are ok to paint with at times, but it’s way better to invent your own new colors! That way you can have thousands of colors instead of just a few.
• Line– One of the many ideas that artists use, to create artwork with.
- Technique– This is a cool word that artists use for the way they work with art supplies, art ideas, and movement (how an artist moves their hand and arm). A wiggly line is just one technique for making lines.
CLASSROOM PREP
What your room needs
Here are your printable lists and room prep instructions.
Opens in new window
CLASSROOM MATERIALS
- 11 x 17″ Copy Paper
- 4B Pencil
- Erasers
- Markers
- PDF Printouts
- Oil Pastels
- Blender sticks(stumps)
- 11 x 17″ Card stock paper
- Brushes – all sizes
- Paper towels
- Water tubs for brush cleaning
- Water spray bottle
- Black Markers
- Smocks
- 8.5 x 11″ Copy Paper
PREVIEW
Week 5: Stars & Butterflies
September 2 – 6
Students will compare wiggly and straight lines, and create 2 oil pastel and watercolor resist paintings: one with white pastel and one with dark pastels.
Week 6: Donut Holes
September 9 – 13
Students will learn about shapes that are made up of air, and are in-between other shapes, and how it helps to draw things if you look at these shapes in addition to solid shapes.