
OVERVIEW
Students will see how different kinds of lines create different looking caterpillars. Then they'll create 2 oil pastel and watercolor resist paintings: A butterfly using black pastel and a starry night sky with a white pastel.Grades 1 – 2
Week of September 1 – 5
1 Hour & 30 Minutes
Lesson At A Glance
A brief overview of each step. Buttons jump to each section for detailed information.
5 Min – Blending and mixing oil pastels
10 Min – Color and blend with oil pastels
15 Min – Draw butterfly step-by-step
10 Min – Make patterns on wings
15 Min – Paint butterflies with warm colors
8 Min – Use white pastels to make stars
10 Min – Mix cool colors & paint sky
2 Min – Everyone helps
SCROLL & TEACH
LESSONPLAN
Each section is a different color. Read over once and then you can SCROLL & TEACH using any device you like. It’s designed to work best with your phone.


LEARNING TARGETS

Students learn to express themselves through creating from their imagination.
M A T E R I A L S
- 11″ x 17″ Copy Paper
- 4B pencil
- Eraser
- Markers and/or oil pastels
- Blenders (stumps)
- Paper Towels
1.1 GREET
Kneel down so that you are on their level. Bending over emphasizes the differences in your height, while kneeling makes them feel more important. Have tape and marker ready so you can stick some tape on the table by each student and write their name on it as they sit down.
1.2 CHOICE
Everyone should take their time with the work and make a finished piece of art. Limiting the paper can also help kids focus on the work. If someone finishes in super-fast time, ask them what more they can do to the existing paper. Ask again several times – unless they appear overly frustrated; then you can allow them to move on to a new work.
LEARNING TARGETS
Students know how to use and blend oil pastels.
M A T E R I A L S
- Oil Pastels
- Blender Sticks
- Paper Towels
2.1 GATHER
2.2 DEMO
Tap the 4 arrows icon to enlarge the video to full screen.
Review the demo video and demonstrate to your students, or you can simply display the video on a larger screen for them to watch.
Points to make in DEMO:
- Show layering colors and white to blend
- Alike colors blend much better than opposites (Not in video!)
- Show using stump stick (blending stick) to blend
- Wipe dirty pastels with paper towel to clean
- Rub blending stick on sandpaper board to clean
LEARNING TARGETS
Students know how different kinds of lines create different looks for objects.
M A T E R I A L S
- 8.5 x 11″ cover stock
- 2B Pencil
- Erasers
- Oil Pastels
- Blender sticks
- Paper towels
3.1 DRAW
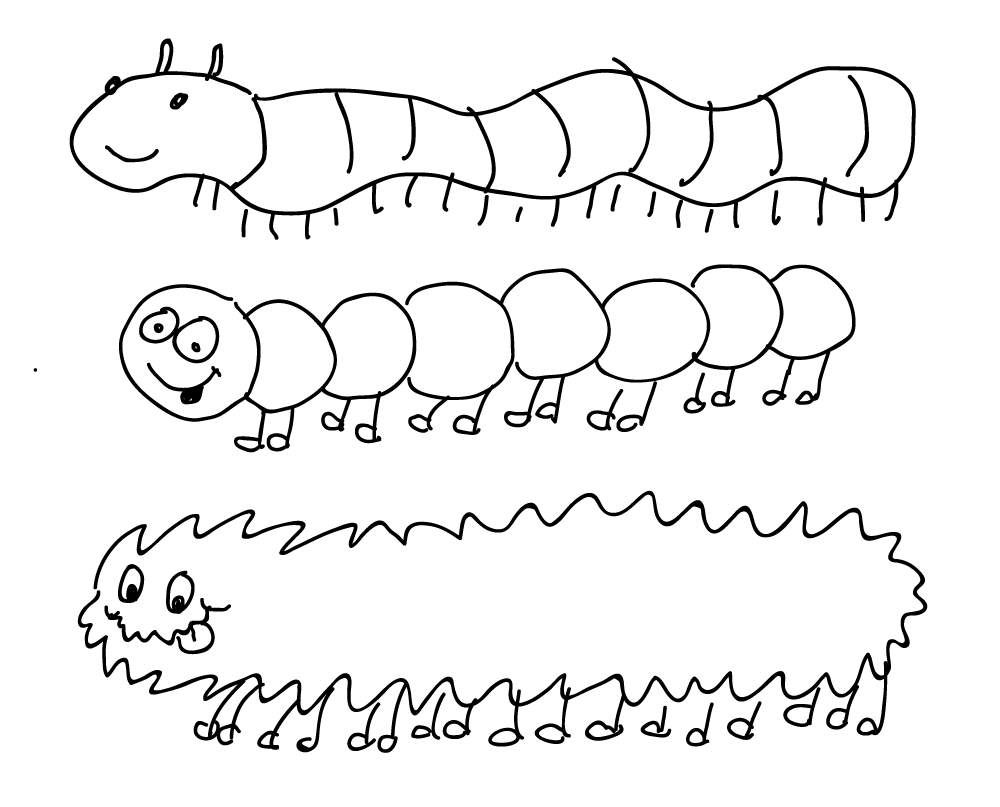
Have them draw a caterpillar in pencil. They can either use wiggly lines or they can make a bunch of circles in a line. If the circles are squished into each other it looks very caterpillar-like.
Other ideas are to use a squiggly line or zig-zag line. Each kind of line will make a different looking kind of caterpillar!
Display the picture below to get them started.
LEARNING TARGETS
Students know how to use and blend oil pastels.
M A T E R I A L S
- Caterpillar drawing
- 2B Pencil
- Erasers
- Oil Pastels
- Blender sticks
- Paper towels
4.1 BLEND
- Layering colors and white to blend
- Alike colors blend best
- Use stump stick (blending stick)
- Wipe dirty pastels with paper towel to clean
- Rub blending stick on sandpaper board to clean
If they get too rowdy, use the secret weapon, “freeze!”
Then tell everyone to sit down in slow motion. Making obeying into a game is always helpful. Praising the ones who follow your directions is also much better than calling out the ones who do not.
LEARNING TARGETS
Students know how to follow step-by-step directions.
M A T E R I A L S
- 11″ x 14″ or so Watercolor Paper
- 2B Pencils
- White Erasers
- Black Oil Pastels
5.1 DEMO
5.2 DRAW
1. Draw a big X that looks like a letter.
2. Then draw a horizontal line across the middle, intersecting the same point that the X intersects, to make a six pointed star. Mention how this is one kind of way that we can make straight line stars. We might need these later today!
3. Draw a shorter vertical line (up and down) in the middle for the body.
4. Now we can use some of our curved lines again to help us finish. show how to make 4 curved lines to connect the top and bottom of each wing to the center horizontal line.
5. Add the antenae going up off the top of the head to finish!
6. Redraw over the light lines with your black oil pastel to make a bold black line drawing. Use a regular technique instead of tickle technique.
NOTE: See how the wings attach to the body at one spot, just like your arms do.

1. A large X for the first step
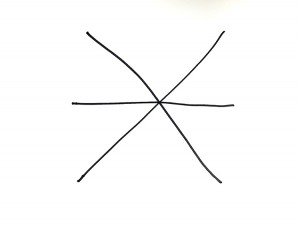
2. Horizontal line (a star!)

3. short vertical line

4. Connect lines with curves

This makes 4 wings

5. Add antennas and it’s done!
LEARNING TARGETS
Students know how to use pattern in their artwork.
M A T E R I A L S
- Butterfly drawings on Watercolor Paper
- 2B Pencils
- Erasers
- Black Oil Pastel
6.1 Prints
Reference
Pattern Ideas
Use these to help students make good patterns.
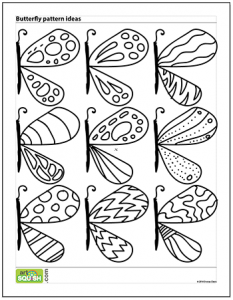
1 Page – Opens in new window
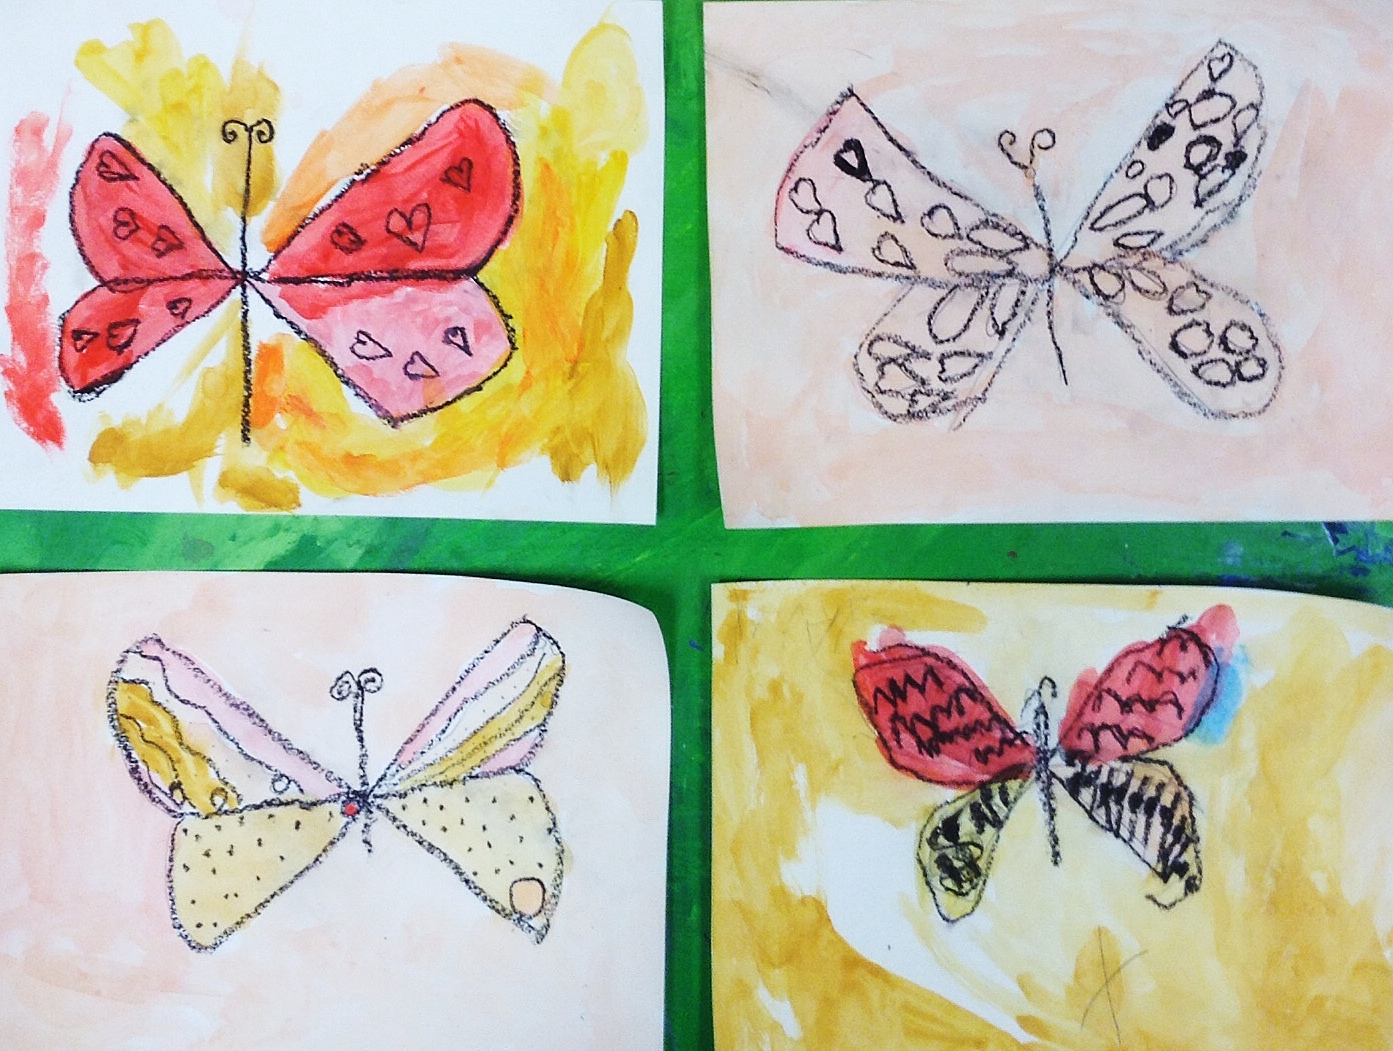
6.2 PATTERN
Pattern is made when the same kinds of shapes or lines are repeated several times close together.
LEARNING TARGETS
Students know how to use watercolor.
M A T E R I A L S
- Watercolor Paper
- 2B Pencils
- Paint Brushes
- Watercolors
- Water Containers
- Smocks
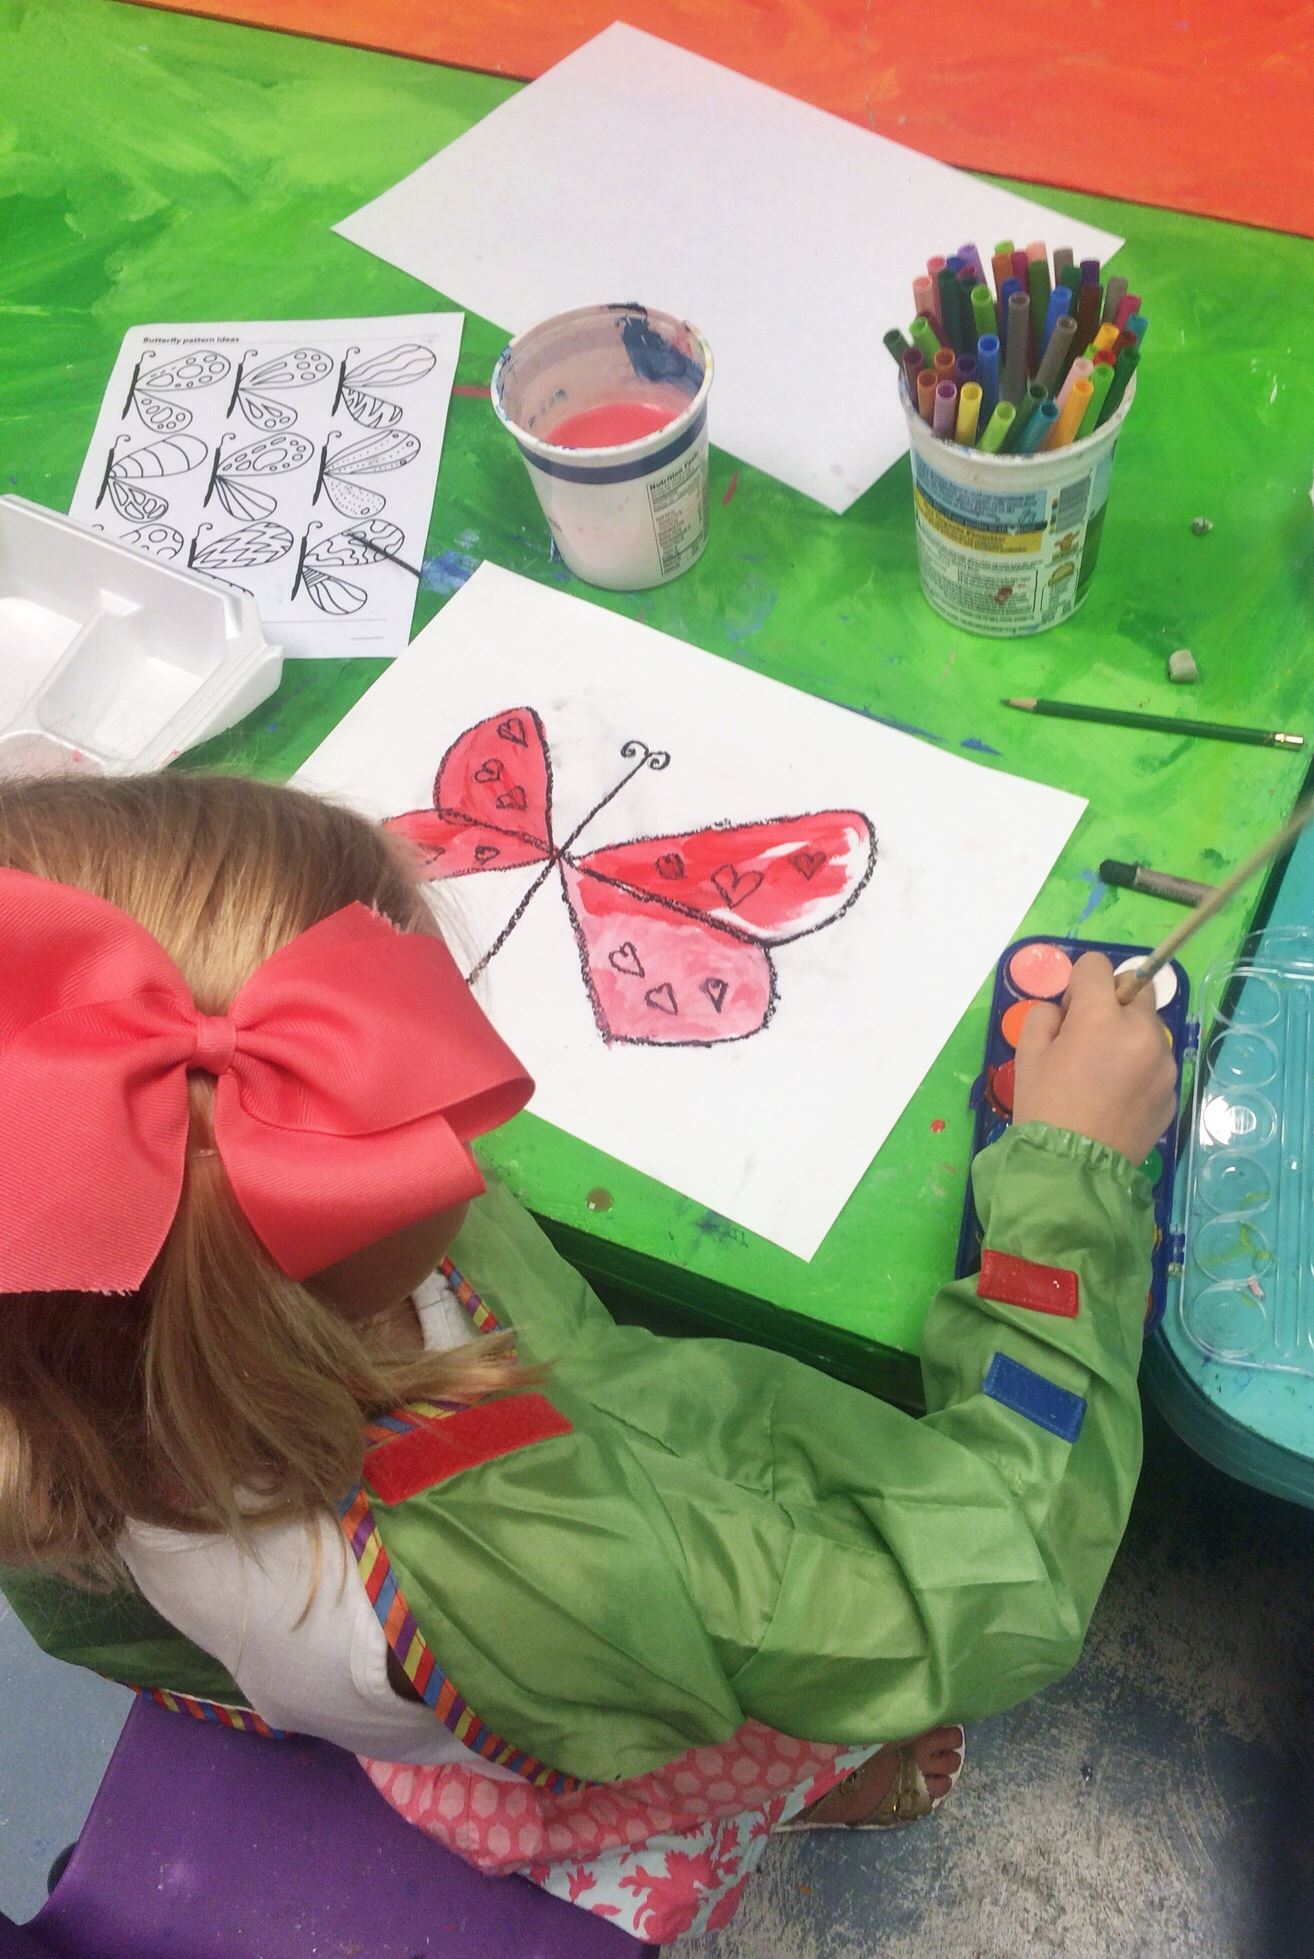
7.1 PAINT
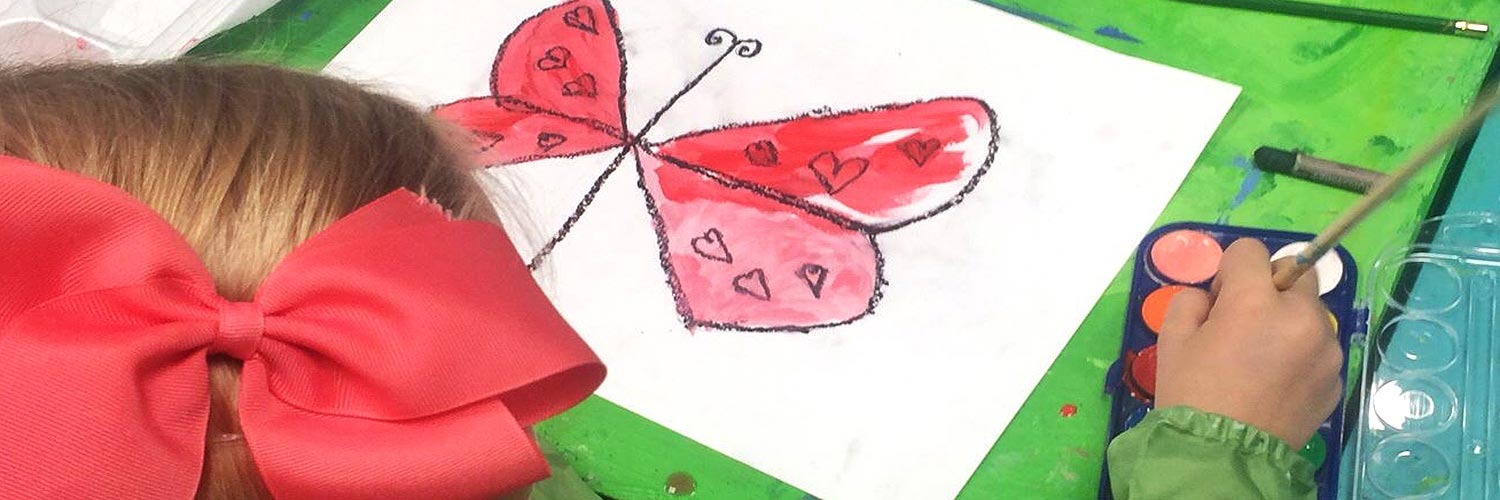
Tell your students to paint their butterflies only using WARM colors. (Red, yellow, orange, pink). If your students are worried that the paint will ruin the black pastel, explain to them that water doesn’t mix with oil and show them with a little example. You should tell them to be gentle with the brush, or it can smear the pastel. Even though the water will not be doing it, the brush might.
When finished, set aside to dry.
LEARNING TARGETS
Students know how lines can represent stars.
M A T E R I A L S
- Watercolor paper with drawing
- Reference photo on stand
- 2B Pencils
- Kneaded Eraser
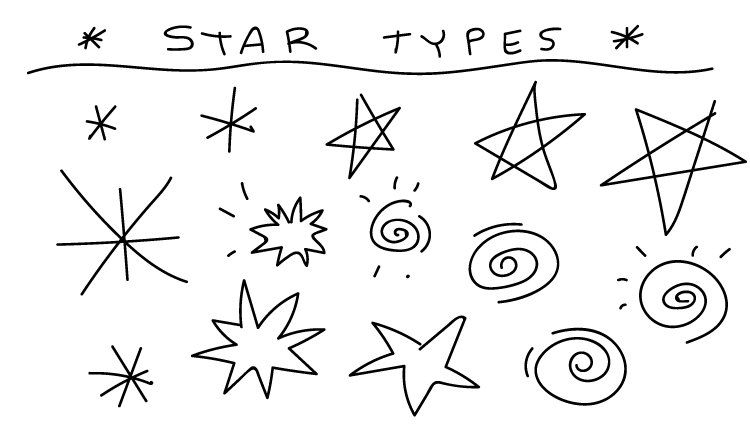
8.1 PASTEL
This time, students will use a white oil pastel on the paper. Draw several different kinds of stars for them: Use 3 or 4 straight lines, like we used for the butterfly; a zig-zaggy overlap method for 5-pointed star; a zig-zag starburst; or a curvy spiral. You get to choose which kinds of lines to make your stars with. Fill the sky with stars using a white pastel on the white paper. Press pretty hard and keep the stars fairly small. Remember how there are tiny stars in the sky at night.
Explain that although you can’t see them very well right now, we will make the stars come out at night in a few minutes. It will be just like when the sun sets and the stars become visible!
Make a bunch of stars. This looks best with a lot of white used on the paper.
Show the image below from your device or on a larger display.
8.2 Stars
LEARNING TARGETS
Students know how oil pastels resist watercolor.
M A T E R I A L S
- 14″ x 17″ Sketch Paper
- Watercolor
- Brushes
- Water Container
- Paper Towels
- Smocks
9.1 PAINT
Explain how the oil pastels will push the watercolor away, which is called a resist. The stars will stay white because of this really fun technique!
They will only be using COOL colors (blues and purples) for the night time sky. Make sure there is strong color and a lot of water too. Paint the sky with watery paint and watch the stars come out!
9.2 COLLECT
Check to make sure their names are on their artwork!
LEARNING TARGETS
Students know the importance of cleaning up.
M A T E R I A L S
- Cleaning wipes
- Sink
- Waste baskets
- Well-lit spot for photos
- Camera or phone-camera
10.1 CLEAN
- Empty water containters
- Super-wash brushes if used
- Put art supplies away (sop up runny paint before disposing of palette paper)
- Wipe tables & toss trash
- Remove any smocks (last)
- Check for items on floors and tables
10.2 PHOTO
OBJECTIVES
- Practice and improvement using line, pattern, & watercolor paints
- Understanding how different materials like oil and water, can create fun techniques
- Accomplishment in finishing 2 brightly colored paintings
- Fulfillment in choosing line styles and creating patterns
TROUBLESPOTS
Ruining colors – Remind students (show new arrivals) to wash out brushes between getting colors to keep them clean. There is always a getting plate or tray, and a mixing plate or tray.
ART WORDS
Tickle Technique – Using a tool like a pencil or brush so light, it’s like tickling. Drawing a very light line as guidelines (to know where to paint) takes practice. The idea of just tickling the paper, is a good schema for young children to easily understand what the feel of drawing lightly is like. So we use a tickle technique with our pencil to create light lines.
Resist – This is an artist’s term that we use when two kinds of materials won’t mix. They resist each other, kind of like they don’t like to be in the same picture! But artists have learned to use this to make interesting things happen.
Pattern is made when the same kinds of shapes or lines are repeated several times close together.
CLASSROOM
PREP
Make sure you have enough supplies for each student and have the blending demo ready to go.
Have some way to display the example pictures in several steps.
What your room needs
Here are your printable lists and room prep instructions.
Opens in new window
CLASSROOM
MATERIALS
- 11″ x 17″ copy paper
- 8.5 x 11″ cover stock
- 4B Pencils
- Erasers
- Markers
- Oil Pastels
- Blender Sticks
- Paper Towels
- Smocks
- Water Containers
- Watercolors
- Paint Brushes
- 11″ x 14″ or so Watercolor Paper – 2 sheets per student. You can use smaller if you need to conserve.
PREVIEW
Week #4: Donut Holes
Students will learn about shapes that are made up of air, and are in-between other shapes, and how it helps to draw things if you look at these shapes in addition to solid shapes.
Week #5: Lines that Dance, Jump & Glide
Students will learn how different motions make different kinds of artwork. Today most of the work will be with line, and some with oil pastel, as we try color-dancing, and create black and white line paintings of frogs. There is also a quick review of air shapes.