
OVERVIEW
Students use warm & cool colored oil pastels in a fish drawing, working on movement and technique. The imagination is employed to invent a new idea - using household tools to create fish. They'll finish the work using watercolors, and then use oil pastels to finish another earlier drawing.Grades 1 – 2
Week of September 22 – 26
1 Hour & 30 Minutes

Lesson At A Glance
A brief overview of each step. Buttons jump to each section for detailed information.
20 Min – Color dance with fish
10 Min – Draw tools
10 Min – Make a fish scene out of tool drawings
5 Min – Set up for painting with watercolors
15 Min – Paint tool fish pictures
2 Min – Clean up watercolors and clean brushes
10 Min – Create a background with oil pastels on step 4 drawing
3 Min – Everyone helps
SCROLL & TEACH
LESSONPLAN
Each section is a different color. Read over once and then you can SCROLL & TEACH using any device you like. It’s designed to work best with your phone.
LEARNING TARGETS

Students learn to express themselves through creating from their imagination.
M A T E R I A L S
- 11″ x 17″ Copy Paper
- 4B pencil
- Eraser
- Markers and/or oil pastels
- Blenders (stumps)
- Paper Towels
1.1 greet
Kneel down so that you are on their level. Bending over emphasizes the differences in your height, while kneeling makes them feel more important. Have tape and marker ready so you can stick some tape on the table by each student and write their name on it as they sit down.
1.2 choice
Everyone should take their time with the work and make a finished piece of art. Limiting the paper can also help kids focus on the work. If someone finishes in super-fast time, ask them what more they can do to the existing paper. Ask again several times – unless they appear overly frustrated; then you can allow them to move on to a new work.
LEARNING TARGETS
Students know that movement affects artwork techniques.
M A T E R I A L S
- 11″ x 17″ Card Stock Paper
- 2B Pencil
- Black Marker
- White Eraser
- Oil Pastels
- Blenders (stumps)
- Paper Towels (clean off the tips of pastels)
- Music to play – soft and flowing
2.1 Prints
Reference
Fish Follow-Along
A Step-by-Step follow-along cartoon of a fish.

1 Page – Opens in new window
2.2 draw
Be sure to explain to the students that for the first drawing, they should try to make pencil “tickle lines” (very light). Don’t worry if the kids can’t do this yet, but it is good to hear it often so that they can begin practicing this technique early. Tell students it takes a lot of practice to be able to draw tickle lines.
2.3 outline
2.4 color
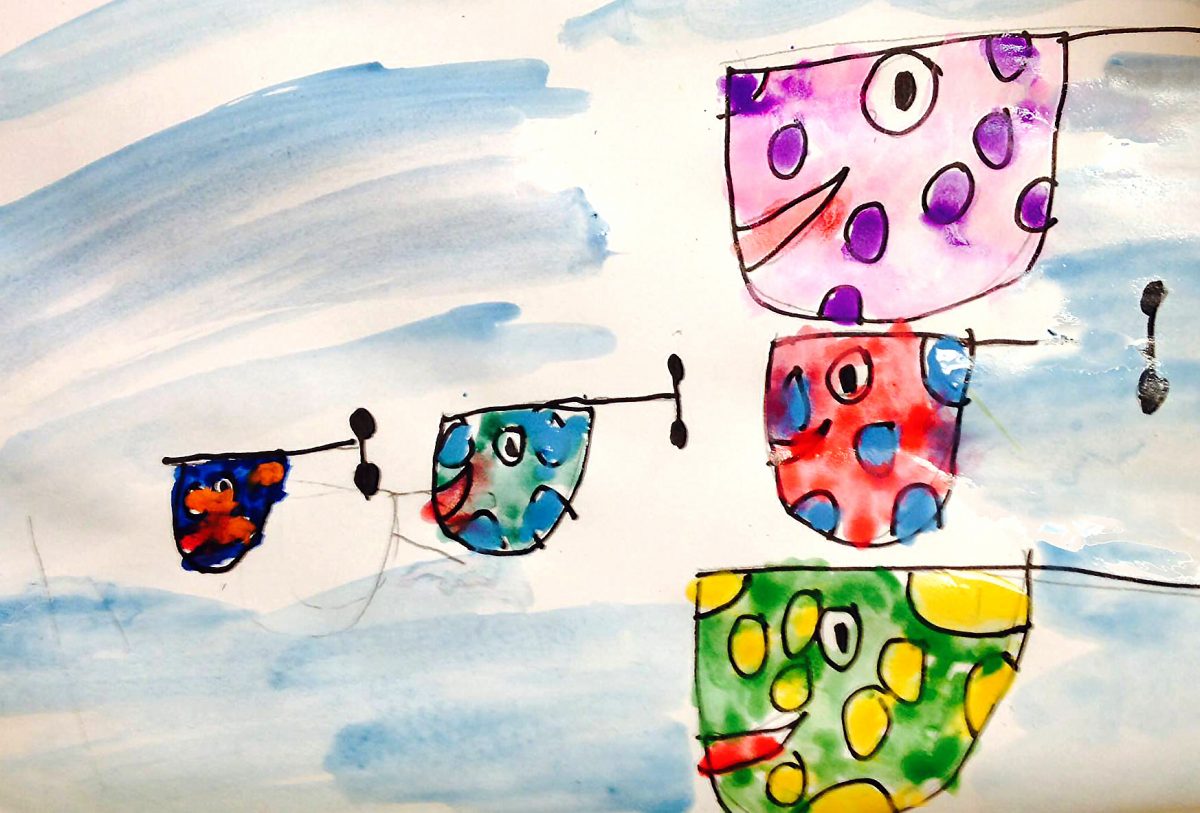
Use 3 warm color pastels to color dance inside the fish.
Use 2 or 3 cool colors pastels and white to color dance outside of fish. We’re not drawing air shapes this time, we’re drawing water shapes!
Song recommendations: ENYA – Orinoco Flow, or CHRISTOPHER CROSS – Sailing
LEARNING TARGETS
Students know how to identify texture.
M A T E R I A L S
- Tools PDF – OR
- Real tools in interesting shapes
3.1 Prints
Reference
Tool Photos
Tool pictures with silhouettes and outlines.
Have one set to use as you talk about the tool shapes.

3 Pages – Opens in new window
3.1 talk
There are all kinds of lines in these shapes: straight lines, curved lines, zig-zag lines and sharp angles. I can also see texture. That’s what we call things that look or feel rough. Usually people mean how things feel when they say it has texture, but artists also use this word for areas of shading or paint that have the same look as things that feel rough. You can make things look rough by using your pencil or pastel on its side instead of using the tip.”
3.2 DEMO
Do not talk about turning these into fish until later in the next step.
LEARNING TARGETS
Students know how to draw from reference.
M A T E R I A L S
- 11″ x 17″ Copy Paper
- Cheasels
- Pencils
- White Erasers
- Oil Pastels
- Tool PDF Prints from STEP 3 above
4.1 setup
*Each set should have 3 versions of the same tool and there are two sets to a page. Students should come choose a tool they like.
4.2 draw
Be sure all students have their names somewhere on the paper and set it aside for later.
LEARNING TARGETS
Students know how imagine and create with their art.
M A T E R I A L S
- 10″ x 14″ or so Watercolor Paper
- Tool reference PDF
- Watercolor paint trays
- Pencil
- White eraser
5.1 draw
As they work, “wake up” the watercolors by adding a few drops to each color cake in the pans.
LEARNING TARGETS
Students know how to begin setting up and working with watercolors.
M A T E R I A L S
- Smocks
- Paper towels
- Watercolors
- Brushes (small and medium)
- Water containers
6.1 setup
LEARNING TARGETS
Students know how to paint with watercolors.
M A T E R I A L S
- Drawing they’ve done on watercolor paper
- Smocks
- Paper towels
- Watercolors
- Brushes (small and medium)
- Water containers
7.1 color
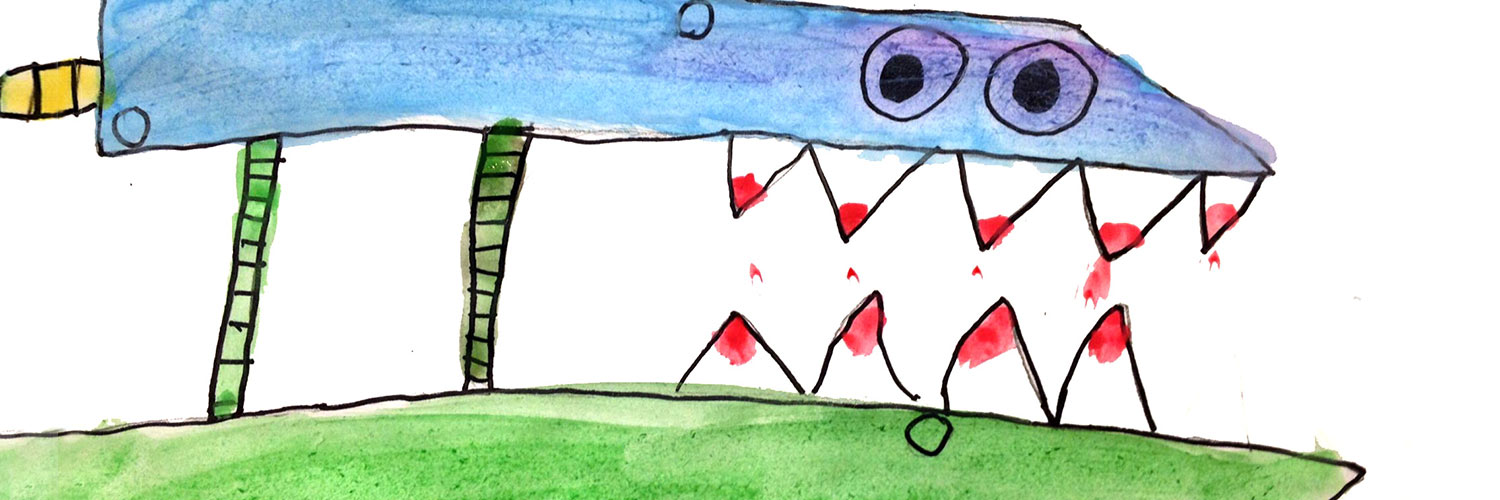
If they finish early, they can add texture to their fish using the side of a medium-colored oil pastel. Don’t use black or a dark color, and use a light tickle-drawing pressure. You may have to tear a bit more paper off of the pastel for them.
LEARNING TARGETS
Students know how to keep their work space tidy.
M A T E R I A L S
- Paper towels
- Sink
8.1 clean
- Empty water containters
- Super-wash brushes
- Put away watercolor trays
- Wipe up any spills
LEARNING TARGETS
Students know how to look for negative space around objects (drawing the air).
M A T E R I A L S
- Tool drawing from Step 4
- 11″ x 17″ copy paper
- Oil Pastels
- Blender stick(stump)
- Paper towels
9.1 color
Use oil pastels and lots of blended colors (as many as you like, including white) to create a busy colored background around the tool shape you made in STEP 4. Leave the tool shape totally white – the paper color, so that it looks like a missing puzzle piece, or a silhouette. Encourage students to make lots of small colored areas in their air, and small lines with many different colors, so that it looks like it has a texture.
LEARNING TARGETS
Students know the importance of cleaning up.
M A T E R I A L S
- Paper Towels
- Cleaning wipes
- Sink
- Waste baskets
- Well-lit spot for photos
- Camera or phone-camera
10.1 clean
- Empty water containters
- Super-wash brushes if used
- Put art supplies away (sop up runny paint before disposing of palette paper)
- Wipe tables & toss trash
- Remove any smocks (last)
- Check for items on floors and tables
10.2 photo
OBJECTIVES
- Practice and improvement using visual skills and artistic techniques
- Understanding how looking for shapes can help create a good drawing
- Accomplishment in finishing some creative & colorful artwork
- Fulfillment creating a new idea by putting two other ideas together
TROUBLESPOTS
Tool dangers – If you bring real tools, children should not be allowed to handle them since they can have sharp edges and pinch fingers. Be firm about this.
Filling in tool details – When drawing the silhouette guideline in step 4, emphasize only drawing the outline of the outside edge and nothing else. Otherwise students will not get to make an invisible tool later in the lesson.
Tracing tools – If you have actual tools on the table, students will want to draw around them like they do with their hand. Encourage them to draw by looking instead, since this is a lesson about learning to… Look!
ART WORDS
Silhouette – The outline of an object – as if it were a puzzle piece and you took it out of the puzzle.
Watercolor paper – A special paper with a special coating that allows watercolor to work on it.
CLASSROOM PREP
What your room needs
Here are your printable lists and room prep instructions.
Opens in new window
CLASSROOM MATERIALS
- 11×17” Copy Paper
- 4B Pencils
- Erasers
- Markers
- Oil pastels
- Blenders (stumps)
- Paper towels
- Music to play (soft and flowing)
- Tools PDF OR
- Real tools in interesting shapes
- Cheasels
- 10 x 14” or so watercolor Paper
- Watercolors
- Brushes (small and medium)
- Water containers
- Smocks
- Camera or phone camera
PREVIEW
Week 7: PIGS!
Students will have fun drawing and painting pigs in several projects. Simple shapes and symbols help us create pig cartoons with different expressions. More realistic pigs are drawn from photo reference, colors are mixed, and then they will paint the pig using tempera
Week 8: Shape Hunters
Students are introduced to an important design element, The Most Important Spot, (emphasis). We hunt for shapes, using tracing paper to capture them from photos. Students will also work with warm vs. cool colors using oil pastels in 2 projects.