
OVERVIEW
Students will be introduced to, and have a chance to use, The 3 steps to accuracy method, which is based on the way professional artists analyze what they see so that they can reproduce it accurately in artwork. There is also a paint-mixing game, and some time to finish landscapes if needed.Grades 6 – 12
Week of September 15 – 19
1 Hour & 45 Minutes
Drawing
Each lesson Plan focuses primarily on one of the 4 Cornerstones of Art:
Drawing | Painting | Color | Style
Lesson At A Glance
A brief overview of each step. Buttons jump to each section for detailed information.
20 Min – Introduce the 3 steps to accuracy
20 Min – Color big shapes – abstract oil pastels
5 Min – Set up for painting
25 Min – Students paint color maze
5 Min – Everyone helps
SCROLL & TEACH
LESSONPLAN
Each section is a different color. Read over once and then you can SCROLL & TEACH using any device you like. It’s designed to work best with your phone.
LEARNING TARGETS

Students know how to finish a painting.
M A T E R I A L S
- Landscape Paintings
- Acrylic Paint
- Brushes
- Smocks
- Paper Towels
- Palette Paper
- Water Containers
All materials are suggestions and may be modified as you see fit. We have tried many items, and these seem to allow the most versatility for the cost.
Brushes should be nylon for springiness and durability. Round brushes are the most versatile.
Paint pigment list:
- Napthol or Pyrrol Red
- Hansa or Light Yellow
- Pthalo Green (blue shade)
- Cyan or Cerulean Blue
- Ultramarine Blue
- Dioxazine Purple
- Magenta
- Burnt Umber
- Raw Sienna
- Titanium White (professional grade only)
1.1 paint
Have any paintings that are not finished, out and ready for the students so they can jump right into finishing up their work.
Any other items you can have ready will also help, such as water tubs, paper towels, and if you have pads stored at the classroom, you can get palette pads ready too. If anyone is still not finished, they may take it home to finish, or save it for an artist choice time in the future.
1.2 choice
Anyone who is finished with their painting is welcome to draw Artists’ Choice. Have several objects and photo references to choose from so students can set up at their own work area. Pencil sketching is fine, or they can choose to do charcoal or oil pastels. No ink today.
As students work, show them the Pinterest page on Nicolas de Stael and share the brief bio on him below.
Paints don’t have to be completely cleaned up.
Nicholas de Staël
Jan.5, 1914 – March 16, 1955
“When he was only 5 years old, the family of Nicholas de Stael was forced to migrate from their native Russia to Poland, because of World War I. Three years later his parents died, leaving Nicholas and his sister orphaned. They were moved to Brussels to live with a Russian family, when Nicholas was 8.
As a young man, Nicholas began to travel Europe and decided to live and work in Paris. He is considered to be a French artist.
He is now known for his groundbreaking artwork through which, he wanted to show time and space, temperature and light rather than colors and objects. His work is harder to appreciate viewing from a photo and it is said an individual needs to experience the art work in person to see the almost magical way they appear to move, spin, reflect and give the appearance of more than a flat, static surface.”

Pinterest Gallery
Use This Link or tap the icon to the left to open our special Pinboard showing examples of artwork to display to your class.
CREATIONS - tap here to open
Our Creations lessons are for students who have completed the two years of Foundations and are ready to begin using all that they have learned to create new work. These more challenging versions of the same concepts and techniques are easily taught along-side students in the Foundations course. This allows for excellent review, and is encouraging for students to see progress from each viewpoint.
Use the Student Instructions printout below to distribute to your Creations students. Tap the image to open the PDF in a new window.
Abstract Painting
Overview: Advanced artists may continue working on their landscapes. If finished, they should use the same simple references provided in Step 3, and create one or two finished drawings in pencil or oil pastels, working on accuracy using the 3 Steps.
NOTE: students may believe that they remember the 3 Steps clearly, and think they don’t need review, but memory can trick us. They should watch the slide show and participate in the presentation of the 3 steps as review, and to help newer artists understand the importance of this method.
Advanced students may also want to tackle the color mixing game and do a better job than previously.
Tap images to open Creations Student Instructions in a new window

LEARNING TARGETS
Students know how to use 3 Steps to create accuracy.
M A T E R I A L S
- Projection devices for slideshows
2.1 INTRO
“Who wants to draw pictures more like things really look, or more realistically?
Every artist I’ve met wants to be able to draw and paint well. When we look at work we’ve done that we don’t like, and don’t want to show to anyone, it’s almost always because it came out different than real life. It looks inaccurate. How do professional artists get things to look so real? That’s what we are going to learn today. It all boils down to 3 simple steps.
The problem for most learning artists is this – they are unwilling to do 3 steps in the proper order. Artists want to draw the fun details first, but that’s a little like eating some pie before your dinner. It tastes good, but you can’t live well eating desert all the time.
The really good news, is that unlike eating vegetables before ice cream, it doesn’t take much time to do the first two steps. Then you get to have most of your time enjoying the fun part, like the desert, and it will be way more fun because you did steps one and two first!
I cannot say it any stronger. Doing these 3 simple steps in the right order is the one most important thing you’ll ever learn for making things look more like real life.”
2.2 FRAME
“A FRAME is what we call the rectangle of our canvas or paper artwork. It’s the edges. The different sides of an object, in this case our frame, are related to each other in size. The length of one part, will always be a certain amount longer or shorter than another part. This relationship between the two sides doesn’t change, so you can’t change it or your artwork will not look the way you want it to.
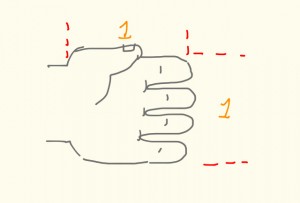
For instance, your hand is about twice as long as it is wide, and looks something like this which has these accurate proportions of 2 to 1:

If you drew your hand the same width as it is long, it would not look very accurate, because the proportions would be 1 to 1, and hands are never 1 to 1. It would look like this drawing:
If you get the proportions of your FRAME off, by even a little bit, then the image cannot fit inside of it. You will either squeeze or stretch all of your subject’s shapes to fit the wrong frame, and that will make everything look different than real life. Getting the FRAME proportions accurate first, is essential to making your drawing or painting look realistic.”
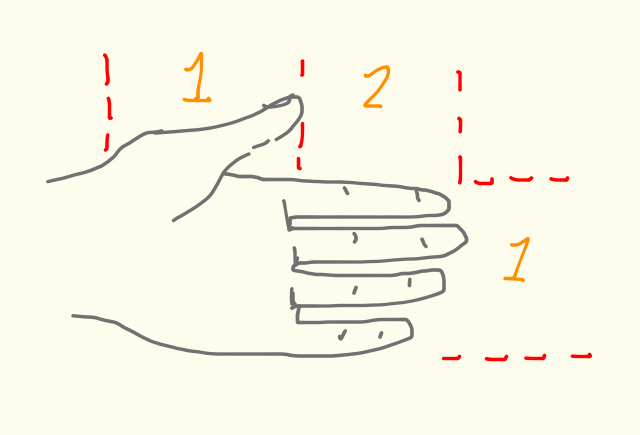
Hand Proportions are 2 to 1
The proportion of most hands is about 2 to 1, or twice a long as it is high.
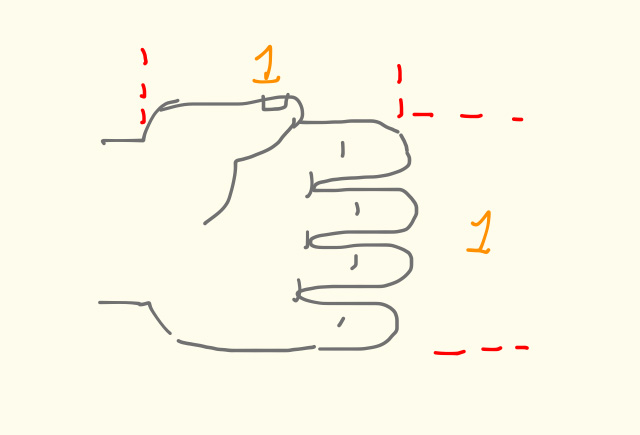
1 to 1 looks innaccurate
A 1 to 1 hand does not look accurate because it has the wrong proportions.
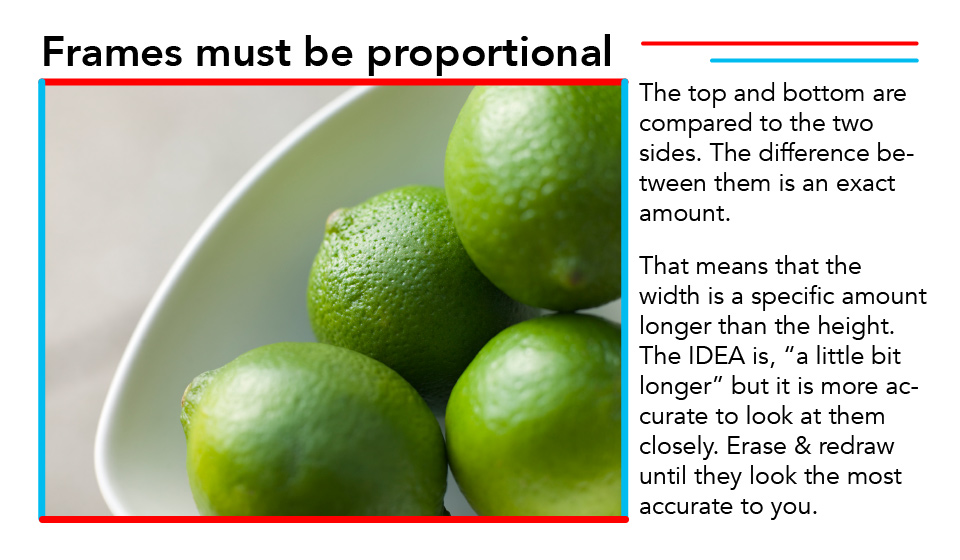
Frames must be proportional
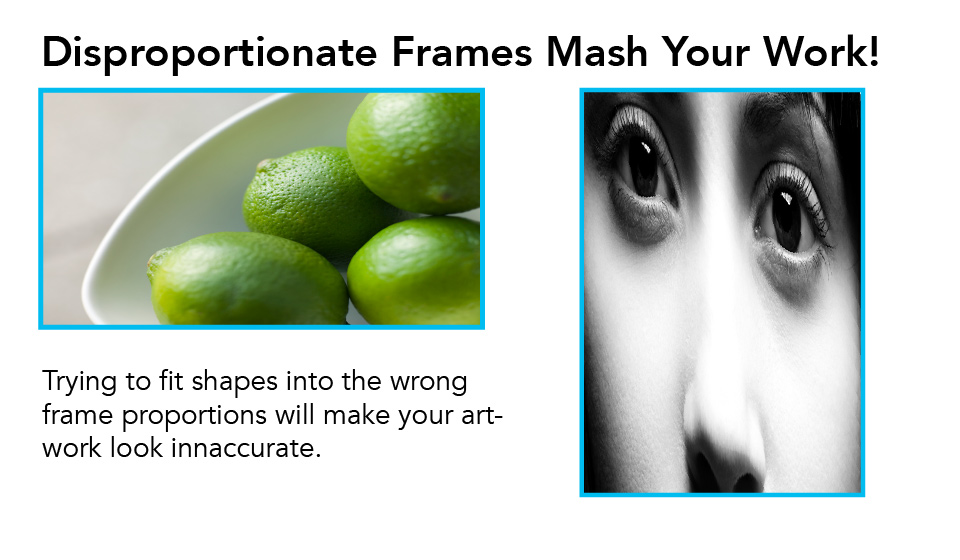
Innaccurate Frames
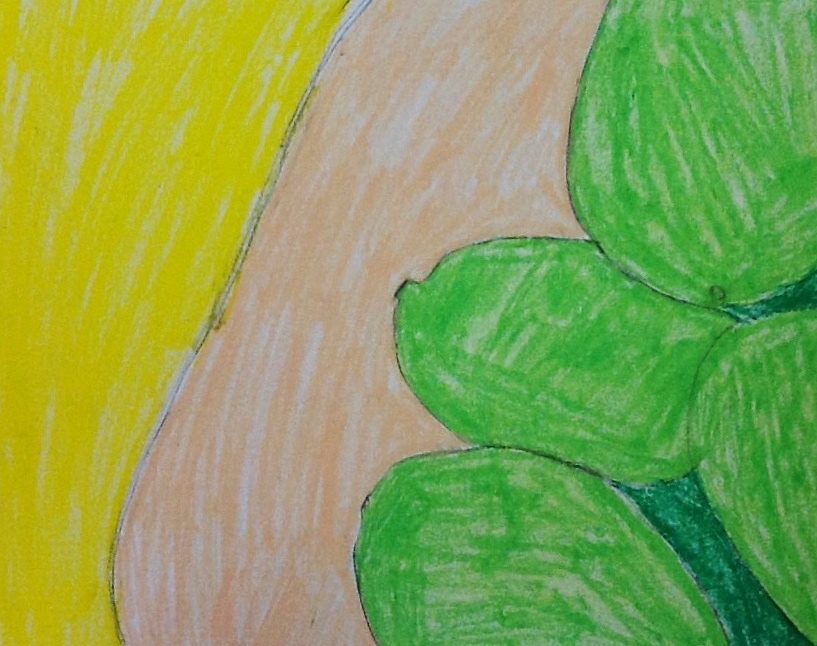
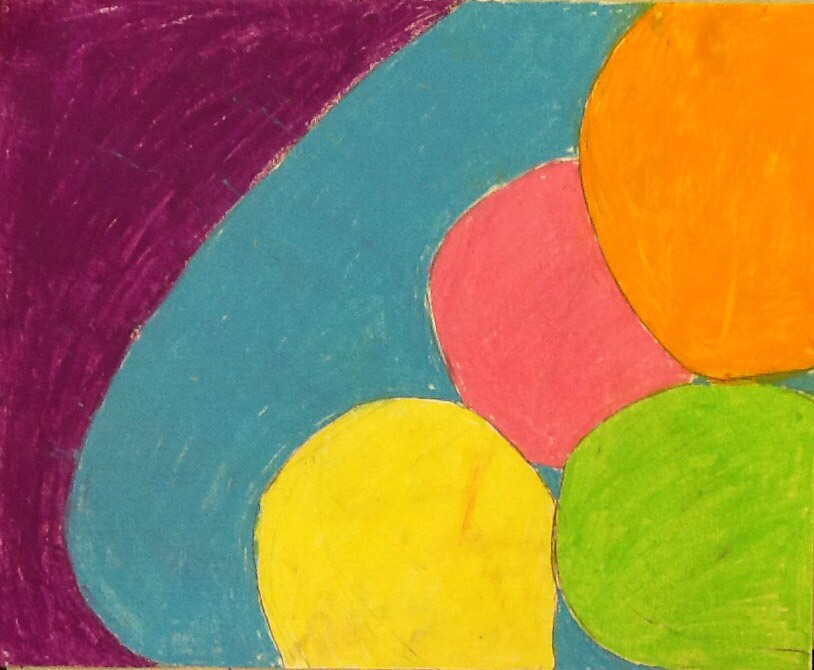
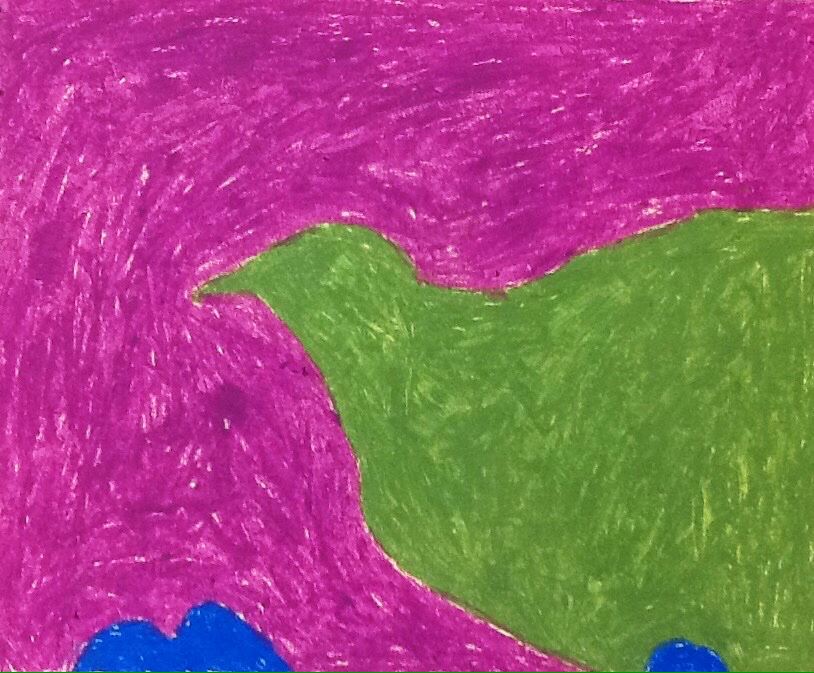
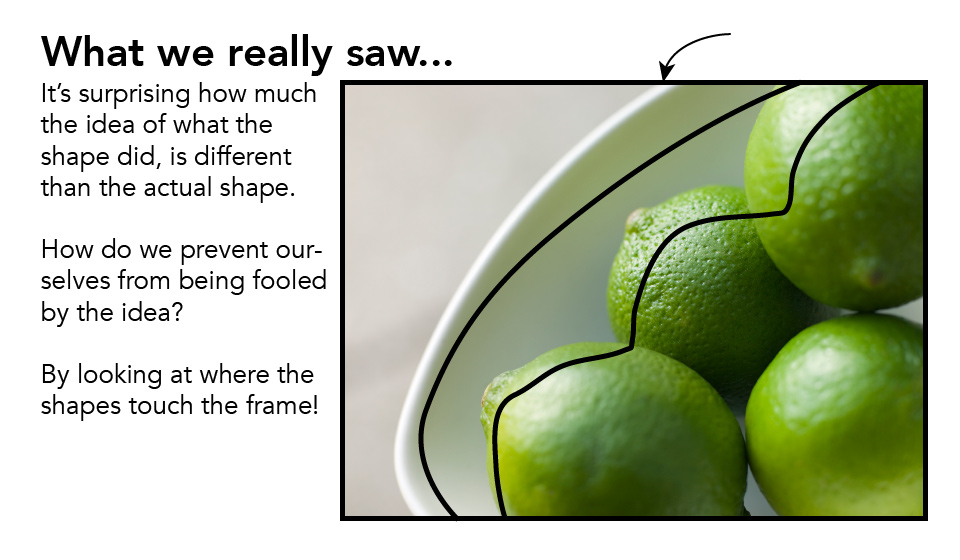
2.3 shapes
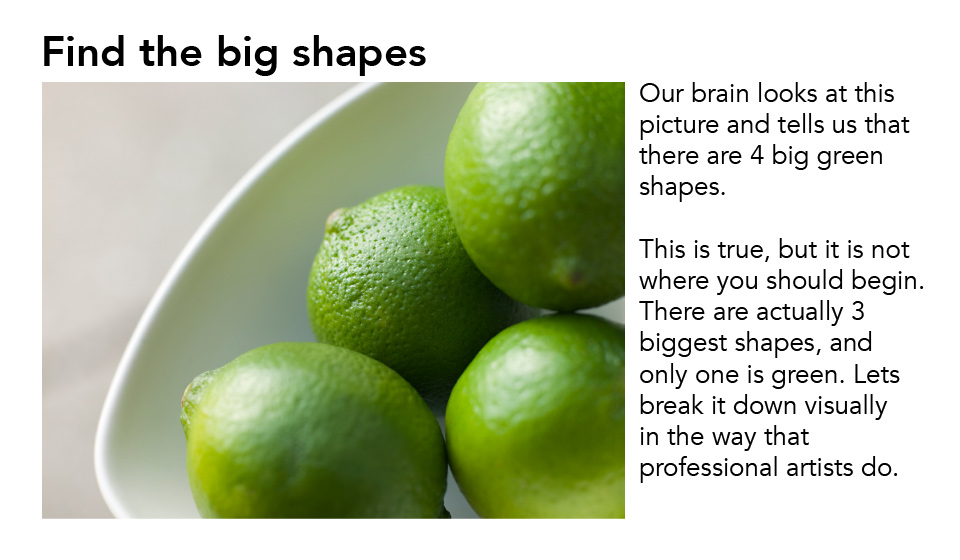
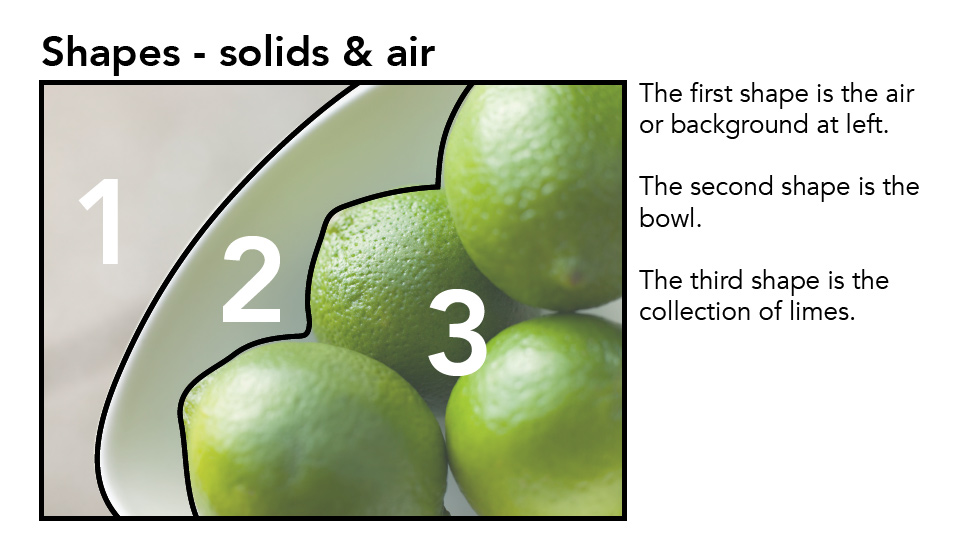
Introduce Step 2 – Big Shapes – Find the 4 or 5 biggest shapes
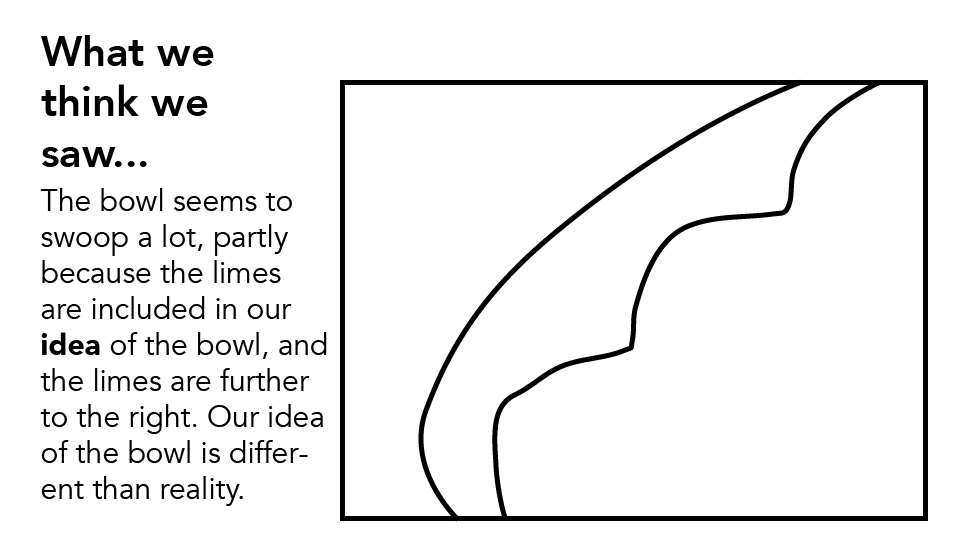
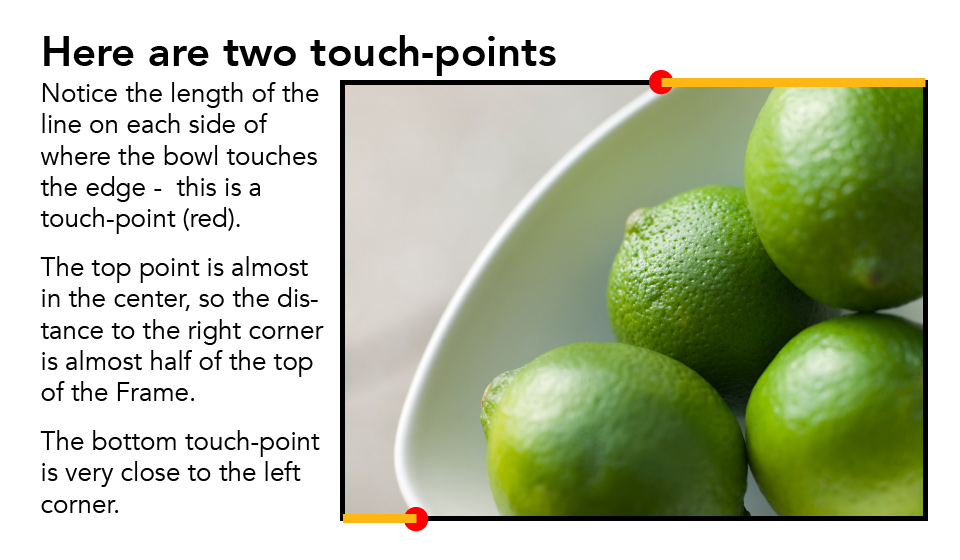
Usually the biggest shapes will be pretty simple, and often touch 2 or 3 edges. Use the slideshow to explain how we have to ignore general ideas that fool us, and instead we can use the Frame’s edges for help. Find a shape’s touch-points – where the shape touches the frame. Then we can draw the rest of the shapes pretty easily. Getting things accurate at this stage makes the rest of the drawing or painting a lot more fun. It doesn’t take long, but artists tend to skip the first two steps.
2.4 details
LEARNING TARGETS
Students know how to use the 3 Steps to Accuracy.
M A T E R I A L S
- 14″ x 17″ Sketch Paper
- 2B Pencil
- White Eraser
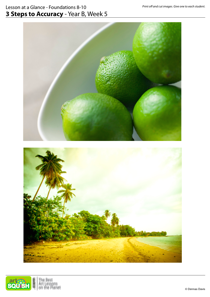
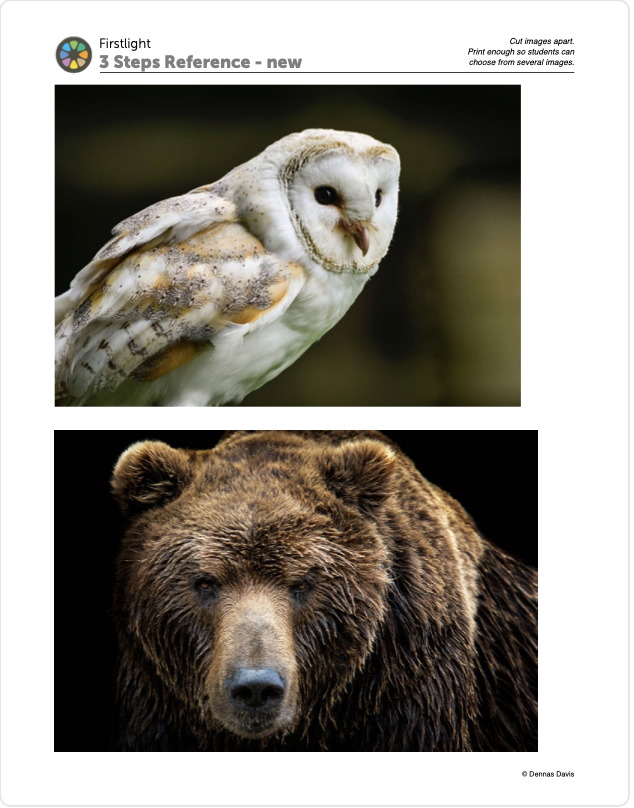
3.1 Prints
accuracy
Cut images apart and print enough for each student to choose from several.
3 Pages – Opens in new window
3 Pages – Opens in new window
3.2 sketch
Have sudents choose a reference image from photos. They will begin their sketch with the first 2 steps of accuracy.
Explain that we will not be doing details today; only practicing the frame and big shapes.
•FRAME – Work with it, using the eraser to change if needed so you can get proportions accurate.
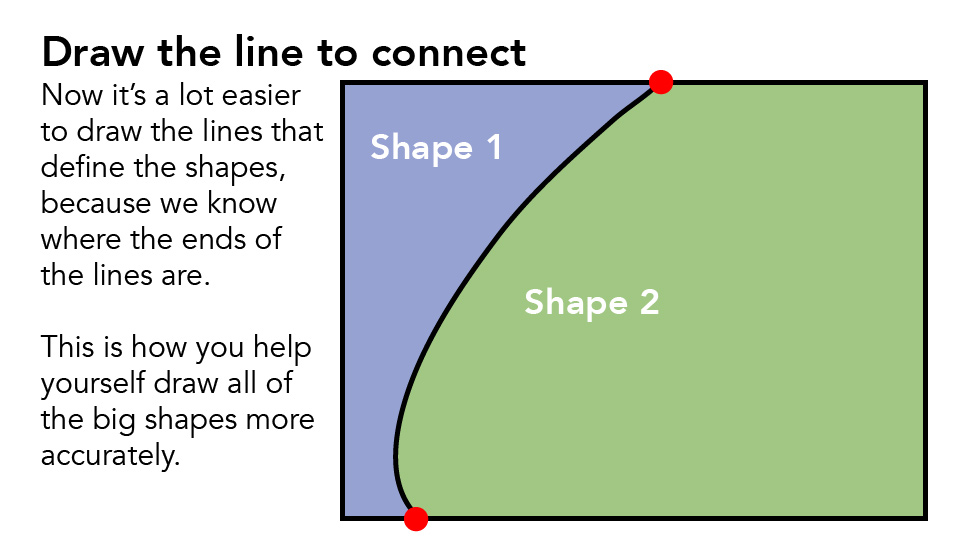
•BIG SHAPES – Make Touch-Points for all the biggest shapes. Then draw the shapes in. Focus on 4, maybe 5, big shapes.
Walk around and help students with their proportions and Touch-Points.
LEARNING TARGETS
Students know how to create a drawing using the 3 Steps to Accuracy.
M A T E R I A L S
- 14″ x 17″ Sketch Paper
- 2B Pencil
- White Eraser
- Oil Pastels
- Blender stick (stumps)
- Paper towels
4.1 pastel
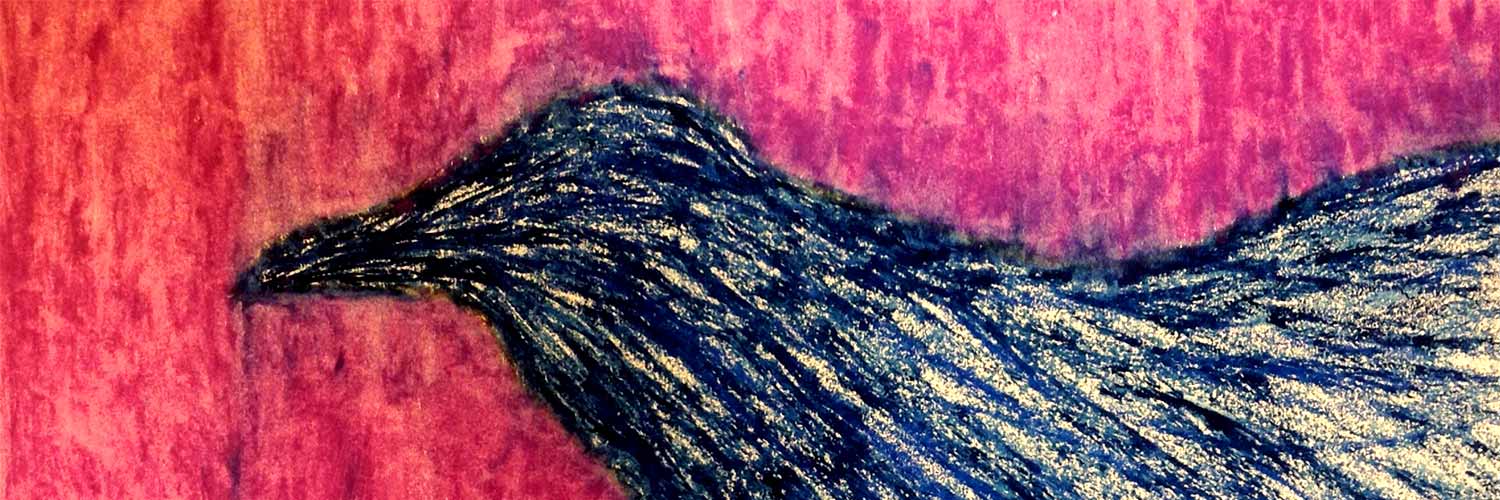
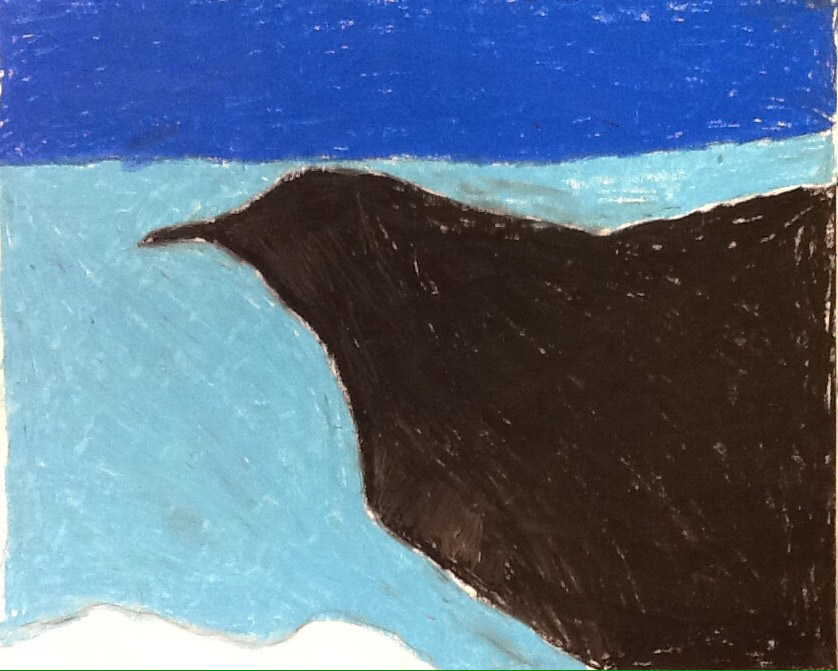
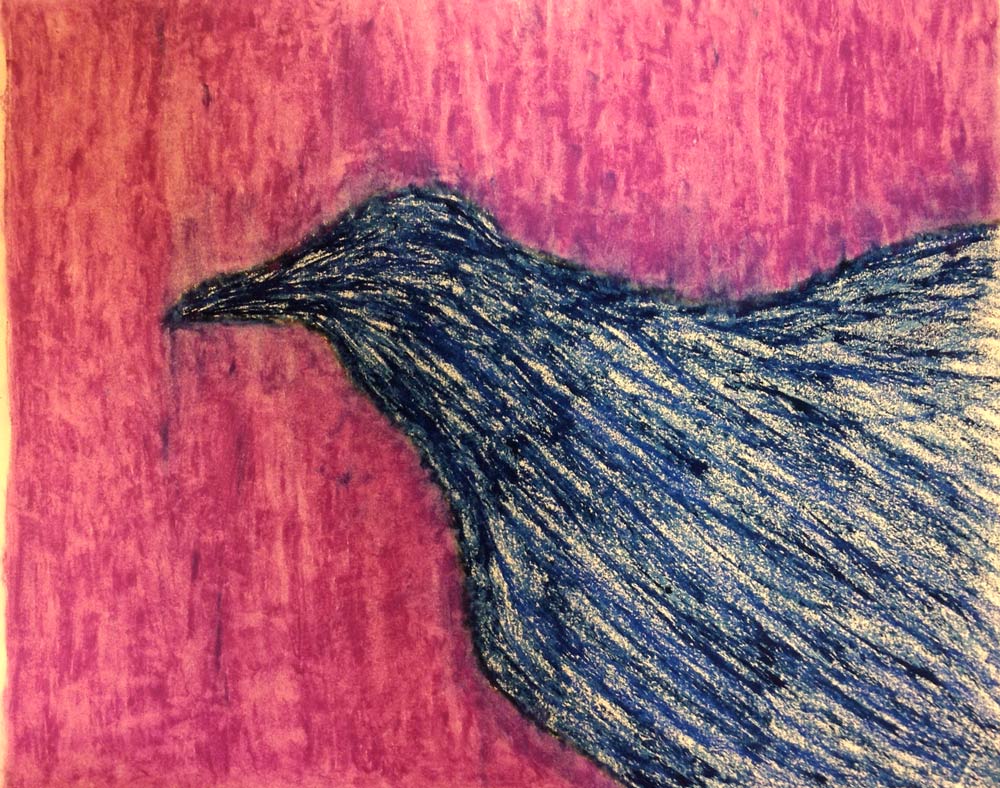
Once the frame and big shapes are drawn, students need to get out their oil pastels for an abstract version of the image. This can be fun. Encourage your class to think about using non-accurate colors. Accuracy is a choice, not the ultimate goal.
Students fill in their big shapes with oil pastels:
- Color each shape a different oil pastel color – realistic or expressive and fun colors. Fill in loosely, not worrying too much about full coverage right now.
- Use another ALIKE color (or 2) on top of each color area, and mix together
- Use white on top of some areas and blend even more, to create a painterly technique.
LEARNING TARGETS
Students know how to set up their work area for painting with acrylics.
M A T E R I A L S
- Acrylic Paints
- Palette paper
- 2B Pencil
- Brushes (small)
- Smocks
- Water containers
- Paper towels
5.1 set up
Begin setting up for painting whenever each student is done with their oil pastels, have them move into the game by setting up quickly for acrylic paints. Use a small brush and very small amounts of paint.

LEARNING TARGETS
Students know how to mix acrylic paint.
M A T E R I A L S
- 8.5″ x 11″ card stock
- Acrylic Paints
- Palette paper
- 2B Pencil
- Brushes (small)
- Smocks
- Water containers
- Paper towels
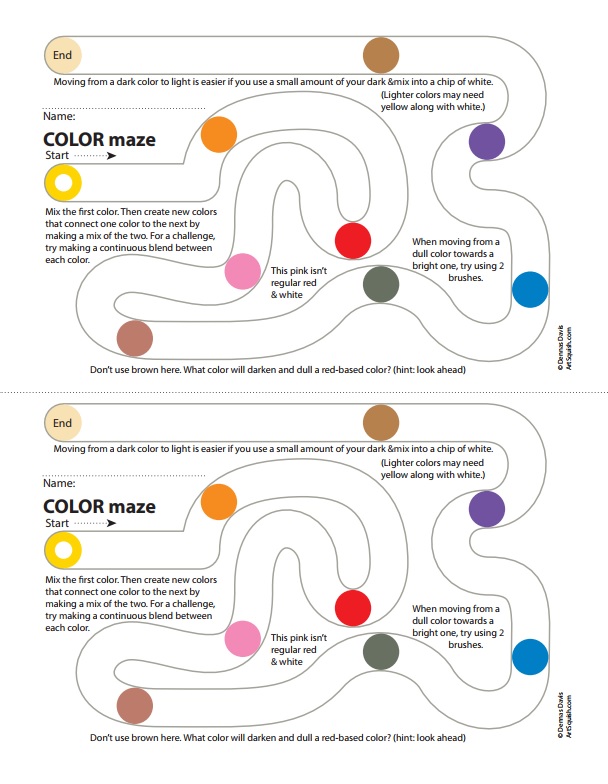
6.1 Prints
Color Game
A fun game where students use their acrylics to mix colors IN ORDER.
1 Page – Opens in new window
6.2 game
As students finish their oil pastel drawing, have them set up and then give them a color mixing game card.
This activity is fun and will help students practice mixing for color accuracy. It’s important to realize that students will only need very, very small amounts of paint. Only squeeze out small chocolate chip sized paint bits.
Let students mix the color they see, and mix an in-between color before mixing the next color. Young students, ages 8 – 10, should only make a dot to match the shown colors. Older students should make colors in-between each dot, and add them to the path. Advanced and oldest students should make a continuous blend, slowly changing each color to the next one to progress through the maze.
Make sure to get names on these.
Before they begin, you can demo one section to help them understand the process more clearly.
Make sure students do not try to do the maze backwards. It makes it much harder to mix because the order sometimes allows you to use what you already have mixed.
LEARNING TARGETS
Students know the importance of cleaning up
M A T E R I A L S
- Paper Towels
- Cleaning wipes
- Sink
- Waste baskets
- Well-lit spot for photos
- Camera or phone-camera
7.1 clean
Students set up their work area.
- Wash hands
- Super-wash brushes if used
- Put art supplies away
- Wipe tables & toss trash
- Remove any smocks (last)
- Check for items on floors and tables
7.2 photo
7.3 connect
OBJECTIVES
- Practice and improvement in drawing accurately, using an easy system of 3 steps
- Understanding that artists must analyze large shapes before drawing details
- Accomplishment by mixing colors and drawing more accurately
- Fulfillment in making a work of abstract art from photo reference
TROUBLESPOTS
Complaining – about the boring stuff – No one likes to take even a moment to “prepare” for art. It’s not fun or creative. The idea that the most creative art just pops out of you is enticing. Encourage students, by emphasizing how little time good preparations will take. Race drivers love to drive, but if they don’t start out with a pit crew – good tires – full tank of gas – etc. – then they won’t be able to drive fast and enjoy the race. You can’t just grab a car and pull into a race! It’s the same with art. You can’t grab a canvas and start painting if you haven’t taken just a few moments to prepare. Even the most experienced artists take the time to do these things we’re learning today.
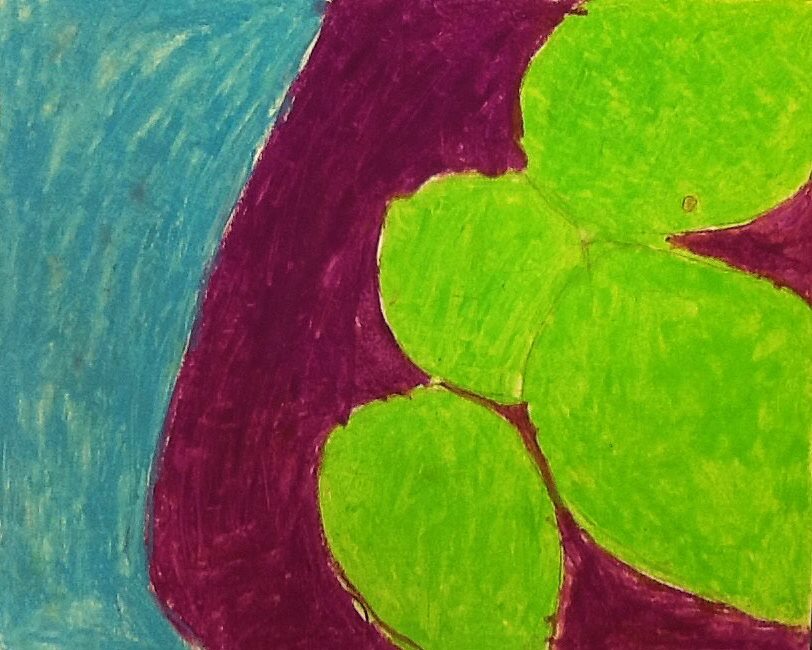
Too small/too many “big shapes” – Students will tend to think of one object as a shape, such as one lime, when in the composition, a group of limes is the larger shape (see the slide show in step 2).
Giving up – Some artists will tell you that they’ll never be able to draw accurately; that it’s not “in them”, and it doesn’t matter to them anyway. This is just a ruse to get out of doing the boring part of this lesson. Don’t fall for it! Anyone can learn these 3 steps and everyone who uses them improves their accuracy.
ART WORDS
Accuracy – When we want things to look realistic, we are striving for accuracy in our drawing abilities. Many people use phrases like, “it looks right”, instead of “it looks accurate”. Using the words right and wrong tend to make artists who are learning accuracy, feel like they’re not true artists. We avoid these terms and say accurate instead.
Frame – The ArtSquish term to denote the edges of a work of 2-dimensional art. Usually a rectangle or square.
Touch-points – Big shapes touch the edges of the frame in 2 or 3 places. It’s easier to look at the edge and find these points before you draw the whole shape.
Big Shapes – The ArtSquish term to denote the 4 to 6 largest shapes in a work of art. Most images can be divided into just a few of these very large shapes, which will intersect the frame on more than one side.
CLASSROOM PREP
Print all of your PDFs from the lesson plan and cut any references apart as needed.
Practice the slide shows and also take a few moments to paint the colors on the maze in Step 6.
What your room needs
Here are your printable lists and room prep instructions.
Opens in new window
CLASSROOM
MATERIALS
- 8.5″ x 11″ card stock
- Water containers
- Paper towels
- Smocks
- Projection devices for slideshows
- Cleaning wipes
STUDENT’S
MATERIALS
- Landscape Paintings
- Acrylic Paint
- Brushes
- Palette Paper
- Water Containers
- 14″ x 17″ Sketch Paper
- 2B Pencil
- White Eraser
- Oil Pastels
- Blender stick (stumps)
PREVIEW
Week 6 – Ink & Air
Students discover (or rediscover) the good, bad, and beautiful qualities of India ink. They create a black and white ink drawing of tools, while also reviewing the 3 Steps to Accuracy, and learning about Air Shapes, the Art Instructor term for the traditional (and more abstract concept), negative shapes.
Week 7 – Inaccurate Painting
Because accuracy is not always the goal, and students need to break free from boundaries, we’ll take a fun break from the structured lessons, and enjoy the freedom of self-expression. We also learn about the Most Important Spot, (or emphasis).