

OVERVIEW
Students will make 3D ornaments out of cardboard and paint them. These will stand up on a table or hang on a tree and can follow non-Christmas themes if needed. Afterwards, they will make their own stamps and use them to create original wrapping paper.Grades K – 2
Week of – December 8 – 12
1 Hour & 30 Minutes
Lesson At A Glance
A brief overview of each step. Buttons jump to each section for detailed information.
10 Min – attach cardboard, cut corners & add yarn
15 Min – use craft foam
15 Min – use foam stamp
10 Min – Oil pastels
5 Min – Everyone helps
SCROLL & TEACH
LESSONPLAN
Each section is a different color. Read over once and then you can SCROLL & TEACH using any device you like. It’s designed to work best with your phone.
LEARNING TARGETS

Students learn to express themselves through creating from their imagination.
M A T E R I A L S
- 11″ x 17″ Copy Paper
- 4B pencil
- Eraser
- Markers and/or oil pastels
- Blenders (stumps)
- Paper Towels
1.1 greet
Greet students as they come in and help them choose a chair.
Kneel down so that you are on their level. Bending over emphasizes the differences in your height, while kneeling makes them feel more important. Have tape and marker ready so you can stick some tape on the table by each student and write their name on it as they sit down.
1.2 choose
Encourage students to work with one piece of paper for a while. If someone uses the phrase, “free draw”, explain that artists’ choice is something only artists can do, while free-draw is something anyone can do. You want to use the phrase to elevate the students’ expectations of their work.
Everyone should take their time with the work and make a finished piece of art. Limiting the paper can also help kids focus on the work. If someone finishes in super-fast time, ask them what more they can do to the existing paper. Ask again several times – unless they appear overly frustrated; then you can allow them to move on to a new work.
LEARNING TARGETS
Students know how to create a 3D ornament
M A T E R I A L S
- 2 squares of corrugated cardboard that are 4″ x 4
- White gesso
- mini painter roller OR
- large paint brush
- Flat cardboard
- Metal straight edge
- Box Cutter (for TEACHERS ONLY)
- hot glue
- Masking tape
- Brushes
- Smocks
- Scissors
- Yarn
2.1 Set Up
2.2 create
Begin making cardboard ornaments (or art stand-ups for people who do not observe a holiday)
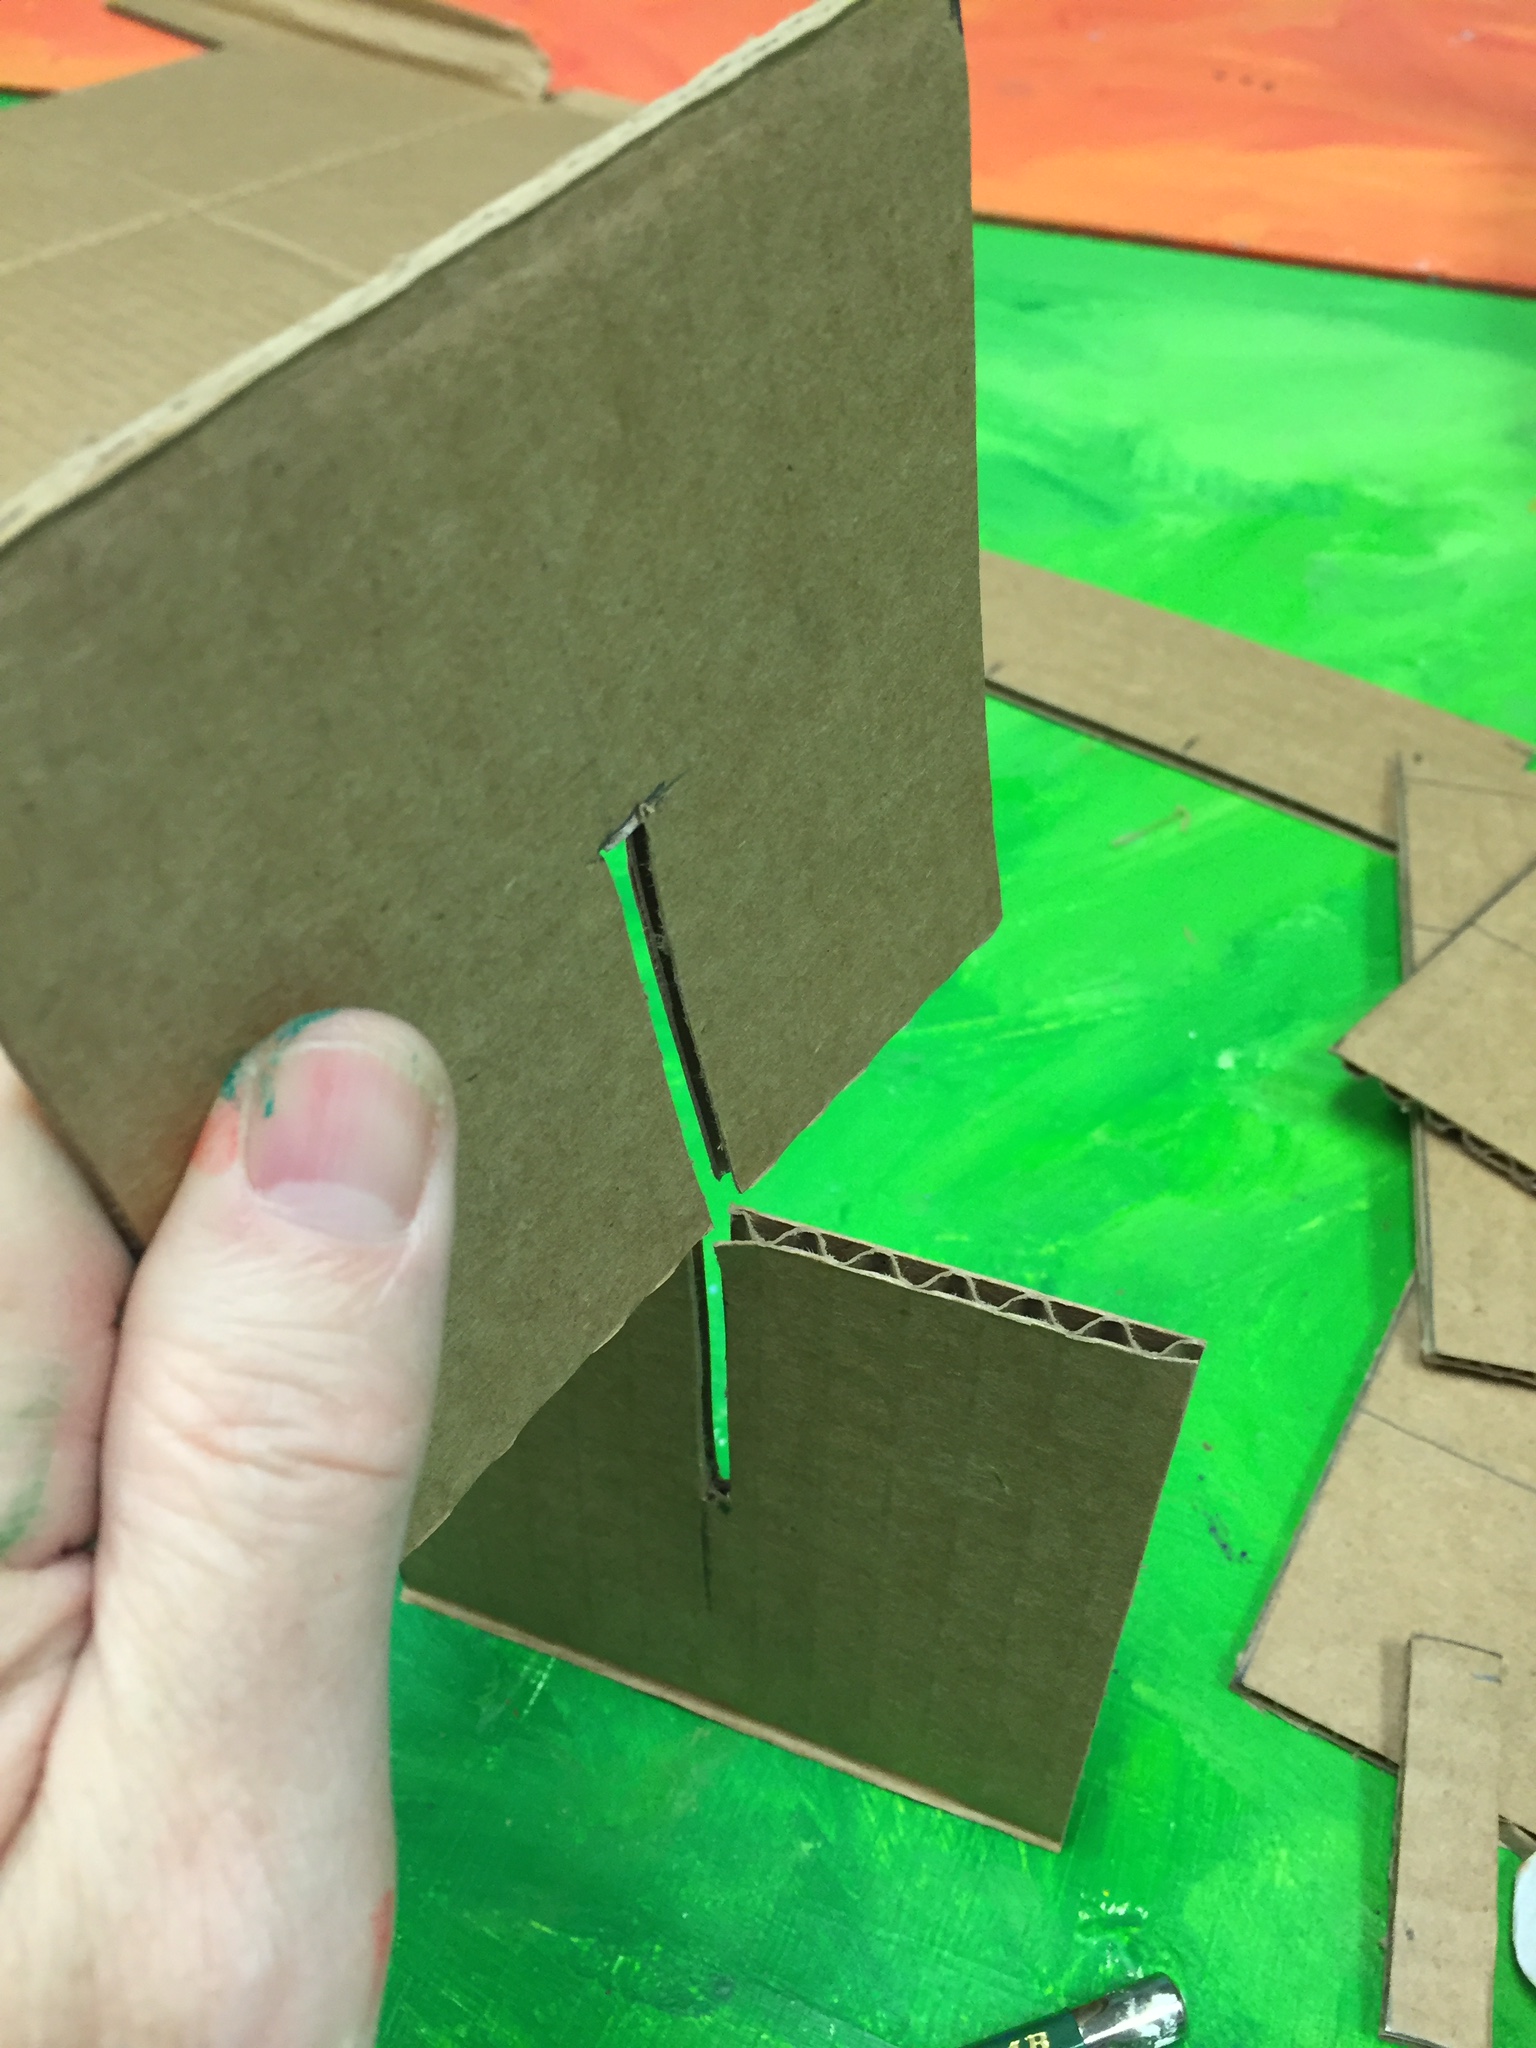
Show your kids how to slide their 2 pieces of cardboard together – with some help if needed. If they are loose, use a dab of hot glue to secure them together.
Have students draw some lines for cutting off the corners at angles to look more like a tree ornament. You can modify their work a bit as you cut to make a good shape. Use good grown-up scissors.
Then use hot glue to secure a loop of yarn to the top for a hanger. Write student’s name on some tape and stick this to the yarn.
Without the yarn and with only the top corners cut, it makes an art stand-up.
Step 1
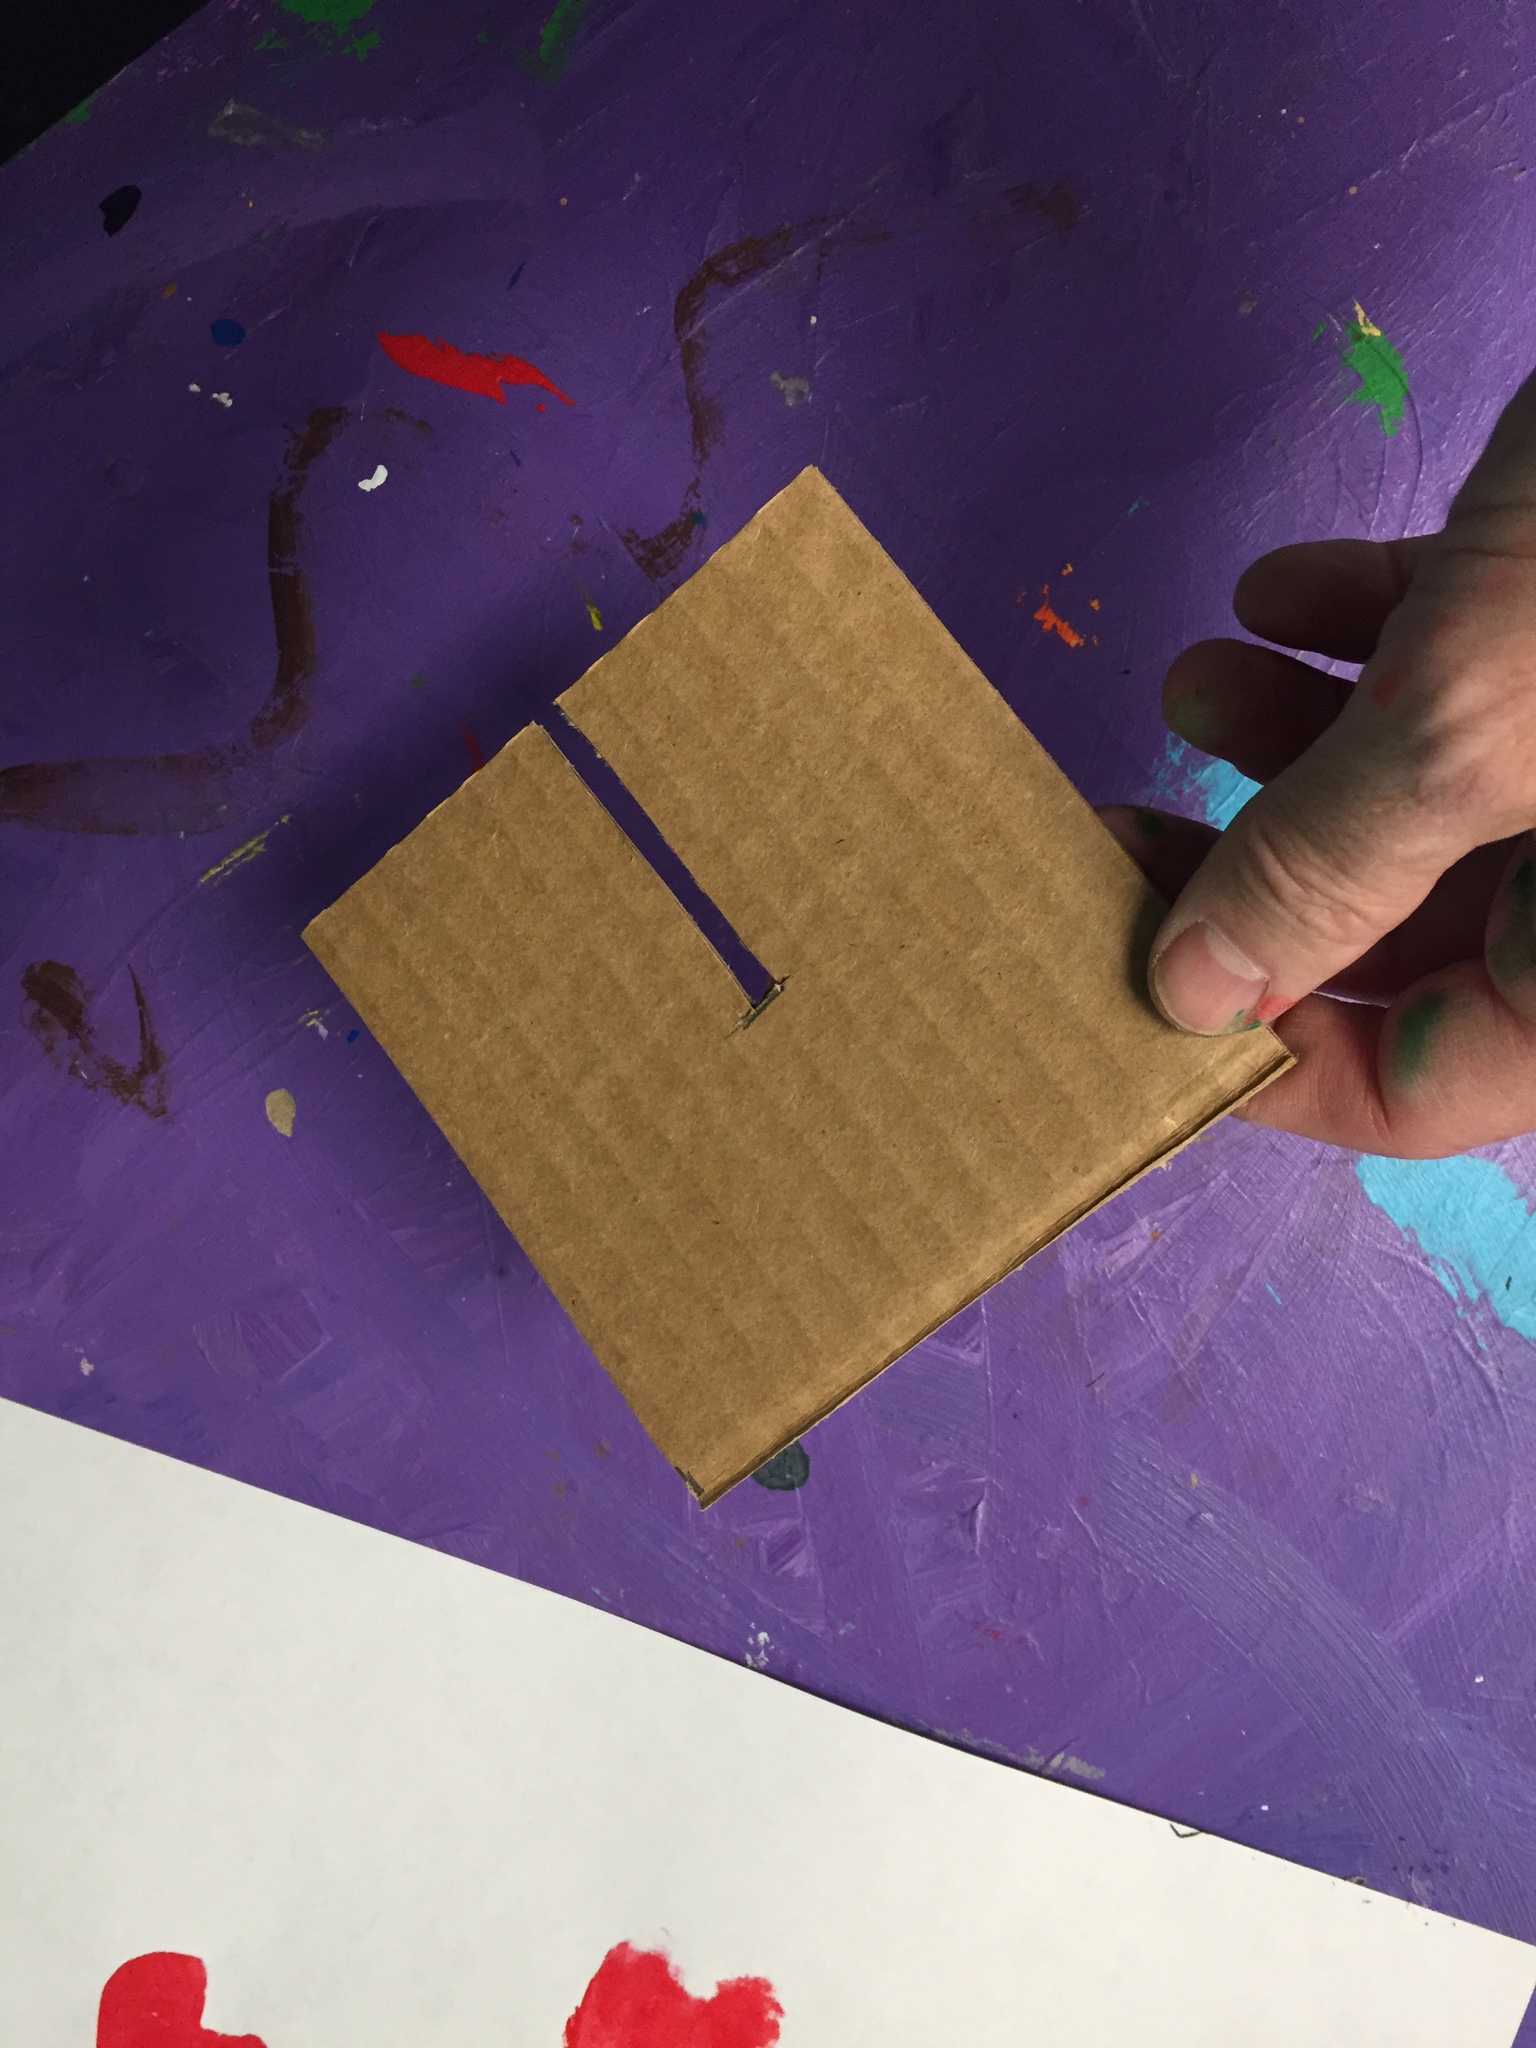
Give each student 2 squares of corrugated cardboard that are 4″ x 4″. It should not have printing or labels on it, since they’ll be painting both sides. Prepare before hand by cutting a vertical slot in the center of each that only goes halfway. (This slideshow shows the cardboard without the gesso or white paint. Students should receive cardboard that is prepped with white and ready to paint).
Step 2
Kids will slide their 2 pieces of cardboard together – with some help if needed. Don’t let them bang on them.
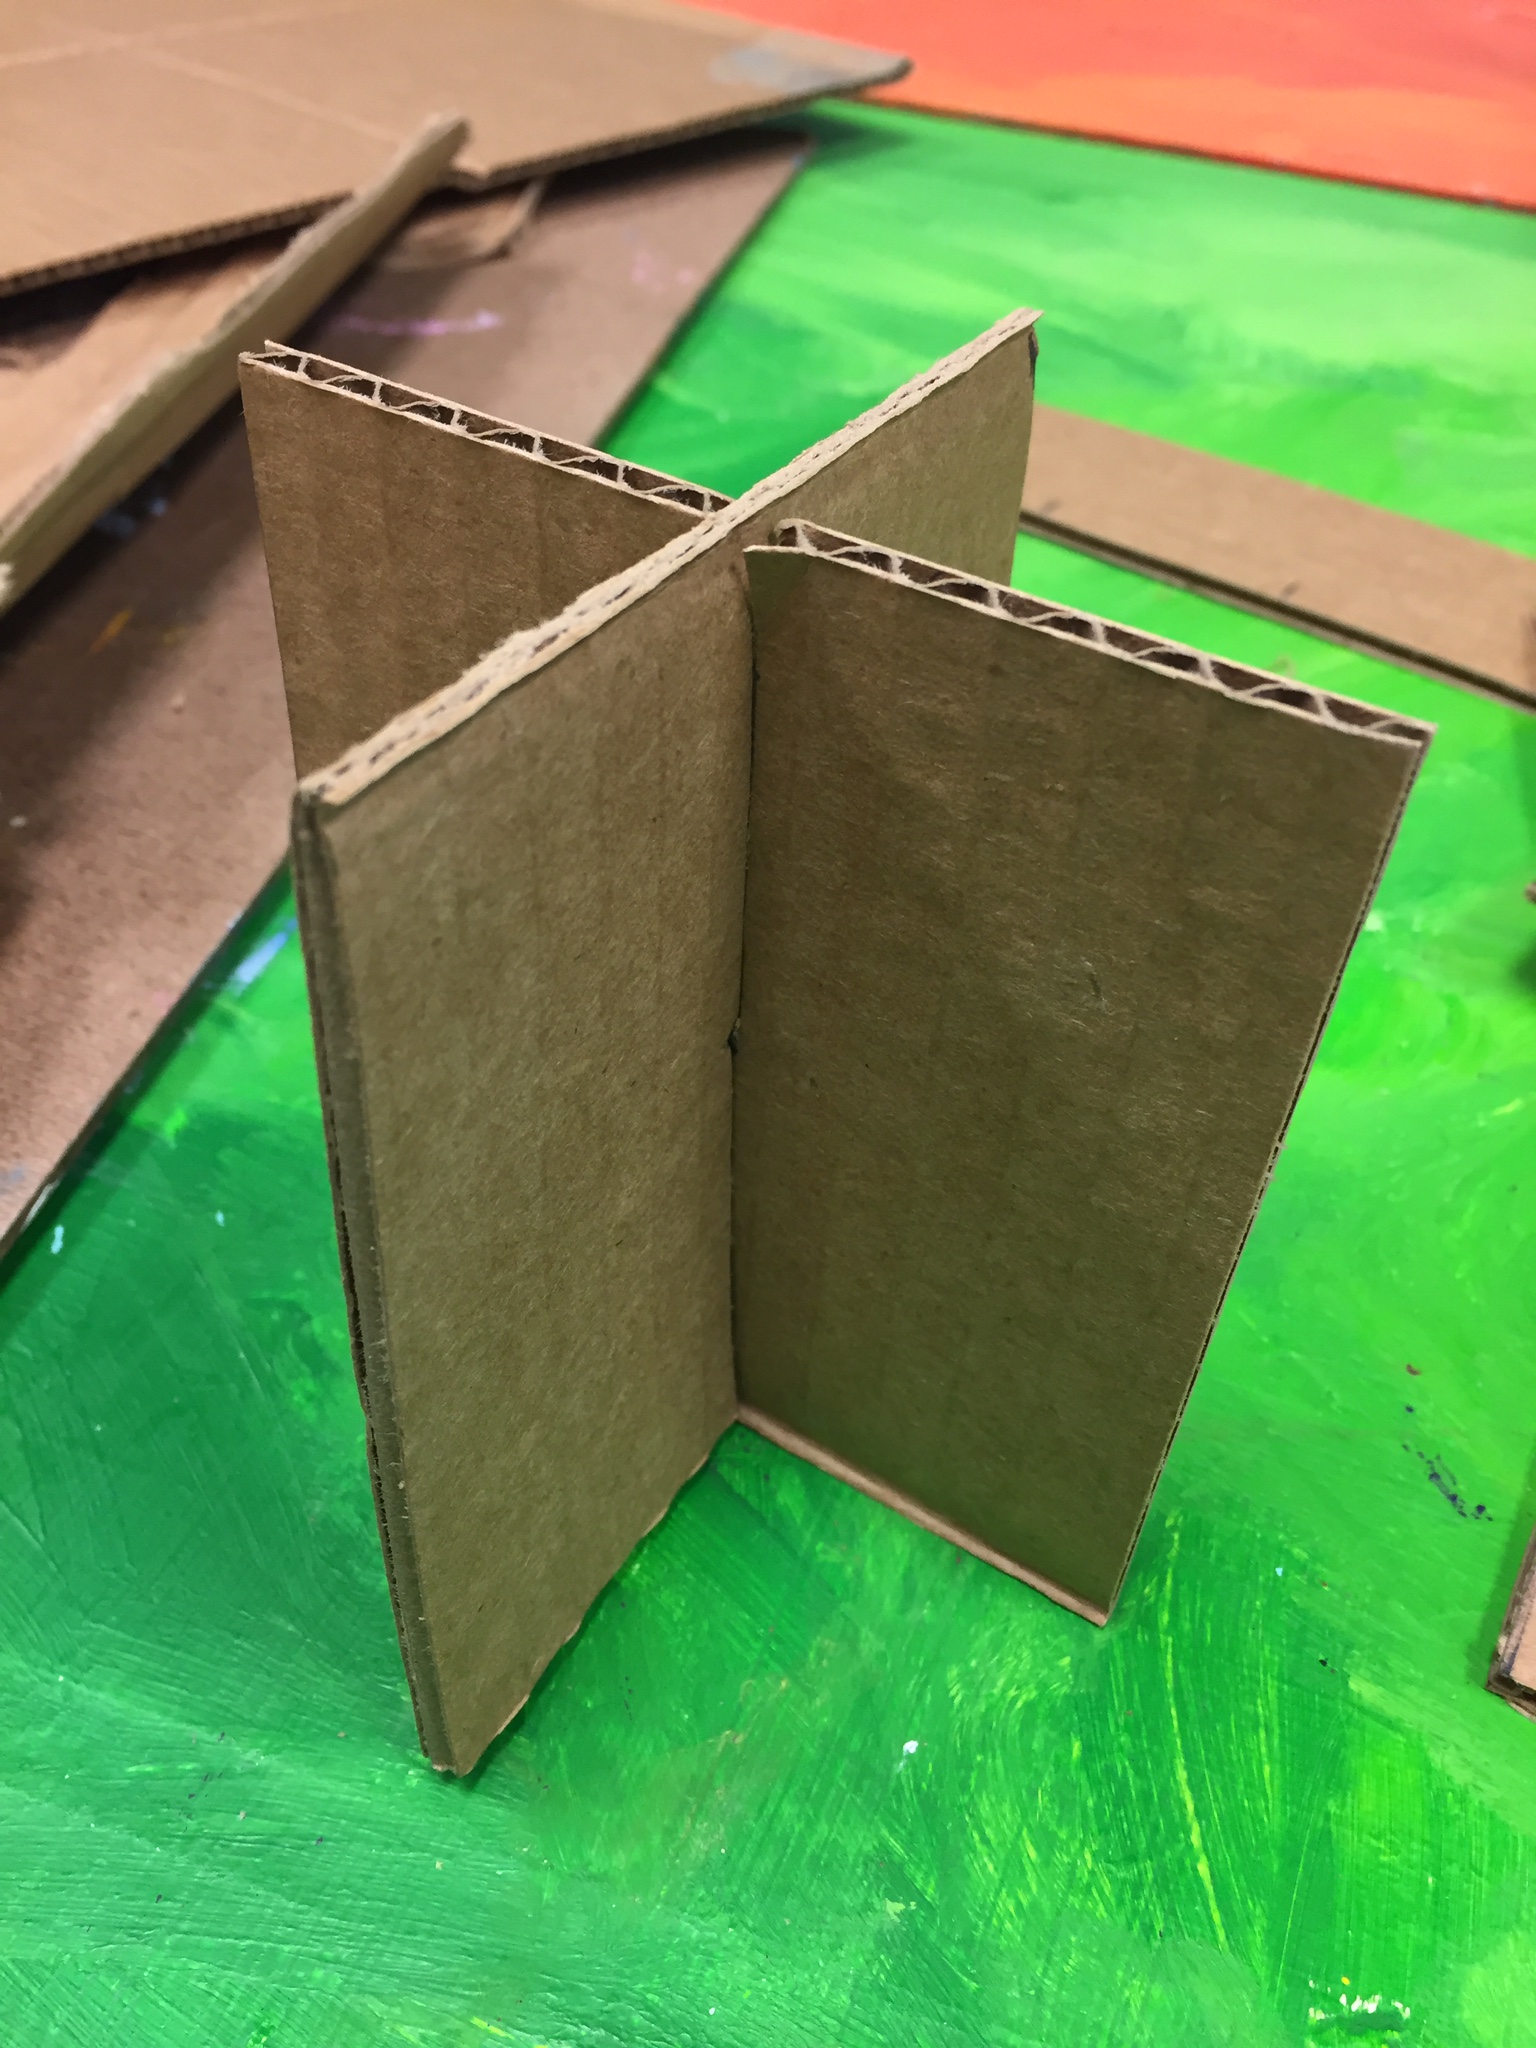
Step 3
Use a dab of hot glue or tape to secure
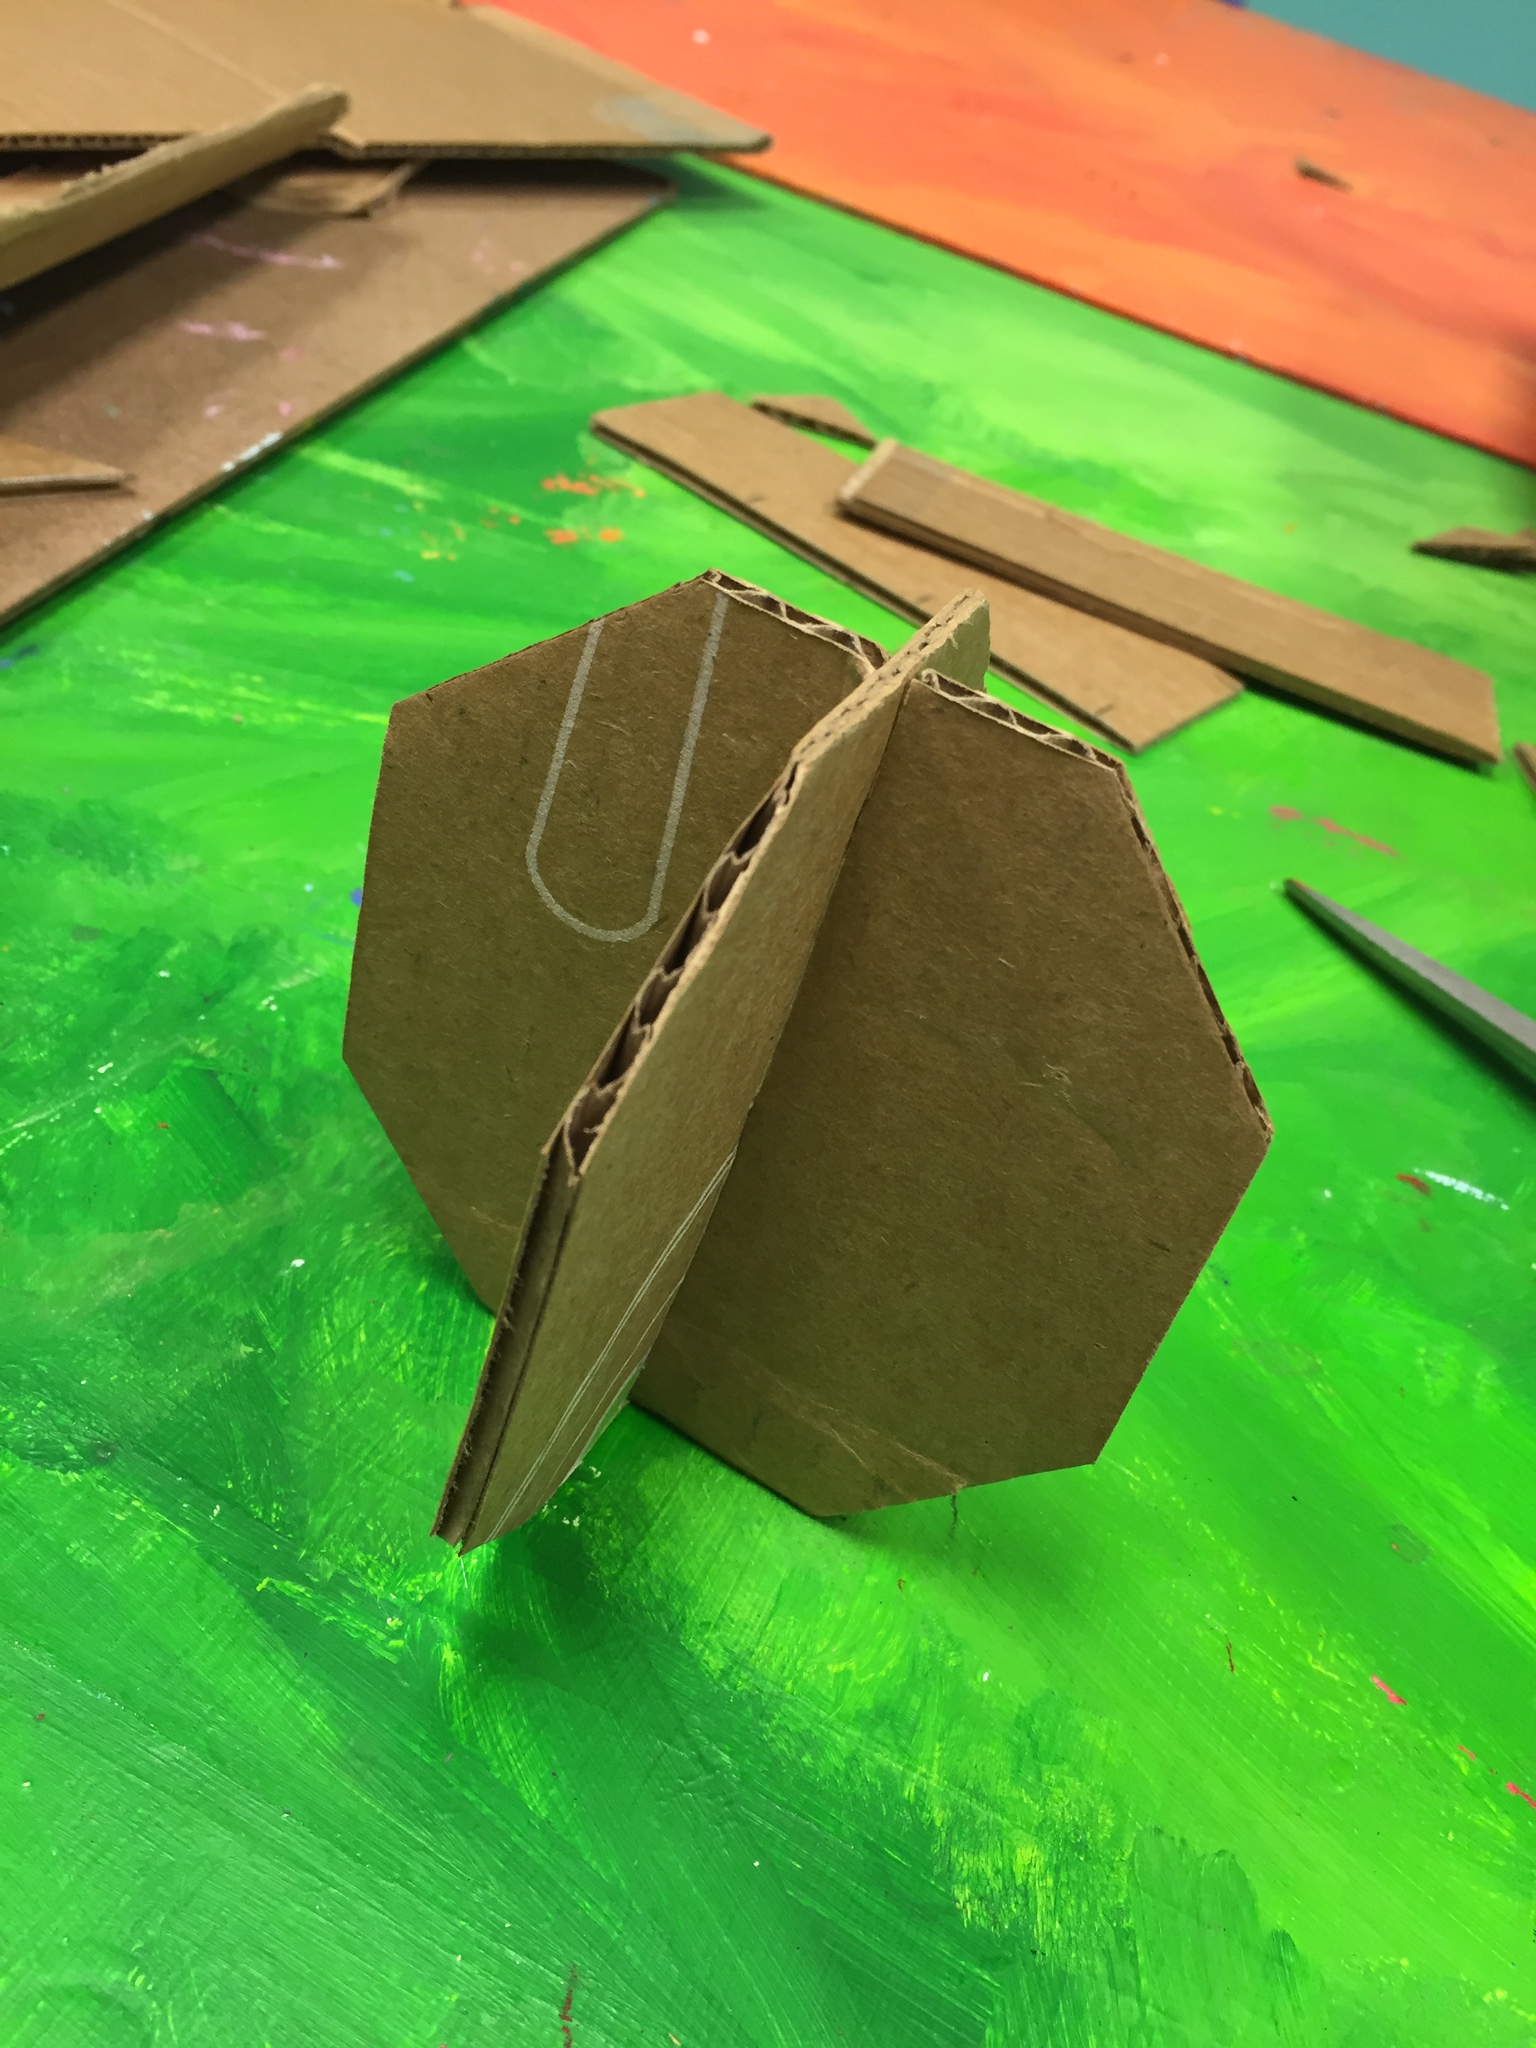
Step 4
Cut the corners with scissors for students if they want it. (This will make it look more like an ornament)

Step 5
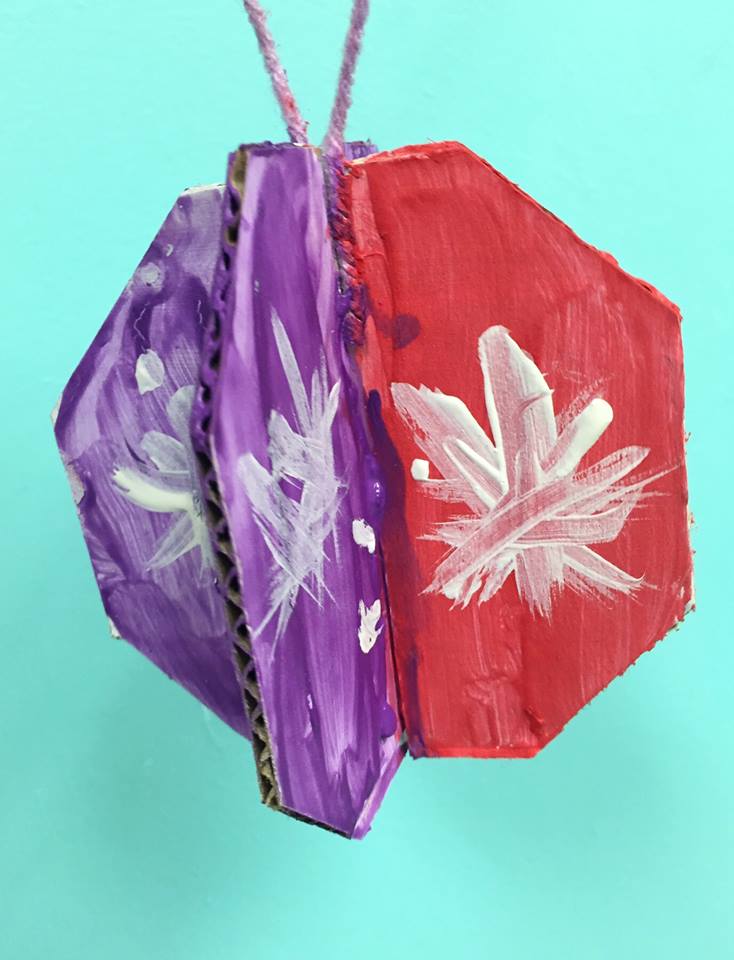
Paint the ornament with acrylic paint. When students are done, use a hot glue gun to attach yarn for a hanger (if the student is making an ornament).
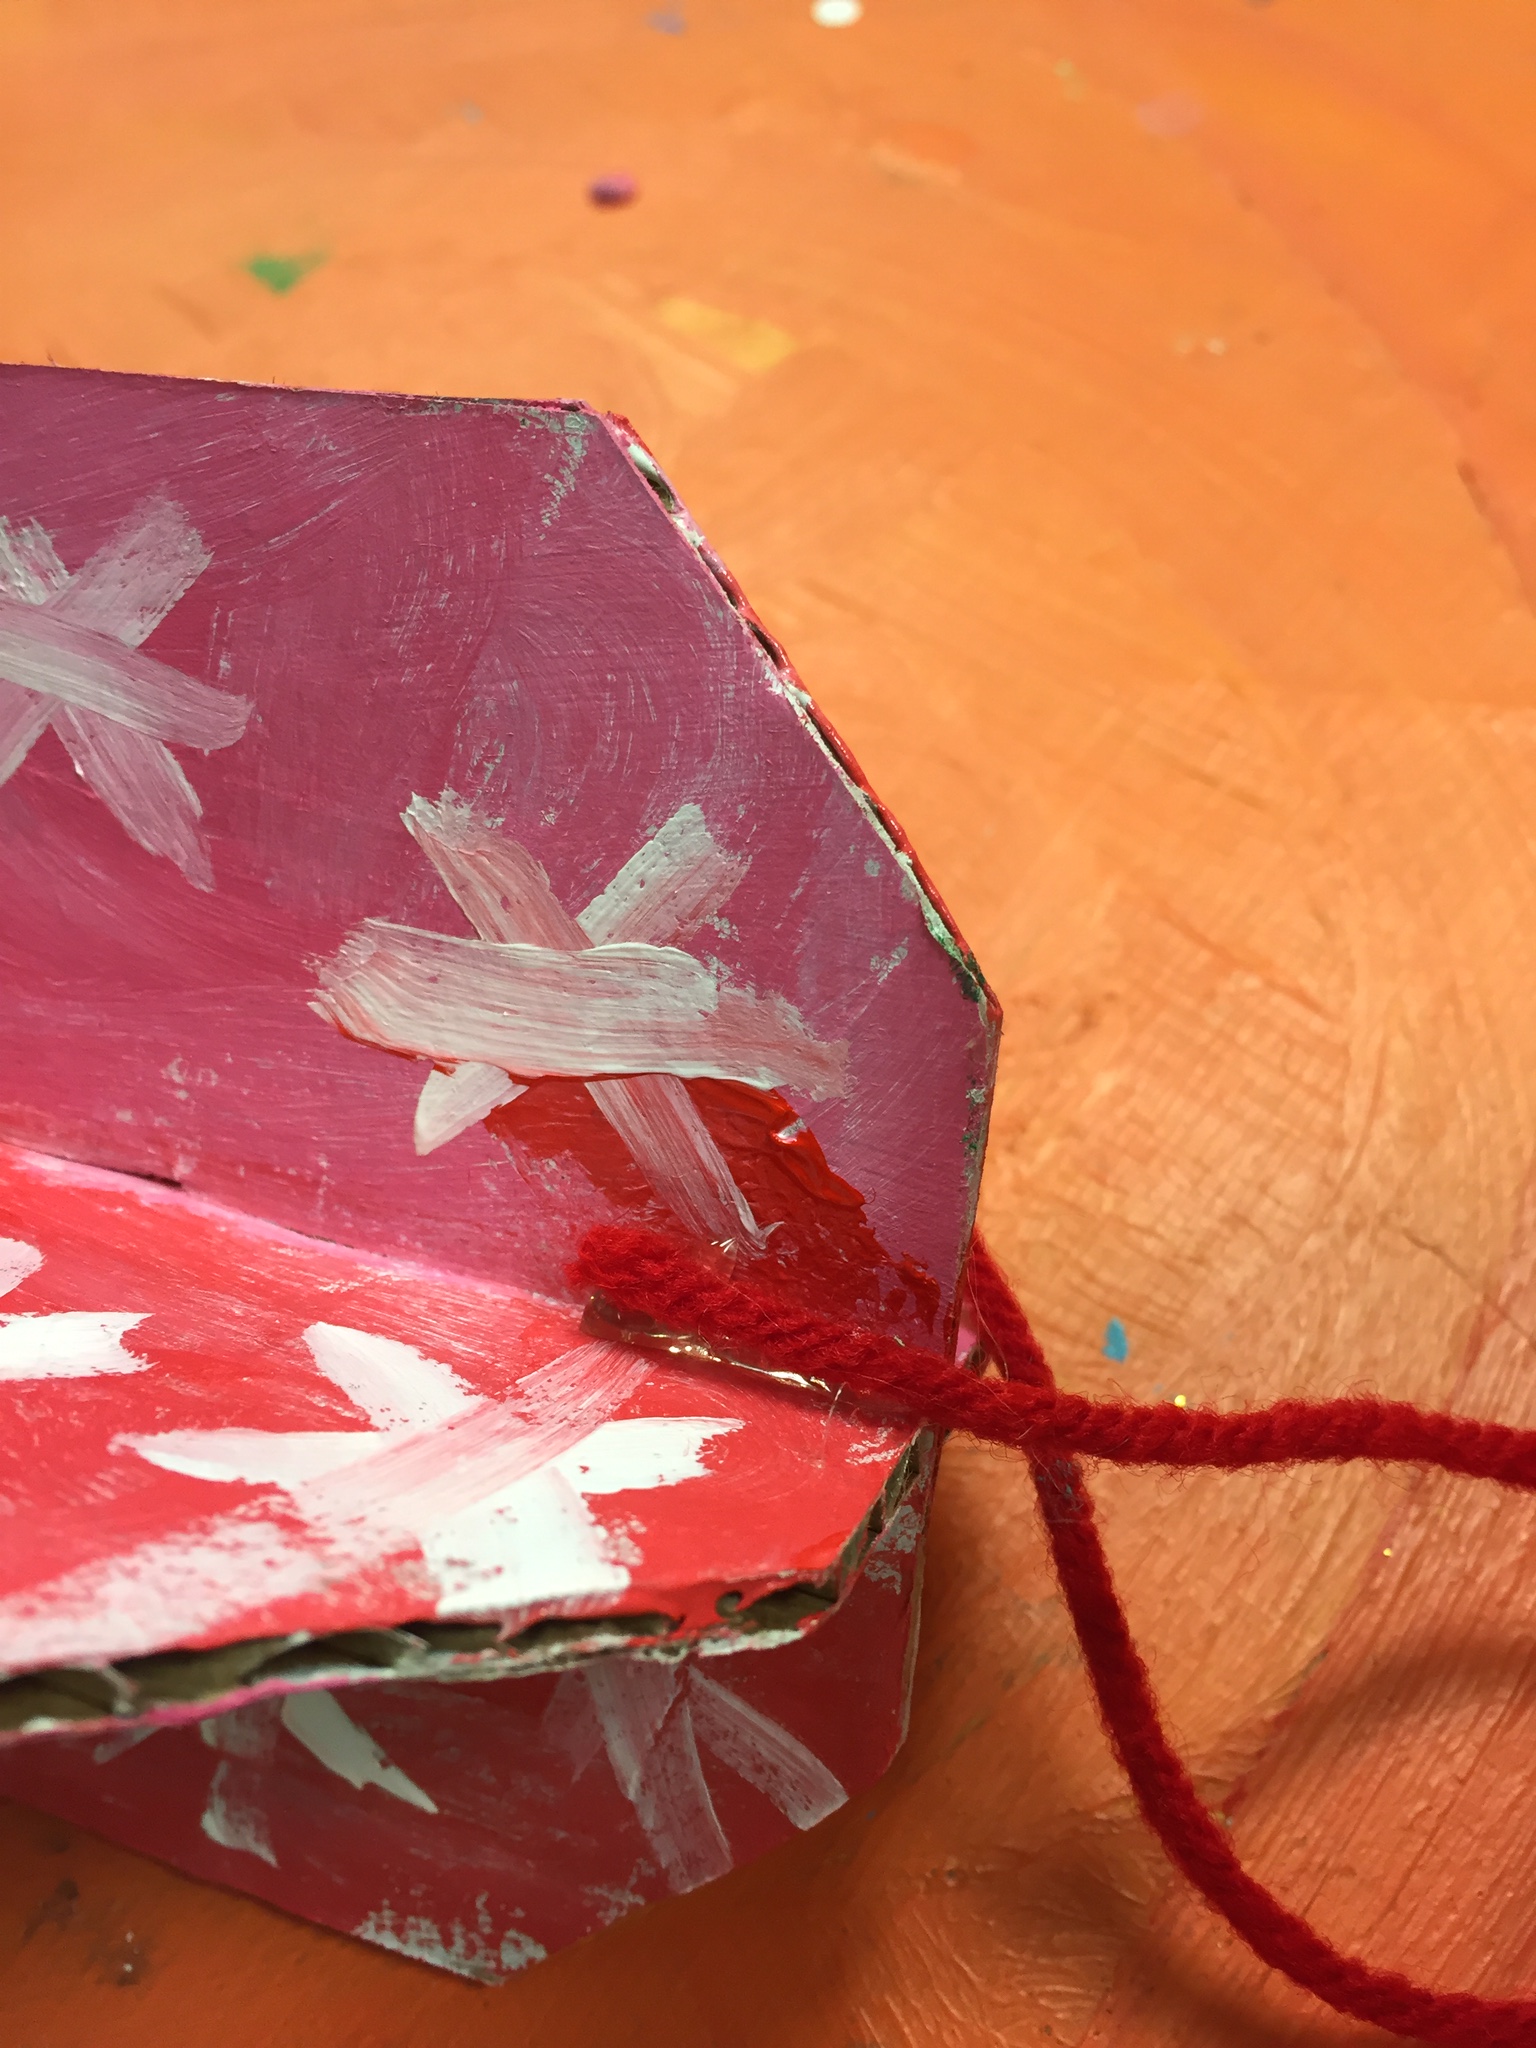
Step 6
Secure the yarn to the cardboard (press with a scrap piece of cardboard to keep fingers from getting burned).
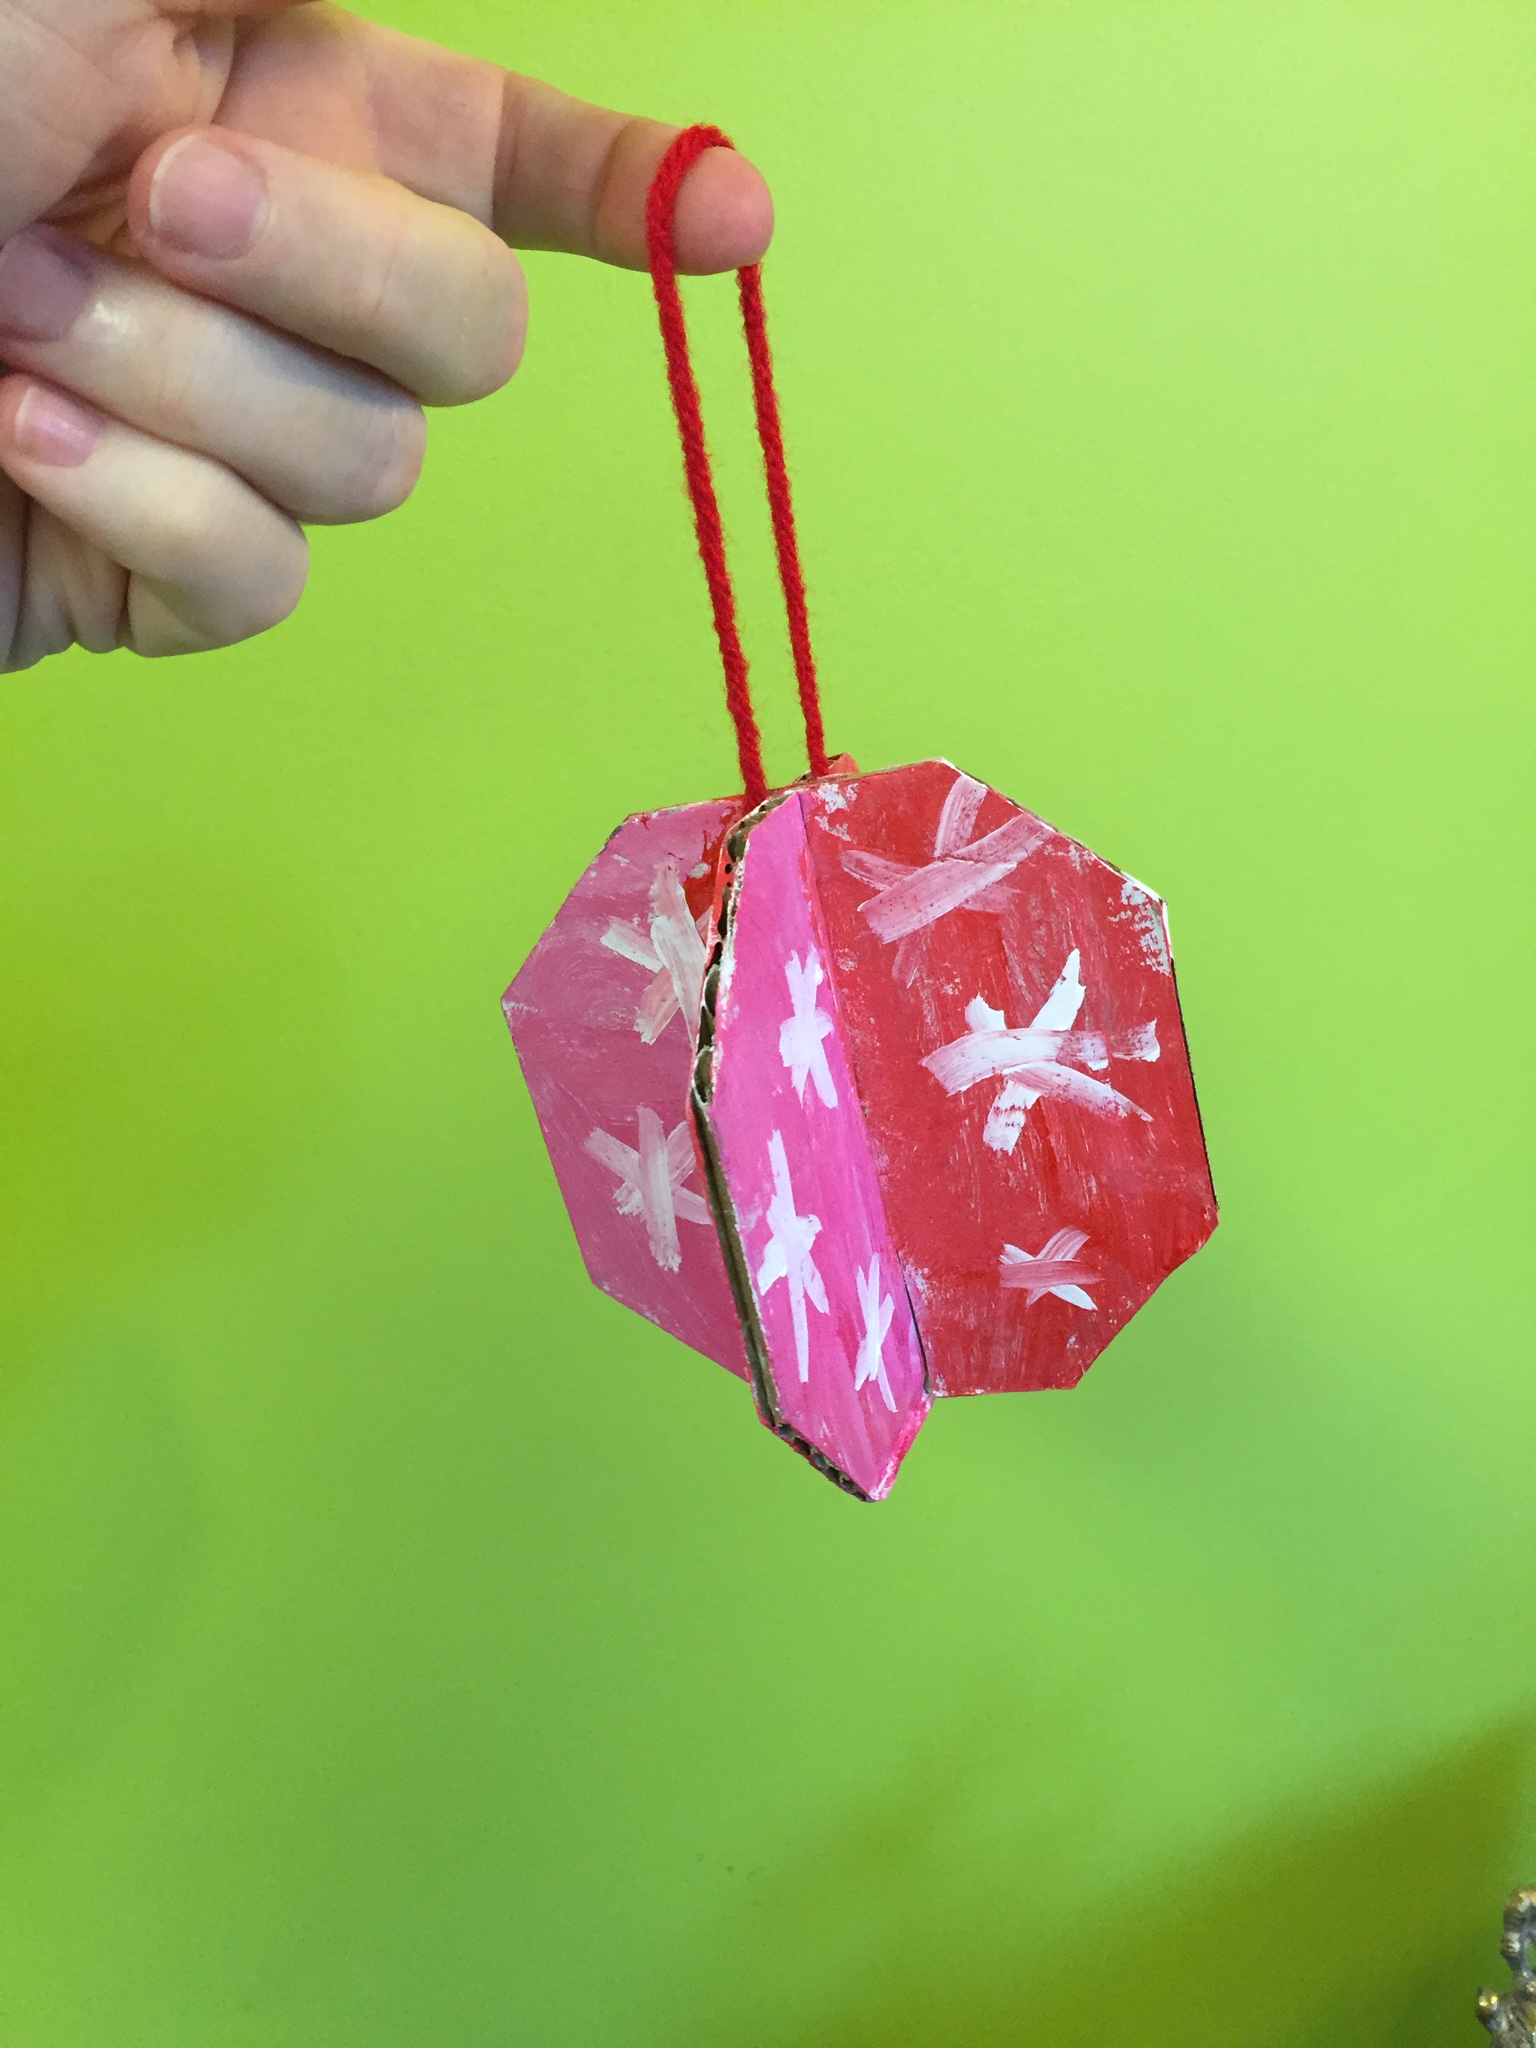
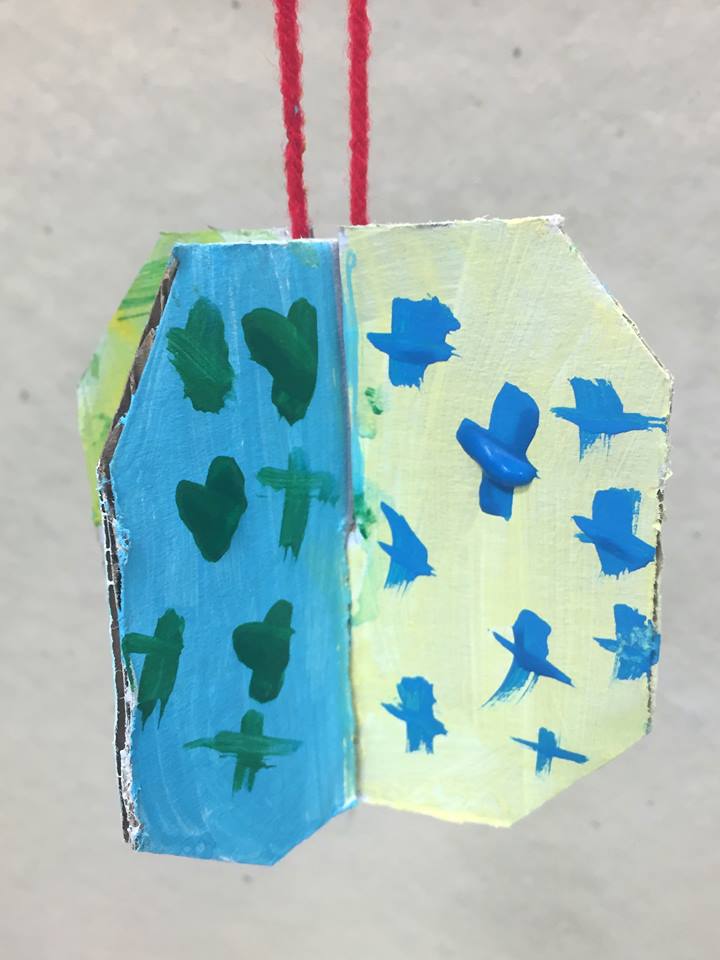
Step 7
Now you have a completed ornament!
LEARNING TARGETS
Students know how to paint a 3D ornament
M A T E R I A L S
- Cardboard ornament or cutout
- Paintbrushes (small, medium)
- Bowls
- Acrylic paints
- Water container
- Paper towels
- Smocks
We use acrylics for this project so the ornaments will last. Tempera paint will flake off and if it gets wet will be ruined. However, acrylic paint DOES NOT WASH out of fabric after it dries. Clean accidents immediately. Here’s a LINK to our article:
Brushes should be nylon for springiness and durability. Round brushes are the most versatile.
Paint pigment list:
- Napthol or Pyrrol Red
- Hansa or Light Yellow
- Pthalo Green (blue shade)
- Cyan or Cerulean Blue
- Ultramarine Blue
- Dioxazine Purple
- Magenta
- Burnt Umber
- Raw Sienna
- Titanium White (professional grade only)
3.1 teach
Teach your students about getting & mixing plates. Help your students understand how to keep colors away from other colors, yet mix new colors for their paintings. It’s easy with this simple system.
- Getting Plate: Place all the fresh paint in one disposable tray or plate (we use square food trays)
- Mixing Plate: Have another plate dedicated to just mixing & inventing new colors
Refer to the plates by these names. You only scoop paint OFF of the getting plate, and move it over TO the mixing plate. Then you blend it with other colors to invent new colors.
3.2 paint
Assist students with painting their ornaments.
Smocks are very important for this lesson! Students will be using acrylic paints which are not washable. Make sure you roll up everyone’s sleeves because we are using paints that do not wash out easily. Pushing sleeves up simply does not work for more than a minute or two. If you have long-sleeved smocks with elastic cuffs or sleeve guards, that works too.
Paint designs on all 4 sides of the cardboard ornaments. Have fun and be very careful with the acrylic paints. Help your artists keep their paints from getting muddy by wiping and washing brushes, and being careful to not let warm colors and cool colors get mixed.
When finished, set aside to dry and clean the brushes. Since you need paints again in step 5, don’t clean them up yet; just push the paints out of the way for the next step. (If dividing the lesson, go ahead and clean up).
LEARNING TARGETS
Students know how to make a stamp
M A T E R I A L S
- Craft foam ( 6″ x 4″)
- Tape
- Pencil
- Safety Scissors
PREPARE:
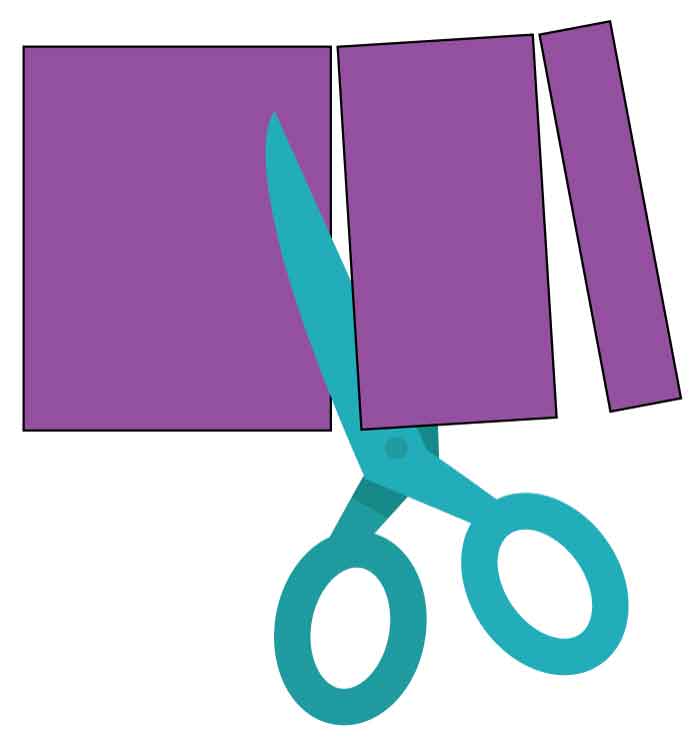
Cut standard foam in half ahead of time to create two 4″ x 6″ pieces. The picture below shows the scissors dividing a full sheet, although the right half shows the second cut that the students will make, already done.
4.1 create
Have students follow along with instructions, and make a stamp yourself as you show them how:
- Lay the foam in shower position and draw a line from the top to the bottom, over to one side, so that one side is wider than the other. The picture has the smaller piece already cut off over to the right.
- Cut along the line.
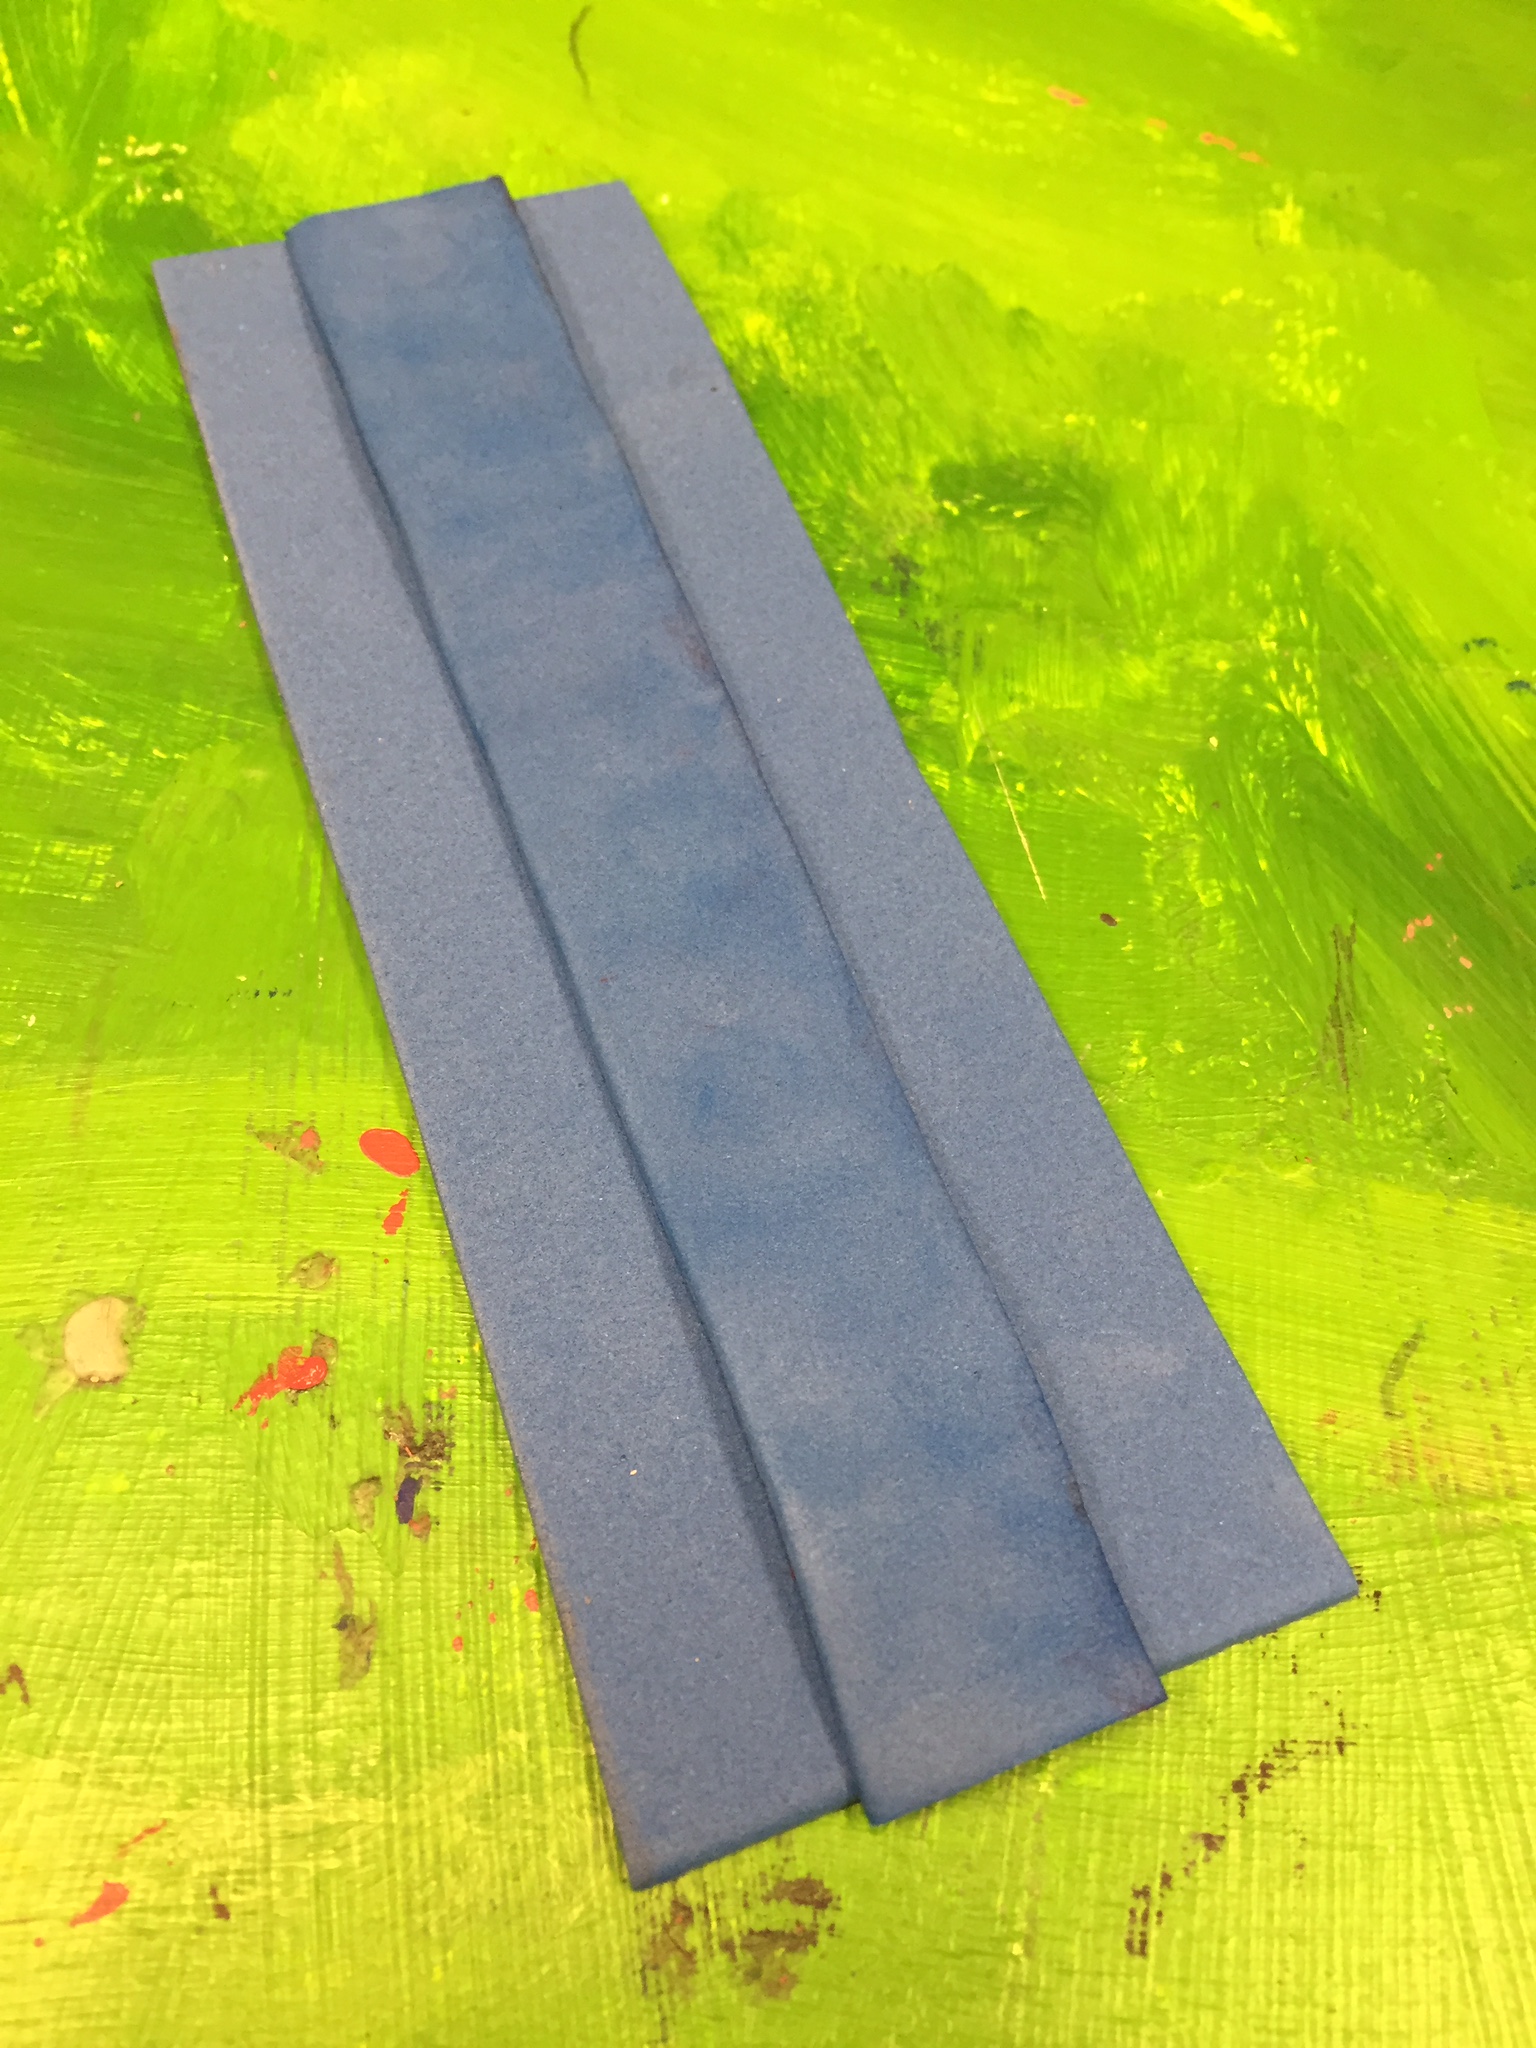
- Lay the smaller strip on top of the center of the larger piece of foam as shown in the picture.
- Carefully roll both of the strips of foam up together. Be sure to keep it pretty snug. Secure the foam with the tape. You may need help from an instructor.
POSITION
Place the skinny piece on top of the wider piece (long-ways)
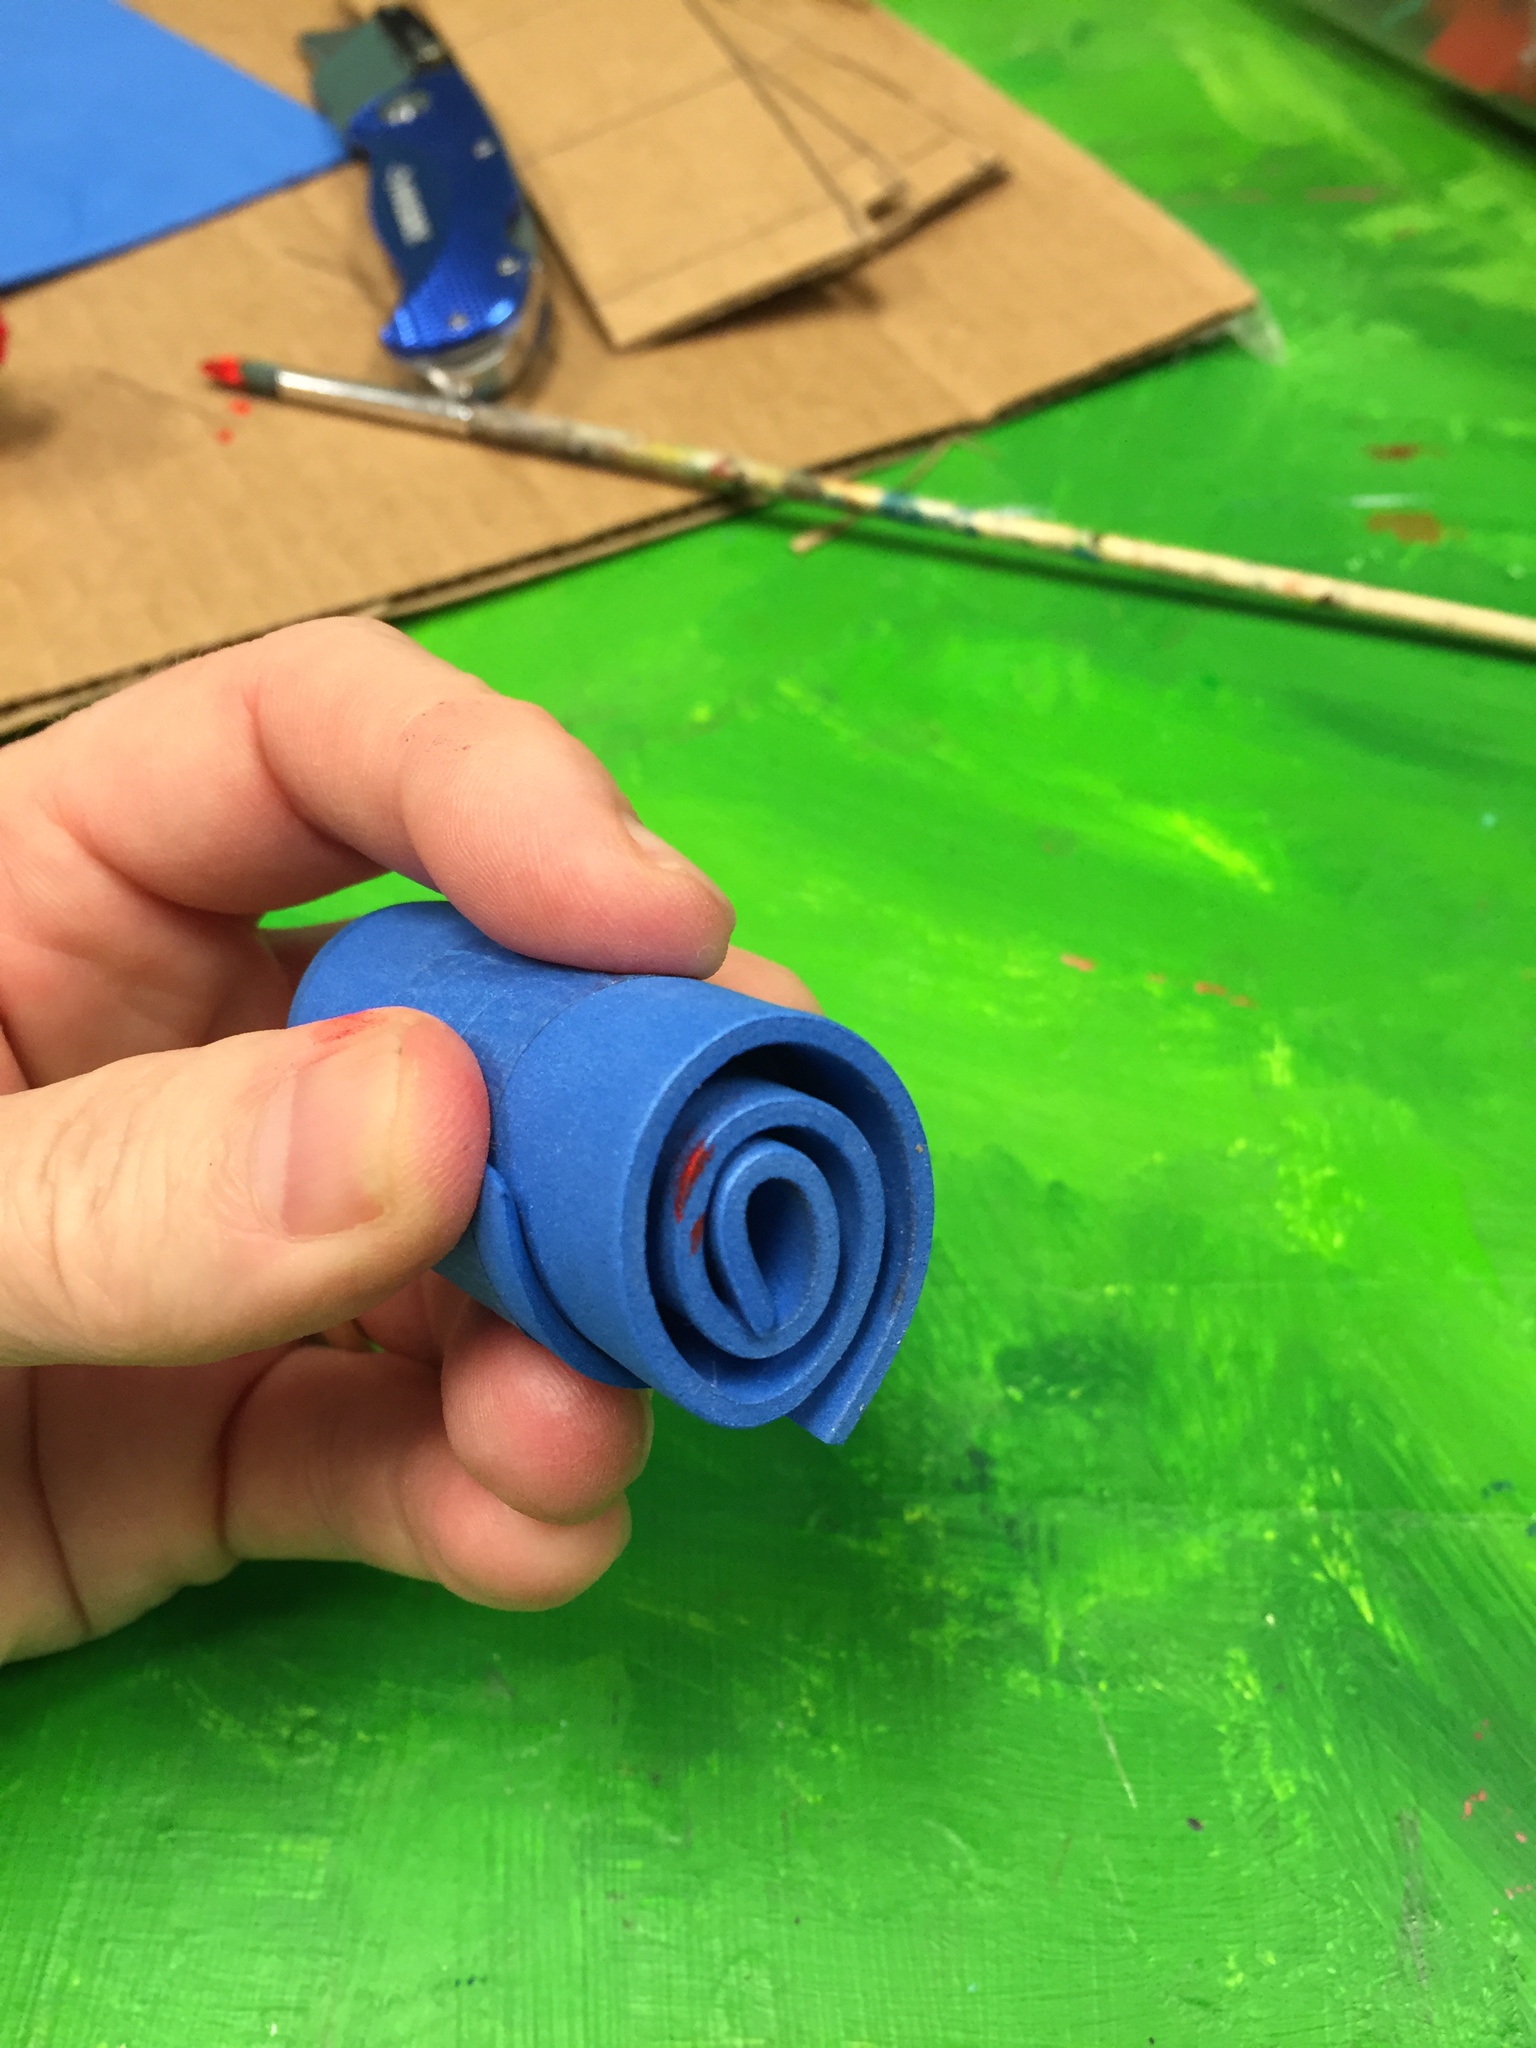
ROLL
Roll them up together and tape to hold.
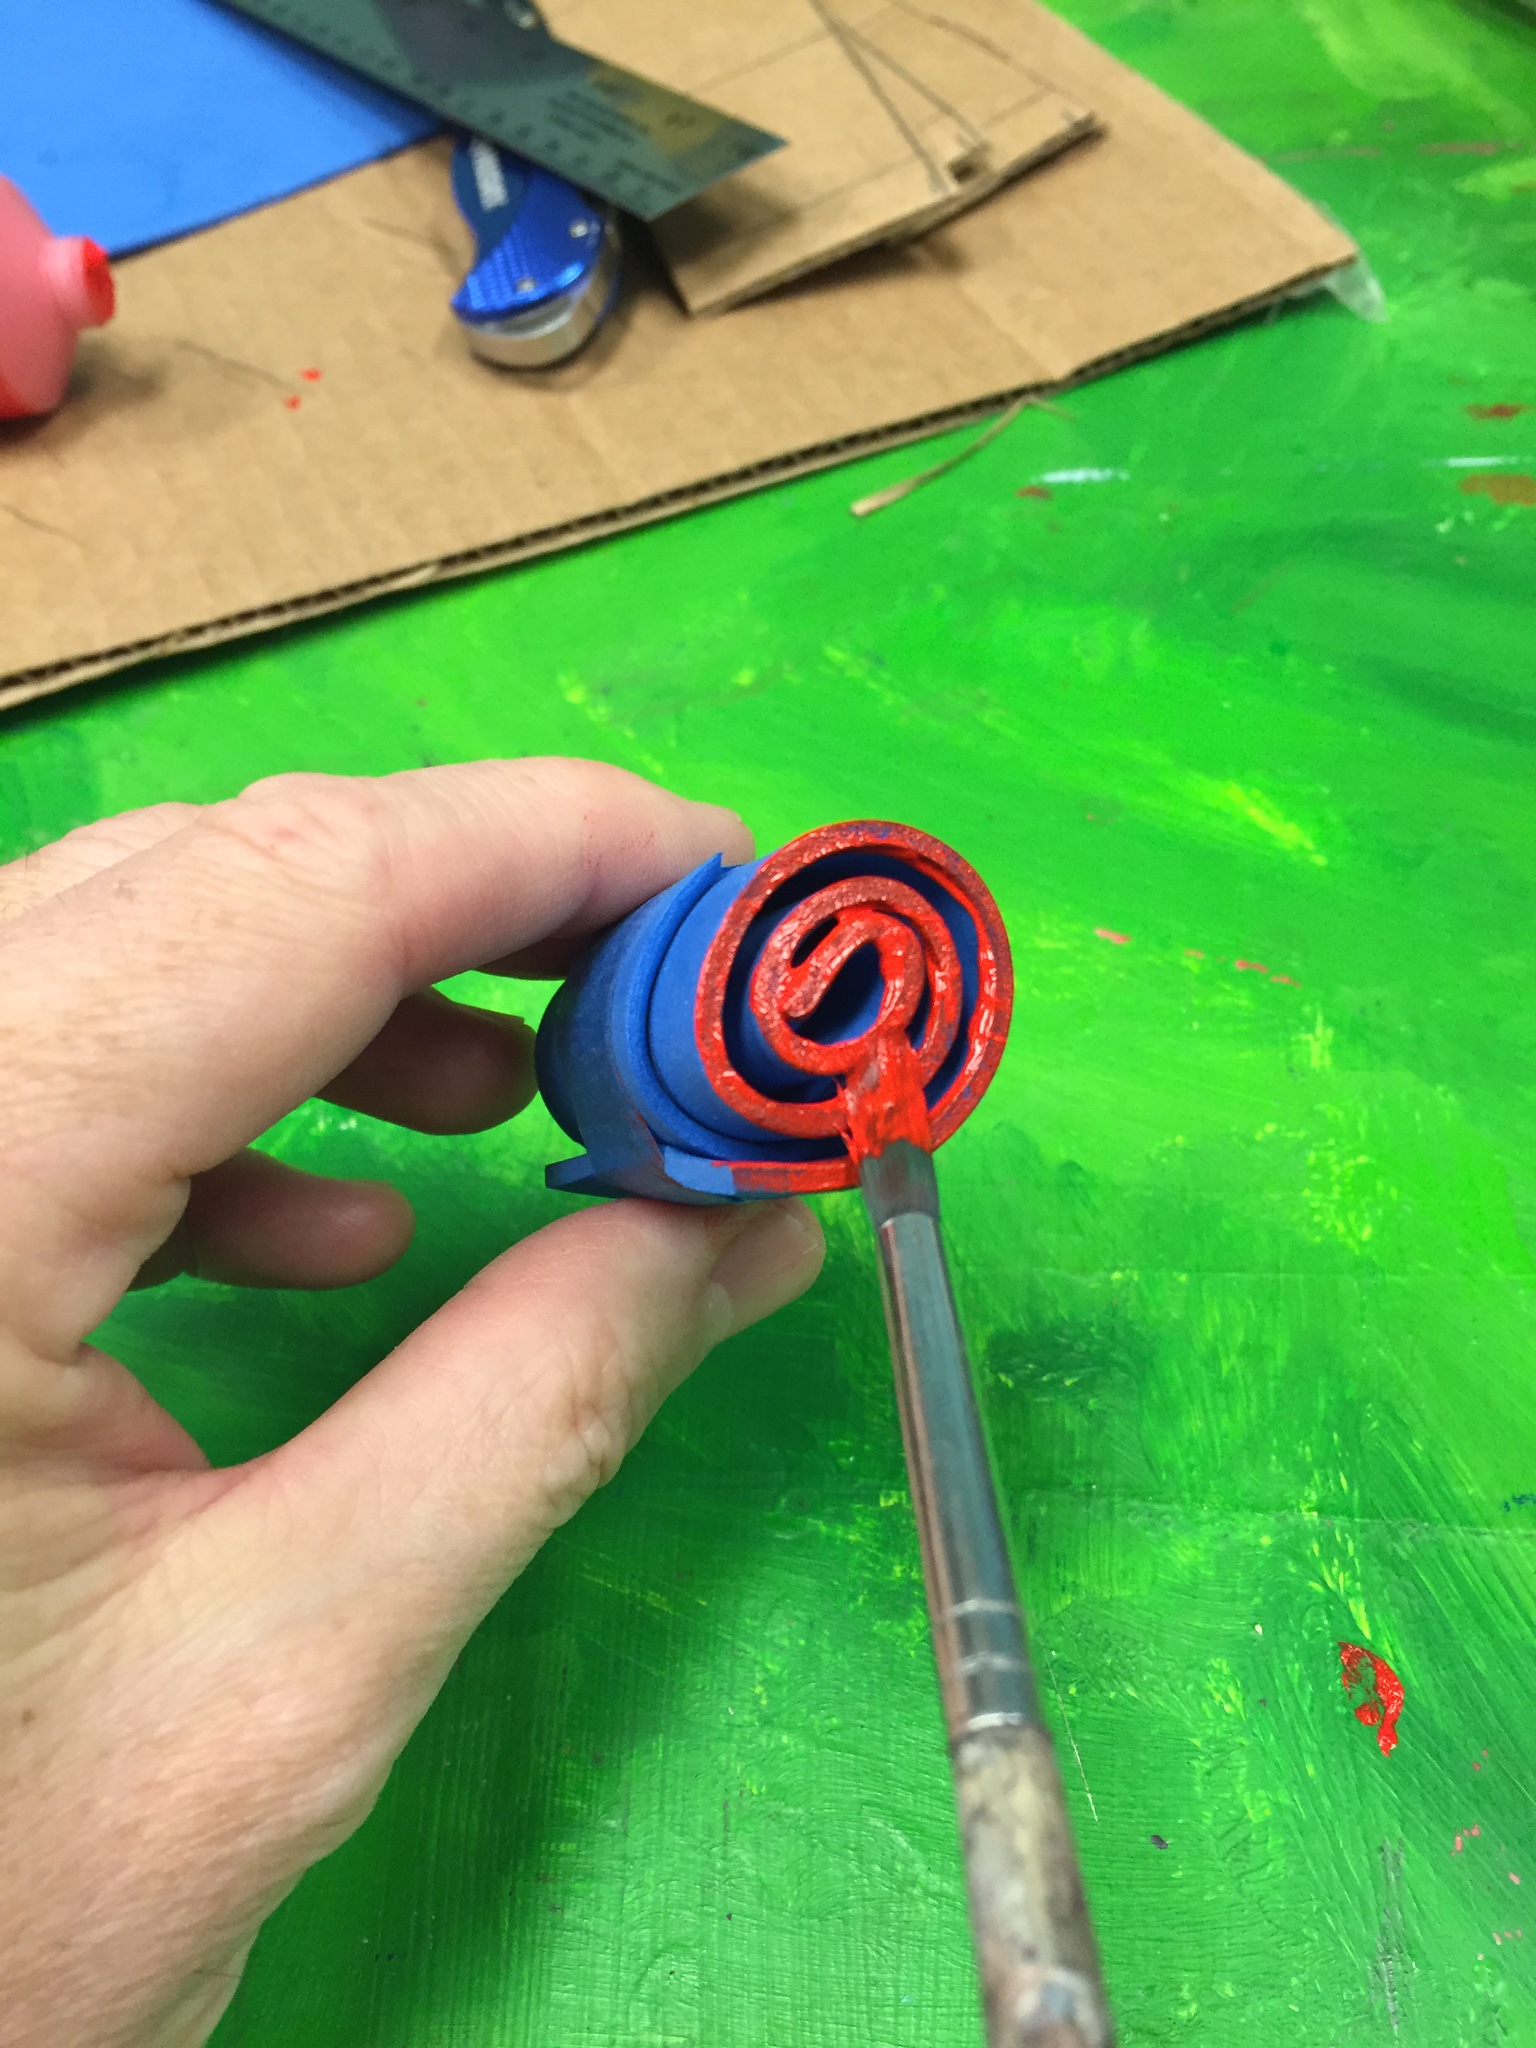
PAINT
Paint the end.
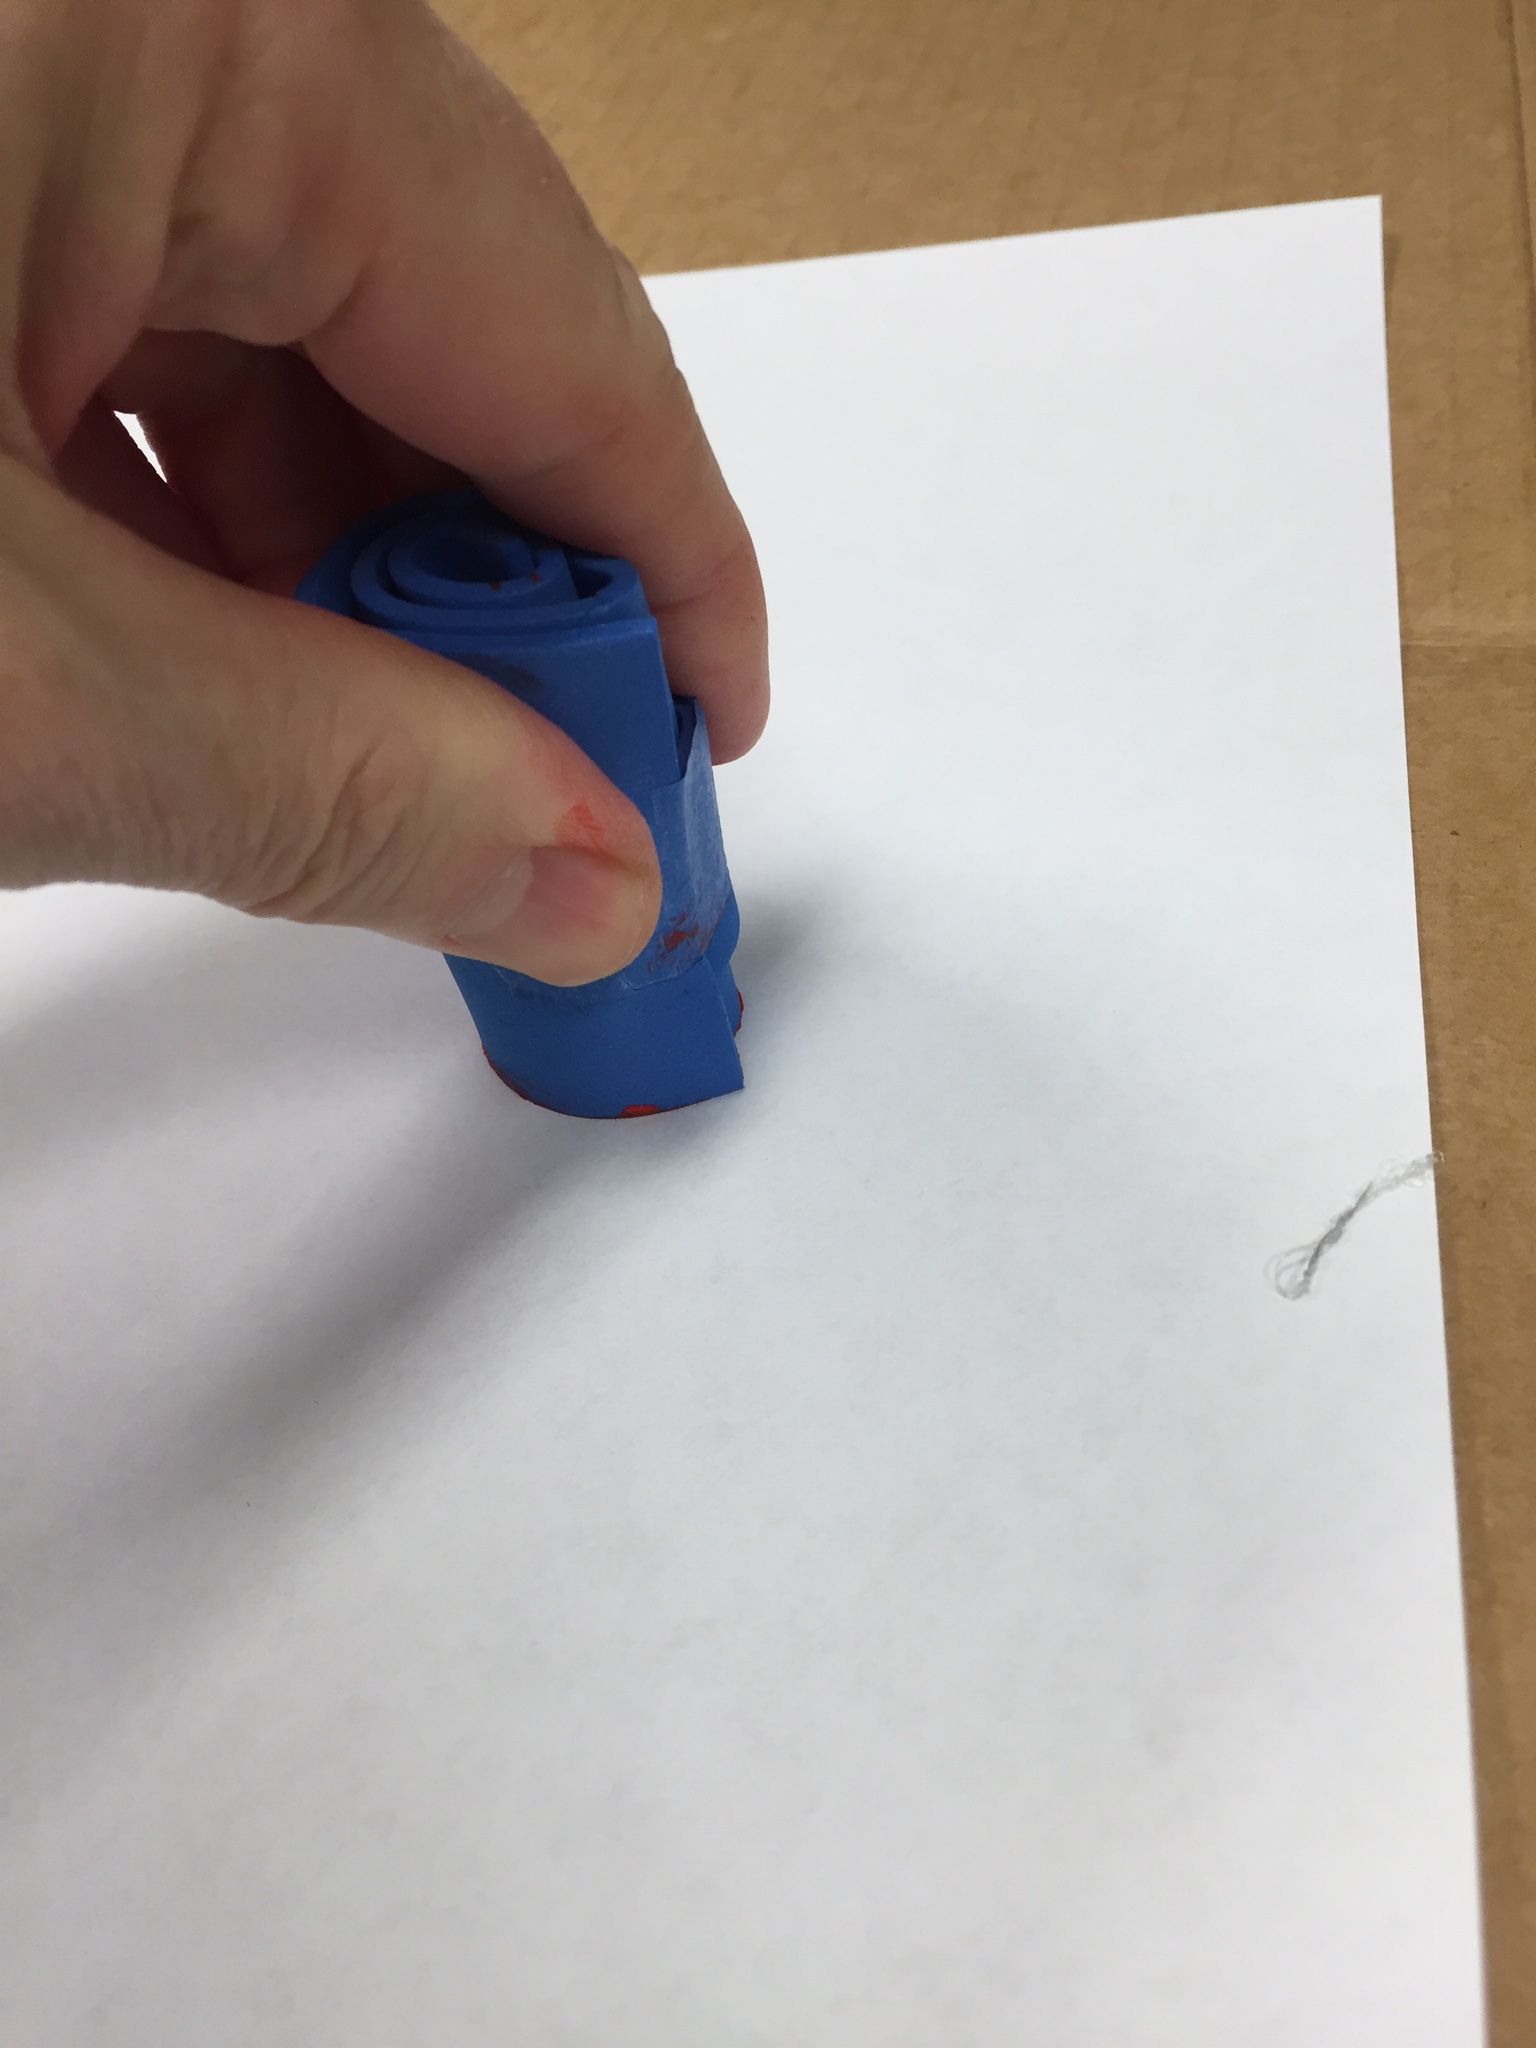
STAMP
Press on paper. Once or twice before painting the end again.
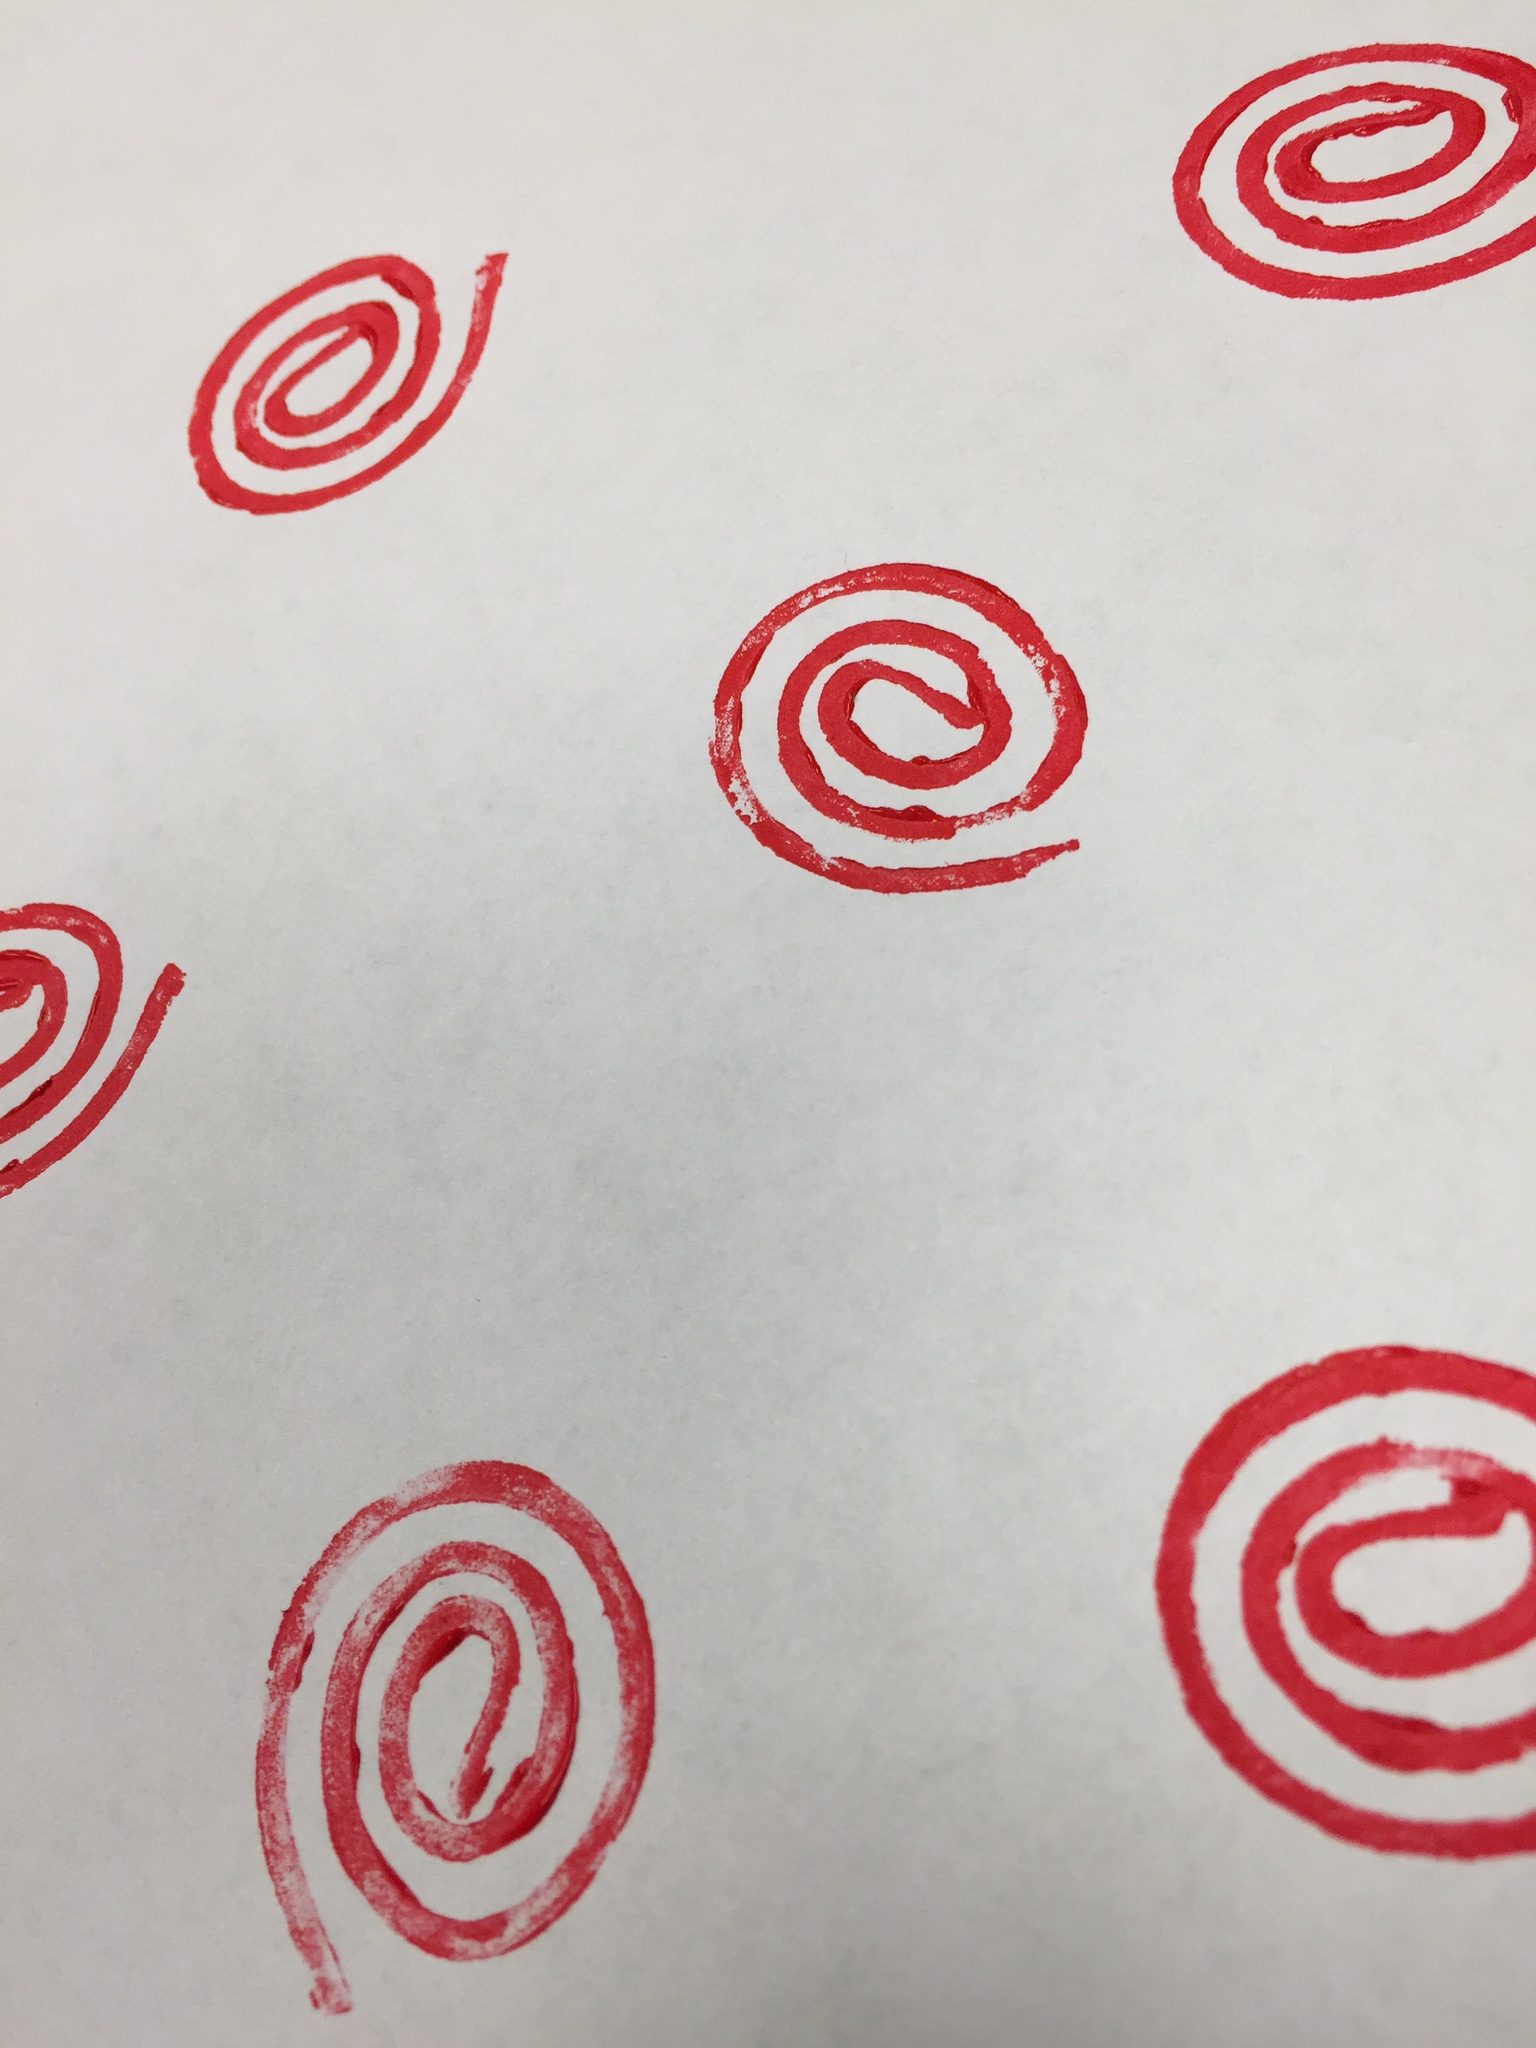
DONE!
Leave space between each spiral.
LEARNING TARGETS
Students know how to make designs on paper using stamps
M A T E R I A L S
- Foam stamps
- Butcher block paper
- Brushes
- Water tubs for cleaning
5.1 stamp
Students will use the paint and brushes from the ornament paintings to create the stamped wrapping paper.
Use the paints and brushes that are already out. When the first kids are ready with their stamps, stop the class for a moment and show them how to make pattern designs using the stamp you made.
- Choose a color and gently paint a stamp surface with it.
- Look at the paper and decide where it will go.
- Gently press down and then press a little harder. Don’t let it slide around.
- Paint the stamp again with the same color OR
- Press the stamp onto a paper towel and then wash gently with a cleaning brush and water
- Press the stamp again onto a paper towel to dry, and then start with a new color or a new stamp.
-
Extra – Stars!
You can also use a small square of foam to make short lines. Just paint one edge (edge must be straight) and press. You can make a snowflake/star by making an X with two line stamps, and then adding one more line across it to make a 6-pointed star. These look great in light blue.
LEARNING TARGETS
Students know how to create an oil pastel drawing
M A T E R I A L S
- 11″ x 17″ Copy Paper
- Oil Pastels
- Blender sticks
- Paper towels
6.1 color
This is an extra project for early finishers. If you don’t get to this step, that is ok!
Draw a long looping line around and around to make some shapes. Use oil pastels to add lots of bright colors inside each shape. Blend two colors or a color and white in every area. Blender sticks (stumps) are helpful too. Write students names on each sheet of paper and set aside.
LEARNING TARGETS
Students know how to clean up.
M A T E R I A L S
- Sink
- Waste baskets
- Well-lit spot for photos
- Camera or phone-camera
- Paper towels
- Cleaning wipes
7.1 clean
- Empty water containters
- Super-wash brushes if used
- Put art supplies away (sop up runny paint before disposing of palette paper)
- Wipe tables & toss trash
- Remove any smocks (last)
- Check for items on floors and tables
7.2 photo
- Try to get photos of your student’s artwork. Find a good spot for quick lighting without highlights or shadows from your hands and device. Ideally in-between two strong lights on each side.
OBJECTIVES
- Practice and improvement using visualization skills
- Understanding how how 3-D objects have different views
- Accomplishment by creating 2 finished projects
- Fulfillment by self-expression and bring useful art gifts home
TROUBLESPOTS
Muddy colors – Red and green are opposites, and will make brown when mixed even a little bit. They should be completely kept apart during the painting time. Clean a brush before switching, and only mix red or green with white to keep your colors bright and clean.
Row stamping – kids sometimes don’t understand pattern, and will make all their stamps in rows like words and sentences. Be watching for it, and help them space out the images if you can. If they want to make it a certain way, don’t ruin the experience by forcing anything. Fun is the biggest goal! If you have a happy artist, then they will continue creating. Someday they will be ready for new instruction.
Sleeves in the paint – Pushing sleeves up only keeps them clean for about 30 seconds before they slip back down and fall into paints. Take a moment to roll the kids’ sleeves so they stay up for painting if you don’t have smocks with sleeves and cuffs.
ART WORDS
Sculpture (3D art) – When we paint something like an ornament, it’s like a sculpture and you can see it from any side. That means you need to paint all the sides so there’s not a back or front to it.
Opposite colors – Red and Green are opposites. If they mix, they stop being bright and turn into brownish colors. That’s what opposite colors do. When you keep them clean by not letting them mix, they can look very festive next to each other. They look good together so we call them complimentary colors sometimes.
CLASSROOM
PREP
For ornaments you’ll need:
- Gesso or white paint. Gesso is best but white acrylic works good too. If you only have high quality white, you can add a small amount of water to make it thinner and it will cover more area.
- A mini roller from the hardware store. Because of the small diameter roller, it soaks up much less paint so you use less. Or you can use a large regular paintbrush.
- Lots of flat cardboard.
- A metal straight edge and sharp utility knife
Steps to prime and cut cardboard for the project:
- Take some boxes and cut and/or open them up so you can have several large pieces of flat cardboard.
- Use gesso, (or white paint), and the mini-paint roller, to cover the cardboard with a thin layer of white primer. It won’t look solid white, but that’s fine.
- Let it dry and then paint the other side with white. Let that side dry too.
- Cut into 4″ x 4″ squares.
- Make one 2″ slot in each square, from the center of one edge, to the center of the square.
- Use another piece of cardboard on it’s edge as a guide to make the slot the right width.
The slots are for connecting the two pieces by sliding the open end of two slots together to form a stand-up art surface or an ornament. Have enough so each student has 2 squares, and a few extras, just in case.
What your room needs
Here are your printable lists and room prep instructions.
Opens in new window
CLASSROOM
MATERIALS
- 11×17” Copy Paper
- 8.5 x 11” Copy paper
- 4B pencils
- Erasers
- Markers
- Oil pastels
- Blender sticks (stumps)
- Clipboards
- Paper towels
- 2 Squares of cardboard that are 4 x 4”
- White gesso
- Mini paint roller OR
- Large paint brush
- Flat cardboard
- Metal straight edge
- Box cutter (FOR TEACHERS ONLY)
- Hot glue
- Masking tape
- Brushes
- Scissors
- Yarn
- Bowls
- Acrylic paints
- Water container
- Craft foam
- Butcher block paper
PREVIEW
Week 18: Gingerbread houses
This is one of our favorite and most popular lessons, because it’s so much fun. There is a lot to it, but it is always worth the effort. Artists love to show off with a “regular” kind of project, putting their artistic touch to it. We use milk cartons (old style), cut and glued to cardboard, for the mock gingerbread part. We cover the entire thing with icing, so there’s really no gingerbread to it anyway. Then everyone decorates it to complete craziness with candy features and trimmings.
Week 19: Winter Fun
Students will Students will learn about snowflakes, first drawing some snowflake designs, and then painting a large snowflake in tempera paint. They’ll end their lesson with a choice of working on some holiday cartoons or doing a pastel of lights at night.