
Painting
Each lesson Plan focuses primarily on one of the 4 Cornerstones of Art:
Drawing | Painting | Color | Style
OVERVIEW
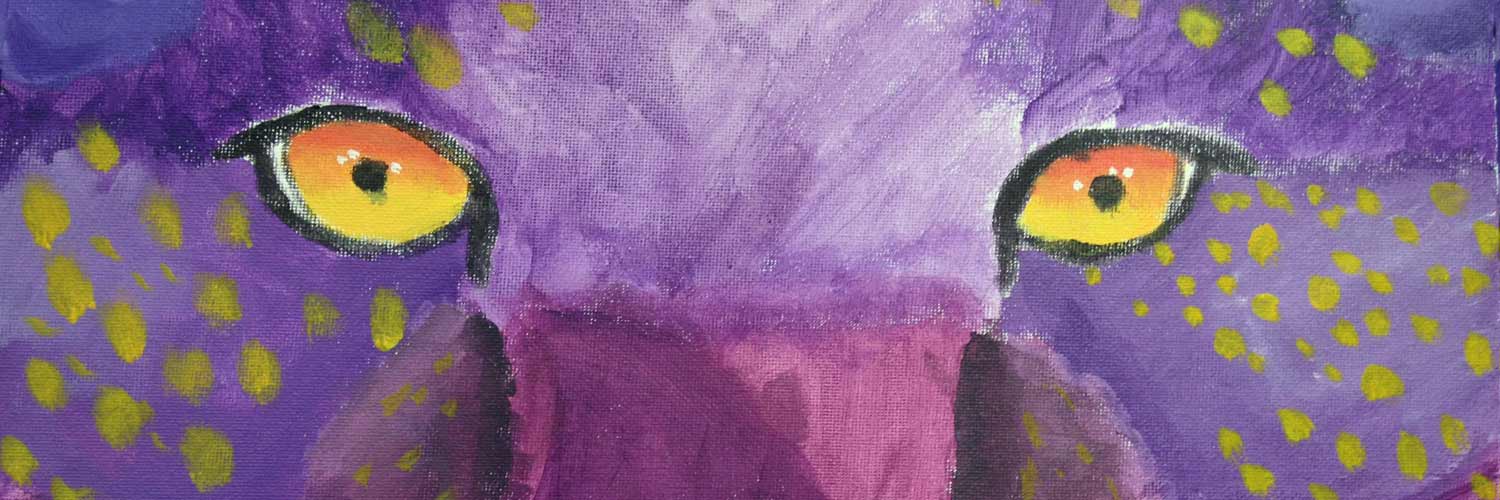
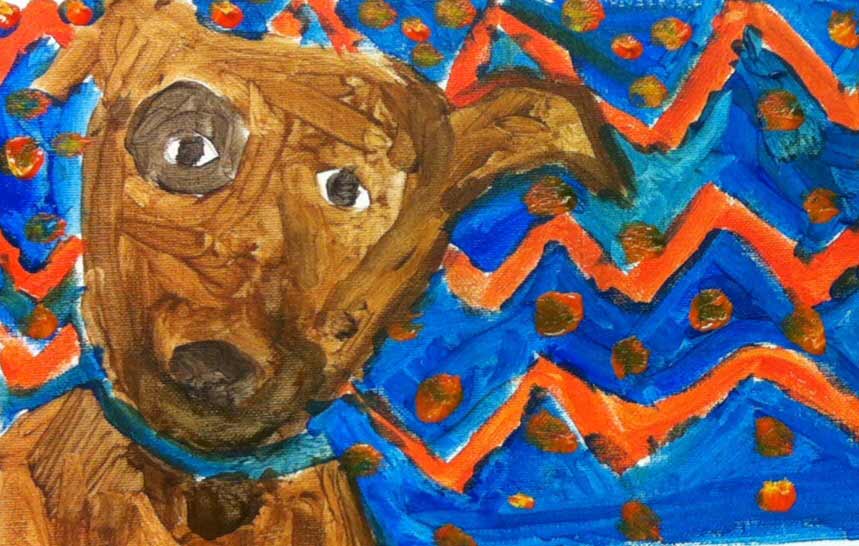
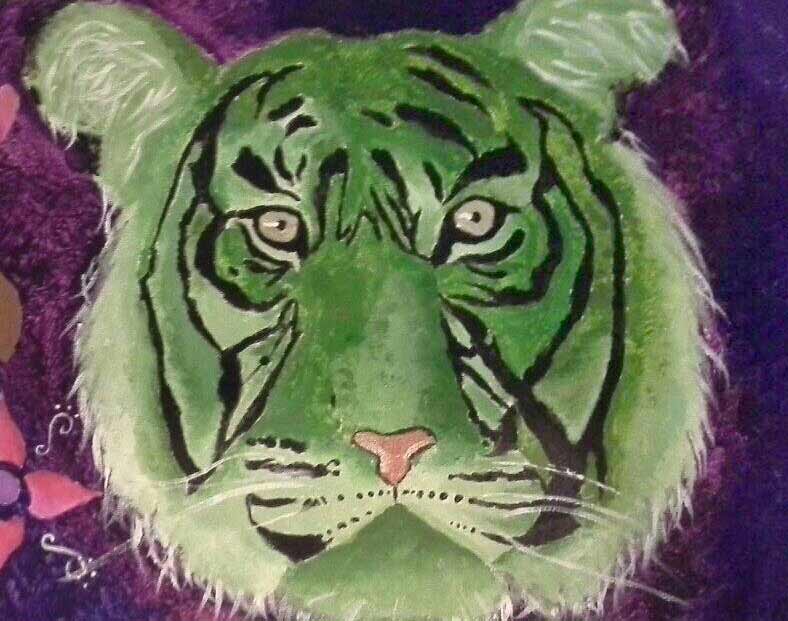
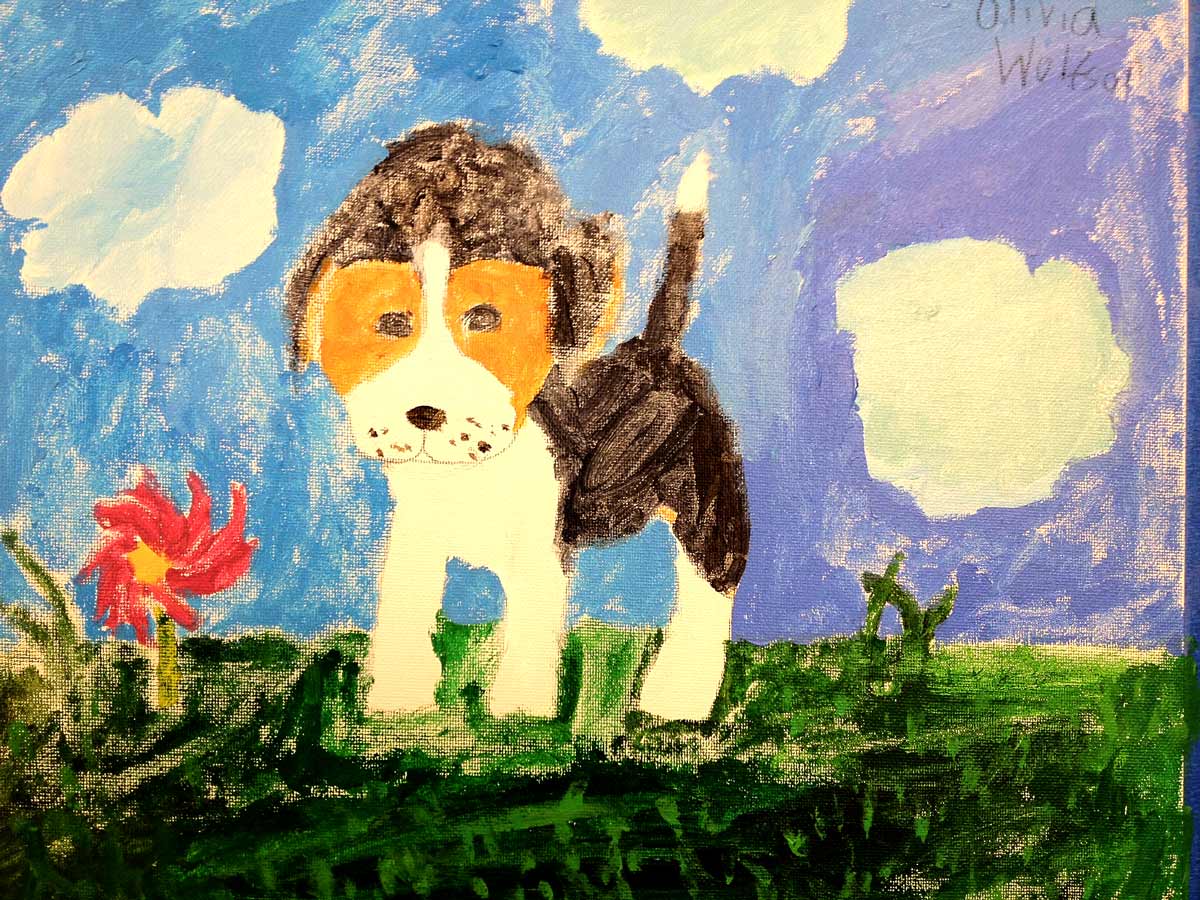
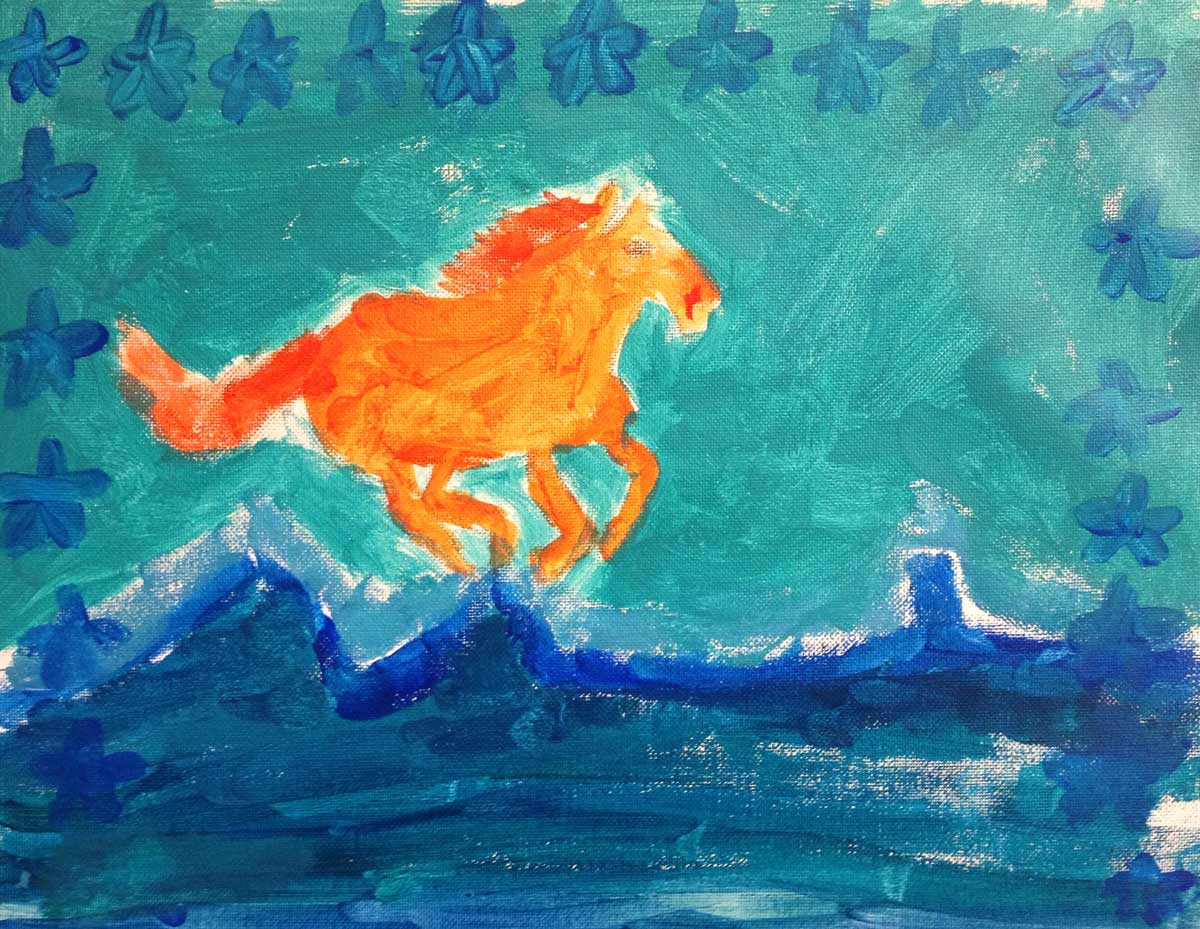
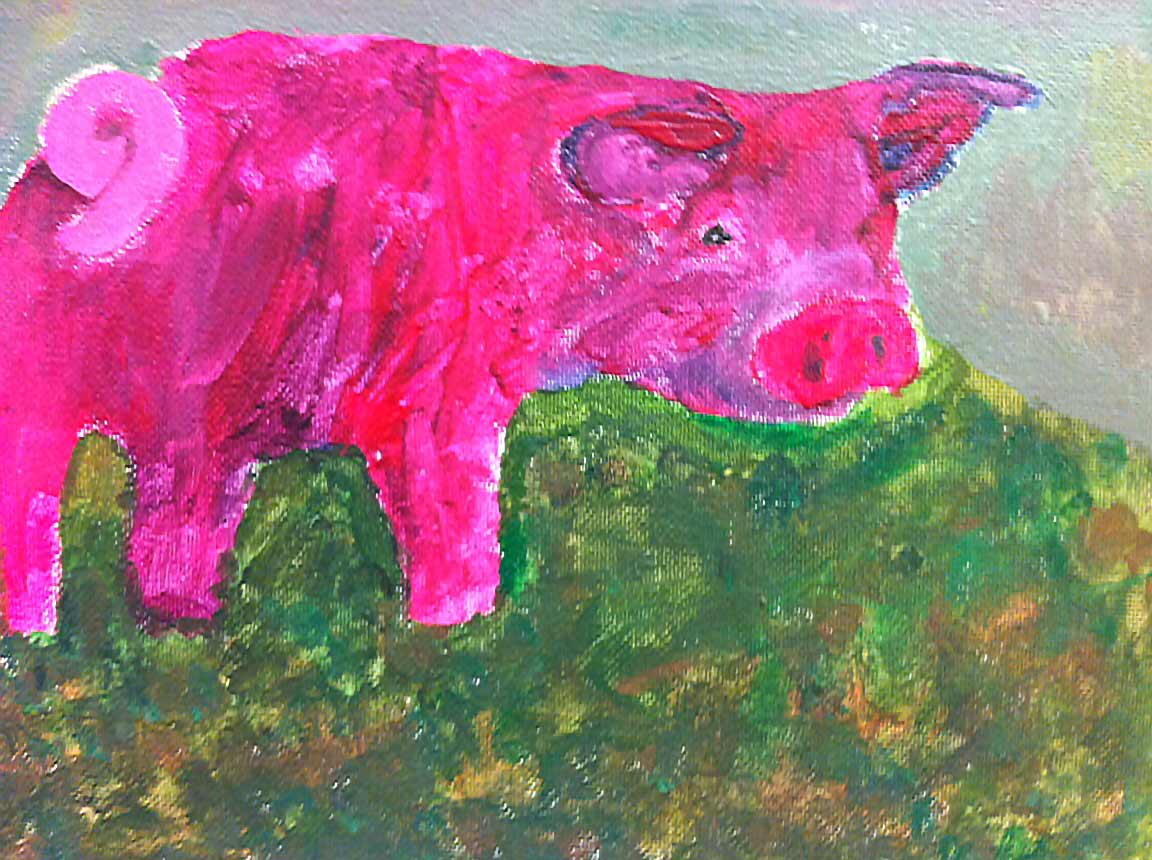
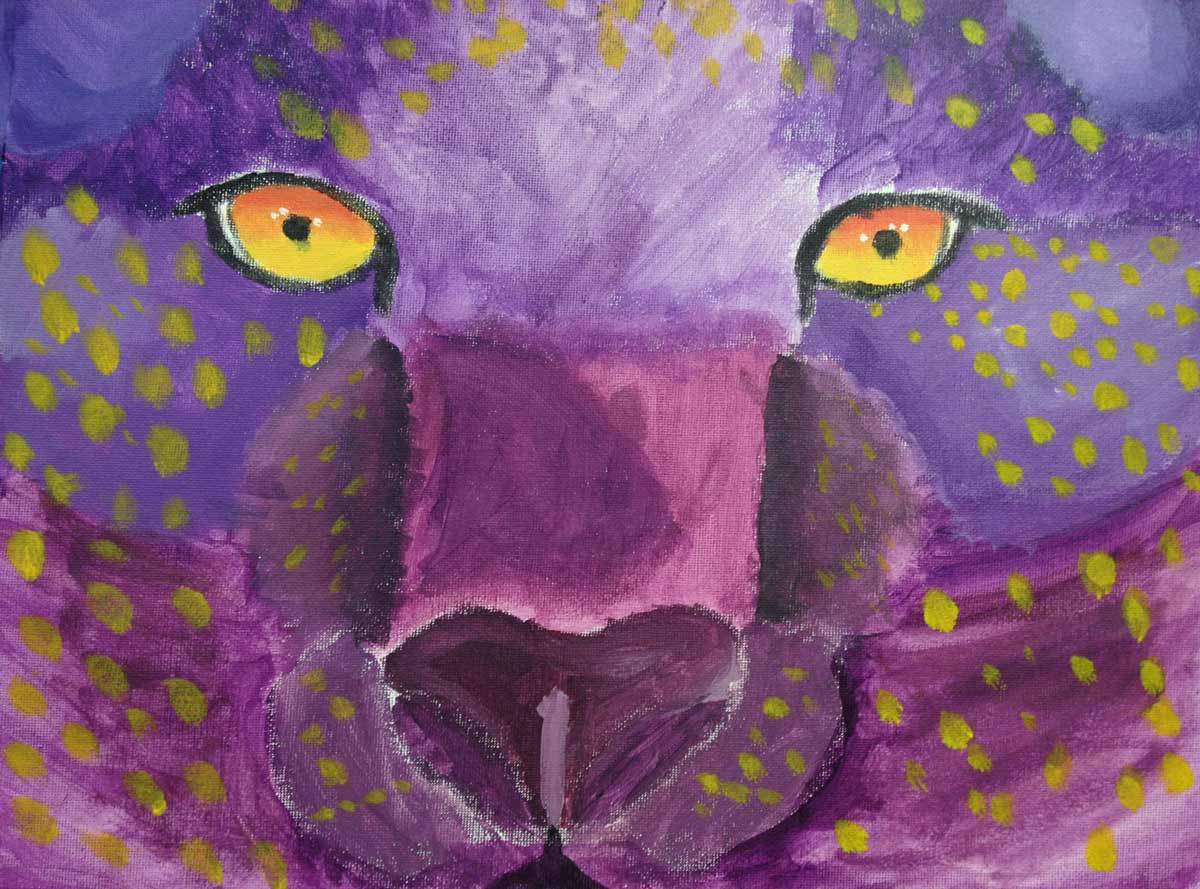
This week everyone will continue on their animal paintings using the complementary color schemes and mixing opposites for shadow colors. Paintings should be finished this week. There is a fun drawing in the round game for early finishers.– – –
Grades 3 – 5
Week of March 16 – 20
1 Hour & 45 Minutes
Lesson At A Glance
A brief overview of each step. Buttons jump to each section for detailed information.
30 Min – Students work on complement animal paintings
35 Min – Everyone works to complete their animal painting
15 Min – Early finishers can form groups for a drawing game.
Extra– Any extra time may be filled with artists’ choice
2 Min – Everyone Helps
SCROLL & TEACH
LESSONPLAN
Each section is a different color. Read over once and then you can SCROLL & TEACH using any device you like. It’s designed to work best with your phone.
LEARNING TARGETS

Students know how to set up their work area for painting with acrylics.
M A T E R I A L S
- Acrylic paints
- Brushes
- Palette pad
- Water container
- Smocks
- Paper towels
Brushes should be nylon for springiness and durability. Round brushes are the most versatile.
Paint pigment list:
- Napthol or Pyrrol Red
- Hansa or Light Yellow
- Pthalo Green (blue shade)
- Cyan or Cerulean Blue
- Ultramarine Blue
- Dioxazine Purple
- Magenta
- Burnt Umber
- Raw Sienna
- Titanium White (professional grade only)
1.1 setup
Create a neat work area.
- Water should be near the palette
- Tubes should not be standing up because they fall into your work or palette
- Palette, brushes, water, and paper towel should be on the right if you are right handed.
- Set up your reference so you can see it easily without having to turn your head or stand up.
- Tape your canvas to a board
- Smocks
- A table or floor easel may be used if available

CREATIONS - tap here to open
Use the Student Instructions printout below to distribute to your Creations students. Tap the image to open the PDF in a new window.
Artists’ Choice Painting. Week two of two.
Overview: Students will continue their painting of their own choosing: Artists’ Choice. They should also review and follow the 7 Stages of Art
No prints needed
LEARNING TARGETS
Students know how to complete an acrylic painting
M A T E R I A L S
- Acrylic paints
- Brushes
- Palette pad
- Water container
- Smocks
- Paper towels
2.1 review

- Work from dark to light – Sunrise method.
- Look at your reference a lot!
- Mix your colors – do not use tube colors.
Also review the IRPSGLAC method. See if your students can remember the acronym and what each letter stands for.
- Inspiration
- Reference
- Practice
- Setup
- Guide Lines
- Art!
- Cleanup
2.1 paint
Walk around and help your students, asking for permission to give any suggestions. Be on the lookout for disatisfaction, which is sometimes hidden by students. Asking, “Is there anything you’re not happy with right now?” is a good way to begin.
LEARNING TARGETS
Students know how to handle a palette knife
M A T E R I A L S
- Acrylic paints
- Brushes
- Palette pad
- Water container
- Smocks
- Paper towels
- Palette Knives
- Sketch paper or copy paper
- 2B Pencil
- White Eraser
3.1 draw
Quietly give students a short project, making either a Spring-themed cartoon or a simple Spring drawing they would like to do. Explain that they are waiting for enough students to finsih so you can do a little demo.
3.2 demo
Explain that next week is a palette knife painting project, so practicing using the leftover paints they have is a great use of time and resources. You can show a bit of technique, and/or explain using the teacher talk below.
You can use a sheet of canvas, or a sheet of watercolor paper. Students should stay away from the edges so the wet surfaces can be taped or pinned to a wall.
Color is not important at all. This is simply a practice. If you get something you like, write your name on it and we can save it, but otherwise you’ll toss these in the trash when you’re done.
The tip of the knife won’t do much. To make something similar to a brush stroke, let the flat part of the knife hover over the surface so a lot of it touches when you spread. It’s a lot like putting butter on toast.
You can also make lines by using the edge of the knife.
Play around with any palette knives you have and try different pressures; different strokes, and different colors on the knife at the same time. You can scrape hard or make smooth buttery strokes with a light touch. When you finish, you want there to be ridges and bumps of texture in the paint, so don’t finish with scraping.
Only one thing should not be done, and that is pressing down flat, and then pulling straight up. This leaves little pointed peaks of paint. It’s really fun to say, but not much fun to paint over later.
Please Prevent little Pointed Peaks of Paint.”

3.3 practice
This only uses leftover paints and does not have to cover the canvas since we will add more to it later.
Make sure that students only use leftover paints for the following palette knife practice. If they don’t have any leftovers, or just a tiny bit, you may need to help them choose 3 colors, with one being white. Have students put out just enough extra paint to make a few small areas with the palette knife technique. Since this is practice, the paint can be worked with several times before it dries too much. Let young artists know right away to not get out new paints without permission.
LEARNING TARGETS
Students know how to complete an acrylic painting
M A T E R I A L S
- Acrylic paints
- Brushes
- Palette pad
- Water container
- Smocks
- Paper towels
4.1 paint
Encourage students and make the rounds, helping individuals as needed by asking questions and giving your honest responses.
When several students have completely cleaned up (including super-washing their brushes), you can group them for the artist’s game in STEP 5: Crazy Creatures!
The uncured paint can easily adhere to other surfaces and form an inseparable bond, ruining both surfaces.
4.2 cleanup
- Wash hands
- Super-wash brushes if used
- Put painting supplies away
- Wipe tables & toss trash
LEARNING TARGETS
Students know how to collaborate and have fun with other artists.
M A T E R I A L S
- Crazy Creature starter Pages PDF
- 4B Pencil
- White Eraser
5.1 print
Worksheets
Crazy Creature
Print enough several of these starter pages on regular 8.5″ x 11″ copy paper.
Let them choose one. Or you can also let them choose blank copier pages and start it themselves.

3 Pages – Opens in new window
5.2 print
Reference
Creature Parts
Here’s a bunch of parts for kids to look at for ideas.
Make sure everyone who wants to see one has access. No more than two people should share between them.

1 Page – Opens in new window
5.3 explain
You can hand out the PDF starter pages or just let students start the pictures themselves. Each student gets a starter page or blank regular sized copy paper page. Use an dark pencil like a 4B.
If many in your class is doing this you can play music, and pause it as a signal to stop and pass the drawings every 2 or 3 minutes. Keep an eye on the progress, so you don’t rush anyone, or have them get bored waiting either.
RULES
- Make it nice. Nothing can be drawn that any parent would be unhappy about
- Make it good. Begin each turn by thinking and visualizing. What will look cool on this new creature?
- One part each turn. You can only draw one creature part each turn. A nose is one part. A pair of eyes can be one part too, but a head is many parts.
- Original parts. You cannot draw the same thing twice
- Be considerate. You cannot mess things up on purpose
- Take your time. It’s not a race.
Everyone should write their name on the first paper that they are starting with, and pass to the right/receive from the left.
I’ll be playing music, and when it stops, you’ll pass your paper to the right, and get a new one from the left.”
5.4 PLAY
Stop whenever you like. After you’re all finished, students get to keep the one with their name on it. You can let them all vote on the best one, since they all worked on it together. If you have the resources, you can make everyone a copy of the best one.
Students can trade their originals with each other if they want to.
STEP 6. Artists' Choice
Students who have finished their work will have Artists' Choice timeLEARNING TARGETS
Students know how to independently create artwork
M A T E R I A L S
- 14″ x 17″ Sketch Paper
- 4B Pencil
- 2B Pencil
- White Eraser
- Oil Pastels
- Charcoal
6.1 draw
Anyone who has completely finished their work and cleaned up, may use pencil, charcoal, or oil pastels to express themselves in any way they want.
LEARNING TARGETS
Students know the importance of cleaning up.
M A T E R I A L S
- Paper Towels
- Cleaning wipes
- Sink
- Waste baskets
- Well-lit spot for photos
- Camera or phone-camera
7.1 CLEAN
- Wash hands
- Super-wash brushes if used
- Put art supplies away
- Wipe tables & toss trash
- Remove any smocks (last)
- Check for items on floors and tables
7.2 PHOTO
OBJECTIVES
- Practice and improvement using acrylic paint & mixing colors
- Understanding how complements create darker and duller colors
- Accomplishment in finishing a painting
- Fulfillment from choosing colors & animal subject
TROUBLESPOTS
Potty humor – The drawing in the round can devolve into crudeness if you let it. Appeal to their identity as artists, and set the rules firmly before you begin.
If you quit the game play at the first sign of trouble, it will be much easier to get compliance. Give it a minute and then give them a second chance and try again.
ART WORDS
Complementary color scheme – When colors are on opposite sides of the color wheel or star, they make a nice visual color scheme.
Opposites mixing – Perfect pigment opposites (using the color star) will create duller and darker colors when mixed.
CLASSROOM
PREP
Print all of your PDFs from the lesson plan and cut any references apart as needed.
What your room needs
Here are your printable lists and room prep instructions.
Opens in new window
CLASSROOM
MATERIALS
- PDFs
- Water container
- Smocks
- Paper towels
- Cleaning wipes
- Sink
- Waste Baskets
- Camera or phone-camera
STUDENT’S
MATERIALS
- Acrylic Paints
- Brushes
- Palette Pad
- Palette Knives
- Sketch paper or copy paper
- 2B Pencil
- 4B Pencil
- White Eraser
- Oil Pastels
- Charcoal
PREVIEW
Week 26: Ketchup Day
There should be a lot of half-finished color journals and artwork that students need to finish up. This week we will be reviewing, creating organization, catching up (ketchup… get it!), and thinking about future projects. Students who are completely finished with everything will have artists’ choice. We also look at the rise of the Impressionists and their significance in art history.
Week 27: Spring Break