
Style
Each lesson Plan focuses primarily on one of the 4 Cornerstones of Art:
Drawing | Painting | Color | Style
OVERVIEW
A Bunch O’ Boxes project completes the school year program. Everyone must work together as a team and combine a few boxes into a 3D sculpture and/or installation that has a theme and incorporates everyone’s efforts and style into one final work. Classes are divided into teams of 5 or less so that everyone can work at once. Boxes are covered in white paper and painted for display all summer or for an art show. It’s also a fun day for an end of year party!– – –
Grades 6 – 12
Week of May 9 – 13
1 Hour & 45 Minutes


SCROLL & TEACH LESSON PLAN
Don’t worry about rewriting anything. Just spend a few minutes reading the lesson plan and printing out your PDFs. Then check out the READY, SET, GO! section and print your prep-page, which includes checklists and an “at a glance” outline of the lesson so you can stay on track when you’re teaching. Set out the materials from the list on your prep page and you’re ready.
That’s all you need to know. Use your smartphone to Scroll & Teach!
Lesson At A Glance
A brief overview of each step. Buttons jump to each section for detailed information.
5 Min – Narrow it down to one idea
12 Min – Cover with a layer of white to work on
5 Min – Set up for painting
5 Min – Visualize areas for artwork
30 Min – Take turns if needed. Be considerate.
2 Min – Everyone helps
10 Min – Have a party or finish with Artists’ Choice!
SCROLL & TEACH
LESSONPLAN
Each section is a different color. Read over once and then you can SCROLL & TEACH using any device you like. It’s designed to work best with your phone.
LEARNING TARGETS

Students know how to brainstorm ideas for making artwork
M A T E R I A L S
- 14″ x 17″ Sketch Paper
- Pencil
- iPad or TV to display images
1.1 display
That means you are not the artist today. You are part of a team of artists. What you want may not be what the group decides upon, and most likely everyone will have to compromise to some degree to make this work. Many jobs require artists to work together like this, so it is good practice.
It also brings new ideas into your own work, which is always good for artists.
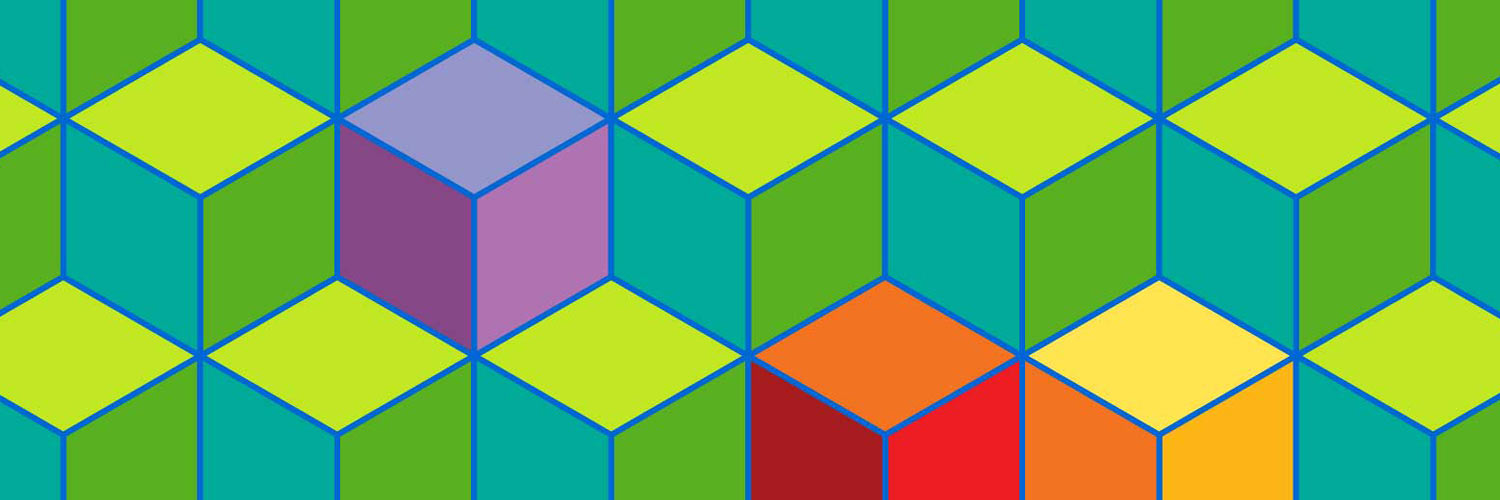
You’ve seen paintings and sculptures, but art can also be more than that, taking up not just space, but adding to a space like a room or garden. This is called an installation. It’s more than a sculpture, but less than architecture. Sometimes artists created installations that is architecture but with no function, just form. In others words, there’s no use for it other than to enjoy it.
Let’s look at some installations on the screen, but keep in mind that you can’t really judge any of these unless you are there and experience the actual space and art together. But it will give you an idea of what we’re talking about.”

Pinterest Gallery – Installation Art
Tap the icon to the left to open our special Pinboard showing examples of artwork to display to your class. See our Article for making Pinterest work on larger displays. You can also use a laptop or large tablet and gather everyone around like you’re using a book.
1.2 plan
First have everyone make their own private list of 3 ideas. They should be written down.
Then have everyone make suggestions as a group. Write all the ideas down on a board or screen so everyone can see each idea. Circle ideas that can be combined or seem to be variations of the same basic thing.
Large classes may need to be divided into smaller groups of 5-6 for working, or even less, depending on the idea they come up with. This can also be helpful if you have groups who are excited about different ideas. Small group projects can even be joined in a larger group at the end, or spread out around the room in some way.
It’s very possible to come up with ideas that will need to be hung on the wall or ceiling. You’ll have to figure out a way to attach them. Since they’re light weight, it should be doable.
CREATIONS - tap here to open
Use the Student Instructions printout below to distribute to your Creations students. Tap the image to open the PDF in a new window.
Collaboration
If you have two or more advanced students, they can create their own version of a collaborative installation work. Otherwise they can join the larger group.
Alternatively, if advanced students have a project they’re wanting to finish, allow them to work.
No need for Creations Student Instructions and Reference Materials today.
Use this button to jump down to the preparation section.
LEARNING TARGETS
Students know how to collaborate as a group to plan a project.
M A T E R I A L S
- 14″ x 17″ Sketch Paper
- Pencil
2.1 vote
Voting procedures that work
- Everyone gets 2 votes for the first round. Take time to decide before the vote because you can’t change your mind afterwards
- First vote
- Select the top 2 or 3 winners
- Everyone should take a moment to consider
- One vote per person for the final vote
Sometimes it’s good to have an “I can’t live with that idea vote” if you have a severely divided class. The purpose of this project is to work as a group, not to get what you want. However, you don’t want someone to be horribly angry, even if they are only trying to be in control.
Instead, let the rest of the class collaborate, and take the person aside for a moment. Do not become angry, no matter what the student says. Causing anger is a lower form of control, so they’ll work to make you lose it. Speak with respect, not condescendingly, and give the student a simple choice.
“This project is not about anyone getting their own way, so what you want is just not acceptable unless everyone agreed to do it that way. The others are not rejecting you, they just voted on something else they want for this one project. [pause] So, you can be angry and do your own pencil drawing all by yourself, or you can help everyone do a really good job on the group project, and become a leader in the effort to make it the best it can be. Which do you want?”
You can allow them a moment to themselves to consider their decision. Let them do what they decide without shame either way, even encouraging the drawing project if they go that route. Allow them to return to the group at any time.
Use this button to jump down to the preparation section.
LEARNING TARGETS
Students know how to collaborate as a group to make a piece of art
M A T E R I A L S
- Boxes (all sizes)
- Wide masking tape
- Hot glue (teacher uses)
- Box cutter knife with a retractable blade (Keep in your pocket at all times not in use by you alone)
3.1 build
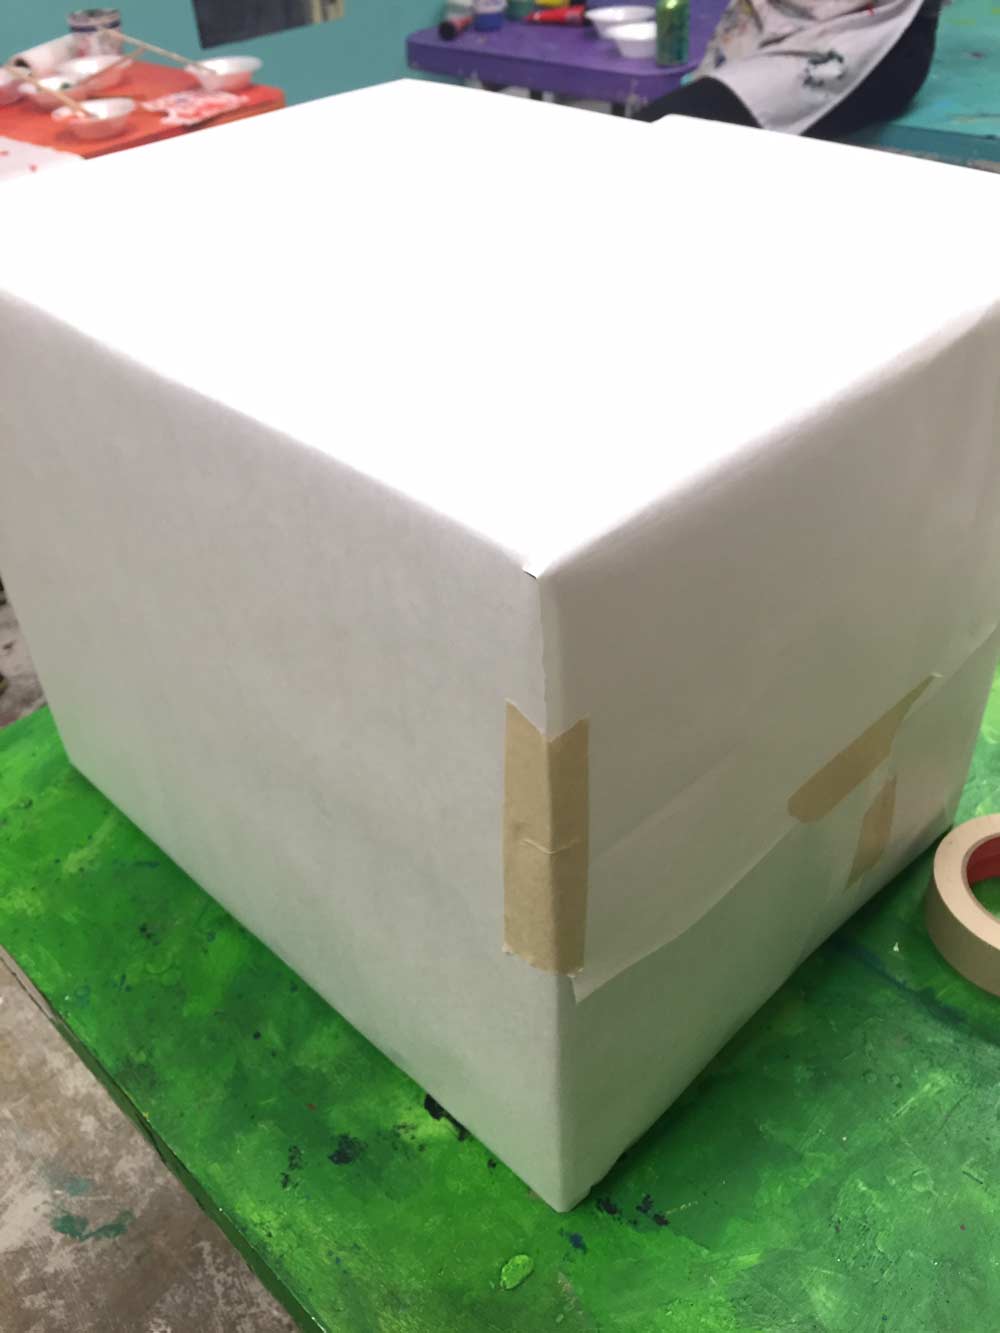
Secure the boxes on all sides and tape shut. Use plenty of hot glue (used by teacher and assistant only) and masking tape to connect the blocks together.
Press the tape well.
You can use packing tape, which is usually stronger, but it will not take the paint, so only use it for the boxes and then you must wrap them with butcher paper afterwards.
Hot glue does not take stress, so it should only be used for light-weight decorations or very small boxes. Hot glue also becomes weak if it is moved at all during the cooling process.
Use this button to jump down to the preparation section.
LEARNING TARGETS
Students know how to collaborate as a group to make a piece of art.
M A T E R I A L S
- White Butcher Paper
- Large Masking Tape
- Scissors
4.1 wrap
Cut sheets to match each side, and tape along each corner all the way along each edge.
Only masking tape will be paintable. If you can find white, that looks best.
Duct tape is USELESS on porous surfaces such as paper and boxes. Do Not Use It!
Use this button to jump down to the preparation section.
LEARNING TARGETS
Students know how to set up their work area for painting with acrylics.
M A T E R I A L S
- Acrylic paints
- Brushes
- Disposable plates or trays
- Water container
- Smocks
- Paper towels
Brushes should be nylon for springiness and durability. Round brushes are the most versatile.
Paint pigment list:
- Napthol or Pyrrol Red
- Hansa or Light Yellow
- Pthalo Green (blue shade)
- Cyan or Cerulean Blue
- Ultramarine Blue
- Dioxazine Purple
- Magenta
- Burnt Umber
- Raw Sienna
- Titanium White (professional grade only)
5.1 Prep
Ask several people to go get a couple of water tubs filled (you don’t need many), and others to gather smocks. That way you have two or three groups in different areas so you don’t get backed up with lines.
We like to use disposable plates or takeout trays for palettes that can even be passed around. Have students put all the warm colors on one and cool colors on another one to keep the colors bright.
Use this button to jump down to the preparation section.
LEARNING TARGETS
Students know how to stop and visualize what they’re going to do
M A T E R I A L S
- Acrylic paints
- Brushes
- Palette pad
- Water container
- Smocks
- Paper towels
6.1 imagine
Make sure it fits within the theme!
Remind artists to be considerate and have fun!
Use this button to jump down to the preparation section.
LEARNING TARGETS
Students know how to collaborate to paint a piece of art as a team
M A T E R I A L S
- Acrylic paints
- Brushes
- Palette pad
- Water container
- Smocks
- Paper towels
7.1 create
Be mindful of the other artists working on the piece.
Use this button to jump down to the preparation section.
LEARNING TARGETS
Students know the importance of cleaning up.
M A T E R I A L S
- Paper Towels
- Cleaning wipes
- Sink
- Waste baskets
- Well-lit spot for photos
- Camera or phone-camera
8.1 clean
- Wash hands
- Super-wash brushes if used
- Put art supplies away
- Wipe tables & toss trash
- Remove any smocks (last)
- Check for items on floors and tables
8.2 photo
LEARNING TARGETS
Students know how to celebrate their hard work
M A T E R I A L S
- Party Supplies
9.1 party
Use this button to jump down to the preparation section.
OBJECTIVES
- Practice and improvement working as a team
- Understanding how to compromise for the good of the end result
- Accomplishment in creating a large conceptual installation work
- Fulfillment by by having input
TROUBLESPOTS
Conflicts – This is a very hard concept at any age, but especially for the younger ones. The purpose is to practice being part of a group decision. A group decision is not about what any individual thinks, no matter how strongly, but what is acceptable to everyone on some level. A conflict always means someone is putting their own agenda in front of the group. However, the main thing is always to enjoy art, so be careful in dealing with conflicts and explaining it to the entire group instead of singling any one person or group out from the others.
See the tip in STEP 2
ART WORDS
• Collaborate – When artists work together on a team project, we call it collaborating, or a collaborative work.
• 3D & Sculpture – When any artwork is viewable at more than one angle, and the nature of the work changes when viewed from those different angles, it is a 3D or sculptural form of artwork. 3D work utilizes the different viewpoints to maximum effect and sometimes creates an environment.
• Installation – Any 3D artwork that a viewer physically enters or feels like is part of the architecture around them, is a form of installation work.
CLASSROOM
PREP
Print all of your PDFs from the lesson plan and cut any references apart as needed.
What your room needs
Here are your printable lists and room prep instructions.
Opens in new window
CLASSROOM
MATERIALS
- iPad or TV to display images
- Water Container
- Smocks
- Paper towels
- Cleaning Wipes
- Camera or phone-camera
- Boxes (all sizes)
- Wide Masking Tape
- Hot Glue
- Box Cutter with knife with a retractable blade (Keep in pocket. Teachers only)
- White butcher paper
- Scissors
- Disposable plates or trays
- Water container
- Smocks
- Paper towels
- Party supplies
STUDENT’S
MATERIALS
- Acrylic Paints
- Brushes
PREVIEW
Week 39: Cartoon Day
An entire class devoted to learning the basics of cartooning. Students develop characters and learn how to make different facial expressions using “keysigns” (symbols that convey extra meaning or action).