

OVERVIEW
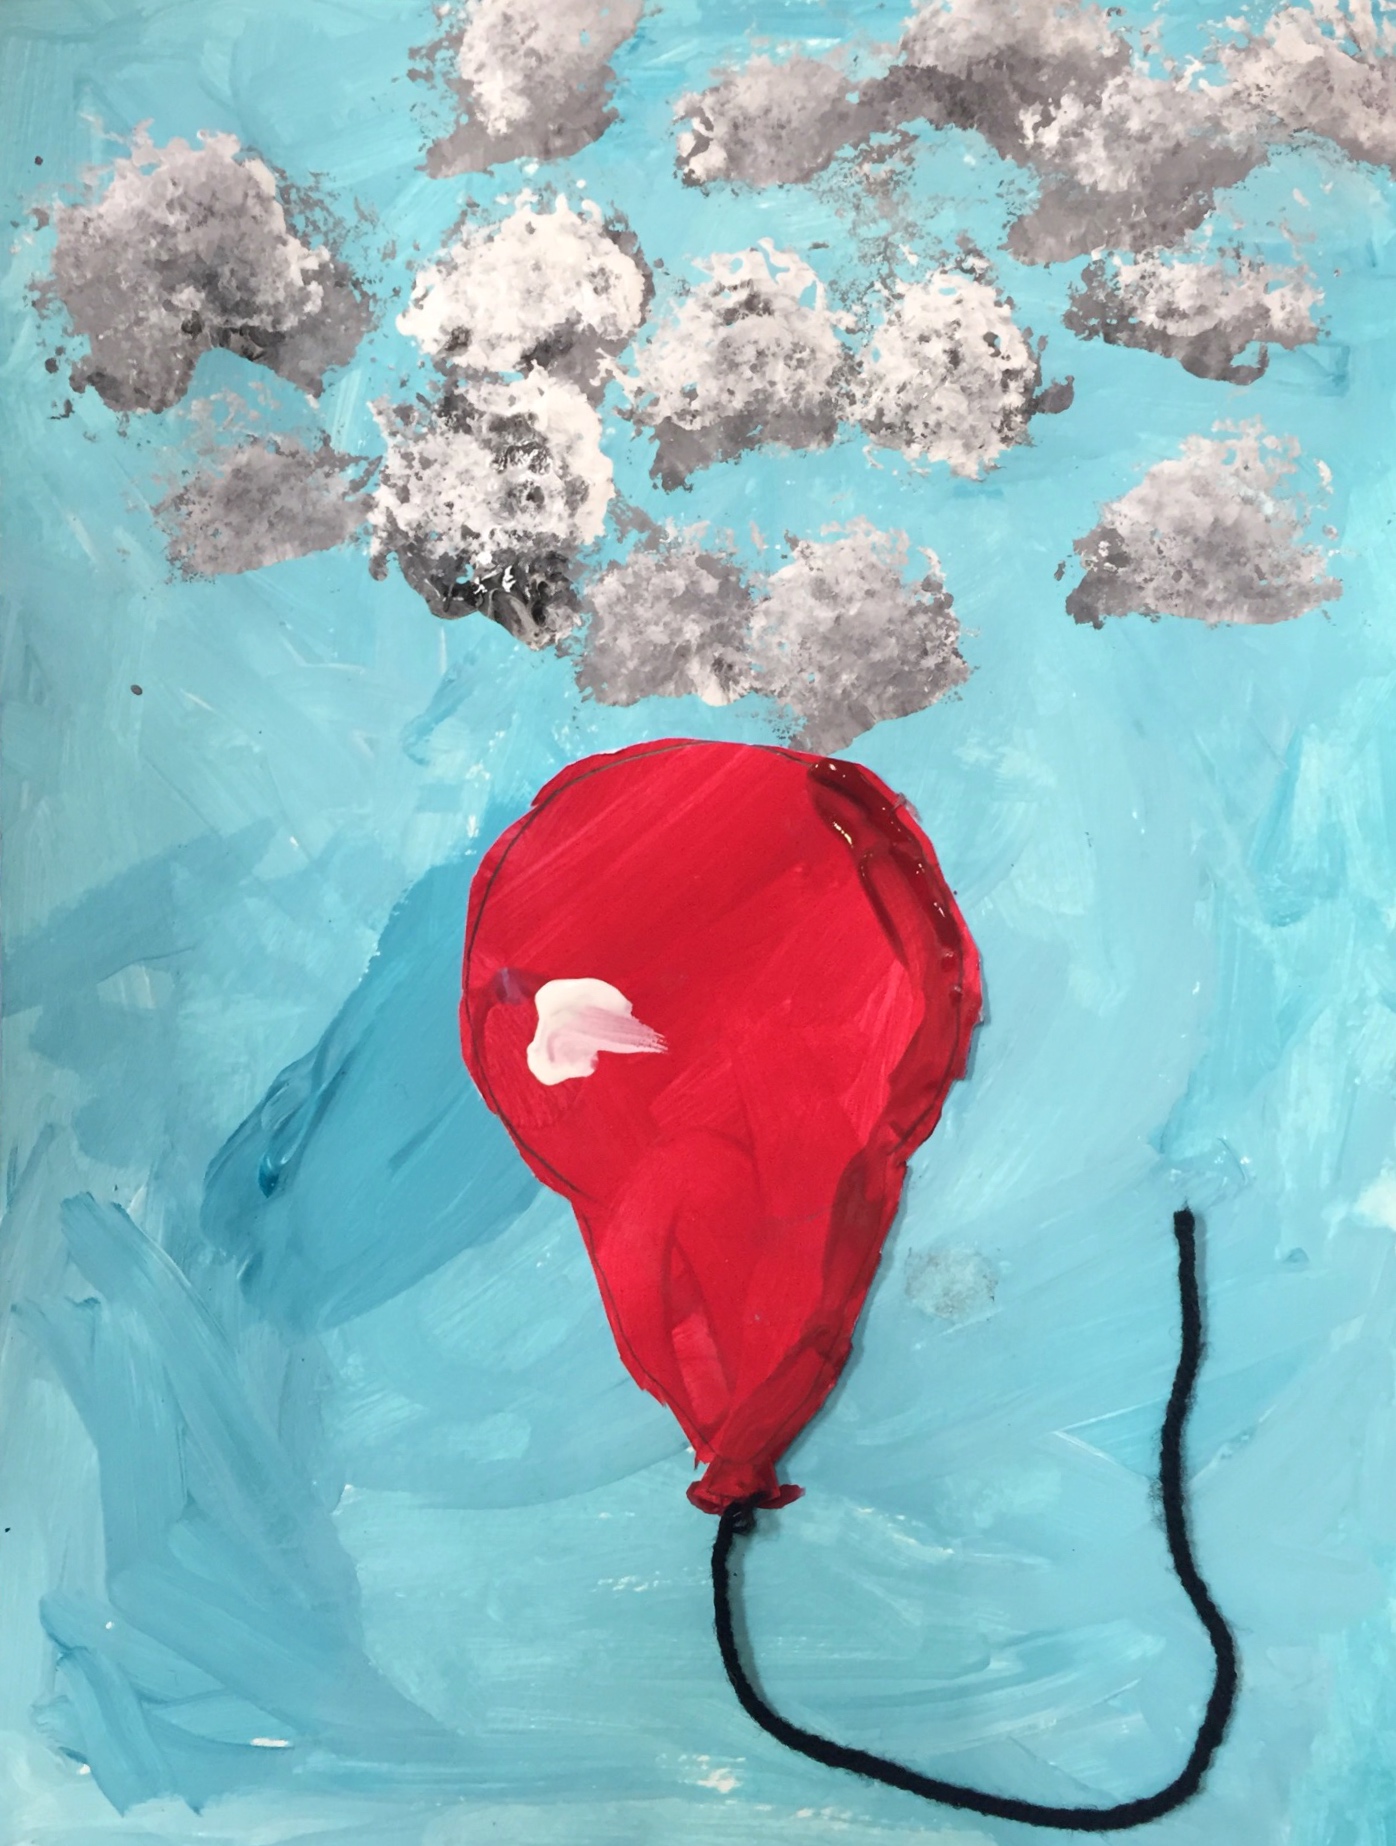
Balloons and clouds are used to teach shadows and highlights. First, the balloon pictures are painted with the “local color”, bright red. Then a darker red is added for a shadow on one side. A highlight is observed on a real balloon, so students can use real life to improve their artwork and make a highlight. Sponges are used to make clouds and cloud shadows in the background.– – –
Grades K – 2
September 2 – 6
1 Hour & 30 Minutes
Lesson At A Glance
A brief overview of each step. Buttons jump to each section for detailed information.
10 Min – Color dancing with circle templates.
5 Min – Explain highlights and shadows
10 Min – Use sponges to make stamped clouds
5 Min – Students draw their balloons
15 Min – Cut balloons & string, add shadows, and finish clouds
10 Min – Everyone glues their balloons & signs their work!
5 Min – Everyone helps
SCROLL & TEACH
LESSONPLAN
Each section is a different color. Read over once and then you can SCROLL & TEACH using any device you like. It’s designed to work best with your phone.
LEARNING TARGETS

Students learn to express themselves through creating from their imagination.
M A T E R I A L S
- 11″ x 17″ Copy Paper
- 2B pencil
- Eraser
- Markers and/or oil pastels
- Blenders (stumps)
- Paper Towels
1.1 greet
Kneel down so that you are on their level. Bending over emphasizes the differences in your height, while kneeling makes them feel more important. Have tape and marker ready so you can stick some tape on the table by each student and write their name on it as they sit down.
1.2 choice
Everyone should take their time with the work and make a finished piece of art. Limiting the paper can also help kids focus on the work. If someone finishes in super-fast time, ask them what more they can do to the existing paper. Ask again several times – unless they appear overly frustrated; then you can allow them to move on to a new work.
Use this button to jump down to the preparation section.
LEARNING TARGETS
Students know how to make different types of lines with markers
M A T E R I A L S
- 11″ x 17″ Copy Paper
- 2B pencil
- Eraser
- Markers
- Paper Towels
2.1 Print
Reference
Circle Templates
4 Circles to be printed on card stock and cut out for tracing templates.
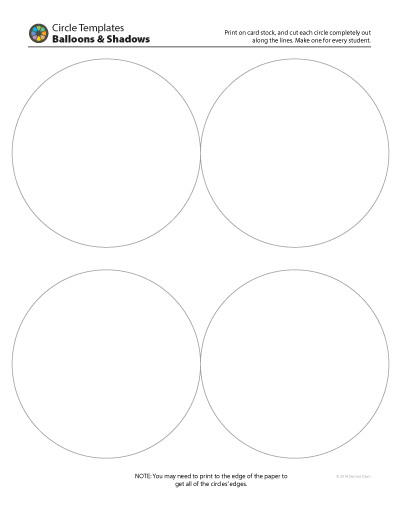
1 Page – Opens in new window
2.2 draw
Pass out the pre-made circle template above, and let students write their name on them (or give numbers if you plan to re-use the templates).
Start off by letting everyone choose four colors that look nice together, and then set those markers aside.
On 11” x 17” copy paper, have kids place a circle template on the center of the paper. To use these templates:
- Choose your first marker and take the cap off so you’re ready
- Use your other hand to press down on the middle of the circle, so it won’t move around
- Trace a colored line all around the edge of your circle
- Take the paper circle away and set aside
- Draw another, circle just inside this circle, a little bit smaller (use any color)
- Draw another circle just outside and a bit bigger.
- Make more circles inside and outside of the first one.
- Go slowly so you can control your lines.
- Write your name in a corner
Play slow music while they work, to facilitate slower technique and practicing control.
Use this button to jump down to the preparation section.
LEARNING TARGETS
Students know how to identify Local Color
M A T E R I A L S
- 11″ x 15″ Watercolor Paper
- half -sized 5.5 x 8.5″ Card Stock Paper
- Pencil
- Water tub
- Large brushes (2 per student)
- Tempera Paint
- Mixing plate or bowl
- Paper towels
- 2 or 3 Red Balloons (optional)
- Smocks
Brushes should be nylon for springiness and durability. Round brushes are the most versatile.
Paints
- RED
- BLUE (Ultramarine or royal blue is best)
- BLACK
- WHITE
3.1 setup
Use watercolor paper if possible, or very heavy paper if that’s not available. The paper we use is 11″ x 15″ and works well for this project. Students should write names on the back before beginning. Also have sheets of card stock cut to 5.5″ x 8.5″ ready (cut regular paper in half). Set several red helium-filled balloons on the table using weights to hold their strings down.
Blue paint and red paint
Students should have a water tub, paper towel, a very large brush, and a mixing plate or bowl with white tempera paint and a little blue (Ultramarine is best). Keep the paints in one area using either a divided plate, or by drawing lines across it with a sharpie marker to make 4 to 6 mixing areas. Otherwise they will use the entire plate to play in with one color.
Place some pure red in another area or in separate bowls to prevent mixing with the blue.
First, we are going to create the Sky color for the background of our painting. Then we’re going to make a big red piece of paper that will become our balloon shape later. We only need one blue and one red to begin this way today. We are using what artists call “local color”. That means whatever main color we are using. This balloon is red, so the bright red is its local color.
Have you ever noticed that things look darker in shadows? Most things have a light side and a dark side on them. The darker side is not getting as much light, so it is a shadow on the object. So when you paint things in art, you also paint darker areas for shadows, and lighter areas for highlights. We’ll add those light and dark parts later”
3.2 Paint
Write names on the back of the paper. Then have them use one of the brushes to mix the blue and white all together and paint the entire sheet of watercolor paper with their sky color. They can have more blue to mix in, if they want a stronger color.
This can be streaky and have more than one shade of blue. Help everyone fill the entire page all the way to the edges.
Set aside to dry.
3.3 Paint
Hand out the half-sized pieces of card stock copy paper (5.5″ x 8.5″). Write names in pencil on the VERY CENTER on the back. Now have them use bright red right out of the bottle to paint this smaller piece of paper all red.
Use a new brush so blue is not mixed in by accident.
Set aside to dry.
Use this button to jump down to the preparation section.
LEARNING TARGETS
Students know how to see shadows on a real life object
M A T E R I A L S
- PDF Balloon Diagram
- Shiny Red Balloon (optional)
- Small lamp (optional)
4.1 print
reference
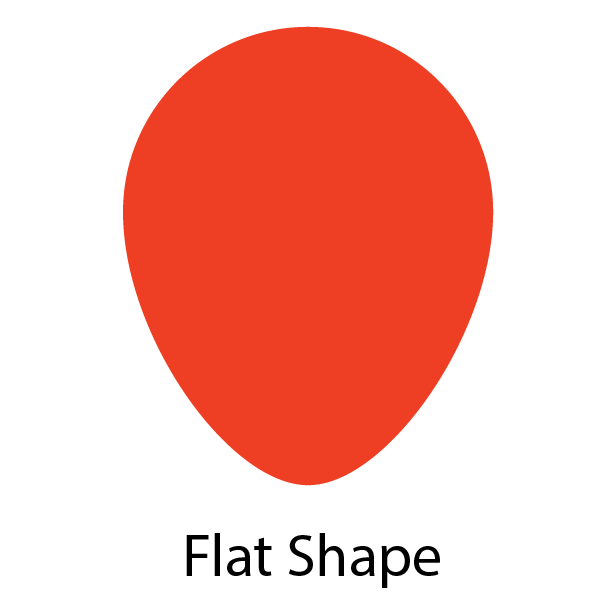
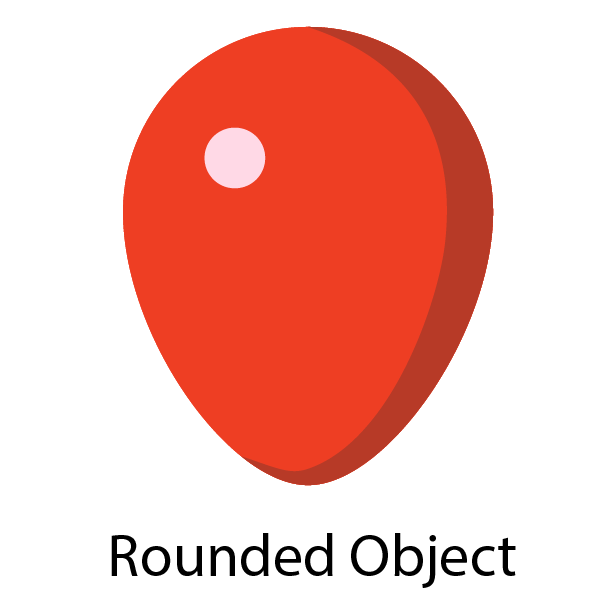
Balloons & Shadows
An example with instructions for how to paint a red balloon with a highlight and shadow.

1 Page – Opens in new window
4.2 Explain
You should also try to use a lamp and a real shiny red balloon to show how it has a darker edge on one side and on the bottom. Then point out the highlight, which is a reflection of the lamp.
Most, if not all, of your students will not see the shadow at first – and maybe even after you point it out. Their brains only interpret the shadow as roundness. They may even tell you that the color does not get darker. Ask them to trust you on this, and try to see it by squinting your eyes. This blurs the vision and makes the lights and darks show up more.
Soft objects, like clouds are different. They have almost no highlights, and their shadows are soft and fuzzy. That makes sense, because a cloud looks soft and fuzzy.“
4.3 Display
The only difference is the shadow and the highlight. Go back and forth between the two images a couple of times.
Use this button to jump down to the preparation section.
LEARNING TARGETS
Students know how to paint in the dark to light technique
M A T E R I A L S
- Tempera Paint
- Make-up sponges
- Brushes
- Paper towels
- Smocks
If you can’t find any makeup sponges, you can use regular sponges cut into cloud shapes, or even wadded up paper towels in a pinch.
5.1 Explain
Talk about how the sponges are fluffy, just like a cloud! This makes them great to paint clouds with.
5.2 paint
Every student should have a mixing area with white, a little blue and a tiny bit of black paint. They should mix this together with a small brush, and then set the brush in the water tub.
There should be two clouds, one on each side of the paper, so that the center can have the balloon. Students can make a third cloud near the top in the center if they want.
Dip the sponge lightly into the paint and use it to stamp on the sky background. You can always get more paint, but you can’t take it back very easily. Don’t make more than 3 little clouds, using the blueish gray color. Remind them as they work that this is NOT the local color of a cloud, but that we’re painting the cloud shadows first! Make the whole cloud shape though. We will add the white later after these have dried.
Clean out the sponges really well and MAKE SURE TO DRY THEM!
Use this button to jump down to the preparation section.
LEARNING TARGETS
Students know how to draw a balloon shape
M A T E R I A L S
- Circle Templates – from STEP 2
- Red Painted Paper – from STEP 3
- Balloon Diagram PDF – from STEP 4
- 2B Pencil
- White Eraser
- Black Yarn
- Safety scissors
6.1 draw
Have your class follow along with these steps. Use the term, “big shape” often. We use this term all through our lessons in older grades.
- Have kids turn their red paper UPSIDE down, so that their name shows. It should be tall, in the shower position, not sideways like a bathtub.
- Place your circle template on the middle of the paper. Then slide it up so that it almost reaches the top of the paper, but not quite. If it touches the top, slide it back down some. Use your non-writing hand to hold it down.
- Trace the top half of the circle in pencil. Don’t do the bottom.
- Set the circle aside & look at the big shape of the red balloon on the printout.
- Notice the circle shape at the top, but how the bottom isn’t like a circle. It comes down almost to a point, like the bottom of a heart, but a little more rounded.
- Try to draw this balloon shape. You can draw more than one line and erase them if needed.
6.2 Cut
You will also need to cut out short pieces of black yarn for the balloon string.
Use this button to jump down to the preparation section.
LEARNING TARGETS
Students know how to paint a shadow
M A T E R I A L S
- Smocks
- Paper towels
- Medium/Small brush
- Make-up sponges
- tempera paint: Black, Red, and White
7.1 paint
Use the red paint and add a small touch of black to mix up a shadow color. Have students look at the PDF diagram and paint the side and bottom of their balloon with the darker color. Finish the balloon by cleaning out the brush really well, and using a dab of pure white paint to make a dot for the highlight.
Get the sponges back out and use the pure white paint to make the bright white fluffy parts of the clouds. Be sure to leave the right side and the bottom the shadow color.
Clean brushes.
7.2 Stamp
Get out the sponges again. Then use pure white paint and stamp on top of the shadow clouds.
To make the clouds look like they have shadows, leave the right edge and bottom edge alone and do not cover these edges with the white. Show the photo below so they see exactly what you mean.

Use this button to jump down to the preparation section.
LEARNING TARGETS
Students know how to add final details to their artwork
M A T E R I A L S
- White Glue
- Kids’ Scissors
- Yarn strings
8.1 Assemble
Glue the balloon to the sky background using white glue. You can use a small piece of cardboard to spread the glue on the back of the balloon, which has some wet paint on it and cannot be set down upside down.
It’s usually good to cover some of the clouds!
Attach the strings by dragging it through the glue and placing it on the bottom of the balloon and going down in either a straight or wiggly line. Use scissors to snip any yarn that’s hanging off the bottom.
Sign your work with a pencil in the bottom corner!
Use this button to jump down to the preparation section.
LEARNING TARGETS
Students know the importance of cleaning up.
M A T E R I A L S
- Paper Towels
- Cleaning wipes
- Sink
- Waste baskets
- Well-lit spot for photos
- Camera or phone-camera
9.1 CLEAN
- Wash hands
- Super-wash brushes if used
- Put art supplies away
- Wipe tables & toss trash
- Remove any smocks (last)
- Check for items on floors and tables
9.2 PHOTO
OBJECTIVES
- Practice and improvement using darks and lights to show shadows and highlights
- Understanding where shadows can be seen on rounded objects.
- Accomplishment in finishing an awesome picture of a balloon in the sky
- Fulfillment by mixing colors and applying them to their paintings
TROUBLESPOTS
Play-painting the palette – Kids will enjoy the fun of mixing colors so much that stirring it around will get larger and larger until they’re using all their paint to cover the entire mixing plate or palette. Prevent this from happening by using divided plates.
Another easy idea: Create separate mixing areas by drawing lines on the plate with a sharpie marker, like spokes of a wheel. Just keep the areas pretty big, like 4 or 5 total.
ART WORDS
Local Color – This is the main color we think of when looking at an object. “That balloon is red” means it’s local color is red, even though an artist will see many variations of reds, dark shadow reds, and light pinks.
Shadow – Objects usually have a darker side, where the light is not falling on it as much. Shadows are always on the opposite side of the light, and often on the bottom too, but never on both sides, or the top AND the bottom.
Highlight – A bright spot on shiny objects is called the highlight.
Big Shapes – Most pictures only have 3 or 4 really big shapes and the rest is details. It helps artists to be able to identify big shapes when trying to draw accurately.
CLASSROOM
PREP
Make sure you have all your supplies ready and a way to display photos from this web page. If you can purchase a few shiny red balloons it can really make it fun and more helpful. If you get a balloon, also find a small lamp that you can use to shine light to create a highlight.
Print all of your PDFs from the lesson plan and cut the circle templates carefully out.
What your room needs
Here are your printable lists and room prep instructions.
Opens in new window
CLASSROOM
MATERIALS
- 8.5″ x 11″ card stock cut into halves to make 8.5″ x 5.5″
- 11″ x 17″ copy paper
- 11″ X 15″ Watercolor paper
- 2B Pencils
- Eraser
- Markers and/or oil pastels
- Blenders
- Safety Scissors
- Variety of brush sizes
- Make-up Sponges
- Black yarn
- White glue
- Tempera paints: Red, Blue, White, & Black
- Mixing plates or trays/bowls
- Water containers
- Paper towels
- Smocks
- Red Balloons (opt)
- Lamp (opt)
PREVIEW
Week 4: The Other Side of the Fence
This is a great lesson for learning a basic concept for drawing accurately, but without the students getting bogged down in lesson concepts. When drawing it helps artists to be able to draw the air shapes (negative shapes) that are in-between other things. It doubles the information available for accurate drawing. A fence is used to plant the seed of this concept, and then we use the bold line painting as a background for an “ink” drawing over it.
Week 5: Chicken Day
After learning about drawing big shapes and air, students get to practice these concepts, but we make it fun by having chicken day. We draw chickens, paint chickens, and even dance like chickens! The idea of drawing the air, and drawing on “both sides of the line” is reinforced with chicken shapes and also an exercise using the handle of a mug or vase. Oil pastels are used on a black line painting of a chicken.
Use this button to view our parent’s blog. Share the link: http://parentart.org, with your student’s parents so your they can read about the lesson each week.