
OVERVIEW
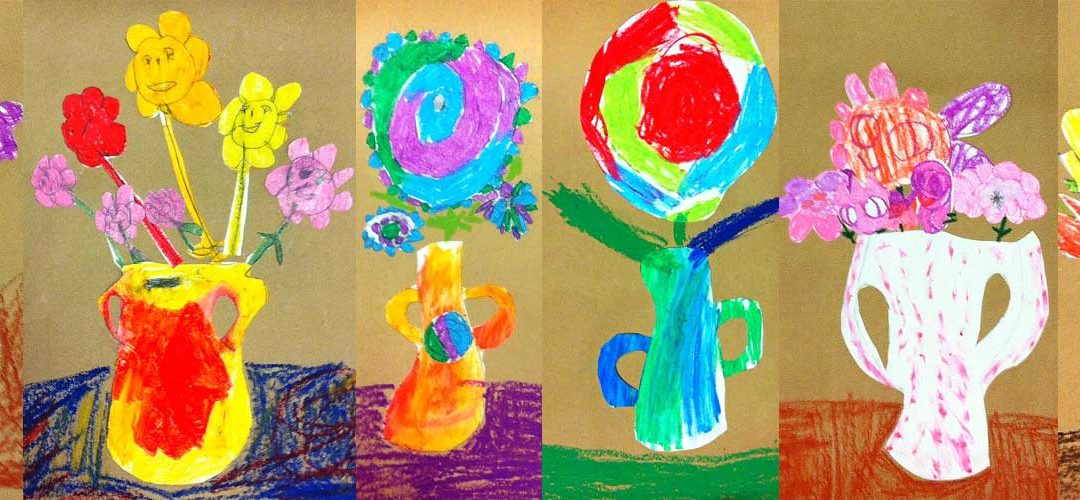
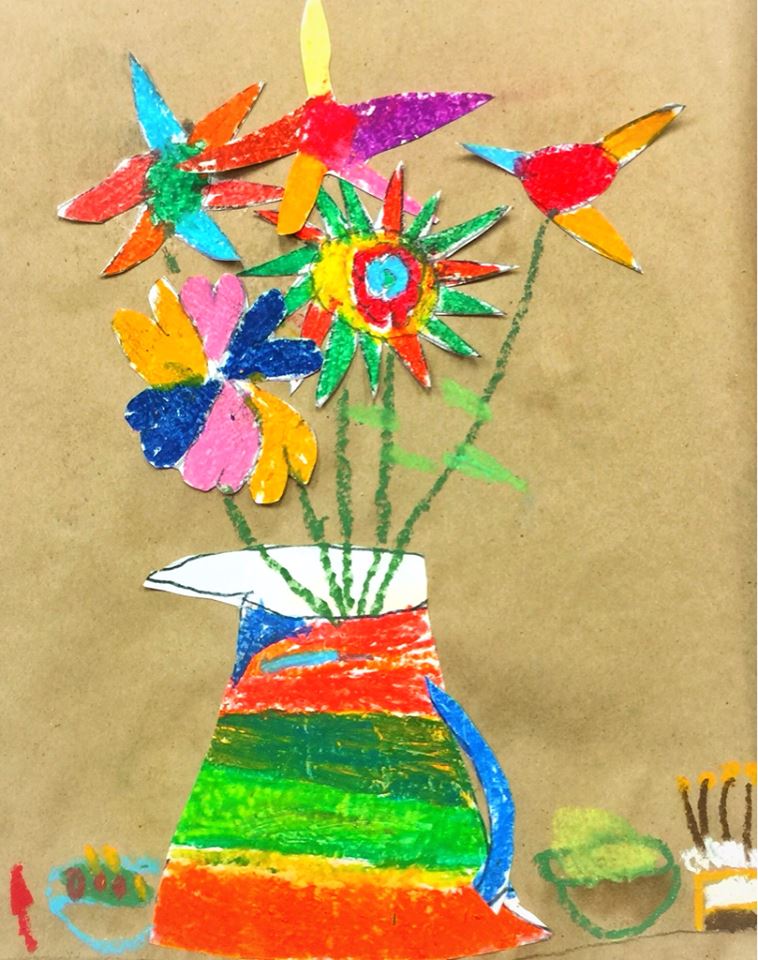
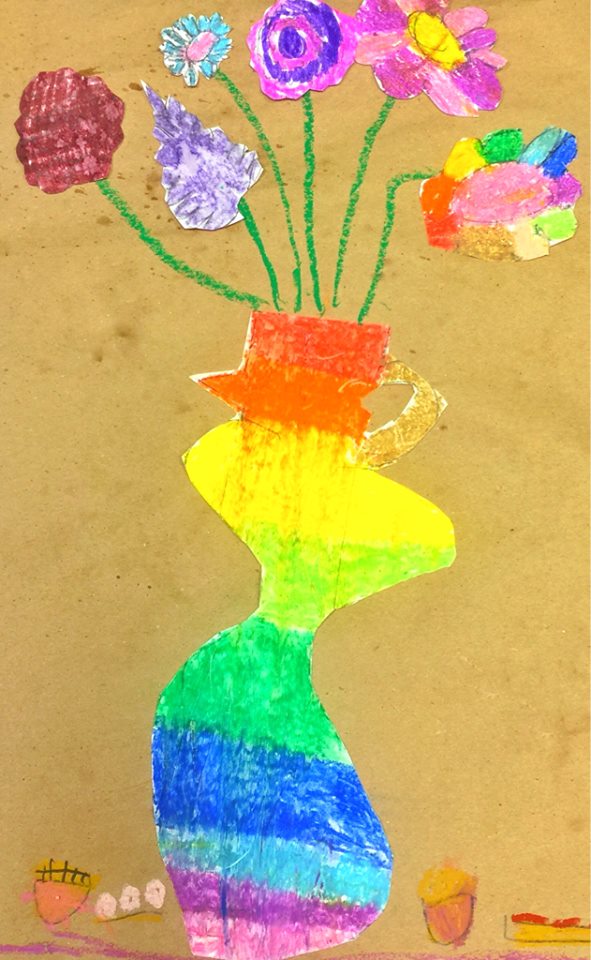
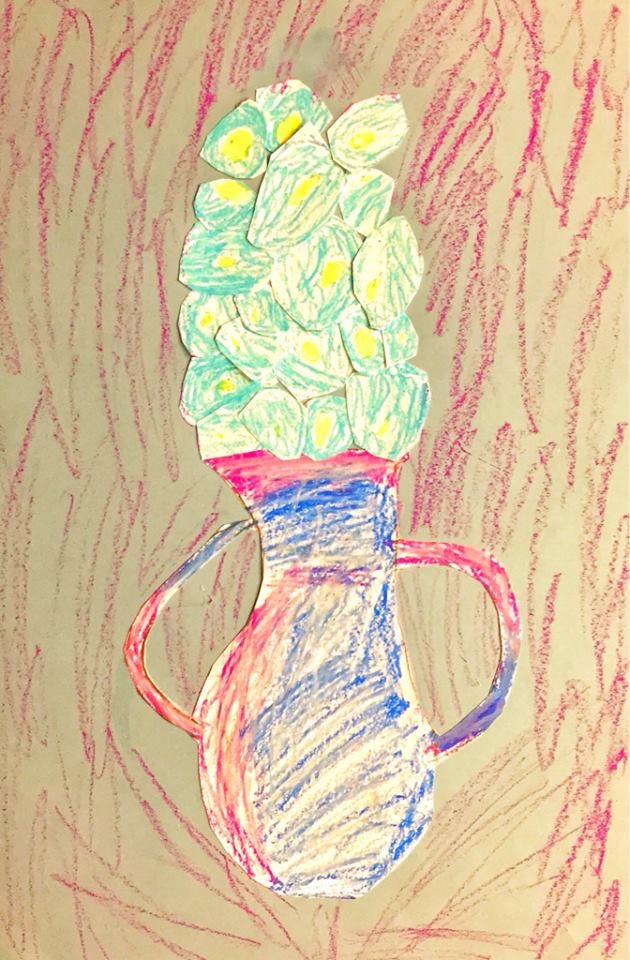
Students use drawing skills to create a large vase and flower collage with mixed media: Oil pastels, kraft paper, cutting, and gluing. Composition is worked on as they apply the shapes they’ve drawn and cut.– – –
Grades K – 2
Week of September 19 – 23
1 Hour & 30 Minutes
Lesson At A Glance
A brief overview of each step. Buttons jump to each section for detailed information.
10 Min – Draw flowers
10 Min – Music game
5 Min – Glue vase cutouts into place on large kraft paper.
20 Min – Draw & color flowers pastels.
10 Min – Teachers cut most of flowers out.
10 Min – Fill the vase.
5 Min – Finish with pastels if desired.
SCROLL & TEACH
LESSONPLAN
Each section is a different color. Read over once and then you can SCROLL & TEACH using any device you like. It’s designed to work best with your phone.
LEARNING TARGETS

Students know how to warm up my using their imagination
M A T E R I A L S
- 11″ x 17″ Sketch Paper
- Markers
- Pencils
- Erasers
1.1 greet
Kneel down so that you are on their level. Bending over emphasizes the differences in your height, while kneeling makes them feel more important. Have tape and marker ready so you can stick some tape on the table by each student and write their name on it as they sit down.
1.2 choice
Everyone should take their time with the work and make a finished piece of art. Limiting the paper can also help kids focus on the work. If someone finishes in super-fast time, ask them what more they can do to the existing paper. Ask again several times – unless they appear overly frustrated; then you can allow them to move on to a new work.
Use this button to jump down to the preparation section.
STEP 2. Practice Drawing
Students will practice drawing flowers using photo reference or real life 10 MinutesLEARNING TARGETS
Students know how to practice drawing before they make their final artwork
M A T E R I A L S
- Flower reference prints (below) or some real-life flowers (can be silk)
- 11″ x 17″ Sketch Paper
- Pencils
- Erasers
- Markers
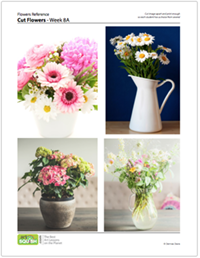
2.1 Print
Reference
Cut Flowers
Cut images apart and print enough for each student to choose from several.
2 Pages – Opens in new window
2.2 draw
Have the reference pages set up on cheasels or other stands, and set them out for the kids to continue with warmup. Encourage using pencils to sketch, but markers are ok too. This should be more about having fun and enjoying the subject than getting anything a certain way.
Make note about how detailed the edges of flowers seem to be, but that they can fit into circle shapes. The Big Shape of a flower is usually a circle, or a cup-like shape as in the tulips.
Use this button to jump down to the preparation section.
LEARNING TARGETS
Students know how to use oil pastels
M A T E R I A L S
- Vase Reference on Stands
- Pencils
- Erasers
- 8.5 x 11″ copy paper
- oil pastels (no black)
- Blender sticks (stumps)
3.1 Print
Reference
Vase & Air Shapes
A helpful reference that visually reminds students about “air shapes” in the handles of a vase.
Place prints on stands so every student can view one.
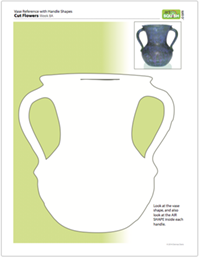
1 Page – Opens in new window
3.2 color
Read the teacher talk, and encourage your students to change their lines at least once to make the drawing more accurate. Help them choose colors that will blend together well, which usually means alike, or analogous colors. Kids tend to not like grays and browns, which are created when a cool color and a warm color mix together.
These will be used later in the lesson, so double-check that their name is ON THE BACK of the vase, not in a corner, since we’ll be cutting these out.
If you have a helper, they should begin cutting the vases as soon as the students have begun finishing them.
After you draw the vase in pencil, let’s color it. We’re only going to use 3 or 4 colors and a white, and then we’ll blend your colors together using white and blending sticks to see the pastels turn into paint. Do not use black though. We’re saving that to the very last part of this project today.”
Use this button to jump down to the preparation section.
LEARNING TARGETS
Students know how to draw big shapes
M A T E R I A L S
- Butcher Paper
- Markers
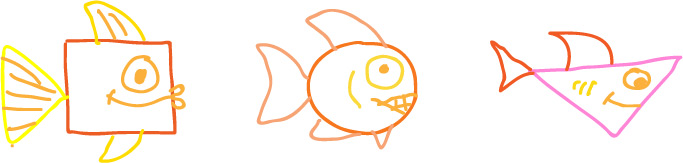
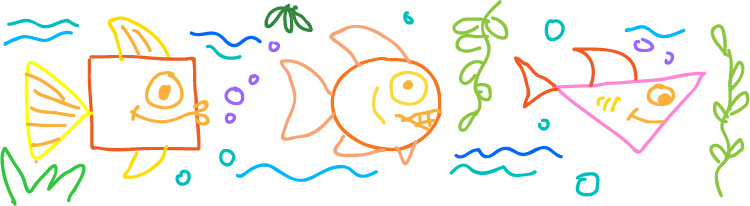
- Fish shapes slideshow
- Gentle Music
4.1 setup
Don’t display the image yet, but begin with the introduction and first stage:
You’ll use certain colored markers to make your shapes. Choose only 3 warm colored markers. These colors remind us of things that are warm or hot, like the orange coals in a fire, or the yellow light of the sun on the beach.
Everyone choose a spot at the table. Be nice!
The paper is the poster and we’ll make a few shapes and then everyone will move to the right a couple of times when I give the signal by stopping the music. Just make 4 shapes at each place, so you can really take your time and make careful shapes. You should make all of them small shapes, and only one bigger fish. Not too big. Just bigger, and only one of those each, for the whole time. Ok, lets begin, and remember to draw in slow motion.”
4.2 draw
After they’ve made the basic shapes, have your students trade out the 3 markers for 3 new markers that are also warm or hot colors. Then go ahead and display the first slide with the fish.
“Now we need to make plants, bubbles, and waves for our lake. Use the cool colors for that. As you work, you’ll see how making all the fish the only thing that is in warm colors, makes them stand out and look different.” We’ll just go a couple of more turns, and remember to draw in slow motion!”
4.3 draw
4.4 draw
Use this button to jump down to the preparation section.
LEARNING TARGETS
Students know how glue down an image
M A T E R I A L S
- Large sheet of brown craft paper (16″ x 24″)
- Vases from step 2, cut out and ready to be glued
- Glue Sticks OR
- White glue in a bowl with brush
- Scrap paper to glue on
5.1 glue
Make sure everyone gets a good coating of glue on the back of their vase cutouts, and that the edges are glued well. Explain how the vase will hold a bunch of flowers we’ll be making next. Place the vase so that it is completely in the bottom half but not touching the bottom edge of the kraft paper.
Use this button to jump down to the preparation section.
LEARNING TARGETS
Students know how to make drawings with oil pastels
M A T E R I A L S
- 8.5″ x 11″ Copy Paper
- Pencils
- Erasers
- Oil Pastels
- Scissors
- Flower References from Step 2
6.1 color
First, have your students use their imagination to visualize the flowers in their vase art.
After they’ve imagined the size of the flowers, have students draw and color flowers like crazy. They can draw realistic flowers like in the picture references, or make up their own imagination flowers. Let them express themselves however they want, but if someone is stuck, suggest a specific flower in front of them, or suggest a favorite solid color flower, or even a striped, or polka dot flower! Have a ton of fun!
Cut their flowers out while you interact with the students, and set them in a neat pile to use later. Be careful not to get flowers mixed up with other student’s work.
We’re going to cut these flowers out, so make them pretty simple around the edges. To save time, I’m going to help cut these out while you work at making lots of flowers to fill your vase. If you make smaller flowers, you’ll have to make more of them, so you can make some big, some medium sized, and maybe a couple of smaller ones too. Remember to blend your pastels.”
Use this button to jump down to the preparation section.
LEARNING TARGETS
Students know how to cut out images
M A T E R I A L S
- Colored flowers
- Scissors
7.1 DEMO
Tap the 4 arrows icon to enlarge the video to full screen.
Review the demo video and demonstrate to your students, or you can simply display the video on a larger screen for them to watch.
7.2 cut
The video (above), “drawing with scissors”, shows you how to turn the paper as you cut, for faster and easier cutting. Sometimes you’ll need to cut circles around flowers that have too many petals to cut out, and that actually works fine. Simple cuts look good.
Use this button to jump down to the preparation section.
LEARNING TARGETS
Students know how to properly glue down images
M A T E R I A L S
- Kraft paper with glued vase
- Cutout flowers
- Glue Sticks OR
- White glue in bowls
- Scrap Paper
8.1 glue
Have students decide where their flowers go by placing them before gluing. Then glue the backs, getting the edges covered well, and place them again on the artwork. Press down all around to secure, and then get the next flower and continue.
Use this button to jump down to the preparation section.
LEARNING TARGETS
Students know how to add details to their artwork
M A T E R I A L S
- Oil Pastels
- Blending sticks
- Paper towels
9.1 draw
After everything else is done, students can add more details in pastels, and even add black lines using the black oil pastel to complete the work, if they want to.
Everyone should help putting pastels away and cleaning up all the papers.
Take photos of artwork!
Make sure you see the kids connect with parents and tell them about the class if you can!
Use this button to jump down to the preparation section.
OBJECTIVES
- Practice and improvement in creating composition and with using analogous colors in pastels
- Understanding how negative shapes (air shapes) help with accuracy. Warm vs. cool colors.
- Accomplishment in drawing an animal with shading
- Fulfillment by choosing the animal they want to draw & paint
TROUBLESPOTS
There are many objectives that can be stated here for the purpose of stating objectives that need to be puposely objectified.
ART WORDS
Paper – That stuff you draw on.
Pencil – That thing you draw with
Paint – Messy stuff
CLASSROOM
PREP
Get enough butcher paper ready to cover a table.
Print all of your PDFs from the lesson plan and cut the flower reference photos apart.
What your room needs
Here are your printable lists and room prep instructions.
Opens in new window
CLASSROOM
MATERIALS
- 11×17” Copy Paper
- Markers
- Pencils
- Erasers
- 8.5 x 11” copy paper
- Oil Pastels
- Blender sticks
- Butcher Paper
- Music
- Brown Craft paper
- Glue sticks OR
- White glue in bowl with brush
- Scrap paper to glue on
- Scissors
- Paper towels
PREVIEW
Week 9: Artists’ Choice Day
Students have a day full of fun and choosing their own subject matter. This encourages artists, who often say they don’t get to do what they want to. There are also 2 stations for learning-art activities.
Week 10: Jungle Rug
Artists enjoy drawing a still life in pencil, and then using watercolors to paint it. There is some review of shadows and highlights during the artwork time. After a break, the kids cut leaf shapes out of colored papers to make a jungle collage, and then create oil pastel art of plants from life or photo references.
Use this button to view our parent’s blog. Share the link: http://parentart.org, with your student’s parents so your they can read about the lesson each week.