
OVERVIEW
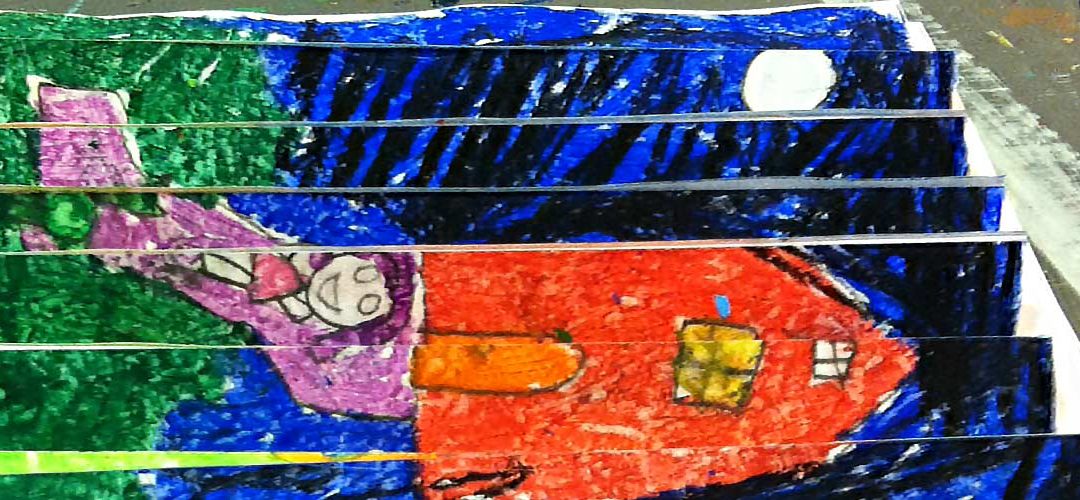
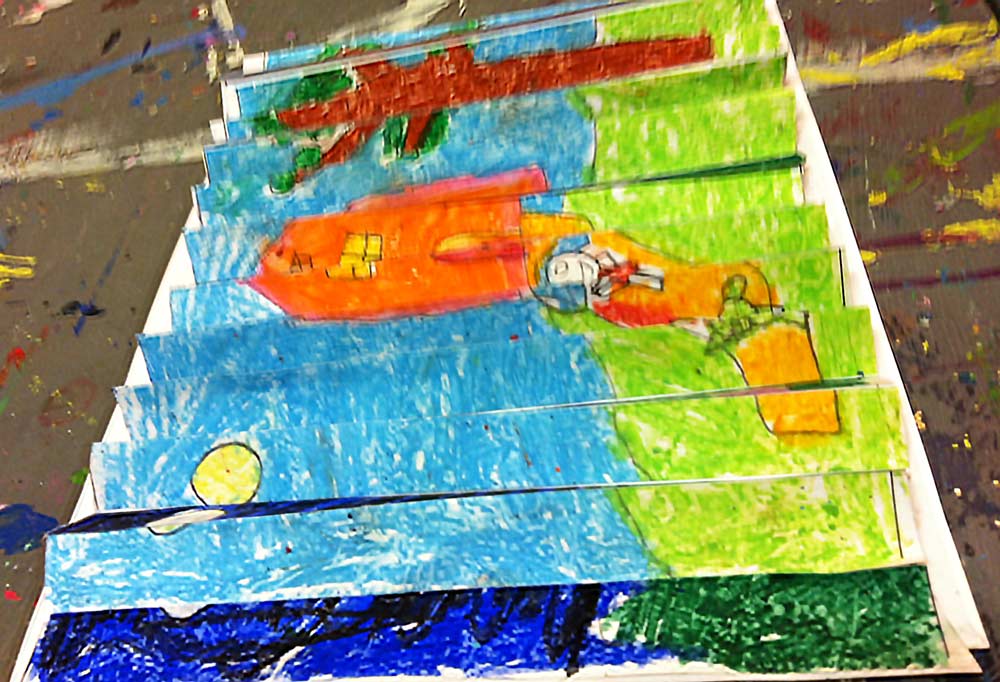
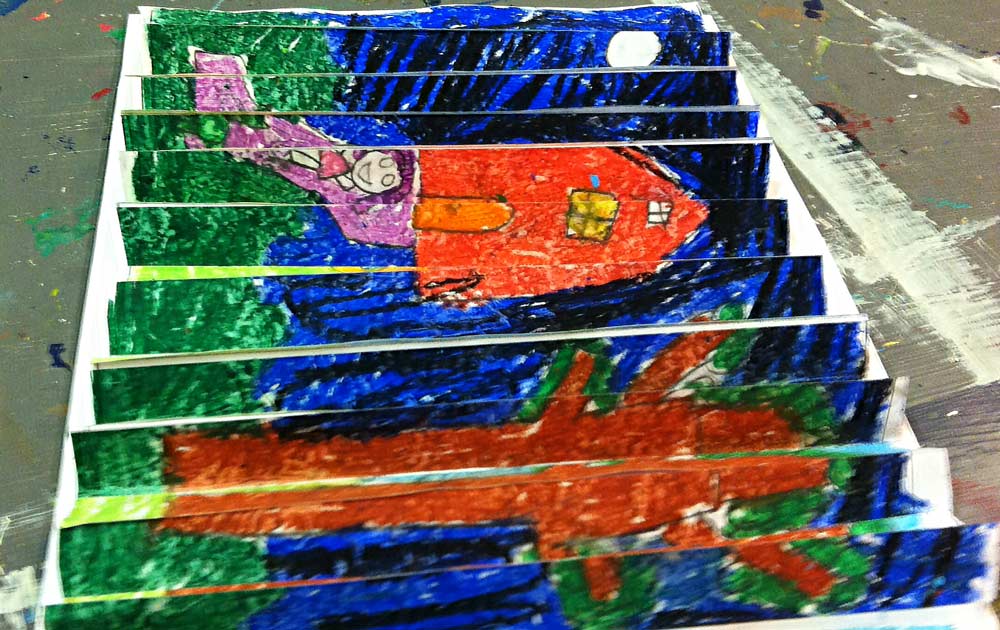
Students will create an interactive color oil pastel work that changes from day to night when you change your viewing angle. They’ll use their memory to draw their own home and yard, so it’s a personal piece. This also takes away any worries about content, so students can focus on the colors and different day and night versions of the scene. We’ll use this fun project to learn about viewpoints, lighting effects, 3D artwork and interactive artwork– – –
Grades K – 2
Week of November 11 – 15
1 Hour & 30 Minutes
Student Work
Student Work VIDEO
Lesson At A Glance
Here’s a brief overview of the complete lesson. It’s also on your prep page in the Ready, Set, Go! section (below the lesson).
Colored buttons jump to each section in the full lesson plan below.
5 Minutes – Artists choice in markers or oil pastels.
10 Min – Artists draw pictures. Make copies.
15 Min – Color the day version & cut.
15 Min – Color the night version & cut.
25 Min – Glue day & night art strips. Fold papers.
15 Min – Glue folded pictures to base
5 Min – Clean Up
Use this button to jump down to the preparation section.
SCROLL & TEACH
LESSONPLAN
Each Step has its own color. Read over once and then you can SCROLL & TEACH using any device you like. It’s designed to work great with your phone.
STEP 1. Warm Up
Students will have Artists' ChoiceTap the button to open a countdown timer in another window.
LEARNING TARGETS

Students know how to use their imagination
M A T E R I A L S
- 8.5″ x 11″ copy paper
- 2B Pencil
- White Eraser
All materials are suggestions and may be modified as you see fit. We have tried many items, and these seem to allow the most versatility for the cost.
1.1 Greet
Greet students as they come in and help them choose a chair.
Kneel down so that you are on their level. Bending over emphasizes the differences in your height, while kneeling makes them feel more important. Have tape and marker ready so you can stick some tape on the table by each student and write their name on it as they sit down.
1.2 Choice
Encourage students to work with one piece of paper for a while. If someone uses the phrase, “free draw”, explain that artists’ choice is something only artists can do, while free-draw is something anyone can do. You want to use the phrase to elevate the students’ expectations of their work.
Everyone should take their time with the work and make a finished piece of art. Limiting the paper can also help kids focus on the work. If someone finishes in super-fast time, ask them what more they can do to the existing paper. Ask again several times – unless they appear overly frustrated; then you can allow them to move on to a new work.
Use this button to jump down to the preparation section.
STEP 2. Draw & Copy
Students will draw their house and yardTap the button to open a countdown timer in another window.
LEARNING TARGETS
Students know how to draw a landscape scene
M A T E R I A L S
- Zig Zag Art Page
- Black ballpoint pens or fine markers
- Copier to make a duplicates
2.1 Print
Reference
Zig Zag Art Frame
Cut images apart and print enough for each student.
Hand out reference prints.

1 Page – Opens in new window
2.2 draw
Artists draw their house and yard using only lines.
Print out the Zig Zag Art Page and explain to your students that their art will be cut apart today. But don’t worry! We will glue them back together and there will be a cool new way of viewing it that can magically change.
Once everyone gets the handout, they can begin drawing. Using a black ball point pen or fine marker, they can draw their house and yard however they like.
As students work, explain daytime colors and nighttime colors. Use the questions to get them thinking and formulating ideas.
When they’re finished, put names somewhere on the drawing and use a photocopier to create one copy of each student’s drawing page.
“What color is the sky in the daytime? Ok, what color is it at night? Well, it’s very dark, but not always black. If you look at the trees and houses at night, they are usually even darker. What is in the sky at night time? How about daytime?
So which time is lighter?
What would a red house look like if it was night time? Would it still be bright red?” How would you make red look darker?
Use this button to jump down to the preparation section.
STEP 3. Day Pastels
Students will color the daytime drawingsTap the button to open a countdown timer in another window.
LEARNING TARGETS
Students know how to color in a landscape scene
M A T E R I A L S
- Oil pastels
- Original drawing
- Blending stumps
- Paper towels
3.1 COlor
Coloring the daytime drawings.
Hand out oil pastels and blending stumps to your kids. Starting with the original drawing, have them color in their house and yard like a daytime scene.
When they finish, you or an assistant can use the guidelines on the printout and a paper cutter to cut into strips.
Use this button to jump down to the preparation section.
STEP 4. Night Pastels
Students will color in a night sceneTap the button to open a countdown timer in another window.
LEARNING TARGETS
Students know how to color in a landscape scene
M A T E R I A L S
- Oil pastels
- Copied drawing
- Blending stumps
- Paper towels
4.1 color
Move onto the coloring the night time drawings.
Then, move on to the copied drawing and do the same thing – but this time colored like night! Encourage blending and mixing colors.
At night, things are still colorful, but dark colors, like dark blue for the sky instead of light blue.
Use this button to jump down to the preparation section.
STEP 5. Glue Artwork Strips
Students glue their artwork stripsTap the button to open a countdown timer in another window.
LEARNING TARGETS
Students know how to glue
M A T E R I A L S
- Drawing strips: daytime and nighttime
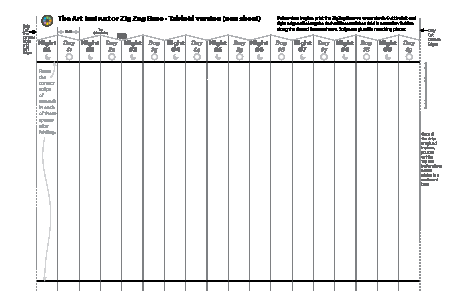
- Zig Zag Base printout, pre-folded
- Permanent glue sticks
5.1 print
Hand out reference prints.
1 Page – Opens in new window
5.2 print
Hand out reference prints.
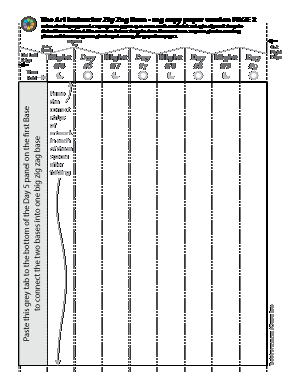
2 Pages – Opens in new window
5.3 glue
Artists glue down drawing strips to pre-folded Zig Zag Bases.
Beginning with the daytime strips, use glue sticks to secure them onto the Zig Zag Base. Make sure artwork edges connect at folds of mountain tops of each fold (leave any white gaps in valleys for the best overall look). Use the sun and moon icons at the top to get the daytime and nighttime strips in the correct places.
Glue the night time strips in the same way as the Daytime, as indicated on the Base sheet.
Use this button to jump down to the preparation section.
STEP 6. Mount on Cardboard
Students mount their artwork to cardboardTap the button to open a countdown timer in another window.
LEARNING TARGETS
Students know how to craft a 3d Project
M A T E R I A L S
- Cardboard
- Zig Zag art
- White liquid glue
6.1 craft
Finish the project by mounting the zig zag folded artwork onto a piece of cardboard.
Use horizontal strips of white glue on your cardboard base. Set the zigzag folded artwork down into the glue – the vertical folds will intersect the horizontal glue strips. Be careful until it dries overnight or at least a few hours. When it’s dry, walk from one side to the other and see the artwork change from day to night, and back again.
Use this button to jump down to the preparation section.
STEP 7. Clean Up
Everyone helpsTap the button to open a countdown timer in another window.
LEARNING TARGETS
Students know the importance of cleaning up.
M A T E R I A L S
- Paper Towels
- Cleaning wipes
- Sink
- Waste baskets
- Well-lit spot for photos
- Camera or phone-camera
7.1 CLEAN
Students set up their work area.
- Wash hands
- Super-wash brushes if used
- Put art supplies away
- Wipe tables & toss trash
- Remove any smocks (last)
- Check for items on floors and tables
7.2 PHOTO
Try to get photos of your student’s artwork. Find a good spot for quick lighting without highlights or shadows from your hands and device. Ideally in-between two strong lights on each side.
Use this button to jump down to the preparation section.
OBJECTIVES
- Practice and improvement color and shading to show light
- Understanding & discovering how 3D artwork can work
- Accomplishment in creating an interactive 3D artwork
- Fulfillment by by depicting their own house and yard, at night and in daytime
TROUBLESPOTS
Rushing – some students will want to finish immediately, creating a house & yard without details. Encourage adding things by asking questions: “what kind of animals are in your yard?”, “What is your porch like?”, or “Do you play games in your yard?”
Jumping ahead – A student may not realize or hear you say to only create lines. Explain carefully about the 2 copies, and then be watching for accidental shading and/or coloring. Try to keep the pastels put away until needed.
ART WORDS
Interactive art – Sometimes artwork requires the viewer to take an action, such as moving to different viewpoints.
Viewpoint – Looking at something from a certain place is called a viewpoint. An example would be looking up from the floor, which is often called a worm’s eye viewpoint. Seeing something from the left side, can look very different than from the right side.
CLASSROOM
PREP
Print all of your PDFs from the lesson plan and cut any references apart as needed. Cut card board bases ahead of time.
What your room needs
Here are your printable lists and room prep instructions.
Opens in new window
CLASSROOM
MATERIALS
- 8.5 x 11” Copy paper
- 2B pencils
- Erasers
- Markers
- Black Ballpoint Pens or fine markers
- Copier to make duplicates
- Oil pastels
- Blending stumps
- Paper towels
- Glue sticks
- Cardboard
- White Liquid glue
PREVIEW
Week 12: Cartoon Faces
Your class will enjoy learning how cartoon faces are put together with parts, like combining words and phrases to make sentences and stories. A metal food can is used and covered to make a pencil cup. Face parts cut from craft foam are cut and glued to make the cup look like a cartoon face. Expressions in cartoon faces are also explored.
Week 13: Shape Reflections
Students begin with a line exercise, making different kinds of lines. Then blue paint colors are mixed as practice for other times. The paints are used to make a mirror image by folding and pressing for a mono-print. This introduces the idea of symmetry and balance. Using mirrors, we see how shapes can make all kinds of symmetrical images, and then we cut doubles out to make a symmetrical collage.
Use this button to view our parent’s blog. Share the link: http://parentart.org, with your student’s parents so your they can read about the lesson each week.