
OVERVIEW
The students get to create a winter nature painting. Snow shows the colors of shadows, and white has many different shades of colors. To learn these insights, we begin by painting snow. building up a painting using 3 kinds of whites, shadows, and big tree trunks. Finally, we finish it off with a dash of bright red. A cardinal bird is painted and glued to a branch. It’s a wonderful painting that looks great in a frame and that kids are very proud of.– – –
Grades K – 2
Week of December 16 – December 20
1 Hour & 30 Minutes
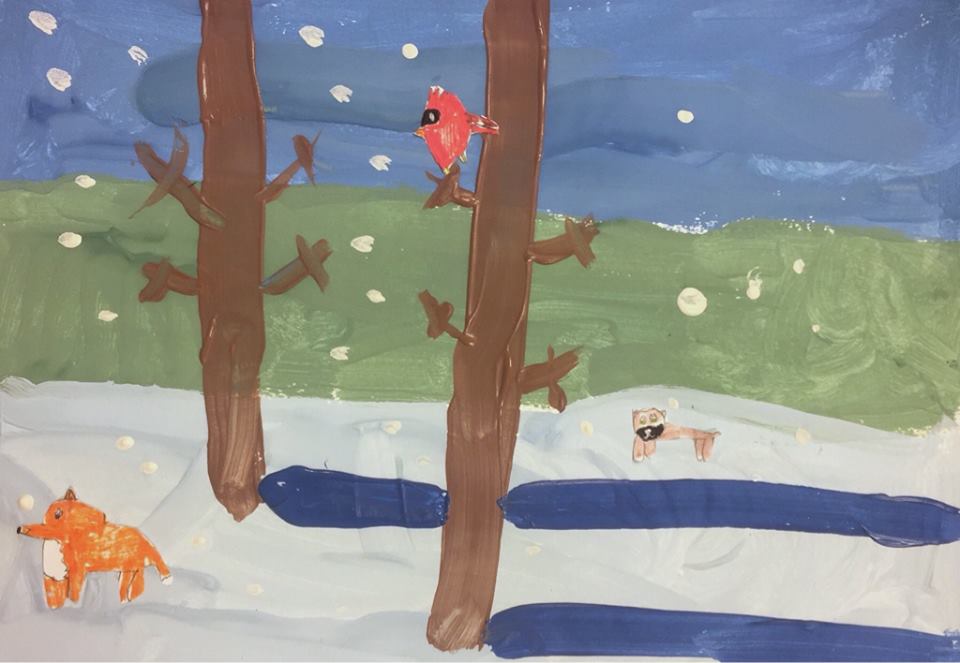
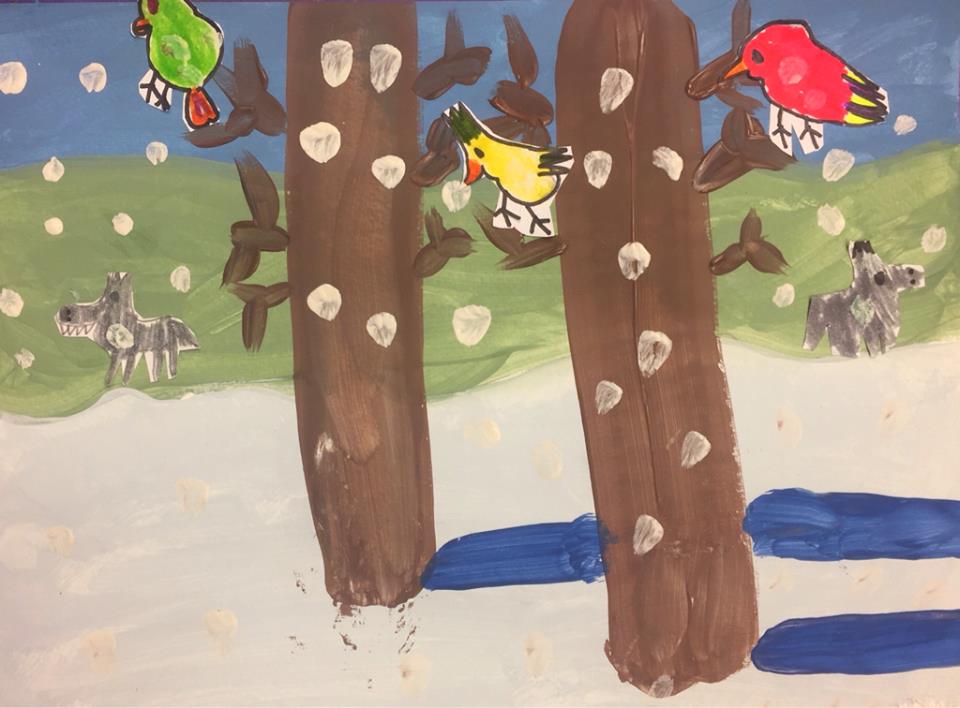
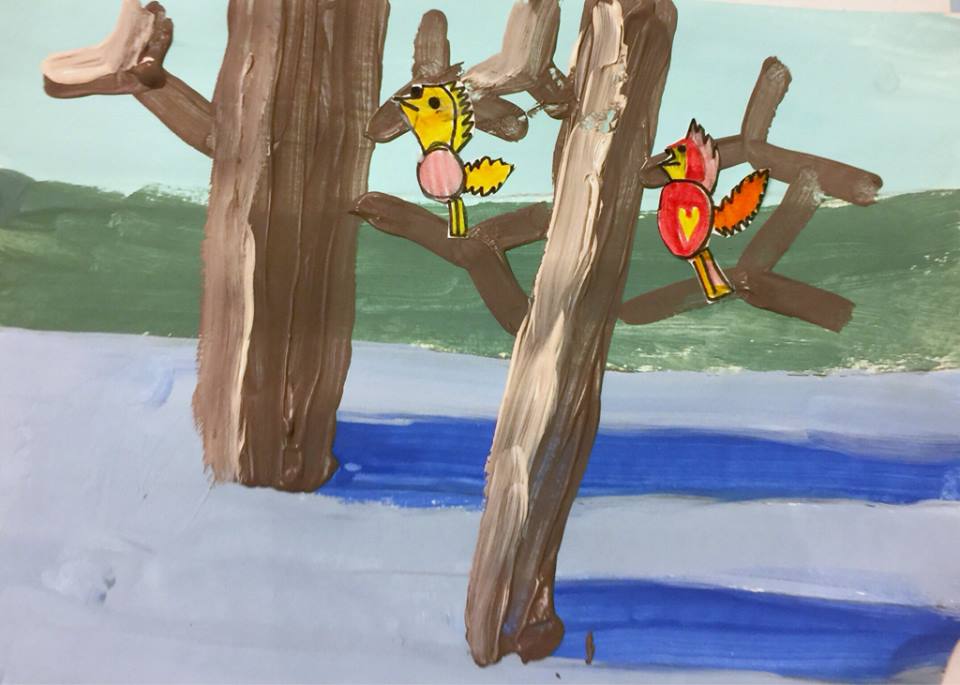
Student Work
Lesson At A Glance
Here’s a brief overview of the complete lesson. It’s also on your prep page in the Ready, Set, Go! section (below the lesson).
Colored buttons jump to each section in the full lesson plan below.
5 Minutes – Short Artists’ Choice
10 Min – Snow & whites
5 Min – Draw lines from slideshow
10 Min – Mix two colors for painting top half
10 Min – Mix two colors for painting bottom half
5 Min – Draw bird on card stock
15 Min – Mix & paint trunks & branches
If Time – Add dots of white
12 Min – Color bird & cut out
5 Min – Glue bird and sign
5 Min – Everyone helps
Use this button to jump down to the preparation section.
SCROLL & TEACH
LESSONPLAN
Each section is a different color. Read over once and then you can SCROLL & TEACH using any device you like. It’s designed to work well with your phone.
LEARNING TARGETS

Students know how to use their imagination
M A T E R I A L S
- 8.5″ x 11″ copy paper
- 2B Pencil
- White Eraser
All materials are suggestions and may be modified as you see fit. We have tried many items, and these seem to allow the most versatility for the cost.
1.1 Greet
Greet students as they come in and help them choose a chair.
Kneel down so that you are on their level. Bending over emphasizes the differences in your height, while kneeling makes them feel more important. Have tape and marker ready so you can stick some tape on the table by each student and write their name on it as they sit down.
1.2 Choice
Encourage students to work with one piece of paper for a while. If someone uses the phrase, “free draw”, explain that artists’ choice is something only artists can do, while free-draw is something anyone can do. You want to use the phrase to elevate the students’ expectations of their work.
Everyone should take their time with the work and make a finished piece of art. Limiting the paper can also help kids focus on the work. If someone finishes in super-fast time, ask them what more they can do to the existing paper. Ask again several times – unless they appear overly frustrated; then you can allow them to move on to a new work.
Use this button to jump down to the preparation section.
LEARNING TARGETS
Students know about shadows on white
M A T E R I A L S
- 11″ x 15″ watercolor paper (for next step, but set out early)
- Pencil
- White erasers
Snow Colors (tap any image to open viewer)
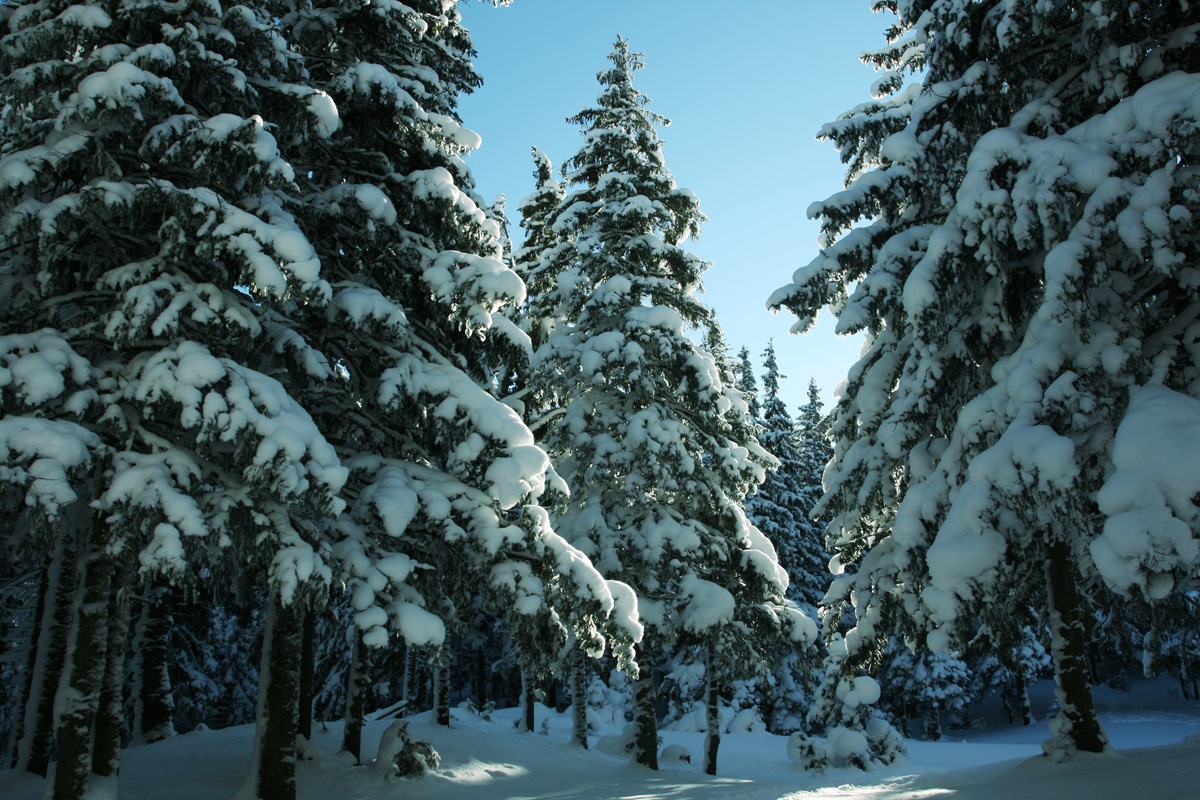
Snow is white, but it is also outside, and reflects the sky. Because the sky can change colors, shadows in snow also change colors.
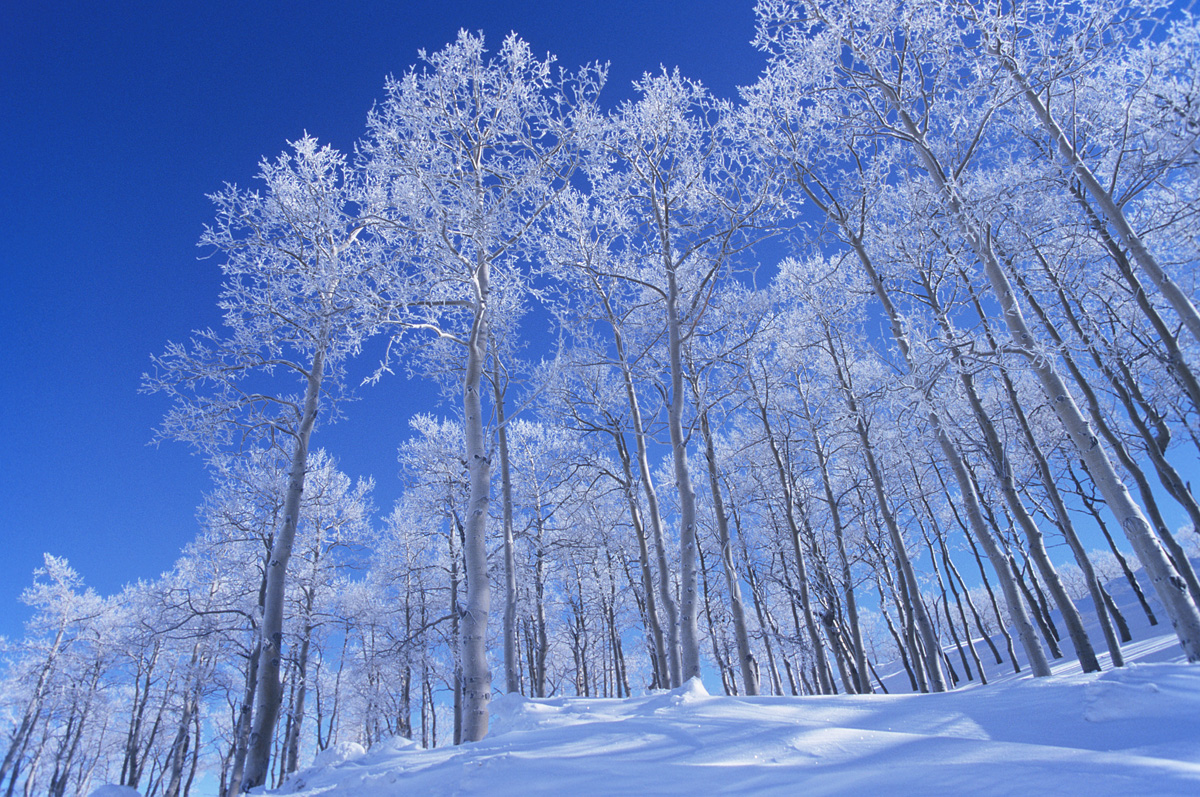
When the sky is bright blue, shadows in snow are also blue.
We don’t usually notice that they’re blueish though. Our brains just tell us that shadows are shadows. It takes practice to see what colors are in them.
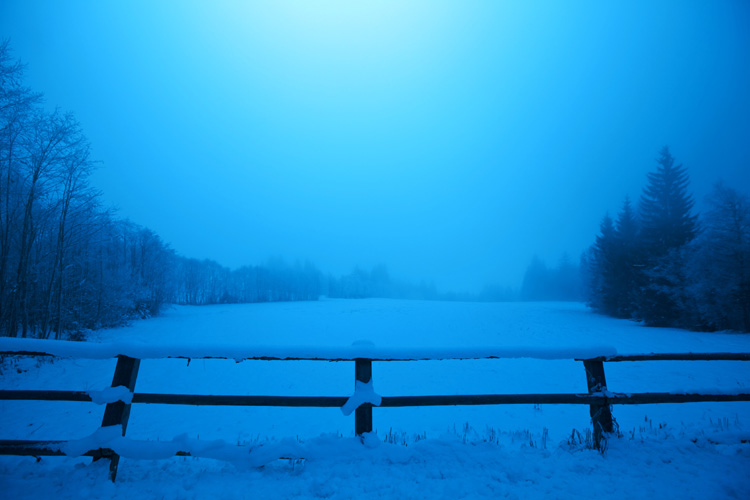
In this late evening photo, you can really see how blue all the snow looks.
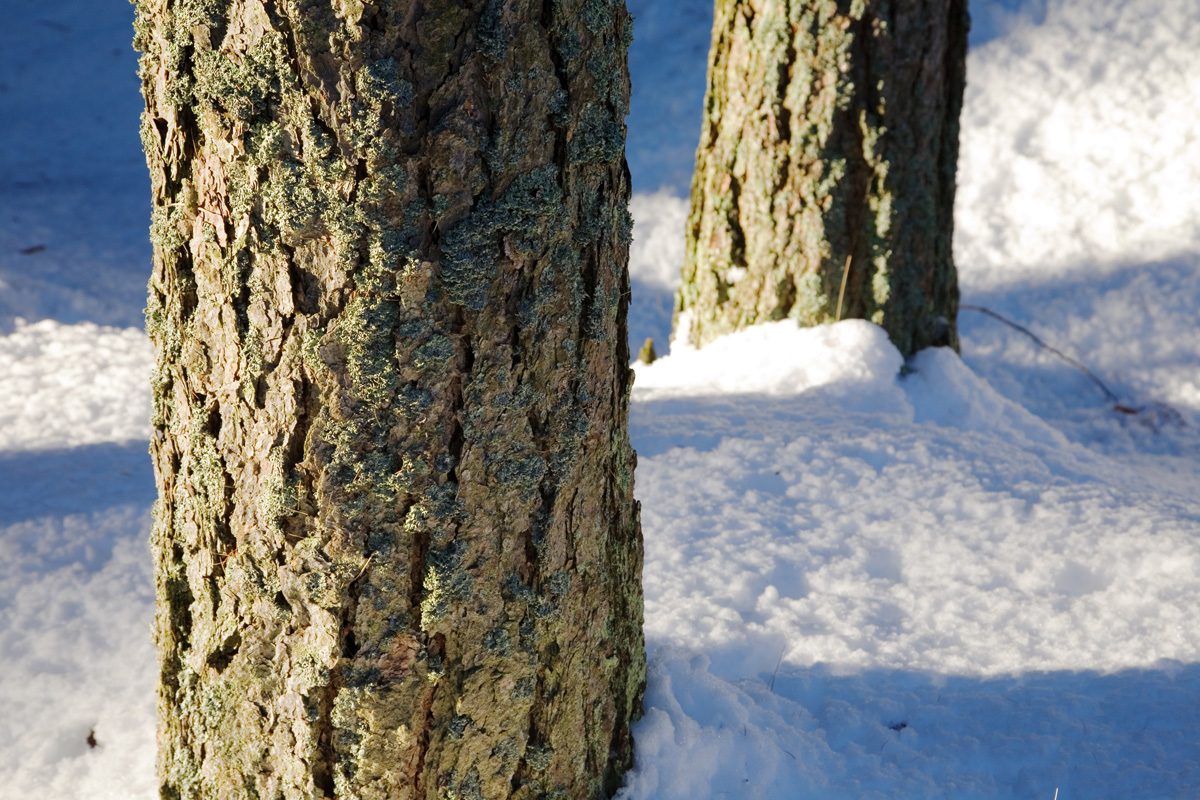
These trees in the snow are a lot like the picture we’re going to make today. Look at the shadows. They look blueish if you look very closely.
2.1 teach
Show the snow slides, read captions and explain that there are many different white colors.
TIP
Assistant can begin setting out watercolor paper & pencils during step 2 so you can move ahead quickly. Tell students to not use the paper yet.
“Whites are Colorful. Did you know there is more than one white? Think of one color, like red. If you make it lighter and lighter, eventually it will become a very light pink. If you keep making it lighter, it will be so white you think it is white, but it’s still just a little bit pink.
Well we can do that with every shade of every color you can think of. That means there are tons of different white colors.
Shadows are colorful too. There are gazillions of shadow colors just like there are gazillions of white colors. Most people think shadows are just gray, but really they are full of color.
Today we’re going to use shadows in white snow to paint a wonderful winter scene.”
“Now we’re going to use watercolor paper to create this painting I spoke about. We are going to make some Stripes. Stripes of whites!”
Use this button to jump down to the preparation section.
STEP 3. White Stripes Part 1
Artists will draw pencil guidelines for painting several white colors in the next steps. 5 MinutesLEARNING TARGETS
Students know how to draw guidelines
M A T E R I A L S
- Watercolor paper – 11″ x 15″ or so
- Pencil
- Kneaded eraser
- large brushes
- Mixing bowls or trays
- Paper towel
Brushes should be nylon for springiness and durability. Round brushes are the most versatile.
Paint pigment list:
- Dark Blue
- Dark Brown
- White
- Yellow
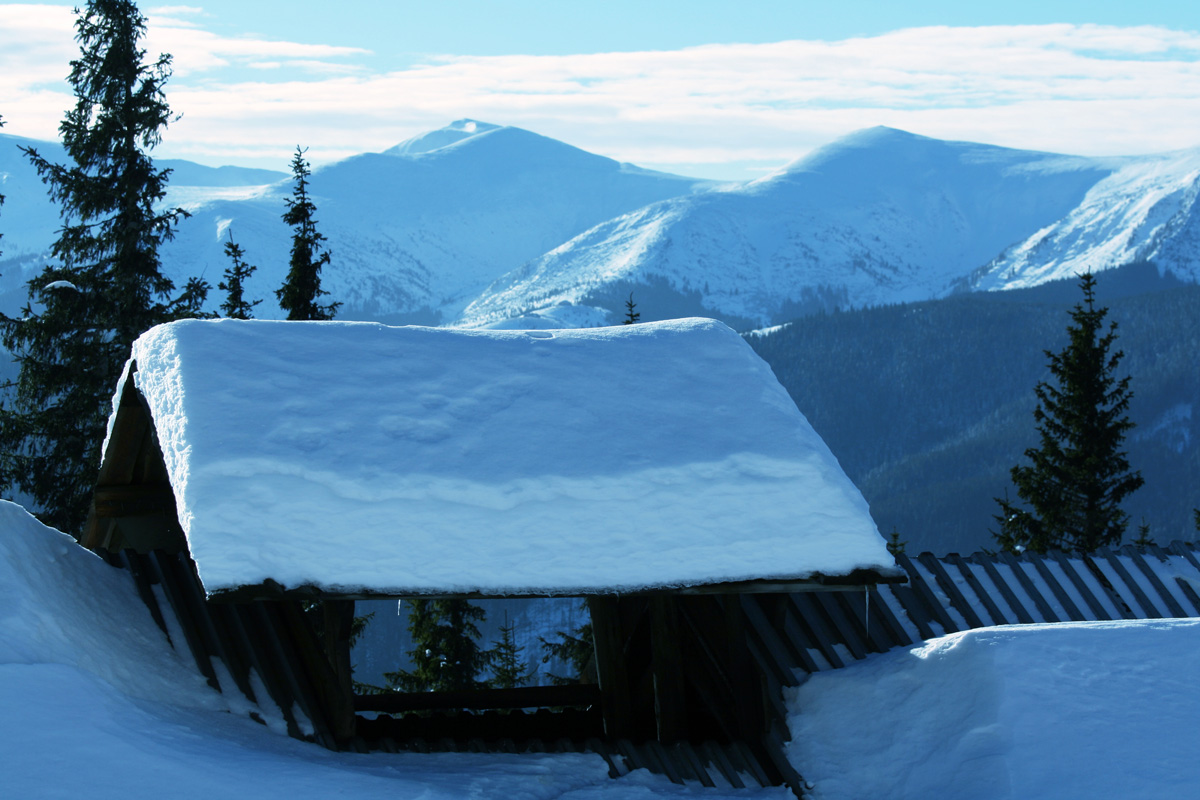
Snow Shadows (tap any image to open viewer)

Use your pencil to draw a line across the middle, halfway between the top and the bottom. The line is shown in blue so it stands out. It can be a little wavy because it is the top of the snow.

Now draw another line halfway between the top of the paper and the line you just drew. It’s shown in blue.

Don’t draw these just yet. We’re going to make stripes like these later on, and they will be on the bottom half like it’s shown here.

Here is what you should actually draw now. The 4 lines to draw are shown in blue.

Later on, when we fill these stripes in, they won’t go all the way across, but it will look like this.
3.1 draw
Draw lines on watercolor paper turned to bathtub position:
- horizontal across middle (can be wavy-ish)
- horizontal and halfway up from first line to the top (top of hills or tree line in distance)
- 4 straight lines below the first line, evenly spaced to create 5 stripes.
TIP
Assistant can begin setting out paints and mixing plates or bowls during step 3 so you can continue to move ahead quickly.
Use this button to jump down to the preparation section.
STEP 4. Whites Stripes Part 2
Students will make the first two variations of white shadow colors 10 MinutesLEARNING TARGETS
Students know how to make shadows on white
M A T E R I A L S
- Watercolor paper – 11″ x 15″ or so
- Pencil
- Kneaded eraser
- large brushes
- Mixing bowls or trays
- Paper towel
4.1 mix
Students mix the first color, blueish grey-white
Have students get a lot of white, and add a tiny bit of dark brown, and then a little bit of dark blue. Add more blue if it looks brownish. It should lean towards blue, because it is for the sky. Make a good amount, because we’ll change it to make the next color.
Make sure the colors are not just white and that students are making grayish colors. This is a shadowy picture.
4.2 paint
TIP
Make sure that all of the wet items (brushes, water, paint, and palette) are on the same side as the dominant hand of each artist. This prevents spills and drips on the artwork.
4.3 paint
Use this button to jump down to the preparation section.
STEP 5. Whites Stripes Part 3
Students paint the lower area with two more new shadowy white colors. 10 MinutesLEARNING TARGETS
Students know how to paint shadows on white
M A T E R I A L S
- Watercolor paper – 11″ x 15″ or so
- Pencil
- Kneaded eraser
- large brushes
- Mixing bowls or trays
- Paper towel
5.1 mix
Use a lot of white, and then add a tiny bit of blue, and a tiny bit of the white you used for the distant tree line in the last step. Remind them to make sure the colors are not just white and that students are making grayish colors.
- First stripe, below the distant trees, is light blue-gray. The Third and 5th stripes are also light blue-gray
- Paint 2 or 3 inches of the 2nd stripe and 4-5” of the 4th stripe on the left side of the page, to create a solid area over to the left. This is the snowy ground.
- The empty places are going to be shadows of trees. Paint them the Blue shadow color.
5.2 paint
On the bottom half of the paper there are 5 horizontal areas, or stripes.
Have students paint the top of these stripes with the new snow color, then skip the second stripe, leaving it blank, and paint the third stripe down. Skip the fourth stripe, and then paint the bottom stripe.
The second bottom stripe (blank right now), should be painted just a little bit. About one fourth of the way from the left. Then students should paint the fourth blank stripe on the left side, from the left edge all the way to the middle of the paper. This makes an area of snow off to the left of the picture.
Do not rinse brushes.
Add dark blue to the snow color you’ve just been using. You should get a light blueish-gray color, but quite a bit darker than the snow.
Make sure students don’t paint anything but the blank paper areas that are left. They should look like this:

5.3 clean
Afterwards, clean out and dry paint brushes.
Use this button to jump down to the preparation section.
LEARNING TARGETS
Students know how to set up their work area for painting with acrylics.
M A T E R I A L S
- Card stock paper cut to 3″ x 4″ or so
- Pencil
- Eraser
6.1 Print
Reference
Bird Reference
Cut images apart and print enough for each student to choose from several.
Hand out reference prints. Set all of the images out on a table or counter, and let groups of students come choose what they want..
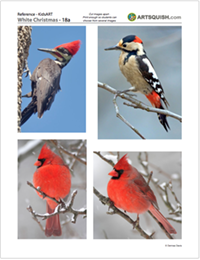
1 Page – Opens in new window
6.2 draw
Use this button to jump down to the preparation section.
LEARNING TARGETS
Students know how to mix paints
M A T E R I A L S
- Pencil
- Kneaded eraser
- large brushes
- Mixing bowls or trays
- Paper towel
7.1 mix
Mix the following to get a tree color that is darker than any other color so far, but not too dark:
- Dark brown
- Dark blue (half the amount of the brown)
- A little white – not too much but enough to make these not look dark.
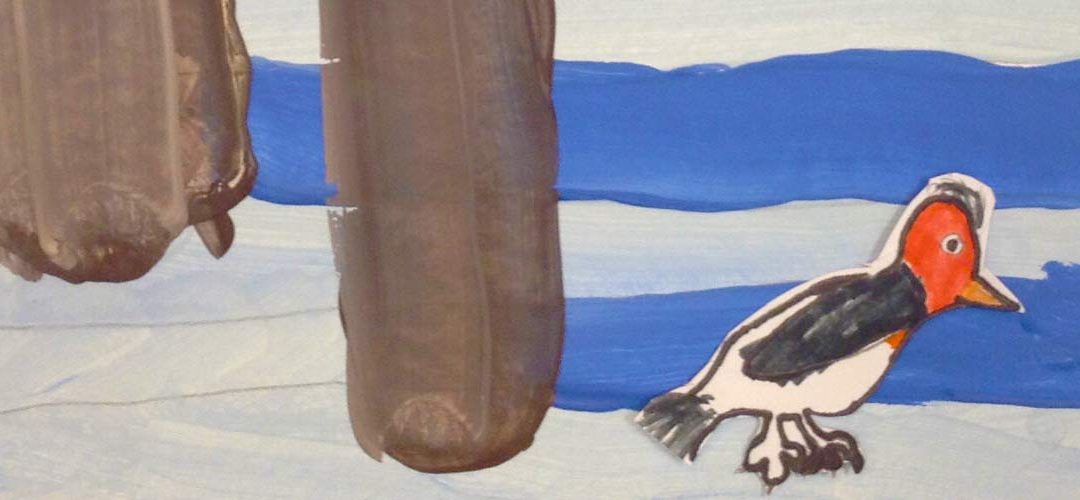
Zoom in on this picture to the place where the tree trunks go to the bottom edge of the blue snow shadow stripes. It should look like the trees overlap the blue shadows. The tree trunks can be rounded on the bottom.

7.2 paint
Use dark warm gray to paint 2 thick tree trunks. These should be the same width as the shadows, or a bit wider even. NOTE: make sure that the bottom edge of the trunks, are at THE BOTTOM of the shadows and overlap them at least a bit.
Then add a branch, much thinner, starting above the middle snow line and going out and up off the top or side of the page. Do 2 branches on each tree, and then use a very small brush to make a few twigs way up at the top. They are miniature branches and do the same thing.
Next mix some white and a bit of yellow into the tree trunk color. Paint the left edge of the trunk (and branches maybe) – this is on the opposite side as the shadows. Just a small edge of the light grey will do but it can be as much as half the tree.
After, clean out brushes and dry them.
Move around the room, helping your students and encouraging them.
Use this button to jump down to the preparation section.
LEARNING TARGETS
Students know how to make texture with their paint
M A T E R I A L S
- White paint
- Small brush
- Smocks
- Paper towels
- Water tubs
8.1 paint
Use this button to jump down to the preparation section.
STEP 9. Color and Cut
Students will use oil pastels to color the bird drawings, and then cut them out. 12 MinutesLEARNING TARGETS
Students know how to cut out their drawings
M A T E R I A L S
- Bird drawings from STEP 6
- Oil pastels
- Blending sticks (stumps)
- Scissors
9.1 color
Use this button to jump down to the preparation section.
STEP 10. Land the Bird
Students finish their painting by adding the bird and signing their name. 5 MinutesLEARNING TARGETS
Students know how to make a collage
M A T E R I A L S
- Bird cut-out
- Glue or glue sticks
- Pencil
10.1 glue
Use this button to jump down to the preparation section.
LEARNING TARGETS
Students know the importance of cleaning up.
M A T E R I A L S
- Paper Towels
- Cleaning wipes
- Sink
- Waste baskets
- Well-lit spot for photos
- Camera or phone-camera
11.1 CLEAN
Students set up their work area.
- Wash hands
- Super-wash brushes if used
- Put art supplies away
- Wipe tables & toss trash
- Remove any smocks (last)
- Check for items on floors and tables
11.2 PHOTO
Try to get photos of your student’s artwork. Find a good spot for quick lighting without highlights or shadows from your hands and device. Ideally in-between two strong lights on each side.
Use this button to jump down to the preparation section.
OBJECTIVES
- Practice and improvement in mixing colors
- Understanding that there are many variations of white and shadow colors
- Accomplishment in finishing a complex painting
- Fulfillment in creating the bird from reference
TROUBLESPOTS
Crazy stuff – sometimes a student will want to mess up a painting, especially if they are not satisfied or don’t understand the purpose and are bored with it. The snow is a point where some kids may get a little crazy and ruin a perfectly nice painting.
ART WORDS
CLASSROOM
PREP
Most of our teachers save time by pre-mixing the 4 whites/shadow colors and browns for the trees. An assistant can mix them right before you need them or you can cover them with plastic wrap after mixing them ahead of class time.
Cut up some 8.5″ x 11″ card stock into 6 pieces 4.25″ x 3.66″ each
COLORS to MIX:
- STEP 4. White colors:
- Sky/Top – Mostly White + Dark Blue (Ultramarine) + tiny bit of Dark Brown (Burnt Umber)
- Treeline/2nd – Add to above: tiny bit of yellow + tiny bit of Dark Brown
- STEP 5. Snow colors:
- Bright snow – Mostly White + tiny bit of Dark Blue (Ultramarine) + teensy bit of Dark Brown
- Snow shadows – White + Dark Blue
- STEP 7. Tree colors:
- Main tree color – Dark Brown + less Dark Blue + bit of White(should be grayish brown)
- Light side color – Add white to above + bit of Yellow
What your room needs
Here are your printable lists and room prep instructions.
Opens in new window
CLASSROOM
MATERIALS
- 8.5” x 11” copy paper
- 11 x 15” Watercolor paper
- Card stock paper cut into 3” x 4” or so
- 2B Pencil
- White Eraser
- Large brushes
- Mixing bowls or trays
- Paper towels
- White paint
- Small brush
- Smocks
- Water tubs
- Oil pastels
- Blending sticks (stumps)
- Scissors
- Glue or glue sticks
PREVIEW
Week 19: Shadows have Color
Students become art mad scientists, and do 3 painting experiments to learn that shadows are made with opposite colors instead of grays. This also teaches them how artists must try different things, and that artwork can be easily changed. A game of hangman is played to give them a big hint, and there are fun exercises as well as several periods where they get to do their own ideas, called Artists’ Choice.
Week 20: Balance act
Students have an object lesson about real balance, and work on creating visual balance in their work.
Use this button to view our parent’s blog. Share the link: http://parentart.org, with your student’s parents so your they can read about the lesson each week.