
OVERVIEW
We start out with looking at the symmetry of a human face from the front. Then we move into a fun project where students all make a hangable painted fish to turn the room into a giant aquarium.– – –
Grades K – 2
Week of Jan 27 – 31
1 Hour & 30 Minutes
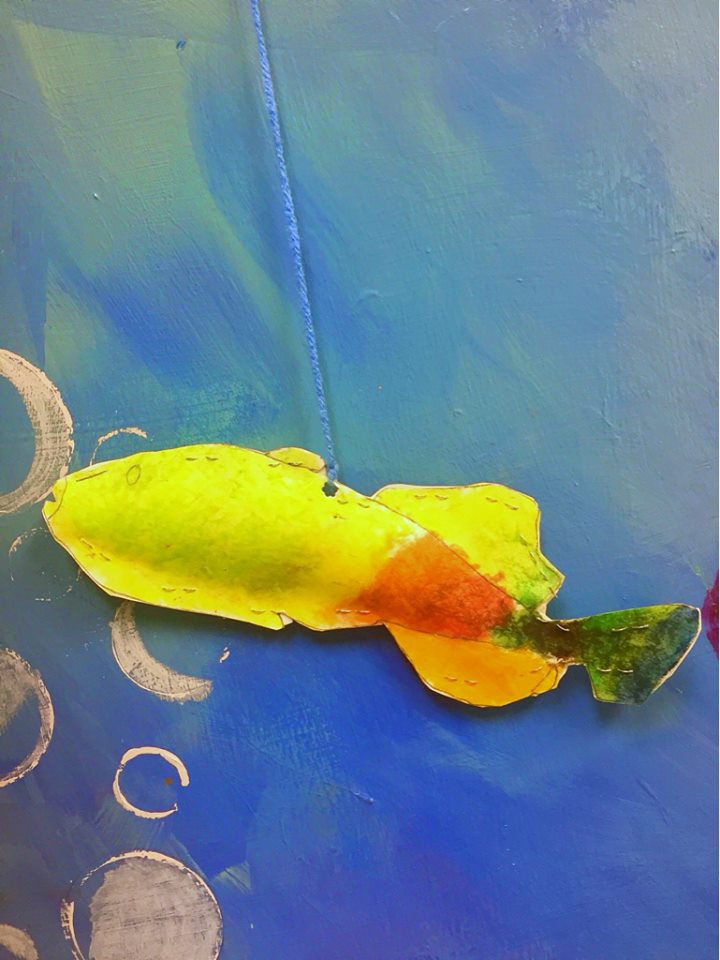
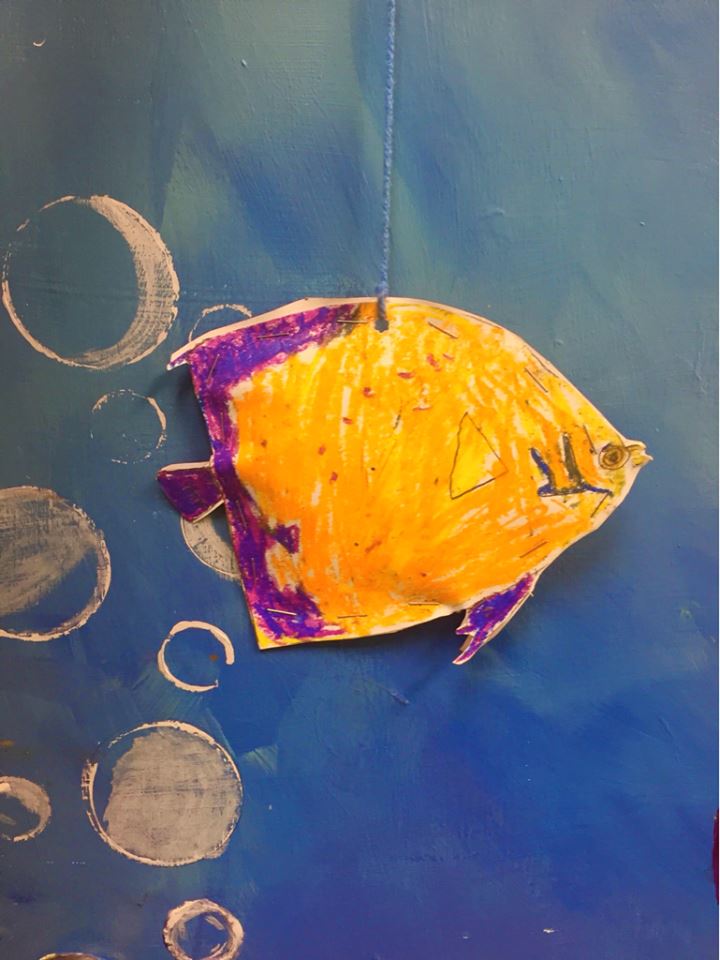
Student Work
Lesson At A Glance
Here’s a brief overview of the complete lesson. It’s also on your prep page in the Ready, Set, Go! section (below the lesson).
Colored buttons jump to each section in the full lesson plan below.
15 Minutes – Students begin with Artists’ Choice
15 min – finish the face & color with oil pastels
15 min – Draw fish from reference
10 min – Color best fish in expressive colors & blend
5 min – Cut the fish outline
10 min – Trace fish & add details
10 min – Color the mirror fish
5 min – Teacher finishes making fishes
3 min – Show how you’ll hang them later
2 Min – Everyone helps
Use this button to jump down to the preparation section.
SCROLL & TEACH
LESSONPLAN
Each section is a different color. Read over once and then you can SCROLL & TEACH using any device you like. It’s designed to work well with your phone.
LEARNING TARGETS

Students know how to use their imagination
M A T E R I A L S
- 11″ x 17″ copy paper
- 4B pencil
- Eraser
- Markers and/or oil pastels
- Blenders (stumps)
- Paper towels
1.1 Greet
Kneel down so that you are on their level. Bending over emphasizes the differences in your height, while kneeling makes them feel more important. Have tape and marker ready so you can stick some tape on the table by each student and write their name on it as they sit down.
1.2 Choice
Everyone should take their time with the work and make a finished piece of art. Limiting the paper can also help kids focus on the work. If someone finishes in super-fast time, ask them what more they can do to the existing paper. Ask again several times – unless they appear overly frustrated; then you can allow them to move on to a new work.
Use this button to jump down to the preparation section.
STEP 2. Colorful Face
Students will finish a symmetrical drawing with pencil and blended oil pastels. 15 MinutesLEARNING TARGETS
Students know how to color creatively
M A T E R I A L S
- Face finish printout
- dark or black colored pencil or fine line marker
- White and kneaded erasers
- Oil pastels
- Blending stumps
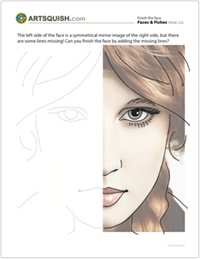
2.1 Print
Reference
Face Finish
Print enough for each student to have one to work on.
Hand out reference prints.
1 Page – Opens in new window
2.2 draw
Have students finish the 2nd half of the face, but just with the lines. Use a black marker or colored pencil. This is a mirror image, symmetrical drawing. Most of the lines are shown as light gray guidelines, but there are some lines missing. Students should go over all of the existing guidelines, and also fill in the missing parts by looking at the right side and drawing them in mirror image on the left.
2.3 color
Use this button to jump down to the preparation section.
LEARNING TARGETS
Students know how to draw from a photo
M A T E R I A L S
- White card stock paper – 8.5″ x 11″
- Light yellow markers
- 2B pencil or colored pencil
- Fish references (below
3.1 Print
Reference
Fishes
Cut images apart and print enough for each student to choose from several.
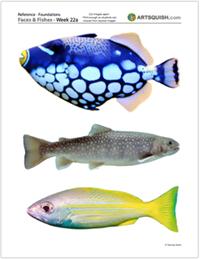
2 Pages – Opens in new window
3.2 draw
Use a sheet of 8.5″ x 11″ card stock paper turned to the bathtub (horizontal) position. Draw this fish using a light yellow marker to make a guide line. Make sure students do not fill in areas. Just draw the outline and any lines needed for fins, mouth and eyes. Pencils can be used if needed, but colored pencils are best. Graphite can mix into the colors and make them look dirty.
Help students make fat fish! There cannot be super-narrow parts, such as where the tail starts, because these will be cut out and stuffed.
Use this button to jump down to the preparation section.
LEARNING TARGETS
Students know how to use oil pastels
M A T E R I A L S
- Fish drawings from Step 3
- Oil pastels
- Blenders (stumps)
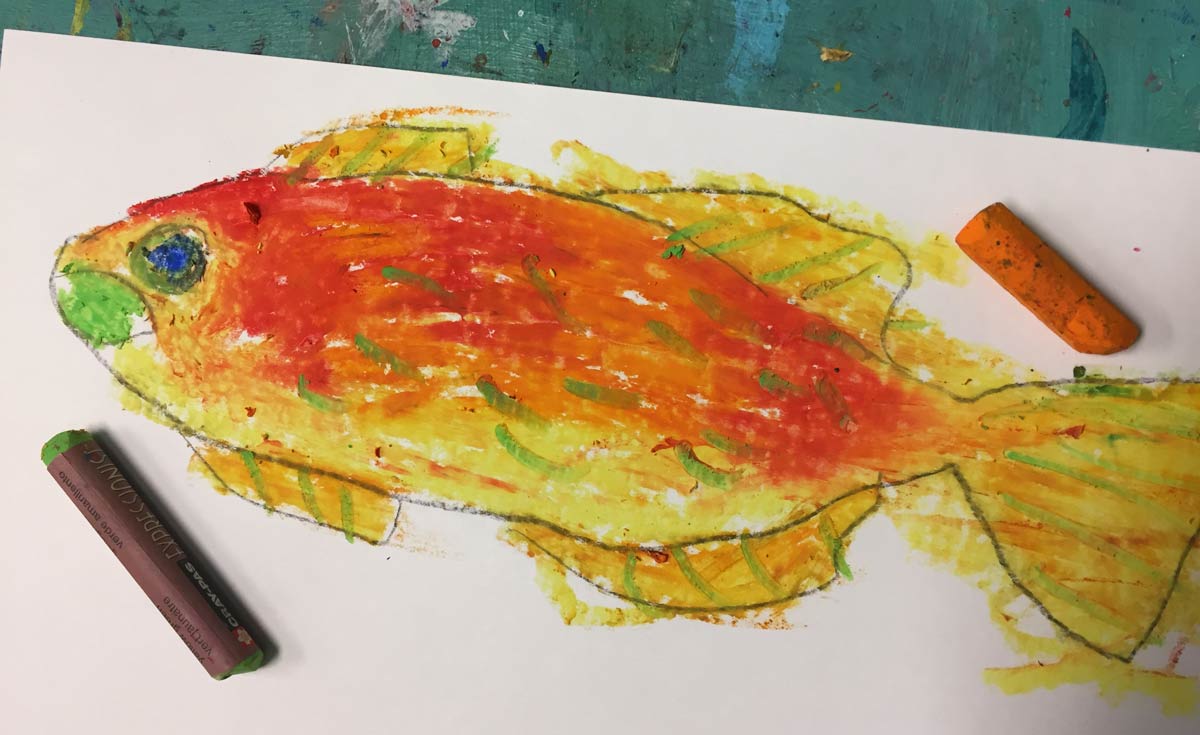
4.1 color
Students choose one fish they like best.
Color the chosen fish in expressive wonderful colors, with layering of several colors and blending with white and blending sticks. Do not blend hot withcold colors, but keep them separate.
It’s ok to make the fish have different colors and patterns than the pictures! Anything goes.
4.2 blend
Use this button to jump down to the preparation section.
LEARNING TARGETS
Students know how to use scissors
M A T E R I A L S
- Colored Fish drawing
- Safety scissors
“You need to cut out the fish twice. The first time you just cut around the fish, getting near the outline but not on it. This is a rough cut, or lazy cutout. Then you start over, and carefully cut along the outline for the second, accurate cut.”
Use this button to jump down to the preparation section.
STEP 6. Mirror Fish
Students will trace around their fish in pencil to create a mirror image. 10 MinutesLEARNING TARGETS
Students know how to draw a mirrored image
M A T E R I A L S
- Cut out fish drawing
- Clean 8.5″ x 11″ white cover stock paper
- 2B pencil
- light yellow marker
6.2 trace
6.3 turn
6.4 draw
“This is the other side of your fish! You can see that it’s facing the other way, because it’s a mirror image of the first one. That means you need to draw the eye, the mouth, and other details on the other end.”
Use this button to jump down to the preparation section.
STEP 7. Mirror Color
Students can choose to color the new fish the same way or make them look completely different. 10 MinutesLEARNING TARGETS
Students know how to use oil pastels to color a mirrored image
M A T E R I A L S
- New fish drawing
- Oil pastels
- Blender stick (stumps)
7.1 color
“Remember to blend alike colors together. Use a white pastel, or a blending stick.”
Use this button to jump down to the preparation section.
LEARNING TARGETS
Students know how to make 3D artwork
M A T E R I A L S
- Fish drawings
- Scissors
- Stapler
- Tissue paper or paper towel bits
- Yarn
- Hole punch
Fish Steps(tap any image to open viewer)
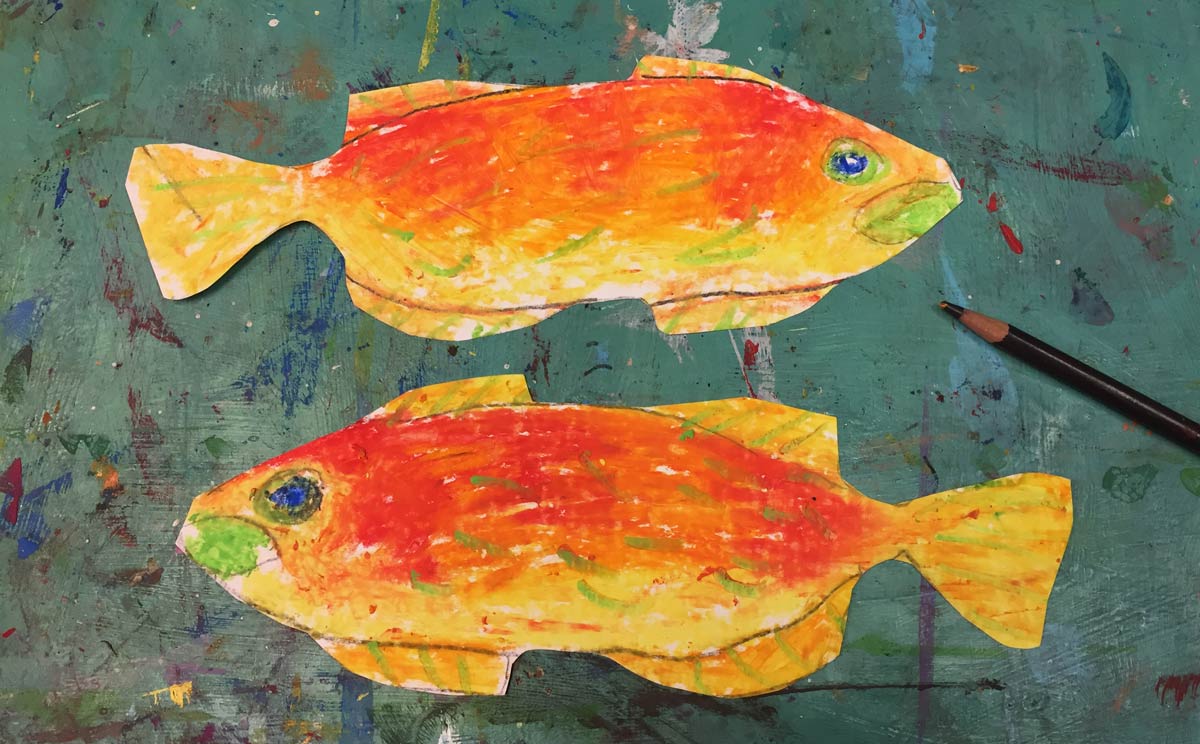
Flipped Fish (mirror image symmetry)
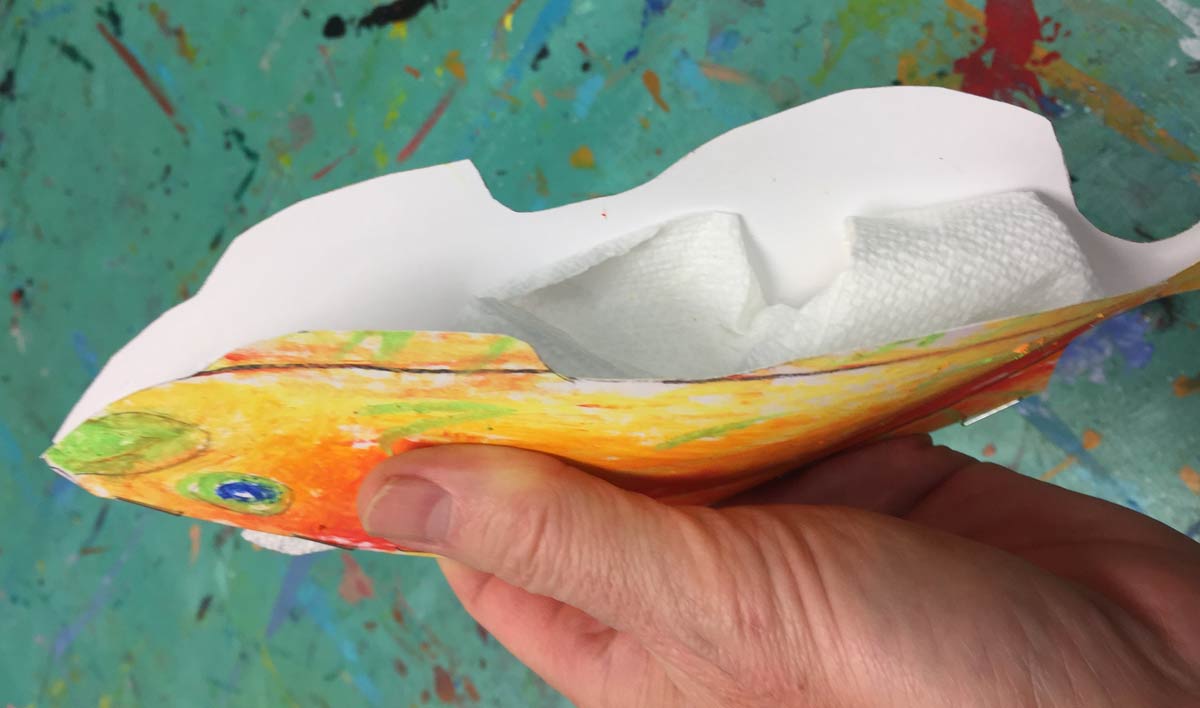
Fish Guts! (paper towels)
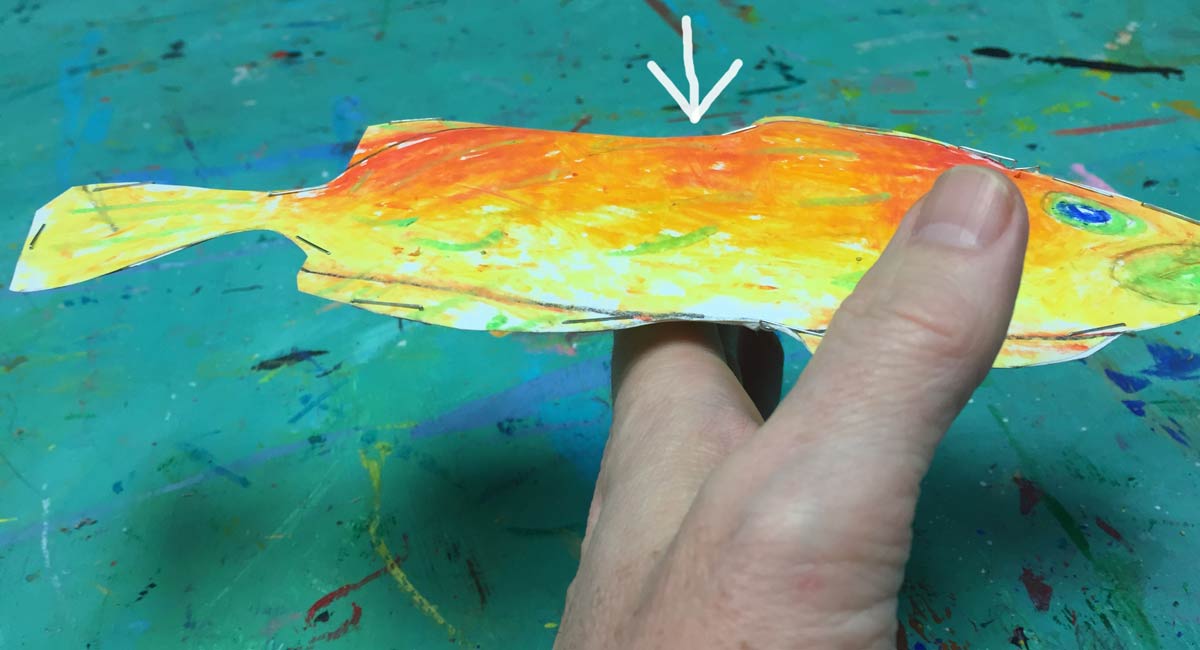
Find the Fish Balance Point
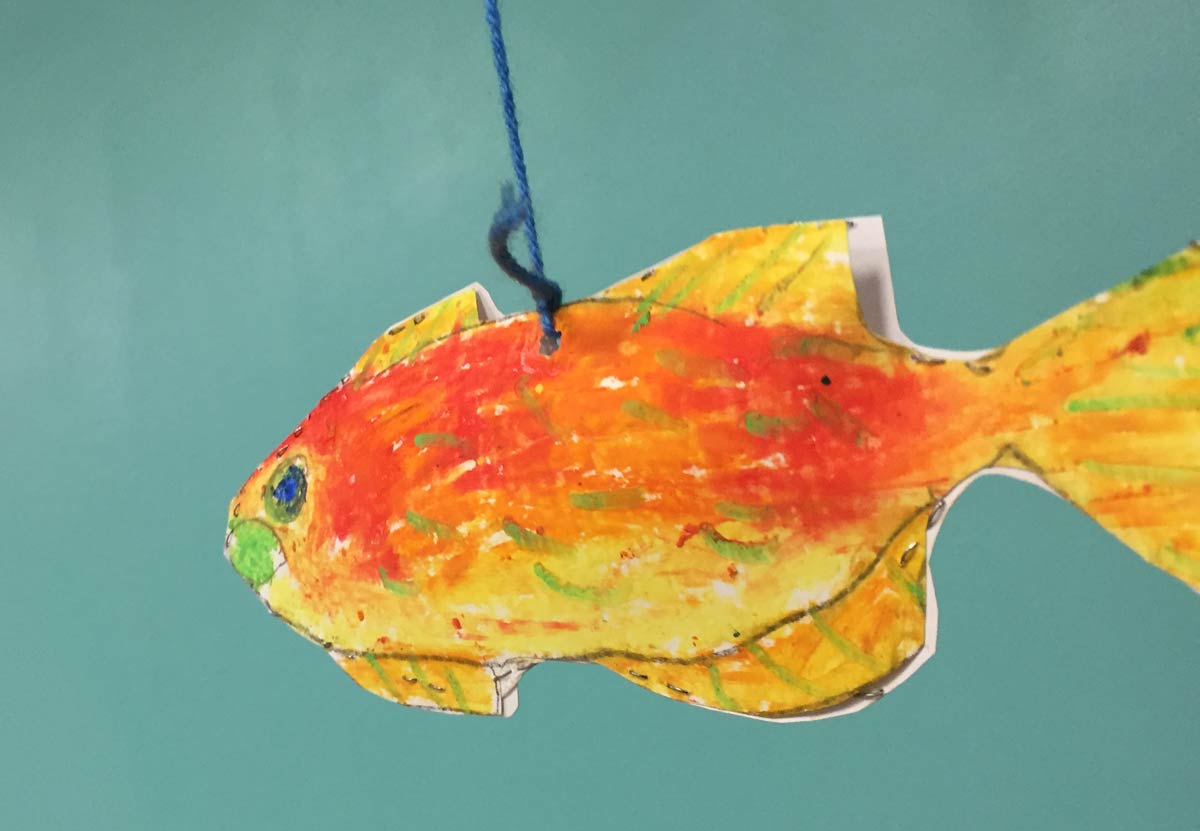
Fish hanging on Yarn
8.3 stuff
8.5 finish
Use this button to jump down to the preparation section.
STEP 9. Hang the Fish
Teachers can show students how their art will be displayed on the ceiling of the art room. 3 MinutesLEARNING TARGETS
Students know how to feel proud about their work
M A T E R I A L S
- materials to hang fish. (tape, etc)
9.1 hang
Use this button to jump down to the preparation section.
LEARNING TARGETS
Students know the importance of cleaning up.
M A T E R I A L S
- Paper Towels
- Cleaning wipes
- Sink
- Waste baskets
- Well-lit spot for photos
- Camera or phone-camera
10.1 CLEAN
- Wash hands
- Super-wash brushes if used
- Put art supplies away
- Wipe tables & toss trash
- Remove any smocks (last)
- Check for items on floors and tables
10.2 PHOTO
OBJECTIVES
- Practice and improvement in drawing from reference
- Understanding how symmetry and mirror images work (& guidelines)
- Accomplishment in decorating the classroom together with artwork
- Fulfillment in creating your own expressive artwork
TROUBLESPOTS
Fish formulas Lots of kids draw fish with a simple 2-line formula where the lines cross over each other to make the tail, like a fish logo. This won’t work for the project because there needs to be enough room all along the shape to make it 3D. This is also about drawing realistically. Explain to students who are showing off their own way to make fish, that their way is one, very awesome way to make fish drawings. However, they are what’s called stylized drawings, and today we’re doing realistic drawings and expressive color.
ART WORDS
Expressive/Expression – When an artist adds their own ideas to an image. It becomes less realistic. Usually expressive work is dramatic and bold, like the bold expressive colors we’re using today.
CLASSROOM
PREP
Print all of your PDFs from the lesson plan and cut any references apart as needed.
What your room needs
Here are your printable lists and room prep instructions.
Opens in new window
CLASSROOM
MATERIALS
- 11×17” Copy Paper
- White card stock paper – 8.5 “ x 11”
- Light yellow markers
- 4B Pencil
- Eraser
- Markers
- Oil Pastels
- Blenders (stumps)
- Paper towels
- Face Finish printout
- Dark o black colored pencil or fine line marker
- White and kneaded erasers
- Fish references printout
- Safety scissors
- Stapler
- Tissue paper or paper towel bits
- Yarn
- Hole punch
PREVIEW
Week 23: Radial Balance
Students discover that a flower has a special kind of symmetry, magically being symmetrical in any direction! Then they work on creating their own radial symmetry artwork on 2 paper plates. To finish the day, the plates are joined like wheels using a toilet paper cardboard roll holder as an axle. The designs roll across the table and radial designs spin.
Week 24: The Most Important Spot
Emphasis is one of the most important aspects of good composition. However, this is a lot of abstract thinking for kids, so we say, “every artwork needs a Most Important Spot!” The lesson helps students think about what is in artwork, and to distinguish between wallpaper type designs and art that has that important spot that you see first. We begin with a fake art show using textures on paper but nothing else on them. Then we do some exercises with color. The end of the class has students taking the art show down and fixing the work by adding an important spot.