

OVERVIEW
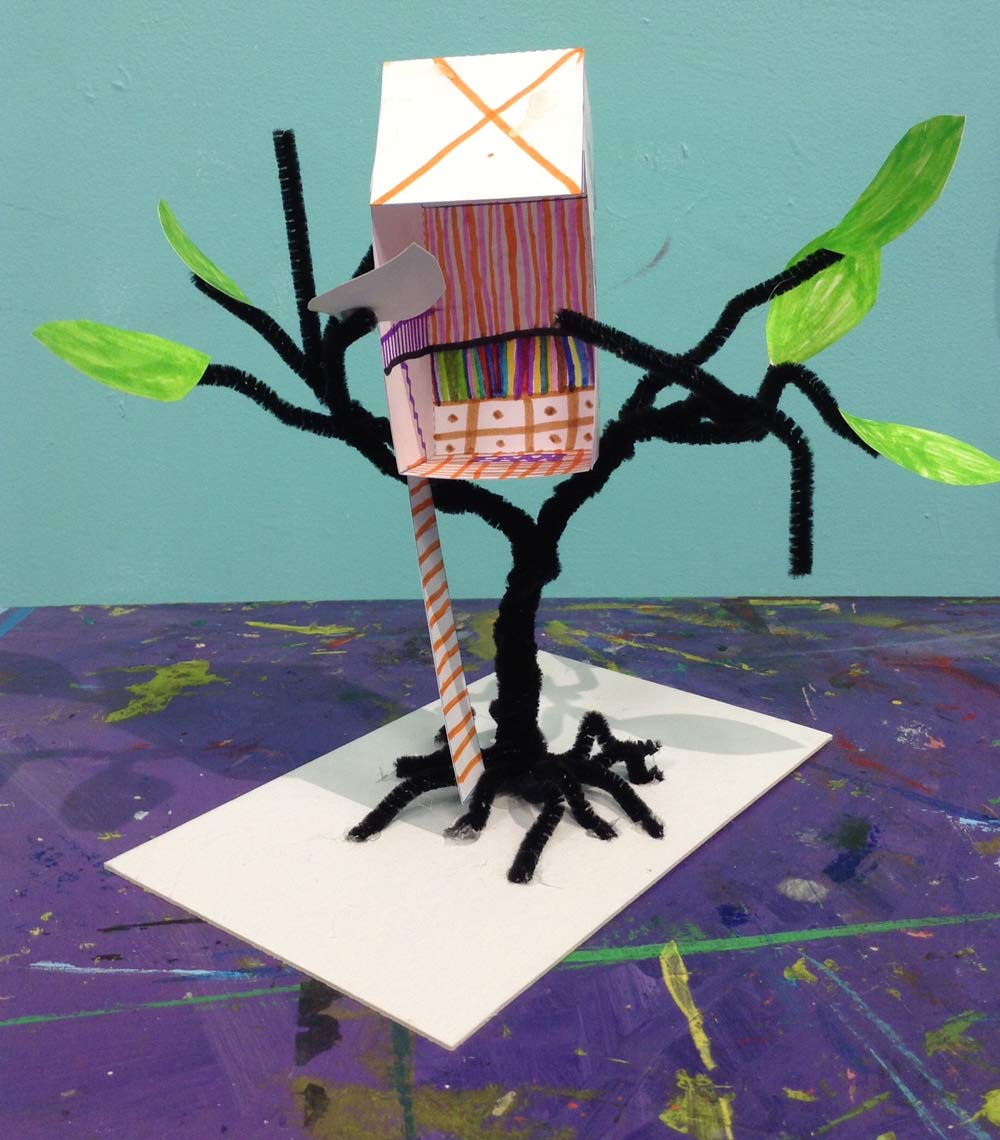
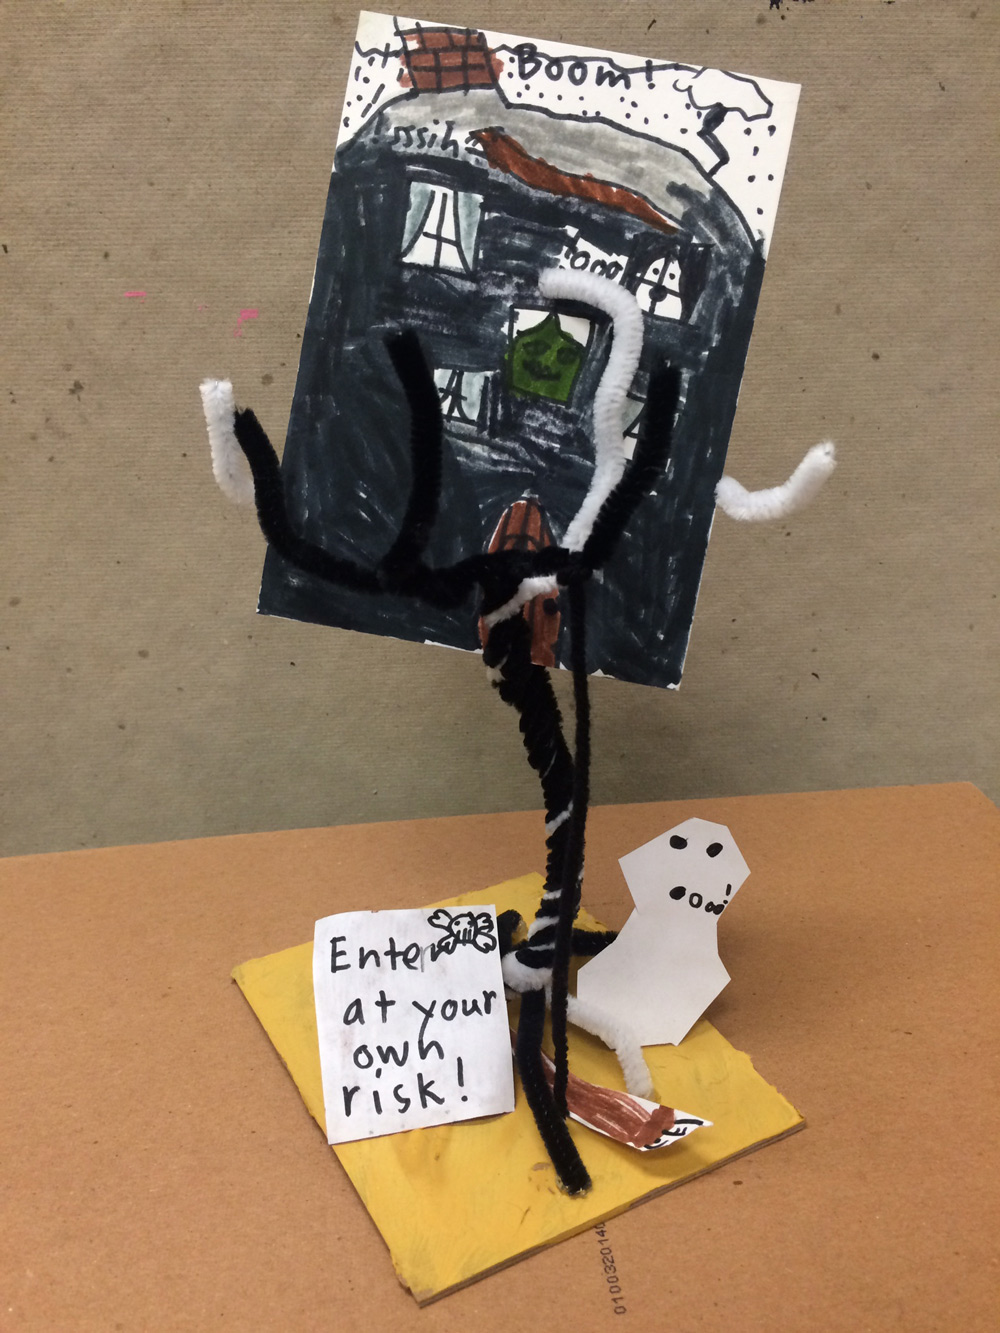
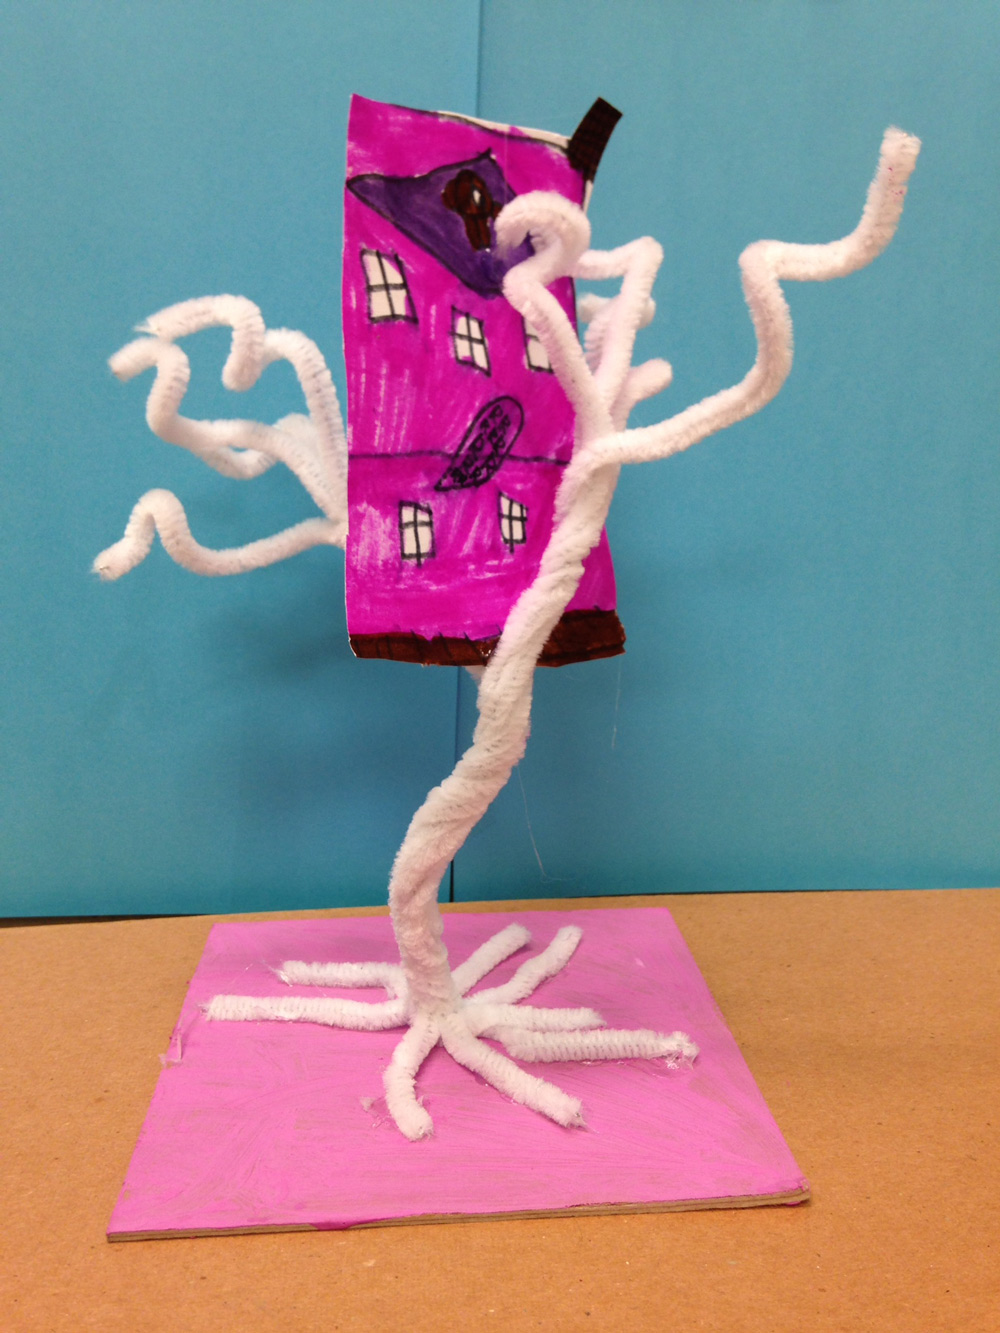
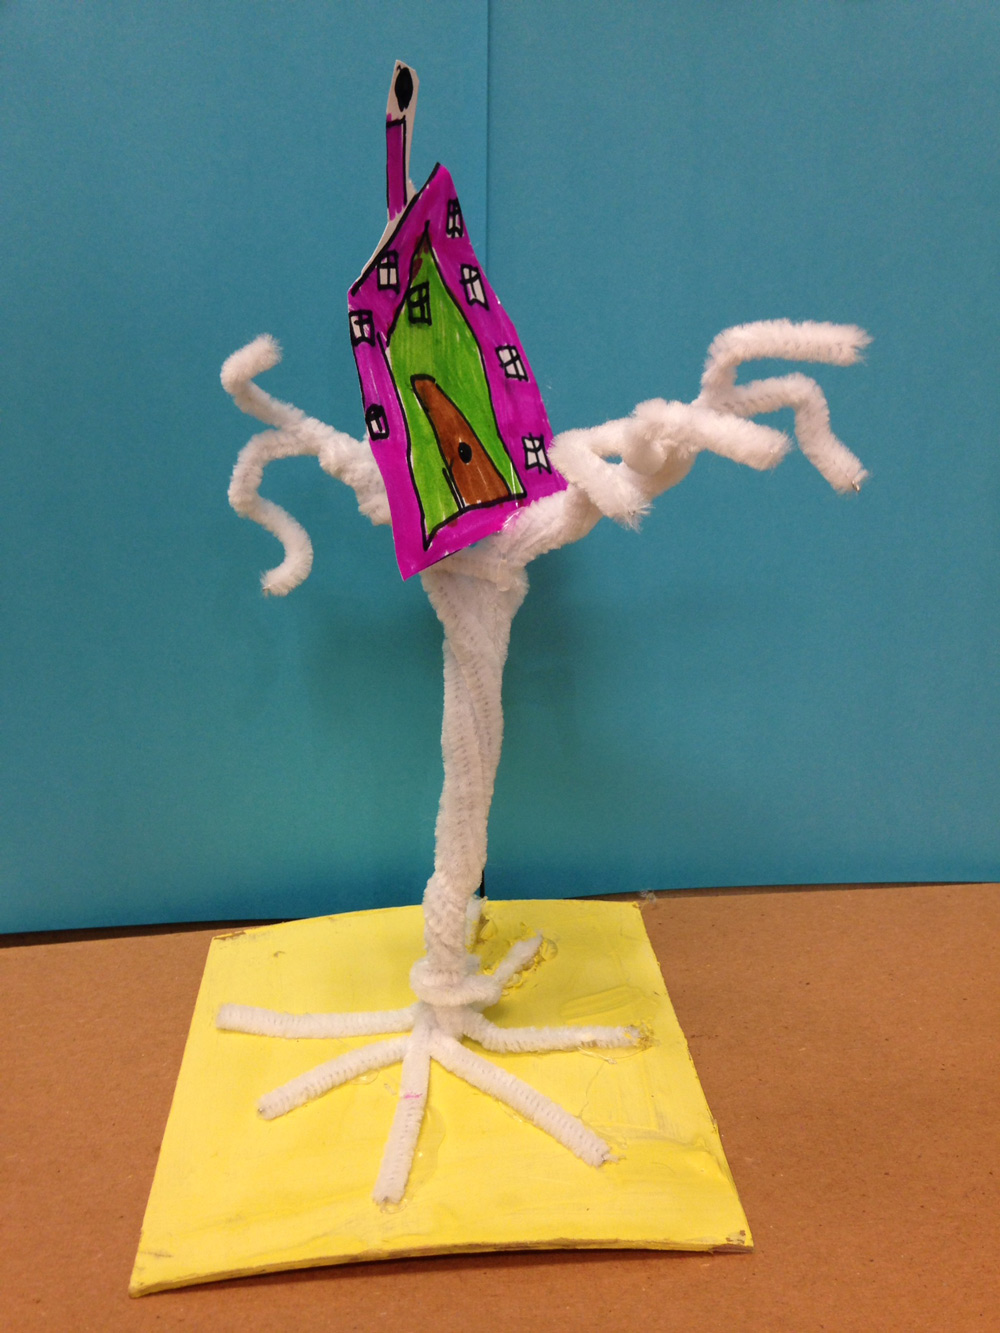
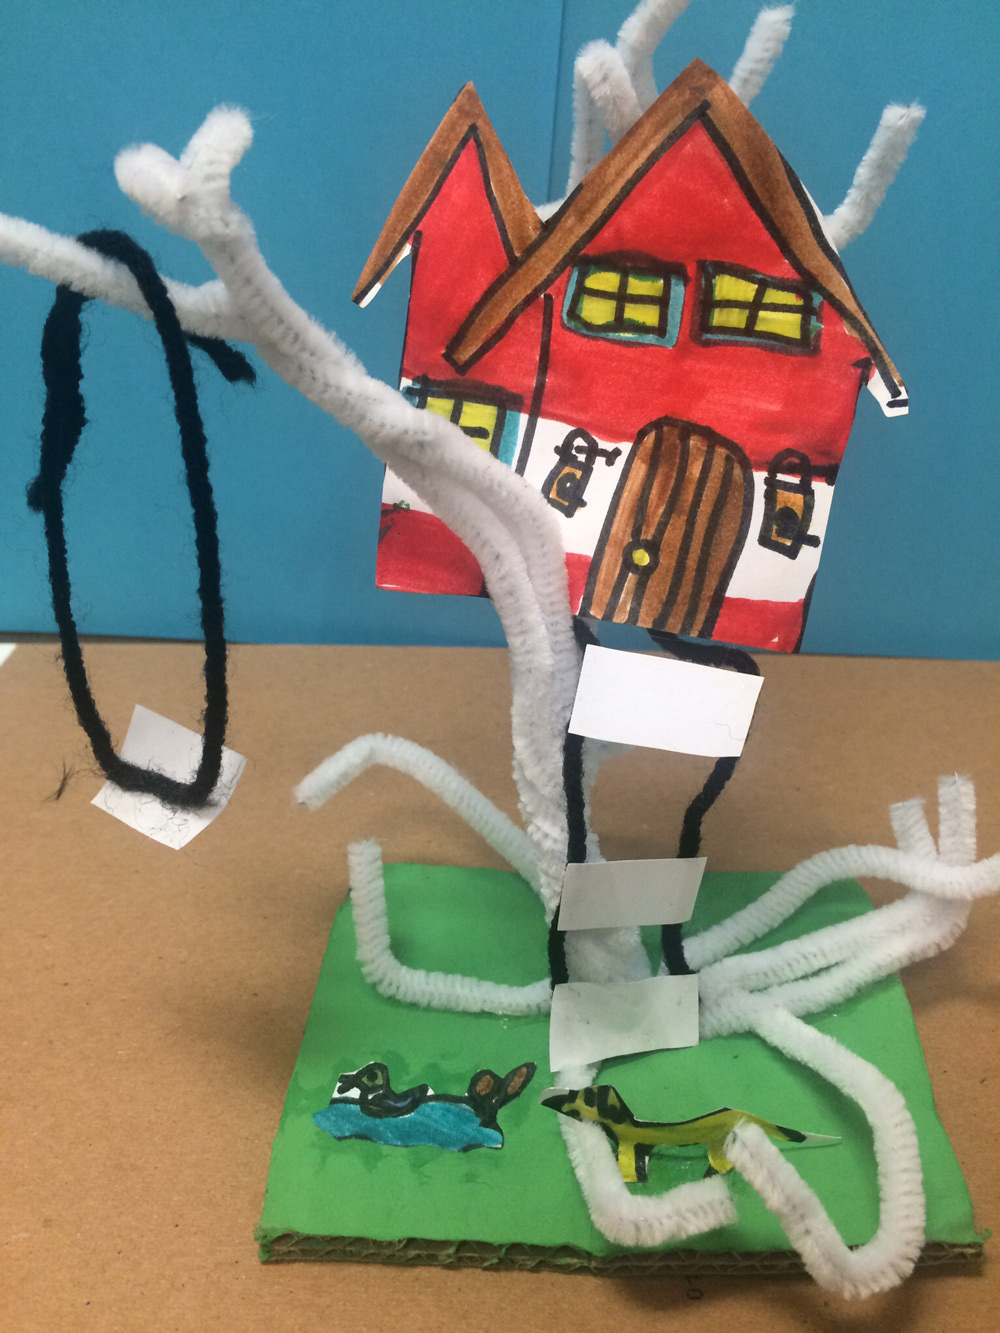
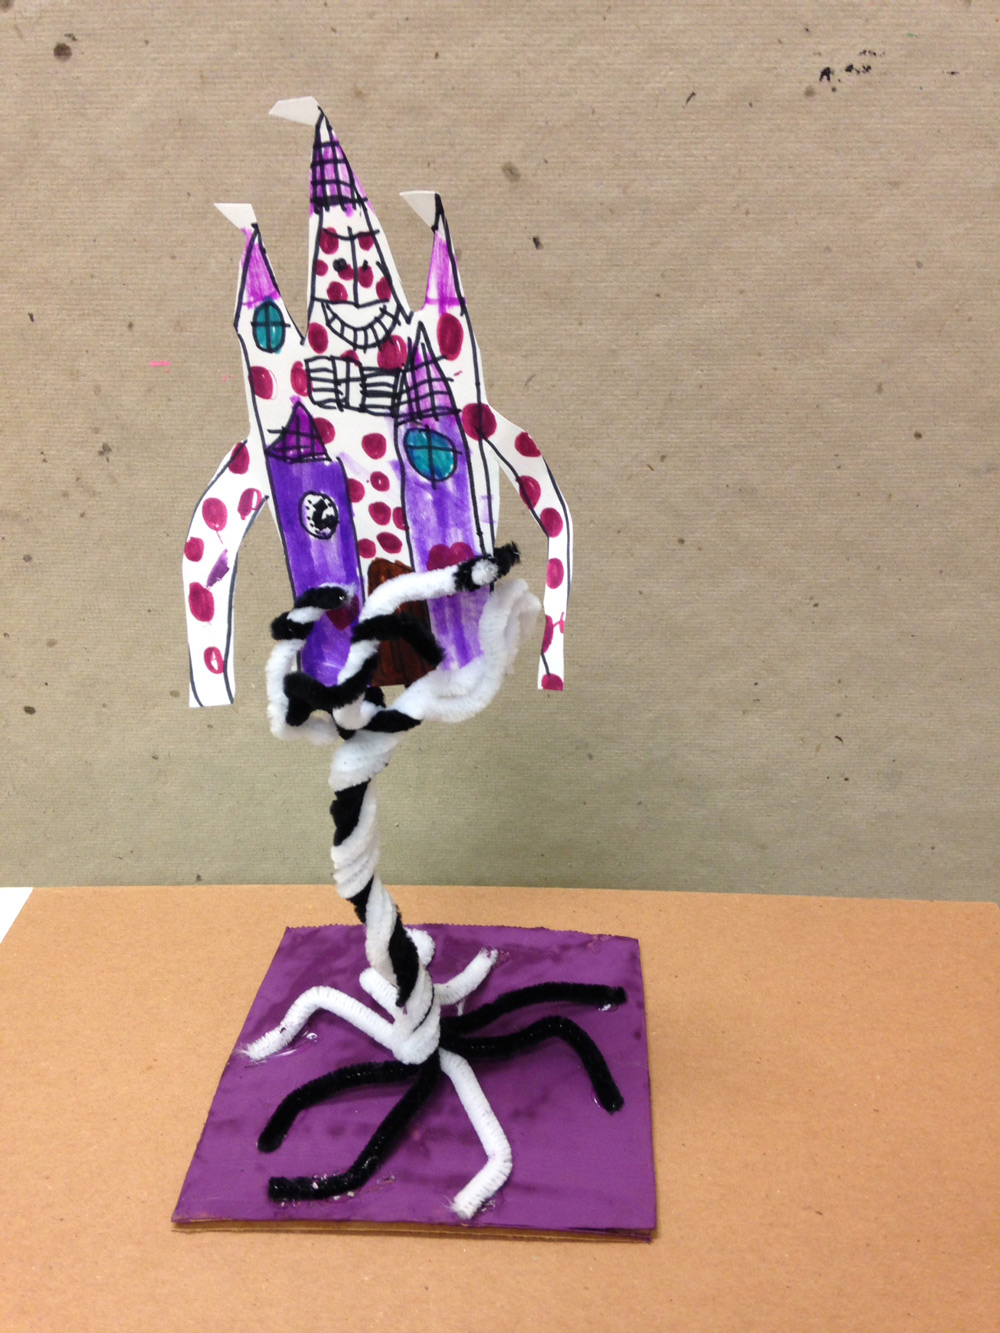
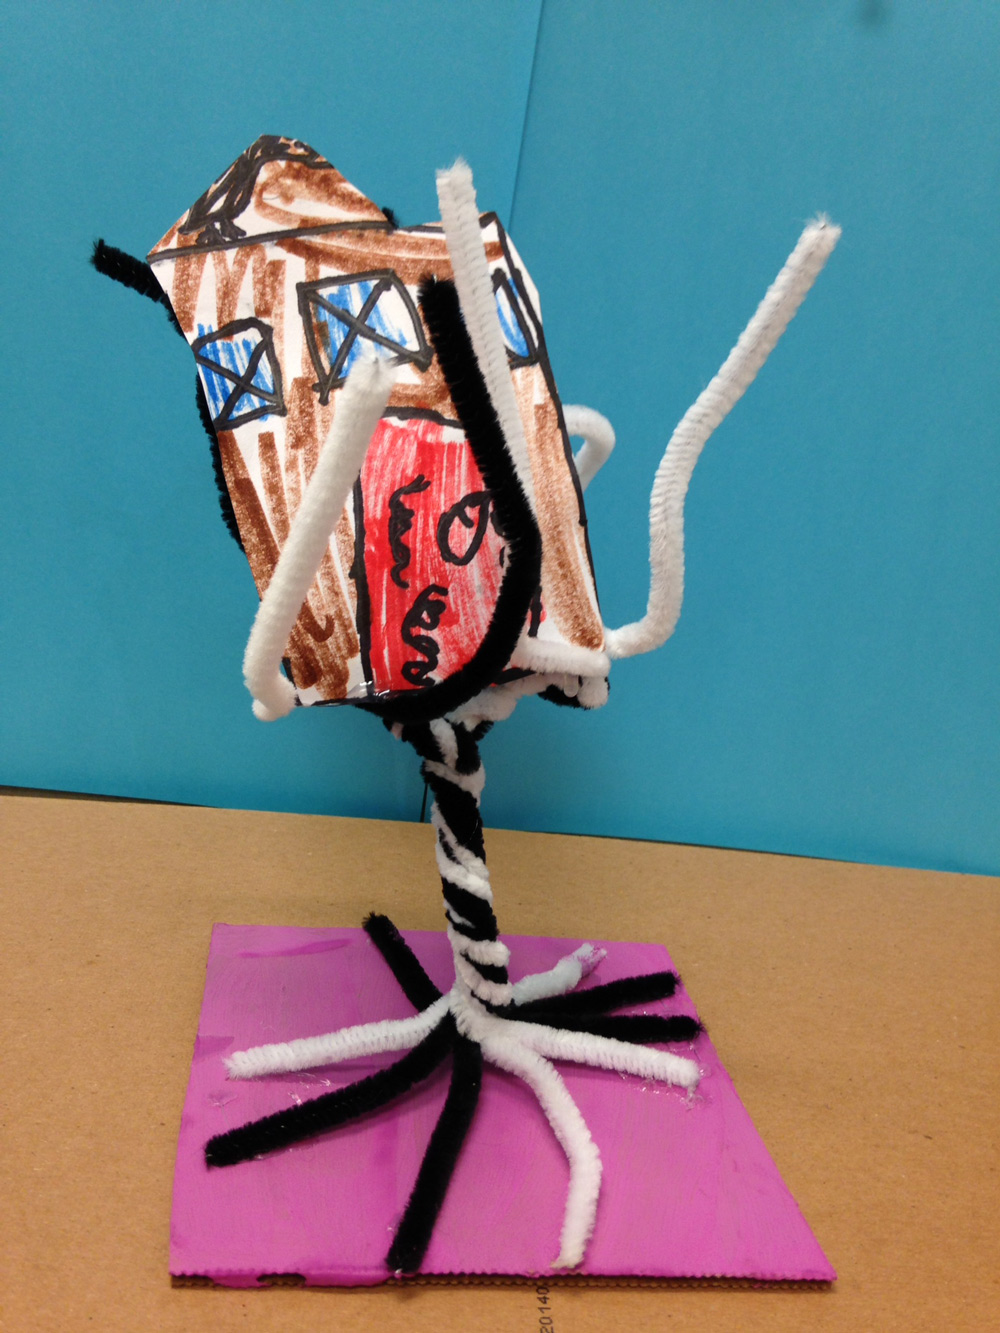
Artists make trees by twisting pipe cleaners, and paper leaves are attached. Then everyone designs and creates a tiny tree house to go onto their tree sculptures. The whole thing is glued together and onto a base for a fun project to take home.– – –
Grades 1 – 2
Week of March 24 – 28
1 Hour & 30 Minutes
Student Work


Lesson At A Glance
Here’s a brief overview of the complete lesson. It’s also on your prep page in the Ready, Set, Go! section (below the lesson).
Colored buttons jump to each section in the full lesson plan below.
5 min – Use leaf template to make a new design
10 min – Demo & discuss tree shapes using clay
15 min – Start to make tree out of pipecleaners
15 min – Use template to create leaves
30 min – Draw and color treehouse designs
13 min – Assemble tree, leaves, treehouse, and base together.
2 min – Everyone helps
Use this button to jump down to the preparation section.
SCROLL & TEACH
LESSONPLAN
Each section is a different color. Read over once and then you can SCROLL & TEACH using any device you like. It’s designed to work well with your phone.
LEARNING TARGETS

Students know how to use their imagination
M A T E R I A L S
- 8.5″ x 11″ copy paper
- 2B Pencil
- White Eraser
- Markers
1.1 Print
Reference
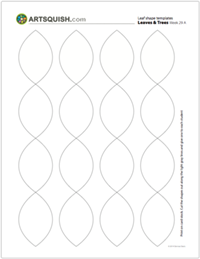
Leaf Shape Template
Cut images apart and print enough for each student
Hand out cut out shapes.
1 Page – Opens in new window
1.2 Greet
Kneel down so that you are on their level. Bending over emphasizes the differences in your height, while kneeling makes them feel more important. Have tape and marker ready so you can stick some tape on the table by each student and write their name on it as they sit down.
1.3 Choice
Have the leaf shapes template printed on card stock, cut out and ready (below). Give one to each student and have them trace 3 or 4 of them on their paper.
Everyone should try and make each of the shapes into something different. What can you make out of this shape? Ideas: it might be a lemon, a football, or an eye. Use the pastels to color and blend the pictures.
Use this button to jump down to the preparation section.
LEARNING TARGETS
Students know how what branches and trees accurately look like
M A T E R I A L S
- Clay or Play Dough
- Plastic knife
Tree Demo (tap any image to open viewer)
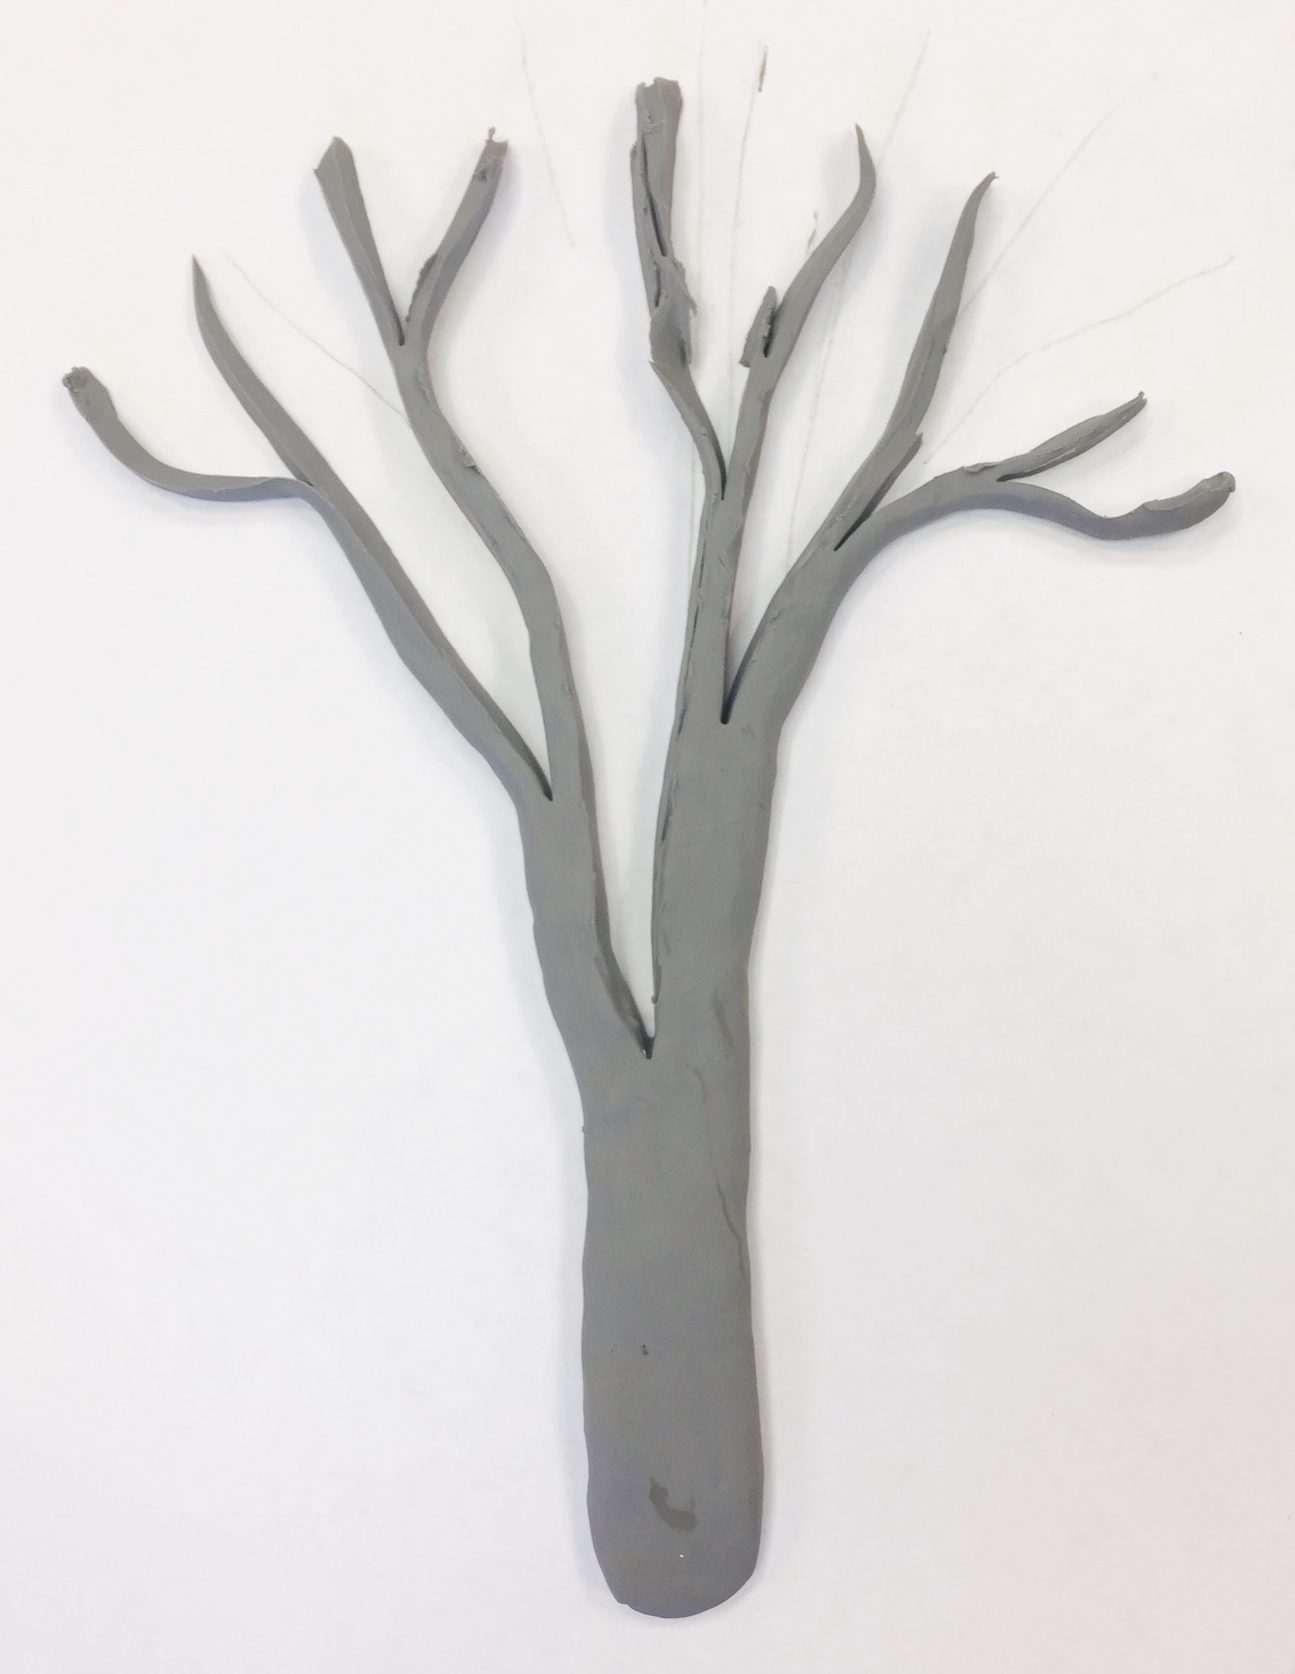
Tree 7
The finished clay tree will look like this to your students. You’ll make it upside down from your perspective.
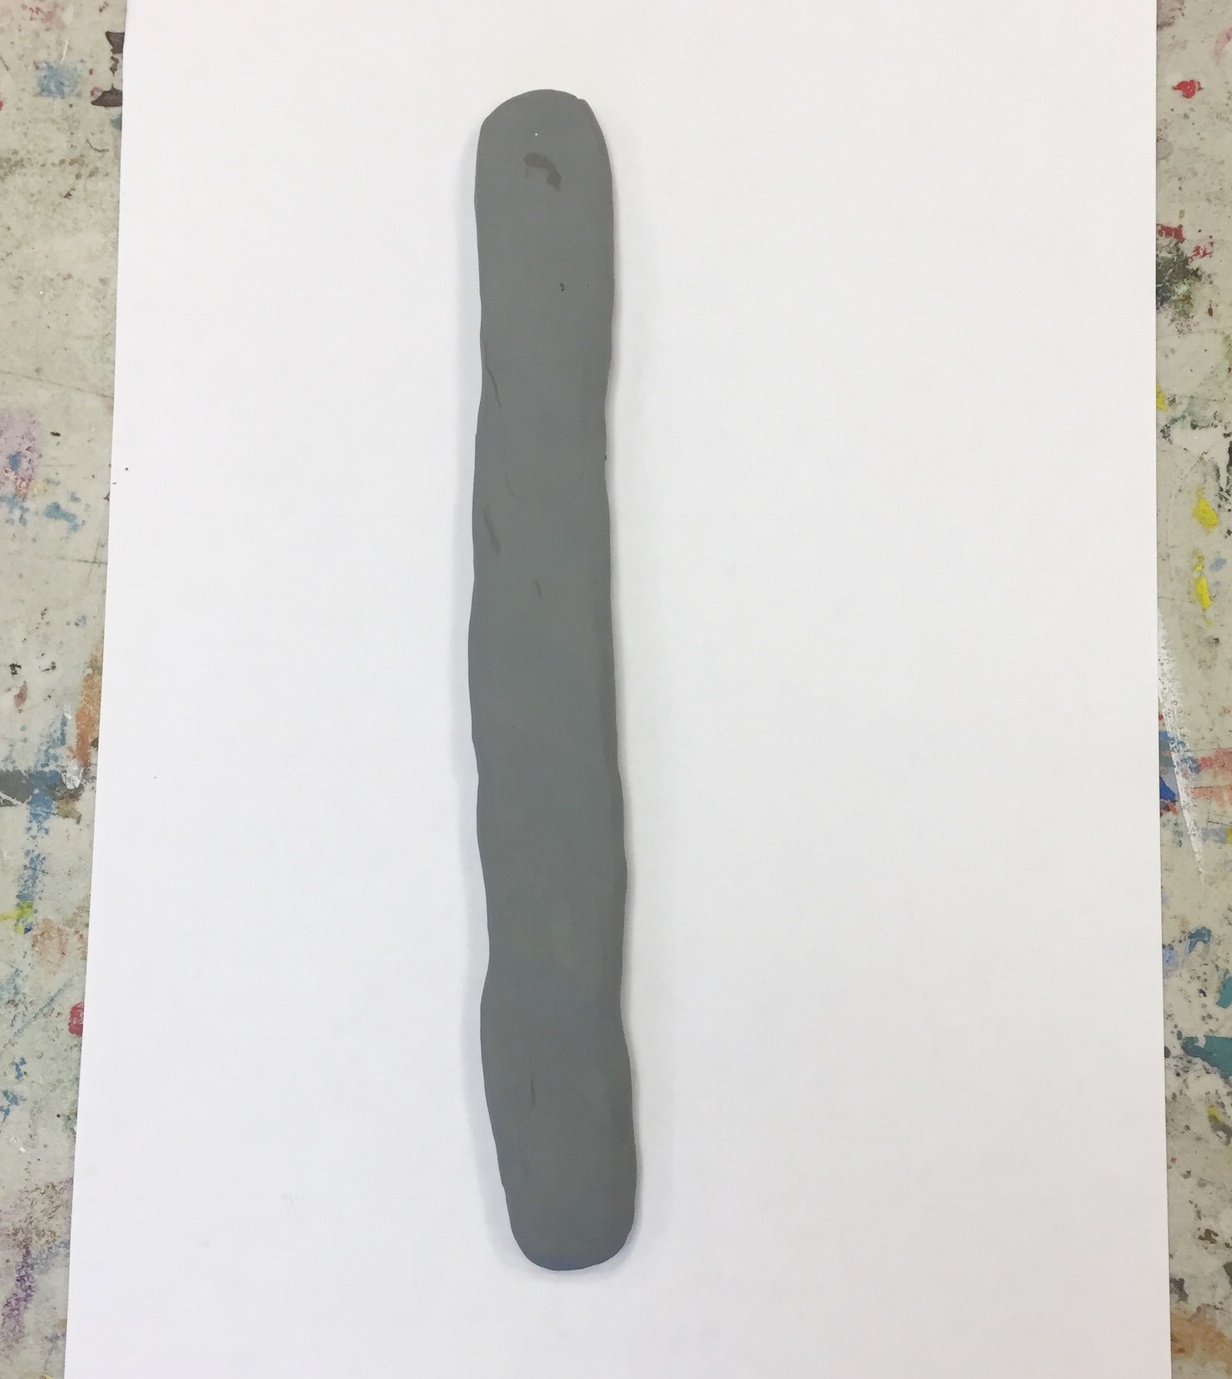
tree 1
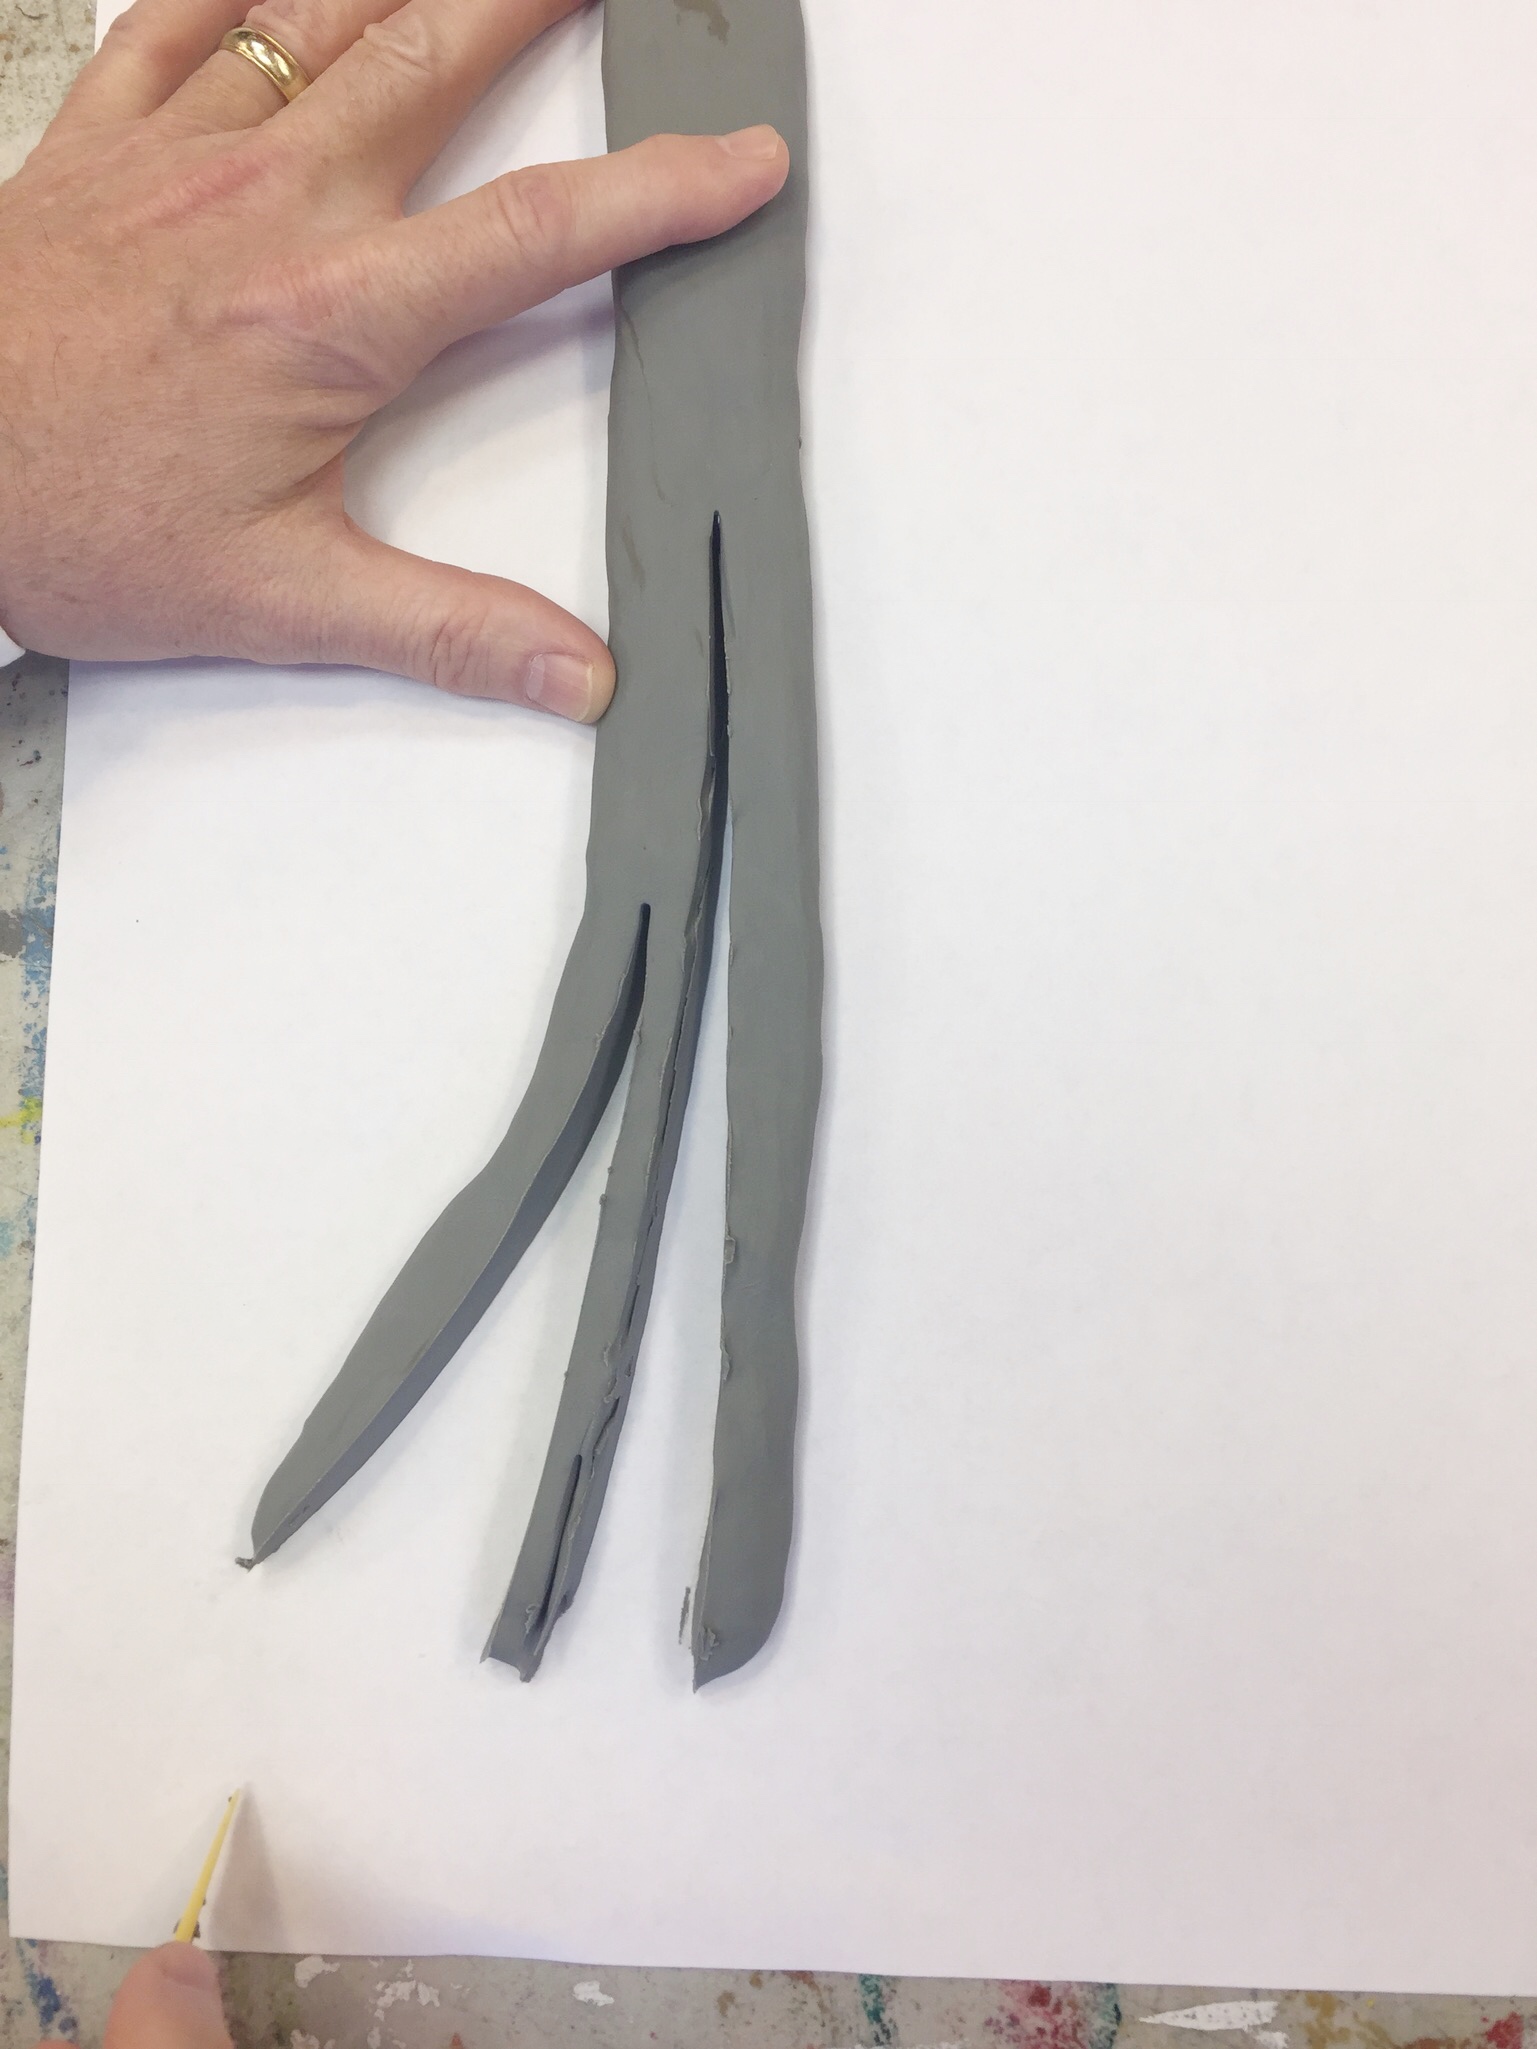
Here’s a long flat tree trunk shape. It’s about 1.5″ x 9-10″
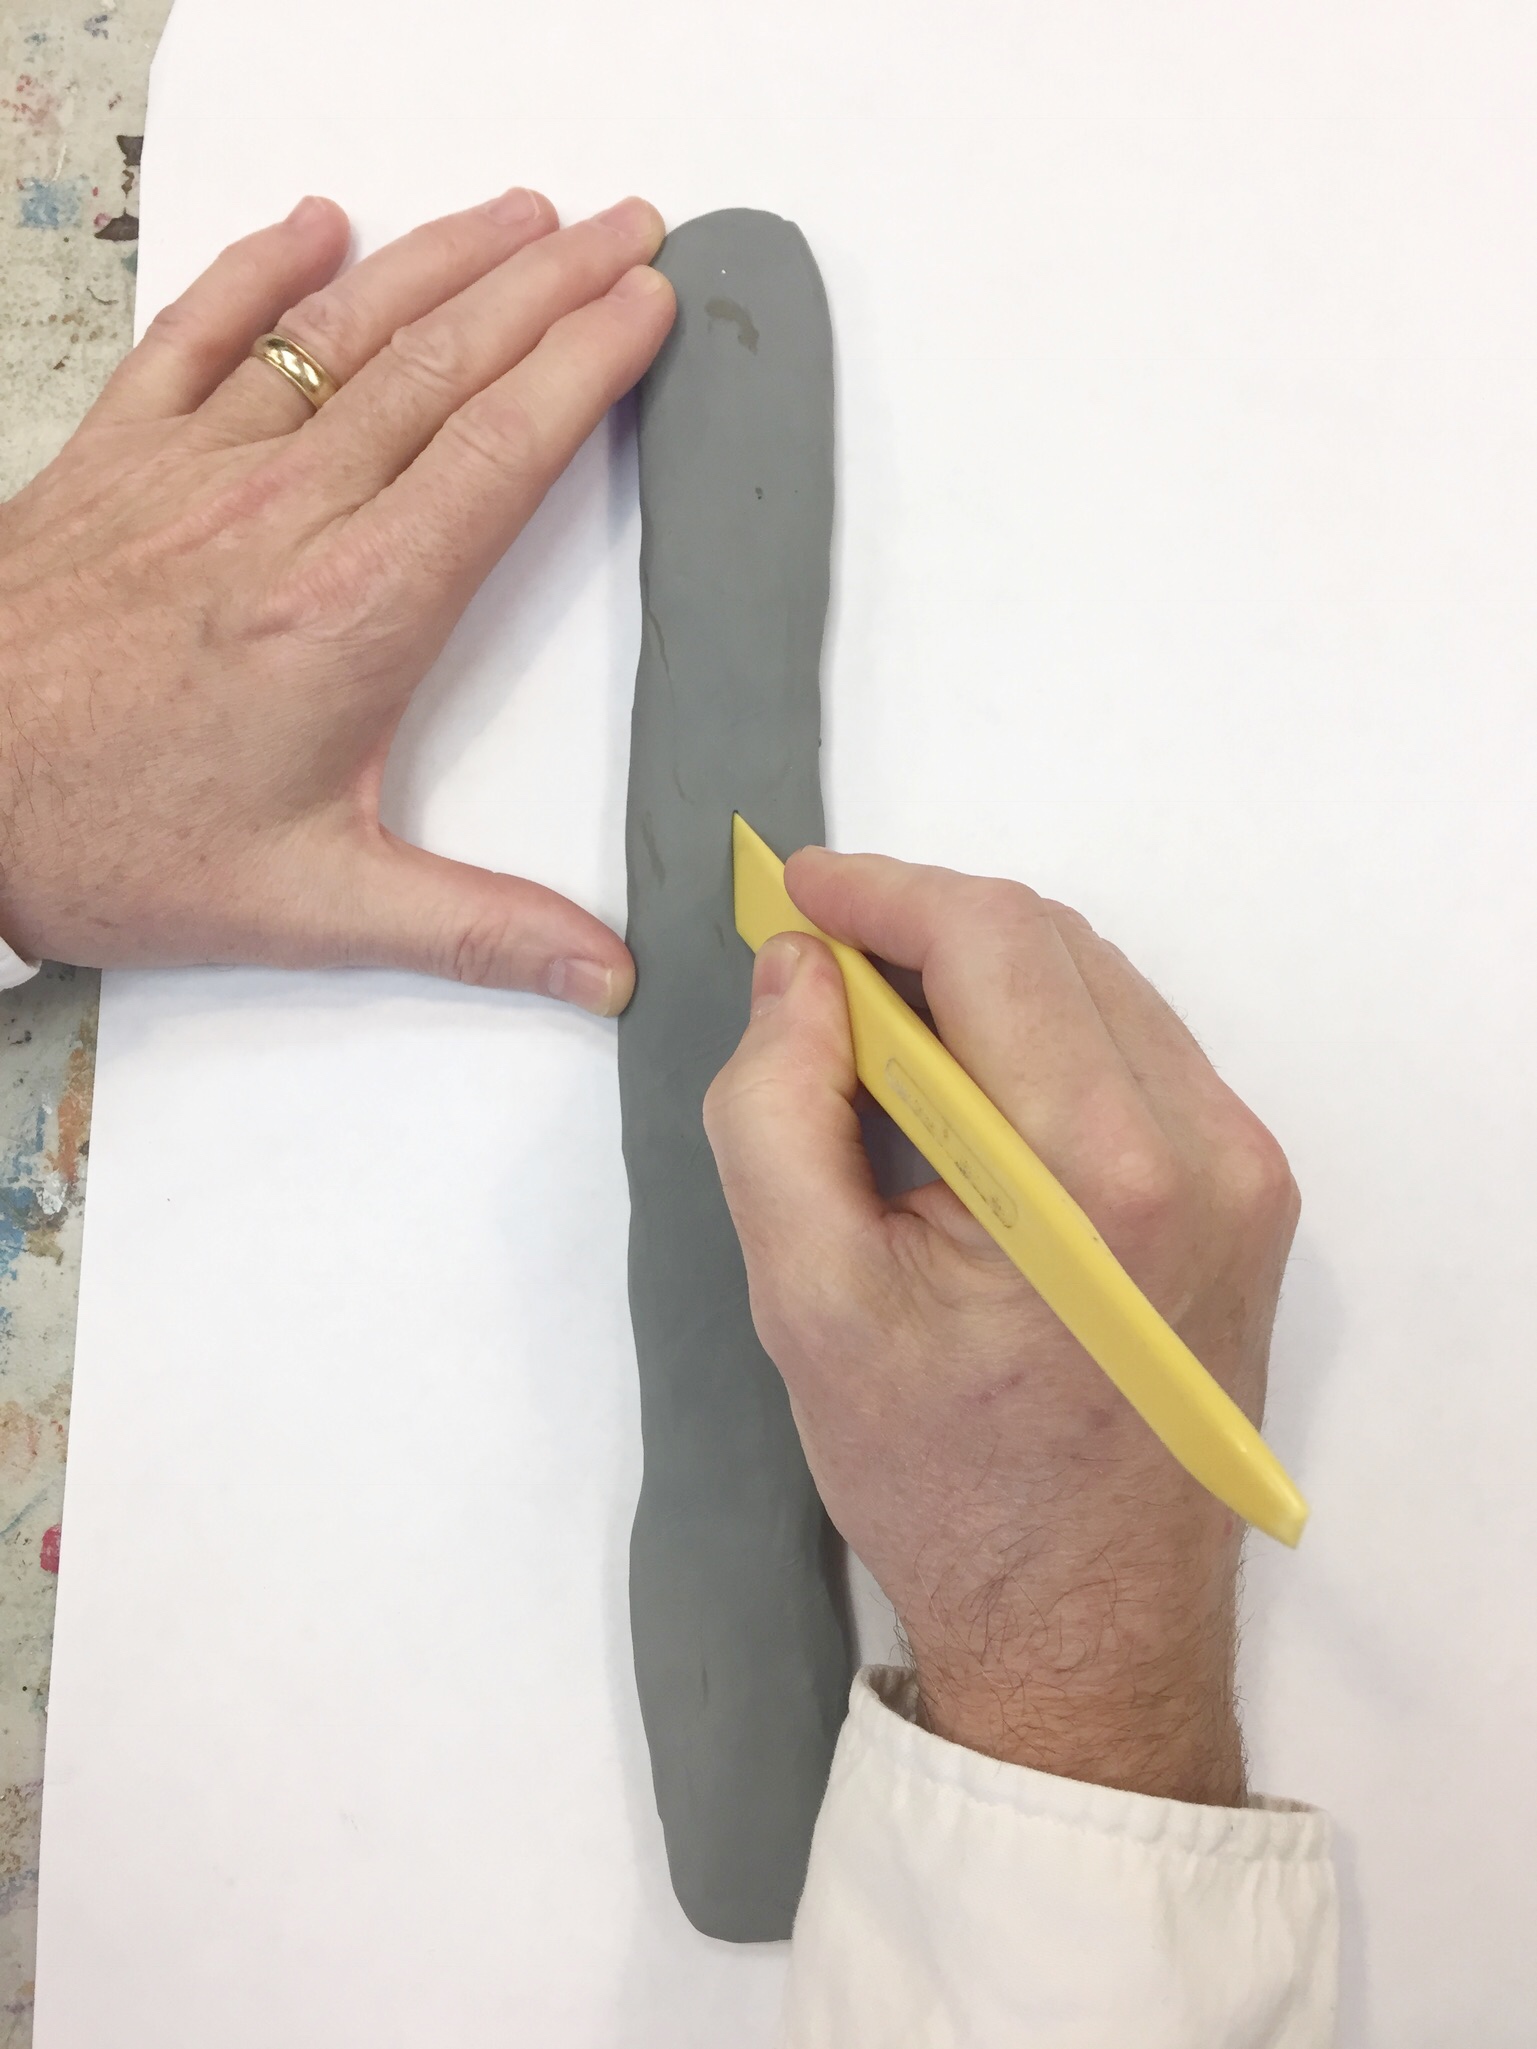
Tree 2
Use a clay tool, plastic palette knife or disposable knife. Start in the center about 1/3 of the way down from the top.
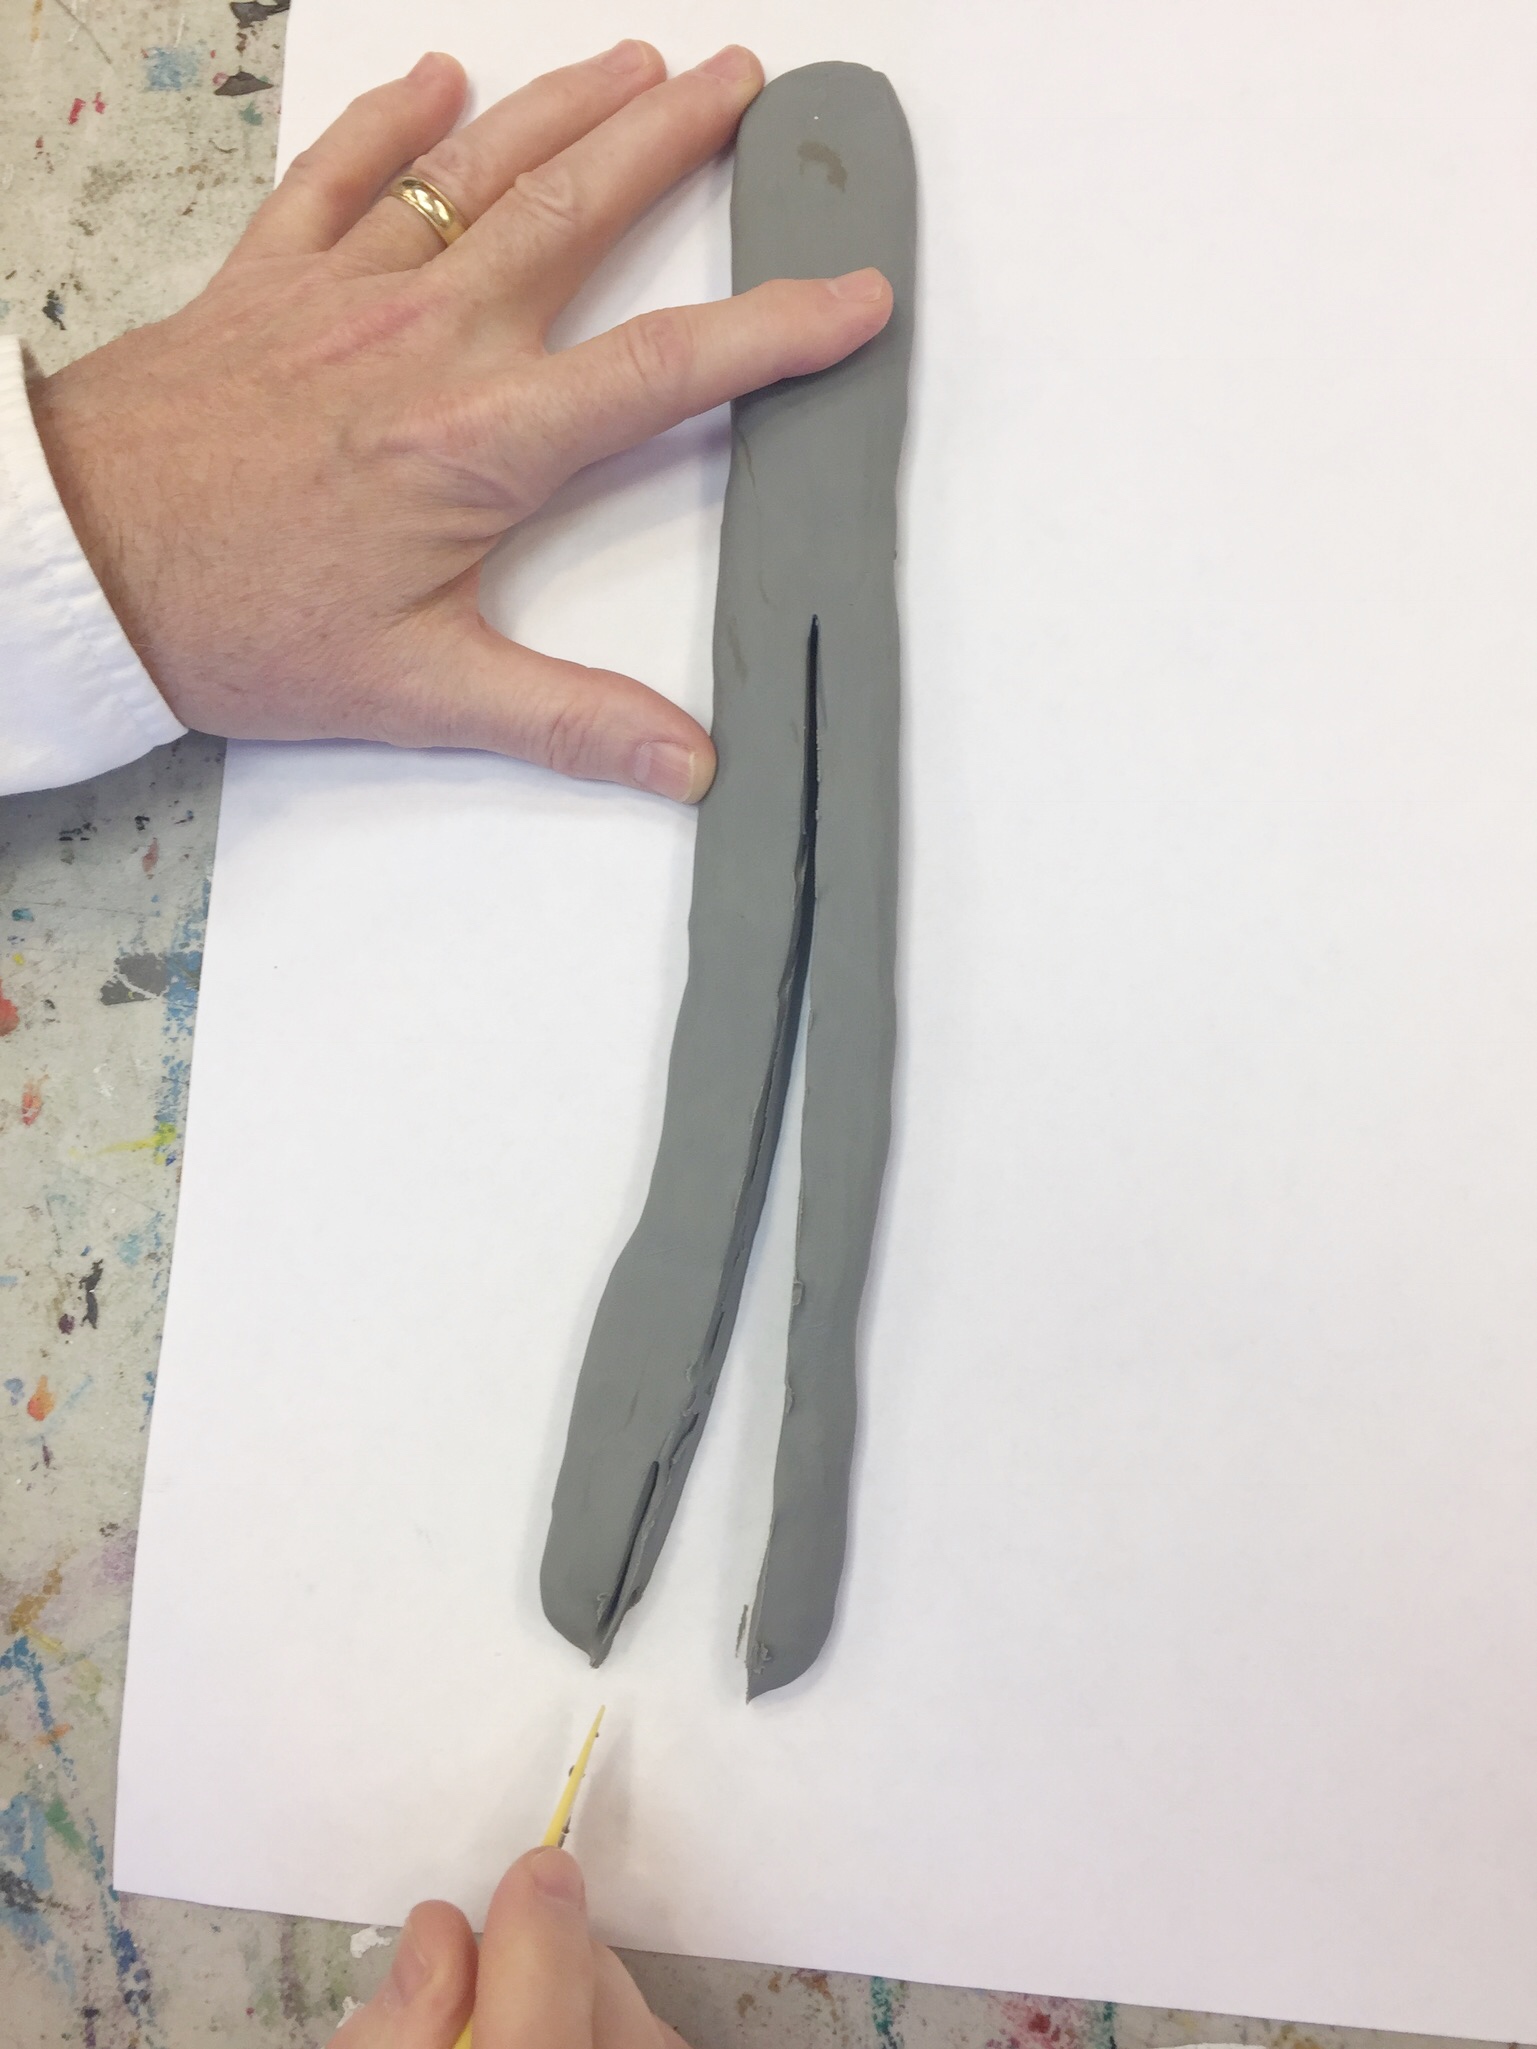
Tree 3
Pull the knife toward you, dividing the clay trunk into two main branches. Pull slightly apart.
Tree 4
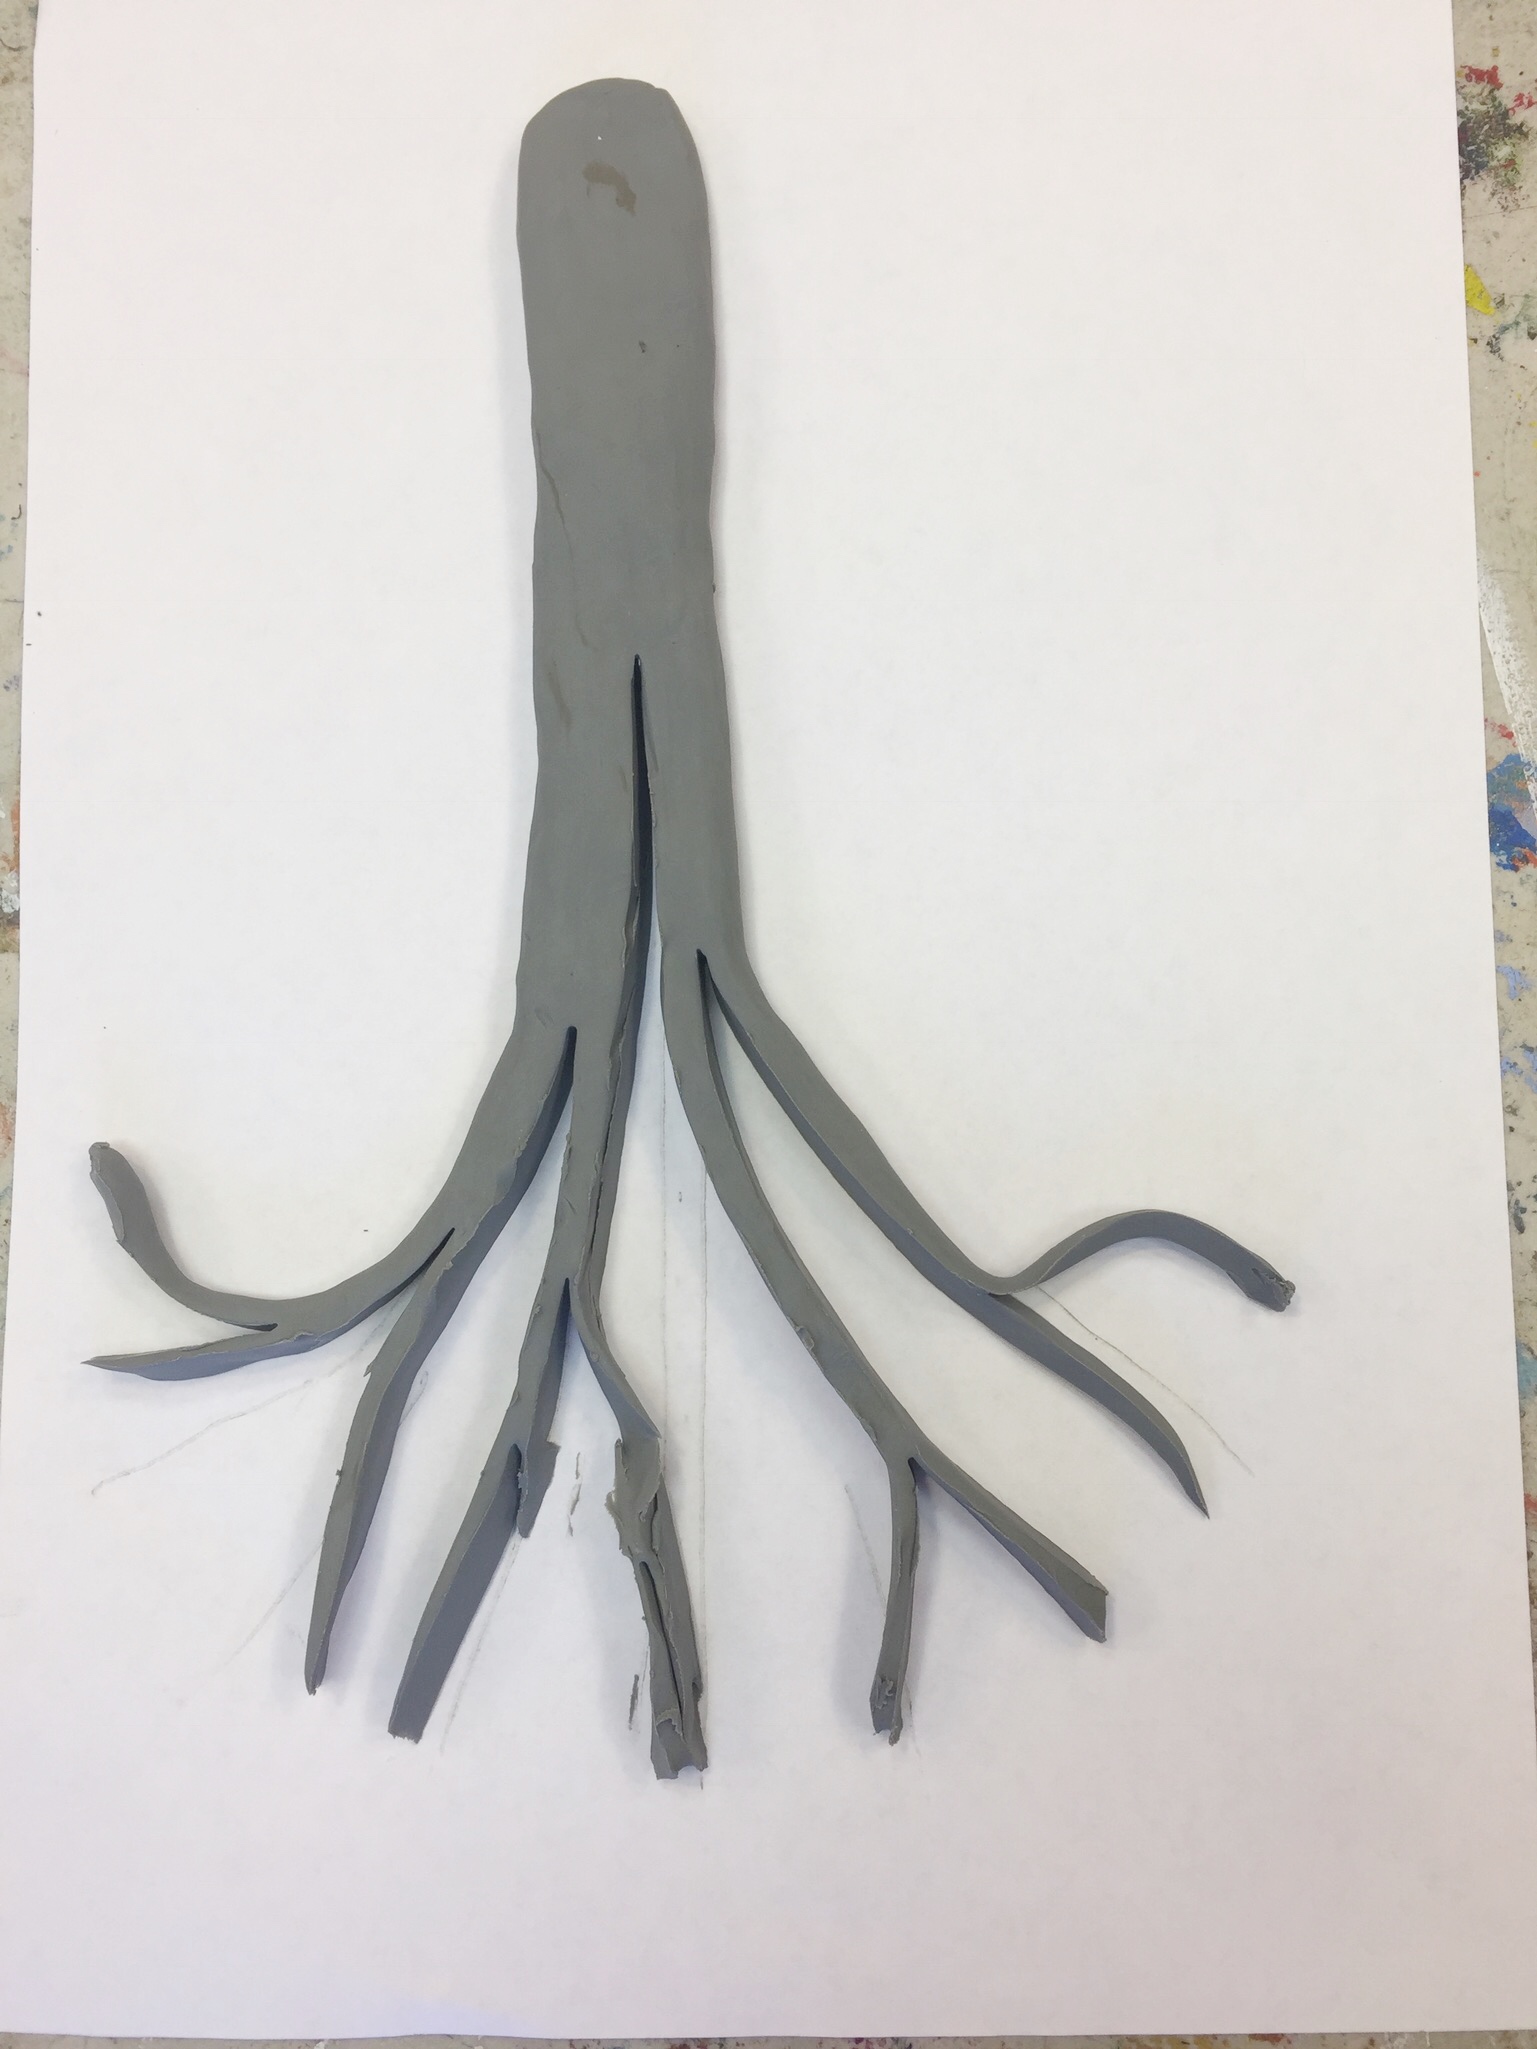
Tree 6
Almost done. To finish, arrange the branches to be more tree-like.
2.1 demo
2.2 demo
2.3 demo
2.4 demo
Branches get smaller and smaller. They are always split into 2 half-sized branches – unless one is larger and the other is smaller to make up for it. Science tells us that trees really work this way. You can’t have 2 branches than would add up to be bigger than what the previous branch was.
Alternative extra point: Add a piece of extra clay to make a too-heavy branch to part of the upper tree. Explain how this make it look unbalanced. Trees just don’t grow that way. Always make the branches smaller and smaller like they do in real life.
Use this button to jump down to the preparation section.
LEARNING TARGETS
Students know how to make a 3D tree
M A T E R I A L S
- Pipe cleaners, long size – any colors except brown
Pipecleaner Tree(tap any image to open viewer)
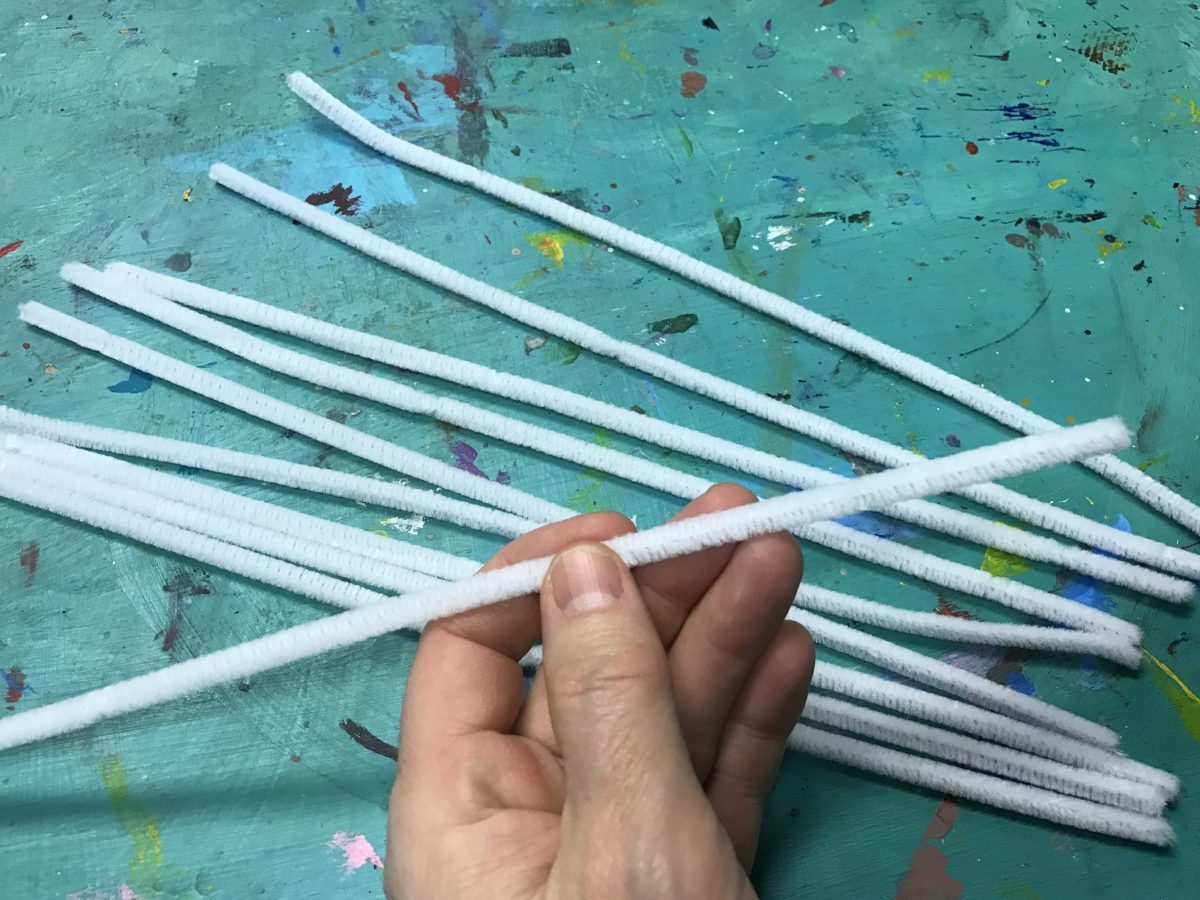
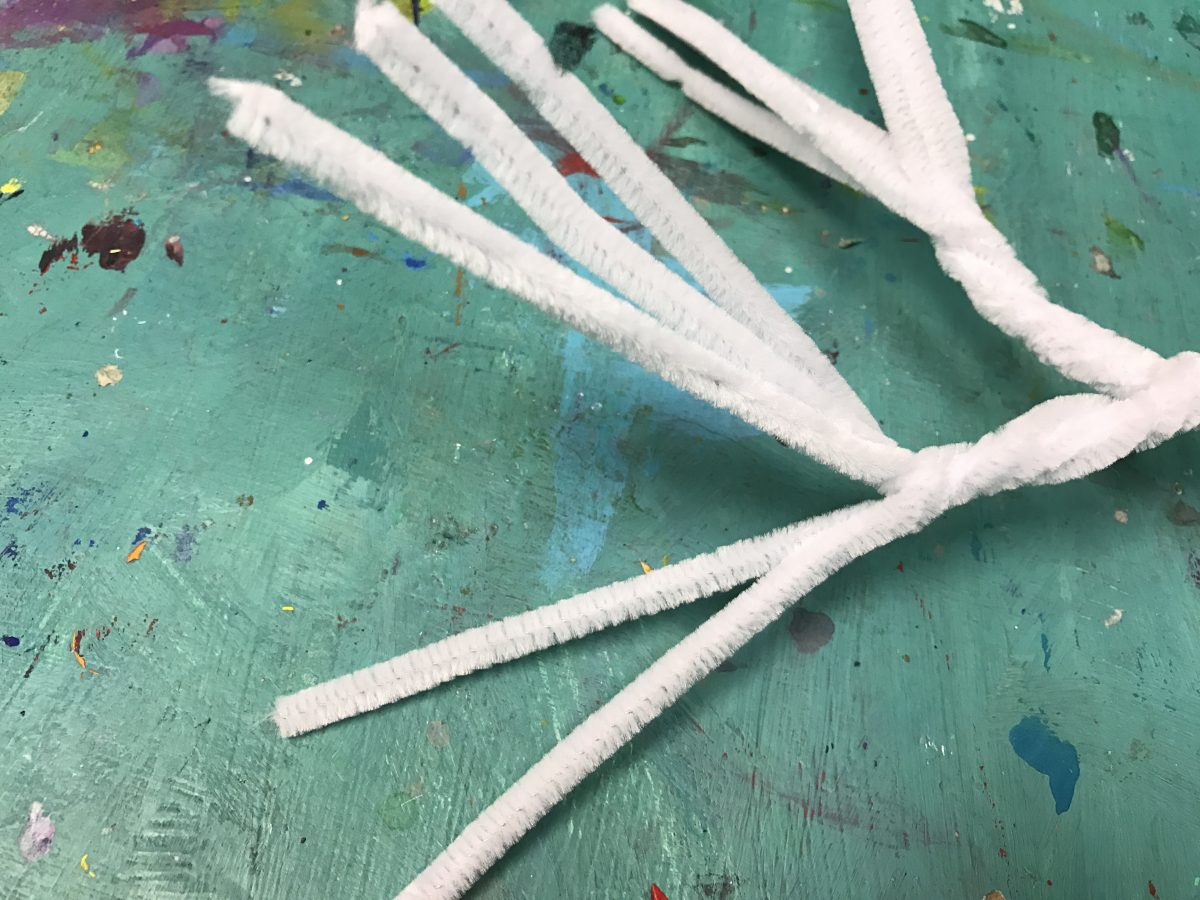
Take 10 long pipe cleaners. We’re using white so they show up easily. You can have a blue, gray, pink, or multicolored tree! (This works with as few as 8, and you can go up to 12 too).
Bundle all the sticks together and have them lined up.
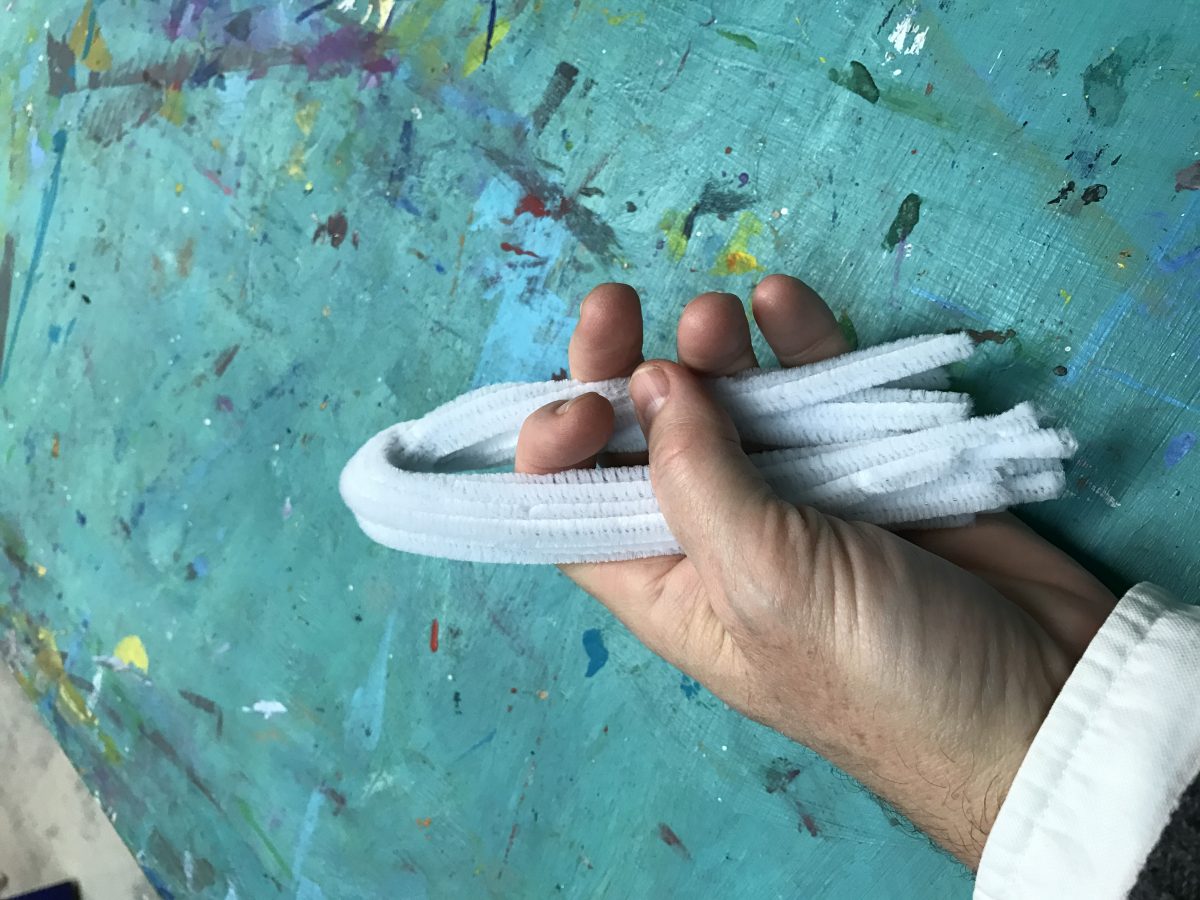
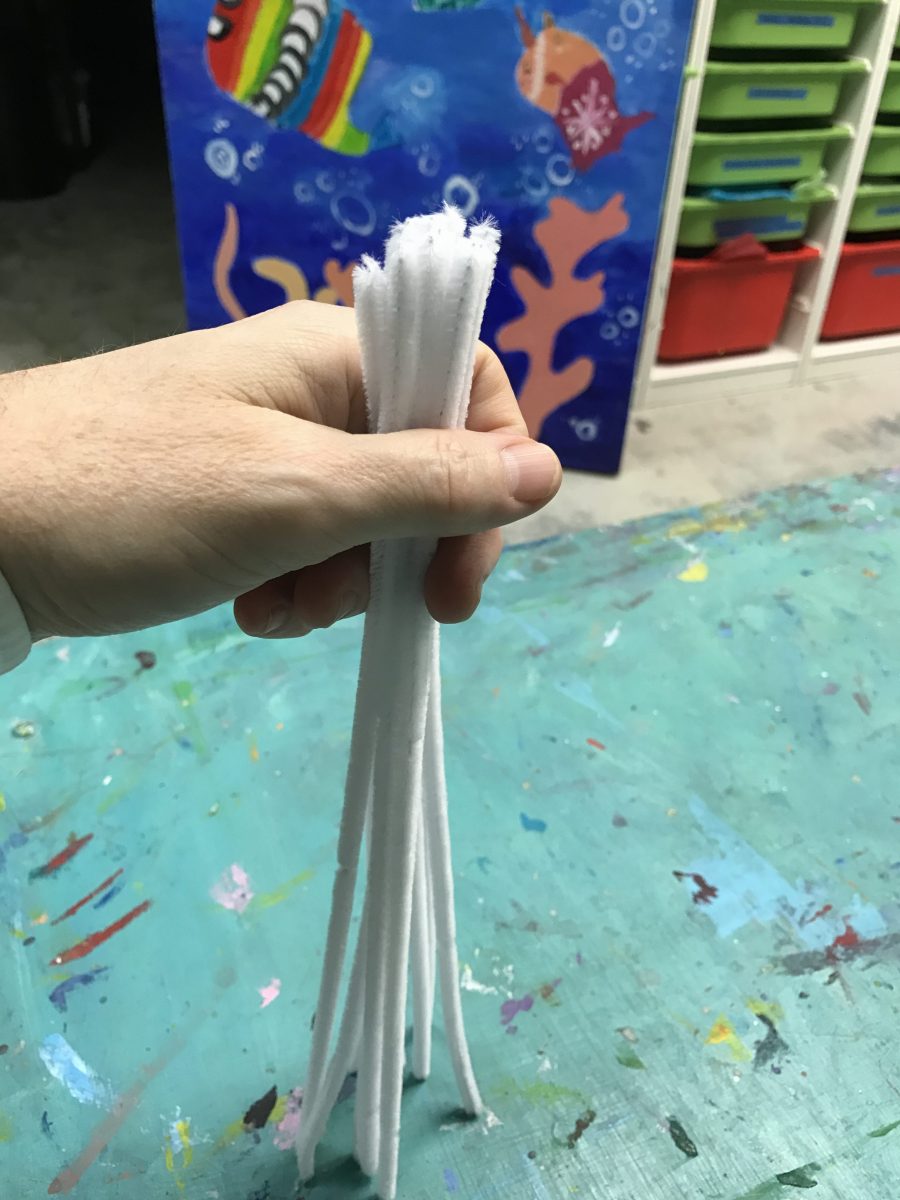
Bend the whole group in half but don’t let go. You might need to do the bundles yourself, up to this step or the next one, so that it’s easier.
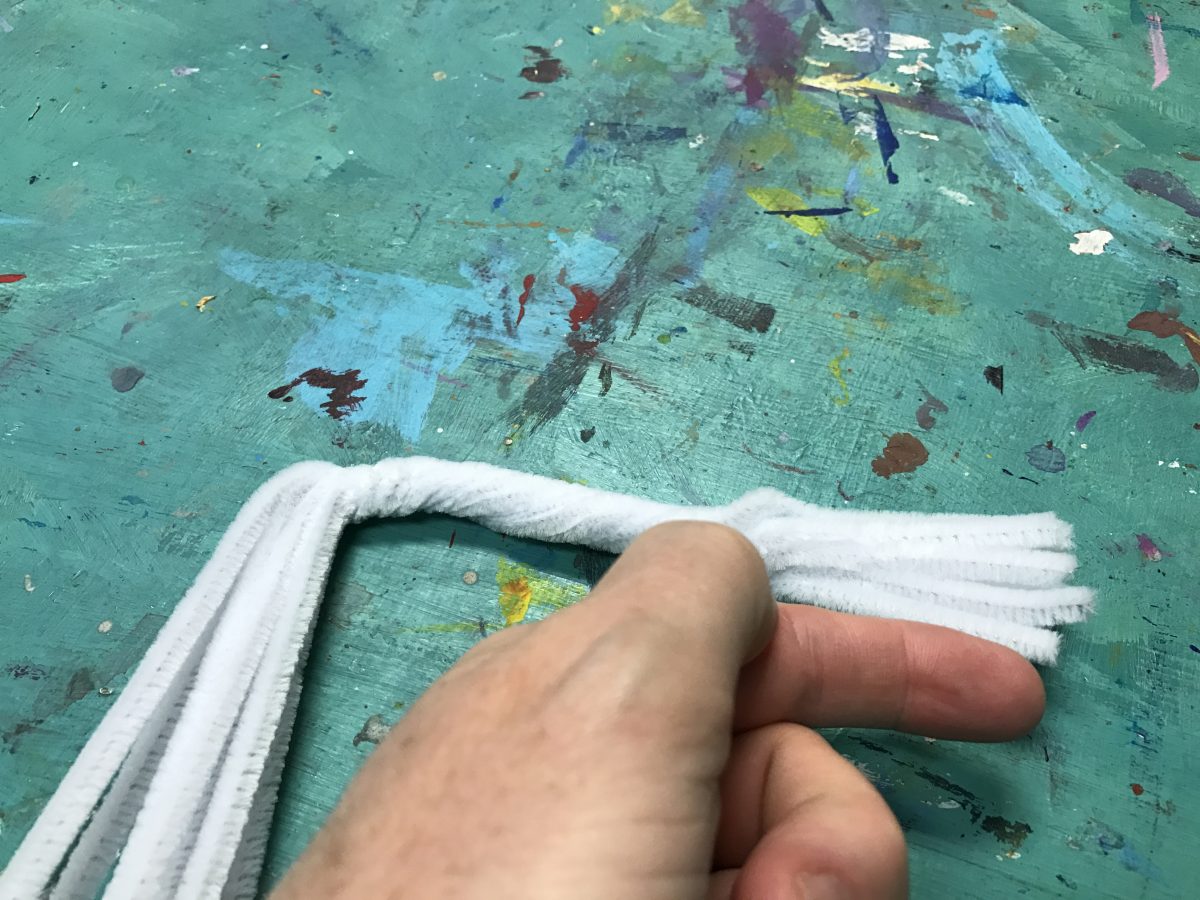
Twist one half but leave the end untwisted so you can make roots. About a child’s finger is good, or 2″.
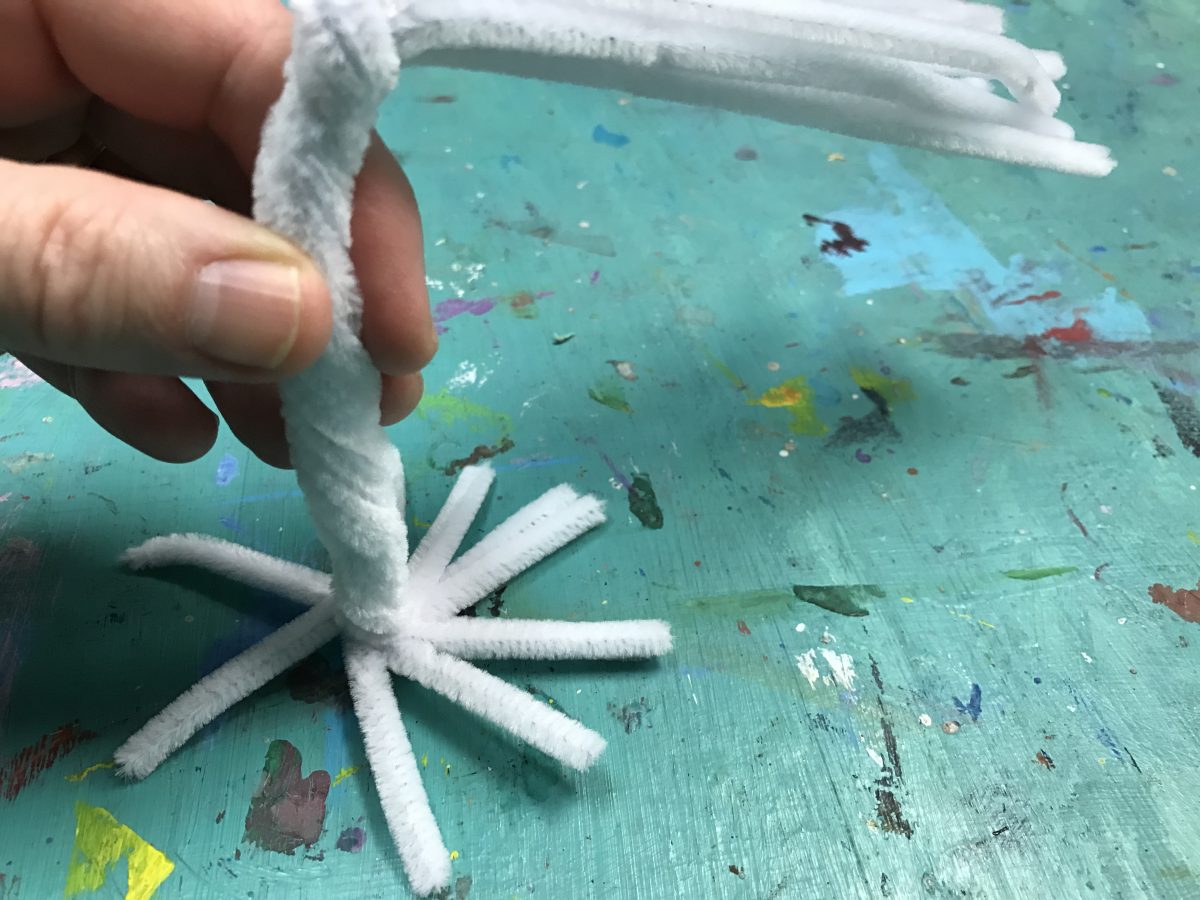
Fan the ends out like a star to make a root base for the tree.
On the other half, divide into 2 equal groups of 5 sticks each. These are the main branches. Begin to twist these groups for a couple of inches from the middle and then stop.
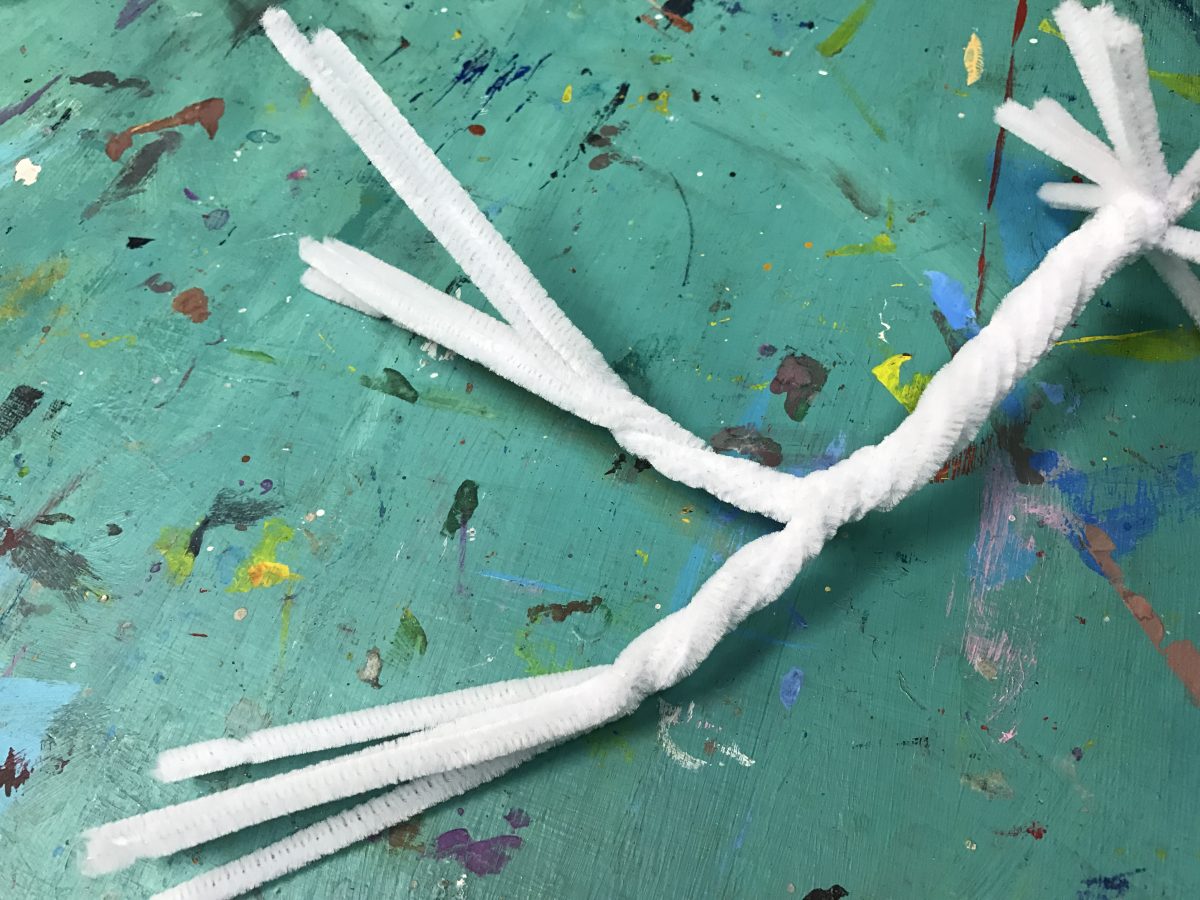
Divide each main branch group into a set of 3 and a set of 2.
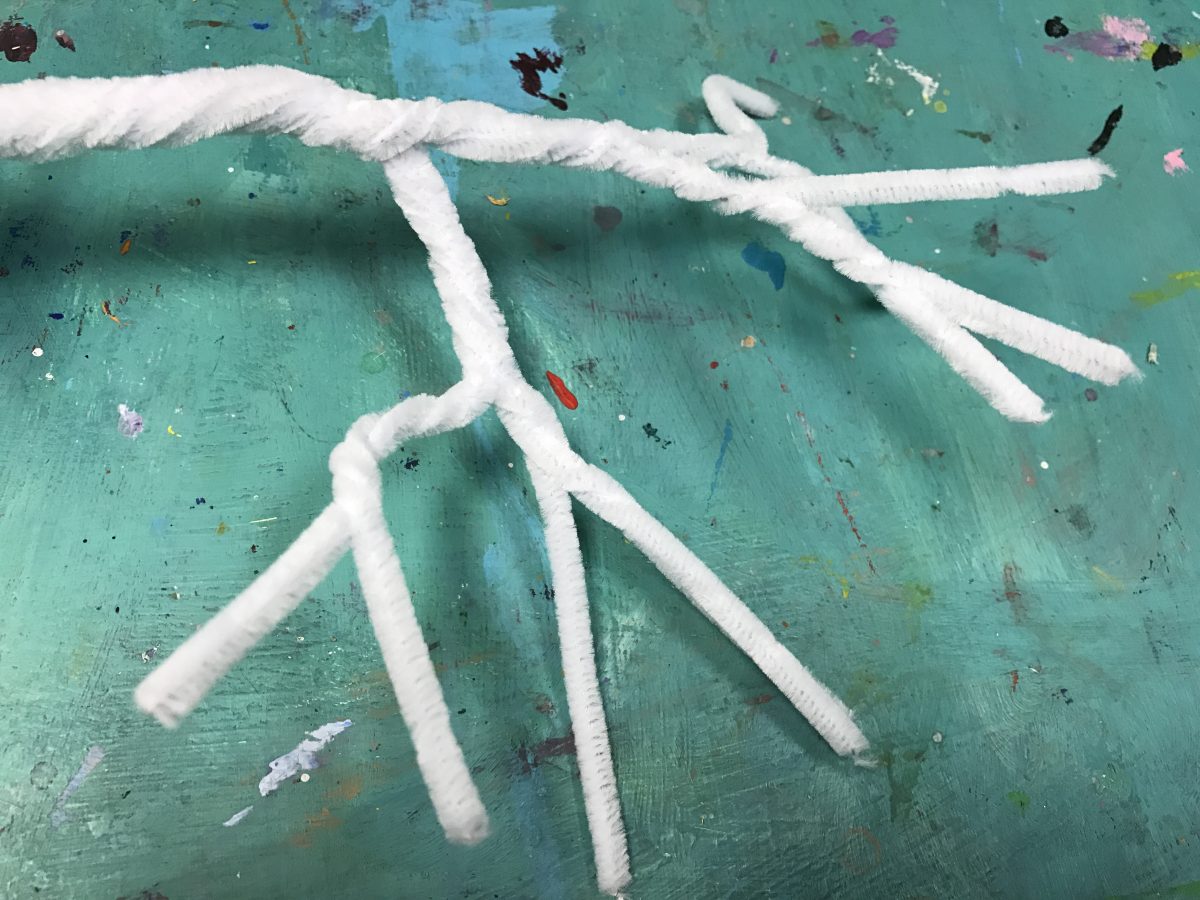
Twist each group part way but leave all the ends with a couple of inches free. (it’s hard to see, but there are 2 ends over to the left there.)
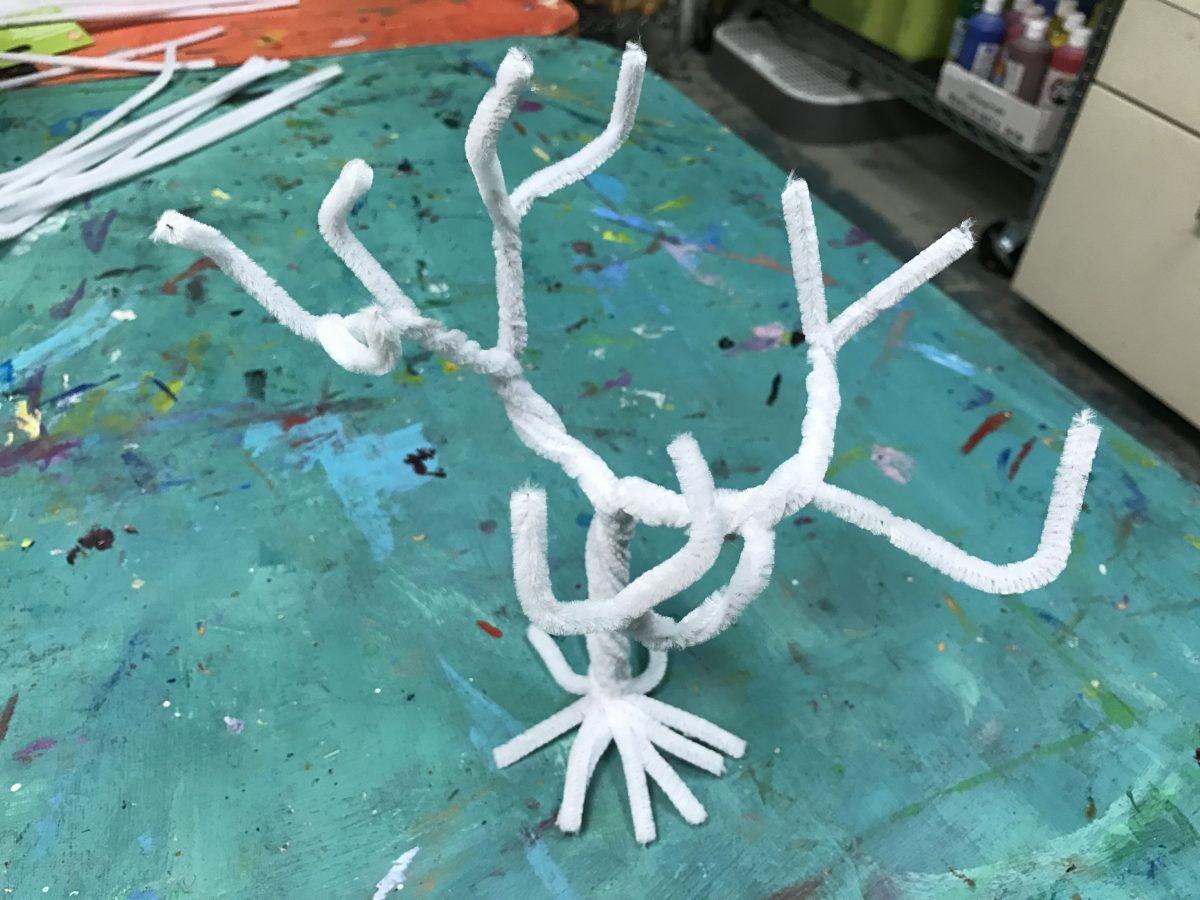
Bend all the branches around until it looks like a tree!
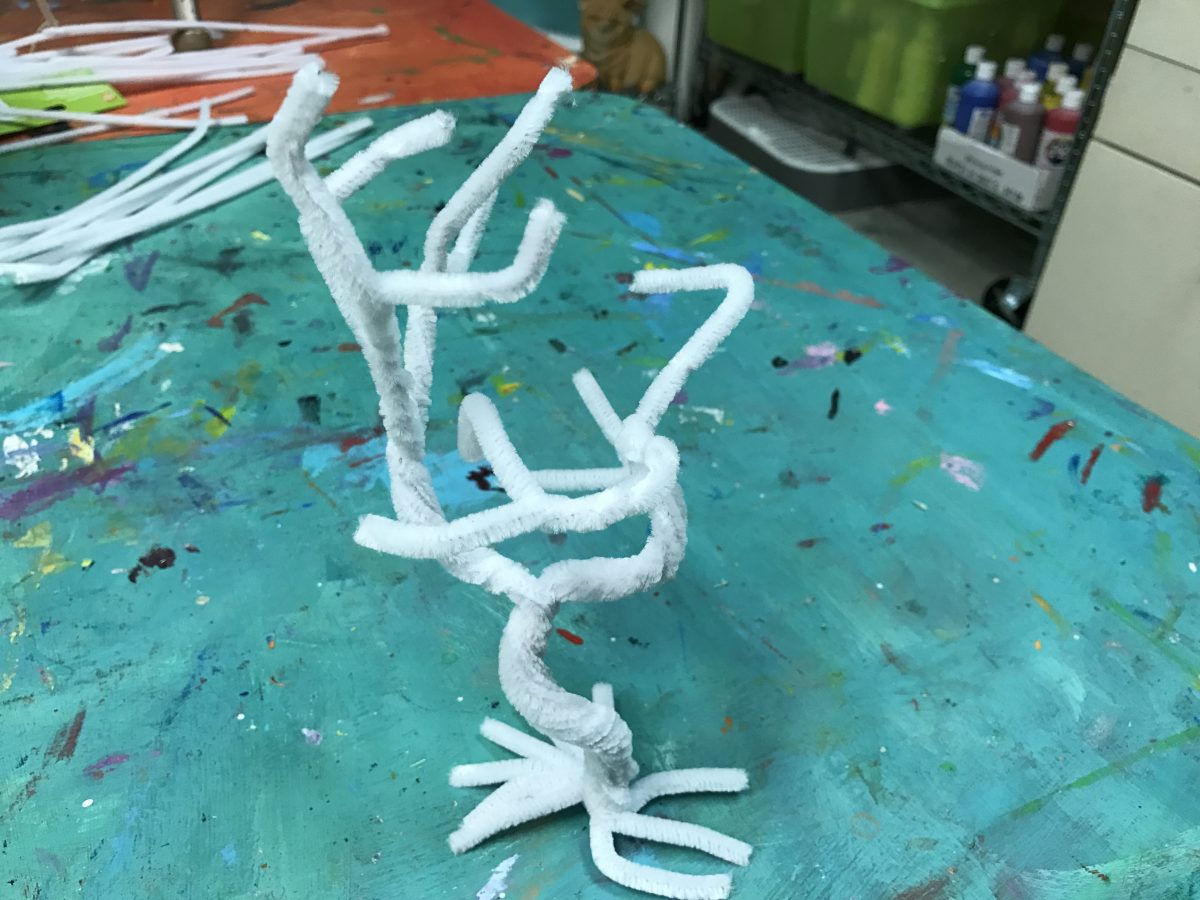
You can also bend the lower trunk to make a twisted tree. It’s more stable this way too.
3.1 Intro
NOTE: the ends of the pipe cleaners can be sharp. Help students understand before they get their fingers poked.
Students should all be given 10 long pipe cleaners each. They will make a tree by working up from the bottom. The longer pipe cleaners work best. Twist the group of pipe cleaner sticks until they just hold together. Do not over-twist.
Use black, gray, or colored pipe cleaners. Using brown seems to make sense, but reinforces the unrealistic notion that trees are brown. Most trees are not.
3.2 demo
3.4 Names
Use this button to jump down to the preparation section.
LEARNING TARGETS
Students know how to cut out leaf shapes
M A T E R I A L S
- Leaf template
- scissors
- markers
- Pencils
- Brushes – All sizes
- Water containers
- Spray bottles
- Water droppers
- Paper towels
- Smocks
4.2 color
4.3 cut
Have a baggie to put the finished leaves in for each student. This will help keep them from getting mixed up or lost. Write names on the baggies with a sharpie.
Use this button to jump down to the preparation section.
LEARNING TARGETS
Students know how to create a 3D sculpture
M A T E R I A L S
- Treehouse printout
- Pencils
- Markers
- Scissors
- Clear wrapping paper tape
- Glue sticks (just in case someone asks)
5.1 print
Reference
Treehouse Template
A template for cutting out a foldable 3-D house. Print on CARD STOCK.
Hand out template prints. Each student will need one. Don’t cut ahead of time unless you think it’s needed. It’s a little easier to draw the interior on an uncut version.
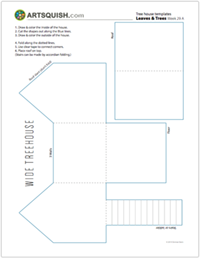
1 Page – Opens in new window
Treehouse Decorations (tap any image to open viewer)
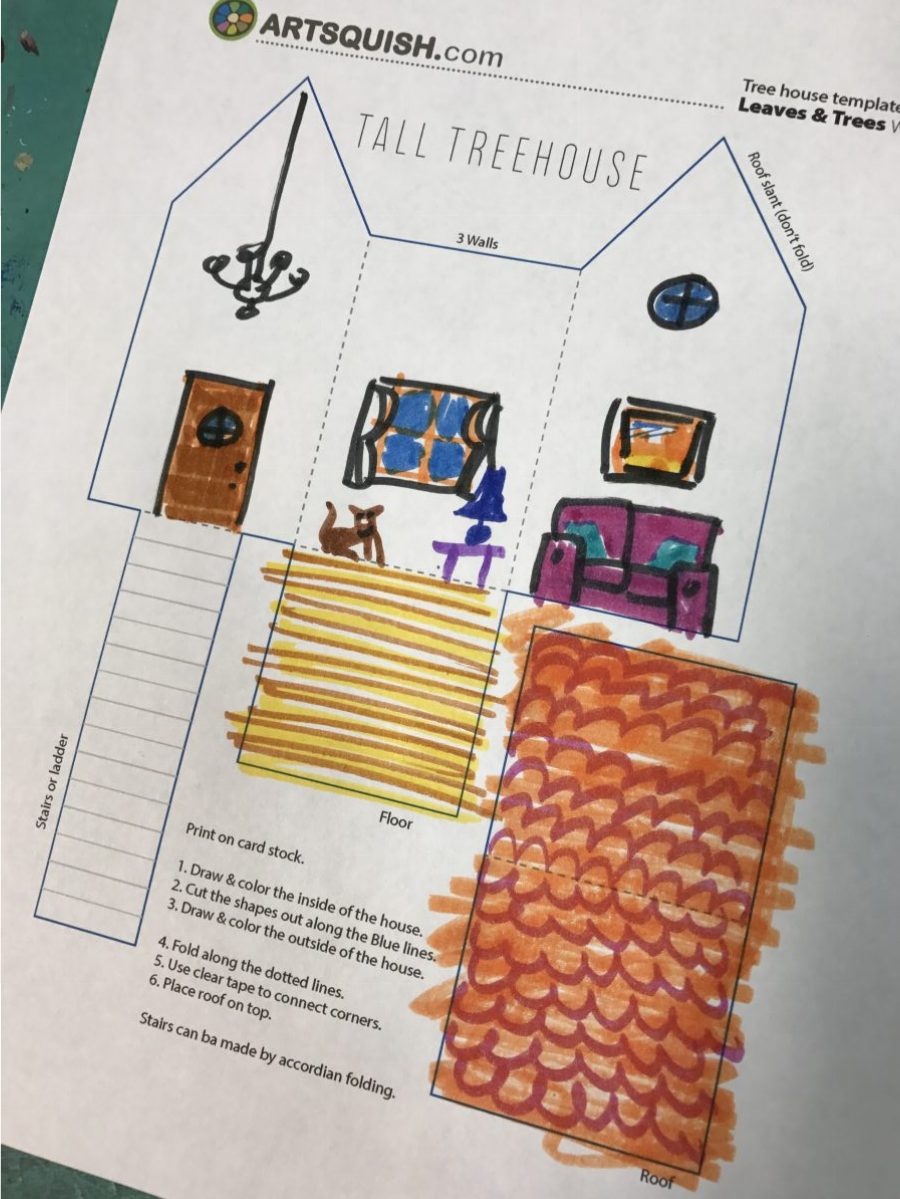
Color the inside first
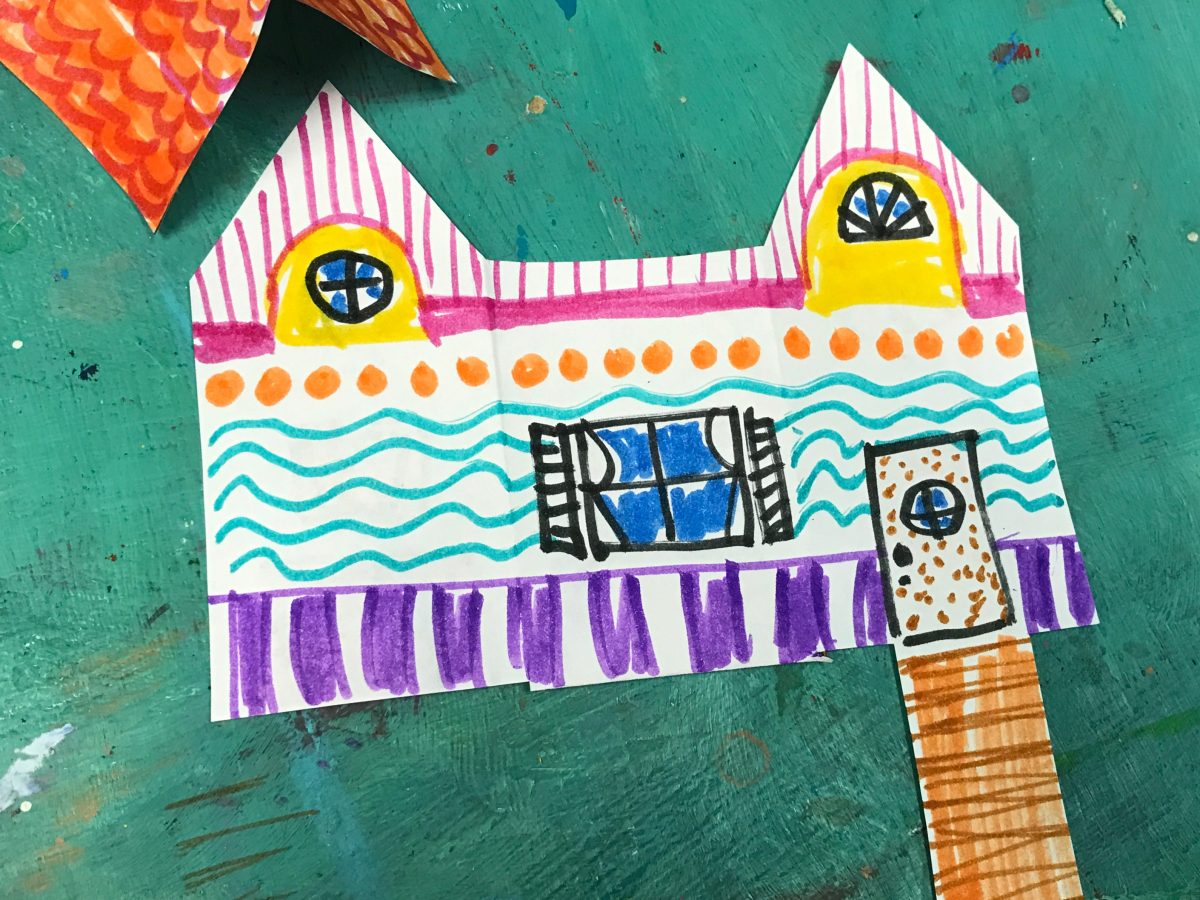
The cut it out and turn over to decorate the outside.
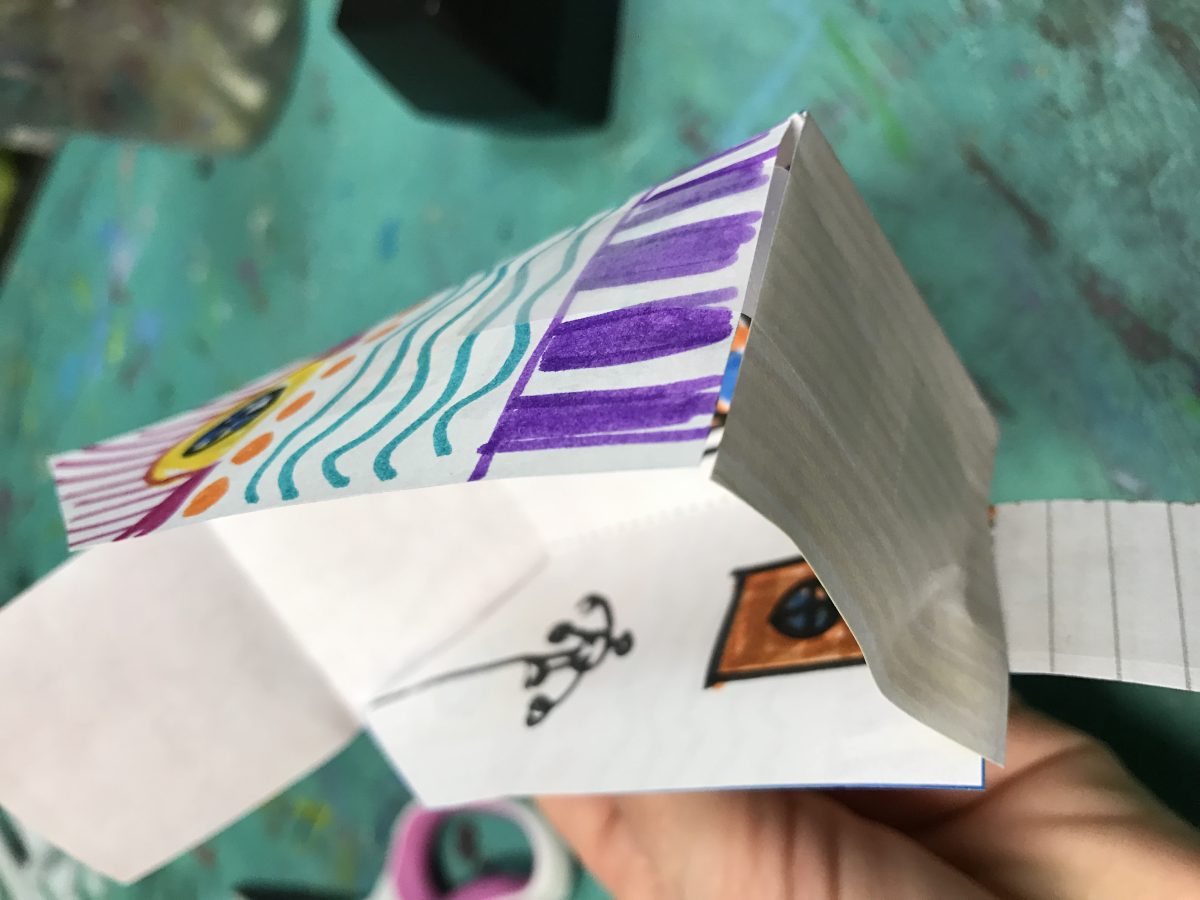
Fold and tape the corners together. Tape the roof on top.
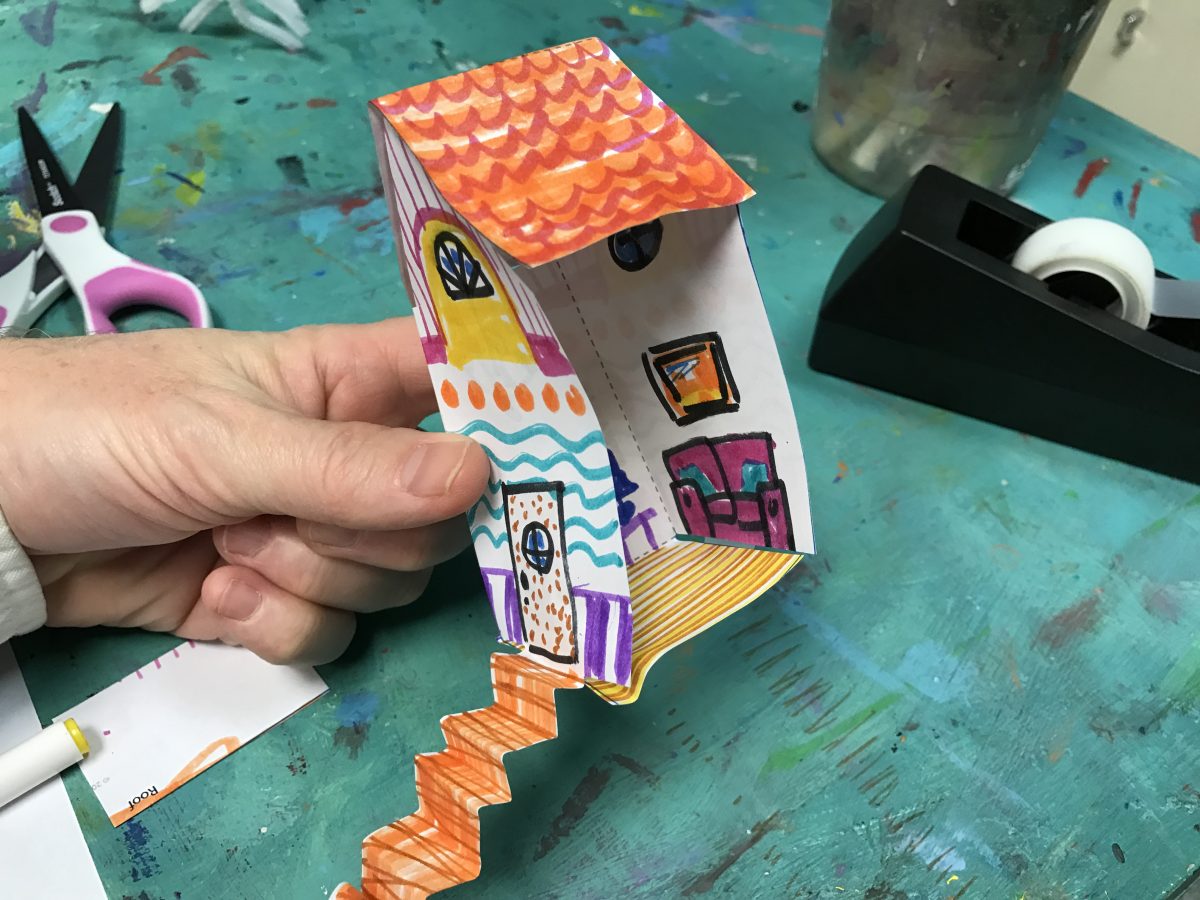
One side is open so you can see inside.
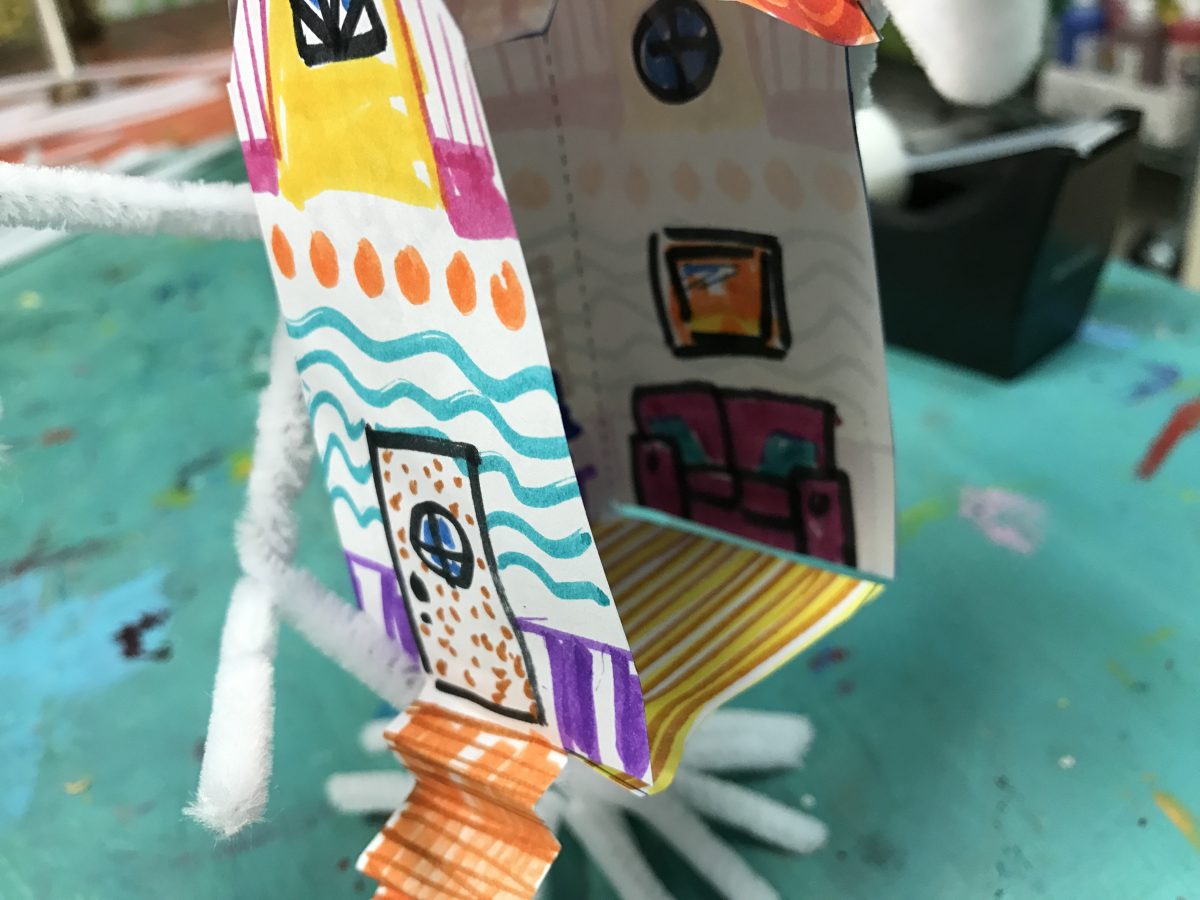
Fit it into the tree. Secure with a couple of dabs of hot glue.
5.2 draw
If someone cuts apart along a fold line, just continue with the decorations and tape back together when finished
5.3 cut
5.4 draw
5.5 fold
5.6 tape
Use this button to jump down to the preparation section.
STEP 6. Assembly
Students will put the tree, the leaves, the treehouse, and a base together – with help. 13 MinutesLEARNING TARGETS
Students know how to make 3D artwork
M A T E R I A L S
- Treehouse
- 4″ or 5″ square piece of cardboard
- Clear tape
- Hot glue and glue gun
- Colored markerss
6.1 glue
6.2 place
“Make sure you move your branches apart so the house can be placed in the middle of the tree. You’ll need branches all around it to hold it in place.”y exist in this space. This is due to the fact that the coffee is cold and I’m starting to get cranky. This is placement text to simulate a real teacher talk which does not currently exist in this space. This is due to the fact that …”
6.3 glue
6.4 tape
6.5 finish
Use this button to jump down to the preparation section.
LEARNING TARGETS
Students know the importance of cleaning up
M A T E R I A L S
- Paper Towels
- Cleaning wipes
- Sink
- Waste baskets
- Well-lit spot for photos
- Camera or phone-camera
7.1 clean
Students clean up their work area.
- Wash hands
- Super-wash brushes if used
- Put art supplies away
- Wipe tables & toss trash
- Remove any smocks (last)
- Check for items on floors and tables
7.2 photos
Try to get photos of your student’s artwork. Find a good spot for quick lighting without highlights or shadows from your hands and device. Ideally in-between two strong lights on each side
7.3 connect
Make sure you see the kids connect with parents and tell them about the class if you can!
OBJECTIVES
- Practice and improvement in designing, planning, decorating, and using color.
- Understanding how a 3D object is created and used to make a sculpture.
- Accomplishment from making a complex project with many different media and parts.
- Fulfillment by designing and arranging the entire thing.
TROUBLESPOTS
Poked fingers – the ends of the pipe cleaners can be sharp. Help students understand before they get their fingers poked.
ART WORDS
Template – A pattern or model to follow to help create your art.
Sculpture – three-dimensional art.
CLASSROOM
PREP
Have a bunch of amazing supplies ready, and cut a few things apart before-hand in a way that make you look amazing.
Print all of your PDFs from the lesson plan and cut any references apart as needed.
What your room needs
Here are your printable lists and room prep instructions.
Opens in new window
CLASSROOM
MATERIALS
- 11×17” Copy Paper
- 8.5 x 11” Copy paper
- 4B pencils
- Erasers
- Markers
- Oil pastels
- Blender sticks (stumps)
- Clipboards
- Paper towels
- Clay or Play Dough
- Plastic Knife
- Pipe Cleaners (long size, not brown)
- Scissors
- Spray bottle
- Water droppers
- Smocks
- Tape
- Glue sticks
PREVIEW
Spring Break March 25 – 29
Week 30: Cats in Hats
Students have a lot of fun working with air-dry clay to create cat sculptures using a follow-along slide show. They’ll also make little hats for the sculptures, and take them home the following week. There is a drawing and painting done from reference as well.
Use this button to view our parent’s blog. Share the link: http://parentart.org, with your student’s parents so your they can read about the lesson each week.