OVERVIEW
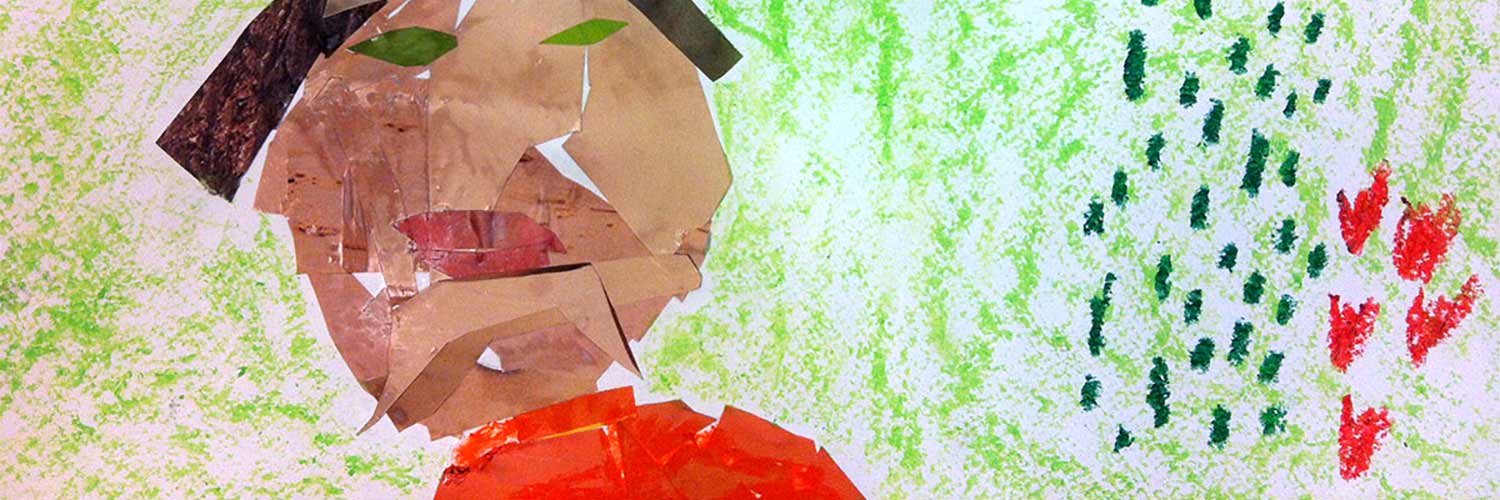
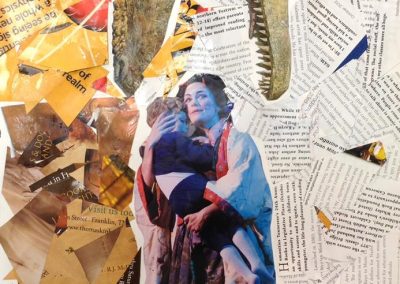
Students will use pages and clippings from magazines to create collage images that tell a story about themselves. They are given the choice to work on an alternative project: a detailed pencil drawing with freedom to choose their subject matter.– – –
Grades 3 – 5
1 Hour & 30 Minutes to two hours
SCROLL & TEACH LESSON PLAN
Don’t worry about anything. Just spend a few minutes reading the lesson plan and printing out your PDFs. Then check out the READY, SET, GO! section and print your prep-page, which includes checklists and an “at a glance” outline of the lesson so you can stay on track when you’re teaching. Set out the materials from the list on your prep page and you’re ready.
That’s all you need to know. Every Step is a different color. Just use your device to Scroll & Teach!
Art Supplies Are Needed
Our lessons are designed to work with very specific supplies (see our supplies page using the button below). We recommend ordering what you need for home delivery. However, you can try and make do with what you have on hand during the health crisis.
Lesson At A Glance
A brief overview of each step. Buttons jump to each section for detailed information.
15 Min – Explain choices for the day & show pinboards
15 Min – Students explore ideas & organize
60 Min – Enjoy making art
5 Min – Everyone helps
Use this button to jump down to “READY, SET, GO!” – our preparation section at the bottom of each lesson. You’ll find information on what is being taught, a full list of supplies, room prep, and what to expect from your young artist(s).
LESSONPLAN
STEP 1. Warm Up - Optional
A quick drawing can help students move into a lesson in a relaxing wayTap the button below to start a timer in a new tab/window.
draw
M A T E R I A L S
- 14″ x 17″ Sketch Paper
- Ebony Pencil OR
- Compressed Charcoal
- Stretchy Eraser OR
- White Eraser
Have several large and medium sized objects set out and available to sketch. You can use items such as:
- A suitcase
- A chair or stool
- Basketballs
- A cooler
- Toys
- Kitchen items
Students should be standing and drawing in their large sketch pad (we use 14″ x 17″ ones). Remind them to use arm movements rather than just their wrist. Sketches should be fast, loose, and fun, but students should be observing carefully, and working towards accuracy, instead of just playing around.
For Students at the Art Scholar Level
CREATIONS LESSON - tap here to open
Foundations are actually what all artists do every single day. However, once you understand them, you can use them more confidently and with more self-expression. It’s like an athlete doing the same events, but better, faster, and stronger. We call the lessons, CREATIONS.
This advanced lesson is for our Art Scholar students who have completed the two years of Foundations and are ready to begin using all that they have learned to create new work. These more challenging versions of the same concepts and techniques are easily taught along-side students in the Foundations course. Even if you have only one student, we put the Creations and Foundations together on the same page for easy review.
Use the Student Instructions printout below for your Art Scholar student(s). Tap the image to open the PDF in a new window.
Artists’ Choice
Overview: Students can choose to work with collage, pencil, ink, oil pastels, painting in acrylic, or watercolor, as well as any combination of these. Before beginning a new project, any work in-progress should be completed first.
Step 1. (15 minutes) Make a decision about the 3 things below, and find reference:
1. Medium (pencil, oil pastel, paint, collage, combination)
2. Subject matter (landscape, animals, portrait, architecture, still life)
3. Technique (style, colors, movement & application)
Step 2. (15 min) Use a pencil or charcoal and sketchpad to create a few quick sketches to get familiar with the subject and the Big Shapes inside the Frame. Don’t worry about the details yet.
Step 3. (10) Prepare and set up your work area for the final artwork.
Step 4. Draw guidelines and create your work.
When we provide advanced reference you’ll find it here. Tap images to open.
explain
M A T E R I A L S
- Device to display videos & Pinboards
Introduce two choices for the lesson.
Today, artists get to pick which project to do.
Magazine collage
- There are two ways to use magazines. 1) Use the colors as small mosaic pieces for creating larger images; 2) Use the photographic images and combine them in new ways. Artists may choose to combine the two methods. It’s also ok to use other papers in addition to magazines.
- Show the Drawing with Scissors video if you need to.
Pencil drawing
- Set up something on your own to draw or find reference from a magazine or book
- Remember that a still life needs a strong light source from one direction
Show Demo Videos and Pinterest Boards.
Drawing With Scissors Demo
Pinterest Gallery – Collages
Tap the icon to the left to open our special Pinboard showing examples of artwork to display to your class. See our Article for making Pinterest work on larger displays. You can also use a laptop or large tablet and gather everyone around like you’re using a book.
Pinterest Gallery – Detailed Pencil Drawings
Tap the icon to the left to open our special Pinboard showing examples of artwork to display to your class. See our Article for making Pinterest work on larger displays. You can also use a laptop or large tablet and gather everyone around like you’re using a book.
Prepare
M A T E R I A L S
- 14″ x 17″ Sketch Paper
- Pencils
- Erasers
- Scissors
- White sheets of copy paper to collect clippings
- Child-appropriate magazines
For the Magazine Collage –
- .Collect images and/or colors for a mosaic effect.
- Consider adding a self-portrait! Take a picture and print it out on your desktop printer.
- Cut and arrange your images so you can see them all.
For the Pencil Drawing –
- Find reference – take no more than 5 minutes to search and set up or print something out.
- Draw 2 or 3 Sketches to familiarize
- Thumbnail drawings help you compose. These are very small drawings of 1 or 2 inches wide. Just arrange the big shapes to make a good composition.
M A T E R I A L S
- 14″ x 17″ Sketch Paper
- Pencils
- Erasers
- Scissors
- White glue OR Modpodge
- Water (for thinning glue)
- OR acrylic medium
- Flat brushes for glue/medium application
- Shallow bowls for glue/medium
- White sheets of copy paper to collect clippings
- Child-appropriate magazines
- Water & Paper Towels
Reference
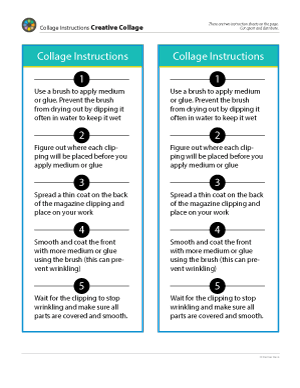
Collage Instructions
2 on the page. Cut apart and print enough for each student.
reference
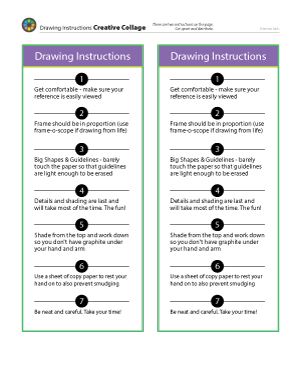
Drawing Instructions
2 on the page. Cut apart and print enough for each student
TOOL
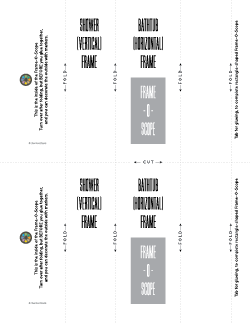
Frame-O-Scope
2 on the page. Cut apart and print enough for each student who needs one. They’ll fold to assemble a great tool for looking at a live subject.
Review
There are two ways to use magazines. 1) Use the colors as small mosaic pieces for creating larger images; 2) Use the photographic images and combine them in new ways. Artists may choose to combine the two methods. It’s also ok to use other papers in addition to magazines.
begin
Help student(s) get started with their chosen artwork as soon as they’re ready.
Provide the appropriate PDF instruction pages to each student for their project.
Use magazines, scrap papers, and even create your own colored papers with some paint if you need to. You can also tear edges for a different effect. Paint, pencil, pastel, ink, and markers can be applied after the collage has dried.
Magazine Collage – scissors, 11″ x 14″ watercolor paper (for a base to work on), medium or glue, brush, water tub, paper towels
- For gluing options: use white glue with a bit of water, Modpodge, or our favorite: clear gloss or matte acrylic medium. Glue sticks also work but can tear thin magazine paper.
- Use a brush to apply medium/glue and prevent it from drying out using water
- Figure out where each clipping will be placed before you apply medium/glue
- Spread a thin coat on the back of the magazine clipping and place on your work
- Smooth and coat the front with more medium/glue using the brush (reason why is below)
- Wait for the clipping to stop wrinkling and make sure all parts are covered and smooth.
Pencil Drawing
- Get comfortable – make sure your reference is easily viewed
- Guidelines – tickle lines on the paper so that they are light enough to be erased easily
- Frame (use frame-o-scope if drawing from life)
- Big shapes – make sure to find and accurately draw the 4 or 5 biggest shapes
- Details and shading last – this will take most of the time
- Shade from the top and work down so you don’t have graphite under your hand and arm
- Use a sheet of copy paper to rest your hand on to also prevent smudging
- Be neat and careful. Take your time!
FRAME-O-SCOPE
If you have a new student or this is your first week with Homeschooling Art, Frame-O-Scopes can be printed at the beginning of this step. To use one, simply close one eye and look through the scope with the other. You can move closer or back up, and turn it vertically or horizontally to crop the real world into the same shape as your paper or canvas!
For the collage — if you only glue the back, the paper soaks up the medium and the fibers expand, but only on the back side. This is what causes wrinkles in the paper; the expanded wet side pushes against the dry side. If you wait for the clipping to absorb on both sides, then you can smooth it out easily. The top coat also protects and creates a nice finished surface. The wet paper may get darker but will dry and lighten back up again. Once wet, the paper can tear much more easily, so be careful.
STEP 5. Clean Up
5 MinutesArtists Always Clean
Students clean up their work area.
- Wash hands
- Super-wash brushes if used. (Run under water for 1 full minute while gently spreading out the bristles).
- Put art supplies away
- Wipe tables & toss trash
- Remove any smocks (last)
- Check for items on floors and tables
%
Insights
This lesson provides understanding
%
Technique
This lesson shows application and movement
%
Self Expression
This lesson allows personal freedom
OBJECTIVES
- Practice and improvement working on creative composition
- Understanding how to think outside of conventional boundaries
- Accomplishment in creating original artwork
- Fulfillment by self expression in collage or pencil
TROUBLESPOTS
Over soaked paper – If you brush and move a wet clipping around too much, it becomes very wet and will tear easily.
Shading without technique – In pencil shading, it’s important to have a consistent technique over the entire piece. If scribbly, it needs to be the same type of scribbles everywhere. If hatch shaded, then the hatch marks should all go in one direction – or – they can go in many directions but the variety of directions must be the same throughout.
ART WORDS
Thumbnail – Artists tend to jump right into their work and then modify it over and over because it was not composed before they began. Only by drawing tiny thumbnails (about 1″ across), can you work on the big shapes and the overall design of a piece without getting pulled into the drawing. Once you begin drawing, your mind enters a completely different mode of thinking in details.
Big Shapes – Every work and reference can be divided into just a few very large areas. If an artist works on getting these shapes accurate, then the details can be worked on afterwards without having to modify or begin over.
ROOMPREP
Real Simple and other household magazines have lots of nice large images. Be very cautious though, since some advertising and advice collumn images can be innapropriate. Go though your magazines and tear out these images ahead of time.
Print all of your PDFs from the lesson plan and cut any references apart as needed.
What your room needs
Here are your printable lists and room prep instructions.
CLASSROOM
MATERIALS
- iPad or TV to display Pinboard
- Scissors
- White sheets of copy paper to collect clippings
- Child-appropriate magazines
- White glue OR
- Modpodge
- Water(for thinning glue) OR
- Acrylic medium
- Shallow bowls for glue
- Paper towels
- Cleaning wipes
- Sink
- Waste baskets
- Well-lit spot for photos
- Camera or camera-phone
STUDENT’S
MATERIALS
- 14” x 17” Sketch paper
- Ebony pencil
- White Eraser
- Charcoal
- Stretchy Eraser
- Flat brushes
PREVIEW
Week 37: Big 3D Installations
May 11 – 15
A Bunch O’ Boxes project completes the school year program. Everyone must work together as a team and combine a few boxes into a 3D sculpture and/or installation that has a theme and incorporates everyone’s efforts and style into one final work. Classes are divided into teams of 5 or less so that everyone can work at once. Boxes are covered in white paper and painted for display all summer or for an art show. It’s also a fun day for an end of year party!

