
[su_panel background=”#dbddcd” color=”#000000″ border=”1px none #cccccc” shadow=”0px 0px 0px #eeeeee” radius=”1″]Slideshows and videos are in many of our lessons, but we also publish each one separately so you can find them without wandering through old posts aimlessly. Just enter text into the “search the site” field over to the right, for something you remember. It can be something that was in the photos or written in the text.
Slideshows are presented as a vertical stack of photos with captions, which are easy to zoom in using your fingers to pinch on a touch screen or touchpad. Just scroll down to advance to the next picture.[/su_panel]
Description
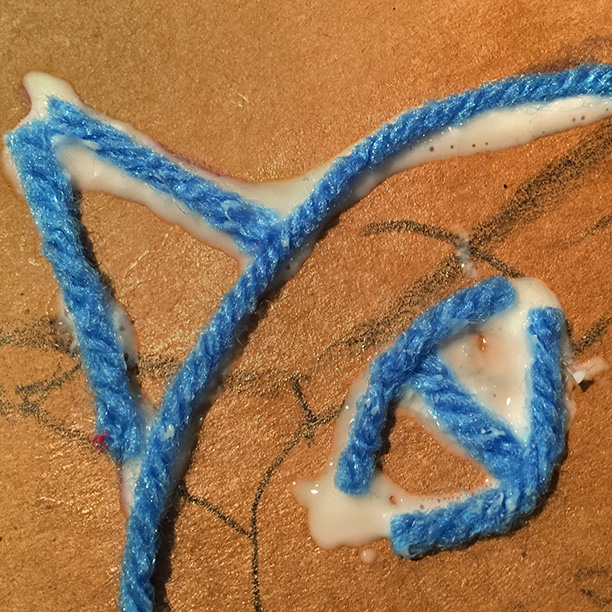
Here’s how to make a yarn printing plate by cutting yarn and gluing to a piece of cardboard.
Use regular or tacky white glue to secure yarn onto the lines. Regular glue draws a little faster and can be put into baggies. Glue should be in good, clean-tipped bottles, to redraw the lines, but if you have badly tipped bottles (who has good clean bottles? I’d like to meet them), then you can use a baggie with a teensy tiny corner snipped off. You can squeeze the glue like cake piping. Just put the glue in the un-snipped corner first, and squeeze out the air. When we say teensy tiny, that’s exactly what we mean.
It’s important to cut the yarn pieces the right length before applying the glue. When gluing down the yarn, begin with the whiskers. This will insure that there isn’t any overlapping of the yarn. Never overlap yarn! All the yarn must be exactly the same width so you’ll get good prints.
- Cut a piece of yarn a little longer than you expect you’ll need for a line.
- Set the yarn on the line and arrange in place over the drawing.
- Use scissors to trim off any yarn that is past the ends of the line so the yarn is the same length.
- Take the yarn off, and “draw” a glue line
- Set the yarn back into place on the drawn line
- Gently press the yarn down into the glue. (Don’t mash flat, but make sure there is good connection.)
[su_panel color=”#6db406″ border=”2px dotted #cccccc” shadow=”0px 0px 0px #eeeeee”]
[su_icon icon=”https://homeschoolingart.com/wp-content/uploads/2015/11/Slideshowicon.png” background=”#373732″ color=”#6db406″ text_color=”#373732″ size=”60″ shape_size=”0″ margin=”0px 0px 0px 0px”][/su_icon] S L I D E S H O W
[toggle title=”Yarn Glueing • Tap to open – Scroll to view – Pinch to zoom” state=”closed”]
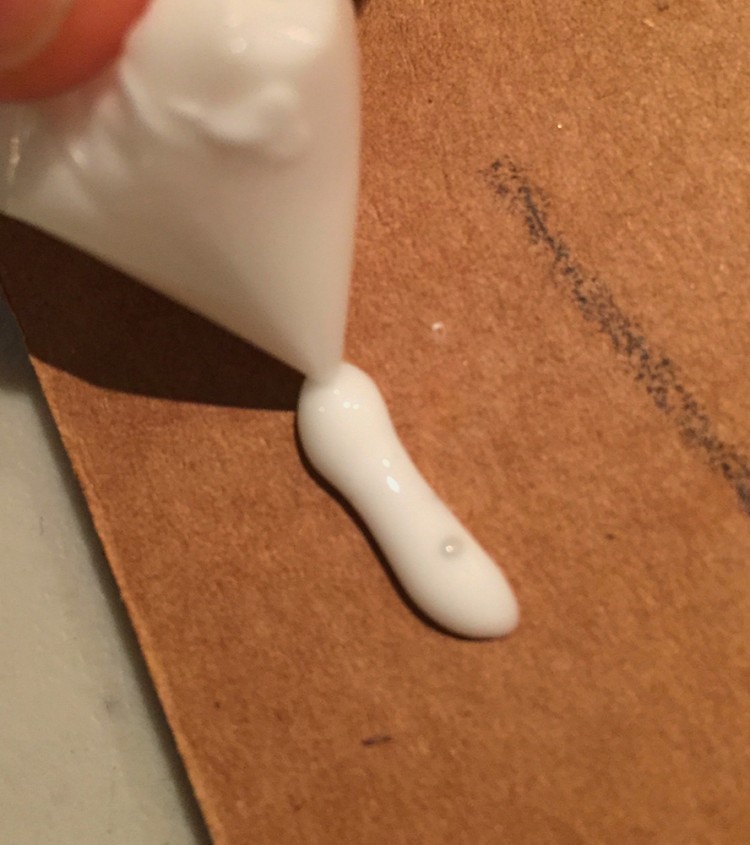
A sandwich bag works great for making glue lines.
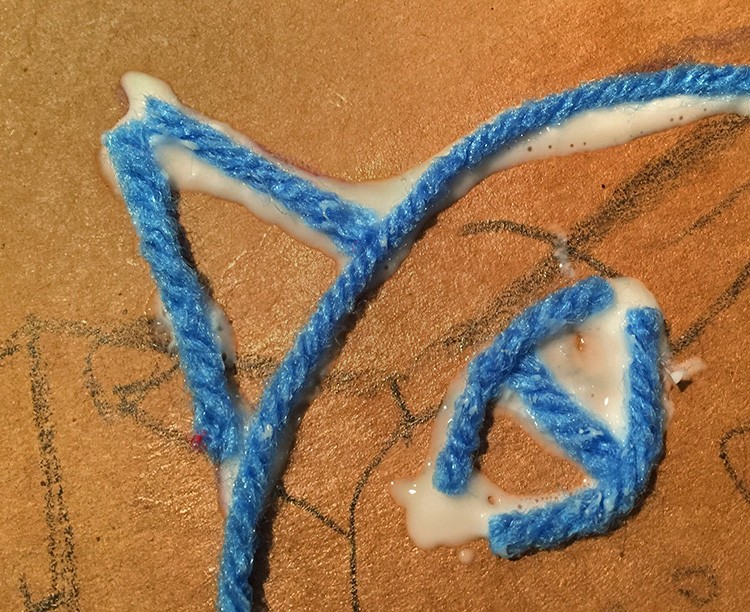
Press the yarn into the glue gently. Also, short pieces are much easier to handle and make better corners.
[su_divider top=”no” divider_color=”#373732″ size=”1″ margin=”5″]
[/toggle]
[/su_panel]