
OVERVIEW
Students begin by painting fireworks and thinking about summer fun. Then they move to creating colorful marker art using geometric grids as a starting guide.– – –
Grades 1 – 2
1 Hour & 30 Minutes
SCROLL & TEACH LESSON PLAN
Don’t worry about anything. Just spend a few minutes reading the lesson plan and printing out your PDFs. Then check out the READY, SET, GO! section and print your prep-page, which includes checklists and an “at a glance” outline of the lesson so you can stay on track when you’re teaching. Set out the materials from the list on your prep page and you’re ready.
That’s all you need to know. Every Step is a different color. Just use your device to Scroll & Teach!
Art Supplies Are Needed
Our lessons are designed to work with very specific supplies (see our supplies page using the button below). We recommend ordering what you need for home delivery. However, you can try and make do with what you have on hand during the health crisis.
Lesson At A Glance
A brief overview of each step. Buttons jump to each section for detailed information.
Optional – Greetings and artists’ choice with markers
7 Min – Show how to hold brush & apply paint
10 Min – Look at pictures and trace
20 Min – Students paint flowers & then fireworks
10 Min – Practice filling in boxes to create patterns on grid
40 Min – 2 levels of grid gameboards
5 Min – Everybody helps
SCROLL & TEACH
LESSONPLAN
Each section is a different color. Read over once and then you can SCROLL & TEACH using any device you like. It’s designed to work best with your phone.
STEP 1. Warm Up - Optional
A quick drawing can help students move into a lesson in a relaxing wayTap the button below to start a timer in a new tab/window.
draw
M A T E R I A L S
- 14″ x 17″ Sketch Paper
- Ebony Pencil OR
- Compressed Charcoal
- Stretchy Eraser OR
- White Eraser
Have several large and medium sized objects set out and available to sketch. You can use items such as:
- A suitcase
- A chair or stool
- Basketballs
- A cooler
- Toys
- Kitchen items
Students should be standing and drawing in their large sketch pad (we use 14″ x 17″ ones). Remind them to use arm movements rather than just their wrist. Sketches should be fast, loose, and fun, but students should be observing carefully, and working towards accuracy, instead of just playing around.
explain
M A T E R I A L S
- Large dark color card stock or construction paper. Black or dark blue is best
- Brushes – medium and small with a good tip
- Water container
- Tempera paint in several bright colors & white
- Disposable trays or plates for mixing
- Sharpie to add lines for mixing on the tray
- Paper towels
- Smocks
Explain how a brush can be held. Read the teacher talk verbatim or just say it in your own words.
Learning the demo and doing it live is much better than using the slideshow, but displaying it is your backup plan.
“There are two ways to hold a brush.
One way is hold it like a pencil. That gives you the best control if you are using a small tipped brush and doing lines, edges, or details.
Another way to hold it is like this. You pick it up like a stick with fingers on one side and your thumb on the other. This is good for larger areas and special effects.”
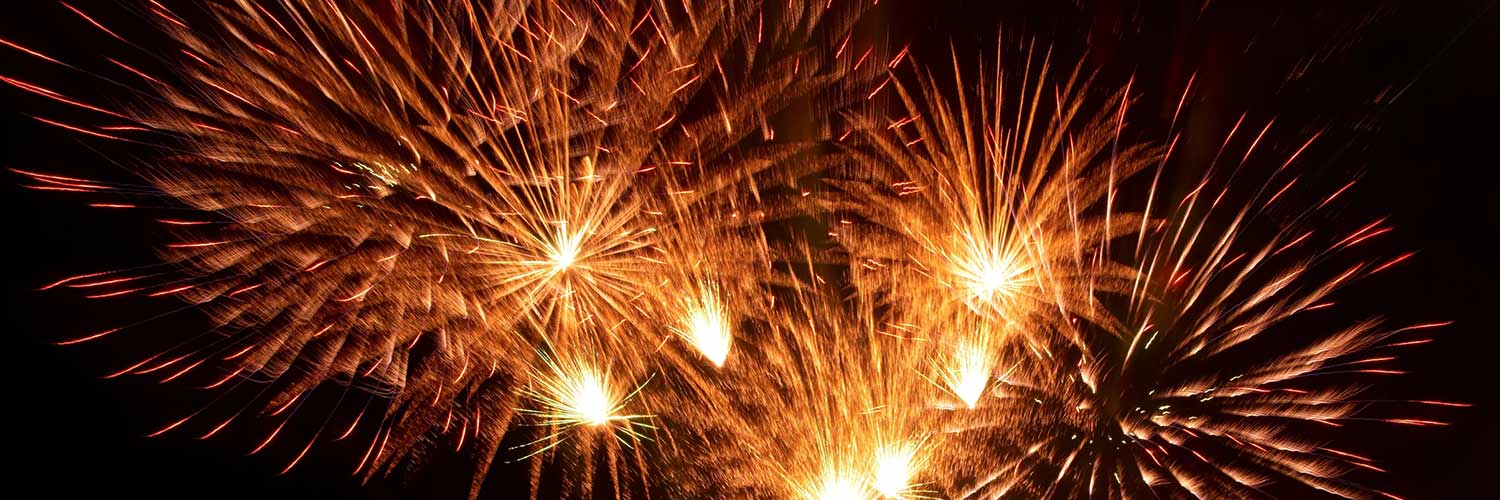
Painting Fireworks
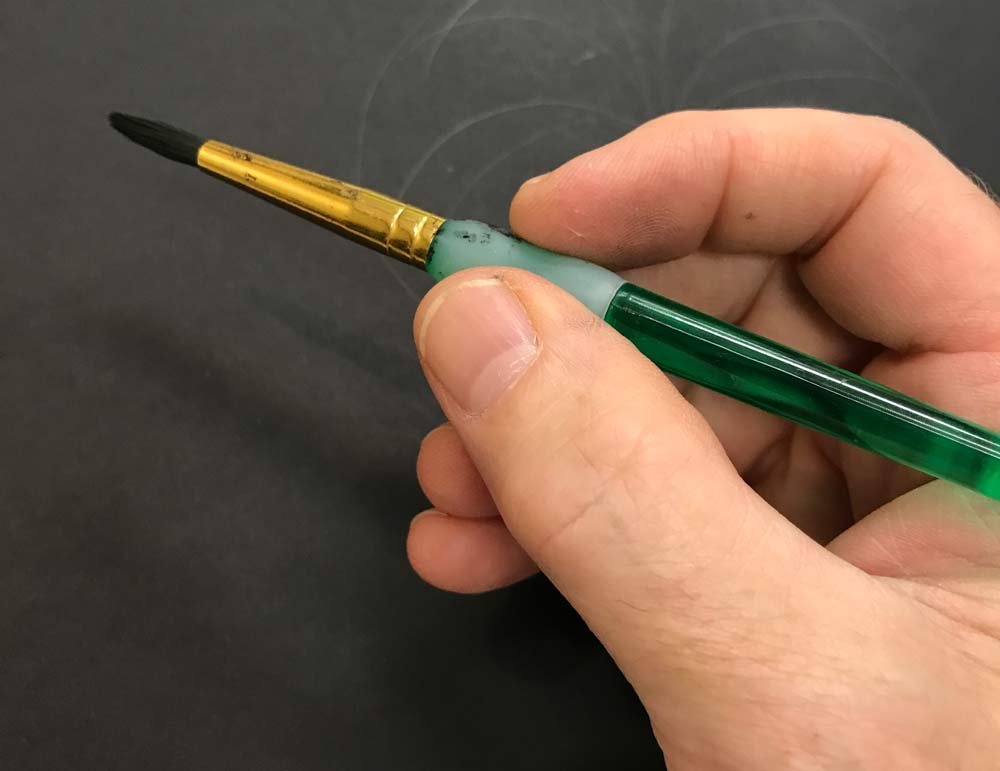
HoldPen
HoldStick
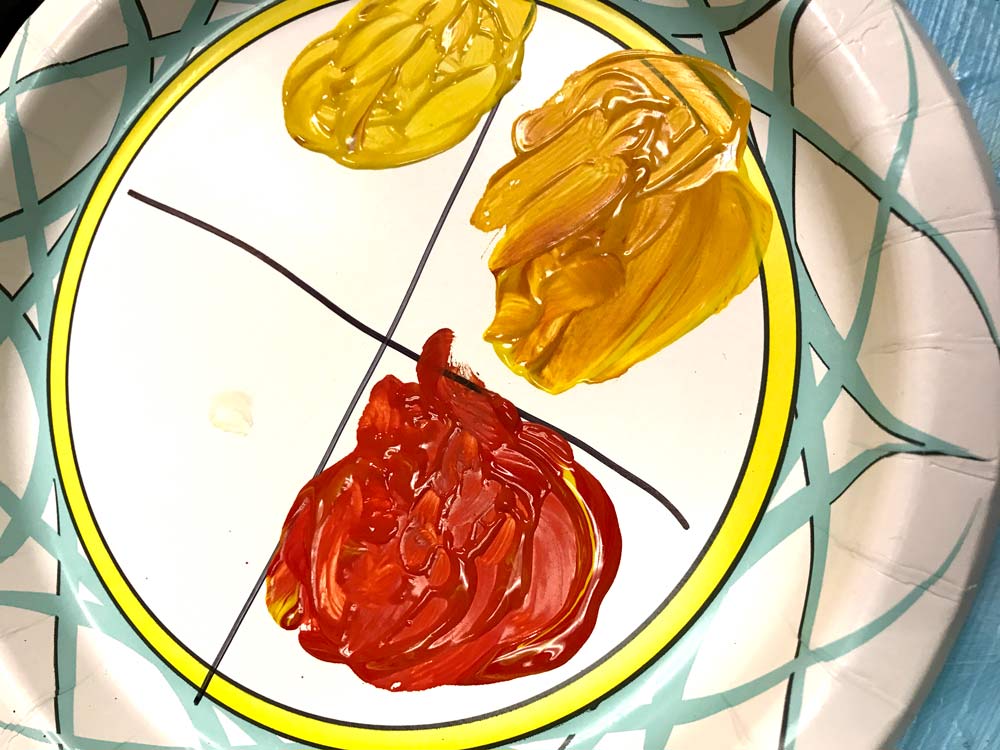
Mixing plate with divider lines
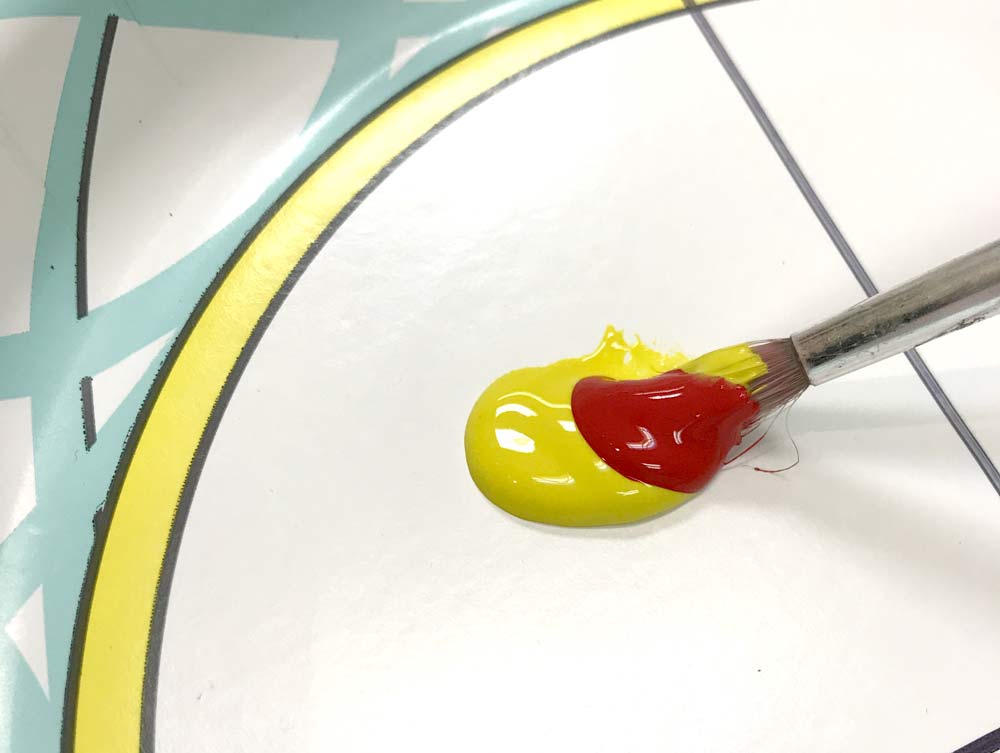
Add a second color
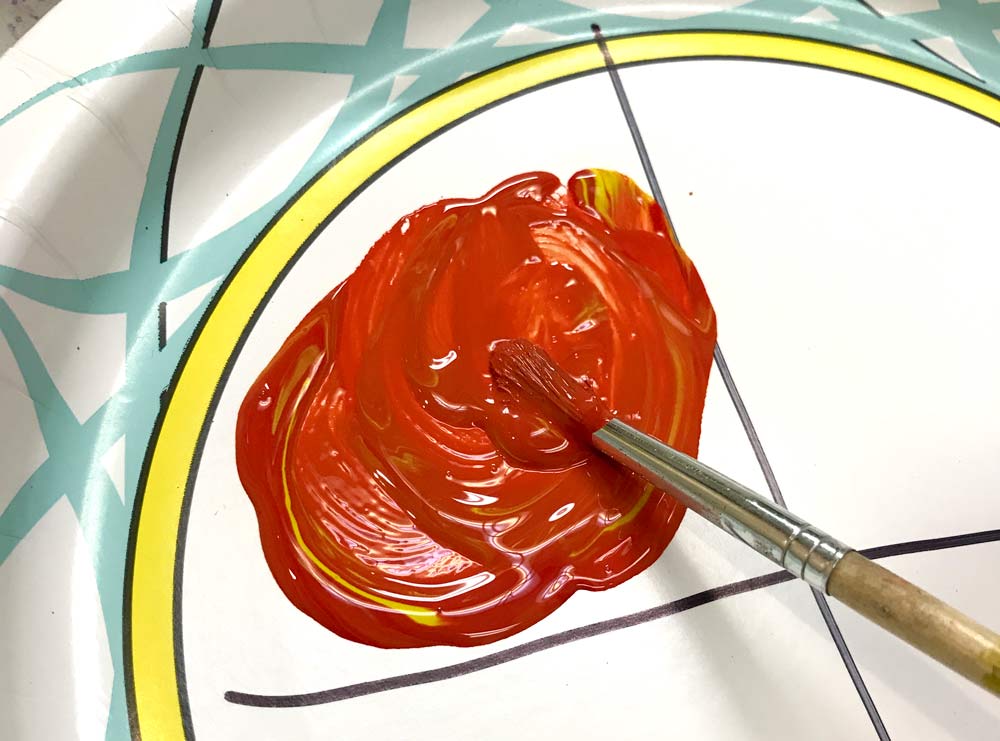
Mix them thoroughly
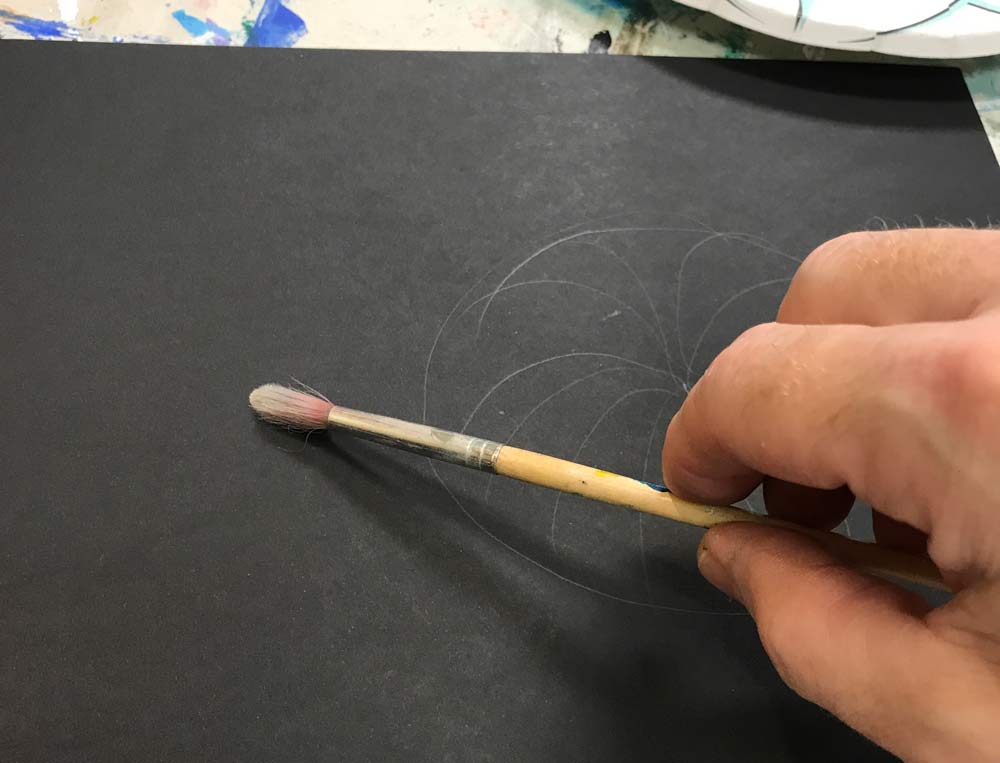
Point the tip towards the edge of your line and bend the bristles
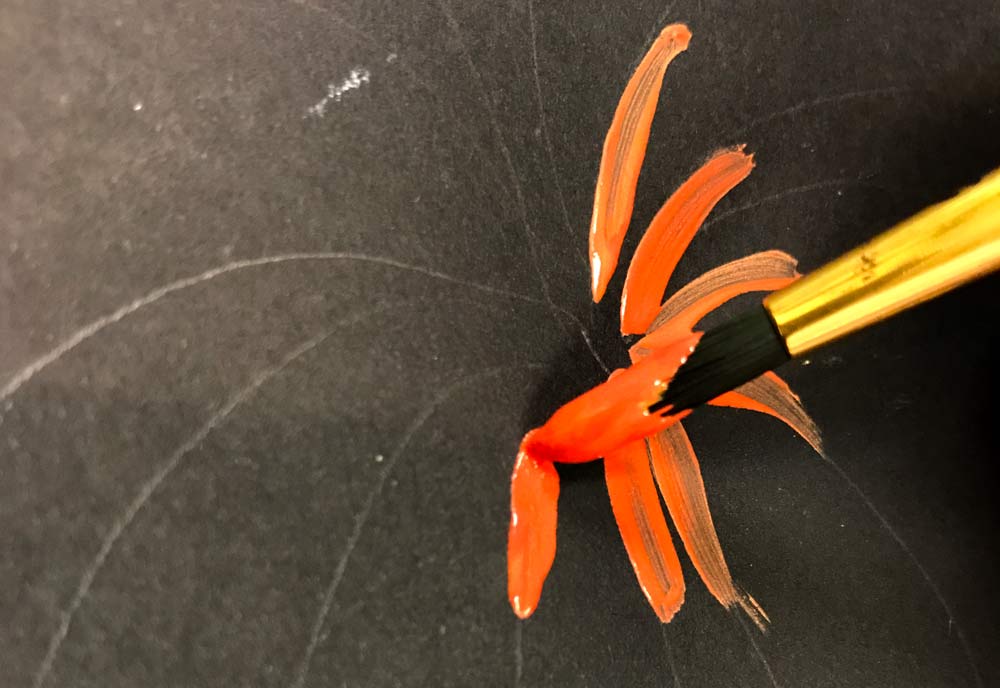
Make thin lines by barely touching the paper. The bristles DON’T bend at all.
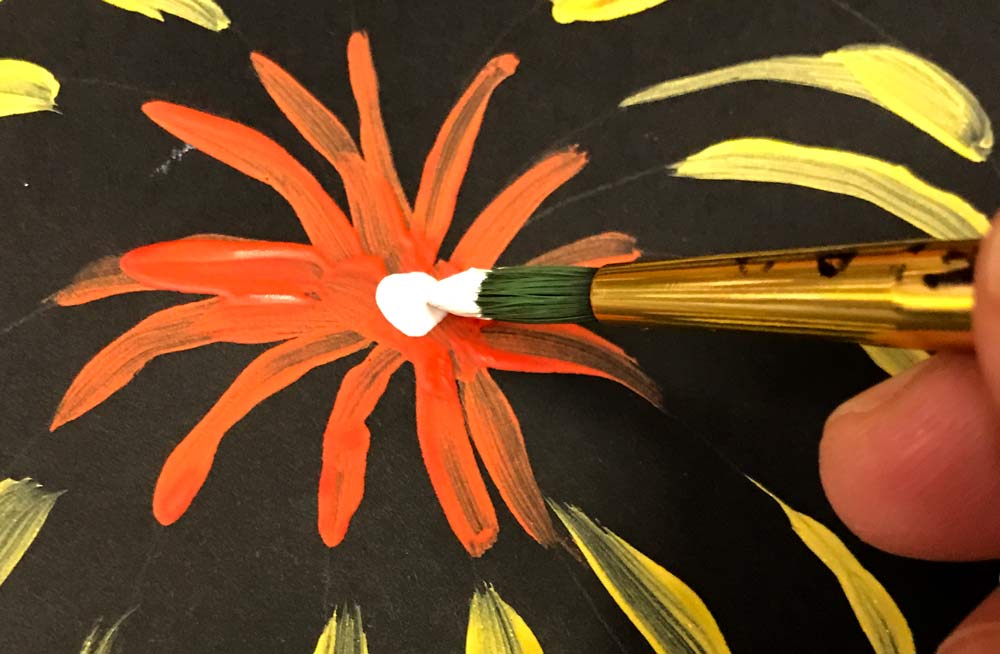
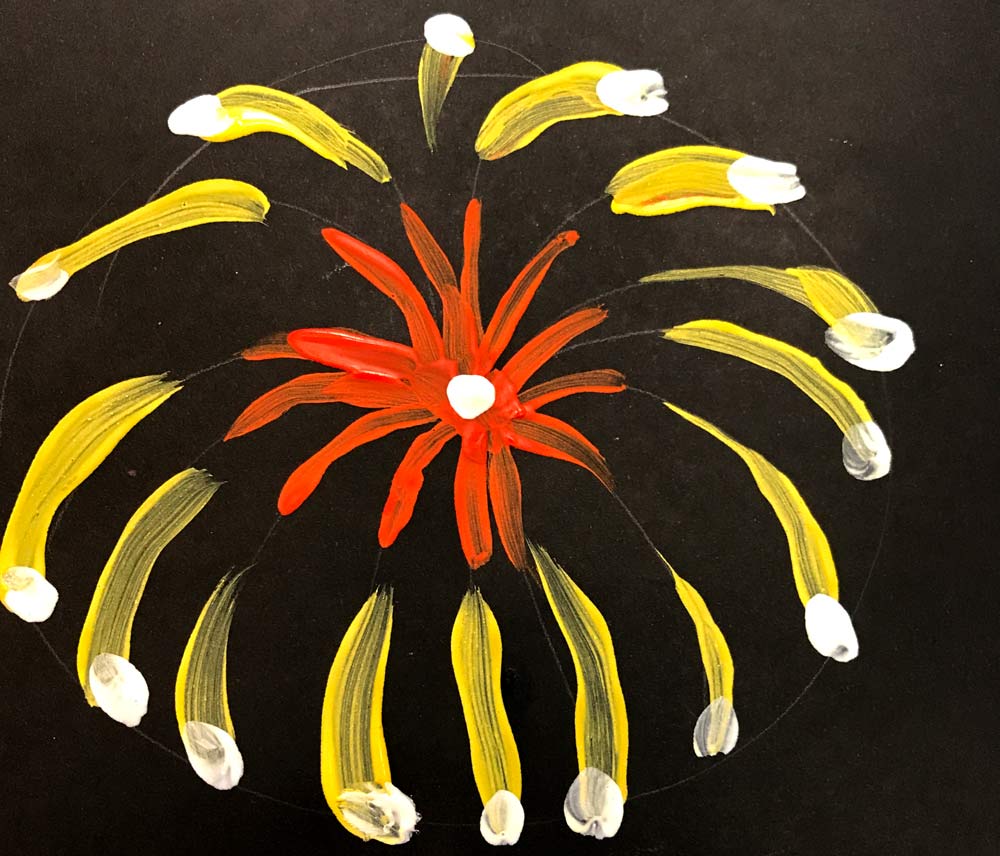
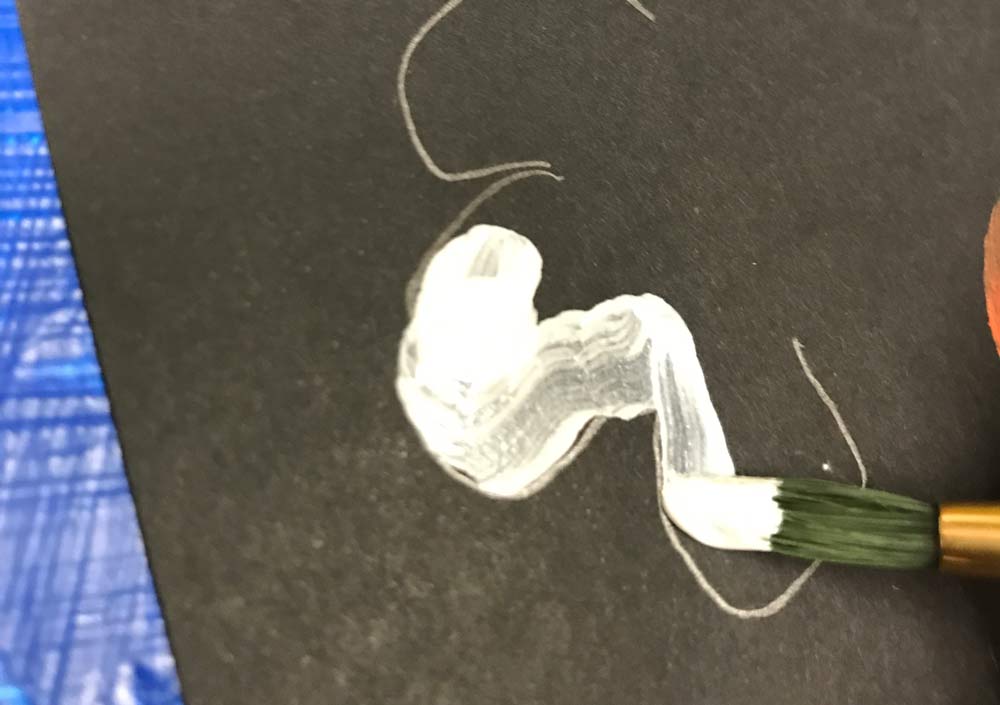
Make a flower in the center of your fireworks using thin lines. Then add a white dot at the center.

Make lighter lines for the falling “stars” of the fireworks. Put a white dot for each star at the ends.
Finished Fireworks
There are three ways to put paint on your paper.
1. To get big coverage and lots of paint on at one time, press the brush so that the bristles bend.
2. To make an edge, bend the brush again, but make sure you point the tip at the line for your edge. You’ll need to keep moving your brush so that it always points at the edge.
3. To make lines, use only the tippy tip of your smallest brush. You should almost not even be touching the paper at all! That means you can only paint one single short line each time you get paint. Once one line is done, go dip your tip to get enough for another line. Never try to do two lines with one dip.”
Prepare
M A T E R I A L S
- 8.5″ x 11″ copy paper
- Desktop printer
- 2B pencil
Reference
Flowers & Fireworks
Print enough for each student to have one, or for 2 students to share
Hand out reference prints. Use a stand to hold the print so there is more work space.
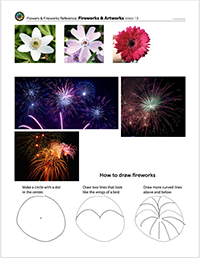
1 Page – Opens in new window
Trace the middle drawing. Look at the drawing examples at the bottom of the printout. Have everyone use their pencil and trace over the middle drawing: the circle, center point, and the two curved lines.
Then draw the other lines as shown to the right. Students may choose to draw them in the middle circle or trace over the ones on the right.
M A T E R I A L S
- Large dark color card stock or construction paper. Black or dark Blue is best
- 8.5″ x 11″ white card stock
- Brushes – Medium and Small with a good pointed tip
- Water container
- Tempera paint in several bright colors & white
- Disposable bowls for paint: The Getting Bowls (or trays)
- Disposable trays or plates: The Mixing Plate
- Sharpie – to draw lines on the mixing plate or tray
- Paper towels
- Smocks
Flowers
Students paint flowers on white card stock for 5 minutes. The first paintings will be in the method that the children naturally do. They’ll paint pretty fast, with the medium-sized brush, and pressing the brush for wide strokes.
The purpose of this part of the lesson is to get started with the paint and for it to be easy and fun. Say encouraging things.
You should help them remember the technique of pointing the tip toward the edges, but don’t worry about it. It’s unlikely that they’ll have the patience at this stage.
The purpose of this part of the lesson is to get started with the paint and for it to be easy and fun. Say encouraging things.
You should help them remember the technique of pointing the tip toward the edges, but don’t worry about it. It’s unlikely that they’ll have the patience at this stage.
Fireworks
“Now we’re going to paint some fireworks! I’ll come around and change your paper from the white flower paper to the dark night sky paper.
Remember how I showed you to barely touch the paper with your brush? The bristles don’t bend at all because you almost don’t even touch the paper. Just the tippy tip of your small brush will be used.
That means you have to get paint for each small stroke, because the paint on the tip gets used up really fast.
Wipe and wash your medium sized brush, the larger one, and then get the small brush. Don’t get paint yet. Just practice your tippy tip technique without paint while I hand out the paper.
As soon as you get the paper, you can use your pencil to draw a circle with the center dot and the curved lines like we did a moment ago. These will be your guidelines for painting the fireworks.”
M A T E R I A L S
- 8.5″ x 11″ copy paper with PDF printed – 1 for each student
- Color Markers
WORKSHEET
Grids
Print enough for each student to have one of their own to work on.
Hand out reference prints. Tell your kids to not draw or color on them yet.
Have them write their names at the top.
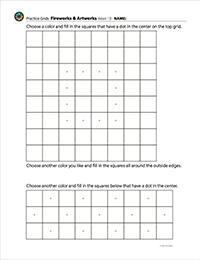
1 Page – Opens in new window
grids
Students work on one grid at a time. If you class is working slowly, just do the top grid and tell your class they get to take the 2nd one home to do later as well as filling in other boxes with colors. They can also use these later in the class if there is time.
Tell everyone to choose a color they like, and fill in each small box that has a little dot in the center. Try to fill the small boxes up to the edges. When finished, you’ll see a new shape made by the colored boxes. What will the shape be?
This is easy on purpose; to build confidence and to get used to the idea of filling in small shapes to make bigger ones.
The bottom grid makes a pattern instead of a shape. It’s called a checkerboard pattern. Speedy students can add more colored boxes in colors they choose.
M A T E R I A L S
- 8.5″ x 11″ copy paper with PDF printed – 1 for each student
- Color Markers
6.1 Print
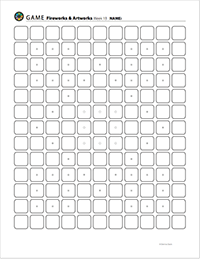
GAMEBOARD
Big Grid
Print one for every student to have.
Hand out gameboard prints. Tell students not to work on them until they hear the instructions.
Have them write their names at the top.
1 Page – Opens in new window
GAMEBOARD
Teacher’s key
Print one for you to use for checking the work and to show when the game is over

1 Page – Opens in new window
round 1
Students choose 3 colors. Take the first color and get ready for the first round.
1. Fill in the small rounded boxes that have a star in the center.
Everyone should be silent about what they see. Then have them raise their hands if they know what the shape these colored areas make. How many of them are there?
If you said squares, you get one point. If you said 4 of them, you get another point.
Points are on the honor system and kids should be working on getting their own best score.
round 2
Students choose next color. Fill in the small rounded boxes that have a solid dot in the center.
Everyone should be silent about what they see again. Then have them raise their hands if they know what the shape this new colored shape is.
If you said a diamond, you get two points. If you said a square you also get 2 points. It’s both!
round 3
Students get their last color. Fill in the small rounded boxes that have an open dot in the center.
How many colored square shapes are there? (Not counting the individual rounded boxes.) Raise hands if you know. If you said 6 total, you get another point. The diamond shape is also a square.
Add up your points! 5 is the most you can get.
extra challenge
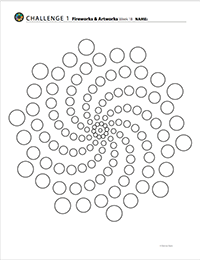
WORKSHEETS
Challenge Grids
Print enough for each student to choose from the two challenges. Have a few extras of each one, for early finishers.
1 Page – Opens in new window

Opens in new window
Create
Students fill their challenge grids in any way they like. They can use just a few colors, or as many as they can fit; make patterns or not. This is their own artwork. The goal is to have fun and freedom to express.
Early finishers can choose a second challenge. They can also finish the practice grids and even fill in the backgrounds of any of the grids.
M A T E R I A L S
- Paper Towels
- Cleaning wipes
- Sink
- Waste baskets
CLEAN
- Wash hands
- Super-wash brushes if used
- Put art supplies away
- Wipe tables & toss trash
- Remove any smocks (last)
- Check for items on floors and tables
Students clean up their work area. After everything is done, if they are taking things with them, stack up the grids and the paintings from the first half. Place the paintings on top if not completely dry, or save them to take home another day.
Ask how they liked working with the paint and with grids if you get finished before time is up. Students can describe their ideas for the challenge grids to each other.
%
Insights
This lesson provides understanding
%
Technique
This lesson shows application and movement
%
Self Expression
This lesson allows personal freedom
OBJECTIVES
- Practice and improvement using paints, markers, color, and design
- Understanding how to hold brushes to create different effects
- Accomplishment from painting fireworks and creating colorful designs
- Fulfillment by choosing the colors and expression in pattern and design
TROUBLESPOTS
- Sometimes students decide to play with art supplies instead of creating art. For the warmup, be on the lookout for things like scribbling the same thing over and over, or just writing a word, on as many pieces of paper as possible.
- Sometimes a student will get frustrated and purposely change their work from something like fireworks to a big blob of muddy paint. This is a coping mechanism. They might even say they like it much better than if they had done fireworks. If you see this try and see if they will attempt the fireworks with a red and orange marker. If not, let it be totally ok!
- Filling in boxes helps the patterns emerge on the grids. Some children will just put a few lines in each box. See if you can get them to use the wider side of the marker tip and do a little more. “And a little more!”
ART WORDS
Tempera paint – a chalky powdered pigment that is mixed with water to create a washable, fairly brittle paint. Try to keep it from getting globed up or it may crack.
Pattern – When a simple image like a dot or a square is repeated over and over, it creates a pattern
ROOMPREP
Have all the supplies ready, and look over the demo in STEP 2 so you can show your students how to hold a brush and apply paint in different techniques.
Print all of your PDFs from the lesson plan as needed.
What your room needs
Here are your printable lists and room prep instructions.

Opens in new window
CLASSROOM
MATERIALS
- 11″ x 17″ copy paper
- 8.5″ x 11″ copy paper
- Desktop printer
- 2B Pencil
- Color markers
- White erasers
- Large dark color card stock or construction paper. Black or dark Blue is best
- Brushes – Medium and Small with a good pointed tip
- Water container
- Tempera paint in several bright colors & white
- Disposable bowls for paint: The Getting Bowls (or trays)
- Disposable trays or plates: The Mixing Plate
- Sharpie marker – to draw lines on the mixing plate or tray
- Paper towels
- Smocks