OVERVIEW
Students will continue our pet theme. First we’ll make prints using the cat yarn print blocks from last week, and then create dog drawings and paintings. We end the day inventing a fantastic dog house!Week of Nov 27 – Dec 1
1 Hour & 30 Minutes, or two 45-minute sessions
STANDARDS For This Lesson
Students will continue our pet theme. First we’ll make prints using the cat yarn print blocks from last week, and then create dog drawings and paintings. We end the day inventing a fantastic dog house!
NATIONAL STANDARDS:
Grade 1
VA.CR.1.K
Grade 2
VA.CR.2.2
Experiment with various materials and tools to explore personal interests in a work of art or design.
LEARNING TARGETS:
Students know how to make prints.
SYLLABUS:
1. WARMUP – Finish watercolor drawings if needed
2. DEMO – Demo how to use watercolors with handout
3. POINT OF A LIFETIME – Teach brush use for watercolor
4. SET UP WATERCOLORS – Set up for painting
5. PAINT – First paint session
6. CONTINUE PAINTING – Make the rounds & help individuals
7. EXTRA Charcoal expressive animals for early finishers
8. CLEAN UP (5 Min) – Everyone helps
Tap the Plus Icon (above right) to open STANDARDS information
SCROLL & TEACH LESSON PLAN
Don’t worry about rewriting anything. Just spend a few minutes reading the lesson plan and printing out your PDFs. Then check out the READY, SET, GO! section and print your prep-page, which includes checklists and an “at a glance” outline of the lesson so you can stay on track when you’re teaching. Set out the materials from the list on your prep page and you’re ready.
That’s all you need to know. Use your smartphone to Scroll & Teach!
Lesson At A Glance
A brief overview of each step. Buttons jump to each section for detailed information.
5 Min – Set up for printmaking
5 Min – Students help
10 Min – View shapes on dogs. Use slideshow.
15 Min – Draw dog using handout
15 Min – Color dog and background
5 Min – Everyone helps
SCROLL & TEACH
LESSONPLAN
Each section is a different color. Read over once and then you can SCROLL & TEACH using any device you like. It’s designed to work best with your phone.
LEARNING TARGETS

Students learn to express themselves through creating from their imagination.
M A T E R I A L S
- 11″ x 17″ Copy Paper
- 4B pencil
- Eraser
- Markers and/or oil pastels
- Blenders (stumps)
- Paper Towels
1.1 Print
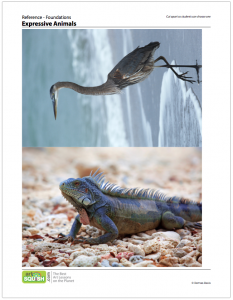
Reference
Expressive Animals
Cut images apart and print enough for each student to choose from several.
This is the same Expressive Animal PDF from last week’s Grade 3-5 “Patch Painting”, so if you have those you can use them again.
1.2 greet
Kneel down so that you are on their level. Bending over emphasizes the differences in your height, while kneeling makes them feel more important. Have tape and marker ready so you can stick some tape on the table by each student and write their name on it as they sit down.
1.3 choose
Everyone should take their time with the work and make a finished piece of art. Limiting the paper can also help kids focus on the work. If someone finishes in super-fast time, ask them what more they can do to the existing paper. Ask again several times – unless they appear overly frustrated; then you can allow them to move on to a new work.
Use this button to jump down to the preparation section.
LEARNING TARGETS

Students know how to set up for printmaking
M A T E R I A L S
- Cat yarn printing blocks from last week (make an extra for kids who may have missed, or let them use a friend’s
- Tempera Paint OR
- Water soluble printing ink
- Bright color copy paper
- Medium sized brushes
- Disposable bowls or plates
- Pencils
- Paper towels
- Spray bottle with water
- Smocks
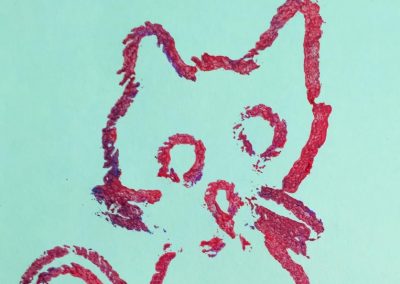
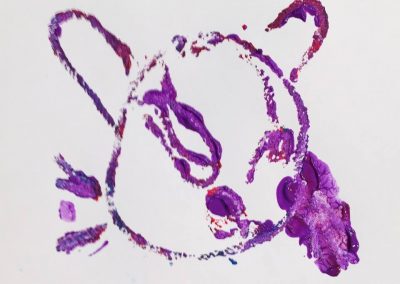
Our block is a small piece of corrugated cardboard with yarn glued on it.
2.1 print
We like to put several tables together for all 3 stations, and let students go around and around in a circle to the different printmaking stages, starting over when they have made their first print. The stations should be large enough to accommodate 2 or 3 students each, and you can have 2 sets of stations for larger classrooms. Have a large area designated for drying, and try to keep each student’s set of prints together while they dry.
STATION 1
Inking the block (painting the yarn)
Fill bowls or plastic plates with tempera paints. You can have black & white, and you can add one or two bright colors too. For bright paint, use white paper.
Have 2 medium-sized brushes for every single bowl of paint. You can also have a plate or paper towel for setting wet brushes down so they don’t flip over out of a bowl. Short handle brushes don’t do this though.
STATION 2
Making the print (pressing the paper onto the block)
Set out stacks of printing paper in several colors – enough for 2-4 prints for each student.
NOTE: Construction paper is not recommended. It looks pretty good at first, but quickly becomes faded and brittle. We prefer using brightly colored copy papers.
STATION 3
Signing the prints with a pencil & Drying area
Have pencils to write names on the prints (small, in a corner) and set aside at the drying area. Set out all of the printing blocks from last week (if someone was absent, let them use a friend’s print block), and this will be where everyone begins and waits for their turn at STATION 1.
2. Place butcher paper, brown drop-cloth paper (from hardware stores), or an old sheet onto any surface that you want to protect from paint.
3. Some kids always know their work, some kids mistake other’s work for their own, and some kids will accept any work if you tell them they did it.
So make sure there are names on every single work or you’ll have upset artists!
Use this button to jump down to the preparation section.
LEARNING TARGETS

Students know how to make prints
M A T E R I A L S
- Cat yarn printing blocks from last week (make an extra for kids who may have missed, or let them use a friend’s
- Tempera Paint OR
- Water soluble printing ink
- Bright color copy paper
- Medium sized brushes
- Disposable bowls or plates
- Pencils
- Paper towels
- Spray bottle with water
- Smocks
If you have enough printing rollers at hand, you can use them first for pressing the paper onto the blocks for actual printmaking, and if you have enough, you can also use them to apply the paint or ink to the block instead of using brushes.
It’s helpful to place the paint or ink on a very smooth flat surface such as a mirror tile or glass panel (tape over the sharp edges really well with duct tape).
3.1 Line up
Artists will choose their colors in paint and paper as they go around the stations. Below are the steps for printing.
Talk through these steps and explain to each group as they get there. You might reward a well behaved student by walking them through all the stations while everyone listens and learns how to do it.
Explain that tempera paint will look better after it has dried.
3.2 Paint
- Choose a color for this print.
- Paint the yarn on the block with the brush. Try to keep paint mostly on the yarn and not paint the cardboard on purpose.
- Return brush to the same bowl it was in or set on a brush holder like a plate or towel.
- Pick up the block with both hands and wait for Station 2.
3.3 Press
- Set the block face up on the table.
- Choose a paper and place on the table next to the cat yarn block.
- Pick up the cat yarn plate and set it carefully face down on the paper, with the wet paint going onto the paper. Don’t slide it around, go slowly!
- Press down – gently at first, and then press all over the back of the cardboard, being careful not to let it slide around at all (this can be tricky at first so if students are struggling, remind them that it is ok to have a few learners as you get better at this new technique).
- Turn the whole thing over, and carefully peel the paper off. This is your Print!
- Take both your Block and your Print to Station 3.
3.4 sign
- Write small name on paper with a pencil below the printed area, and set aside to dry.
- Wipe off the printing plate with a damp paper towel and then a dry one.
- Continue back to Station 1 again! Be patient as you wait while everyone has a turn.
Use this button to jump down to the preparation section.
LEARNING TARGETS

Students know the importance of cleaning up before starting a new project
M A T E R I A L S
- Paper towels
- Smocks
4.1 clean
Have students help you clean up. If any ink got on the tables, they can take damp paper towels and wipe them down. All trash needs to be thrown away, brushes washed, and then students can wash hands. Set the ink blocks aside to dry with the prints.
BREAK
This is the end of part one if you are dividing into two, 45-minute sessions.
Use this button to jump down to the preparation section.
LEARNING TARGETS

Students know how to identify big shapes
M A T E R I A L S
- Ipad or screen to display dog photos
5.1 shapes
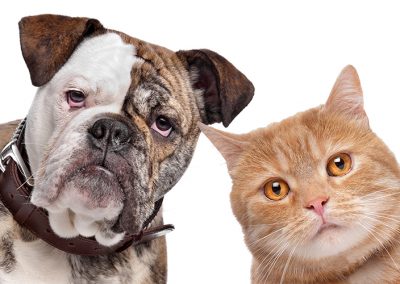
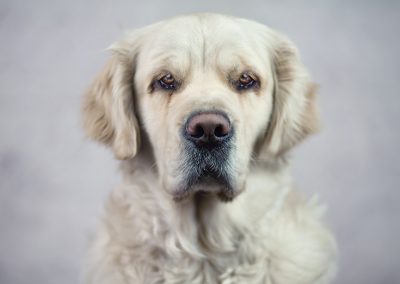
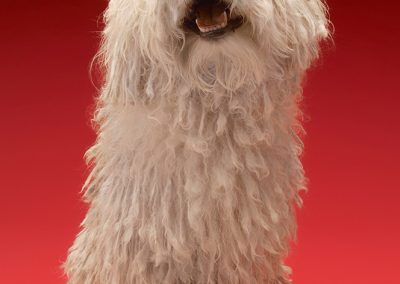
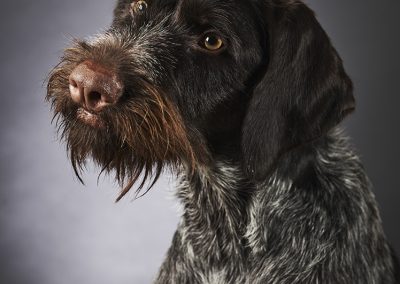
Look at the dog slideshow and analyze big shapes and features:
- Head shapes – many dogs have heads that look like a lightbulb from the front and a car from the side.
- Ear shapes – Sometimes these are triangular, when they flop over. Often they’re odd shapes.
- Eye shapes – Dogs have lots of different shapes for the eyes. The lids can flop over and make them more like triangles or even rectangles.
- Nose shapes – these are mostly just round or squarish.
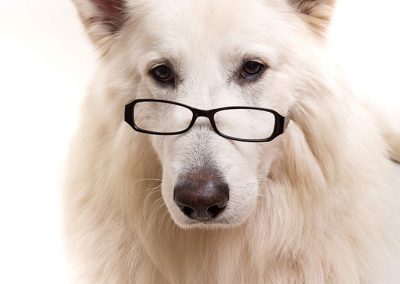
- Fluffy and hard edges – It’s hard to draw fluffy dogs sometimes. It can be easier to color around the fur and leave the fur white, like in the picture with the white dog. You could just color the red parts and make a few small lines for the wavy fur.
That’s right, you have to look at the dog you’re drawing to see what shapes are there.”
Dog and Cat
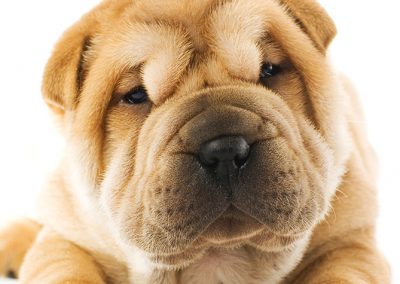
Bulldog and cat. This dog has a circular face and triangular ears; similar shapes to a cat.
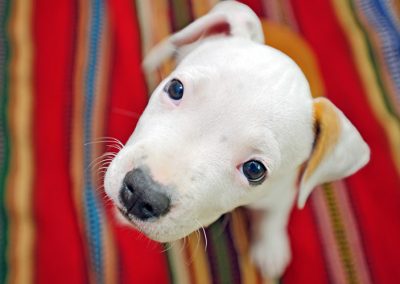
WhitePup
This cute little guy has a balloon shaped head. It will look more like a lightbulb when he’s older.
Use this button to jump down to the preparation section.
LEARNING TARGETS

Students know how to draw a dog accurately
M A T E R I A L S
- 11 x 17″ Cover Stock
- Markers
- Pencil
- Erasers
6.1 Print
Reference
Dogs & Shapes
Have students follow along with these drawing guides.
6.2 draw
Each student will draw the big shapes of the dog they choose in light marker (yellow or pale pink works great). These shapes are shown in blue on the handout. Some simple details are shown in a darker blue but draw the BIG SHAPES first. Draw all the guidelines using the pale marker. The final art we’re doing will be realistic, and we will redraw the real shapes over the guidelines with MORE detail. For that we’ll be using a strong colored marker that shows up much better.
Guidelines just help us know get the size of things, and where they go. They help us get the Big Shapes to look good.
Use this button to jump down to the preparation section.
LEARNING TARGETS

Students know how to color a dog with creative colors
M A T E R I A L S
- Markers
7.1 color
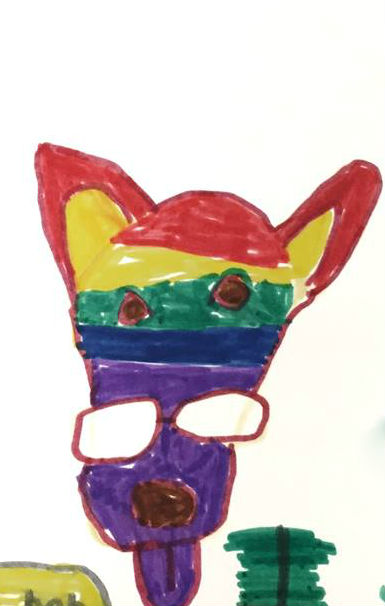
Students will now use markers to color in their dog in bright, crazy colors. Everyone loves a colorful dog! Color fully, and color in the background too if you can. If any students finish quickly, they can draw another dog using oil pastels or markers. Make sure names are on these!
Use this button to jump down to the preparation section.
LEARNING TARGETS

Students know how to clean up.
M A T E R I A L S
- Sink
- Waste baskets
- Well-lit spot for photos
- Camera or phone-camera
- Paper towels
- Cleaning wipes
8.1 Clean
- Empty water containters
- Super-wash brushes if used
- Put art supplies away (sop up runny paint before disposing of palette paper)
- Wipe tables & toss trash
- Remove any smocks (last)
- Check for items on floors and tables
8.2 Photo
- Try to get photos of your student’s artwork. Find a good spot for quick lighting without highlights or shadows from your hands and device. Ideally in-between two strong lights on each side.
8.3 Connect
- Make sure you see the kids connect with parents and tell them about the class if you can!
Use this button to jump down to the preparation section.
%
Insights
This lesson provides understanding
%
Technique
This lesson shows application and movement
%
Self Expression
This lesson allows personal freedom
OBJECTIVES
- Practice and improvement using various materials and drawing skills
- Understanding printmaking
- Accomplishment in creating several identical original prints
- Fulfillment by self-expression
TROUBLESPOTS
Impatience – The beginning of the printmaking line will be a bit of a waiting game for some. You can have a waiting station with blocks, magnetic art games, or paper and markers if you have room and think you’ll need it.
Smearing – Help your artists keep their paper from sliding around by pressing gently first, and then harder..
Reprinting attempts – This just doesn’t work! Watch for someone thinking they can try again on the same paper. Just get a clean sheet.
ART WORDS
Ink – Prints are usually made with special thick ink, but we are going to use paint. There is not much difference when you’re using simple printing techniques like we are today.
Print Block – Artists call the board that is used to make a print, the block. Originally, printing blocks were very large, much like blocks. Today we’re using cardboard as our printing blocks.
Big Shapes – One of the ArtSquish 3 steps to accuracy. finding big shapes and draw them before details, is the most fundamental insight an artist needs to learn.
Edition – A set of prints are usually called an edition of prints. Some artists only make a certain number of prints and then they destroy the printing plate. Those prints are called a limited edition
CLASSROOM
PREP
Print all of your PDFs from the lesson plan and cut any references apart as needed.
What your room needs
Here are your printable lists and room prep instructions.
CLASSROOM
MATERIALS
- 8.5″ x 11″ copy paper
- 8.5″ x 11″ card stock
- 11″ x 17″ copy paper
- Rulers
- Scissors
- Box cutter (teacher only)
- Large Drawing boards with clips
- Water containers
- Spray bottles
- Water droppers
- Paper towels
- Smocks
STUDENT’S
MATERIALS
- 14″ x 17″ Sketch Paper
- 11″ x 15″ watercolor paper
- 2B Pencil
- 4B pencil
- Ebony pencil
- Black Sharpie
- Markers
- India ink
- Ink dip pen with metal nib (not too sharp a point)
- Soft compressed charcoal sticks (not pencils)
- Canvas pencil (dark gray colored pencil)
- White erasers
- Kneaded erasers
- Acrylic paints
- Oil pastels
- Blender sticks (stumps)
- Sandpaper boards (to clean blenders)
- Paper palette pad, or disposable trays/plates
- 11″ x 14″ Canvas (loose or from real canvas pad)
- Canvas boards (optional)
- Tape – blue painter’s tape
- Brushes – All sizes
PREVIEW
Thanksgiving Holidays
November 25 – 29
Week 16: Have a Dog Day
December 2 – 6
Students will continue our pet theme. First we’ll make prints using the cat yarn print blocks from last week, and then create dog drawings and paintings. We end the day inventing a fantastic dog house!

