
OVERVIEW
Students start by using jungle shapes to create outlines like a complex coloring book page. Then oil pastels are used and blended to create a rich and colorful artwork.– – –
Grades 3 – 5
1 Hour & 30 Minutes to Two Hours
SCROLL & TEACH LESSON PLAN
Don’t worry about anything. Just spend a few minutes reading the lesson plan and printing out your PDFs. Then check out the READY, SET, GO! section and print your prep-page, which includes checklists and an “at a glance” outline of the lesson so you can stay on track when you’re teaching. Set out the materials from the list on your prep page and you’re ready.
That’s all you need to know. Every Step is a different color. Just use your device to Scroll & Teach!
Art Supplies Are Needed
Our lessons are designed to work with very specific supplies (see our supplies page using the button below). We recommend ordering what you need for home delivery. However, you can try and make do with what you have on hand during the health crisis.
Lesson At A Glance
A brief overview of each step. Buttons jump to each section for detailed information.
optional – Draw from life or reference
10 Min – Slideshow of Henri Russeau & coloring images
30 Min – Draw dense designs using jungle shapes
7 Min – Using and blending oil pastels
15 Min – Choose black areas and fill in rest with warm colors
15 Min – Fill in accent areas using cool colors
10 Min – Blend with stumps and white pastel
10 Min – Fill in black areas and sign
5 Min – Put pastels away
STEP 1. Warm Up - Optional
A quick drawing can help students move into a lesson in a relaxing wayTap the button below to start a timer in a new tab/window.
draw
M A T E R I A L S
- 14″ x 17″ Sketch Paper
- Ebony Pencil OR
- Compressed Charcoal
- Stretchy Eraser OR
- White Eraser
Have several large and medium sized objects set out and available to sketch. You can use items such as:
- A suitcase
- A chair or stool
- Basketballs
- A cooler
- Toys
- Kitchen items
Students should be standing and drawing in their large sketch pad (we use 14″ x 17″ ones). Remind them to use arm movements rather than just their wrist. Sketches should be fast, loose, and fun, but students should be observing carefully, and working towards accuracy, instead of just playing around.
explain
M A T E R I A L S
- Device to display videos & Pinboards
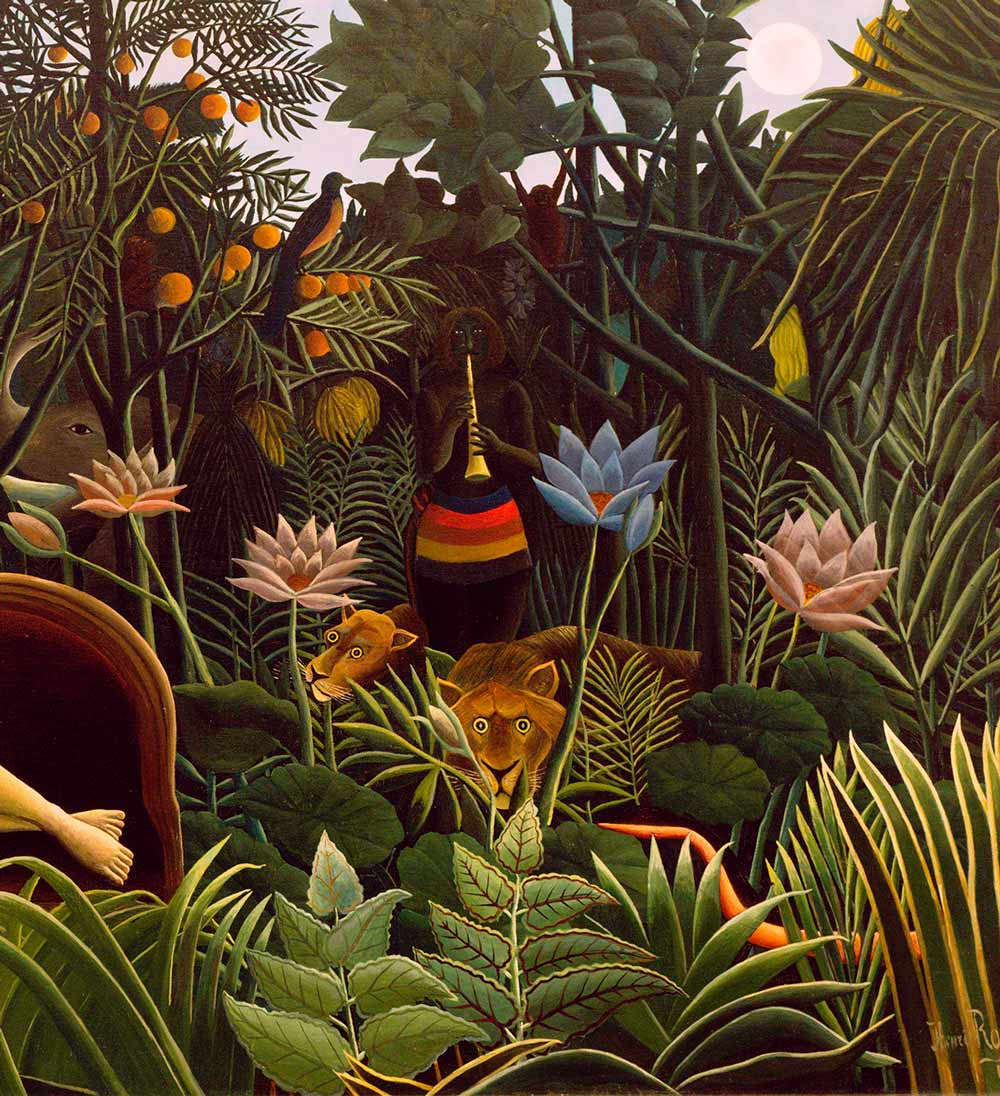
Students watch, and listen as you read the captions. Explain to your students that you’ll tell them about the life of Mr. Rousseau later in the lesson.
Henri Rousseau and colored shapes (tap any image to open viewer)
Itea1
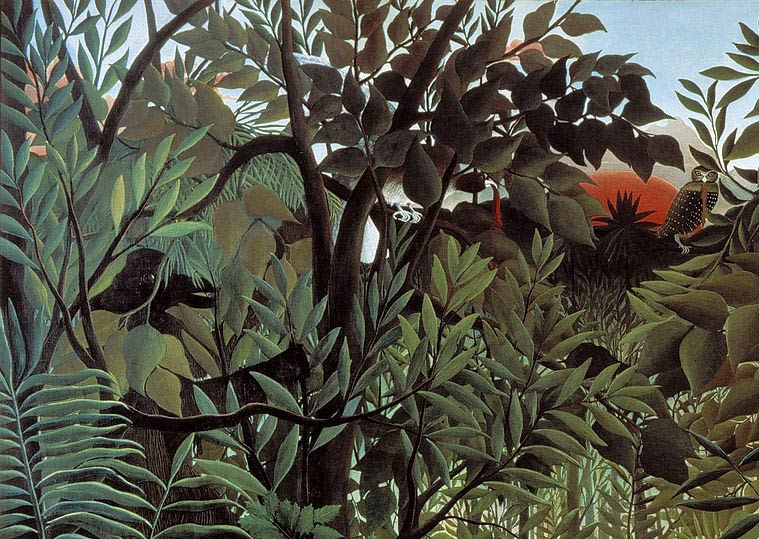
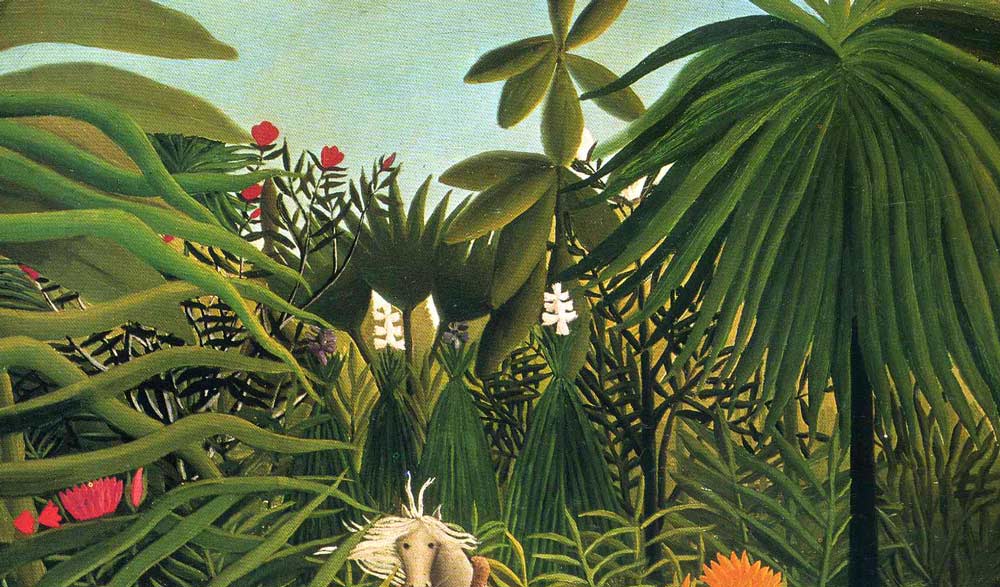
Rousseau – The Hungry Lion (detail) – The leaf shapes are flattened and stylized.
Step 2
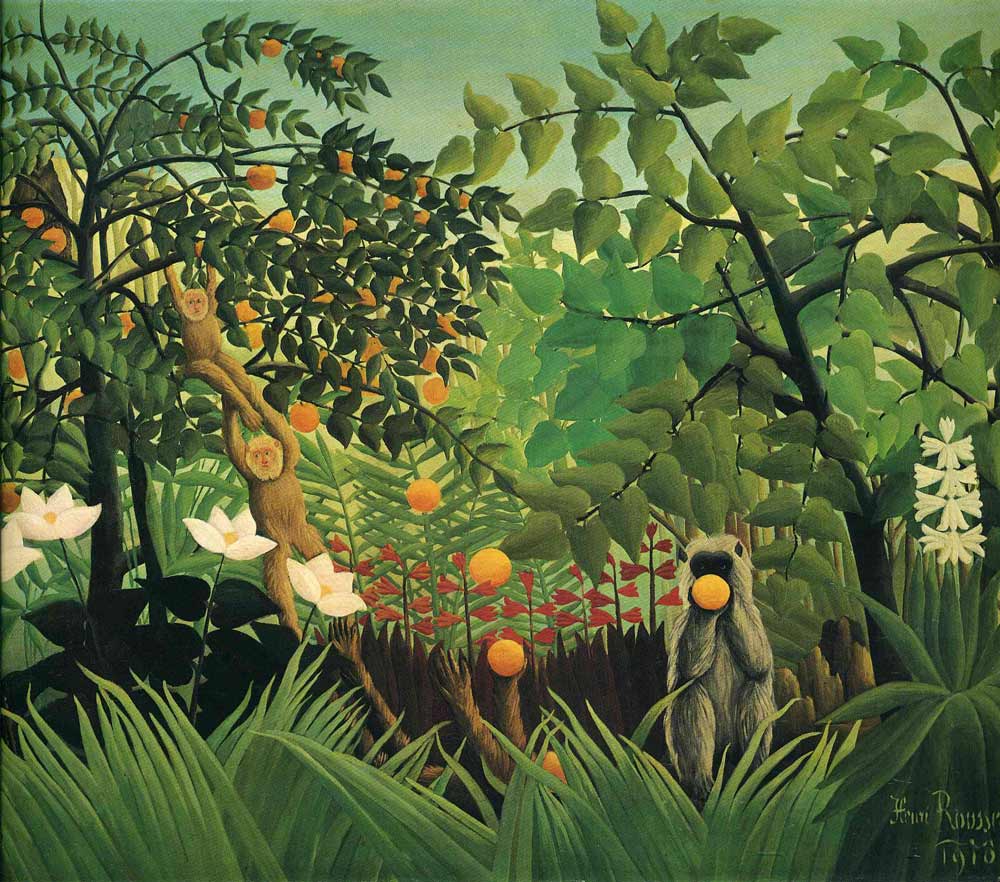
Rousseau – The Exotic Landscape (1910)
Step 3
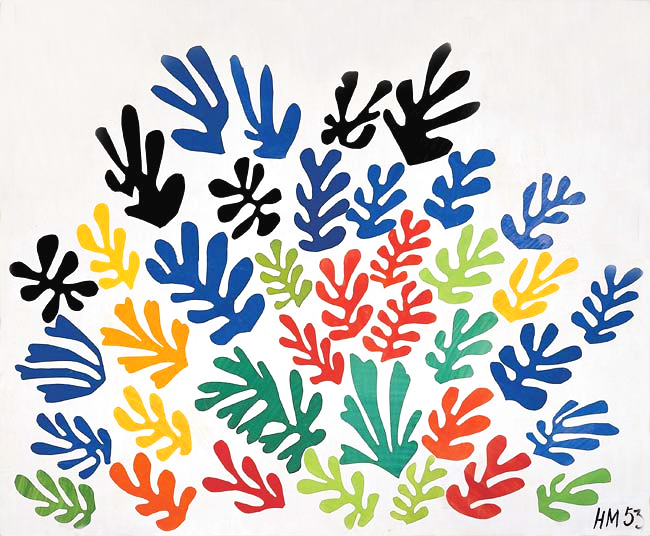
Another artist who worked with leaf shapes is Henri Matisse. These are paper cutouts.
Step 4
Matisse – The Lagoon
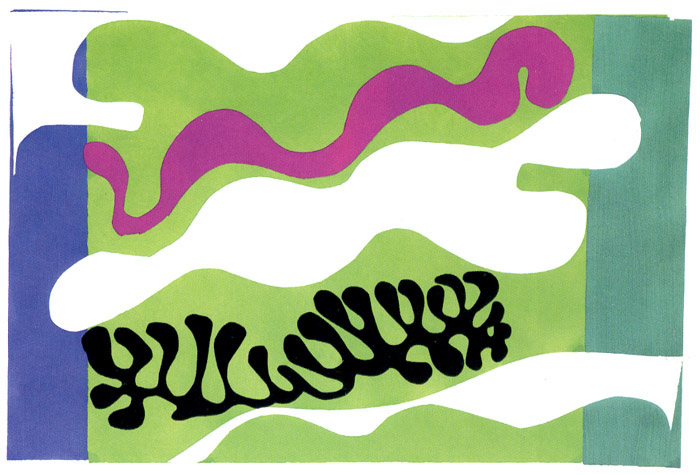
Step 5
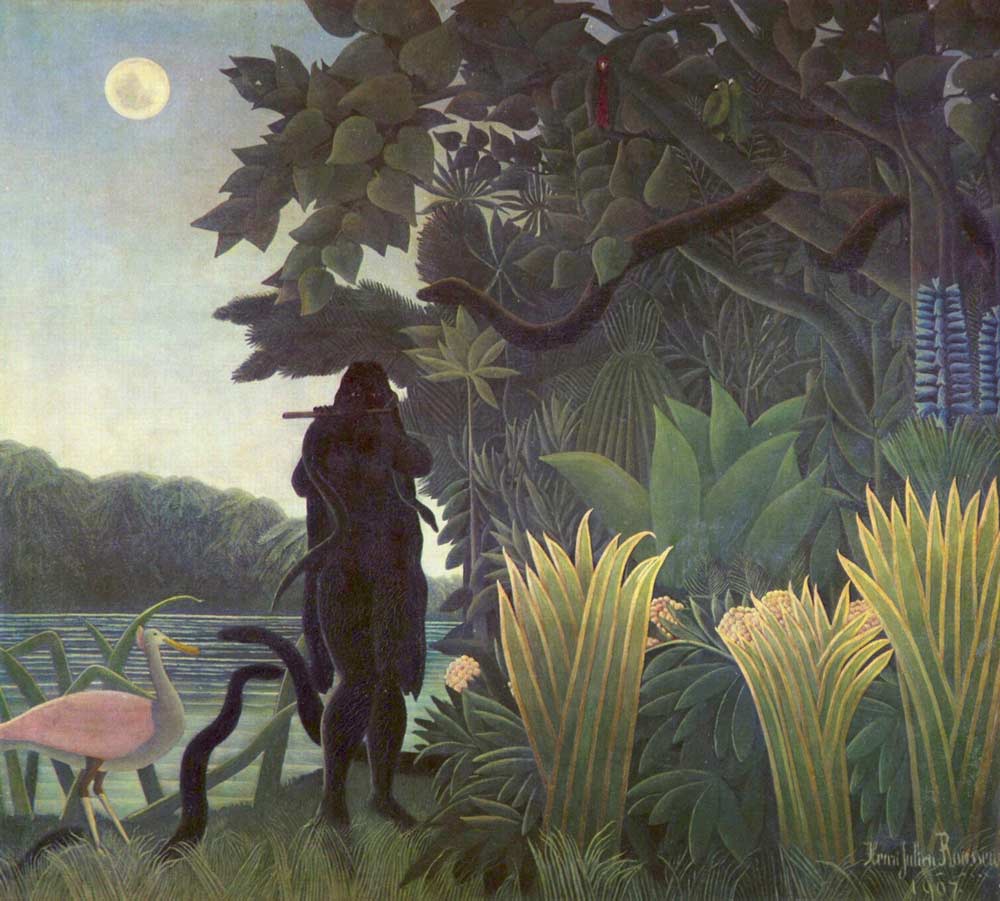
Rousseau – The Snake Charmer
Step 6
Rousseau – (detail)
Prepare
M A T E R I A L S
- Color copier
- PDF printed on:
- 8.5″ x 11″ copy paper
- 2B Pencil
- Black Sharpie
- White erasers
3.1 Print
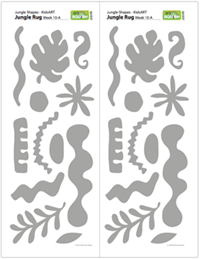
Reference
Jungle Photos
Print enough for each student to view both pages as they are shared around. One set for every 2 students works well.
Create
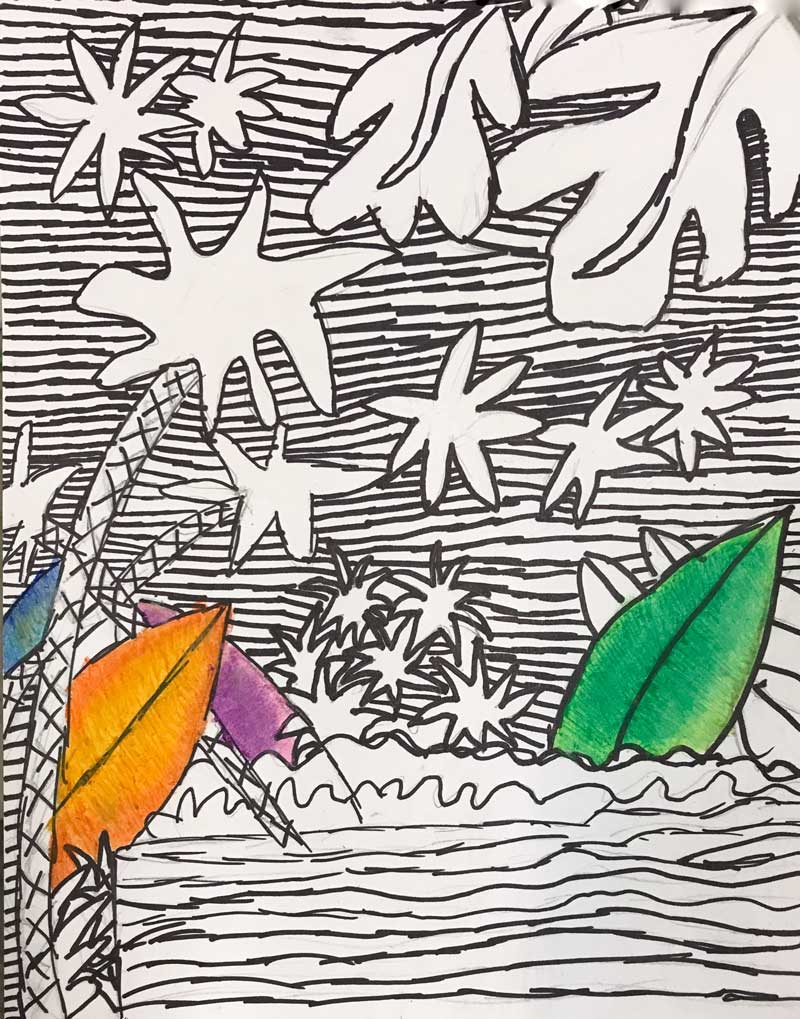
Before beginning, try drawing a few shapes on regular paper. Try several different ideas and make up some of your own shapes. Some shapes should be large and simple, while others are small and repetitive.
Then, use a pencil. Students should enjoy filling the paper with as many shapes as possible in various sizes. Erase and modify as needed. Do not shade or fill in any areas at all.
Think about where you want your most important spot to be. That’s where someone will look before anything else. You can make this important by changing the size and/or the color of some shapes.
Your work will be the most interesting if there is a variety of colors and shapes, and if there is one spot that commands the most attention: the Most Important Spot.
Remember to only draw lines. You also need to make the lines touch other lines at the ends so that the shapes are all contained, even the shapes in-between other shapes. Don’t do any shading at all.
This should look a lot like one of those adult coloring books when you are finished.
M A T E R I A L S
- Line drawing from STEP 3
- Oil pastels
- Blender sticks (stumps)
- Sandpaper boards (to clean blenders)
show
Students should gather around a table to watch. If you have a very large class, you might do this in smaller groups, or you can show the slides on a display and talk them through it.
Henri Rousseau and colored shapes (tap any image to open viewer)

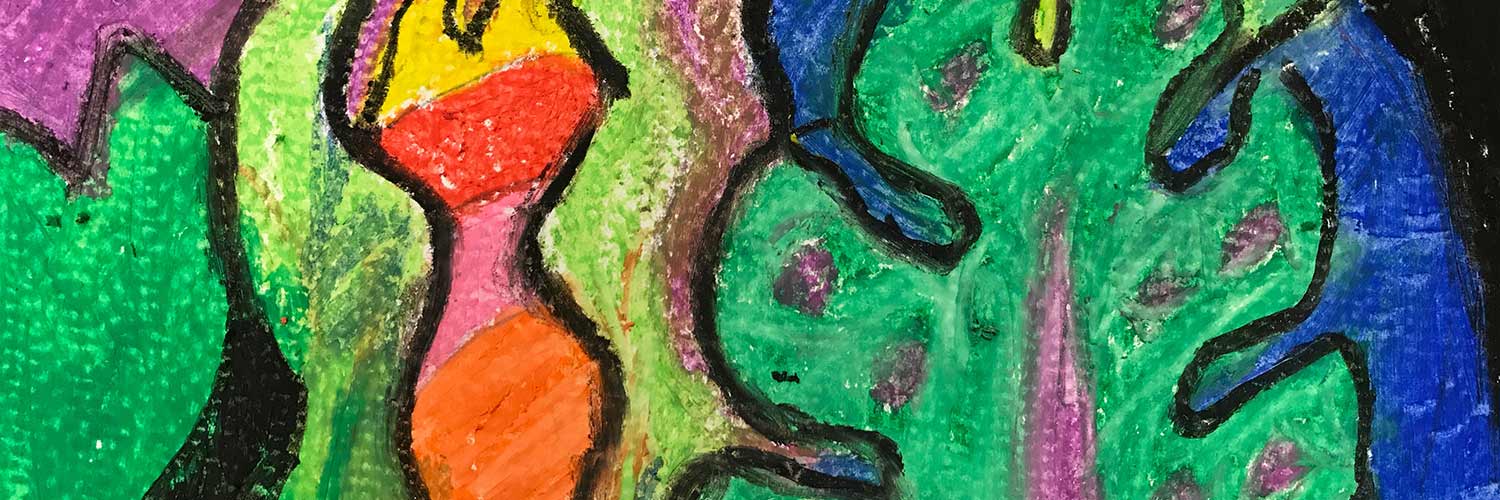
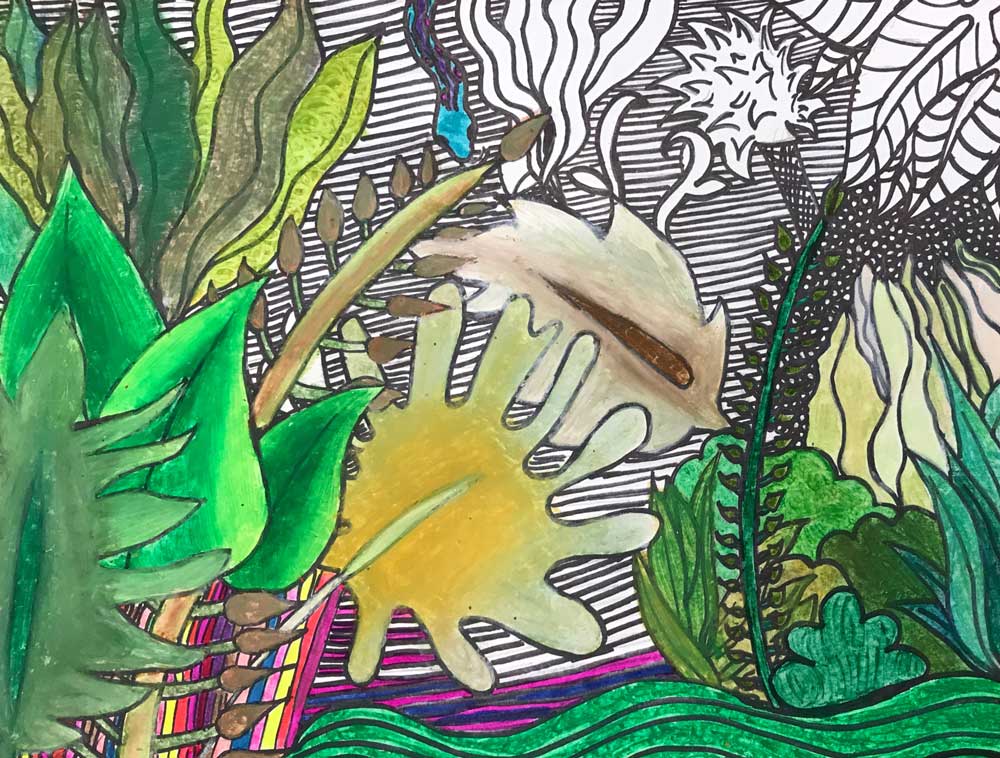
You can layer the color and start to blend them. They mix more like paint than crayons.

Smearing the colors together with the blender looks awesome!
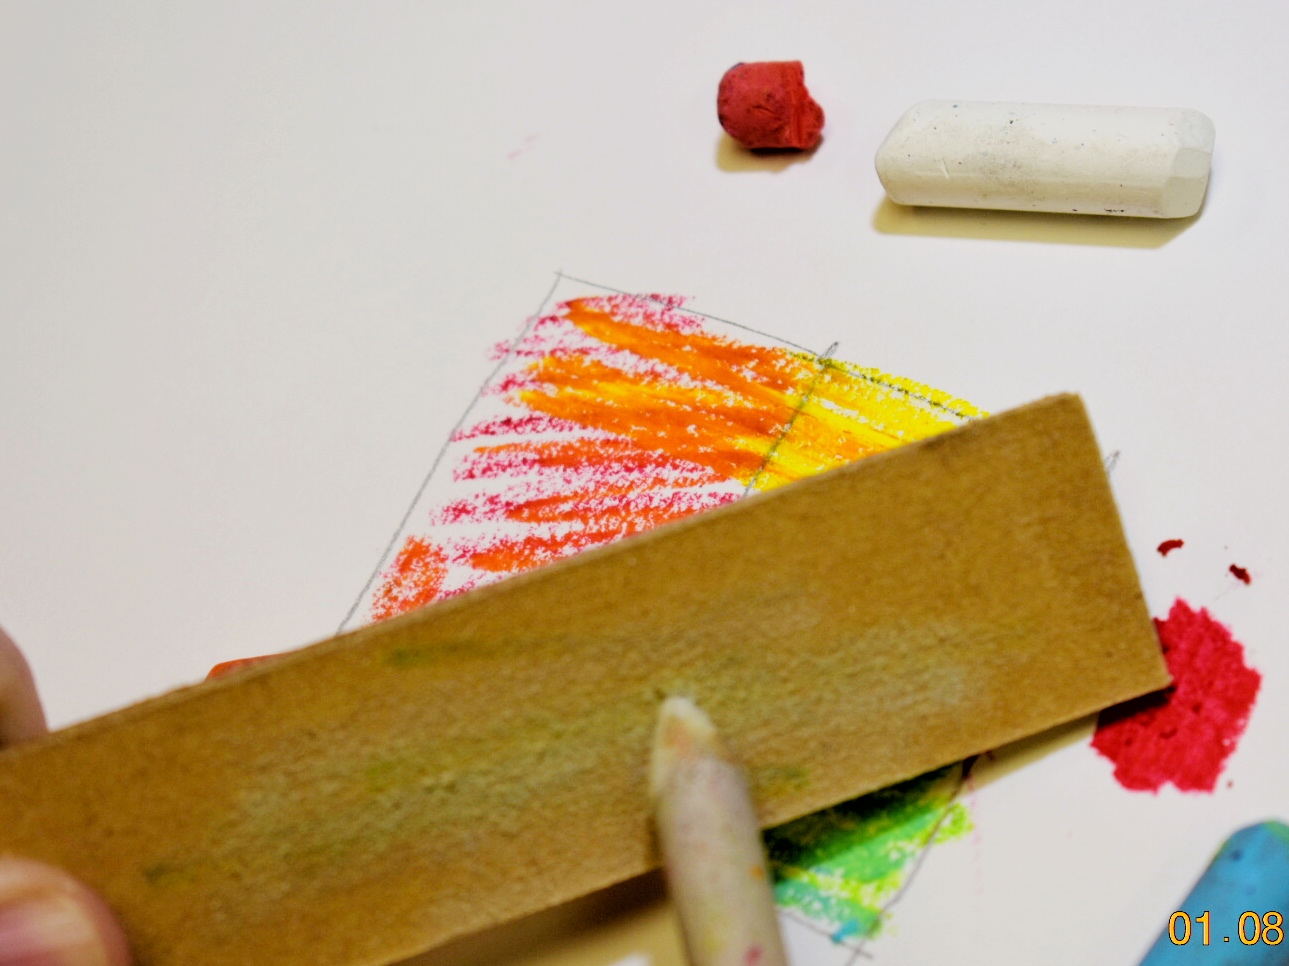
A paper stump (blender stick), can be used. Clean it off by rubbing on a sandpaper board

White can also be used to blend, as well as lighten. Now the pastels look very much like paint
STEP 5. Design
15 MinutesM A T E R I A L S
- Line drawing from STEP 4
- 2B Pencil
- White erasers
- Artwork in progress
- Oil pastels
- Blender sticks (stumps)
- Sandpaper boards (to clean blenders)
- Paper towels
Design
Students design their black areas. Look closely at the overall design and then make a light X or other mark to indicate where solid black areas will be. There may be just a few, or very many black areas in the design.
color
M A T E R I A L S
- Artwork in progress
- Oil pastels
- Blender sticks (stumps)
- Sandpaper boards (to clean blenders)
- Paper towels
Most important spot
Students continue with all their colors.
They can choose one or two accent spots to create emphasis in their drawings. Using a cool color instead of warm draws more attention!
Remind your students to layer their oil pastels instead of mashing one color all at once into the paper. Two or three colors layered together looks like paint. One color tends to look more like a crayon drawing.
M A T E R I A L S
- Artwork in progress
- Oil pastels
- Blender sticks (stumps)
- Sandpaper boards (to clean blenders)
- Paper towels
begin
M A T E R I A L S
- Artwork in progress
- Oil pastels
- Blender sticks (stumps)
- Sandpaper boards (to clean blenders)
- Paper towels
finish
Students fill their black areas last. This prevents the black from accidentally getting into the other colors and making them muddy.
They can use a blender stick or paper towel to add rich blending technique to the black as well.
Early finishers can go over their lines with black pastel if they want to, and then blend the lines a bit.
sign
LEARNING TARGETS

Students know the importance of cleaning up.
M A T E R I A L S
- Paper Towels
- Cleaning wipes
- Sink
- Waste baskets
- Well-lit spot for photos
- Camera or phone-camera
CLEAN
- Wash hands
- Super-wash brushes if used
- Put art supplies away
- Wipe tables & toss trash
- Remove any smocks (last)
- Check for items on floors and tables
PHOTO
CONNECT
%
Insights
This lesson provides understanding
%
Technique
This lesson shows application and movement
%
Self Expression
This lesson allows personal freedom
OBJECTIVES
- Practice and improvement using oil pastels
- Understanding how to blend oil pastels
- Accomplishment by creating a design in color
- Fulfillment from personal expression using color, shapes, and blending.
TROUBLESPOTS
Going fast will create messy artwork that does not have a clear design.
Not working colors to the lines can be a great technique at times, but for this project it creates visual confusion. A white halo around the edge of a color area should be avoided. Color right up to the lines for full coverage, and a rich effect.
ART WORDS
Cover stock – heavy paper that holds up well to rough oil pastel work.
Oil pastels – Sticks of color that are held together with a dry-ish oily substance. These never “dry” or even oxidize to a harder finish, so be careful with final artwork.
.
ROOMPREP
Make sure all of your supplies are ready and clean.
Print all of your PDFs from STEP 3 (above) and make sure your display if ready to go for the slideshow in STEP 2
What your room needs
Here are your printable lists and room prep instructions.
Opens in new window
CLASSROOM
MATERIALS
- 8.5″ x 11″ copy paper
- 8.5″ x 11″ card stock
- 11″ x 17″ copy paper
- Black Sharpie
- Paper towels
- Smocks
STUDENT’S
MATERIALS
- 14″ x 17″ Sketch Paper
- 2B Pencil
- White erasers
- Oil pastels
- Blender sticks (stumps)
- Sandpaper boards (to clean blenders)