
OVERVIEW
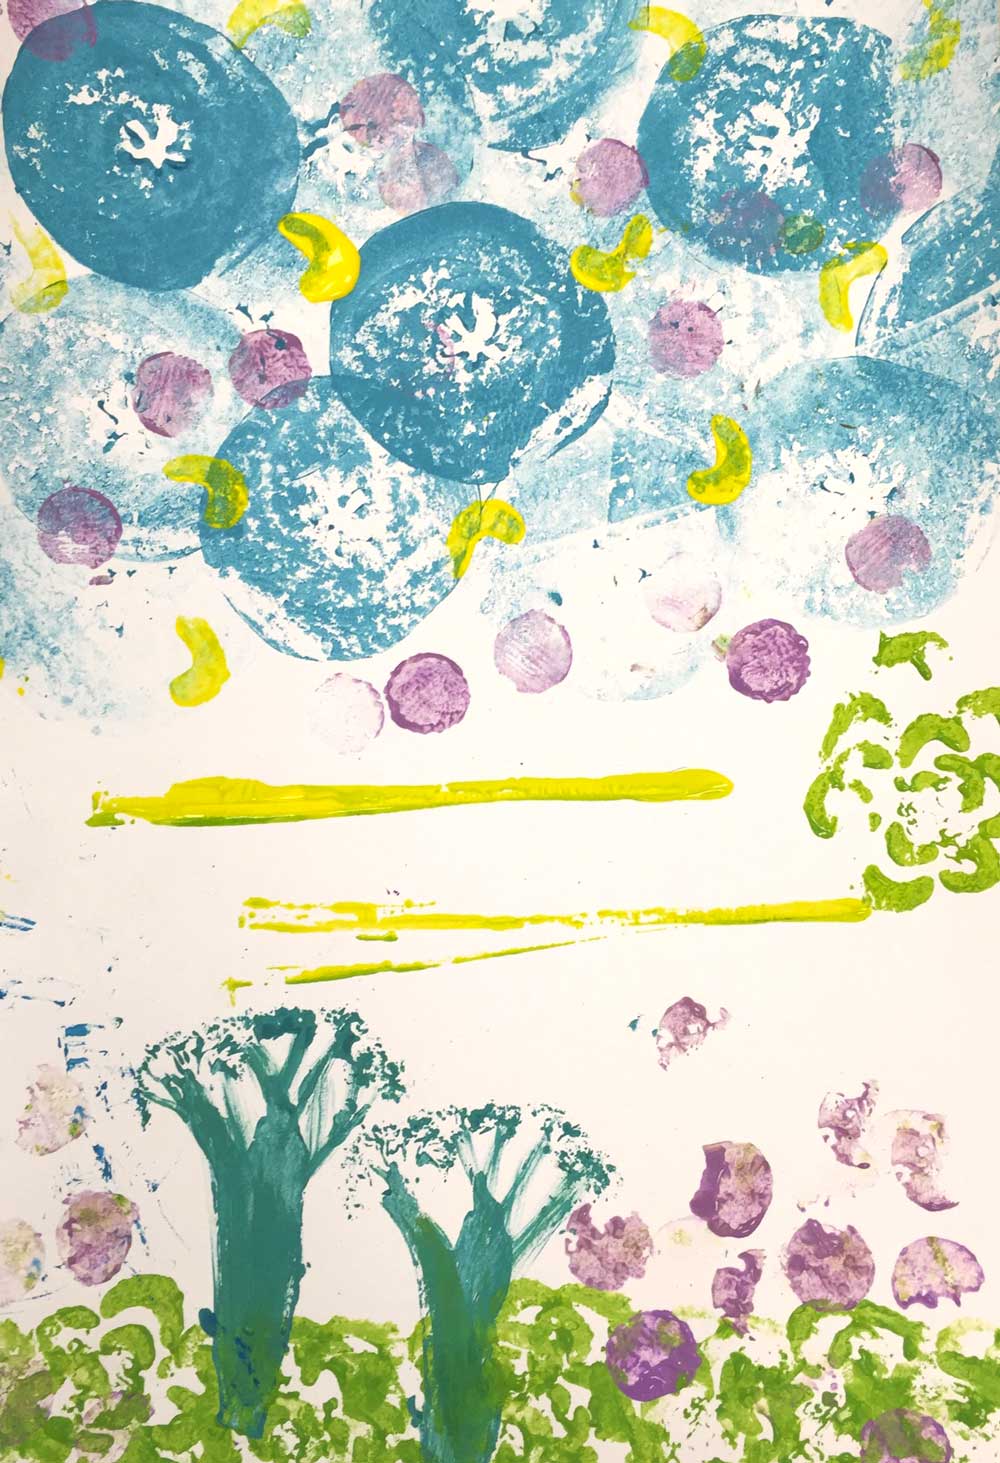
Students create 2 fun art projects that also reinforce important artistic insights: 1) veggie stamp paintings & 2) paper flag design. The stamping is fun and introduces pattern and color schemes. The paper flag design helps the student think about big shapes - the 2nd step in the 3 steps to accuracy.– – –
Grades 3 – 5
August 19 – 23
1 Hour & 30 Minutes
Lesson At A Glance
A brief overview of each step. Buttons jump to each section for detailed information.
5 Min – Discuss colors and explain the rules
10 Min – Talk about flags & brainstorm ideas
32 Min – Create flags by cut & paste with colored paper
3 Min – Everyone helps
SCROLL & TEACH
LESSONPLAN
Each section is a different color. Read over once and then you can SCROLL & TEACH using any device you like. It’s designed to work best with your phone.
LEARNING TARGETS

Students learn to express themselves through creating from their imagination.
M A T E R I A L S
- 11″ x 17″ Copy Paper
- 4B pencil
- Eraser
- Markers and/or oil pastels
- Blenders (stumps)
- Paper Towels
1.1 greet
Kneel down so that you are on their level. Bending over emphasizes the differences in your height, while kneeling makes them feel more important. Have tape and marker ready so you can stick some tape on the table by each student and write their name on it as they sit down.
1.2 choice
Everyone should take their time with the work and make a finished piece of art. Limiting the paper can also help kids focus on the work. If someone finishes in super-fast time, ask them what more they can do to the existing paper. Ask again several times – unless they appear overly frustrated; then you can allow them to move on to a new work.
Use the time to talk to students and make connections. Look for things in their work you like and think are strong, so you can point them out. Do not criticize anything they’re doing.
Use this button to jump down to the preparation section.
LEARNING TARGETS
Students know what is expected of them in the classroom.
2.1 discuss
After everyone is seated in a circle (rugs or chairs are fine), ask each student what his or her favorite color is. You can talk a bit about cool colors as they come up and why we think they are cool as opposed to warm. (What do warm colors make us think of? Things that are hot, like the sun or fire. Cool colors look like ice or grass.) It’s ok if they don’t grasp this concept right away. Help them understand which colors are cool and that we don’t mean cool like wearing sunglasses to be joe cool.
Have some patience. Sometimes kids this age will get things backwards, and insist that Blue is a warm color and Orange is cool. Explain that it might seem different when they think about hot orange fire, or cool blue frozen sodas.
2.2 Explain
Read the Teacher Talk below, or you can say the same thing in your own words.
Ok, that didn’t work out so well. I have no idea what you guys had for lunch. That was silly, but we didn’t really understand each other. So talking one at a time, and listening to others is a good rule, isn’t it? We only have good rules like that for art class. Here they are:
- Listen to the teachers
- Be nice to each other
- Be nice to the art supplies
- Mix and invent new colors
- Do not leave the classroom without permission
Those are some pretty good rules that we can all follow to have more fun and make lots of art!”
Use this button to jump down to the preparation section.
LEARNING TARGETS
Students know how to use stamps and paint to create their own expressive artwork
M A T E R I A L S
- SMOCKS!
- Large smooth heavy paper (11″ x 17″ card stock is great)
- Brushes – medium-large
- Veggie stamps
- Tempera paints – cool colors!
- Getting plates/trays with pre-mixed paint or globs to mix
- Mixing tray for making new colors
- Water tubs (for washing brushes – veggies can simply be wiped off)
- Paper towels to dry veggies and brushes
- Did we mention, SMOCKS!
Brushes should be nylon for springiness and durability. Round brushes are the most versatile.
Mix up 5 or 6 interesting cool colors that look good together, using the tempera paints. Try yellow-green, aqua, and periwinkle (blue, purple and white).
3.1 Prep
This is fun and easy. Get some of these simple produce stamp-makers at the store, and cut them to create a variety of shapes.
If you have a lot of extra time in class, you might want to let your students engage in the process, and watch you make the stamps, but be super careful. Kids who want to help may reach into the area with the knife right as you’re cutting something! Have them put their hands in their pockets or behind their back while you make a cut.
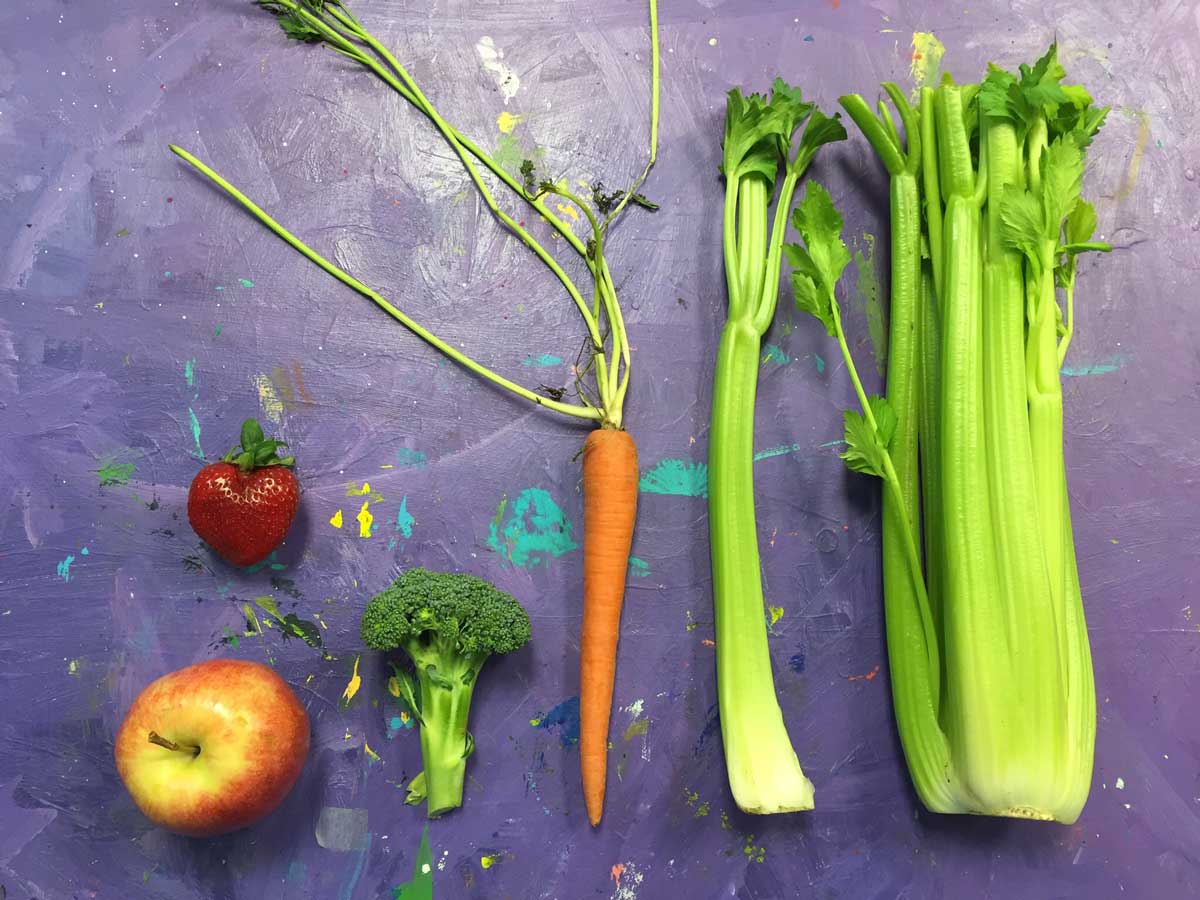
Use a variety
Here are some of our favorite inexpensive but fun stamp makers
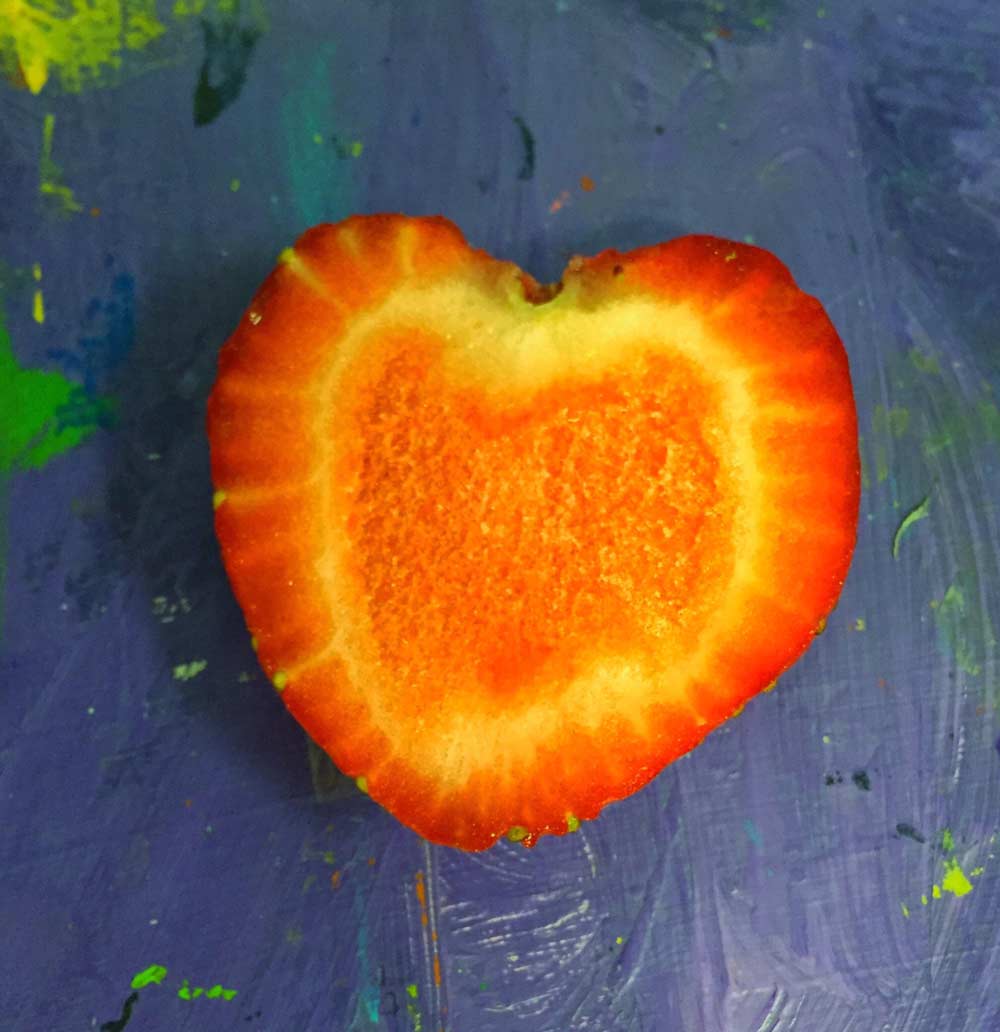
Strawberry Heart
Some items, like this or a star fruit, have obvious shapes.
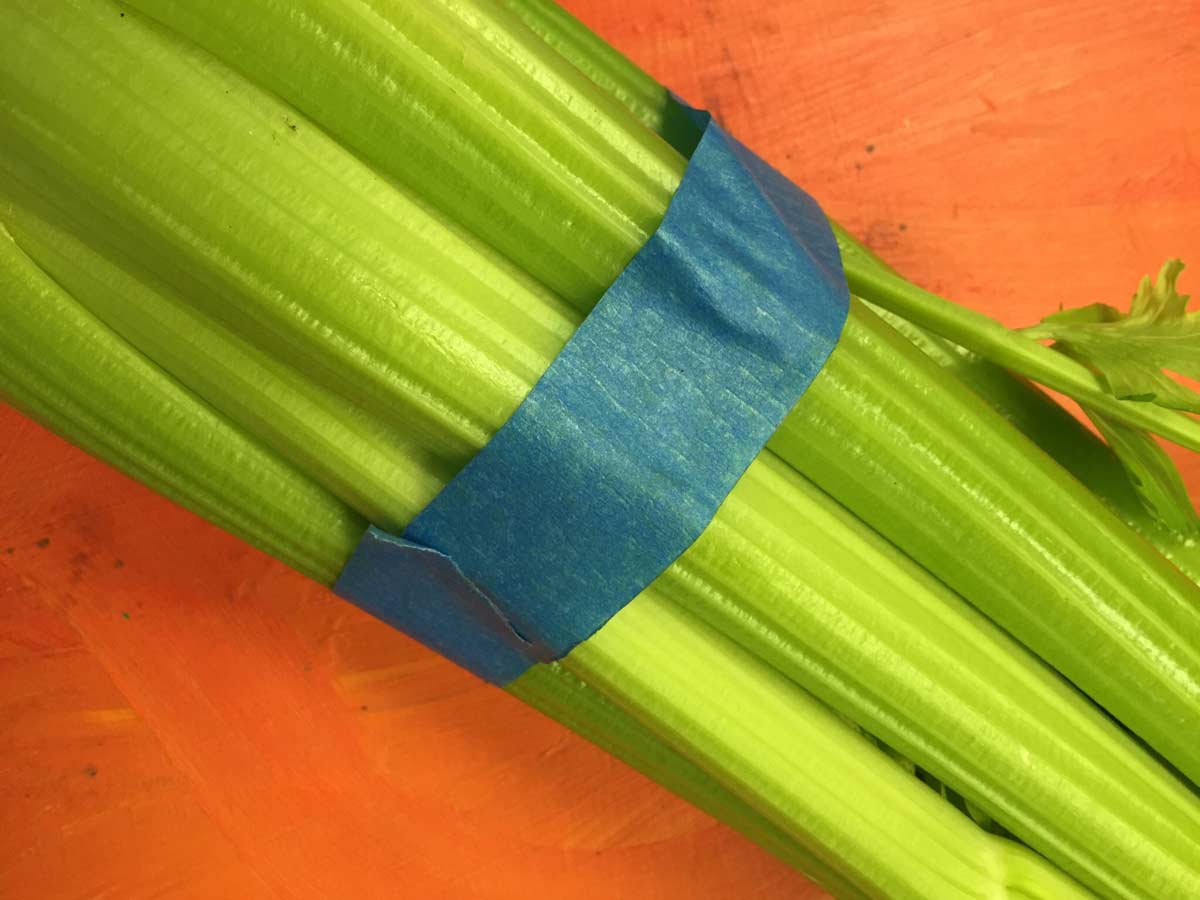
Celery bundle
One celery piece makes a cool crescent, but taping a bundle together…
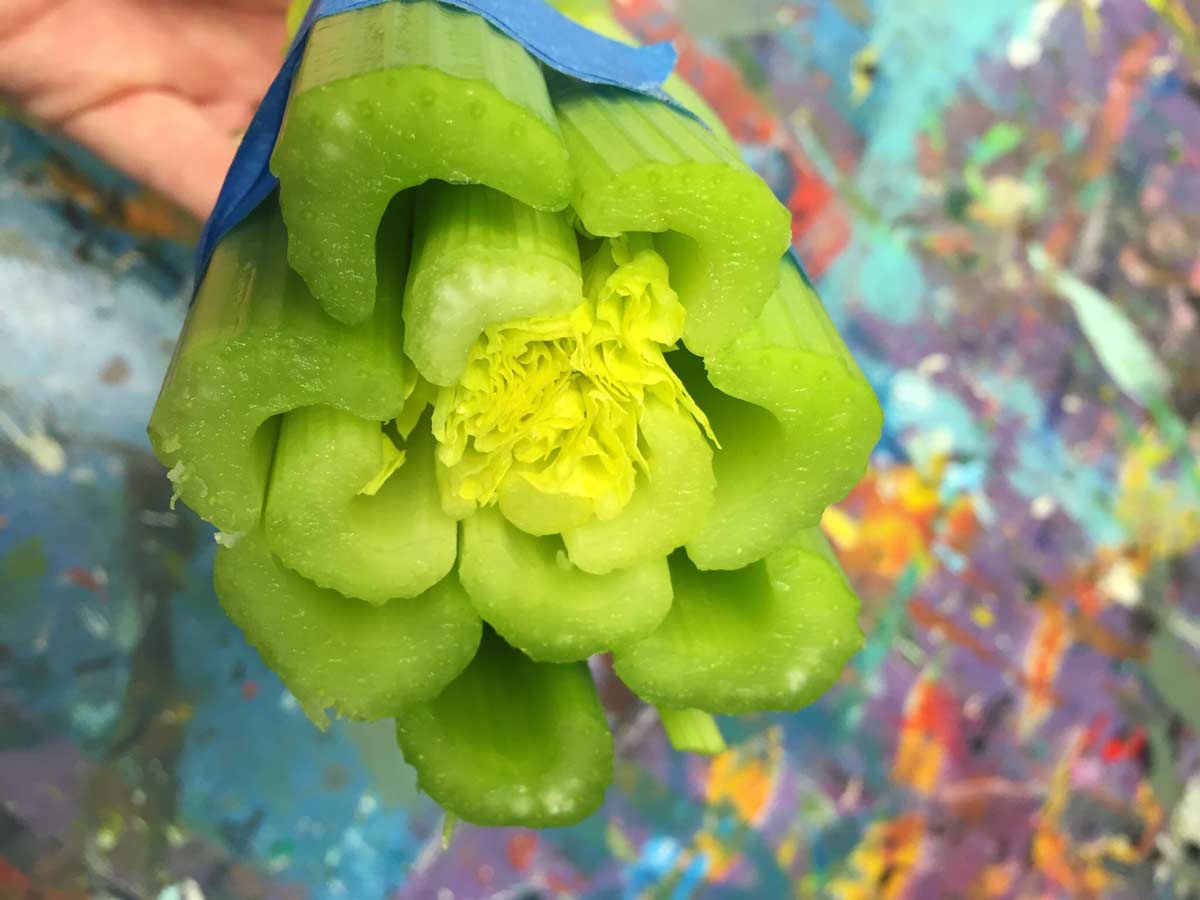
A flower!
Bundle of celery makes a flower design
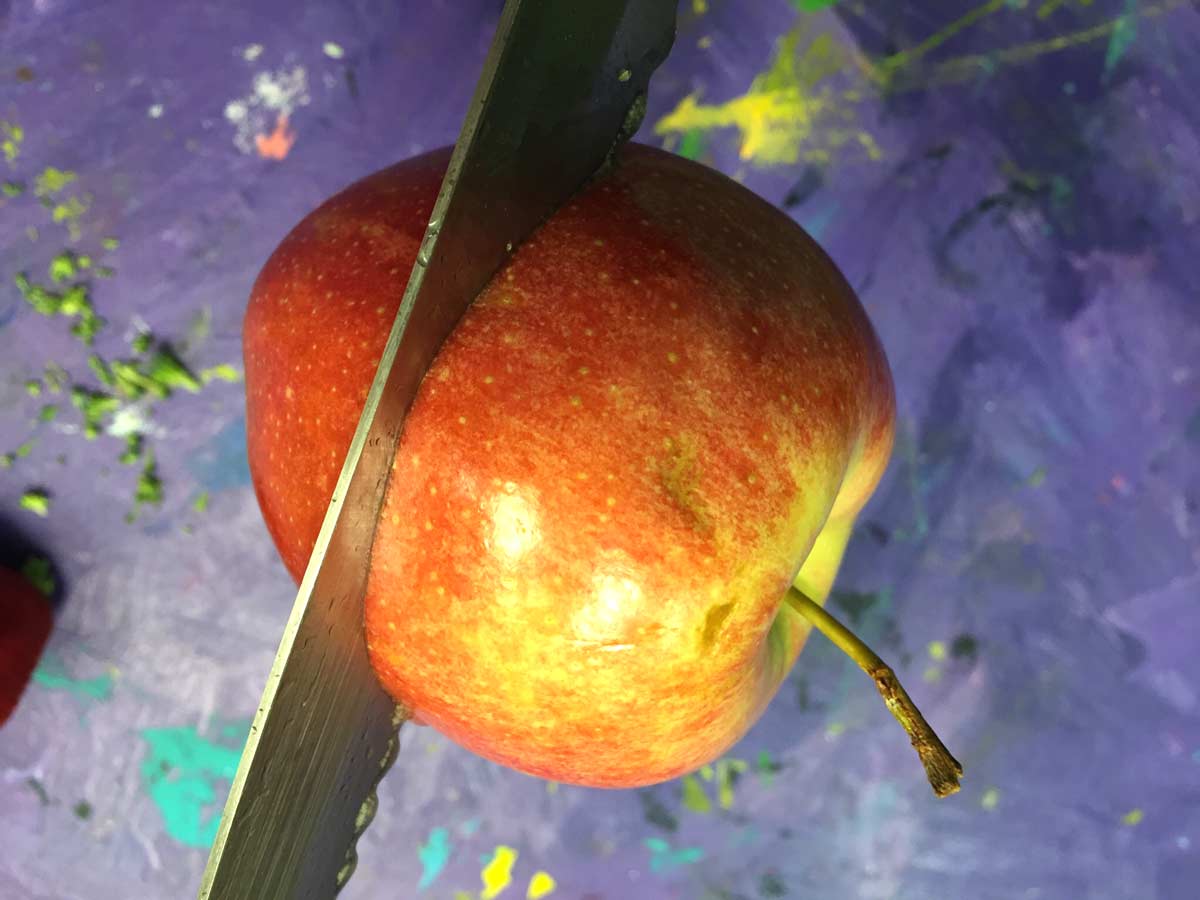
Cut an apple on the side
This allows the center to make a little star shape.

Fun Shapes!
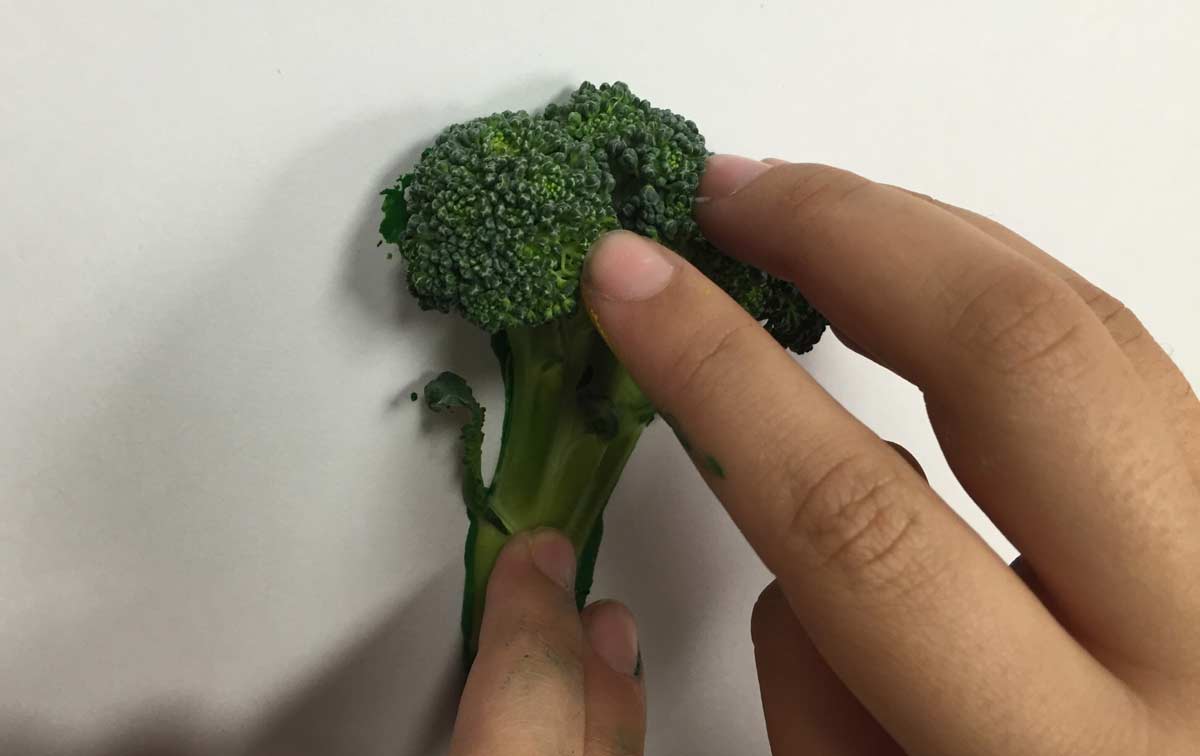
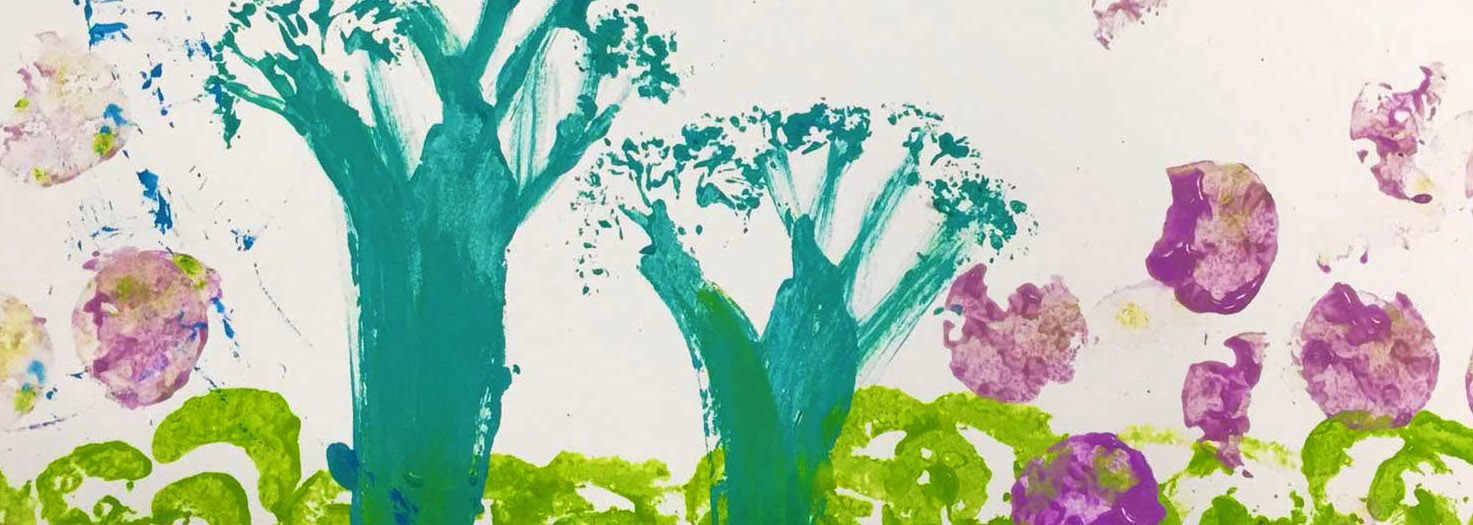
Broccoli tree
Cut broccoli like this.
Example
3.2 demo
Very Important: Always have a pad or stack of paper, or a piece of cardboard underneath your stamping paper instead of a hard table. If you don’t have a soft surface, the stamps will not connect well. In printing, this is called a blanket, and it’s usually made of rubber.
D E M O :
- MIX – Show how to mix a color using small amounts of paint and staying in one area on your tray.
- PAINT – Then paint the veggie stamp with an even layer of paint.
- Too much paint makes a messy stamp. It’s easy to brush the surface a few times and remove any globs of paint though.
- LOOK – Decide where you want this stamp to go on your artwork.
- PRESS – Gently press on the paper, and pull straight up so you don’t slide.
- STOP – Only make one or 2 stamps at a time before re-painting the veggie.
3.3 paint
Very Important: use paper towels to dry veggies that have been cleaned off in the water tubs. WET STAMPS ARE TOO MESSY!
Remember to write names on their work! Set the prints aside to dry before cleaning up.
3.4 Clean
Wipe up spills. Super-wash the brushes in the sink. Toss the paint trays in the trash. Wash off and dry the veggie stamps if you need them for another class. You can store them in a baggie in the fridge later. They’ll stay firm for a day or two depending on the item.
Use this button to jump down to the preparation section.
STEP 4. Flag Ideas
Students will watch a demo about creating flags from their imaginationLEARNING TARGETS
Students know how flags are designed
M A T E R I A L S
- A monitor or screen to display the slideshow


4.1 Display
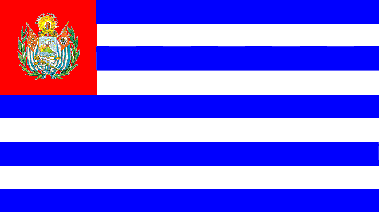
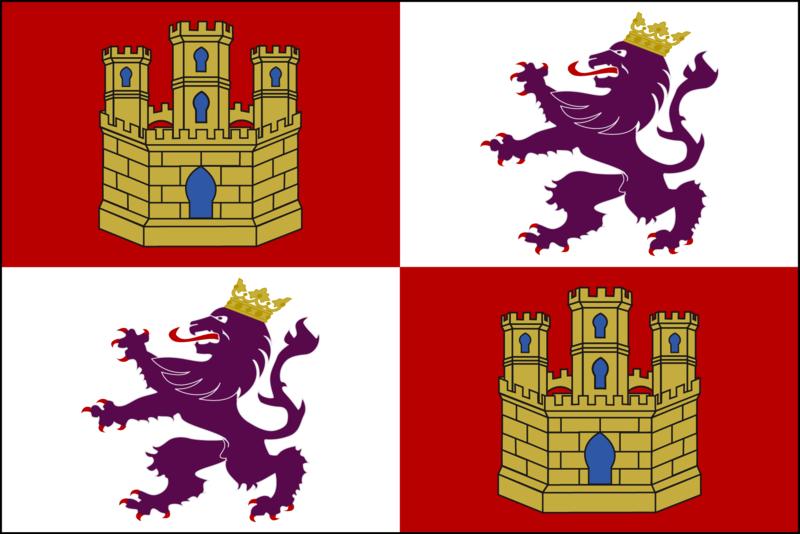
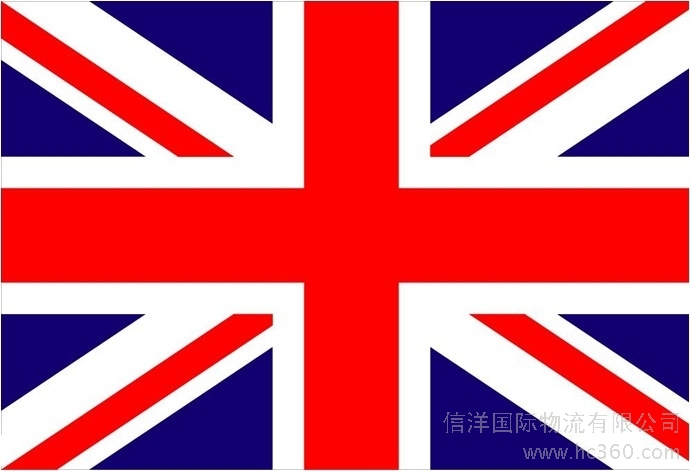
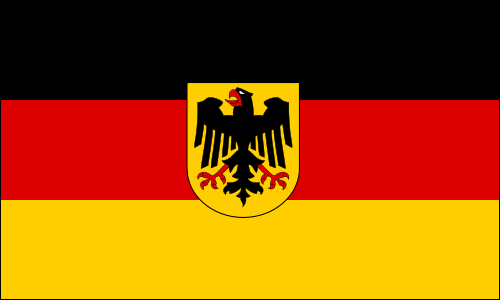
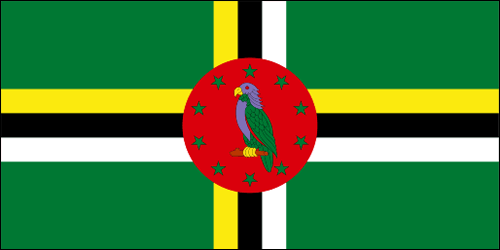
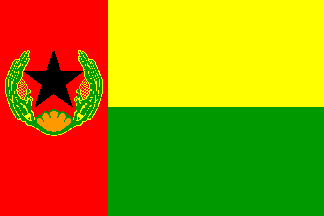
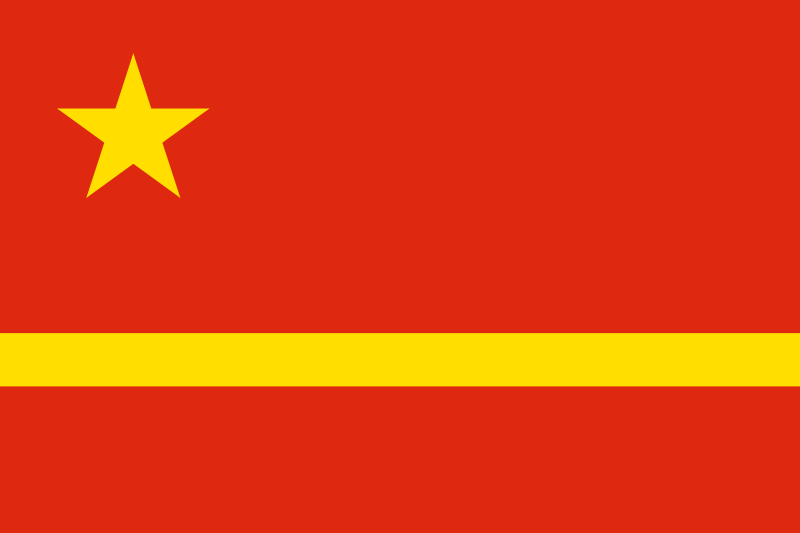
Here are some pictures of real flags of the world. Notice how the shapes are very big and simple. Every now and then there are small drawings or pictures, but the main part of the flag is simple. Squares, stripes, triangles and circles are the main elements.
Look at the colors. how many colors are used on each flag? Count them for each one and note how they are usually only 2 or 3 colors. This makes them simple too. Flags are simple and use big shapes because they need to be recognized from far away.
We’re going to use cut paper parts to make our flags. (show the sample flag you made). After we’re finished with the main design, we can add a tiny bit of details with markers if we need to.”
Use this button to jump down to the preparation section.
LEARNING TARGETS
Students know how to consider several designs using basic large shapes
M A T E R I A L S
- Colored Paper for flag base (8.5″ x 11″ or construction paper)
- Assorted colorful paper shapes (circles, bars, rectangles, stars, stripes…) cut the shapes to fit on copy paper sized flags.
- Larger 11″ x 17″ scrap paper for glue mats
- 18″ long, 1/8″ wooden dowels – one for each student
- Glue sticks
- Kids’ Scissors
- Glue Sticks
- Smocks
Set out the colored paper in two groups:
1. Flag base colors (full sheets of paper)
2. Flag shapes – to paste onto the base.
You can call these the color store, and let the kids “shop” for their colors and shapes.
5.1 Choose
Ask each student what color paper they want to use for their flag background color. They should get the background color as a full sheet of paper, which will be the flag base.
5.2 choose
Let the students look over the shapes and colors, and select several shapes, but only in two more colors. You can act reluctant, and then allow them choose 3, which helps to keep the number at 4 or less for the flag designs – and makes you a nice teacher!
5.3 design
Have everyone take their shapes back to their seat and arrange their flag design. Encourage going back and trying new shapes and changing the design at least once. It’s a great idea to try more than one design, but at this age that may not happen. Don’t worry about it. If someone needs a special shape, you can cut it or let them try with safety scissors.
Make sure they do not cut small shapes. They will be able to make a small drawing on one shape later if they want.
Have everyone choose the design they like the best and set it up just like they want it to look.
5.4 Paste
Once they have their design in place, let them glue the parts down in place, one shape at a time.
Take a shape part, set it upside down on a blank sheet of large 11″ x 17″ white copy paper (a glue mat), and glue the back with a glue stick. Then they can set into place on their colored paper and press down all over.
Help your students a lot, and show them how to use plenty of glue stick especially around the edges. You may have to add some more glue by lifting corners and edges. Continue pasting until all the flag parts are glued in place.
5.5 Do more
If time, the student can create another design for the other side. Begin with a new base background color. They may do the same design again, as a mirror, or exactly the same, or they may want to try a new design. The two flag sides may be taped, glued, or stapled to hold them together when finished.
Early finishers may also want to add one small drawing in markers, but remember to keep this simple and only one small drawing per side on one shape only.
5.6 Finish
Finish up by attaching the flag to a stick using tape all along the edge where the stick is attached, or by using two rows of staples to create a stitched sleeve if you have two flag sides. Here’s how: First make a row of staples about 1/2 inch away from and parallel to the edge of the flag that will hold the stick. Then slide the stick between the two flags, and push it up to rest all along the row of staples. Then staple another row on the other side of the stick to close the sleeve. A couple of pieces of tape at the top and bottom may be needed to keep it from sliding off.
Use this button to jump down to the preparation section.
LEARNING TARGETS
Students know the importance of cleaning up.
M A T E R I A L S
- Paper Towels
- Cleaning wipes
- Sink
- Waste baskets
- Well-lit spot for photos
- Camera or phone-camera
6.1 CLEAN
- Wash hands
- Super-wash brushes if used
- Put art supplies away
- Wipe tables & toss trash
- Remove any smocks (last)
- Check for items on floors and tables
6.2 PHOTO
6.3 CONNECT
%
Insights
This lesson provides understanding
%
Technique
This lesson shows application and movement
%
Self Expression
This lesson allows personal freedom
OBJECTIVES
- Practice and improvement in handling paint & brushes
- Understanding cool colors and limiting colors for effect. Big shapes introduction
- Accomplishment in creating 2 art projects to take home
- Fulfillment in choosing colors and designs
TROUBLESPOTS
Too much paint can make a mess that does not look like the stamp at all.
Not enough paint can make such a ghosted image that doesn’t make the student happy. They may not connect the amount of paint to the light image, so explain how to repaint the veggie often.
Moving the stamp – SLIDING around will create a smear. Teach kids to press gently and lift straight up.
Wet Stamps just don’t work. Dry them off after cleaning in water.
Small cut-outs are not going to work for flag designs. Keep the shapes big and simple by explaining this is not a picture, but a design, and only letting them cut out one or two shapes after they’ve used your pre-made ones.
ART WORDS
Cool Colors – Colors that remind us of things that seem cool, like blue for ice and green for grass.
Design – Sometimes artists use flat shapes and color to create simple-looking work, like flags.
CLASSROOM
PREP
Practice the rules intro if you want. Make sure your slideshow will display properly and get it ready to go.
Purchase produce and cut as shown in STEP 3.1 PREP.
Mix up some nice cool colors in tempera paints. You can keep these from drying out by covering the trays with Press-N-Seal wrap. Make “getting plates” by using disposable trays or plates and drawing an extra line or two to make more paint sections.
Practice making stamp artwork so you know what to expect.
Make a flag of your own as an example and so you know what to expect.
Print all of your PDFs from the lesson plan and cut any references apart as needed.
What your room needs
Here are your printable lists and room prep instructions.
Opens in new window
CLASSROOM
MATERIALS
- 8.5″ x 11″ Colored copy paper (or construction paper, but it becomes brittle and fades)
- Some of the above papers cut into flag design shapes
- 11″ x 17″ White card stock
- 11″ x 17″ copy paper for warmup and for glue mats
- 4B pencils
- Erasers
- Markers and/or
- Oil pastels
- Blender sticks (stumps)
- Medium sized brushes
- Veggies and fruit cut to make stamps
- Tempera paints – pre-mixed for several cool colors
- Getting plates or trays with dividers to provide paint colors
- Kid safety Scissors
- Water containers to wash brushes out
- Monitor or display screen to view slideshows
- 18″ long, 1/8″ wooden dowels – one for each student’s flag
- Glue sticks – permanent
- Paper towels
- Smocks
PREVIEW
Week 2: Scotty Dog
August 26 – 30
Students will learIntroduction to the idea of lines as edges, and oil pastel technique with mixing & blending. Students use a photo of a scotty dog bas-relief sculpture for reference, but it’s turned upside down. This allows it to be drawn more accurately because it’s hard for the mind to interpret so the eyes have to look more closely.n cool stuff.
Week 3: Red Balloons
September 2 – 6
We use balloons to learn about shadows and highlights. Instead of telling students, “we’re going to learn how to make shadows today”, we say, “Let’s all draw balloons!” The balloons are made with the local color, red, and then dark red is added for a shadow. A highlight is observed on a real balloon, so students can use real life to improve their artwork in making a light pink spot for a highlight. Sponges are used for clouds and cloud shadows too!
Use this button to view our parent’s blog. Share the link: http://parentart.org, with your student’s parents so your they can read about the lesson each week.