
Drawing
Each lesson Plan focuses primarily on one of the 4 Cornerstones of Art:
Drawing | Painting | Color | Style
OVERVIEW
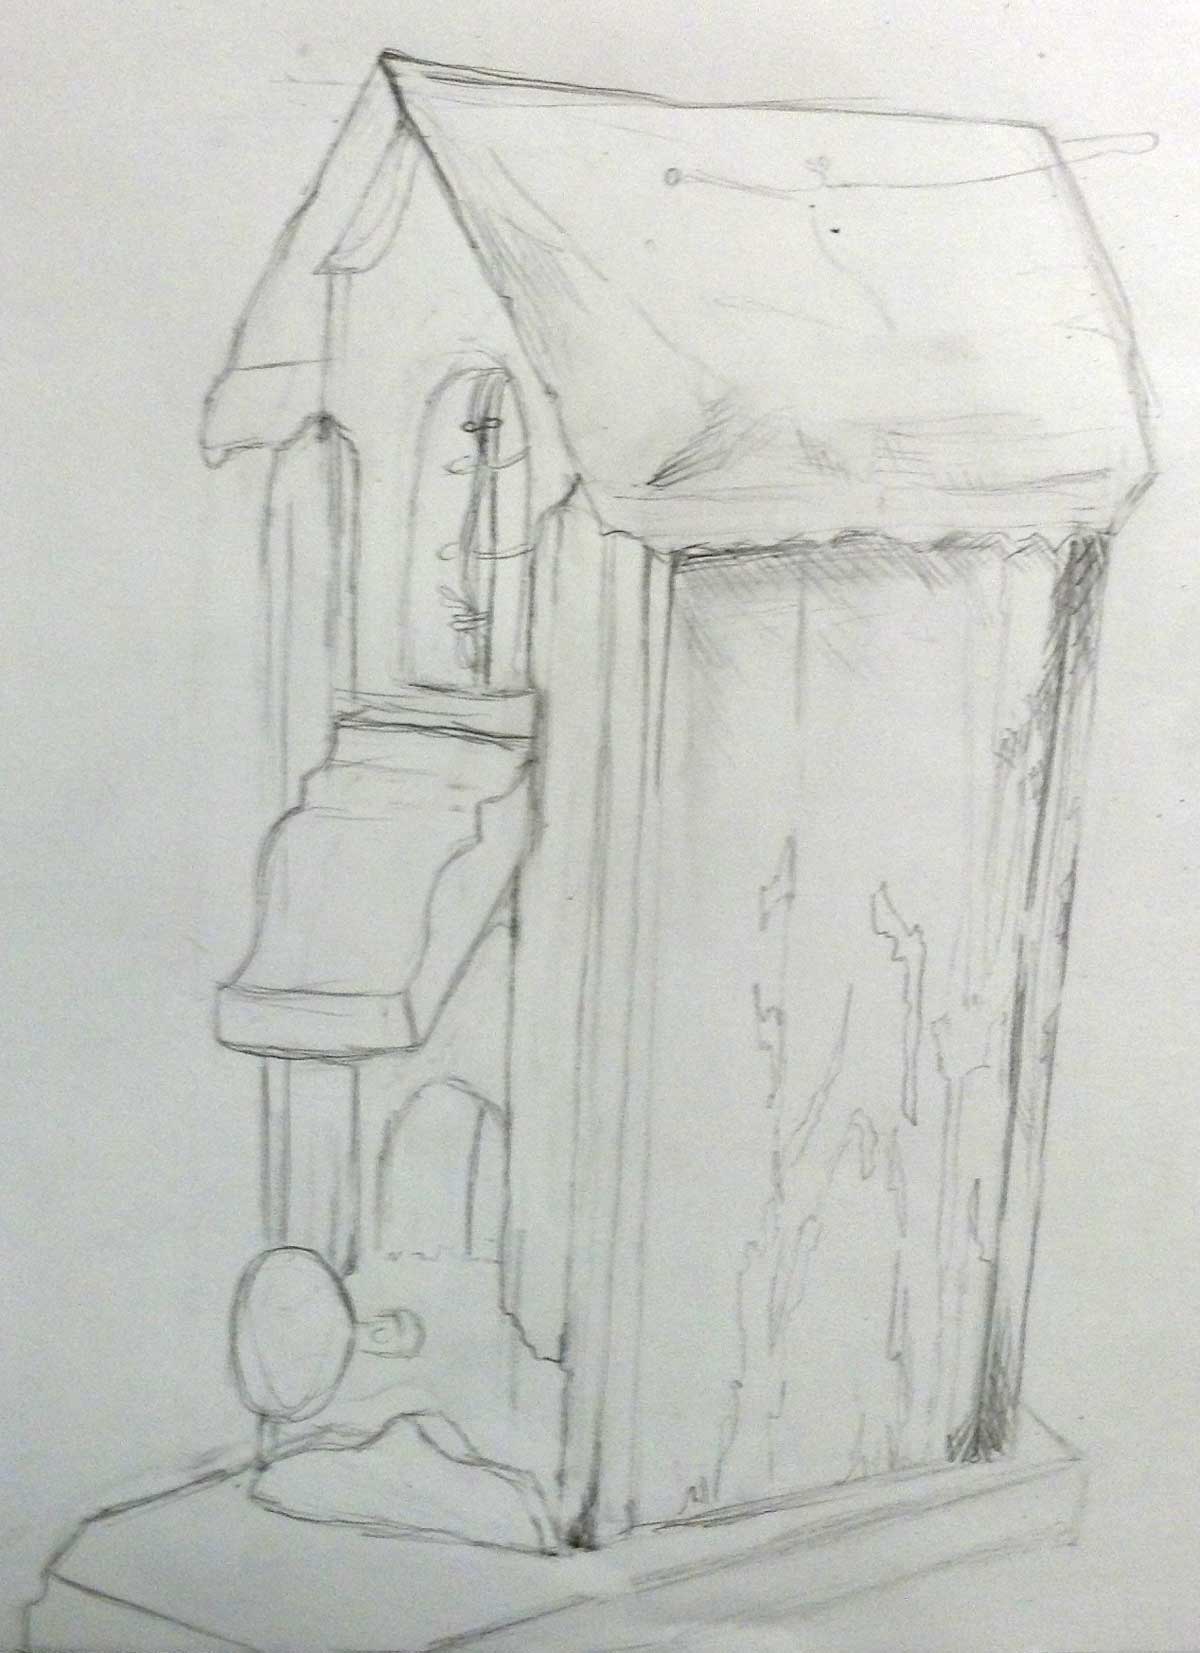
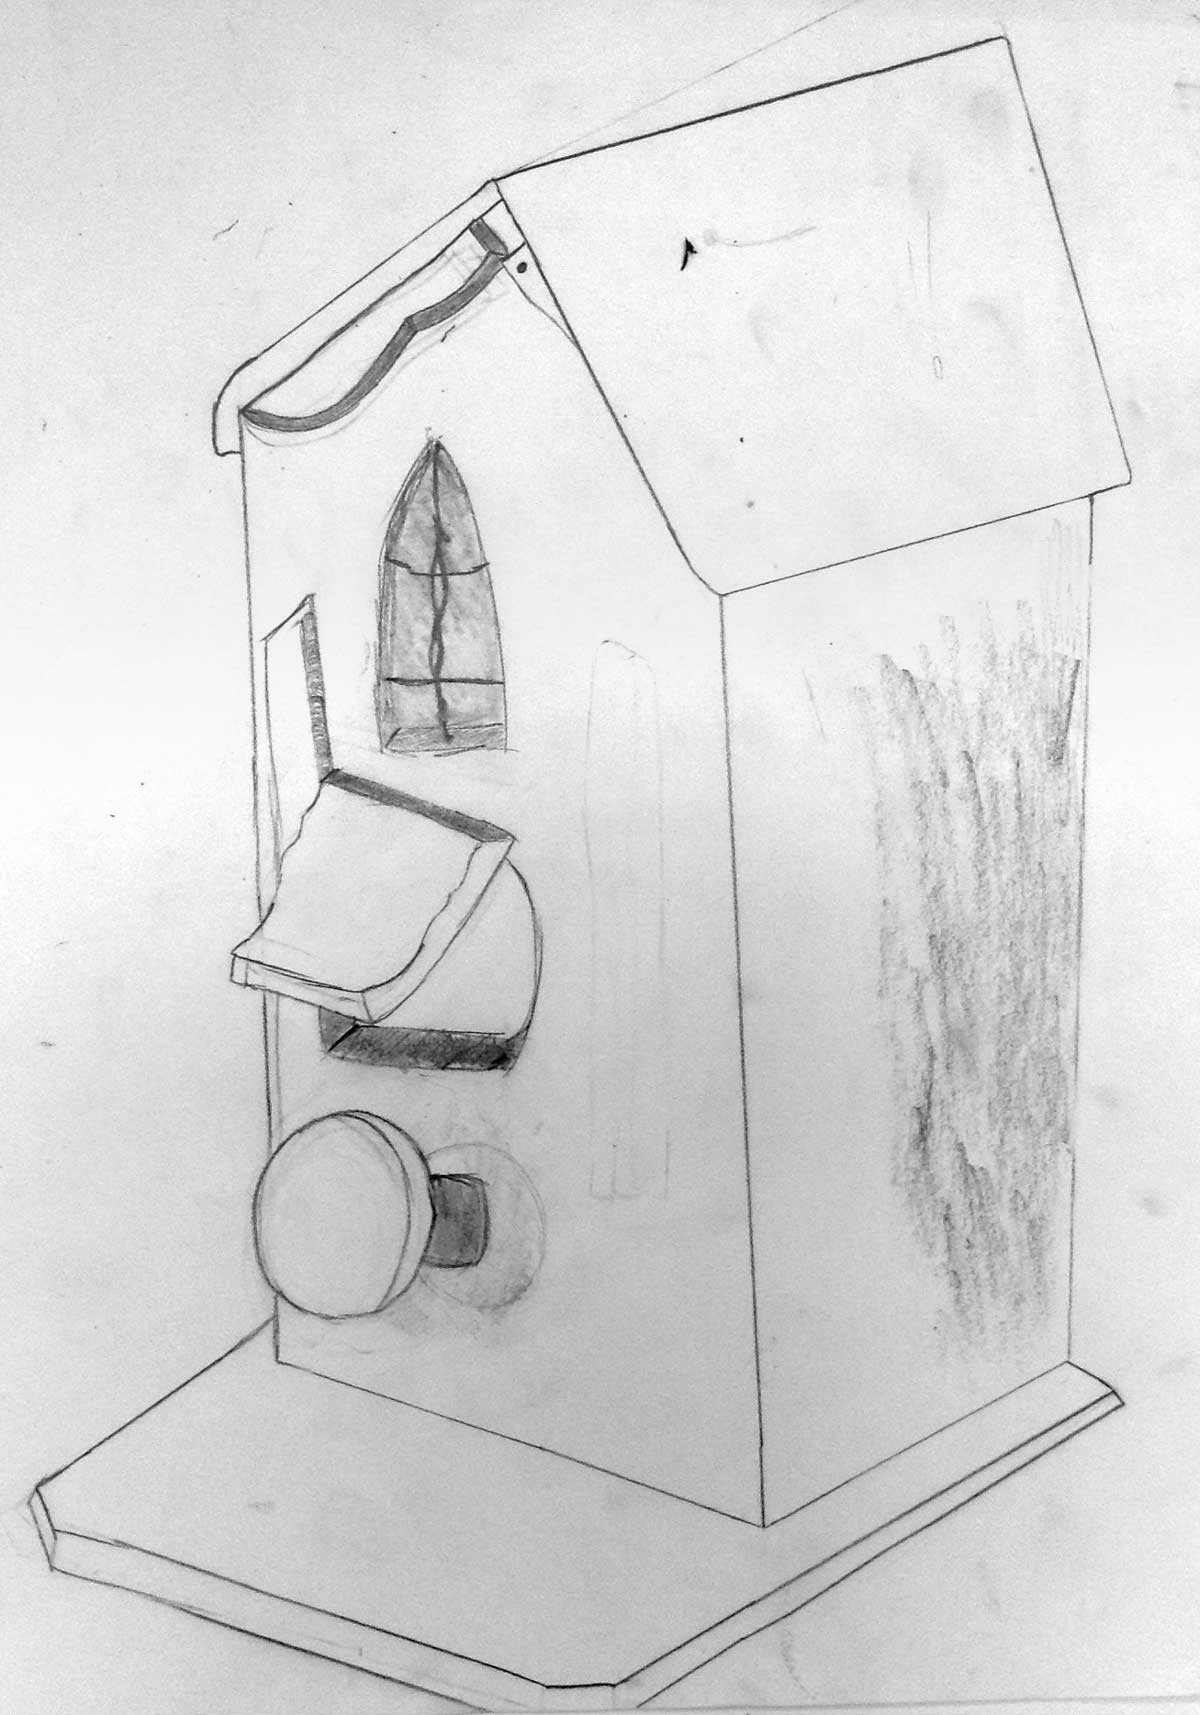
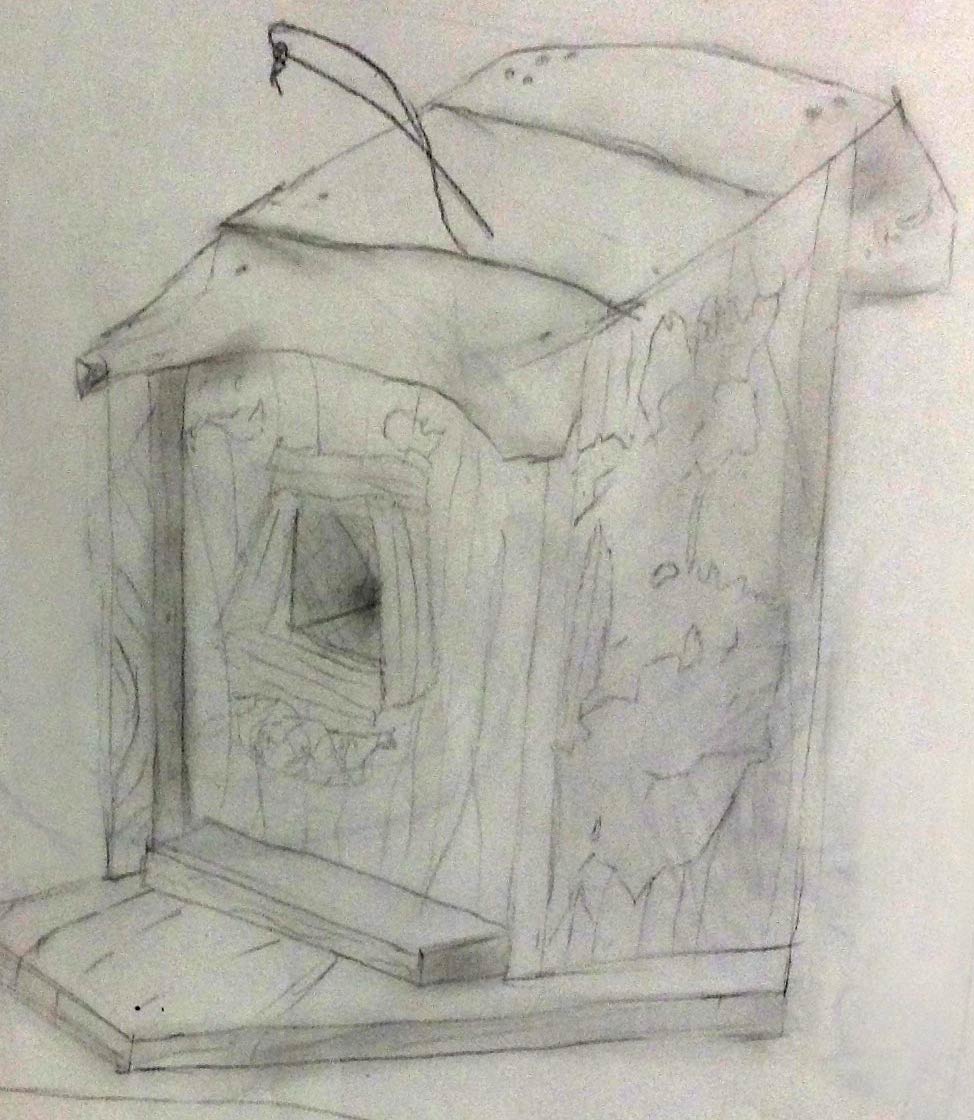
Students will create a detailed drawing of an old weathered birdhouse. If possible, the birdhouses used should be real-life objects, but photos are provided. Steps for preparing, using the 3 steps to accuracy, making guide-lines, and pencil techniques are all practiced to create a finished work. Viewpoint (perspective) tips are also included.Grades 6 – 12
Week of Oct 27 – 31
1 Hour & 45 Minutes


Lesson At A Glance
A brief overview of each step. Buttons jump to each section for detailed information.
10 Minutes – birdhouse sketch & intro
15 Min – Fact vs viewpoint with stool
12 Min – Flatter slideshow & exercise
8 Min – Smaller trees & fingers
10 Min – Framing and Measuring in real life
10 Min – Guidelines & erase
35 Min – Pencil drawing
5 Min -Everyone helps
SCROLL & TEACH
LESSONPLAN
Each section is a different color. Read over once and then you can SCROLL & TEACH using any device you like. It’s designed to work best with your phone.
LEARNING TARGETS

Students know how to warm up before creating finished artwork.
M A T E R I A L S
- 14″ x 17″ Sketch Paper
- 2B Pencil
- Oil Pastels
- White Eraser
1.1 Print
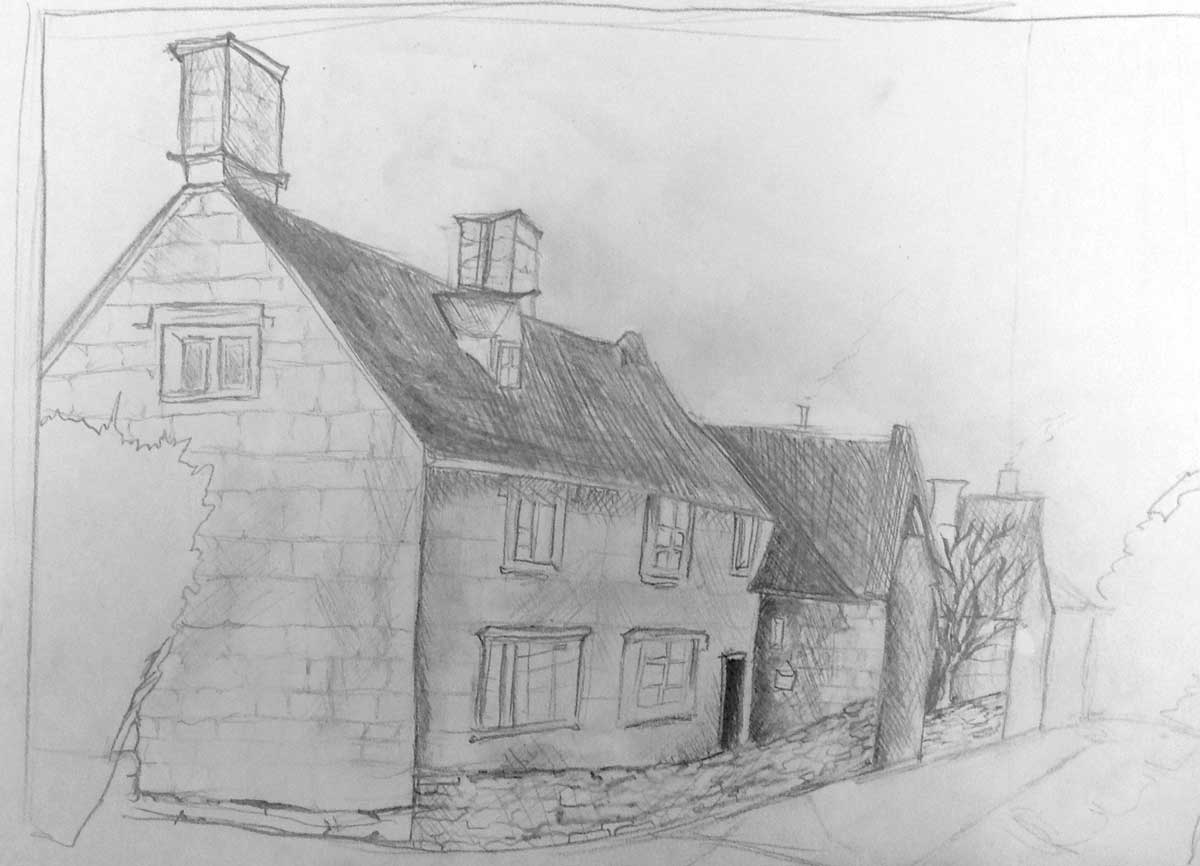
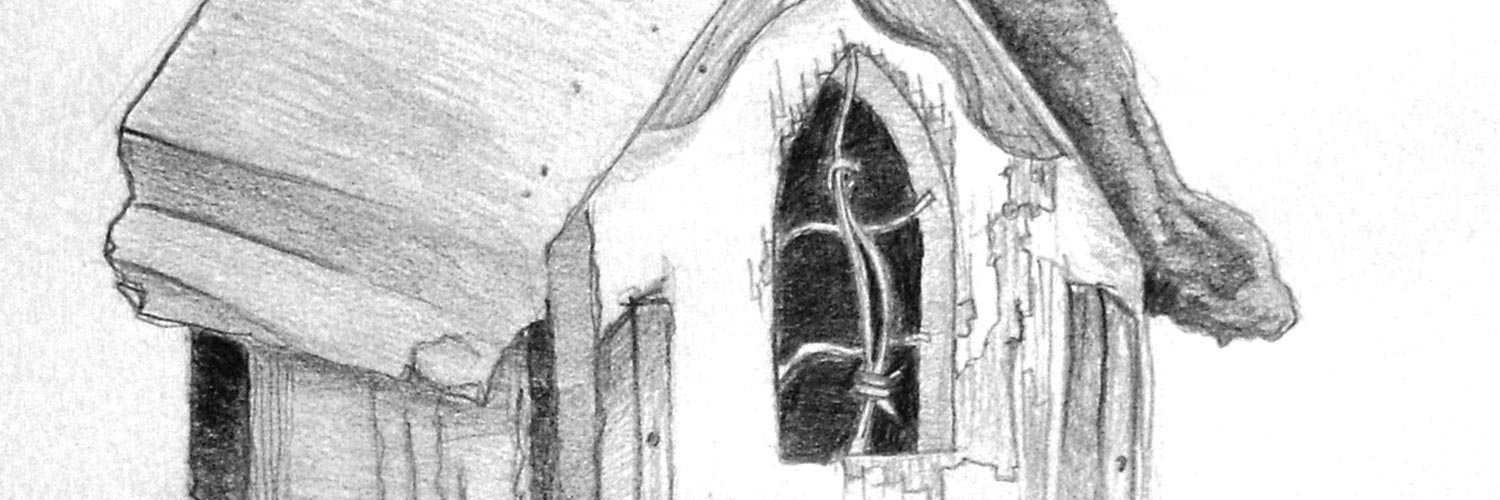
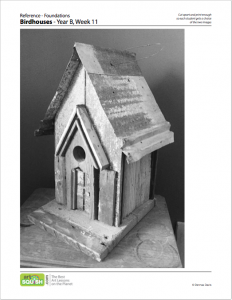
Reference
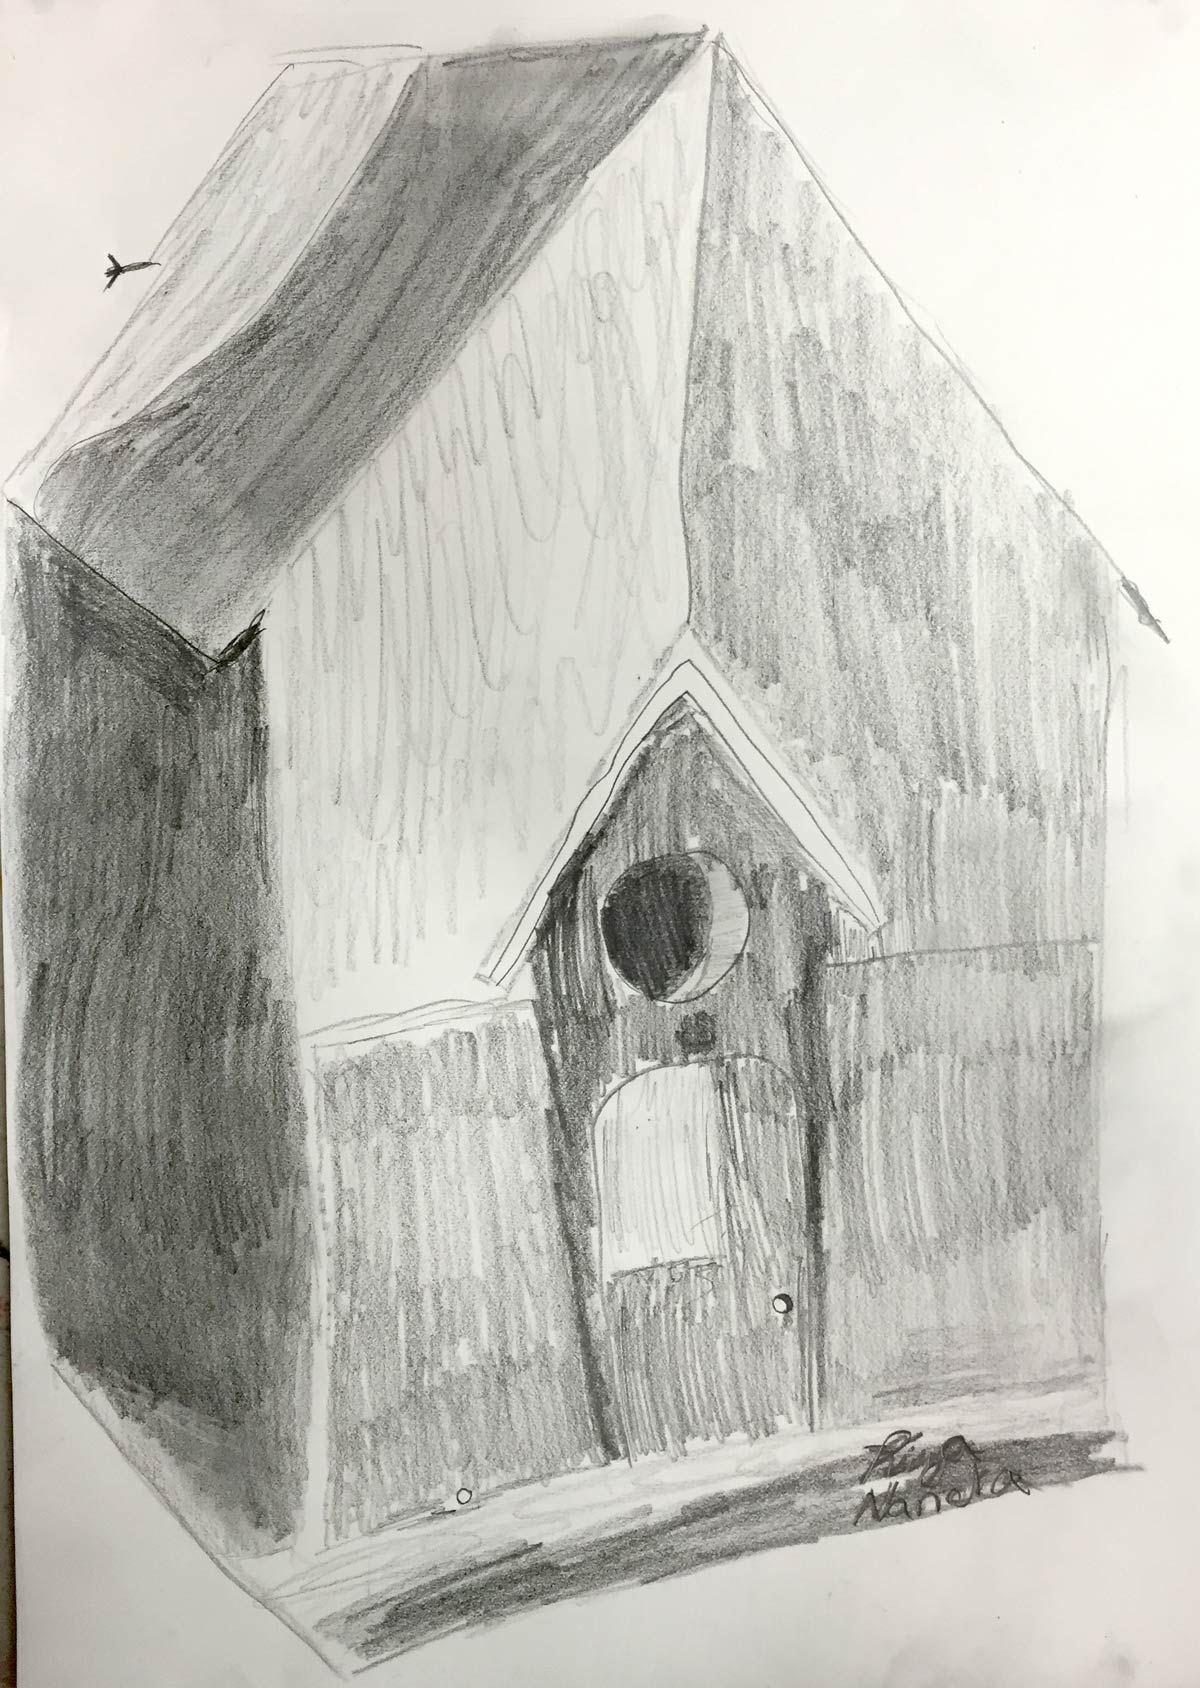
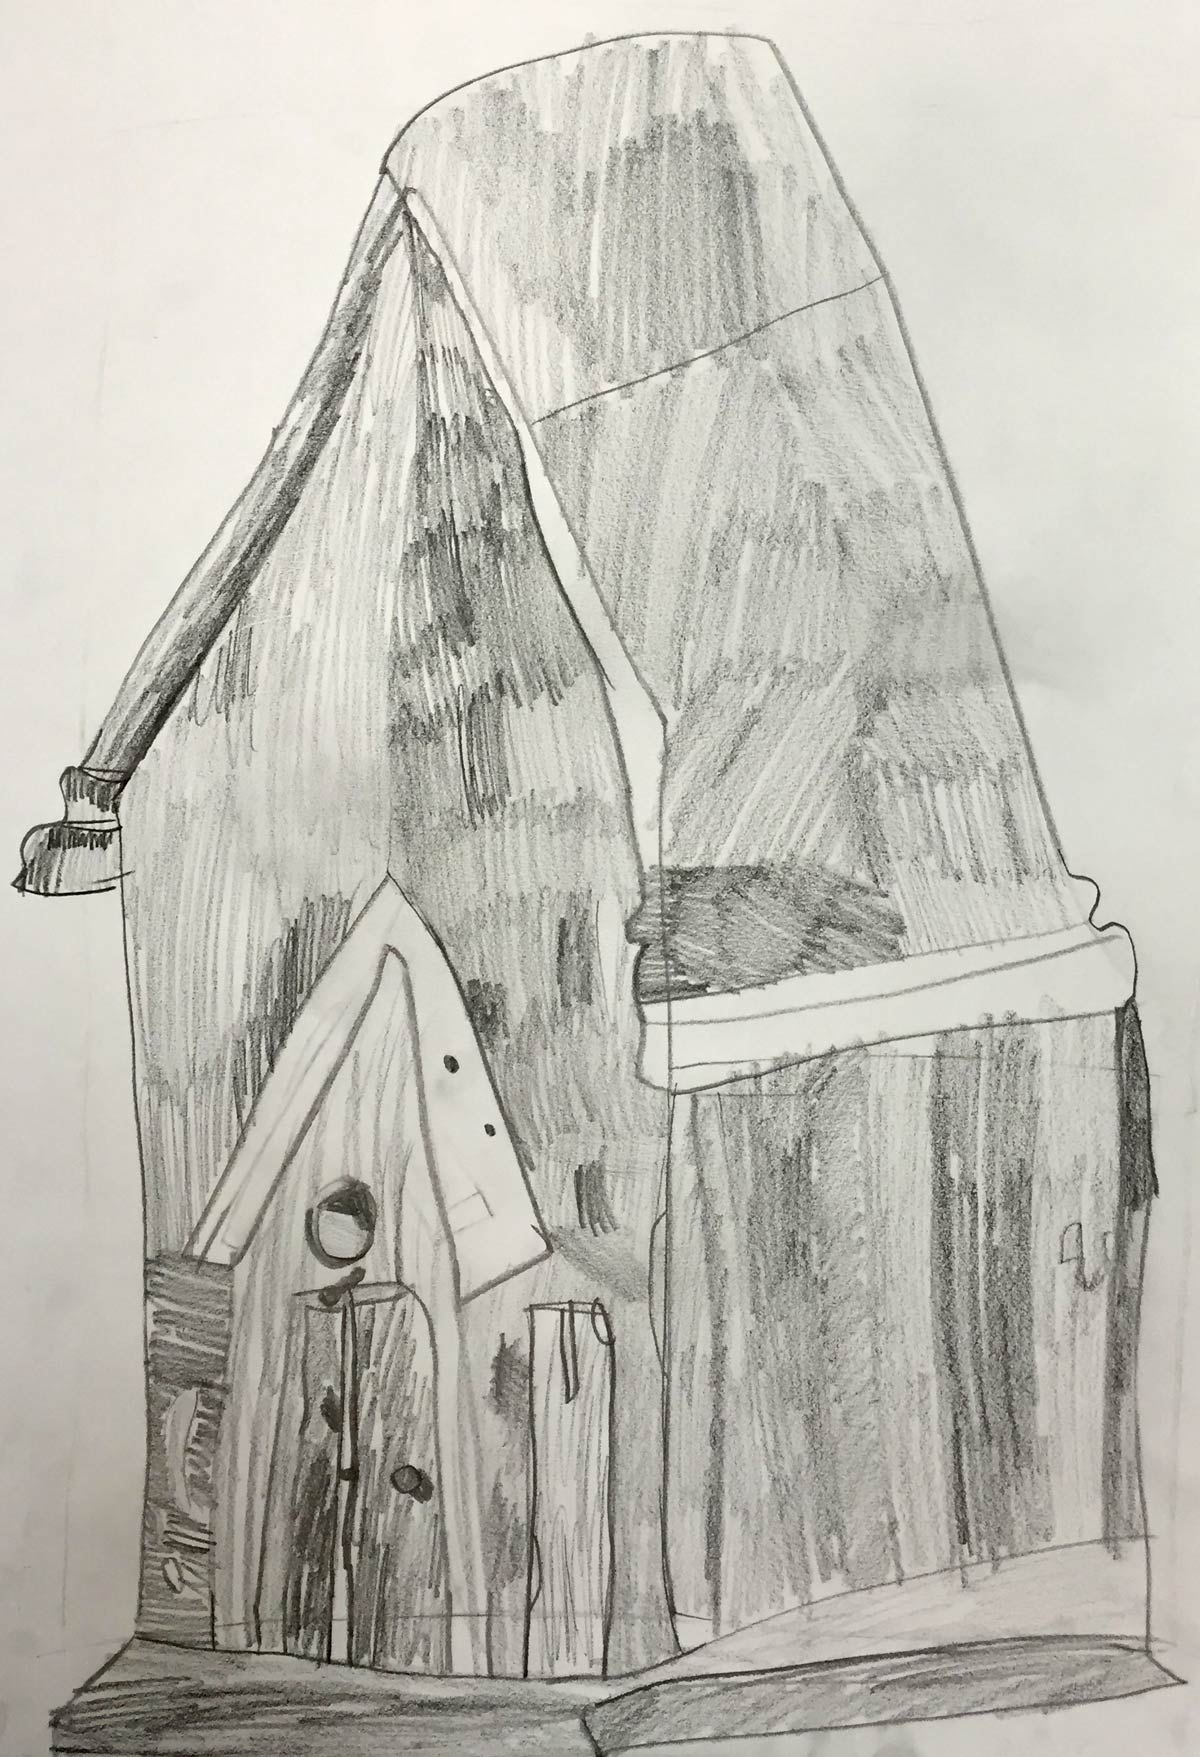
Birdhouse Photos
Two Reference photos to choose from. Print one extra set so every student can choose from either birdhouse photo.
2 Pages – Opens in new window
1.2 Warm up
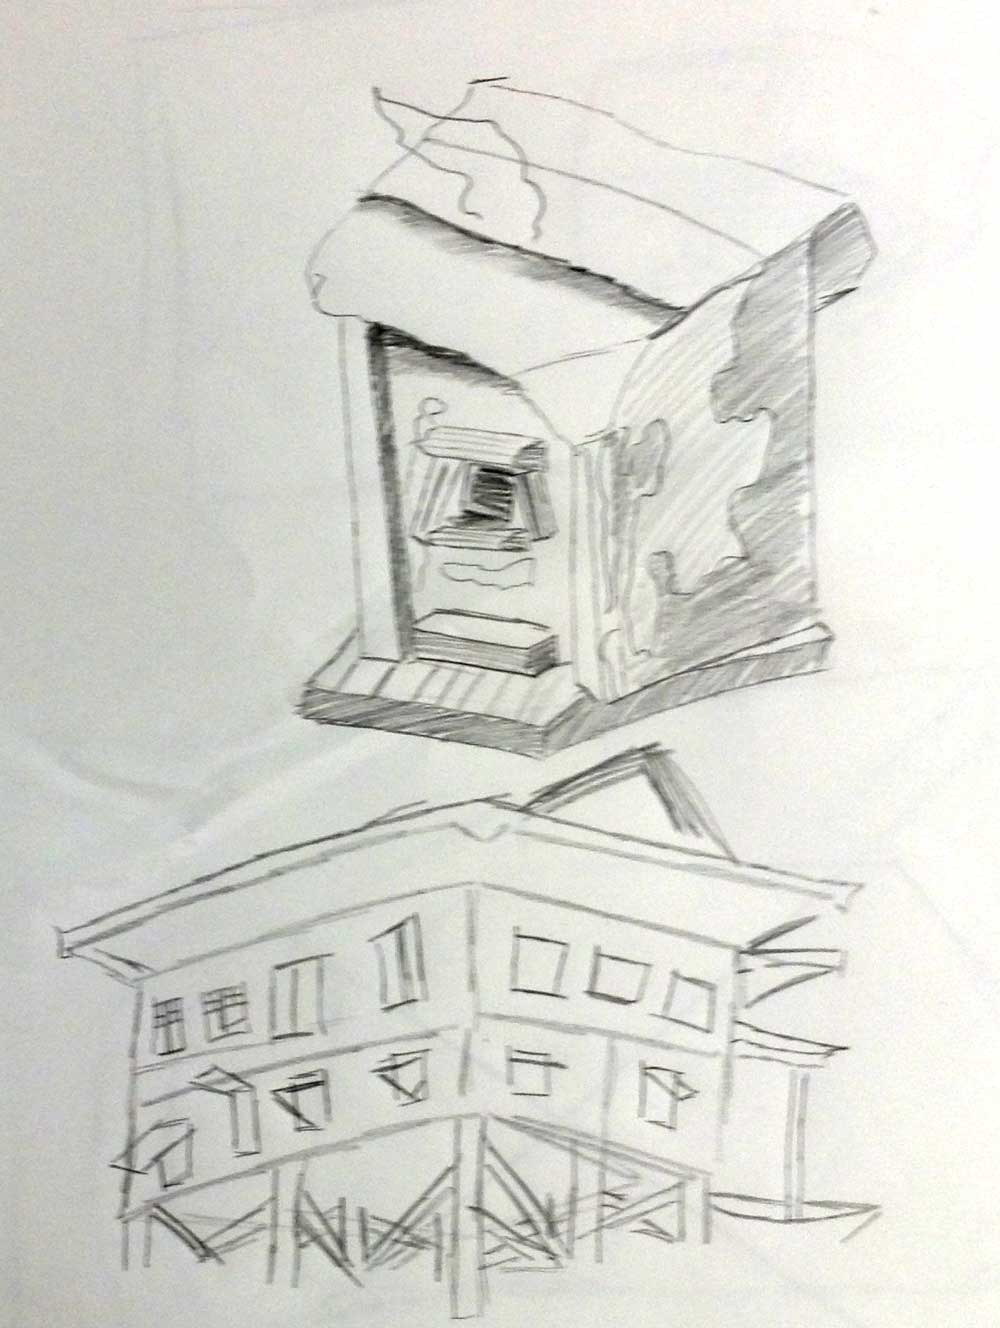
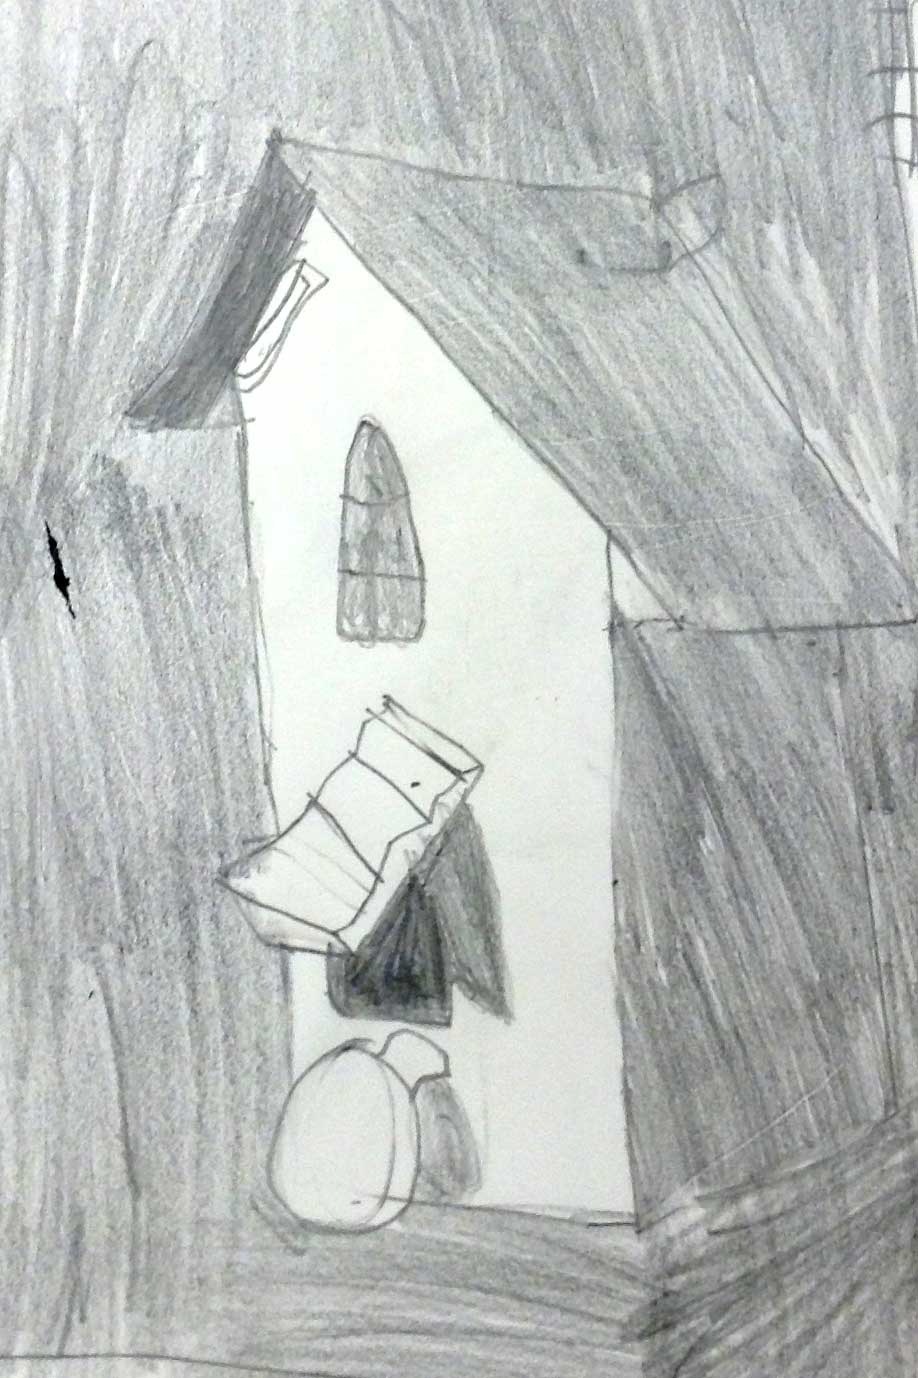
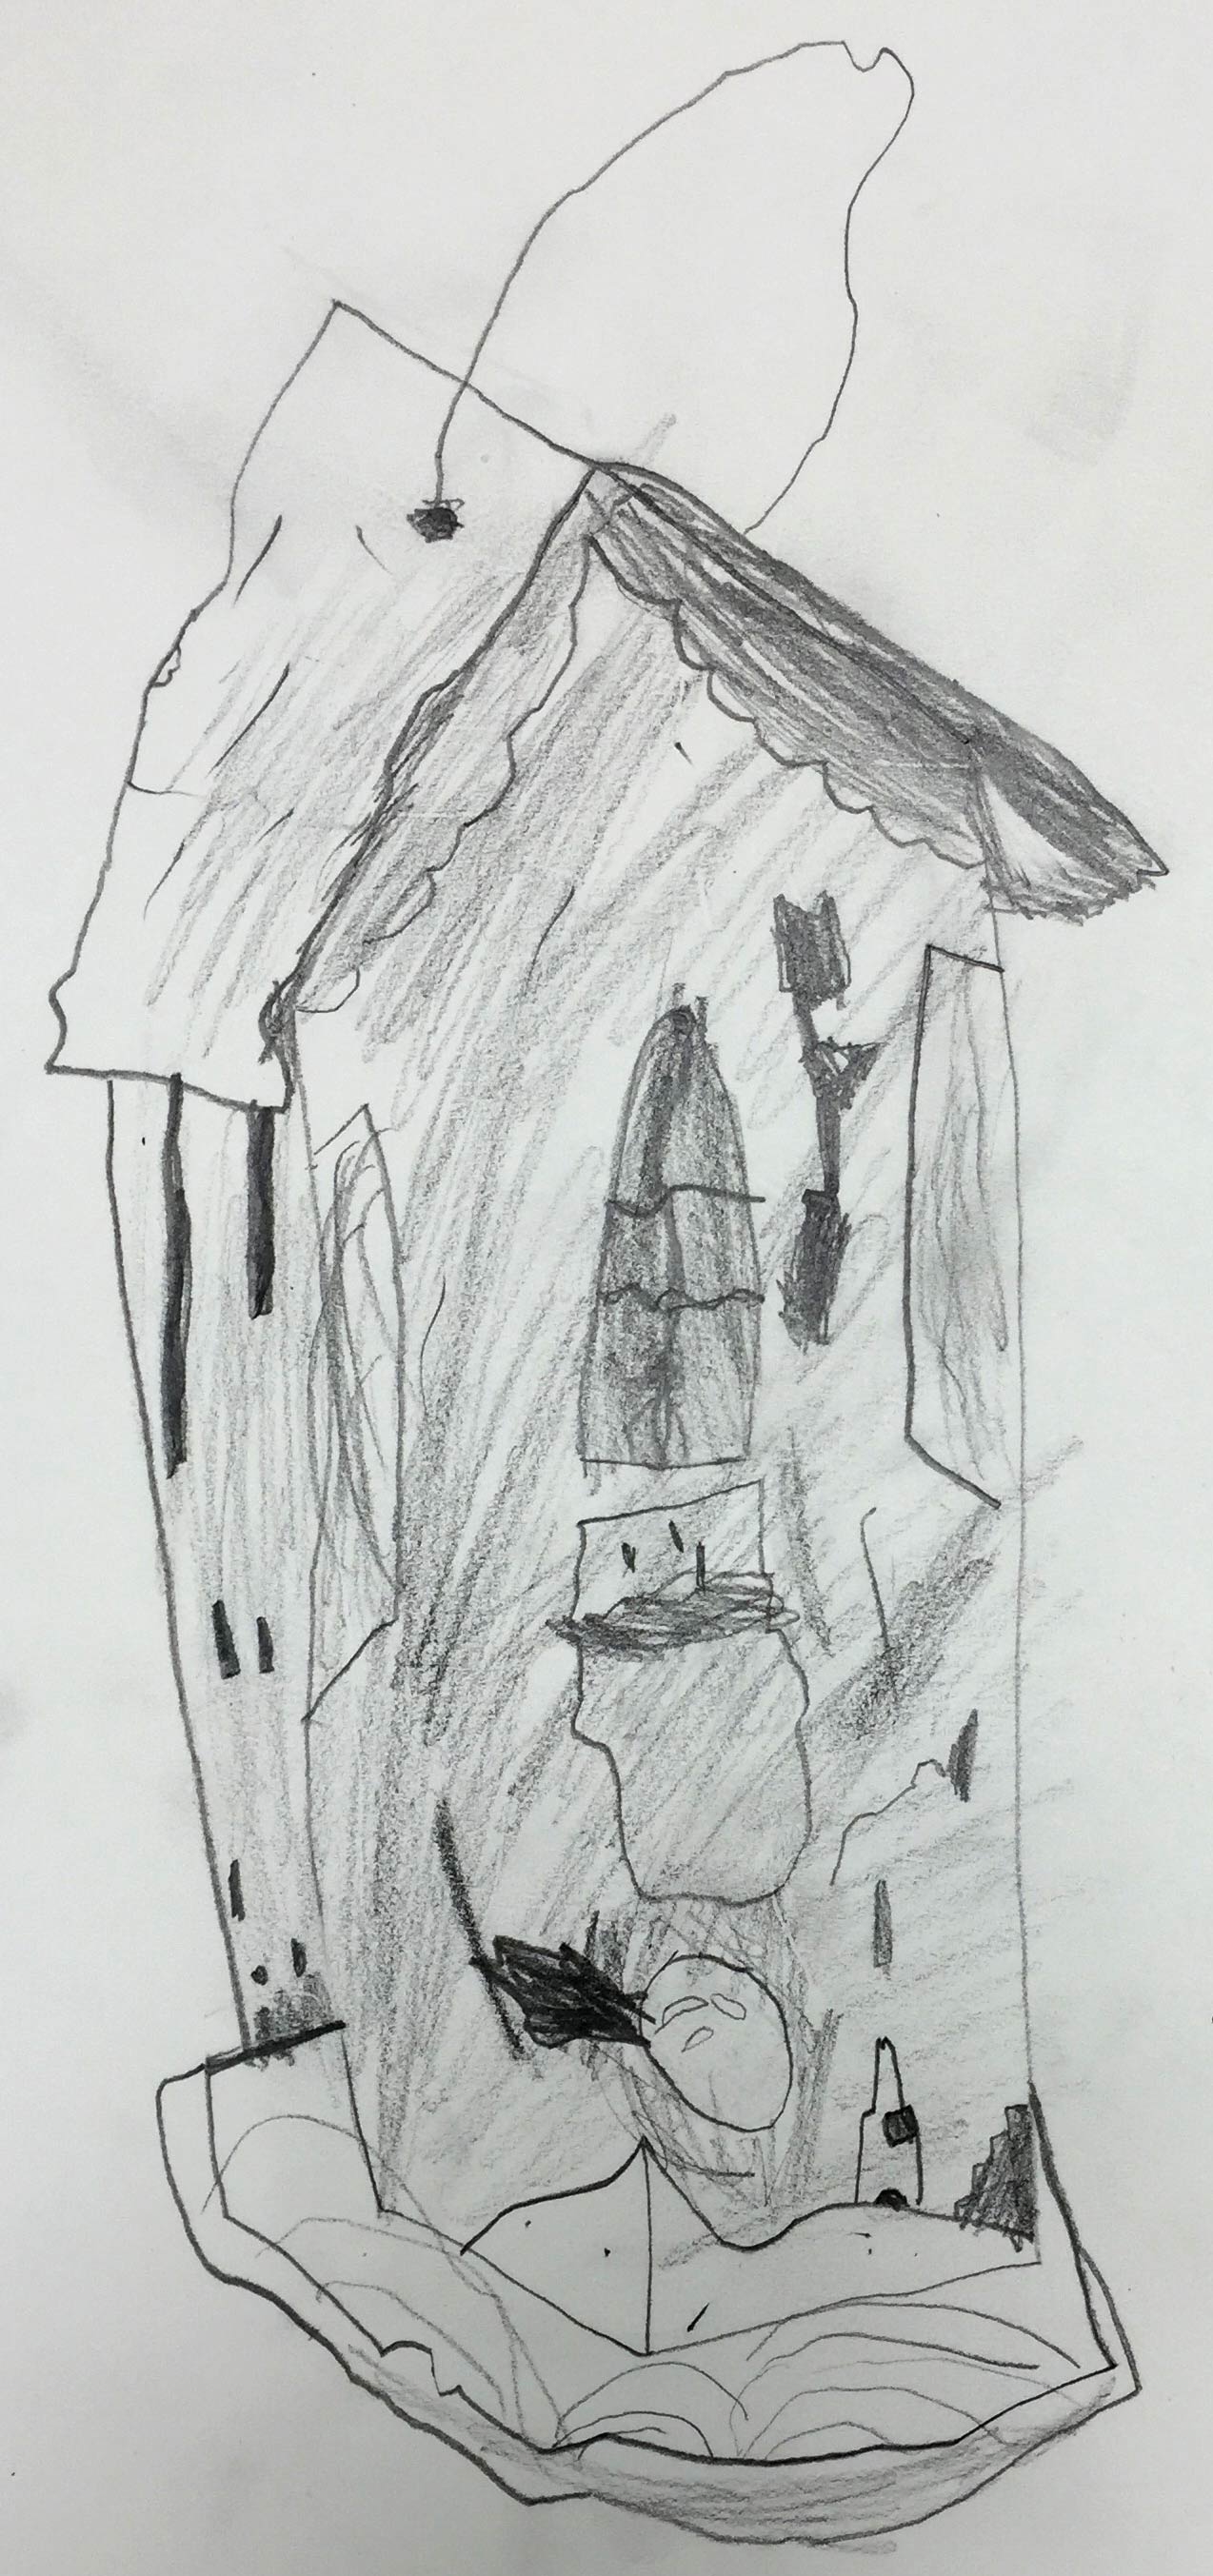
Fast sketches in charcoal. (students who don’t tolerate the feel of charcoal can use a black oil pastel)
Have everyone choose one of the two references of birdhouses. Create 2 or 3 sketches and take only one minute for each.
Explain that they will be drawing in pencil later, so this is just practice, but it is mainly for seeing how to draw the big shapes. Draw lines and black areas, but leave gray areas alone.
Drawing from life is easier to see, if you close one eye when you’re looking at the subject.
1.3 Intro
While students work, explain and review:
“Today we’re going to learn a lot about how to draw more accurately. You’ve probably heard about perspsective drawing. It’s a set of very strict rules, that when followed exactly, help anyone mimic real life on paper, especially for man-made objects like houses, buildings, and the things in and around them.
The problem with perspective though, is that you have to really know all the rules, and you don’t use your artistic eye very much to decide what to do. It’s a good system, but very hard to use, and ironically, even harder for artists.
So we are going to look at some simple artistic eye methods – ideas that will help you draw in perspective, but without the confusing rules of the perspective system. It’s more about trusting your eye, than knowing facts about what you see.
No vanishing points, horizon lines, or 2-point grids will be needed.”
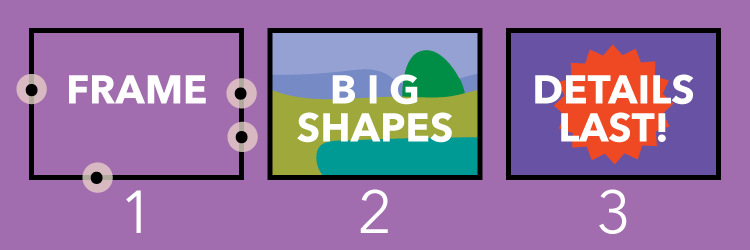
Review the 3 steps to accuracy using the display chart below if needed. Then you can ask some questions while they work.
1) What’s the difference between a camera and a copier machine? [Not much. They both see and reproduce pictures and the are perfectly accurate]
2) Why can both a camera and a copy machine “draw” so accurately? [Because they only use viewpoint to make their images. They don’t have a brain, and can’t think about the logic of the things they are viewing.]
3) What’s the difference between a human and a camera? Why can’t we draw as accurately as a camera? [People think about the facts of the objects we’re trying to draw. Because the facts actually get in the way of what we see, it makes it hard to draw what we see.]
Our brains KNOW things. But logical facts are not what our eyes see. Our eyes see things from viewpoints, and every object, every person, and even different parts of objects – always have their own individual viewpoint.
LEARNING TARGETS
Students will know that facts sometimes make drawing things harder instead of easier
2.1 Discuss
Discuss Fact-based drawings vs Viewpoint drawings using a stool. Then display the stool graphic and how silly the facts would make it look!
There are 2 kinds of ways to think about things. Fact-based information, and viewpoint. These two things don’t work together. They are like oil and water, pigs and flying, peanut butter and pickles. They just do not go together.
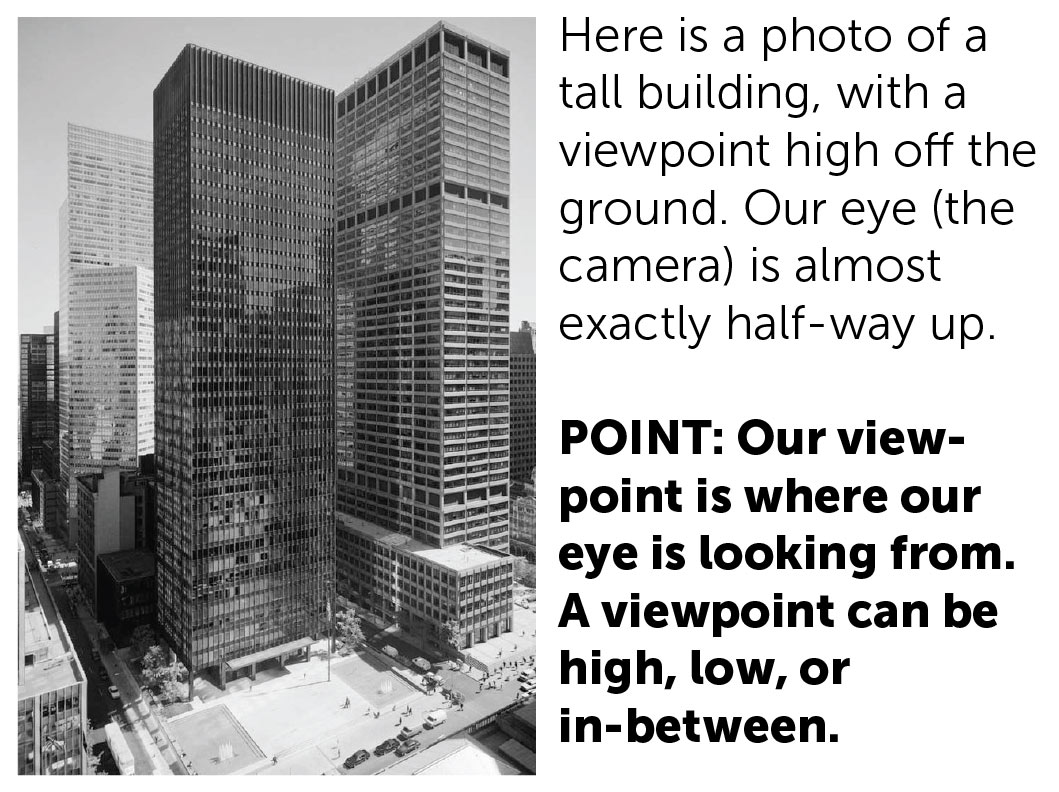
An artistic drawing is made from a VIEWPOINT. A viewpoint is what the thing we’re drawing looks like from one spot, where your eye is. A Viewpoint drawing of an object is completely different from a fact-based drawing drawing of it.
- A fact-based drawing will NEVER be visually accurate
- A viewpoint drawing will NEVER be factually true”
Look at this picture showing a fact-based stool compared to a viewpoint stool. [below]
Artists don’t try to draw a silly stool like the fact-based one I showed you, but those are true facts, and because we know it’s true, the facts do affect the realism we are trying to create. What we do, is we add a little of the facts into what we see. We compromise a bit. That compromise is what we need to learn to ignore.

LEARNING TARGETS
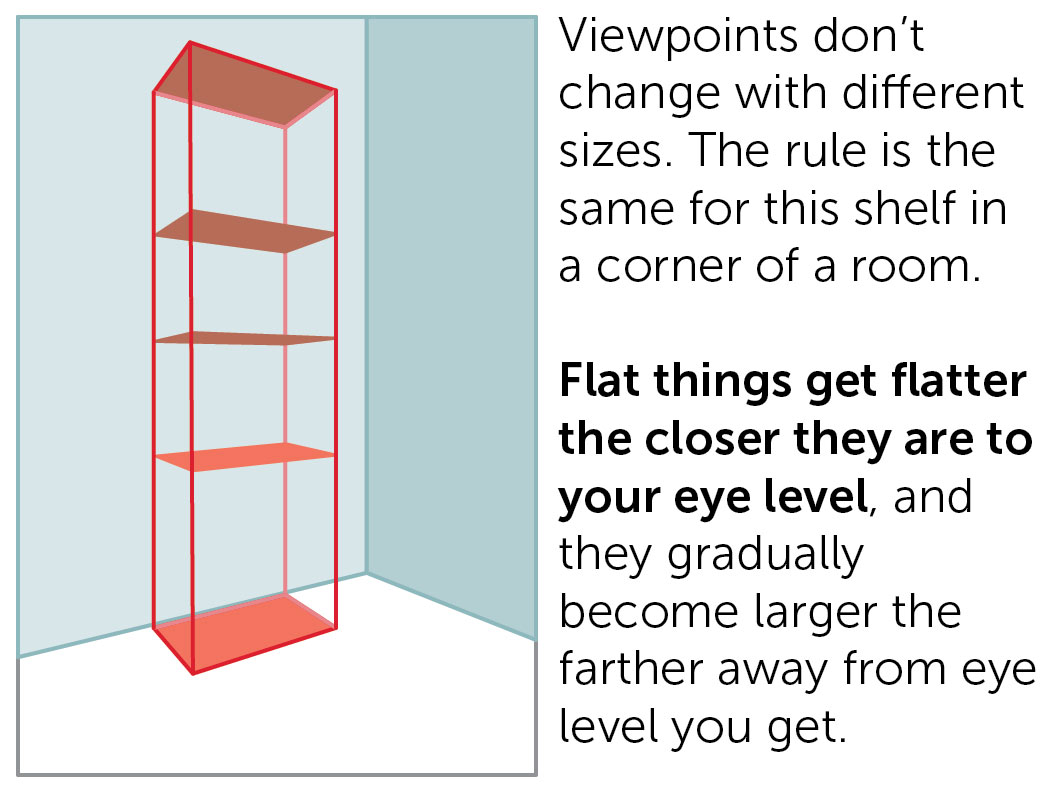
Students know that flat things are flatter-looking nearer to eye-level viewpoint
M A T E R I A L S
- Character prints
- Scissors
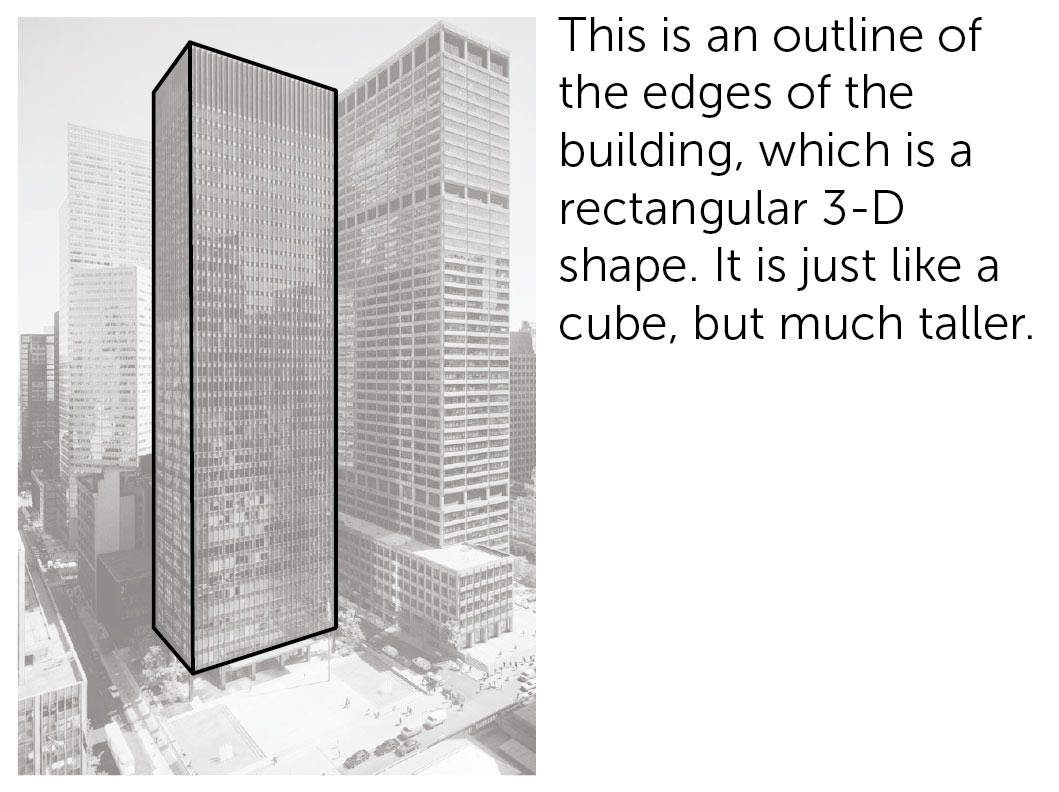
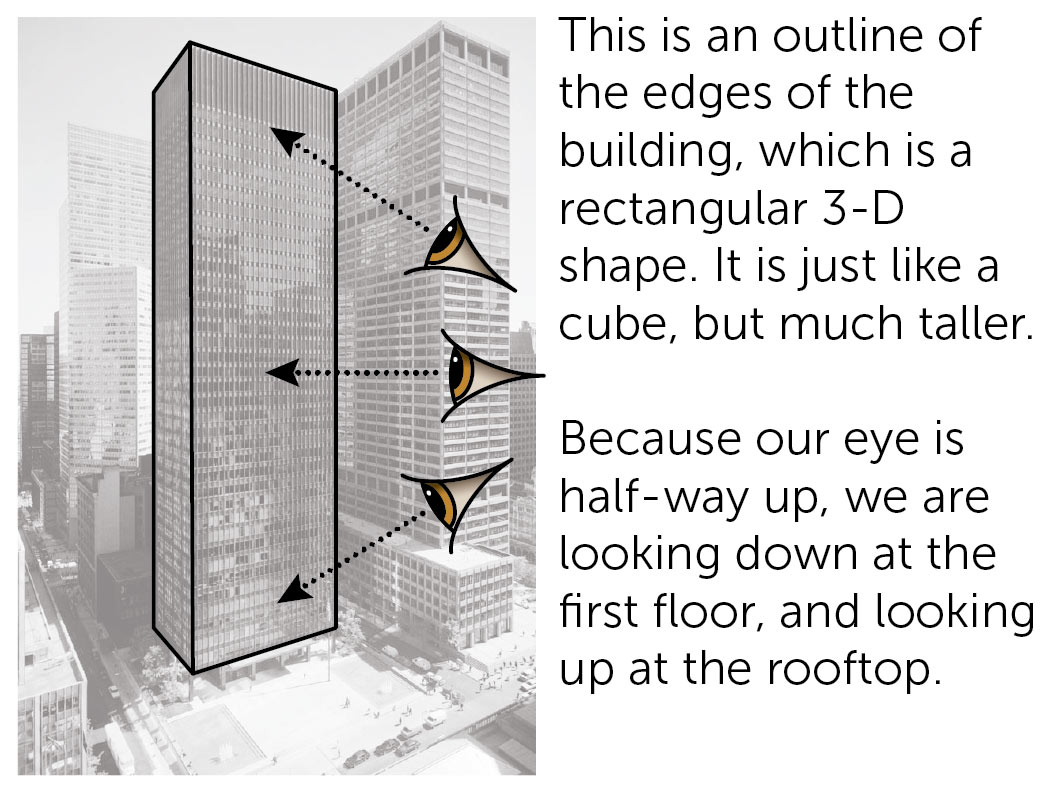
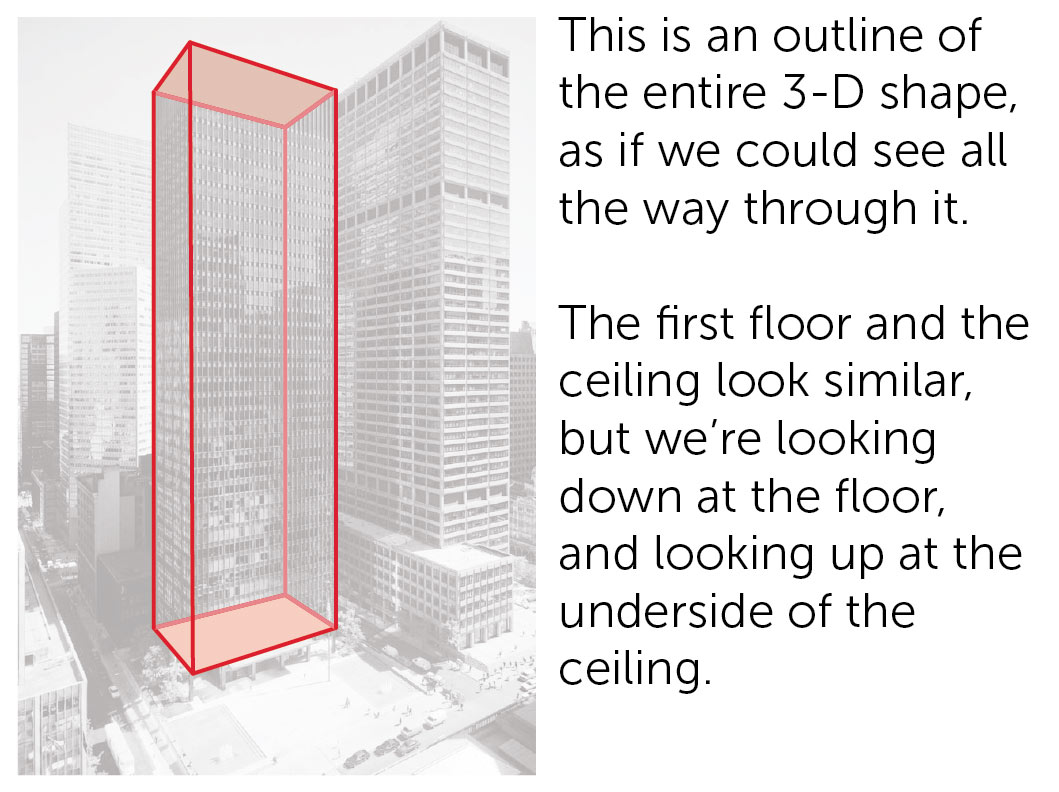
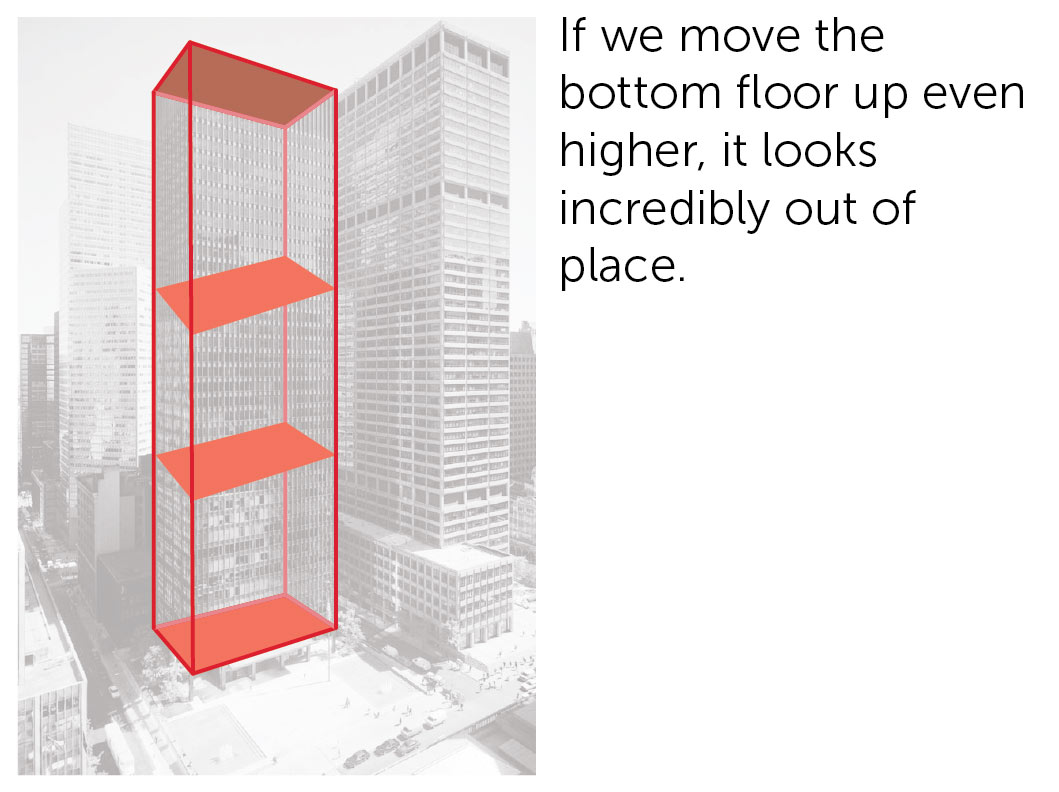
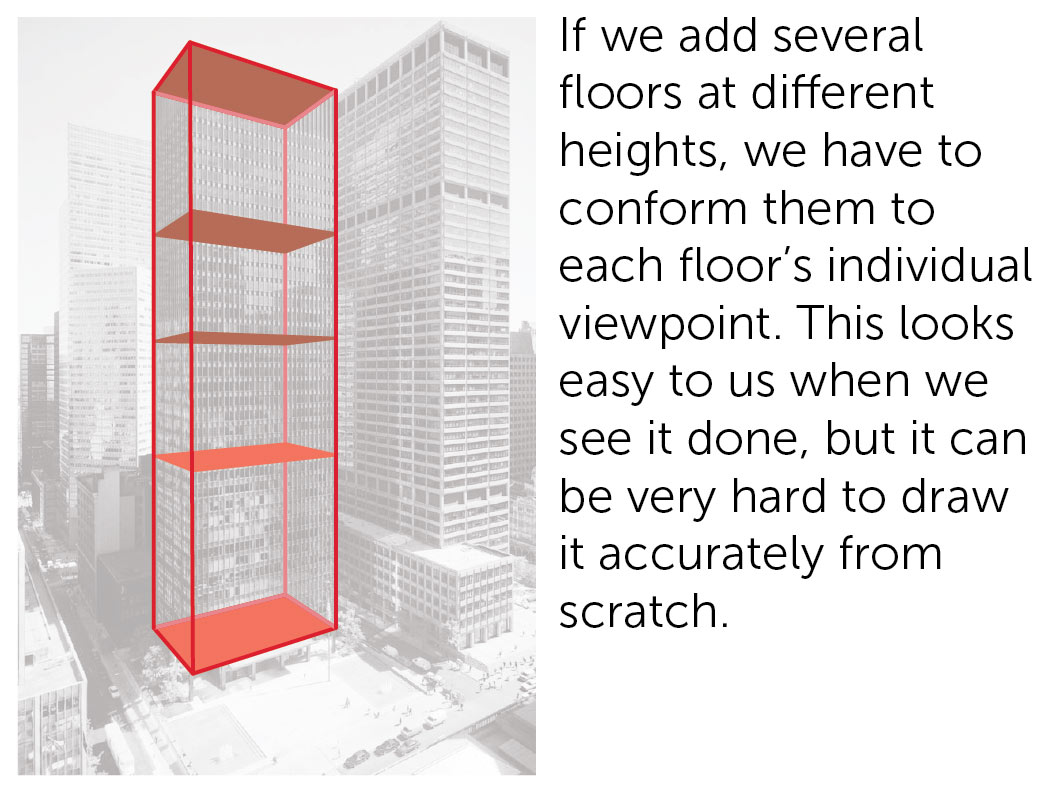
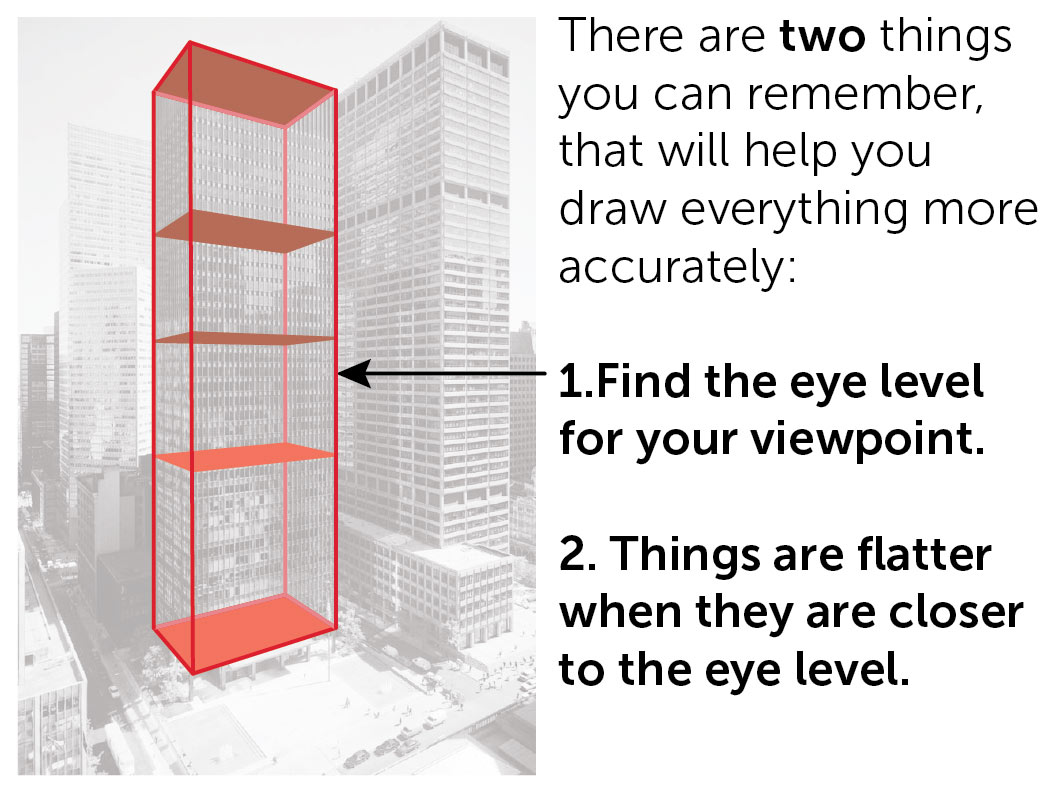
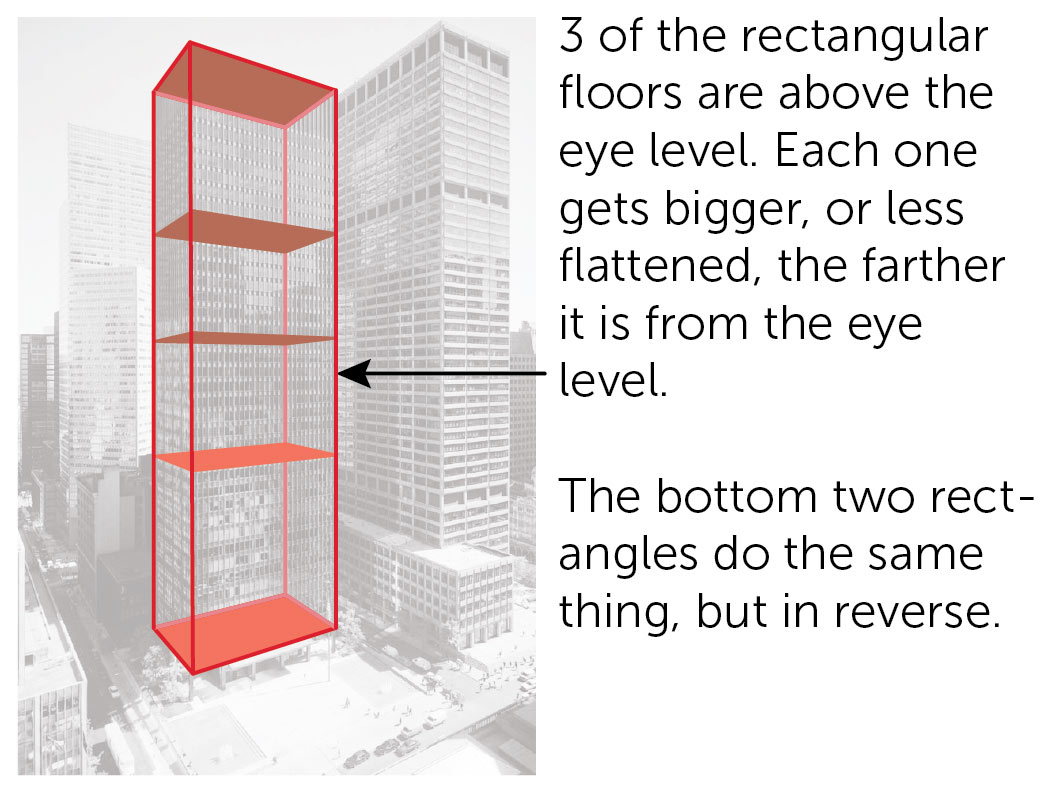
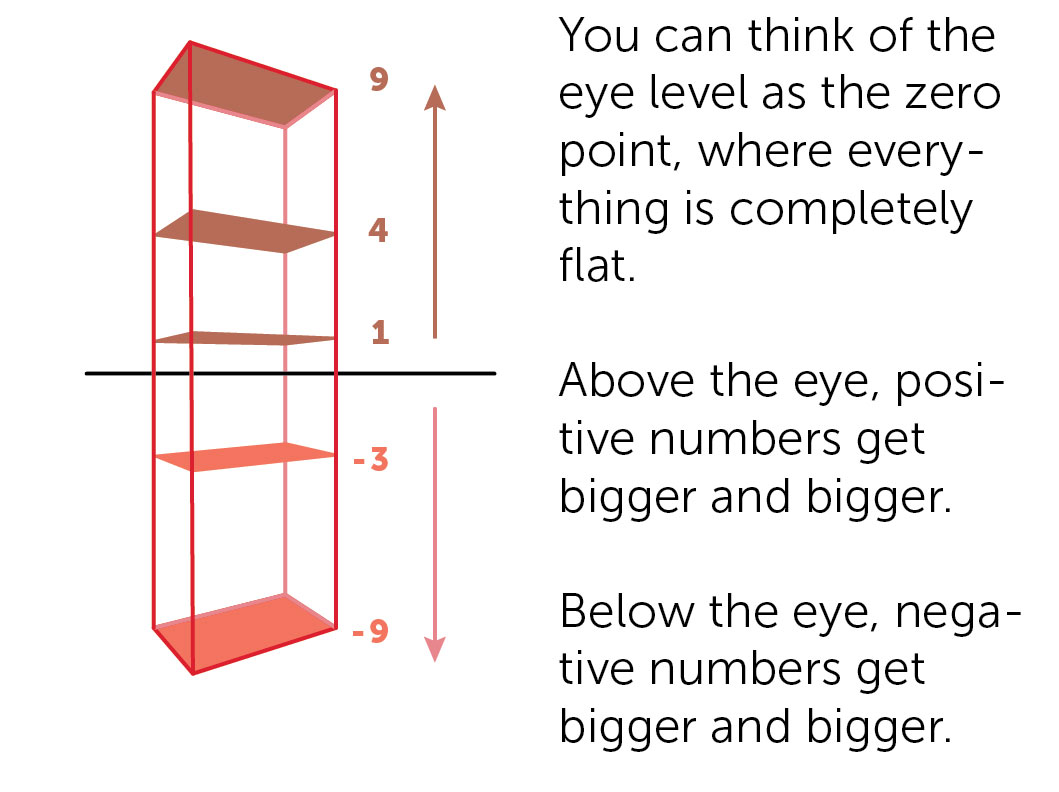
3.1 Viewpoint
Flattening Viewpoints (tap any image to open viewer)
Display the slideshow below, and read the text aloud. Explain more in-depth as you go, if needed. For young children, don’t spend too much time on this. Just plant the seeds for every floor or shelf having a different viewpoint.

3.2 Print
Exercise
OPTIONAL to use instead of characters.
Color Sided Square
Print enough for each student to have one – on CARD STOCK.
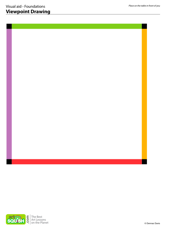
1 Page – Opens in new window
3.3 Shrink!
Have students close one eye and place the paper on the table in front of them. Keeping it flat, move it up slowly, noticing how it gets flatter the closer it is to their eye level. At eye level you can’t even see the square.
Turn the paper upside down at eye level, and keep raising it until the square looks large again, way up high.
LEARNING TARGETS
Students know things get much shorter as they move away from the viewer
M A T E R I A L S
- 14″ x 17″ Sketch Paper
- 2B Pencil
- 4B Pencil
- White Eraser
4.1 draw
Show students that “Things Get Smaller” by having them draw 2 trees.
Have everyone find a clean sheet of sketch paper in their pad. Then have them draw a tall and skinny simple cartoon tree, and imagine that it is 50 feet high. Now draw another 50 foot tree just like it, that is way, way, way off in the distance.
“Did you draw it the same size? Of course not. Since it’s far away, you made it smaller, because we know that things far away look smaller.
- FACT: the trees are the exact same size
- VIEWPOINT: the trees are completely different sizes.
So the fact and the viewpoint are at total odds with each other. Only one can work in a drawing, and the best one is the viewpoint. Your brain knows that things get smaller by appearance if they are farther away. You cannot change the way that works.
Things get smaller.”
4.2 amaze!
“Now let’s do some magic using sleight of hand. Here is a trick where we make our finger shrink to half its size.
Have everyone hold up their two pointing fingers together in a vertical position about 8-12 inches in front of their face. Even up the tops, and the knuckles so they are right next to each other. Now you have two fingers, or “lines” that are the same height. Close one eye.
Now slowly move one finger away from your eye, just 2 inches. See how fast it shrinks! Now move it away another few inches or so, until it appears to be half the height of the closer one. Don’t move your fingers, but open both eyes. Wow! it’s crazy how much smaller it seems to get in just a few inches, isn’t it?
The back of the birdhouse is smaller than the front. Smaller than you think.
You’ve always known things get smaller, but now you know that they get REALLY smaller. This is the viewpoint secret that artists learn for drawing accurately.”
4.3 Tracks
Review the two big things we’ve learned:
- Flat things get flatter closer to eye level
- Things get smaller as they’re farther away – but far more than we think
But now there is one more big thing to remember that helps with accuracy and viewpoints. That is:
3. Parallel lines converge like train tracks
Display the photo below of train tracks. Explain that every wall, ceiling, floor, table top, etc… are all like train tracks, and the lines on each side converge.

LEARNING TARGETS
Students know how to create a frame for their drawing
M A T E R I A L S
- 14″ x 17″ Sketch Paper
- 2B Pencil
- 4B Pencil
- Ebony Pencil
- White Eraser
- Kneaded Eraser
5.1 review
Students draw Big Shapes – the second step in the 3 steps to accuracy.
Have students use their pencil to draw a simple outline of the birdhouse. Trace the roof lines, the door, the sides, and the base, but no smaller details. These are just the biggest shapes.
As they work keep going to the next two steps, and having them stop to listen and look at your display. You’re explaining two important methods for drawing the big shapes more accurately.
STOP, DROP & DRAW
Make sure to have students look at their drawing and compare it to what they thought they saw on the photo. Erase and correct.
- Stop drawing to evaluate
- Drop your eraser down and use it
- Draw more accurate lines
5.2 Teach
Encourage students to practice these during the next exercise.
“Artists close one eye to flatten the world, because that’s how you have to draw it. You want to see a subject from one viewpoint, or one eye, instead of two – without your normally awesome 3D depth perception. Keep your head still and close one eye, and things flatten out for you. It can really help a lot for seeing shapes and proportions. We use this one-eye closed method for two visual methods that make a huge difference when trying to draw accurately: Hand Framing and Pencil Measuring.
Think about where your subject will go on your paper. If you draw it small in the middle with tons of white paper around it, there is no need to have a sketch pad this size or have a detailed subject. We’re using a large pad because we want to make a large, detailed drawing. Your subject should be fairly close to the edges of your paper. It’s ok to let part of the subject run off the edge too.”
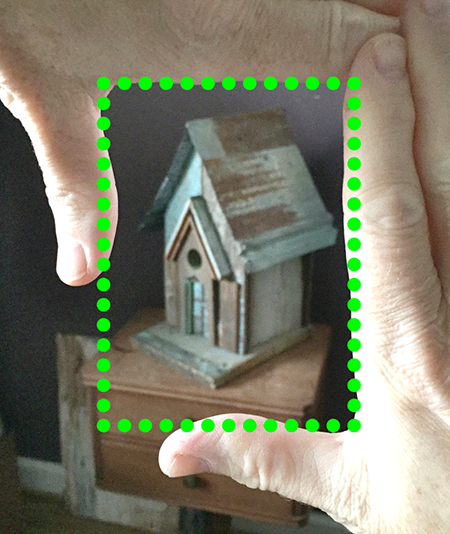
Hand Framing (tap any image to open viewer and read or paraphrase the captions)
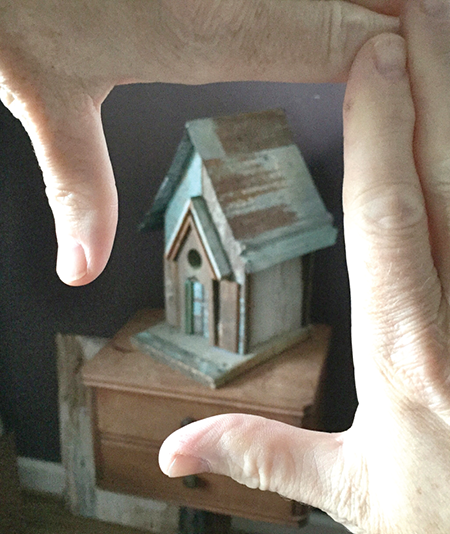
Close one eye and Make two right angles with your hands
You can create any size or proportion of a rectangle

Then make note of where the big shapes interact with your Frame
Don’t try to squeeze part of your subject because you’re drawing close to an edge. Try to see where things will go before you begin, and if you see that there is not enough room to fit, let the object extend off of the paper as if there was more paper but it’s invisible. It’s just like cropping a photograph.
5.3 measure
They will want to just move the pencil down and set it on the paper, drawing a very small birdhouse as a result. This is a proportional measurement, so your drawing should be sized to fit well on the frame of your paper pad.
Here is a teacher talk to explain proportion measuring a little better. Also use the slideshow below.
“Hold your pencil out at arms length. Keep it there for this whole method, and close one eye. You can use your thumb to mark and hold a point anywhere along the pencil, to make a measurement of part of your subject. The height or width of some object at one spot, for instance. Then you need to find a second measurement using the first one as a guide. The new measurement must be either equal to it, or a multiple of it. It can take some trial and error to find some helpful measurements. If you find out that a particular object is 3 times the height of all of your objects, for instance, that helps you draw accurate guidelines because you can measure those same proportions on your paper. If your pencil is too short for the paper, use a long brush handle.”
“Say you have a birdhouse that is 2 pencils tall and 1 pencil wide. The proportions are 2 to one. We could then go out into the parking lot and use two car lengths by one car length to find the proportions for a giant sidewalk-chalk drawing of that birdhouse. Then you could draw a tiny version of it by using two inches by one inches. All of these have the 2 to 1 proportions and will be accurate.”
Pencil Measuring (tap any image to open viewer, and read or paraphrase the captions)
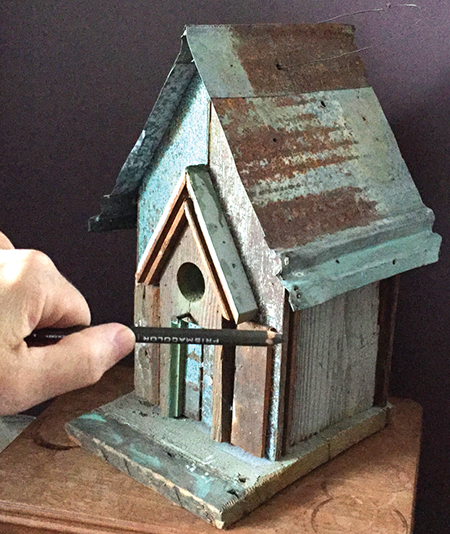
Hold one eye closed and your arm fully extended
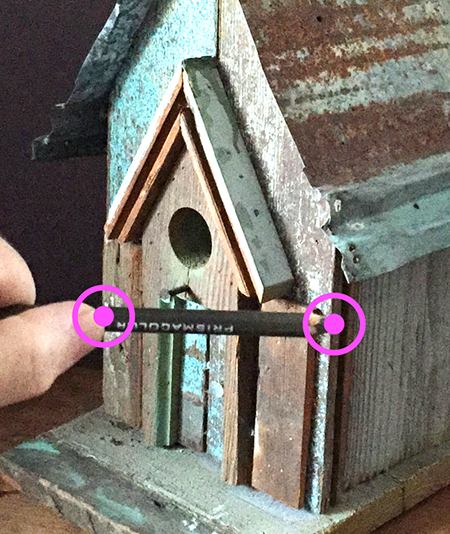
Look for a unit to measure with, such as this width
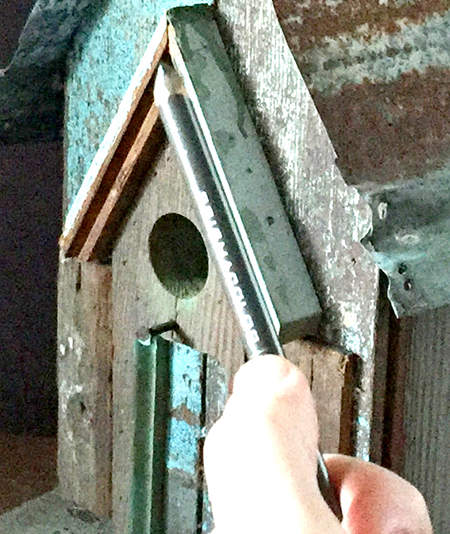
Then use this unit to find another similar measurement
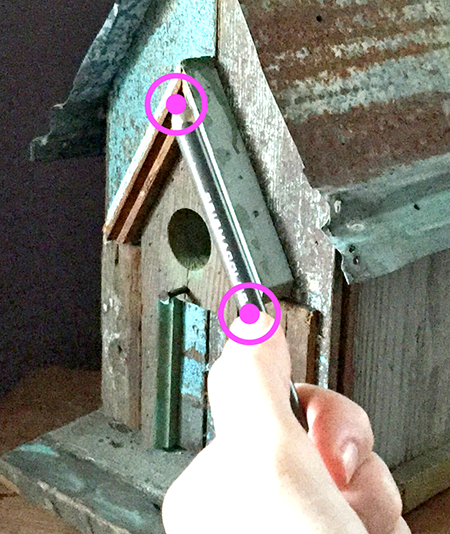
This is the same length as our width
Use this button to jump down to the preparation section.
STEP 6. Guidelines
Students will draw very light guidlines, just like the tracing, but freehand. 10 MinutesLEARNING TARGETS
Students know how to draw guidelines
M A T E R I A L S
- 14″ x 17″ Sketch Paper
- 2B Pencil
- White Eraser
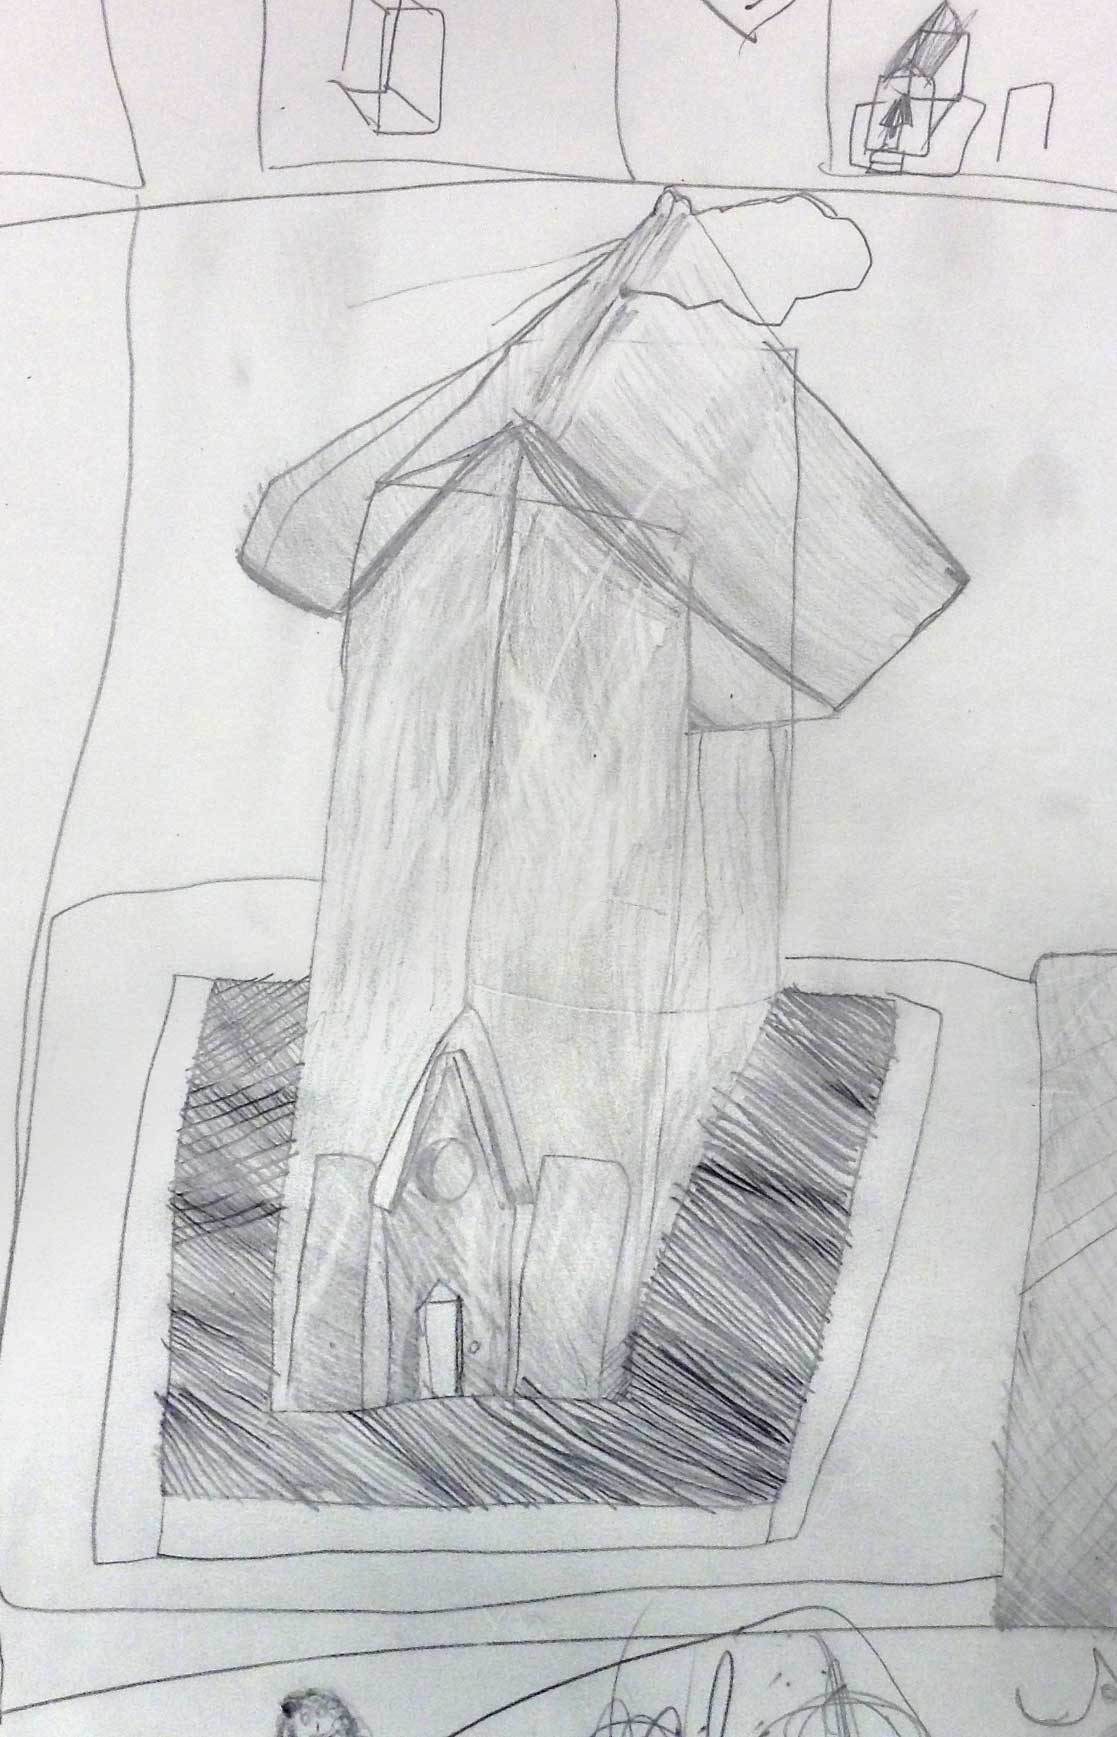
6.1 draw
Students will create light guidelines of Big Shapes for their drawings.
Get a new clean sheet showing in the big sketch pad. Help everyone make their big shapes simple, accurate and light, by moving around the room and offering suggestions.
Guideline drawings can be just like the practice drawings in the last step.
To prevent smudging, use a sheet of copy paper under your hand, and carefully move it instead of sliding it around.
Also work from top to bottom.
LEARNING TARGETS
Students know how to work together and have fun making a silly drawing.
M A T E R I A L S
- 14″ x 17″ sketch pad
- Printout of birdhouse
- Ebony pencil
- Oil pastels
- White Eraser
7.1 draw
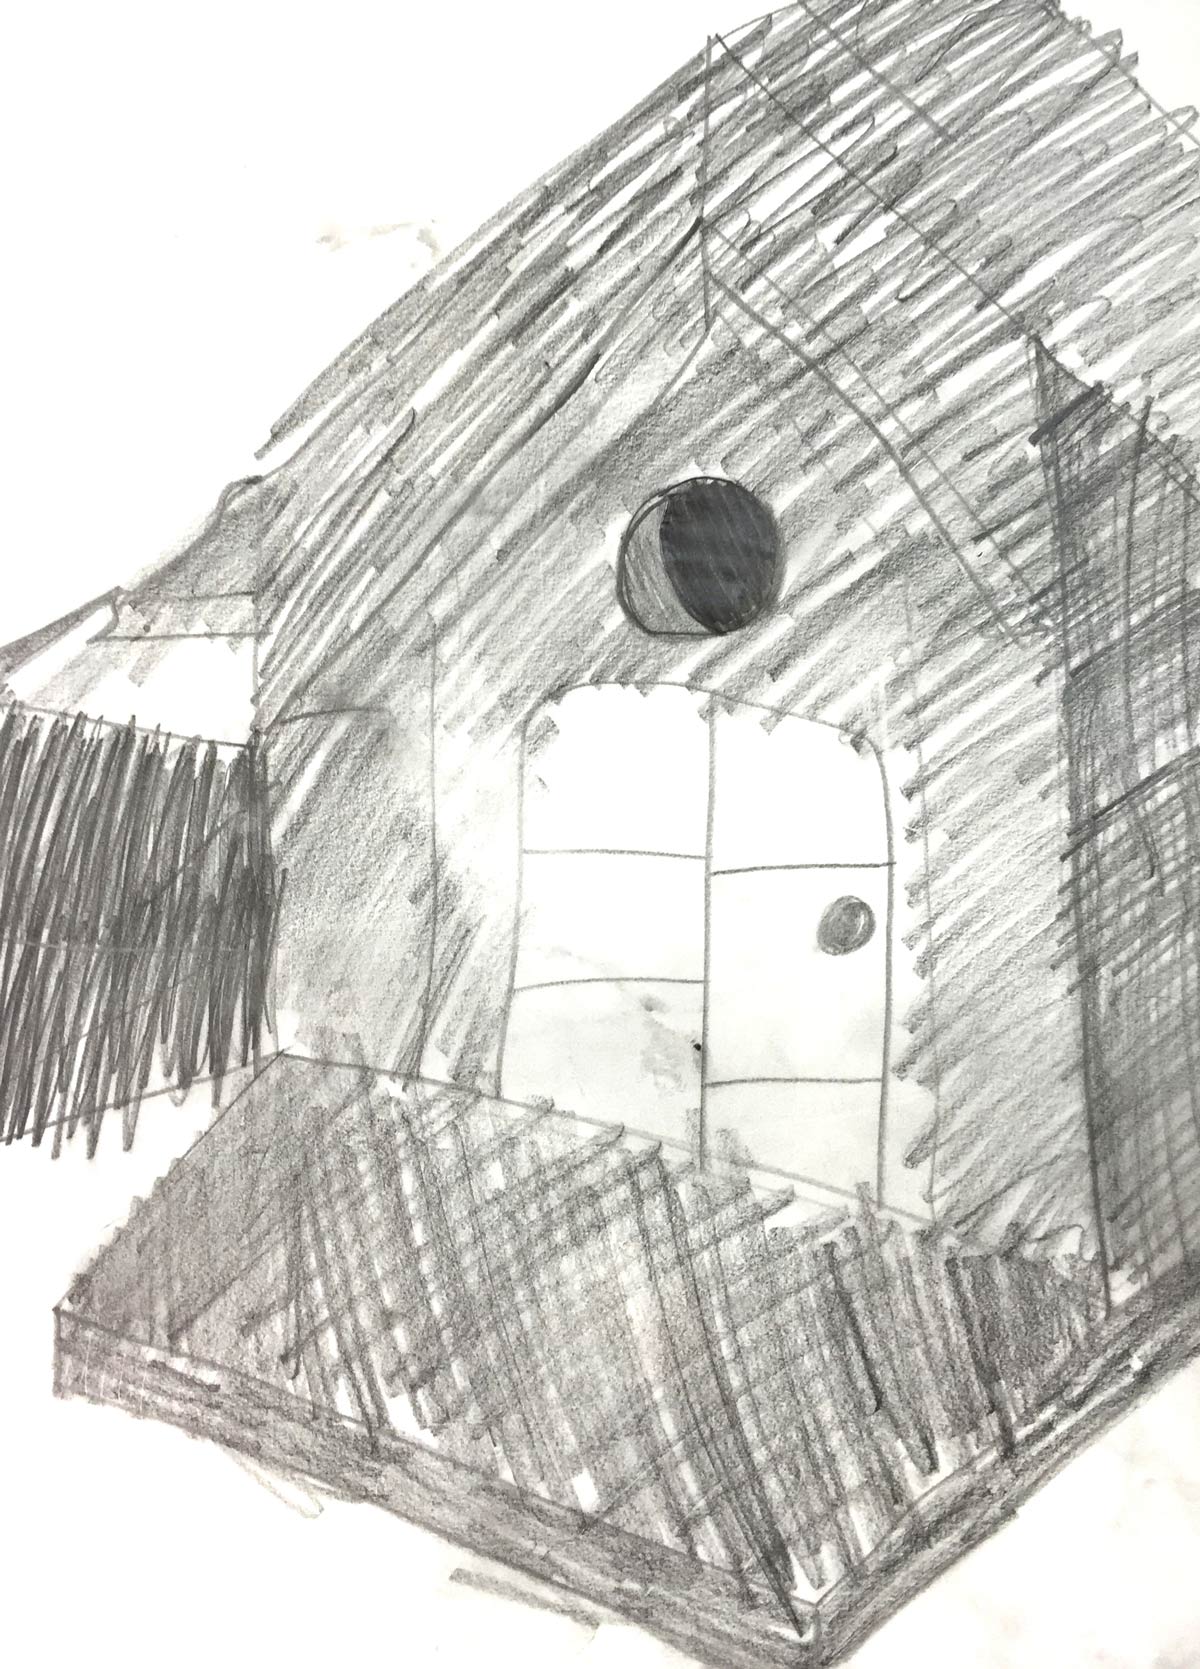
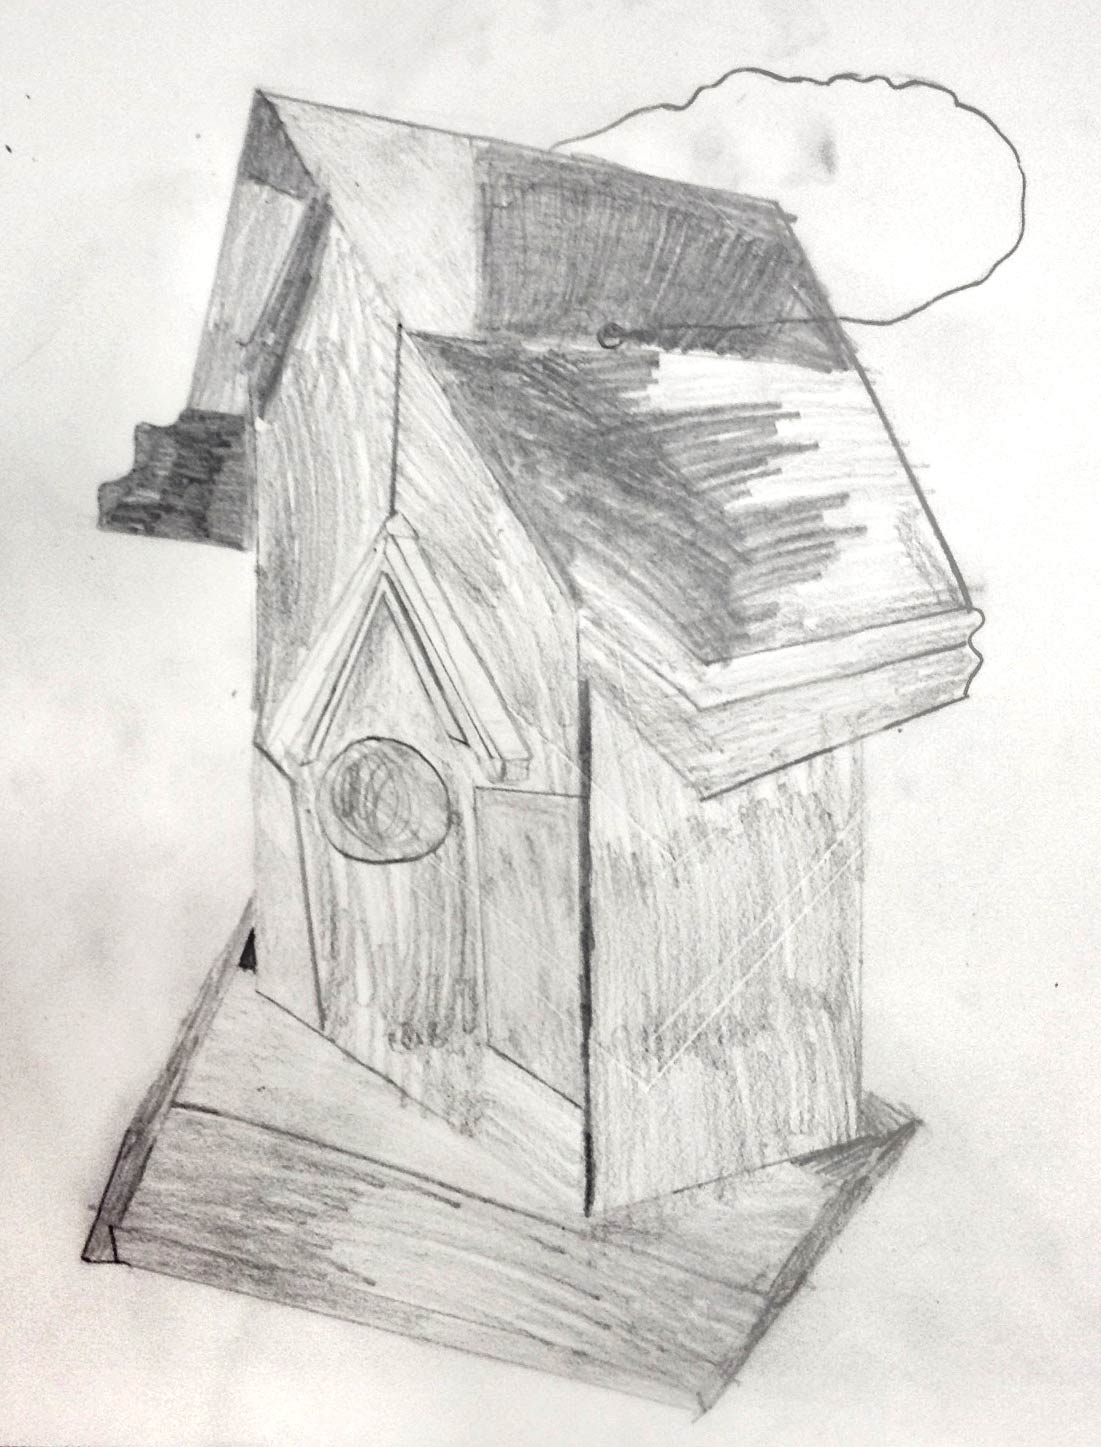
Everyone draws their birdhouse using good pencil techniques and taking their time.
This will take some time, depending on your group. Go around the room, finding things you like about what each student is doing. Ask what they like or don’t like, and get permission to offer suggestions for improvements.
LEARNING TARGETS
Students know the importance of cleaning up
M A T E R I A L S
- Paper Towels
- Cleaning wipes
- Sink
- Waste baskets
- Well-lit spot for photos
- Camera or phone-camera
8.1 clean
- Wash hands
- Super-wash brushes if used
- Put art supplies away
- Wipe tables & toss trash
- Remove any smocks (last)
- Check for items on floors and tables
8.2 photo
OBJECTIVES
- Practice and improvement using insights and techniques recently learned
- Understanding how to prepare for, and create, a detailed pencil drawing
- Accomplishment in drawing and shading more realistically
- Fulfillment by using new skills competently
TROUBLESPOTS
Haste – This kind of work takes a calm, slow, and deliberate approach. some artists tend to want to work only expressively. It’s ok to work in your tendencies, but it is important to develop multiple methods, especially a controlled and realistic drawing style. The best expressionists have worked in a very planned and deliberate way.
Lack of contrast – It’s not easy to look at colors and values, and many young artists will create work that has the same light or medium tone everywhere. Be on the lookout for this, and encourage students to leave the light areas very light, and create good medium tones and dark areas too. Without contrast, a pencil drawing does not command much attention.
Transfering measurements – This one is very important!
Measuring with a pencil in Step 4 helps so much, but young students have a hard time understanding proportion. You will probably see many kids trying to use the exact same measurements from holding their pencil up, and placing it right onto the paper, without enlarging the measurements. Make sure that you explain how it is proportions that you are getting, not exact measurements AND be on guard for this happening.
Classic problems – with the cube shape – The bottom of any rectangular solid will tend to be flattened out by almost every artist. We’ve included the 3 cube tricks from last week, and that should help, but still, be prepared to help students change the structure of their cube shapes to be more accurate. Most often this entails bringing the front point (at the bottom center) much lower, and to create more of a V shape at the bottom, with the two base lines of the cube shape having a stronger V angle.
ART WORDS
Accuracy – When we want things to look realistic, we are striving for accuracy in our drawing abilities. Many people use phrases like, “it looks right”, instead of “it looks accurate”. Using the words right and wrong tend to make artists who are learning accuracy, feel like they’re not true artists. We avoid these terms and say accurate instead.
Frame – The ArtSquish term to denote the edges of a work of 2-dimensional art. Usually a rectangle or square.
Big Shapes – The ArtSquish term to denote the 4 to 6 largest shapes in a work of art. Most images can be divided into just a few of these very large shapes, which will intersect the frame on more than one side.
CLASSROOM
PREP
Print all of your PDFs from the lesson plan and cut any references apart as needed.
What your room needs
Here are your printable lists and room prep instructions.
Opens in new window
CLASSROOM
MATERIALS
- Paper towels
- PDFs
- 3D Birdhouses to draw OR PDF
- Cleaning Wipes
- Sink
- Waste Baskets
- Well-lit spot for photos
- Camera or camera-phone
- Smocks
STUDENT’S
MATERIALS
- 14” x 17” Sketch Paper
- 2B Pencil
- 4B Pencil
- White eraser
- Charcoal
- Kneaded Eraser
- Ebony Pencil
PREVIEW
Week 14: Patches Watercolor
Students will create a square-shaped watercolor, that is divided into a grid design. Each smaller area (rectangles and squares), becomes a tiny little painting, drawn and painted in watercolors. This will employ the small glaze technique, and makes it easy since there are no large areas to worry about. The whole work is made up of painting patches, and each painting is made up of patches of color.
Week 15: Patching Up & Charcoal
Students will finish the little patches watercolor they began last week. As students finish, they’ll begin work in charcoal, warming up with quick sketches and using several photo references. Oil pastels are introduced to create a black and white mixed media, and then color is added for a monochromatic work. There is an in-depth charcoal demo too.