
Painting
Each lesson Plan focuses primarily on one of the 4 Cornerstones of Art:
Drawing | Painting | Color | Style
OVERVIEW
Students will begin the first of two lessons, where they create a landscape in acrylic paints, using the classic red underpainting technique.Grades 3 – 5
Week of September 1 – 5
1 Hour & 45 Minutes
Lesson At A Glance
A brief overview of each step. Buttons jump to each section for detailed information.
5 Min – Demo canvas setup.
10 Min – Change canvas color to red
10 Min – Draw big shapes of practice landscape
10 Min – Add details to practice
10 Min – Use canvas pencil for guidelines
10 Min – Demo graze-brush & layering
5 Min – Get out paint colors for sky
15 Min – Start painting
2 Min – Everyone helps
SCROLL & TEACH
LESSONPLAN
Each section is a different color. Read over once and then you can SCROLL & TEACH using any device you like. It’s designed to work best with your phone.

LEARNING TARGETS

Students know how to create guidelines, drawing lightly, before creating Final art.
M A T E R I A L S
- 14″ x 17″ Sketch Paper
- 2B Pencil
- White Eraser
- Cheasel Reference stand & clip
1.0 Bookend
A bookend is at the beginning and the end of each lesson.
This is where you go over what the lesson is about and what the main learning points are.
Making this clear, helps students remember what they’ve learned and understand the processes they’re going through.
“Last week we used acrylic paints and learned how to handle a brush. Now we’re starting a 2-week landscape painting project, where you’ll get to practice painting, and also learn a great-looking and super-easy method that many professional painters use: changing the color of the canvas surface from white to a color. In our project we’ll be making the canvas bright red, which is great for landscape paintings.
Your main objective for the project is to enjoy painting, but also to know how to get ready and plan the project. You’ll get to choose your reference photo. Today we’ll get all the preparations and drawing practice done, and start painting the sky. Next week you should be able to finish your landscape!
1.1 Prints
Reference
Buildings Photos
Cut images apart and print enough so each student can choose from several, or print one page for each student.
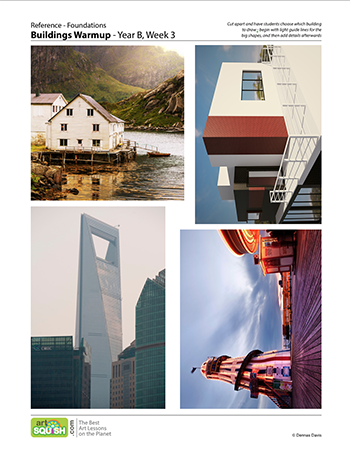
1 Page – Opens in new window
1.2 SHAPES
1.3 DRAW
Read the Teacher Talk below as students work on drawing their buildings for warmup. Elaborate on drawing big shapes first, and details last.
“This is how an artist builds a drawing: light guide lines, for big basic shapes, and then moving to regular drawing and adding the details. If you think about it, this is how a building is created too. If you’ve ever seen a structure in the process of being built, there is a flat, featureless chunk of shapes at first. Then they put all the details on at the end.”

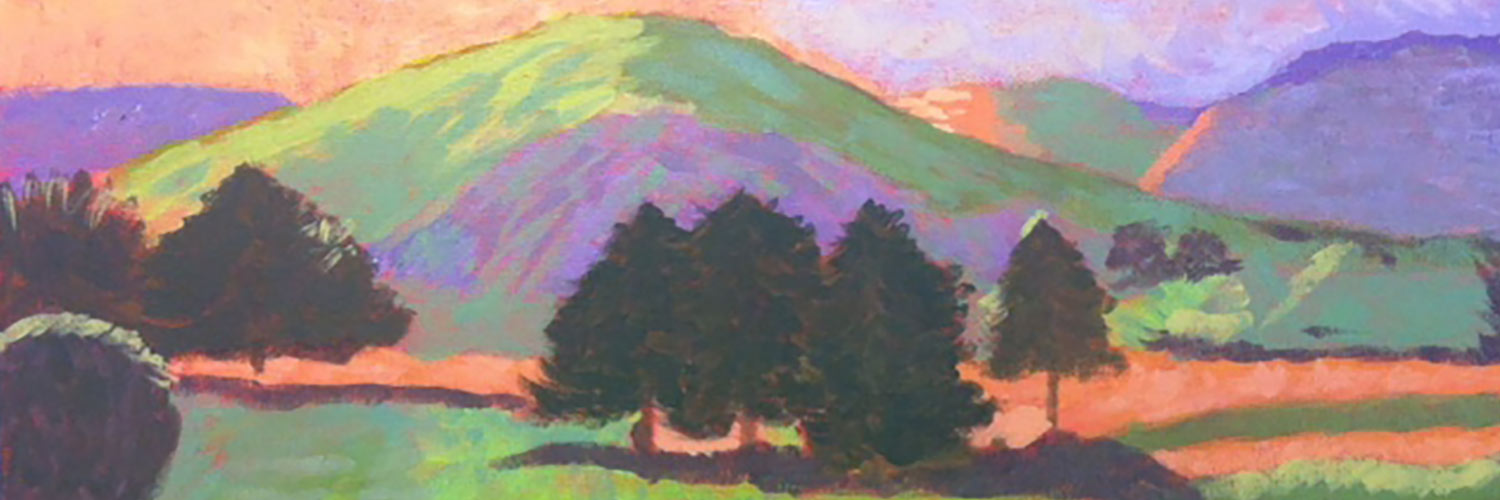
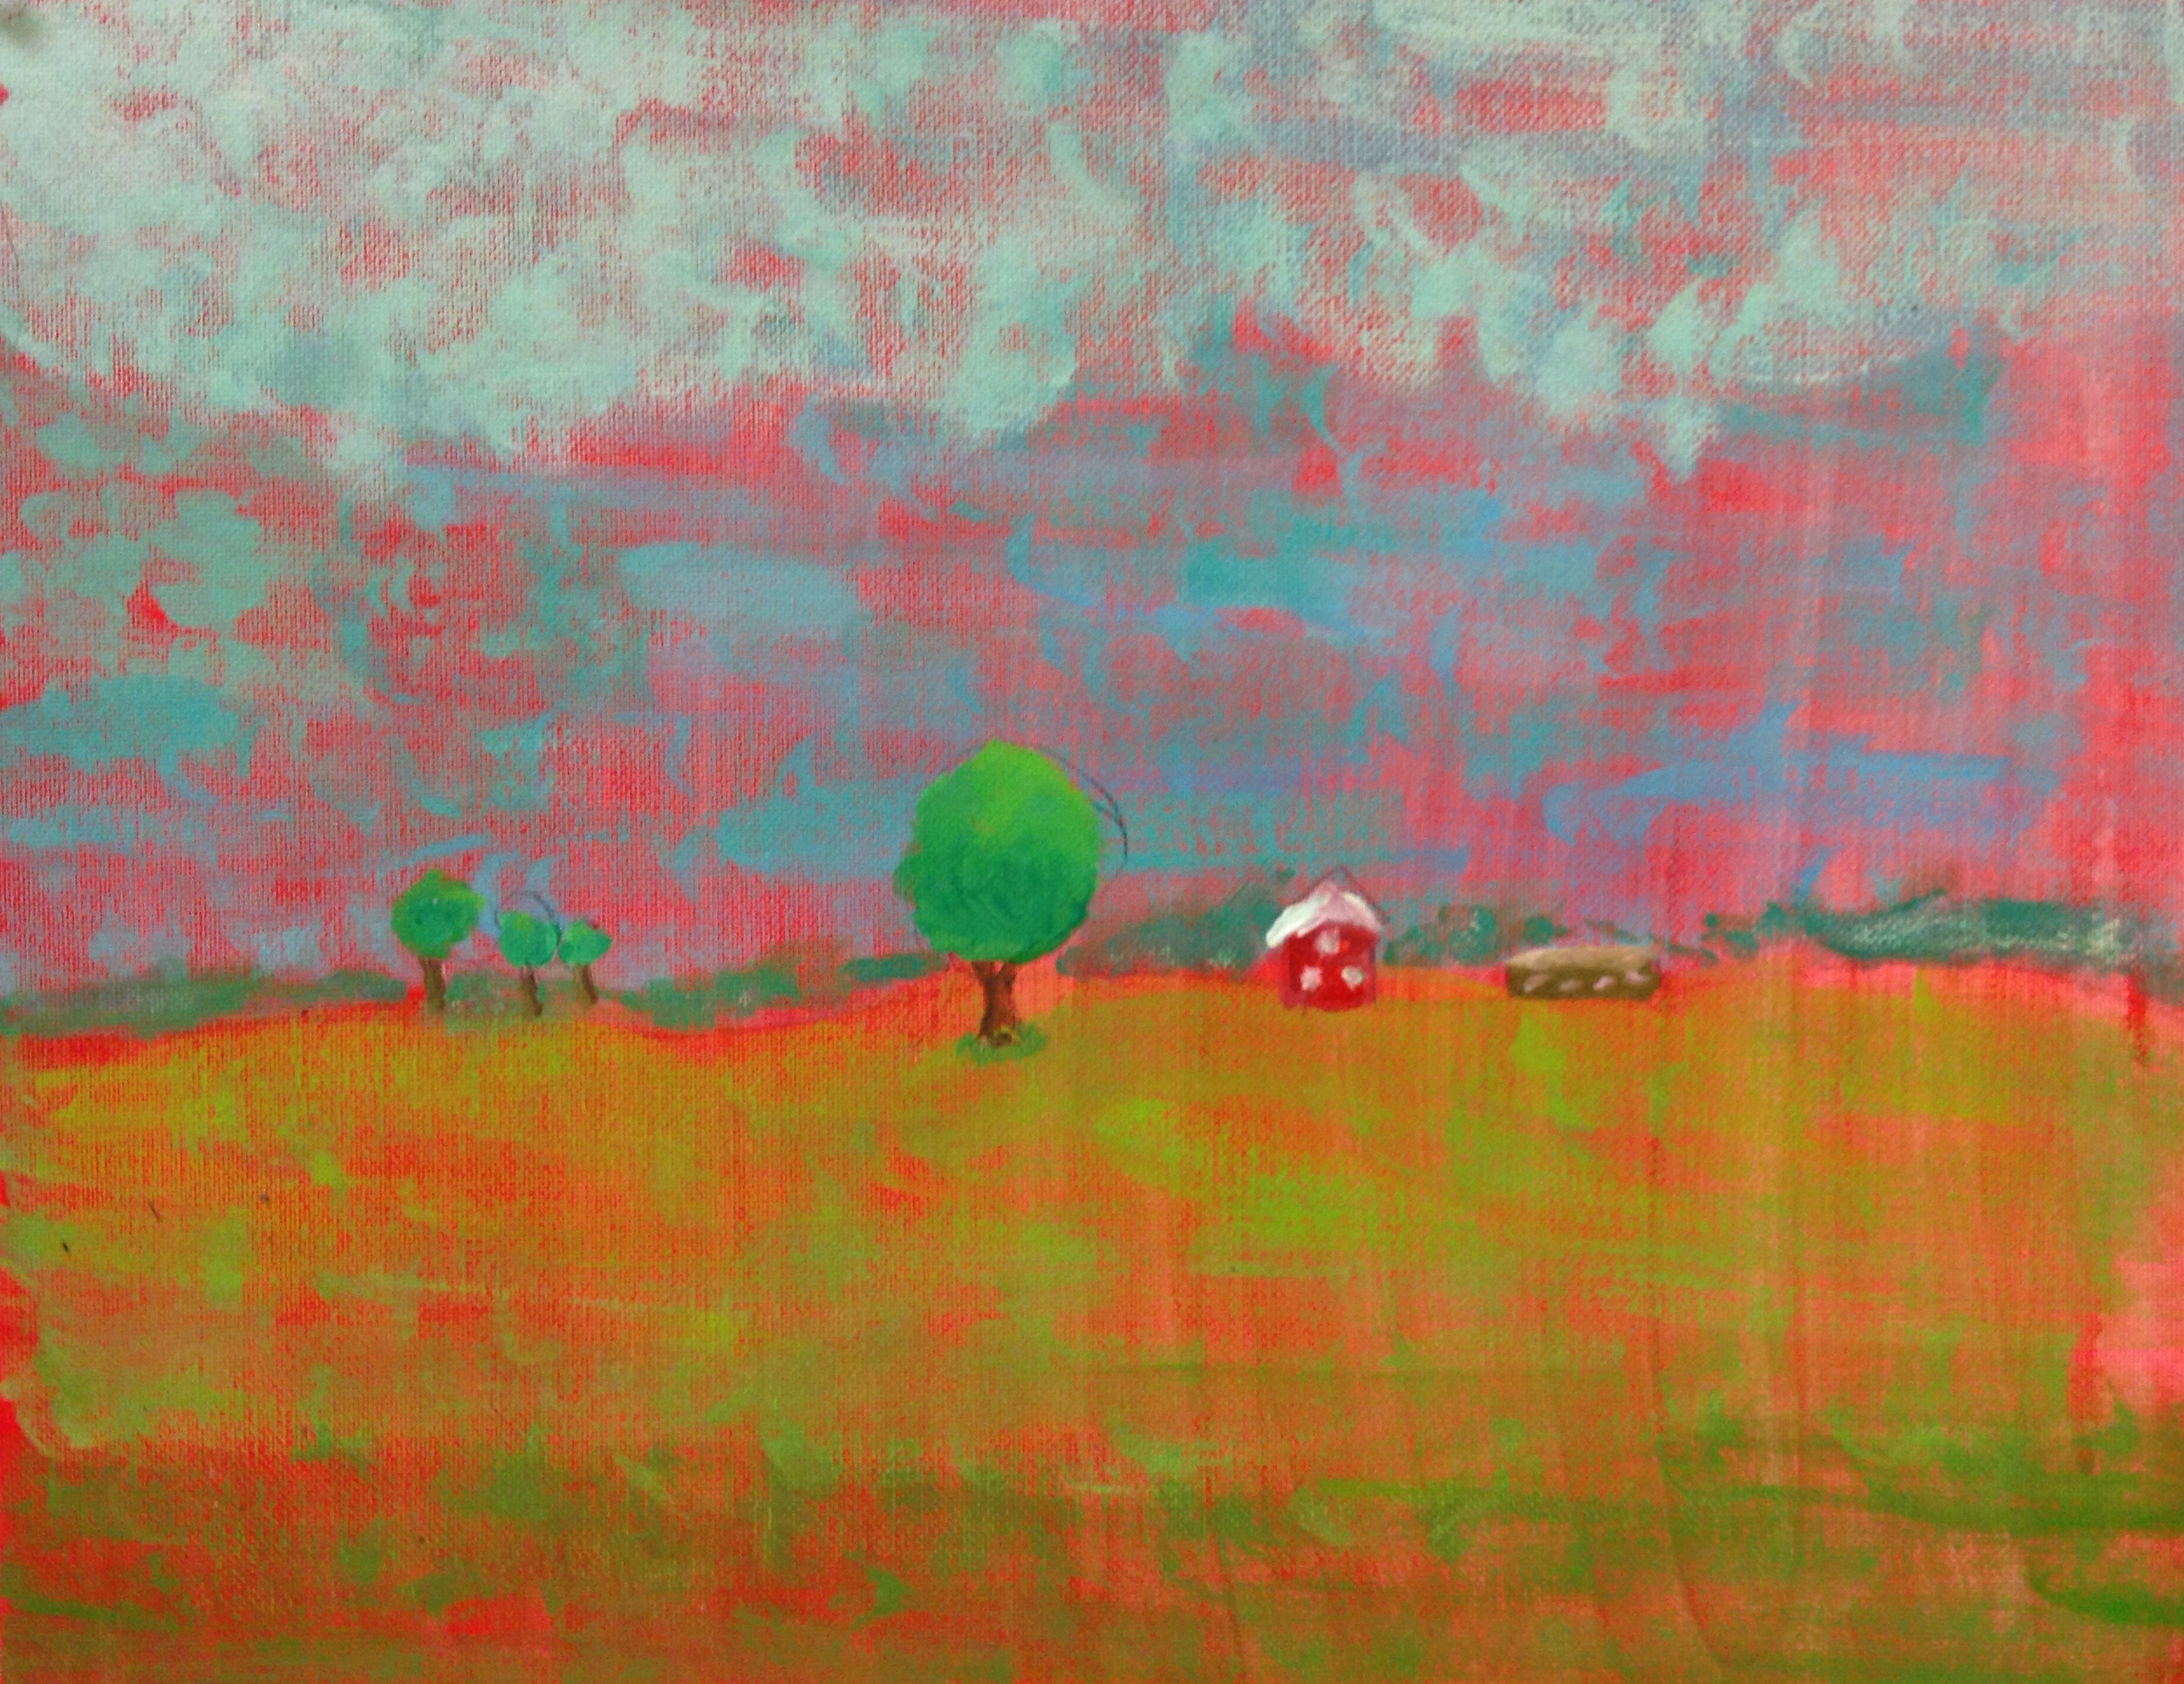
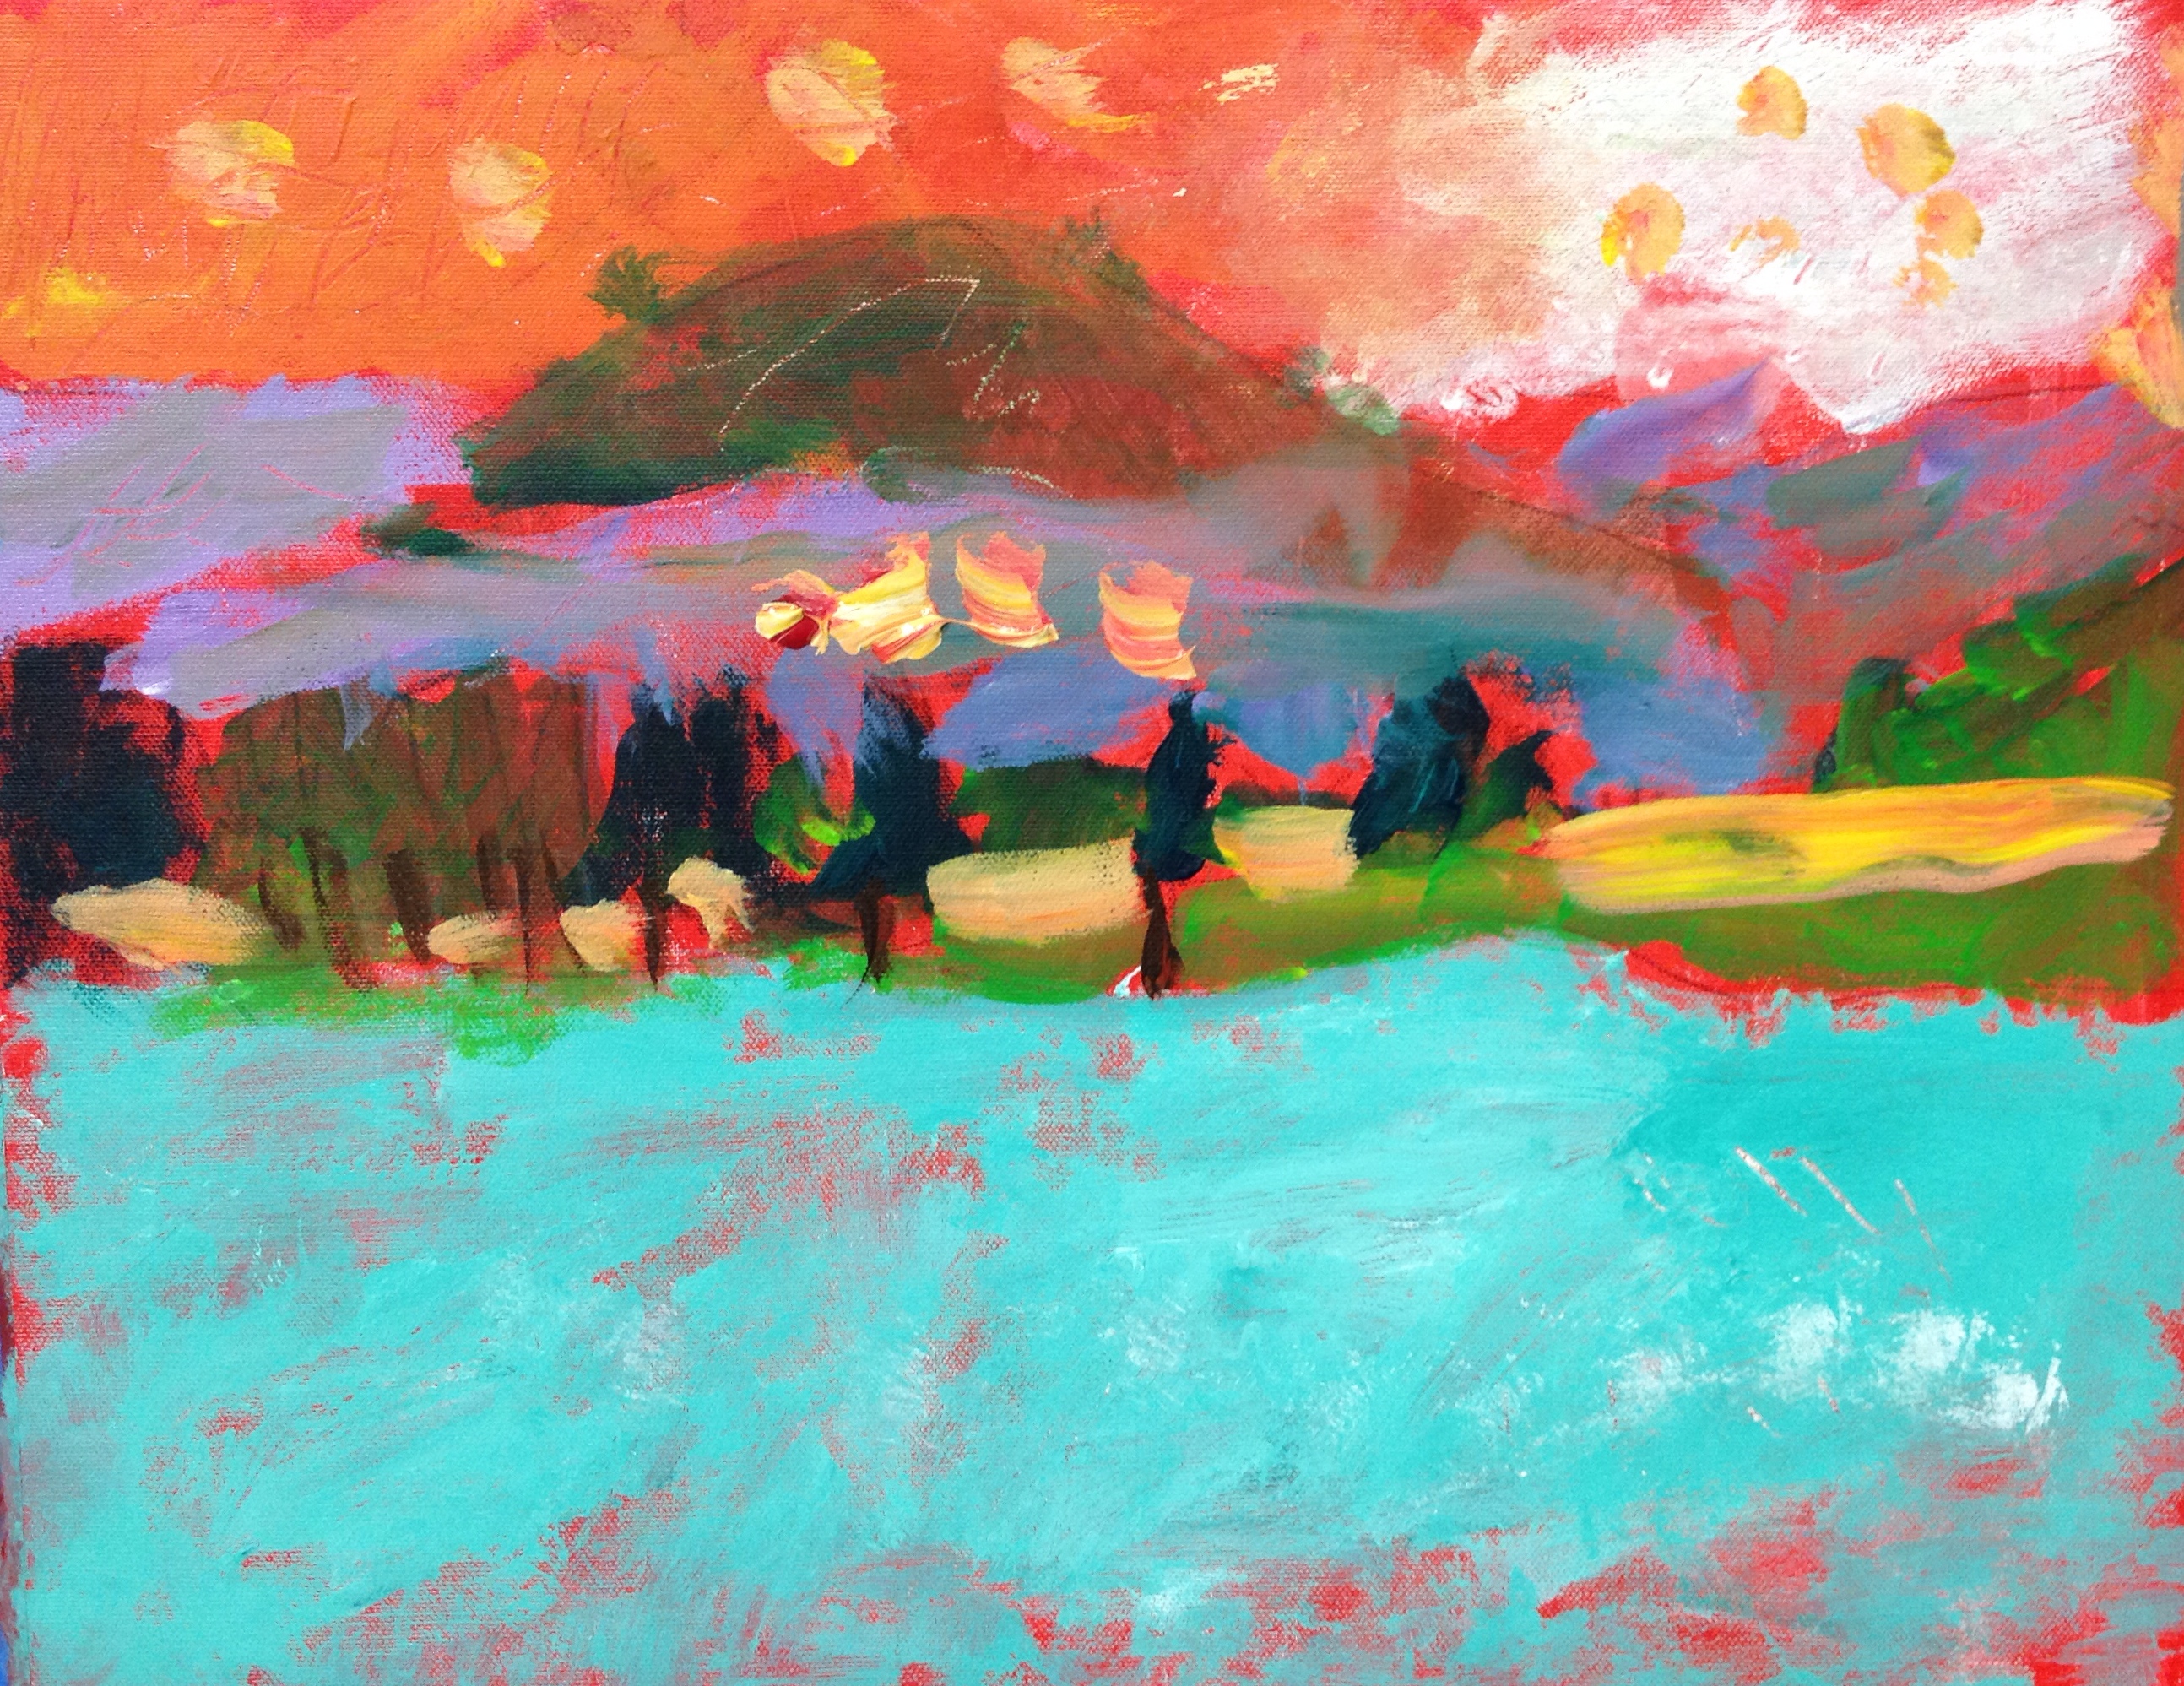
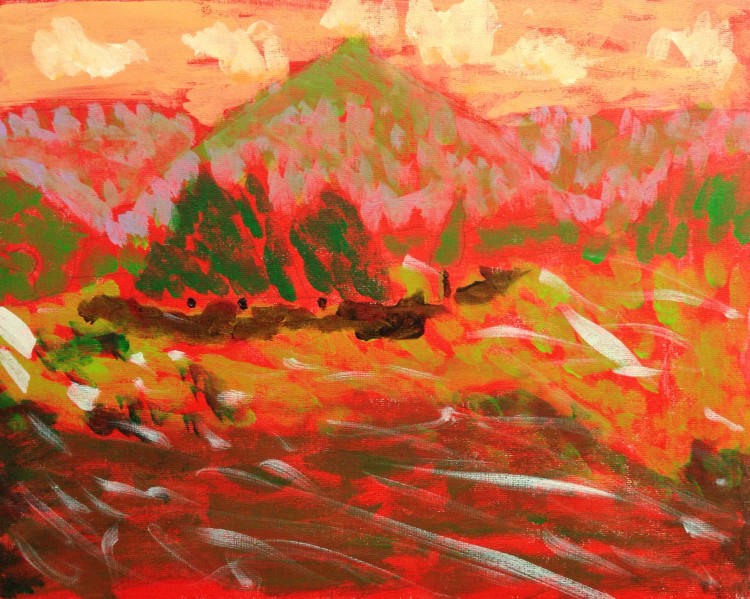
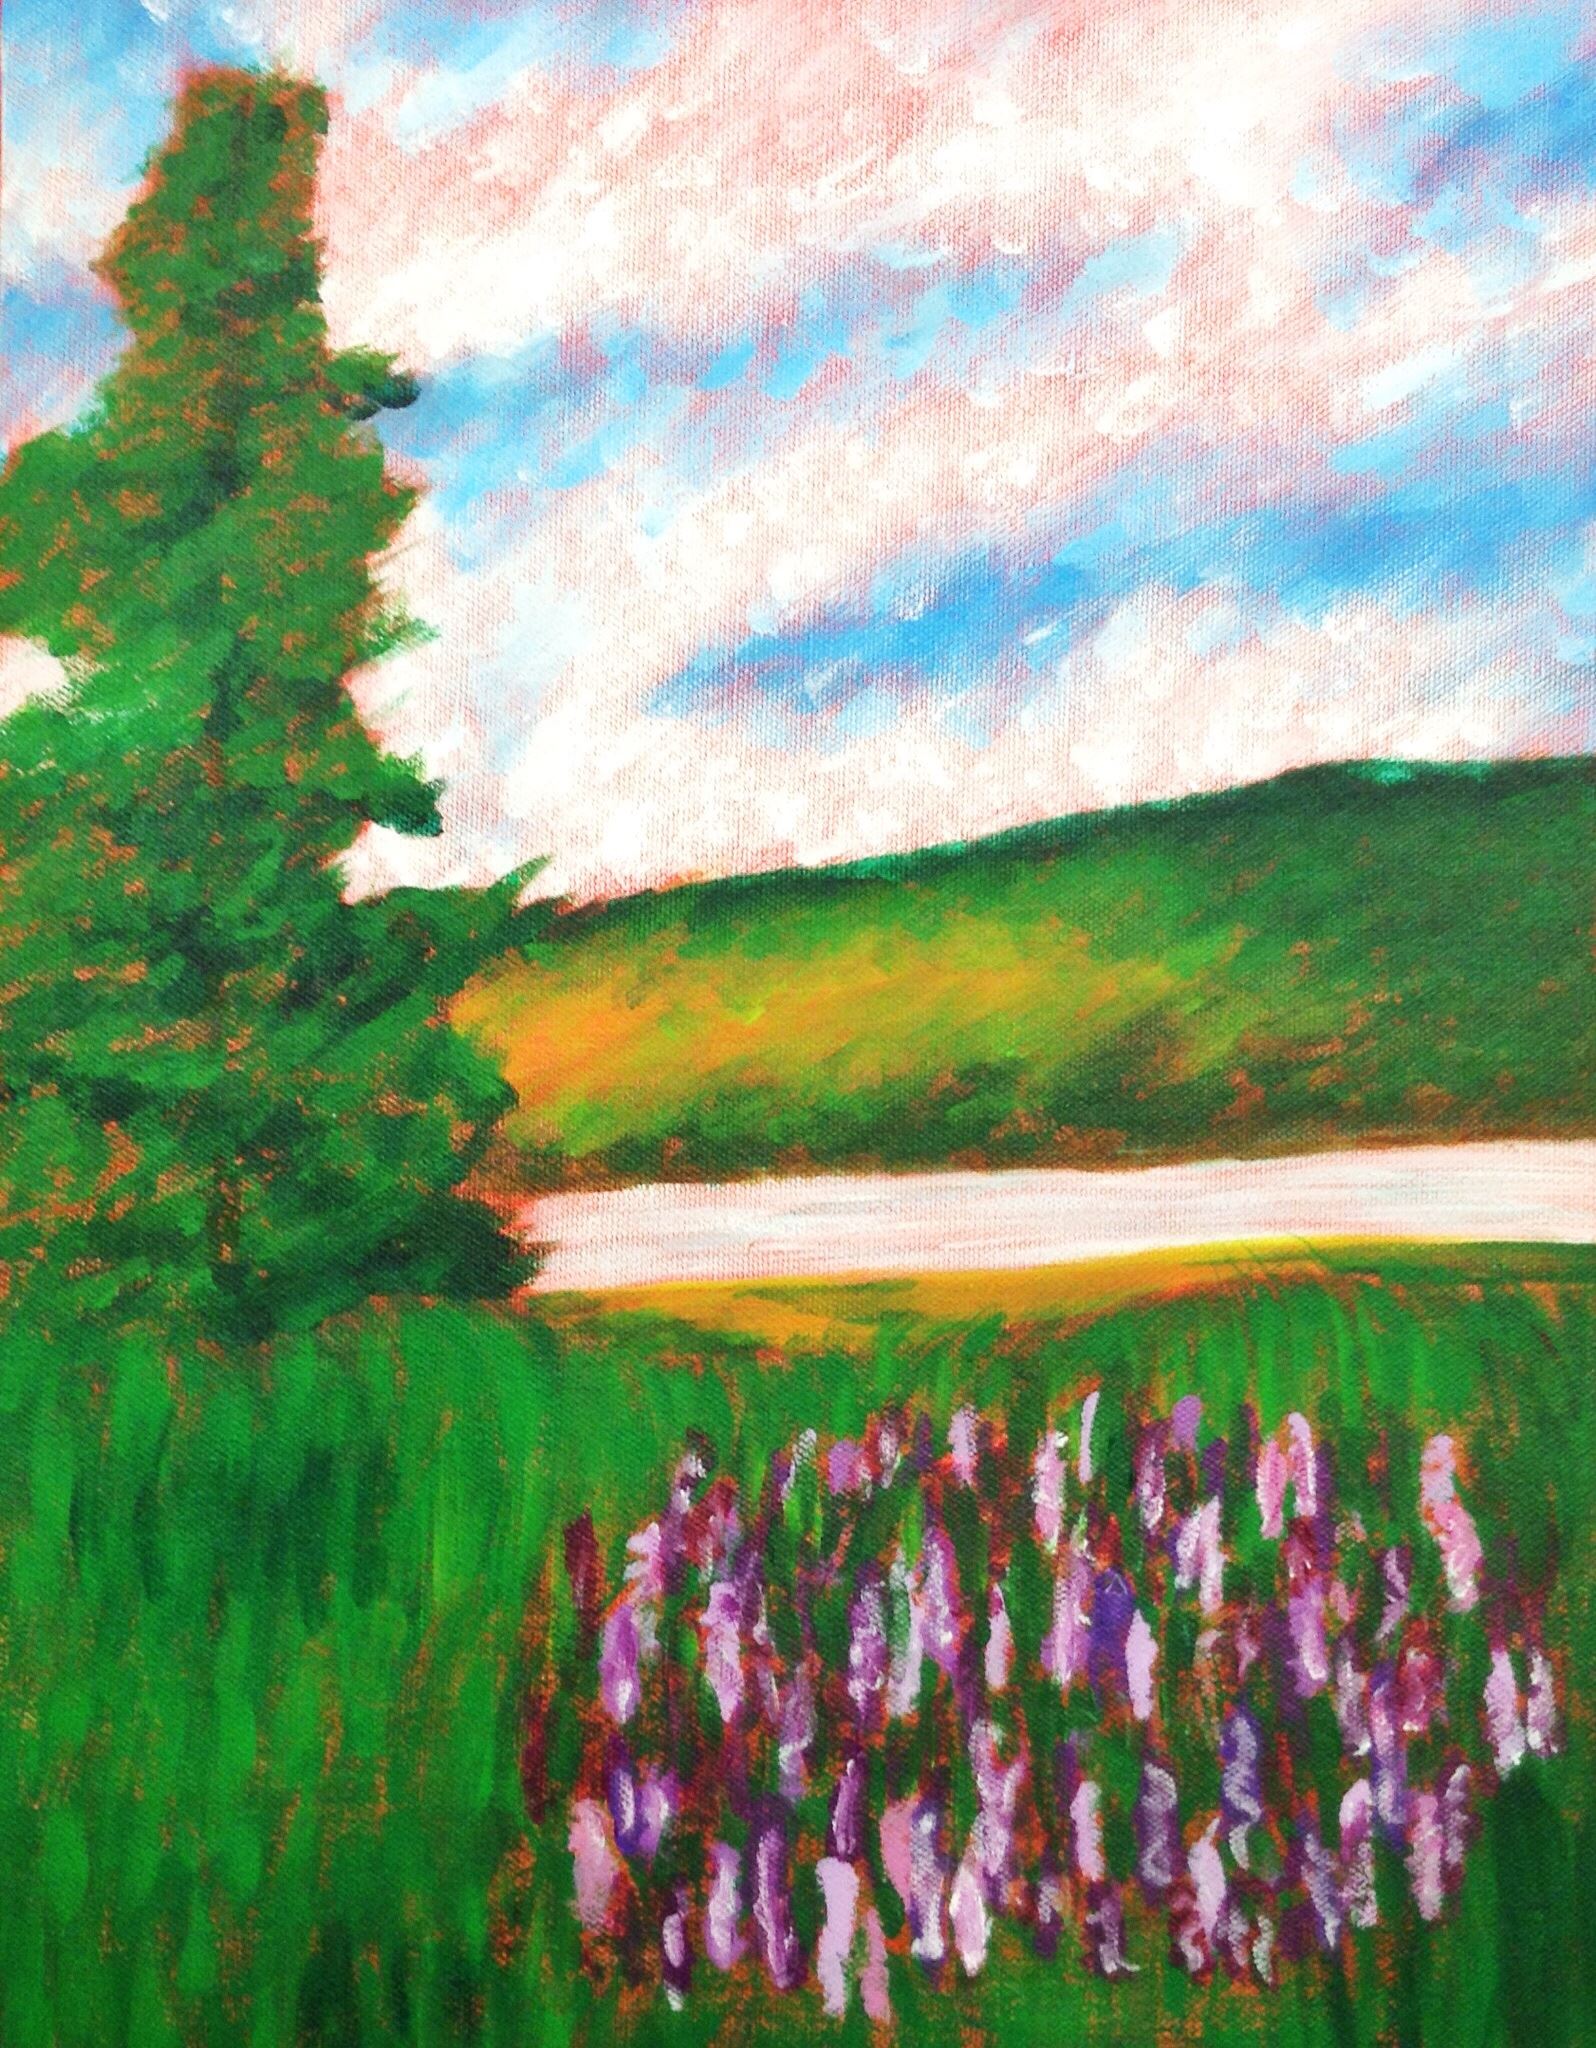
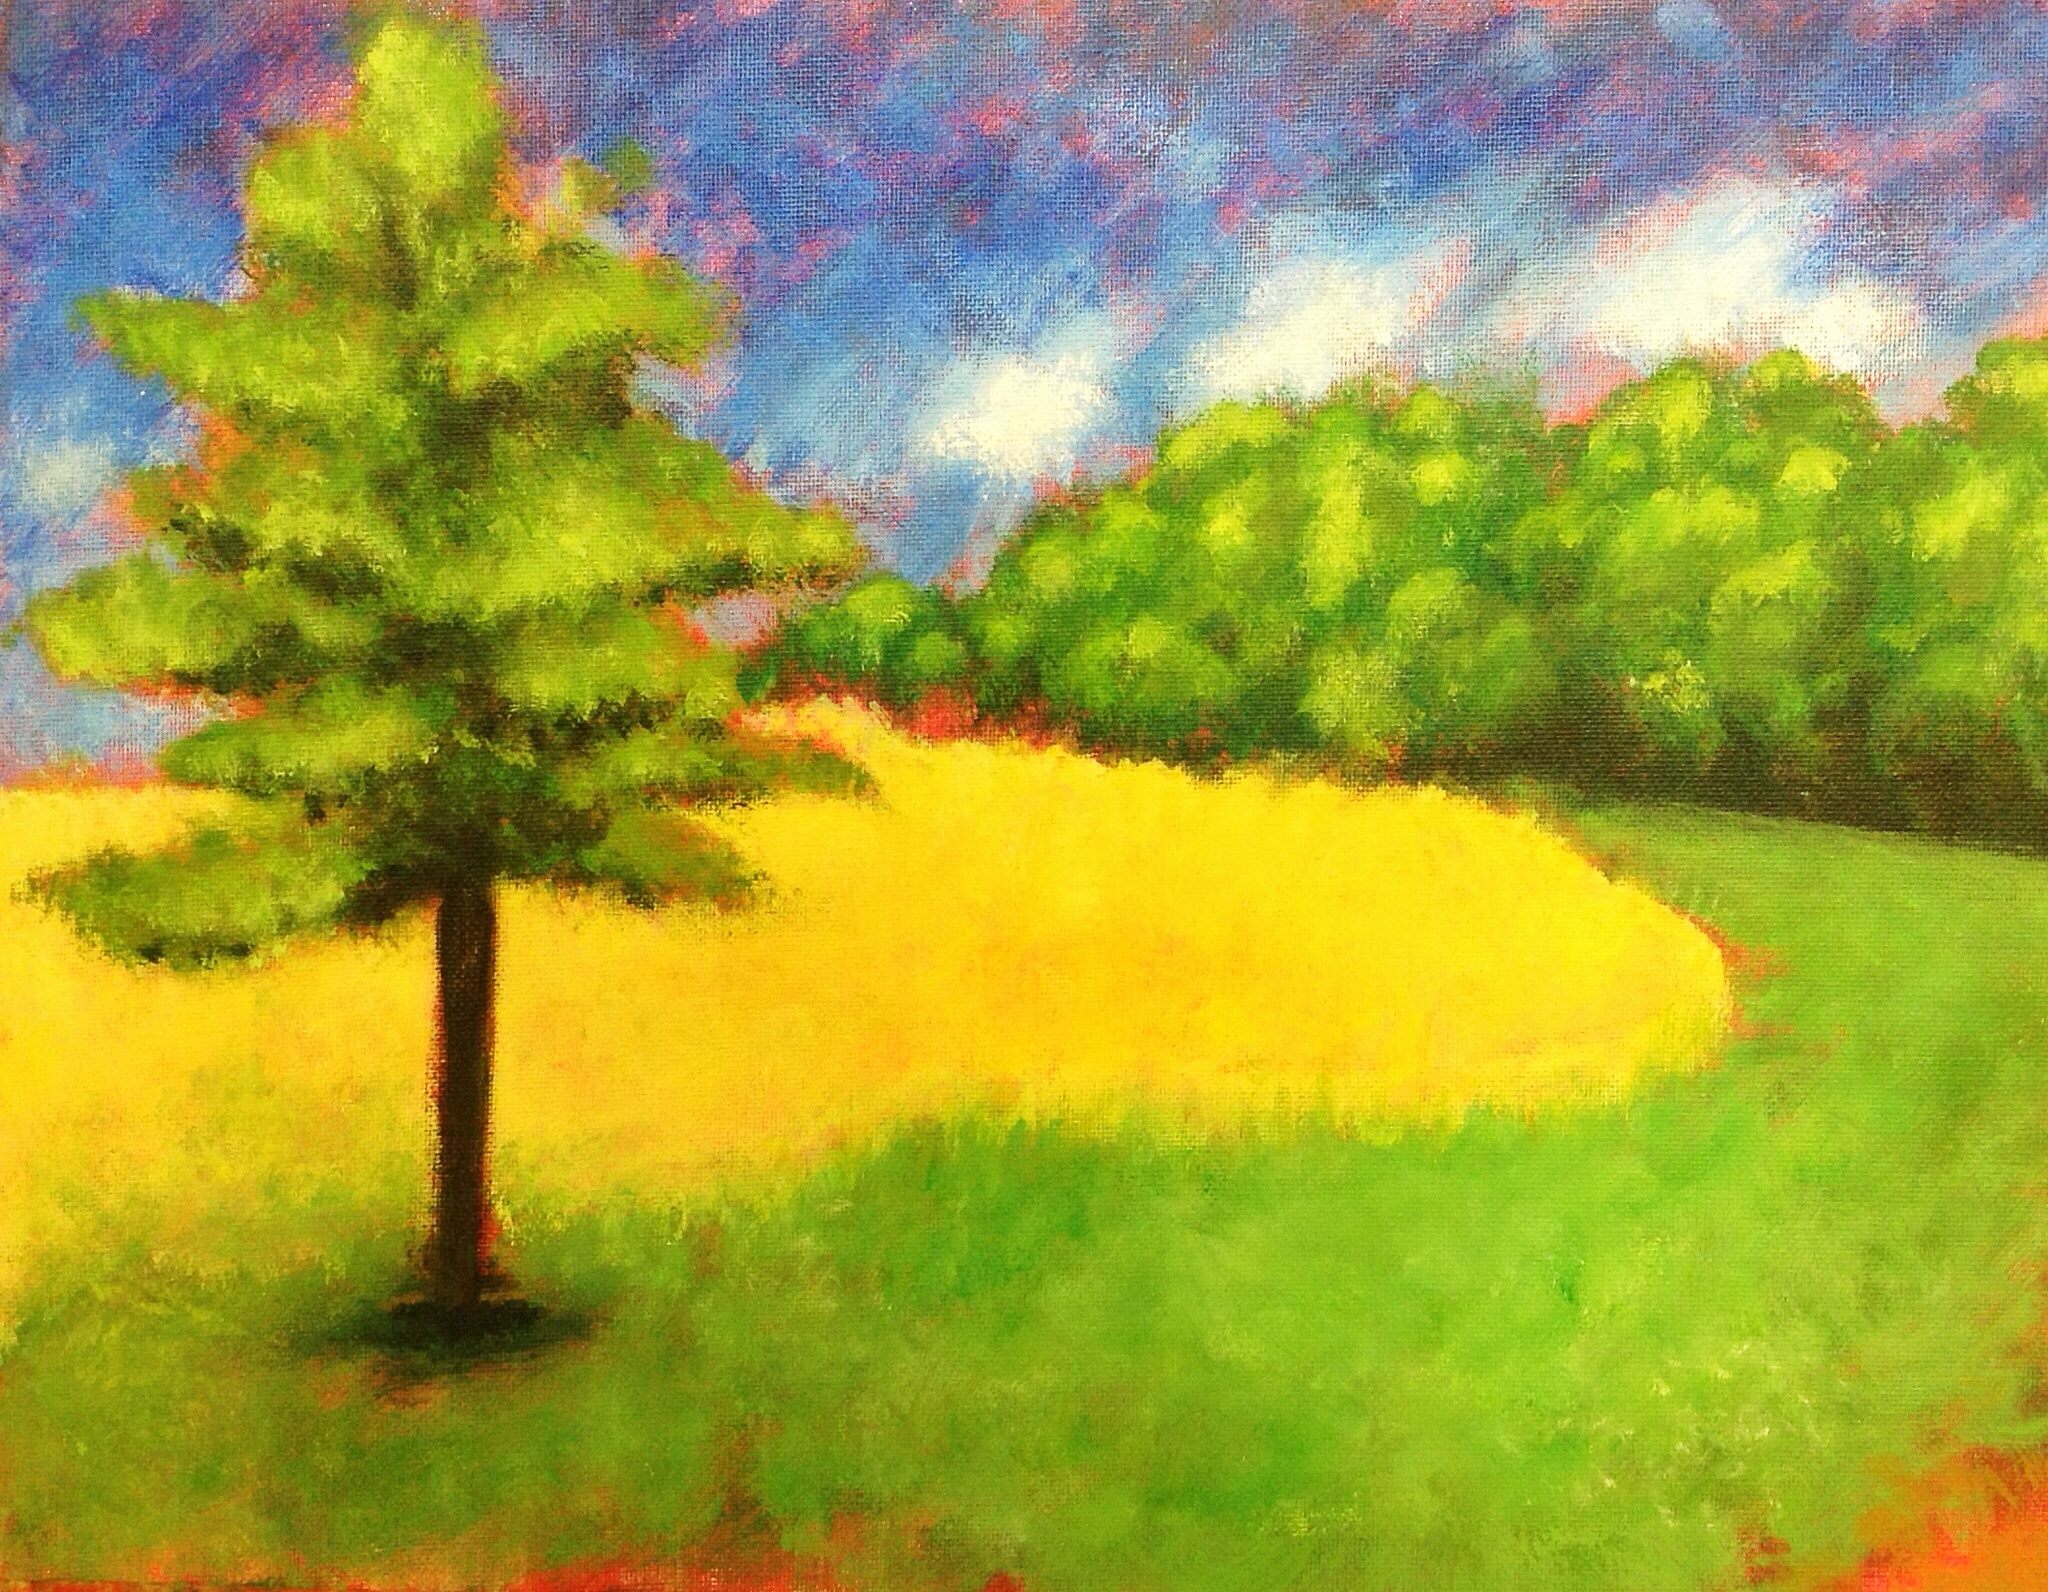
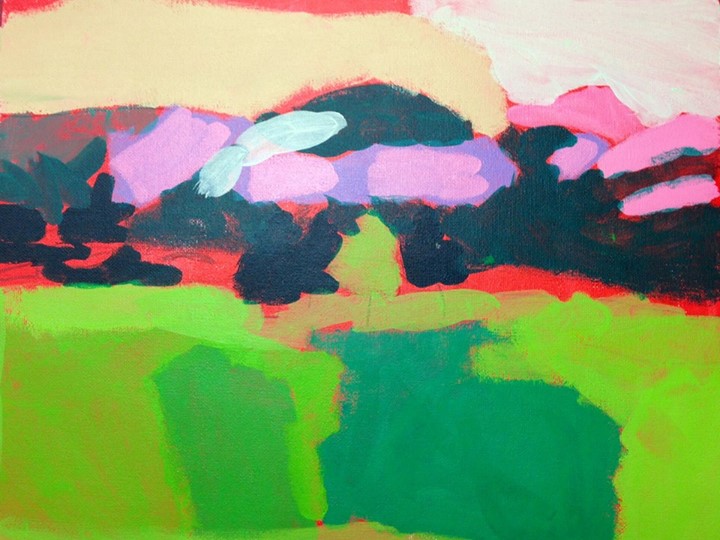
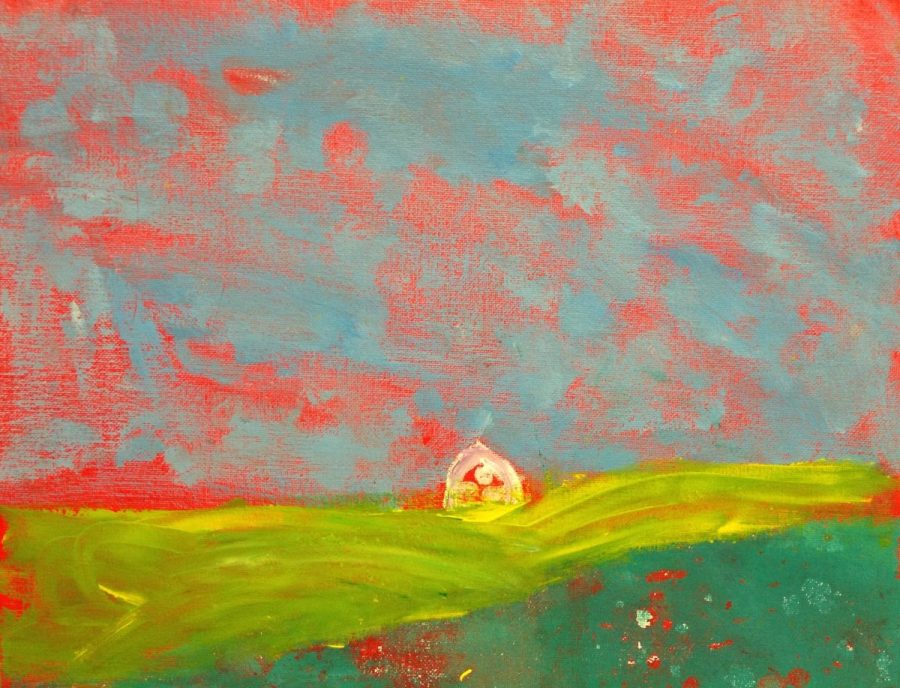
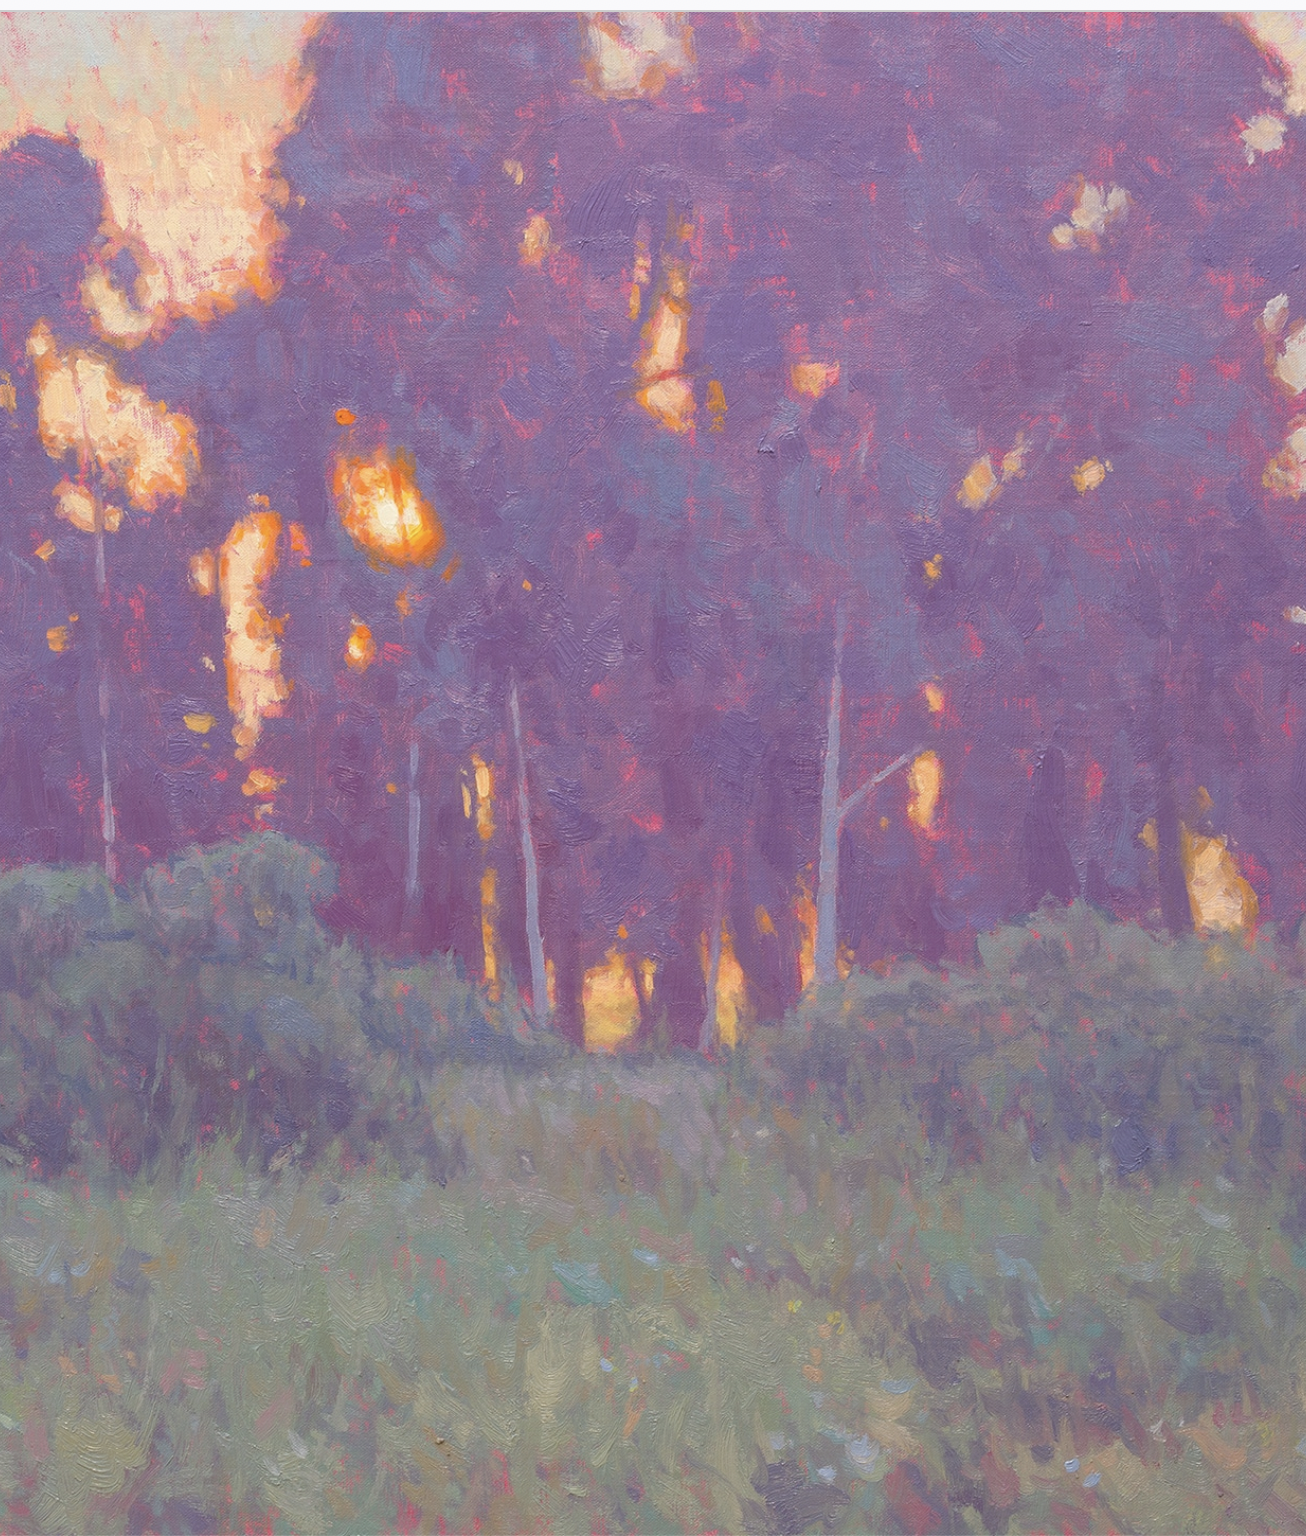
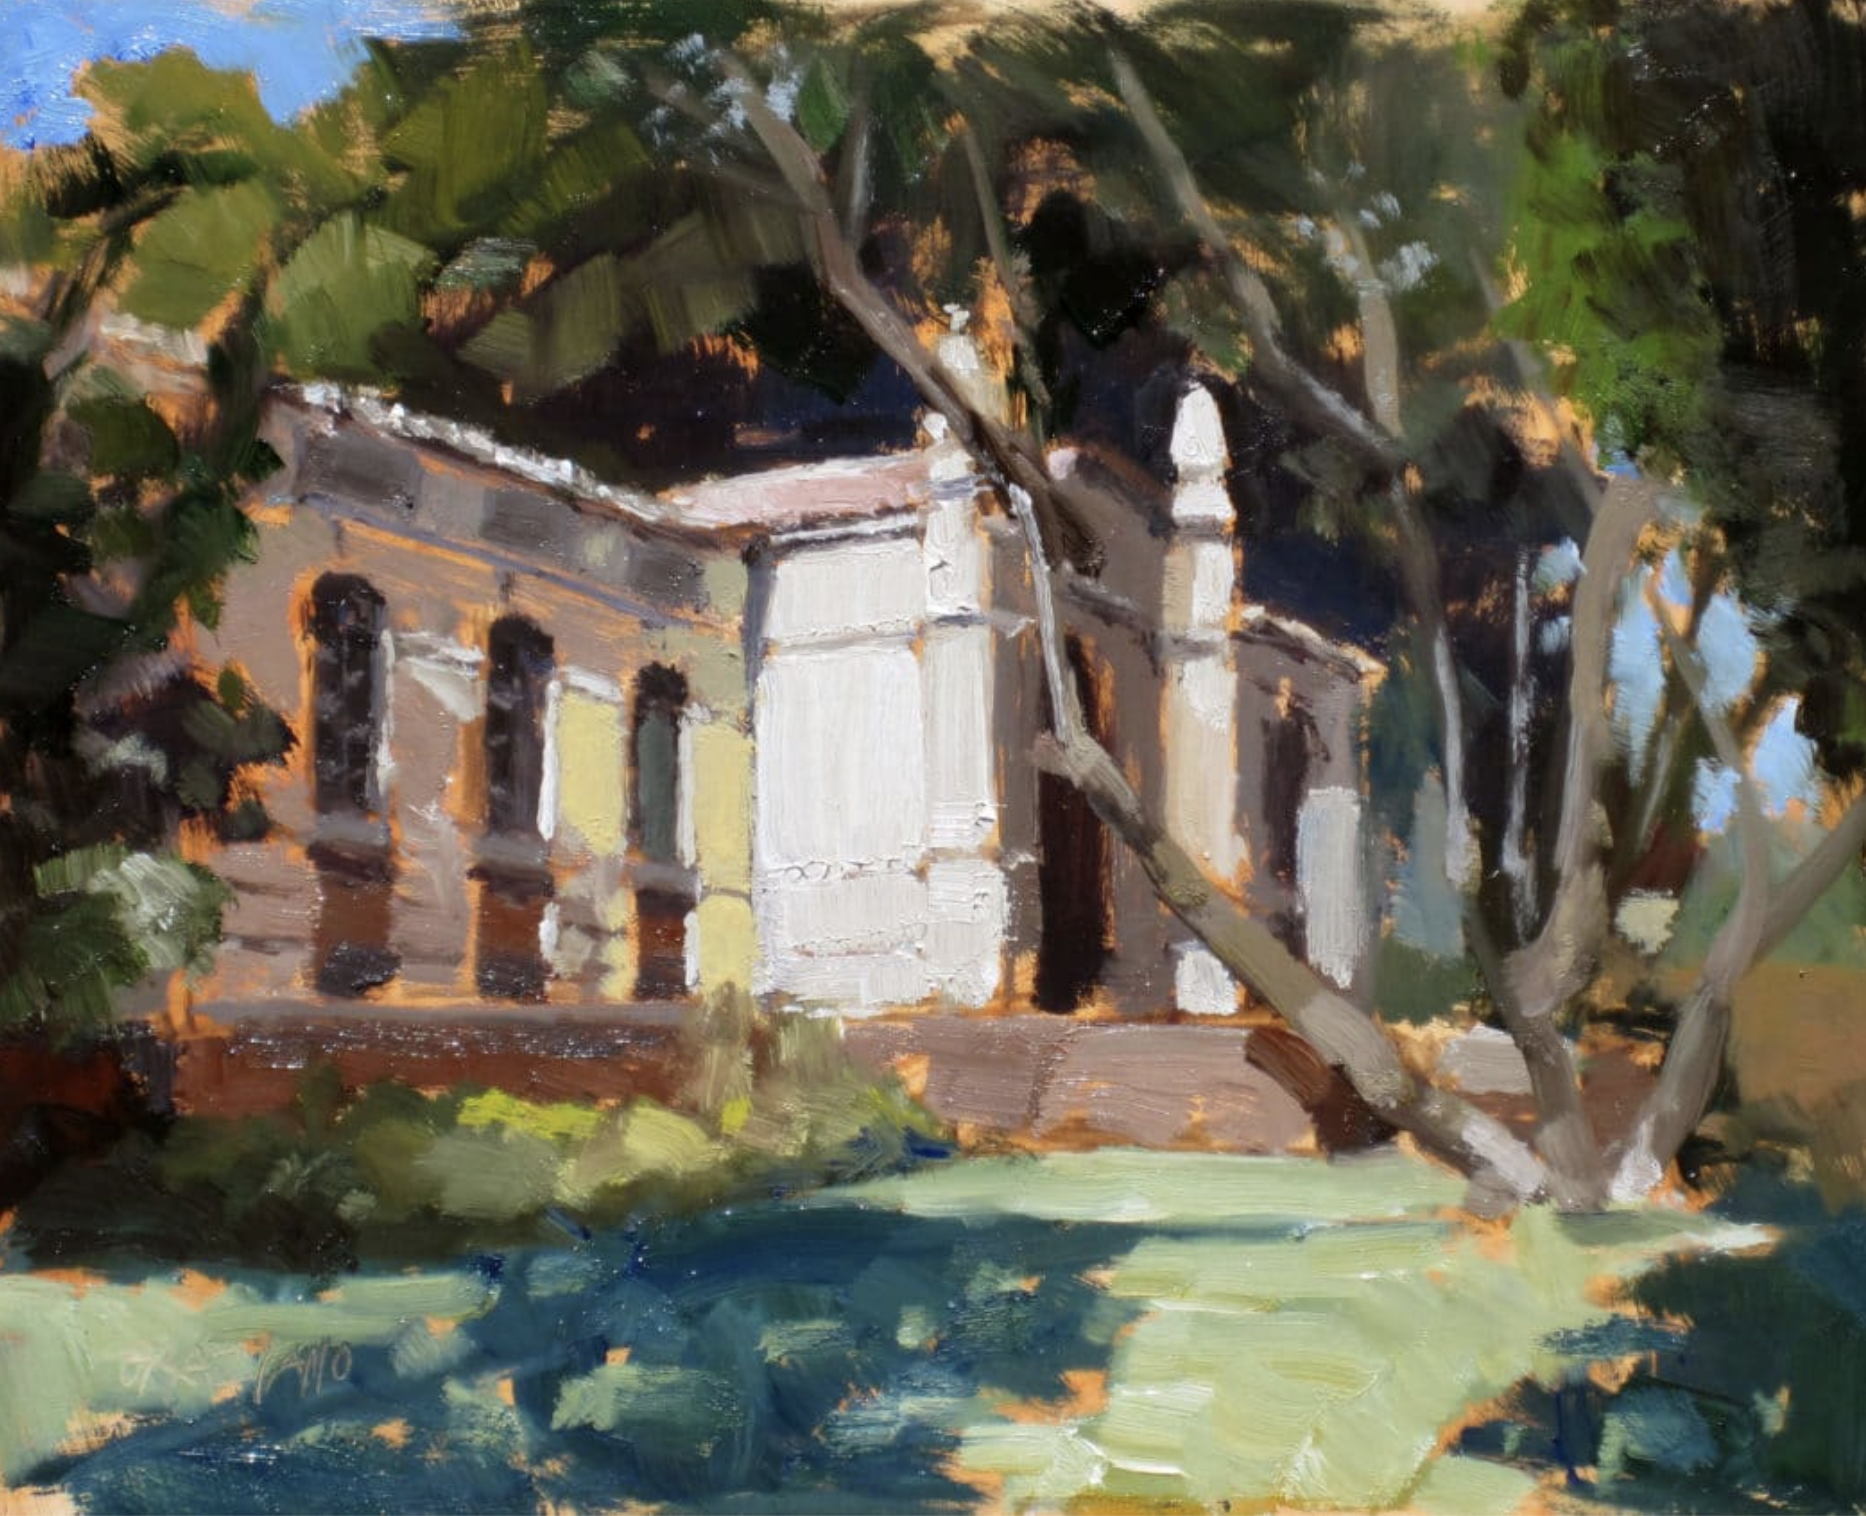
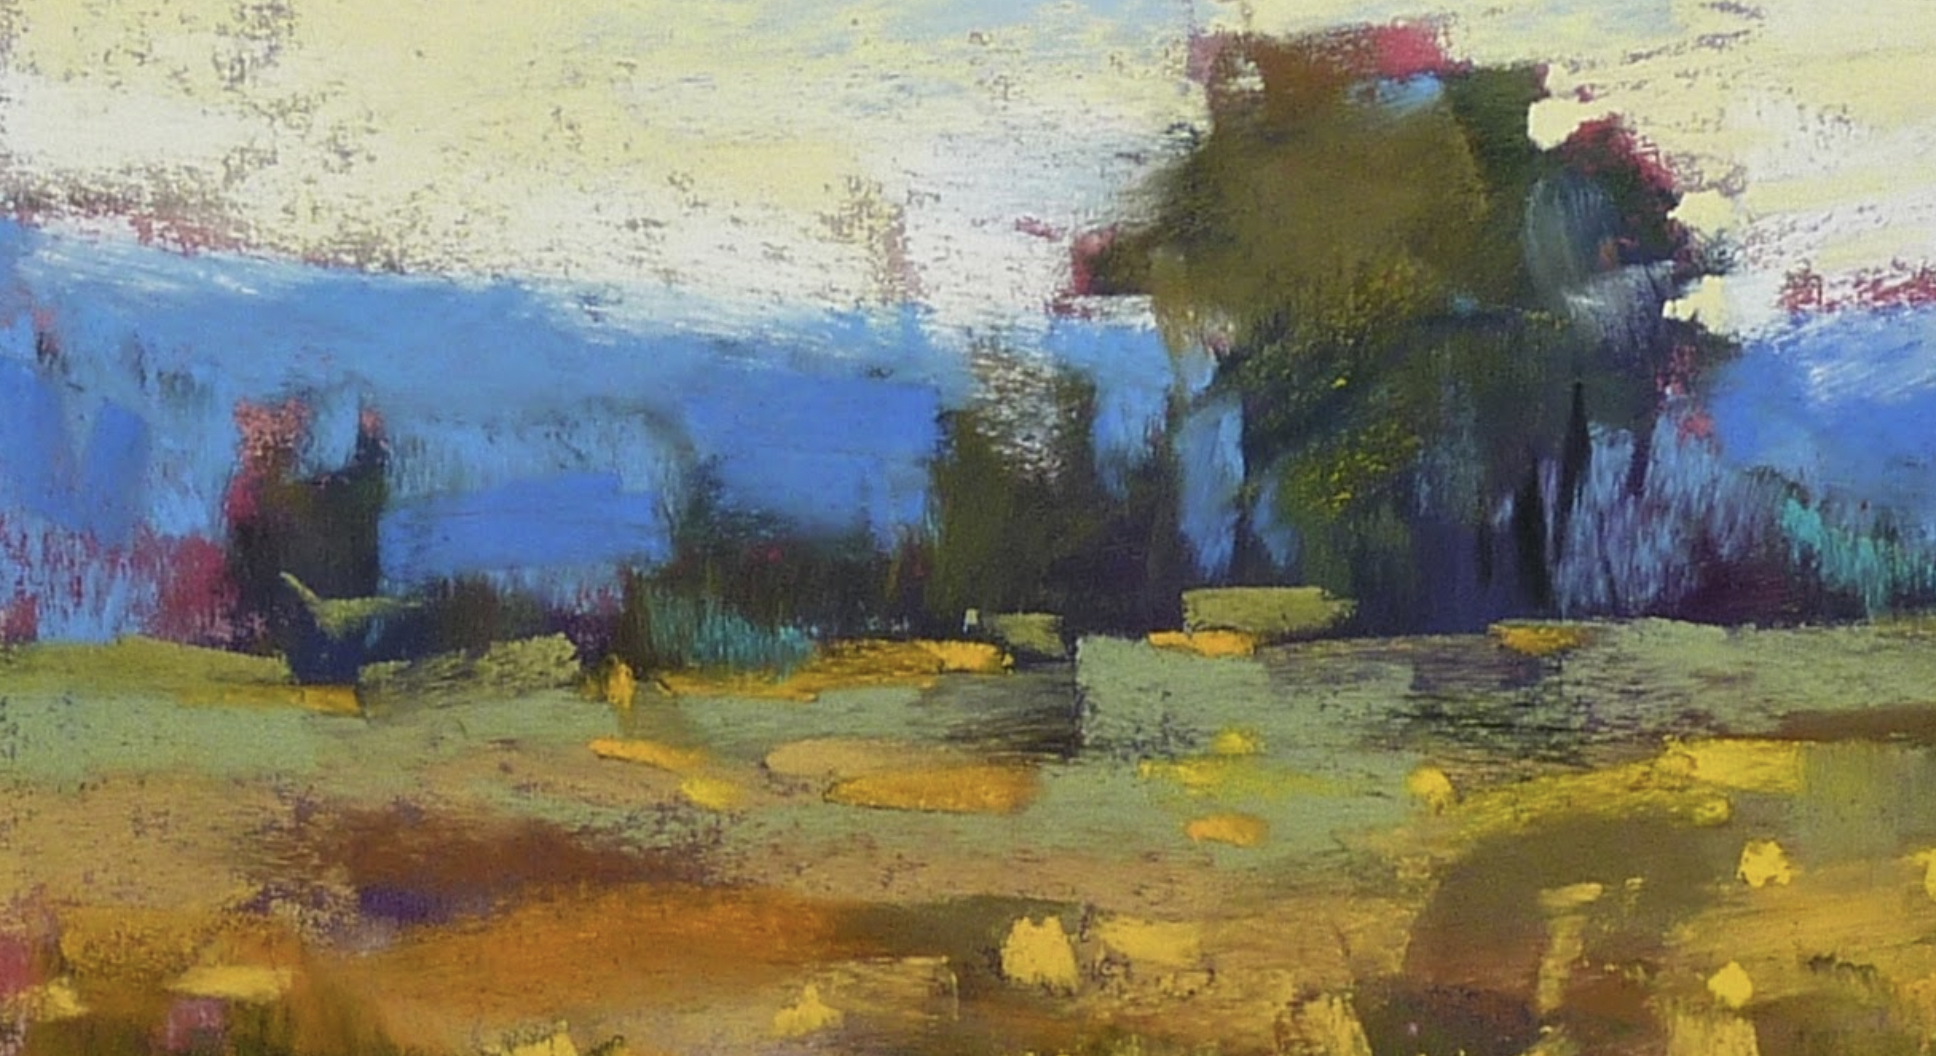
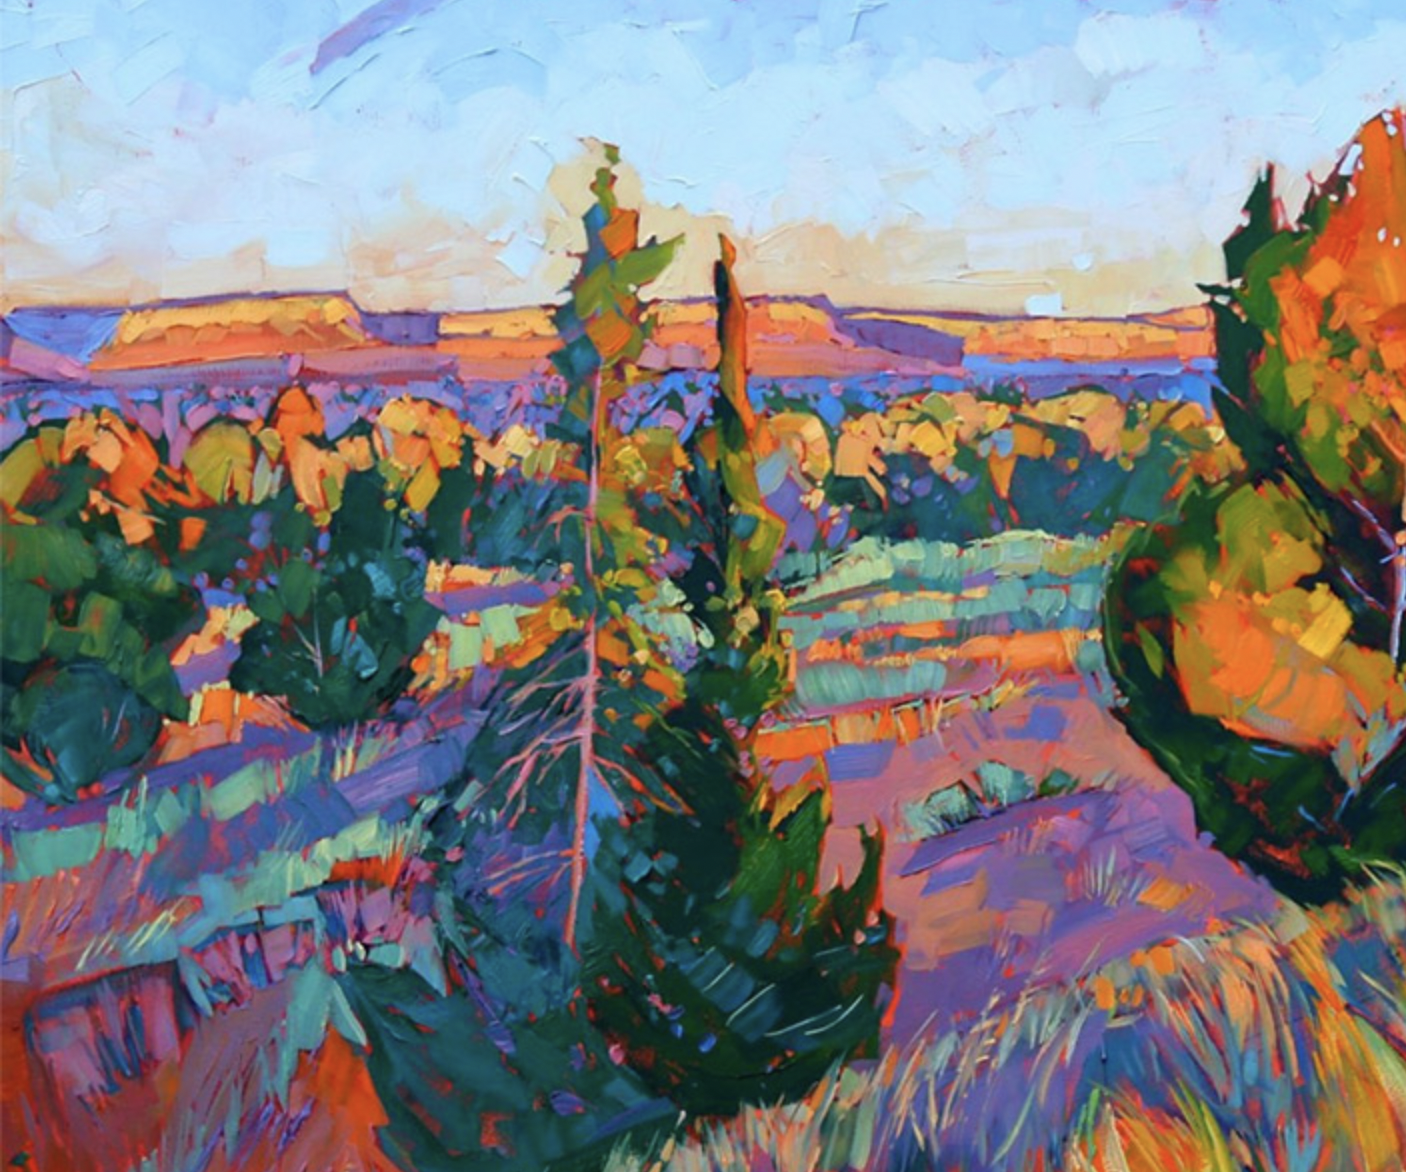
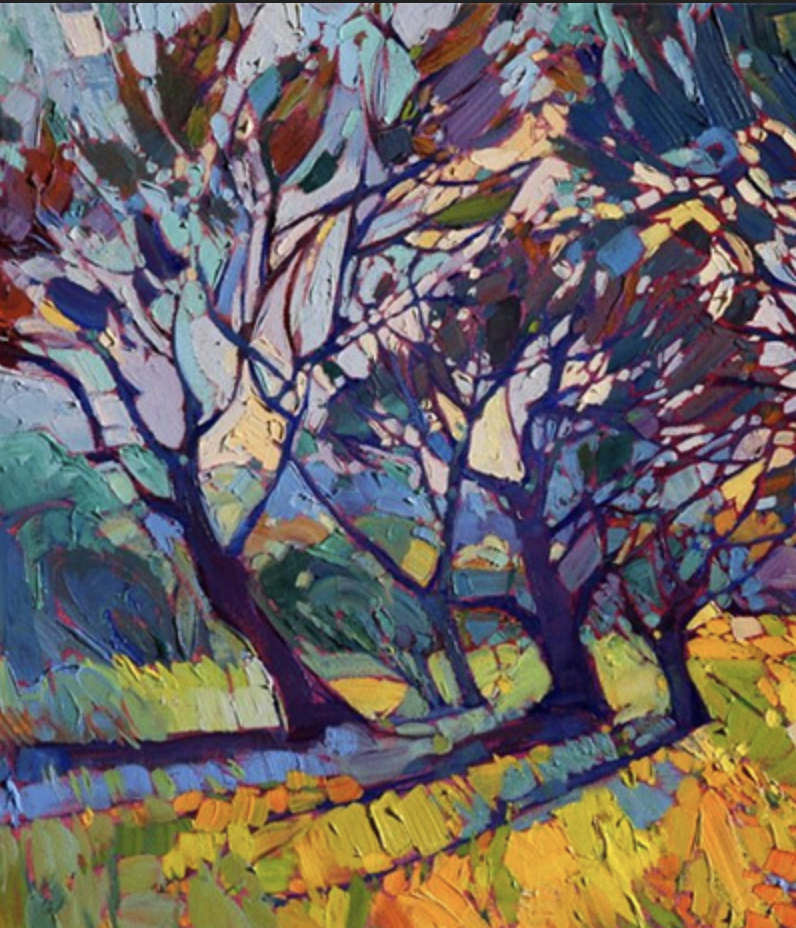
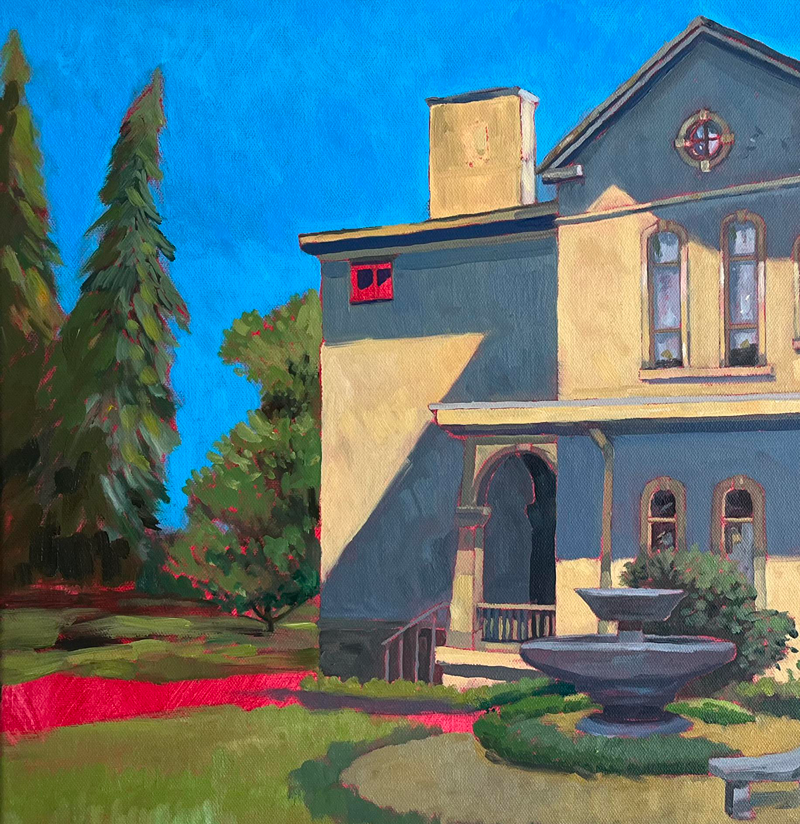
Artist: Amira Hill Grammer
After students settle in to drawing, show some examples of paintings for the upcoming project. Use This Link or tap the icon to the left to open the artists’ blog page by Almira Hill Grammer, showing examples by an artist that uses red underpaintings in almost all of her work.
These paintings have one thing in common: the canvas was not white, it was red. Unlike a background painting, like we did last week, this is not part of the painting. It’s called an underpainting, and is like adding some spice to a dish to change the flavor.
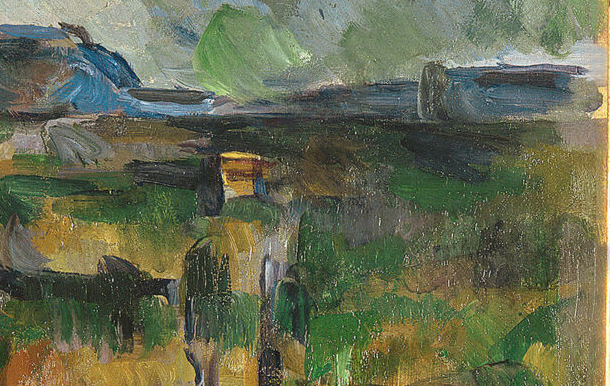
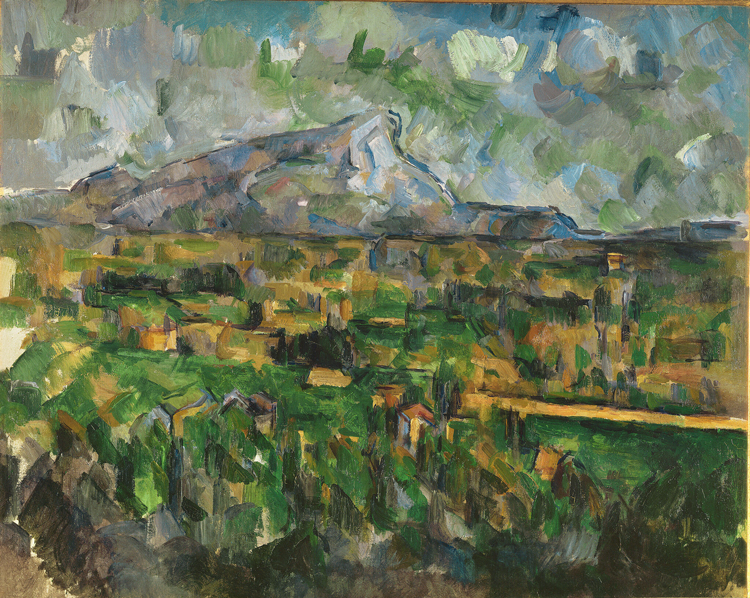
Red Underpainting Examples (tap any image to open viewer)
As you show these paintings, zoom in and talk about a tiny bit of underpainting can show, or a lot of it.
Make sure to point out the unfinished area on the last picture. It’s really streaky, but you don’t see that once the painting is on top. You only see bits of underpaining. It can be very streaky!


CREATIONS - tap here to open
Our Creations lessons are for students who have completed the two years of Foundations and are ready to begin using all that they have learned to create new work. These more challenging versions of the same concepts and techniques are easily taught along-side students in the Foundations course. This allows for excellent review, and is encouraging for students to see progress from each viewpoint.
Use the Student Instructions printout below to distribute to your Creations students. Tap the image to open the PDF in a new window.
Painting with bright underpainted color
Overview: Students will make a painting on their own from subject matter and reference they have found and that will have a bright warm underpainting. If anyone is already working on a project they began last week, they can either continue that or begin the underpainting project.
Use a canvas board, a sheet of taped canvas, or a stretched canvas if available.
For your advanced students, have them warm up for 5-10 minutes with their choice of the following:
1. An accurate quick sketch of the simple modern house from the building references, with no details or texture, so they can think about the lines that make up artist’s perspective. Don’t worry over it, just try a couple of quick sketches.
2. A large and fast charcoal sketch of another person in the room or piece of furniture.
Then hand out the instructions and encourage them to move from the warmup to pondering their subject for a two-week underpainting project.
These students will be doing an advanced project, but do not let them think they can skip any of the steps for setting up, sketching, or guide-lines. This is how professional artists work. We call them foundations because we always use them. Note the following important aspects about this project.
- Underpainting color – They may use red again, or another bright warm color for the underpainting, such as hot magenta or orange. Do not use yellow without mixing in a small amount of red to be a yellow-orange. Remind them on the underpainting to not use white, but water for lightening. This makes a glaze, which is much more intense than a tint with white in it. This allows the color to affect the final painting more.
- Subject – They can do a landscape, a simple still life, or a simple photo of an animal. Simple is important since there are only two weeks. If you have more days you can go for more complexity.
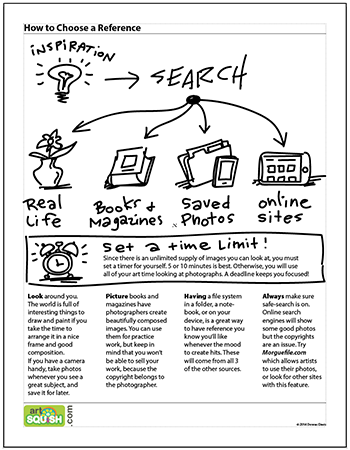
- Reference – Have them search for their own reference in your library or online (Safe-search on! – We always search for students and make sure the results are safe before allowing them to view a screen). Only 5 – 10 minutes for searching maximum, and you might want to set a timer. Be strict about this, or students will spend the entire time viewing photos.
Student Instructions
These are on the PDF printout below for you to distribute to your advanced students.
Step 1. (15 minutes) UNDERPAINTING • Set up for painting in acrylic, and cover your canvas with a thin coat of a bright warm color of your choosing for an underpainting (not a background). Brilliant colors work best, so colors should be mixed with water instead of white, for a glaze effect. Landscapes look good with red. Orange and Pink can also be used. Keep the paint spread out so it will dry quickly. Set aside to dry.
Step 2. (5 min) REFERENCE • Choose a reference photo. The PDF is a good review for how to do this efficiently. As you look, think about the mood you want to convey in your work. Will it be full of bright color or will it be dark? Will the colors be contrasting or analagous?
Step 3. (15) PRACTICE & COMPOSE • Use your sketchbook to do several practice drawings. Some drawingsShould be large and sketchy, and you should do at least two or three very small thumbnail sketches to figure out your composition.
Step 4. (10) GUIDELINES • Draw some simple guidelines using your canvas pencil on the underpainting. Keep your focus on the big shapes and save the details for painting.
Step 5. PAINT • Start with the part of your subject that is the furthest away from you, such as the sky, or the wall. For each area that you paint, paint dark colors first, and continue with lighter and lighter colors. Save the lightest colors for the very end of your painting when you can see the entire effect and make good decisions for adding finishing touches.
Remember that you will also have next week to work on this painting.
Tap images to open Creations Student Instructions and Reference Materials in new windows

LEARNING TARGETS
Students know how to set up a canvas for painting.
M A T E R I A L S
- Canvas Pad
- Drawing Board
- Blue Painters Tape
- Sharpie marker
- Canvas pencil (colored pencil)
2.1 SET UP
1. Drawing board, one sheet of canvas from pad, painters tape
2. Tear out sheet of canvas. Hold a loose corner (not the attached corners), and pull steadily at a 45 degree angle.
3. Place canvas in center in Bathtub (horizontal) position, and then move it toward you and to one side, but not to the edges. See the photo.
4. Tape 2 edges of canvas to secure (pinch tape at edge with both hands and then tear apart to tear off tape)
NOTE: Make sure to get the tape centered all along the edge of the canvas or it won’t hold. Press well to secure.
5. Write your name on the tape with a sharpie marker (pass these around to share)

Canvas Pad
This is a pad of real canvas with gesso. Don’t use “canvas paper”, which is just paper with a textured surface.

Angle
Tear off sheets at a 45 degree angle, pulling from the outside corner.

Gesso
The back is not primed with gesso, and should be recognizable by specks of color, and a slightly off-white color that is not as shiny. Never try to paint on the back!

Measure
Use a long piece of tape and make sure it’s half on the canvas and half on the board.

Pinch
Pinch with both hands close together to tear the painter’s tape.

Done
Finished set up with 2 pieces of tape pressed securely.

Pencil
This is a canvas pencil. A colored pencil in dark brown/gray to mimic graphite.
LEARNING TARGETS
Students know how to set up for acrylic painting.
M A T E R I A L S
- 14″ x 17″ Sketch Paper
- Canvas Pad
- Art Boards
- Water containers
- Brushes
- Acrylic Paint
- Smocks
- Paper Towels
Paint pigment list:
- Napthol or Pyrrol Red
3.1 SETUP

LEARNING TARGETS
Students know how to create a glaze for a bright underpainting.
M A T E R I A L S
- Canvas Pad
- Art Boards
- Water containers
- Brushes
- Acrylic Paint
- Smocks
- Paper Towels
Paint pigment list:
- Napthol or Pyrrol Red
4.1 PAINT
Follow the steps below:
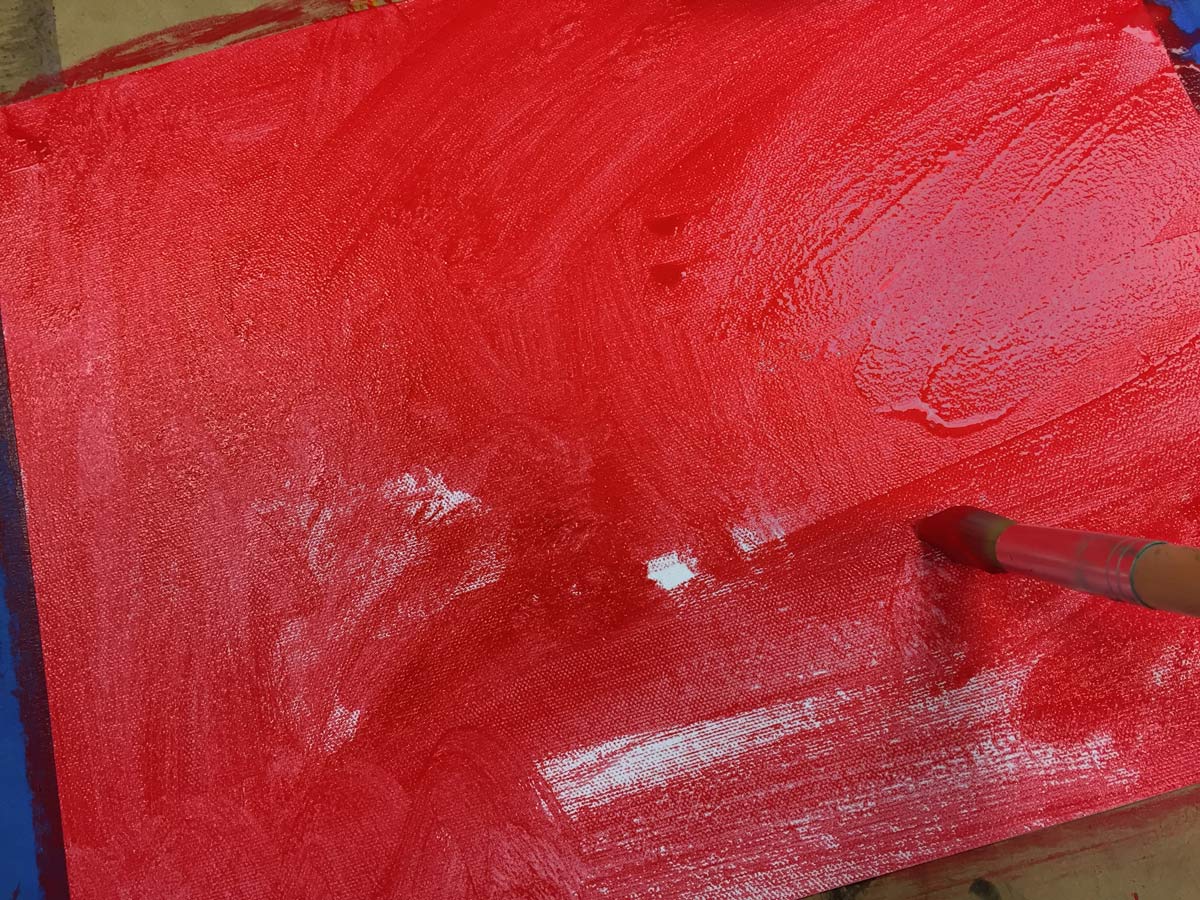
- Squeeze out 5 chocolate chip sized bits of paint in a dice pattern, using the bright red pigment right onto the canvas sheet (already taped to board)
- Dip large brush into water, and spread paint all over surface, covering completely
- Brush should be bent and paint should be watered down just enough to make it cover well
- Paint should be spread thin enough to dry quickly. No globs or ridges.
- Set boards aside (against wall) to dry
- Clean up enough to begin drawing
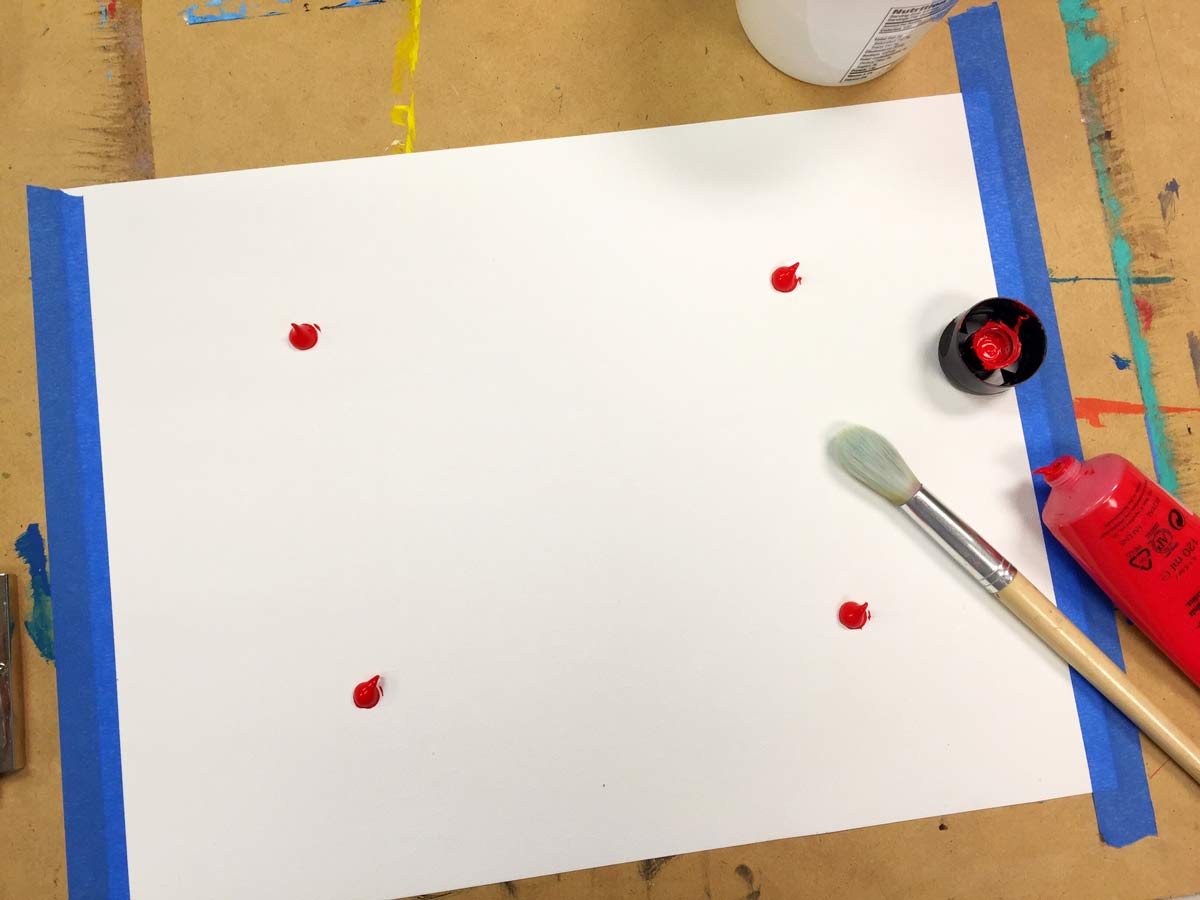
4-chips
Start by placing 4 chocolate chip sized paint bits right on the canvas

5-chips
Add another chip in the center
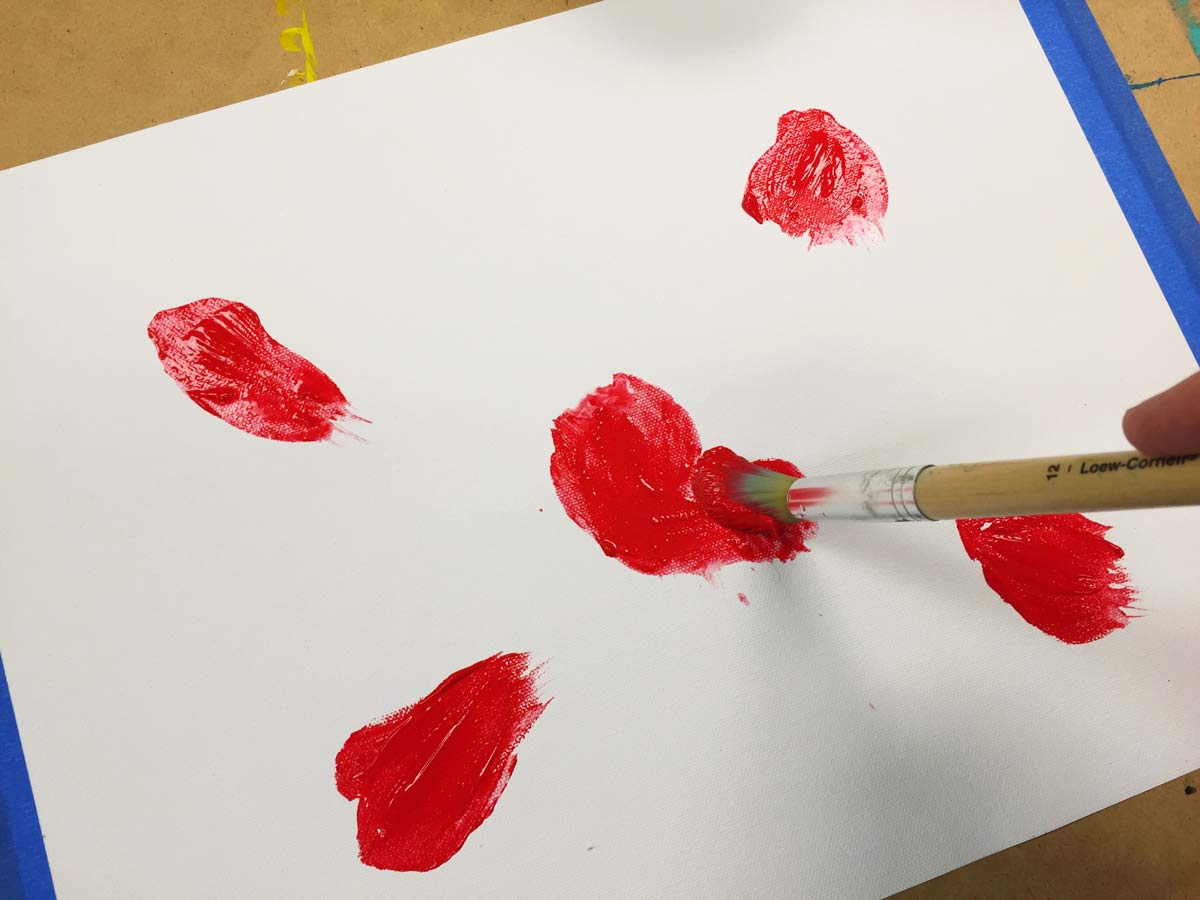
Spread
Begin to spread these out to cover the canvas
Cover
Work quickly and vigorously to cover the entire surface well
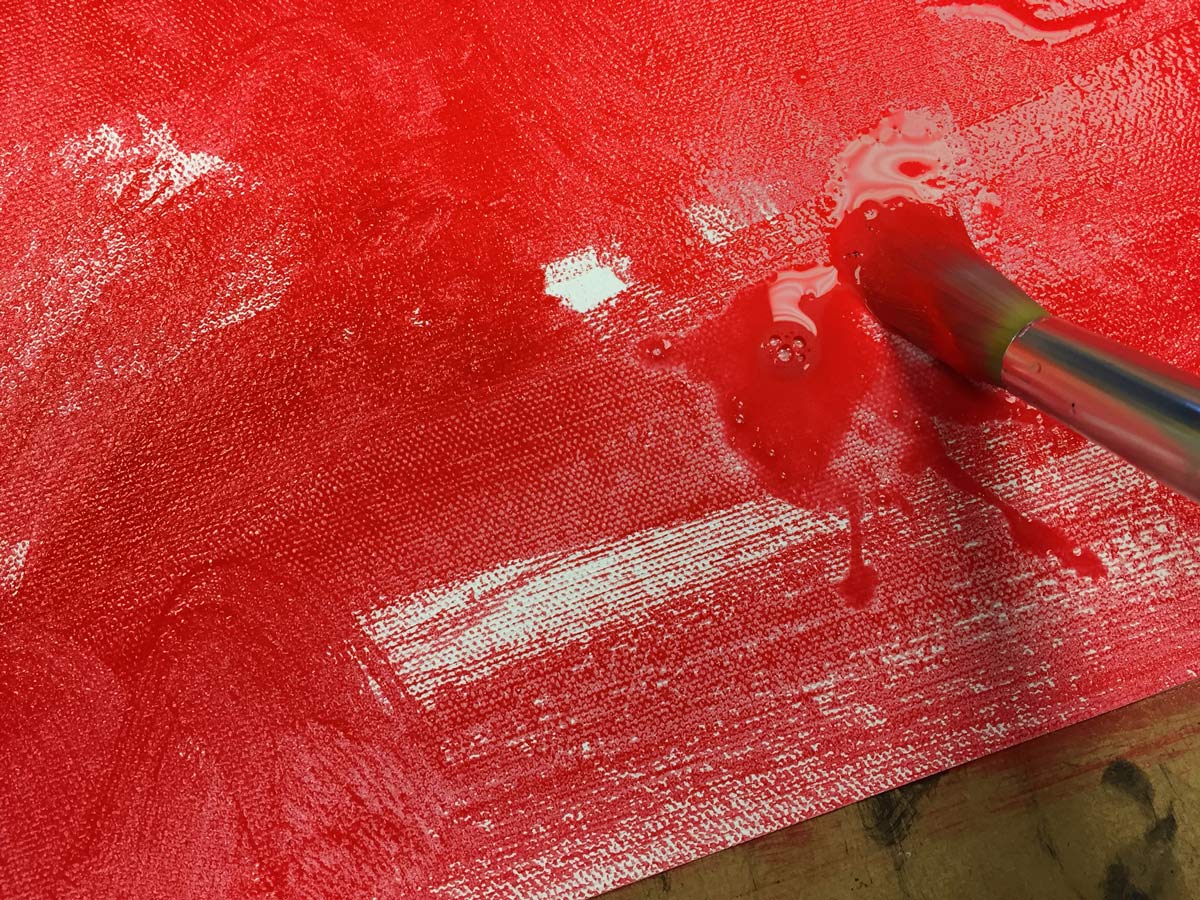
Add-water
Add some water to make it spread easily
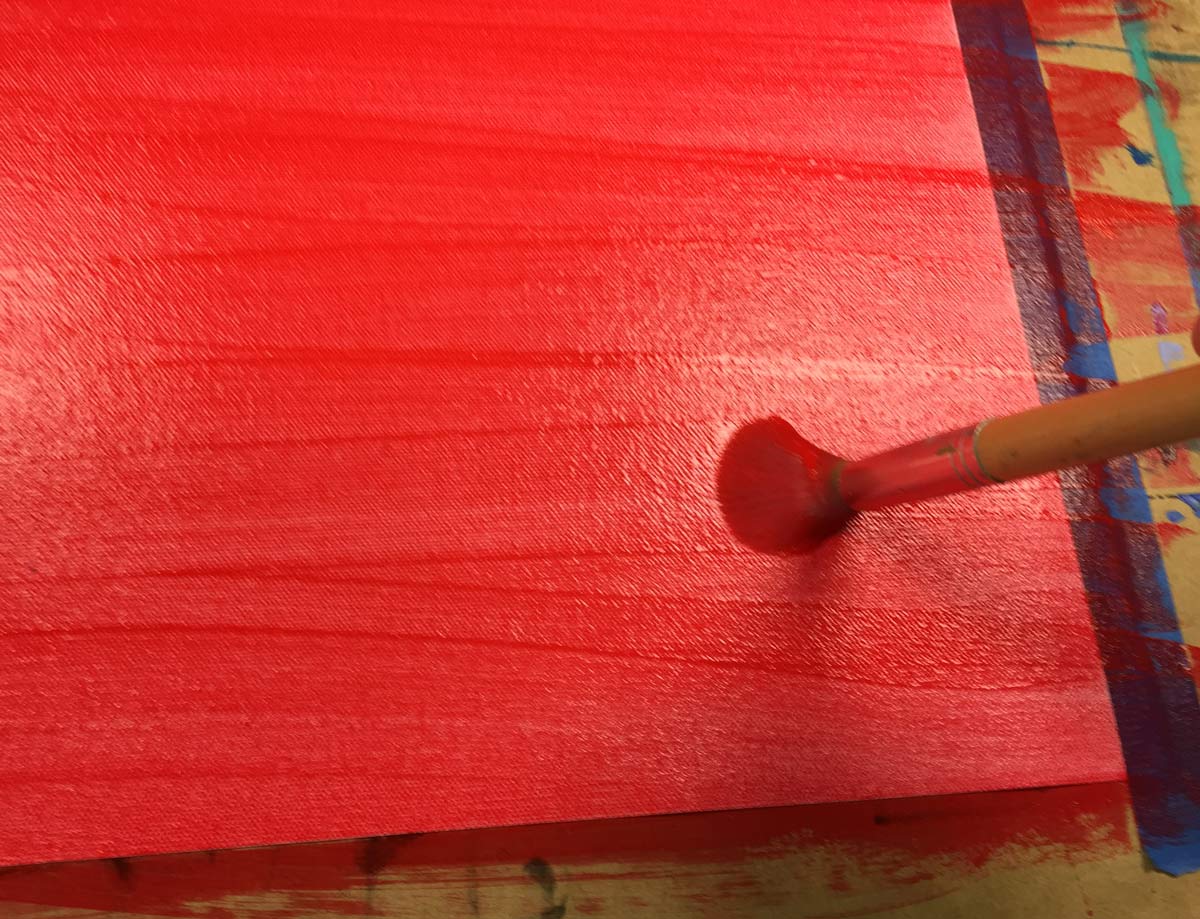
Spread-thin
Finish by making long strokes and spreading the layer of paint very thin so it will dry quickly
“Today we’re going to change our canvas color from white to red. It’s still just a blank canvas. You may have thought that a white canvas isn’t painted, but it is (with gesso, a special kind of sticky primer).
You can make your canvas any color you like. When we are changing the canvas color, it is done more like painting a house, using a lot of just one color. Artists almost never use the “house paint” technique, but this is one time we do. We won’t use any white, but we can add a very small bit of water and we’ll spread the pain thin. This will make it very bright and allow it to dry quickly, which is what we want
Please remember two things:
1. Spreading your paint out with no blobs or thick spots at all, will allow it to dray very fast.
2. Paint normally must be mixed on your plastic coated paper in your palette pad. We never place paint on our canvas like this, UNLESS, we are doing an underpainting!”
LEARNING TARGETS
Students know how to draw big shapes first.
M A T E R I A L S
- 14″ x 17″ Sketch Paper
- 2B Pencils
- 4B Pencils
- White Erasers
5.1 prints
Reference
LANDSCAPES
Cut images apart and print enough for each student to choose from several.
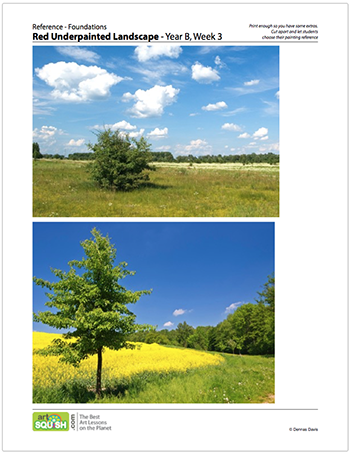
3 Pages – Opens in new window
5.2 SHAPES
First, place the canvas pad onto the sketch pad and draw around it to make a frame the exact size you’ll be painting.
Draw the big shapes, and then adjust by erasing and redrawing. Details are not to be drawn at this stage; just Big Shapes.
Explain to the class that by practice drawing their photo, they are getting to know their image better. It will make their final drawing better because of the time they spent on their practice.
LEARNING TARGETS
Students know how to practice before making a final painting.
M A T E R I A L S
- 14″ x 17″ Sketch Paper
- 2B Pencil
- 4B Pencil
- White eraser
6.1 PRACTICE
As soon as they are finished practicing, each student can move ahead to the next step.
LEARNING TARGETS
Students know how to draw guidelines.
M A T E R I A L S
- Canvas Pencil (Grey Colored pencil)
- Canvas with Red Underpainting
7.1 GUIDES
Explain that we use a colored pencil instead of a drawing pencil because the graphite in a regular pencil will mix with wet paint and make the painting messy. Use this pencil to make guide lines on your red underpainting. Guide lines should only be the big shapes, with very few details and definitely no shading at all. The guide lines are just to help you know where to paint.
Do not erase. If you need to make a change, just draw another line and make it a little bolder.
LEARNING TARGETS
Students know how to use a graze-brush technique.
M A T E R I A L S
- 14″ x 17″ Sketch Paper
- 2B Pencil
- 4B Pencil
- White erasers
8.1 BRUSH
NOTE: if you show the video directly to older students, explain that the video is also used for young grades where we use the more understandable tickle technique as a term.
8.2 DEMO
- For this technique, never dip your brush into water. We want the paint to be as firm, or dry, as possible.
- Show how some white must be added to create an opaque color for layering. Use a yellow with no white and paint over a darker area. Then do the same with a yellow that has just a bit of white mixed in to demonstrate a drastic difference.
- Because you spent all that work to create a red underpainting, don’t press your brush too hard or you’ll cover up your underpainting so completely that you won’t get that bit of visual drama that we want. Pressing too hard, using the tip of the brush, will fill in all the areas, and cover up the red completely. That’s what we needed for the underpainting, so we could get rid of all the white, but now we need something completely different. Now we need to change our technique to make the red play its part.
- Hold your brush almost parallel to the surface of the canvas. Instead of the tip of the brush, we only want to use the sides of the bristles. Using the side of the brush is very important to make this technique work. Just graze the surface, like you are tickling it. This is a graze-brush technique (for younger kids, tickle-brush).
- This technique creates VISUAL texture from the real texture of the canvas. That’s why we use rough canvas.
- Finally, make sure that you work using the Sunrise technique, starting with the dark colors and moving gradually to the morning lighter colors. Show by using a darker color over a medium or light color, and then a lighter color over the same color. Explain how the lighter color looks better. The reason is that our brain tells us that dark colors on top of lighter ones looks like it got dirty.
Tap the 4 arrows icon to enlarge the video to full screen.
Review the demo video and demonstrate to your students, or you can simply display the video on a larger screen for them to watch.
LEARNING TARGETS
Students know how to paint a landscape background
M A T E R I A L S
- Acrylic Paint
- Brushes
- Water Containers
- Paper towels
- Smocks
When painting a daytime sky, we don’t have to put out all our colors, so just use the two blues, white, and burnt umber.
9.1 SETUP
Get out both blues and the white paint tubes and disposable paint palette. Check to make sure smocks are back on if anyone removed theirs.
Students should squeeze out chocolate chip sized bits of both blues (Cyan and Ultramarine), white, and burnt umber paint along one edge of the palette pad. Make sure paper towels are available, and water tubs are ready. Usually when we paint, we lay out all 10 colors. Since we are just painting the sky today, students only need to lay out these 3 colors.
The brown paint should be used very sparingly, just to slightly gray the blues. It works with Ultramarine and white to make a blue gray.
Make sure that all of the wet items (brushes, water, paint, and palette) are on the same side as the dominant hand of each artist. This prevents spills and drips on the artwork.
Also, the main blue for sky is NOT the cyan, but the ultramarine. Most sky blue colors only need a little cyan, or none at all.
“Whenever you want some depth in your painting, begin with the part that is farthest away. Then paint the next farthest away part. That way any edges of paint will cover up the part that it is supposed to be in front of.”
LEARNING TARGETS
Students know how to start a background.
M A T E R I A L S
- Canvas Pad
- Acrylic Paints
- Brushes
- Water Tubs
- Smocks
- Paper Towels
- Palette
10.1 PAINT
Using only the 2 blues and white, have students loosely graze-brush their sky, working with medium-dark blues and finishing with light blue (almost white) for clouds or a bright sky.
Walk around and encourage and help students.
“If you finish your sky, you might have time to begin some trees just under the sky, but be careful of wet paint. You might do better to wait until next time to continue.
If you do continue now, trees far away should be a little lighter than you think. That makes them look distant.
This is a really fun way to paint a landscape! Most of the red will be covered up, but you can paint loosely and let more of it sneak through. Just use a very light touch with your brush for the clouds. Think about how fluffy clouds are. If you use the side of your brush, and don’t actually bend the bristles, you can graze the surface lightly and do some very nice clouds.
You might also notice that clouds are not all white! There is some blue and even some gray in them.
10.2 Bookend
A bookend is at the beginning and the end of each lesson.
This is where you go over what the lesson is about and what the main learning points are.
Making this clear, helps students remember what they’ve learned and understand the processes they’re going through.
“Every time you do a painting, you should take a little time to plan and set up. Drawing before-hand is essential if you want to be accurate, and also to get a good composition that you’re happy with. These steps you did today make the painting part way easier and more fun.
Today we went through all the planning and set up, and now you’ve started your painting. It will look dramatic, because of all the red showing through here and there. The bright color not only ties the whole painting together, but it also makes it look more vibrant and exciting.
LEARNING TARGETS
Students know the importance of cleaning up.
M A T E R I A L S
- Paper Towels
- Cleaning wipes
- Sink
- Waste baskets
- Well-lit spot for photos
- Camera or phone-camera
11.1 CLEAN
- Wash hands
- Super-wash brushes if used
- Put art supplies away
- Wipe tables & toss trash
- Remove any smocks (last)
- Check for items on floors and tables
11.2 PHOTO
OBJECTIVES
- Practice and improvement in using acrylics
- Understanding how opposite colors can look great together, and the concept of underpainting
- Accomplishment n creating a finished acrylic canvas
- Fulfillment by choosing their photo reference and practicing it
TROUBLESPOTS
Covering up the underpainting – If you have taken the time to make an underpainting, you need to let some of it it show through. Watch for this during the sky painting in step 10.
Thick underpainting – Having too much red paint will result in thicker globs and ridges, which won’t dry in time. It’s better to have a lighter red using some water to extend the paint so that it is thin enough to dry quickly.
Mashing brushes into the canvas – This is needed for the underpainting, but when getting to the sky in step 10, this kind of hard brush work will not do well. For this project we are trying to layer the colors over each other, and for that, they need to show through. A light touch, and using the side of the brush is needed. See the “tickle brush technique” in Art Words, and show the demo.
Using white paint – students need to mix white into their paints so that they will cover as they create layers.
Shading and details – When the students are creating their guide lines on the red canvas, the special canvas pencil is used. Since it is wax-based, it will resist the paint a bit if you do shaded areas. Therefore it’s not a good idea, and there’s not enough time to spend, in shading with the pencil. Students can get into the drawing, though, and forget that they’re only creating guide lines.
Not cleaning brushes – This is a critical point, especially for new students. We use the term “Super wash,” and ask students repeatedly, “what will you do when you’re finished painting?” – “Super Wash!”
ART WORDS
CLASSROOM
PREP
Print all of your PDFs from the lesson plan and cut your references photos apart.
Watch and learn the demos for setting up canvas and painting layers in acrylics.
What your room needs
Here are your printable lists and room prep instructions.
Opens in new window
CLASSROOM
MATERIALS
- Art Board
- Water Containers
- Building PDFs
- Landscape PDFs
- Cheasel Reference Stand & Clip
- Paper towels
- Sharpie markers
- Smocks
STUDENT’S MATERIALS
- 11″ x 14″ canvas pad
- 14″ x 17″ Sketch Paper
- 4B Pencil
- White Erasers
- Acrylic Paints
- Palette Pad
- Tape – blue painter’s tape
- Brushes – All sizes
PREVIEW
Week 4 – Underpainting Landscape II
Students will continue working on their red underpainting landscape in acrylics.
Week 5 – 3 Steps to Accuracy
Students will be introduced to, and have a chance to use, Dennas’ 3 steps to accuracy method, which is based on the way professional artists analyze what they see so that they can reproduce it accurately in artwork. There is also a paint-mixing game, and some time to finish landscapes if needed.