
OVERVIEW
Our last class of the year has students going to an animal party. First, they use blank masks to pretend they are animals, then everyone finds reference and paints their mask to match a chosen animal. Pretend play and a game take up the middle of the class time, and then there is a marker drawing project of animals having a Summertime party. We have one extra class next week if you need it.– – –
Grades K – 2
Week of May 13 – 17
1 Hour & 30 Minutes
Lesson At A Glance
A brief overview of each step. Buttons jump to each section for detailed information.
10 Min – Prep masks, cut them out. Explain the lesson.
8 Min – Kids can play with masks and choose animals
5 Min – Setup for painting
15 Min – Paint animal masks
5 Min – Everyone helps
10 Min – Make ear loops out of pipe cleaners for the masks
10 Min – Students have time to play with their masks
SCROLL & TEACH
LESSONPLAN
Each section is a different color. Read over once and then you can SCROLL & TEACH using any device you like. It’s designed to work best with your phone.
LEARNING TARGETS

Students learn to express themselves through creating from their imagination.
M A T E R I A L S
- 11″ x 17″ Copy Paper
- 4B pencil
- Eraser
- Markers and/or oil pastels
- Blenders (stumps)
- Paper Towels
1.1 greet
Kneel down so that you are on their level. Bending over emphasizes the differences in your height, while kneeling makes them feel more important. Have tape and marker ready so you can stick some tape on the table by each student and write their name on it as they sit down.
1.2 choice
Everyone should take their time with the work and make a finished piece of art. Limiting the paper can also help kids focus on the work. If someone finishes in super-fast time, ask them what more they can do to the existing paper. Ask again several times – unless they appear overly frustrated; then you can allow them to move on to a new work.
1.3 Party!
Use this button to jump down to the preparation section.
LEARNING TARGETS
Students know how to observe images
M A T E R I A L S
- Animal Mask References Prints, cut apart
2.1 Print
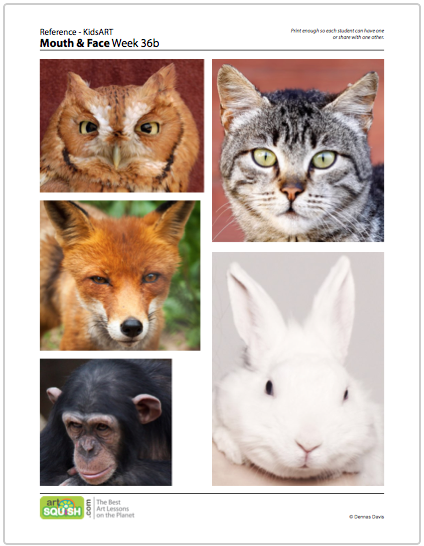
Reference
Animal Faces
Print enough for each student to view the whole page or for two students to share between them.
(Do not cut photos apart)
1 Page – Opens in new window
2.2 Observe
Right now, just ask the students to look at all of the pictures and get familiar with the different animals we have today. They will get to choose in the next step.
Use this button to jump down to the preparation section.
LEARNING TARGETS
Students know how to look at references
M A T E R I A L S
- Safety Scissors
- Hole Punch
- Mask PDF printed on card stock paper
- Reference photo PDF from STEP 2
3.1 Print
template
Animal Masks
Print onto heavy-weight card stock and provide one for each student. Since they can choose from 6 versions, make sure you print enough extras for everyone to have a choice.
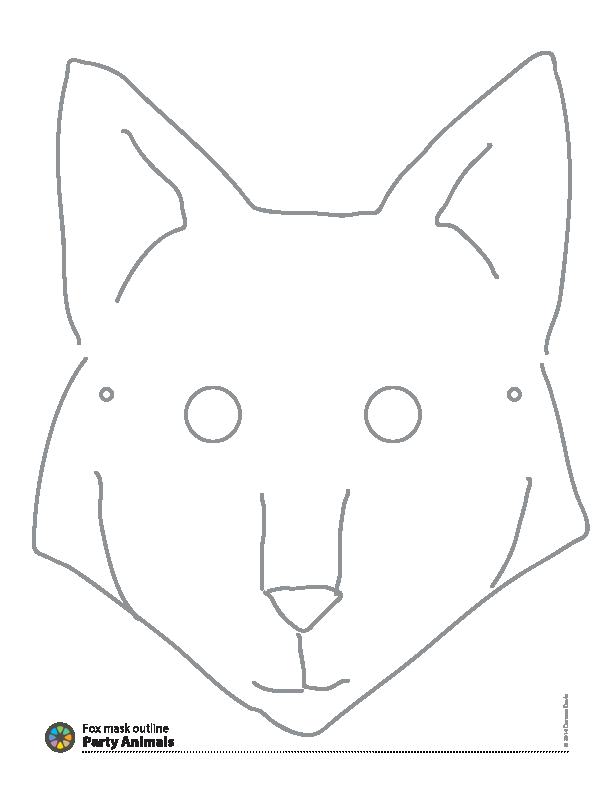
6 Pages – Opens in new window
3.2 Choose
They should know which one they want. Don’t let the choice take much time.
3.3 demo
3.4 Cut
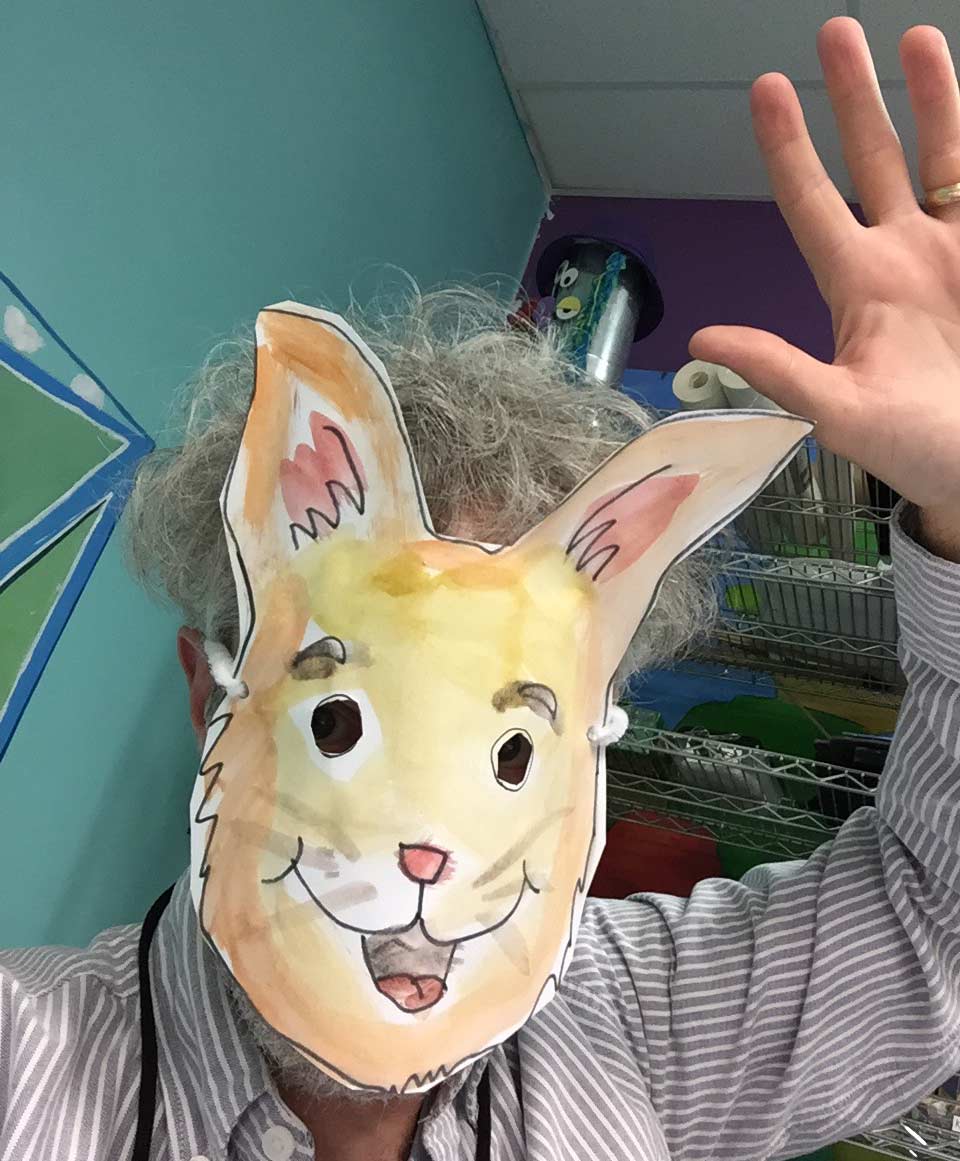
Explain how we’re going to make masks and paint them as animals today.
Also cut the photo from your reference sheets if they have been sharing the photo printouts. If everyone has their own page of photos, then there’s no need.
Let students help as much as possible – the cutting is pretty standard stuff, but they’ll enjoy using the hole punch. There are spots indicated on the printout for the 2 holes that need to be punched.
NOTE: The eye holes are the hardest to do, and may even cause accidents. You should try to find the time to pre-cut the eye holes on your printouts before giving it to your artists.
Use this button to jump down to the preparation section.
LEARNING TARGETS
Students know how to enjoy imaginative play
M A T E R I A L S
- Watercolor Pans
- Spray Bottle
4.1 play
Make sure everyone writes their name on the inside of the mask with a pencil. Encourage safety and gentleness with the masks so no one gets a paper cut or damages their artwork.
While this seems like just a playtime break, it’s actually a very important method used by character and puppet designers. It helps to get a feel for an animal if you’re doing a drawing, painting, or character design based on one. Nothing gives you a better understanding of a character or animal than seeing them and then acting as if you are one.
A large mirror is a great addition to this if you can get one. And don’t forget to have fun yourself!
4.2 Wake up
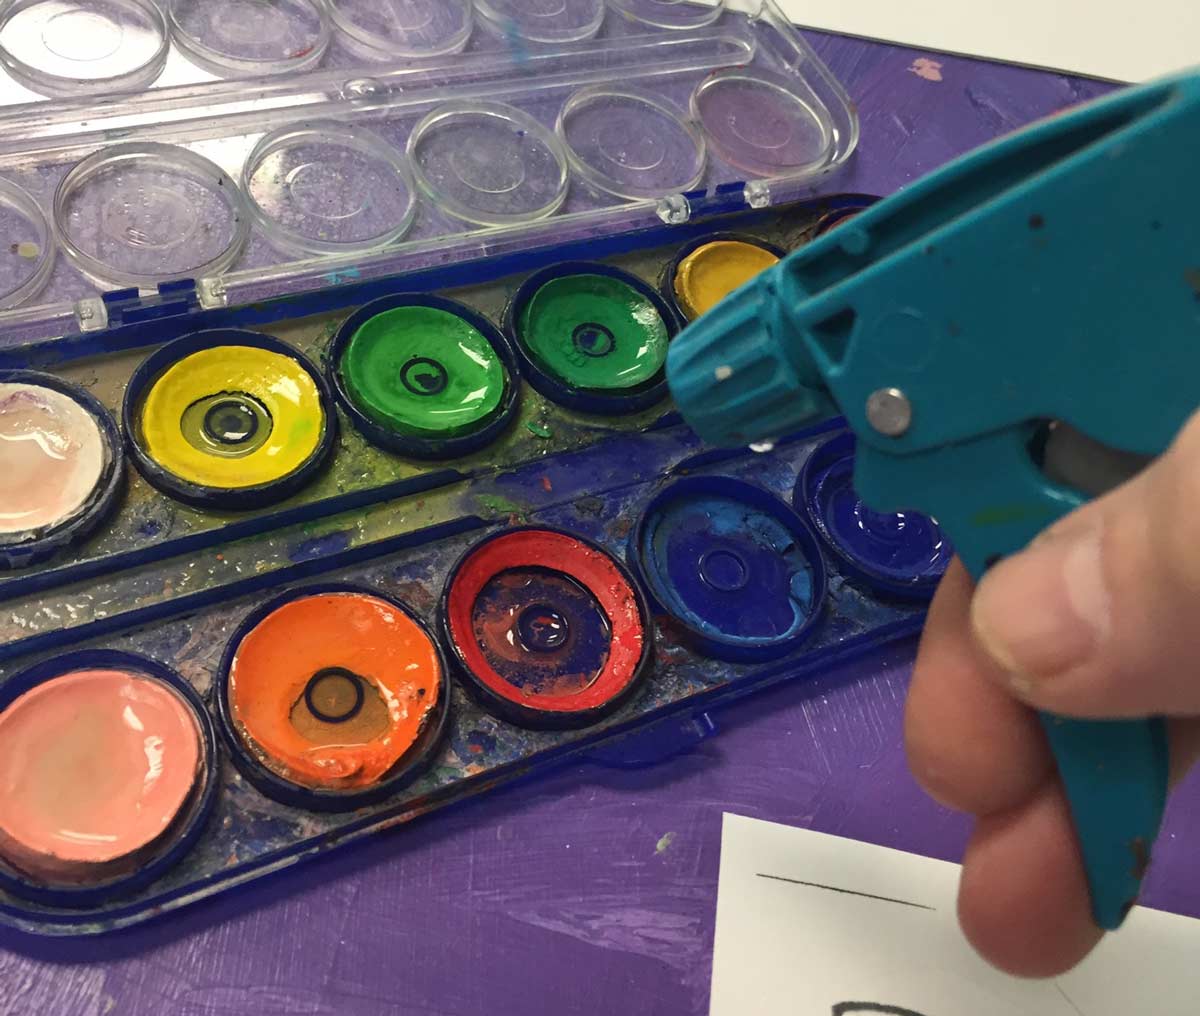
Add a few drops of water to each watercolor cake to soften them. A spray bottle or large dropper works well.
Use this button to jump down to the preparation section.
LEARNING TARGETS
Students know how to begin setting up and working with watercolors
M A T E R I A L S
- Watercolors
- Brushes
- Mixing trays
- Water containers
- Paper towels
- Smocks
Brushes should be nylon for springiness and durability. Round brushes are the most versatile and have good points for watercolor work.
5.1 setup
Use this button to jump down to the preparation section.
LEARNING TARGETS
Students know how to paint with watercolors
M A T E R I A L S
- Watercolors
- Brushes
- Mixing trays
- Water containers
- Paper towels
- Smocks
6.1 Paint
Set the masks aside to dry when finished. If some are very wet, you can use a hair dryer to speed up the drying. Be sure to hold it about 8 inches away from the artwork so nothing gets too hot!
Use this button to jump down to the preparation section.
LEARNING TARGETS
Students know the importance of cleaning up
M A T E R I A L S
- Paper Towels
- Cleaning wipes
- Sink
- Waste baskets
- Well-lit spot for photos
- Camera or phone-camera
7.1 clean
- Wash hands
- Super-wash brushes if used
- Put art supplies away
- Wipe tables & toss trash
- Remove any smocks (last)
- Check for items on floors and tables
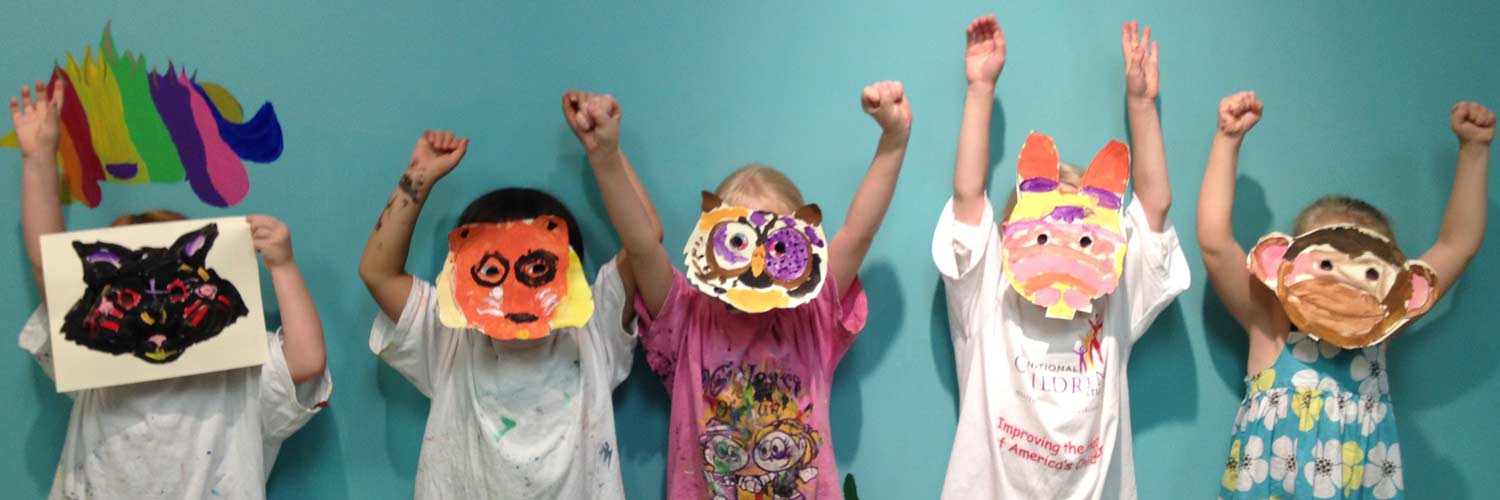
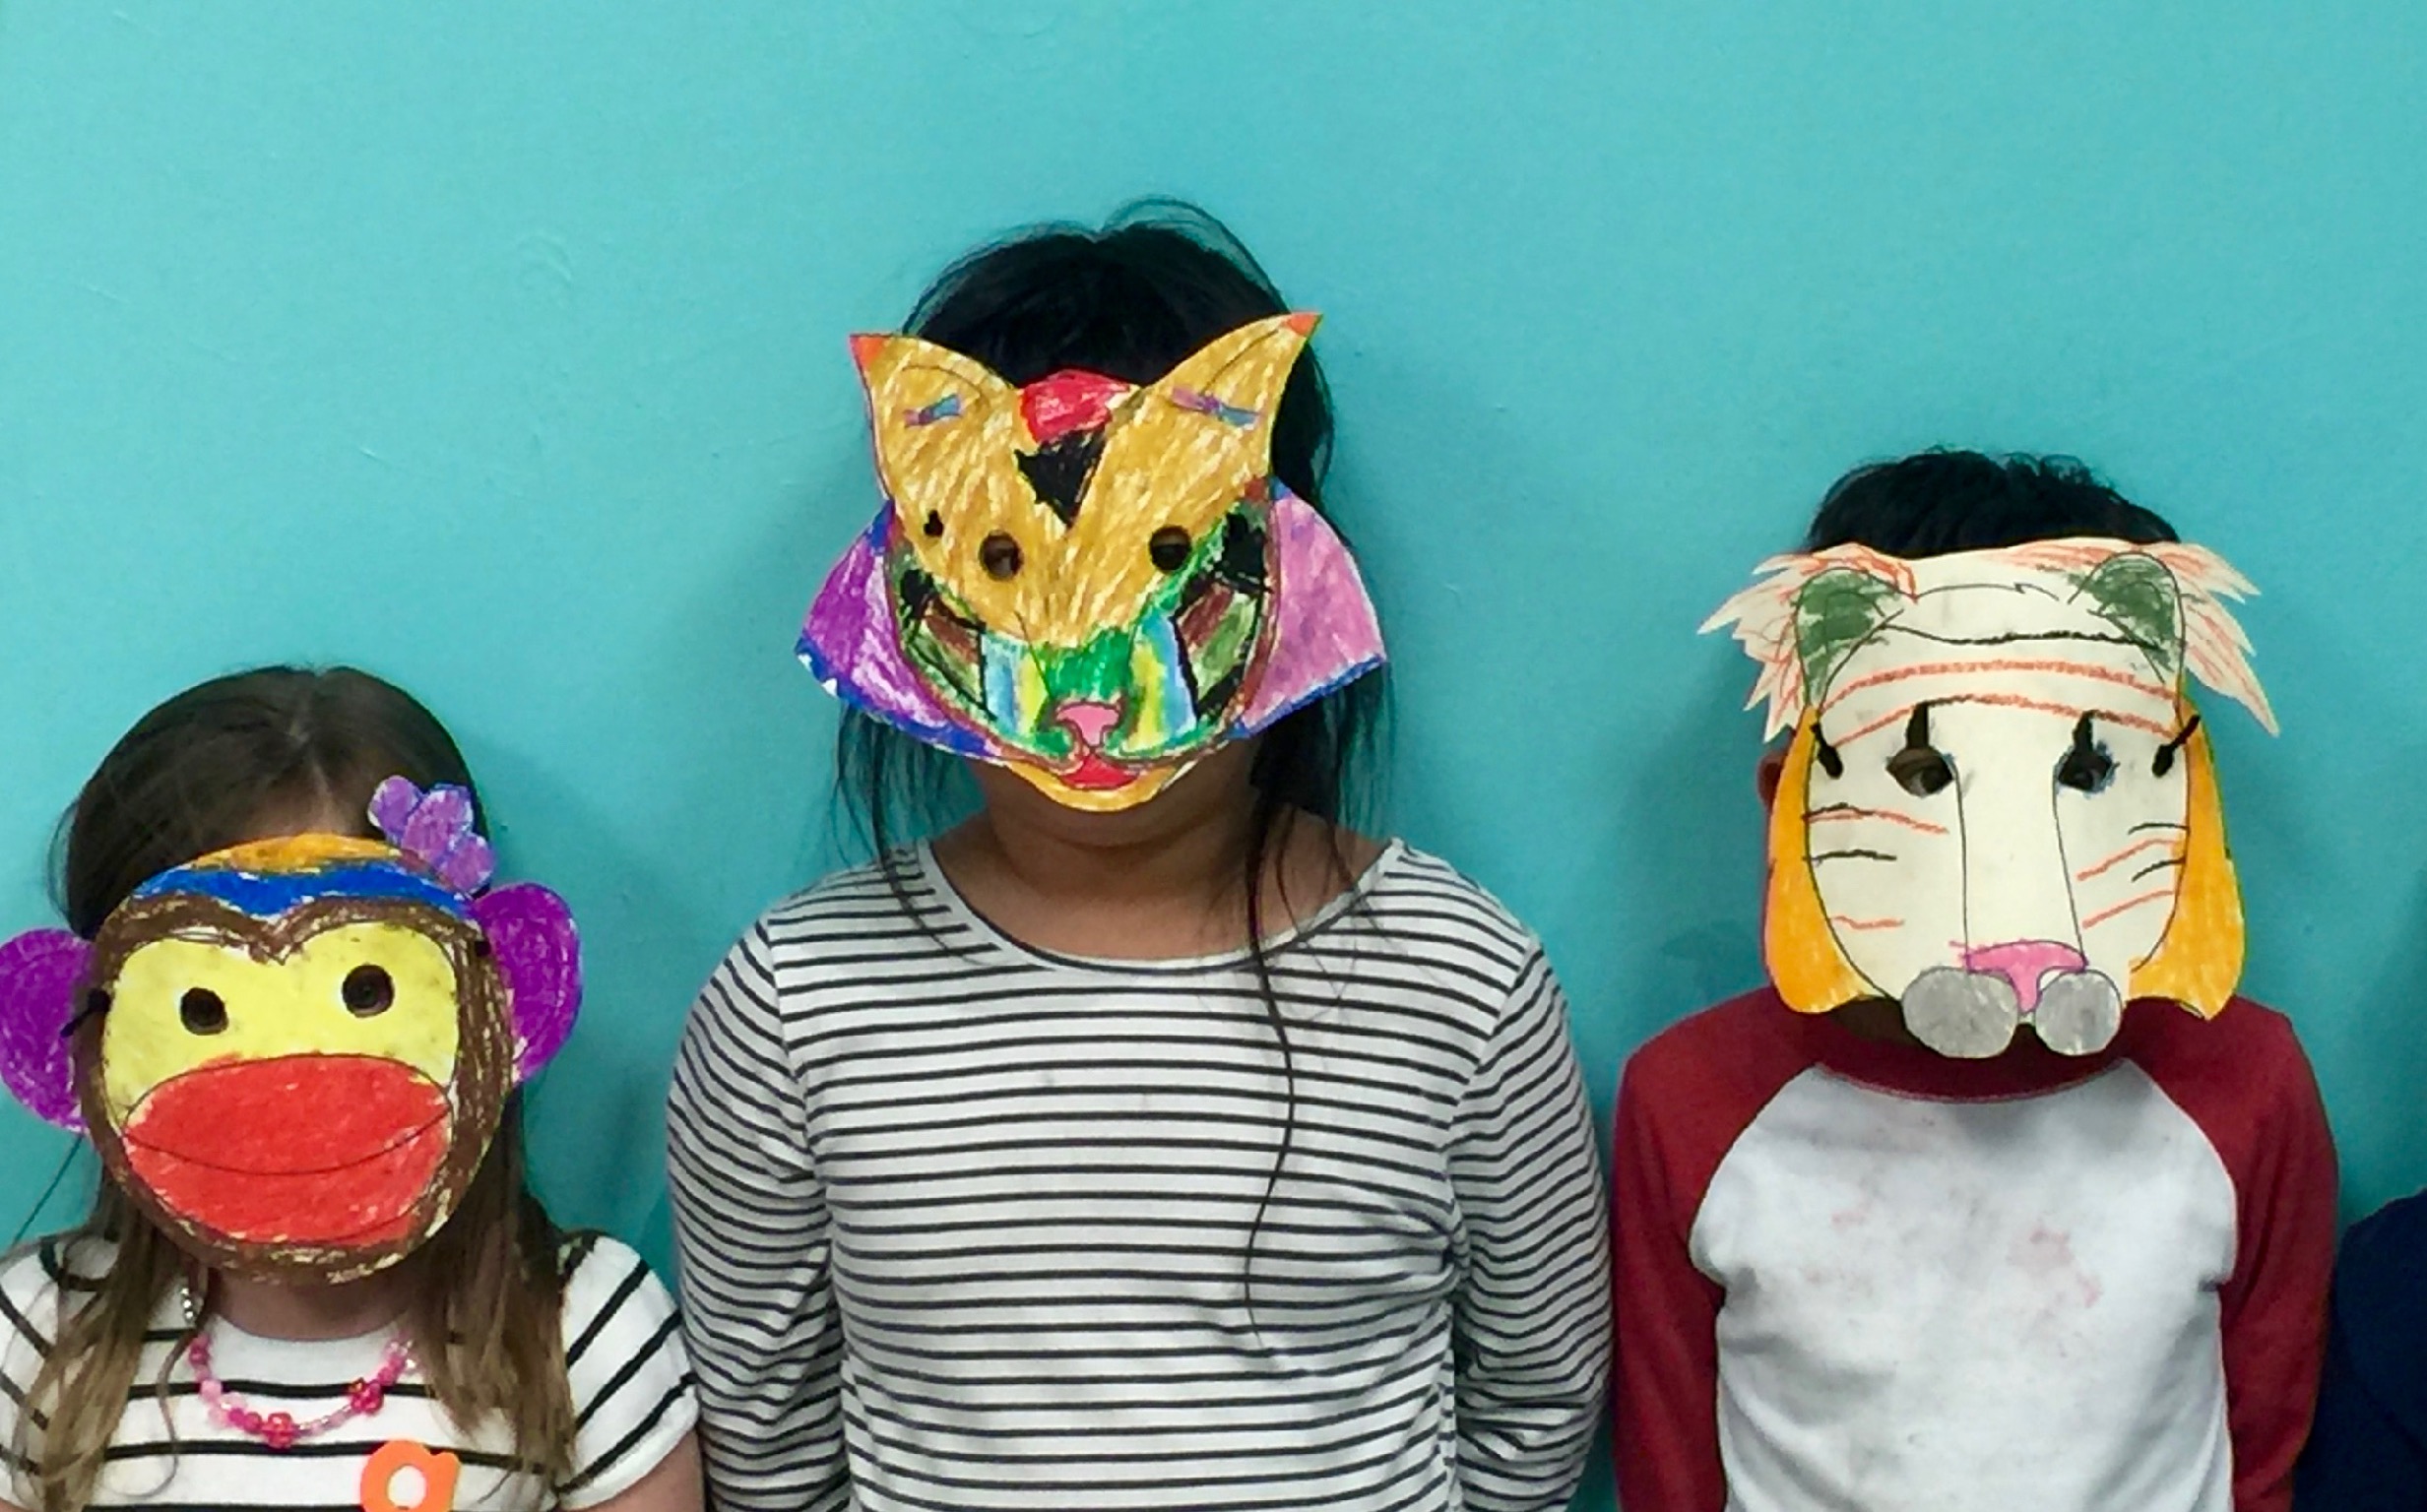
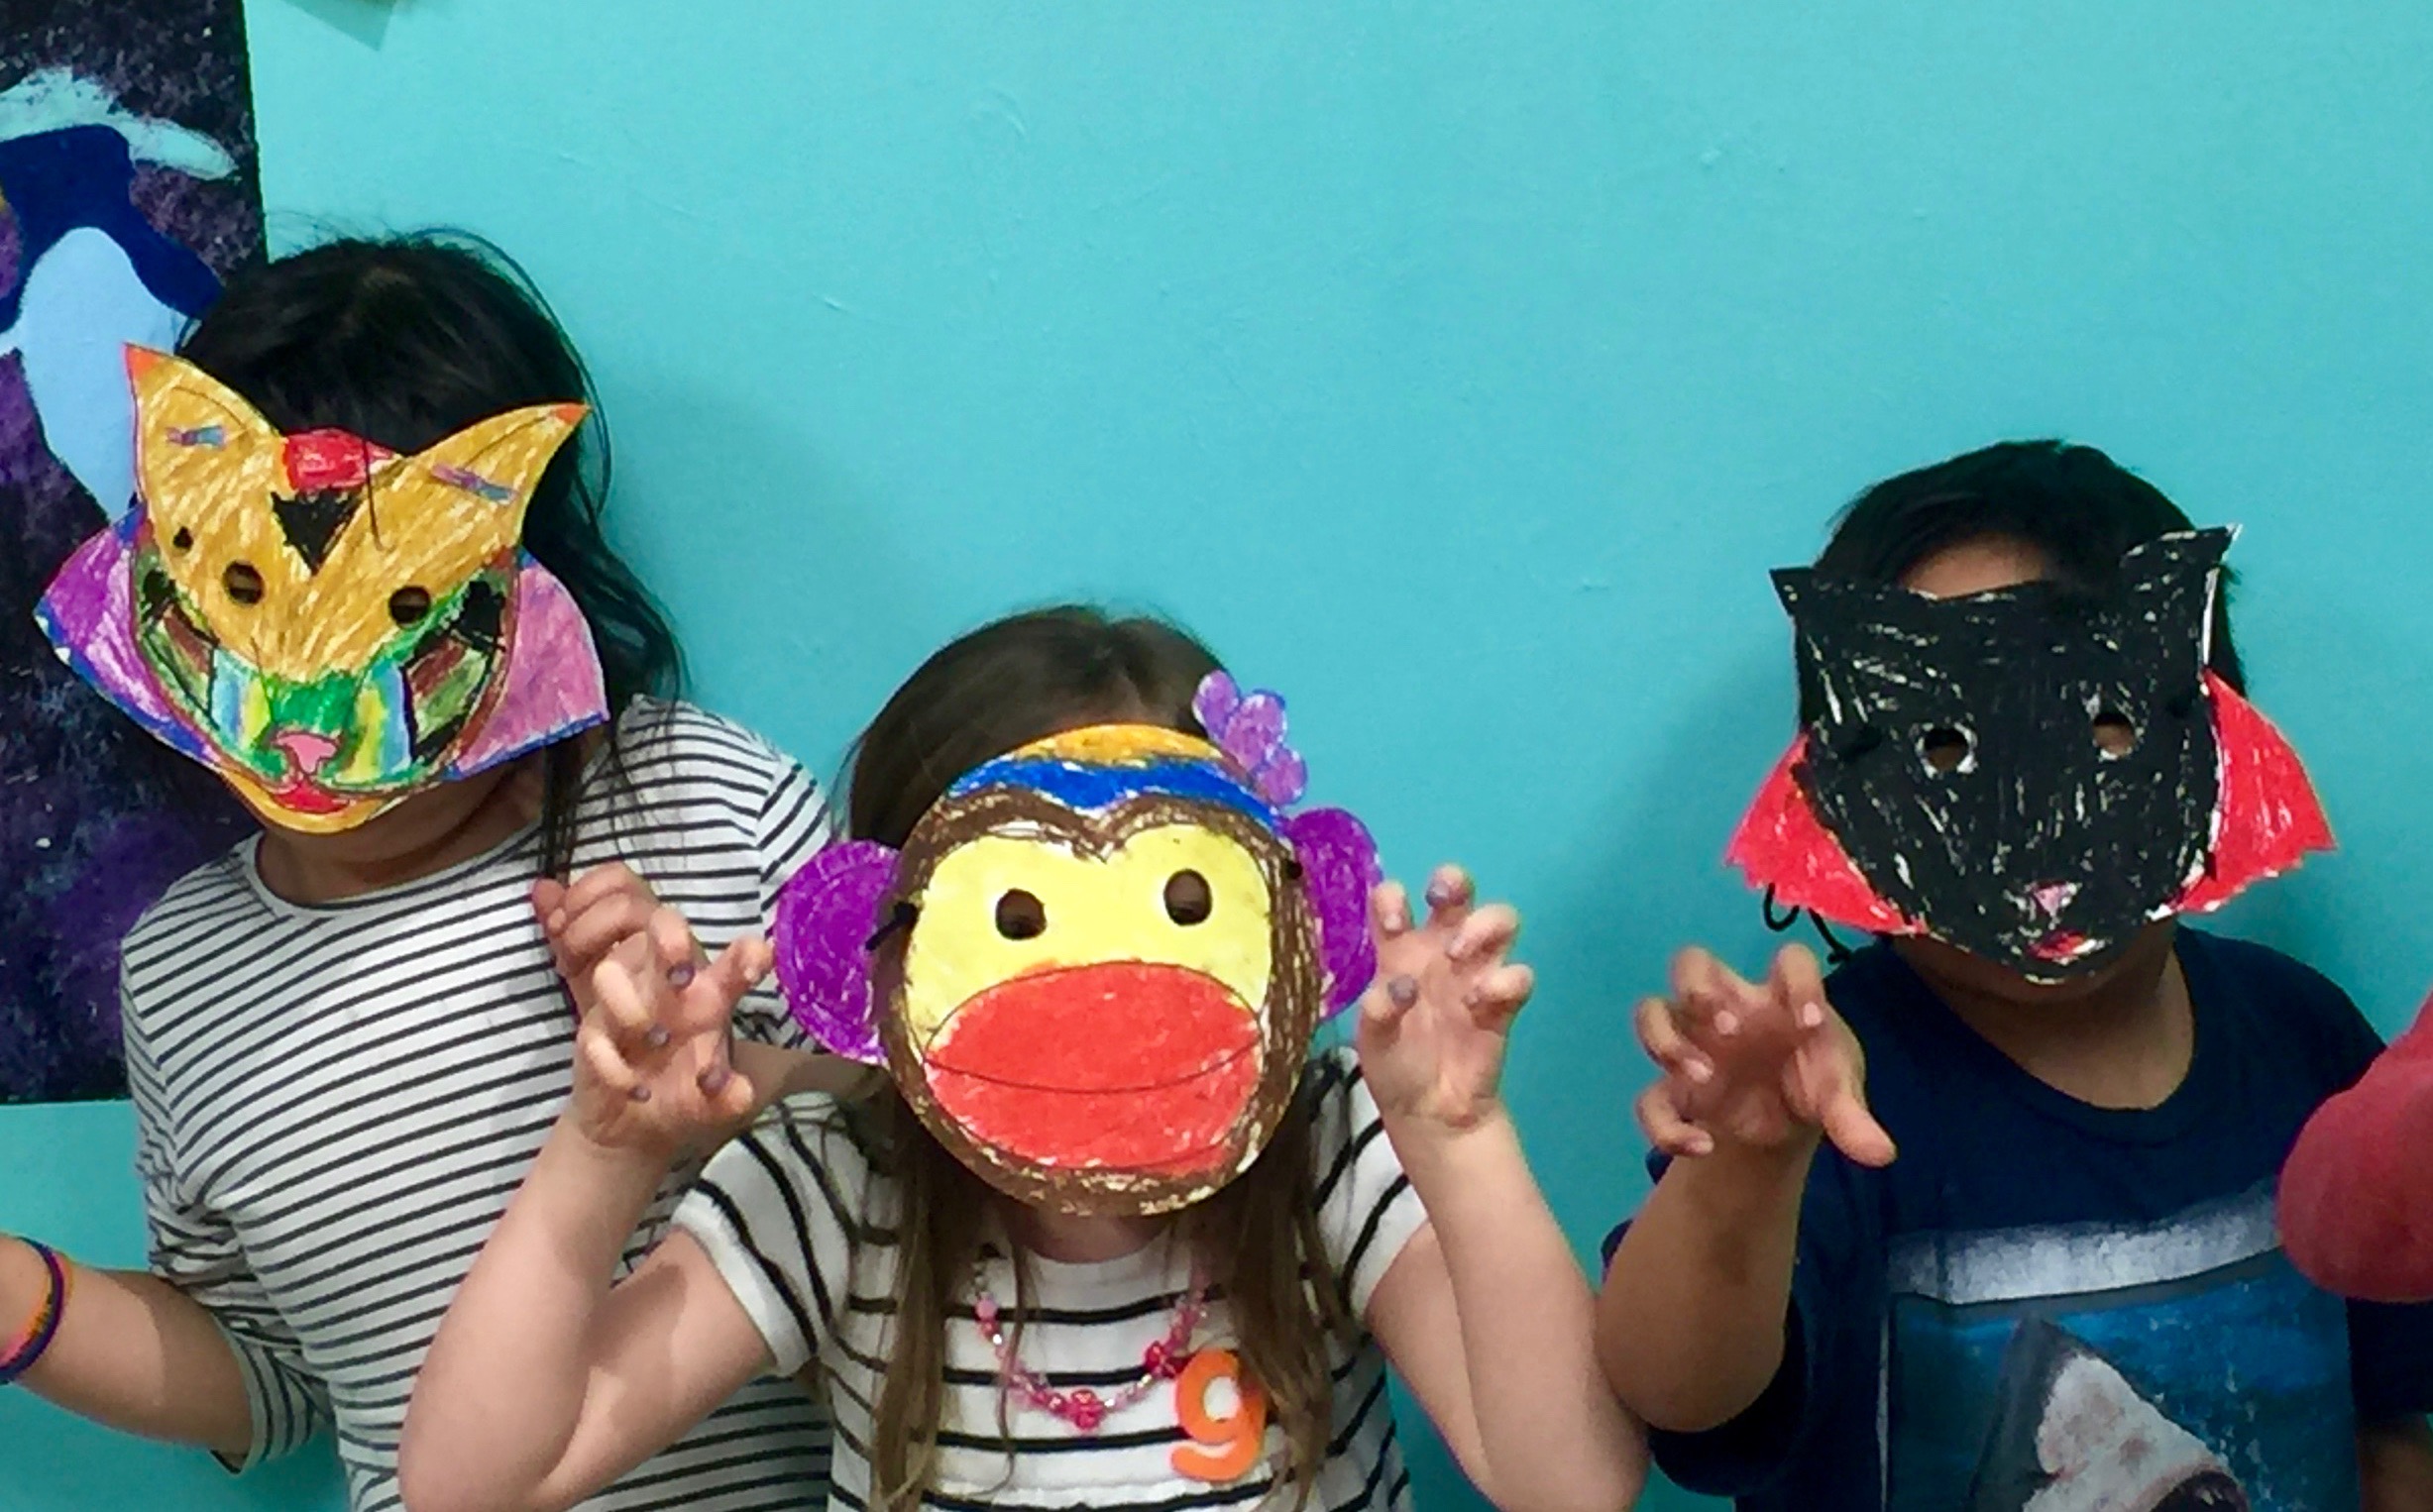
7.2 photos
LEARNING TARGETS
Students know how to listen to directions
M A T E R I A L S
- Pipe Cleaners
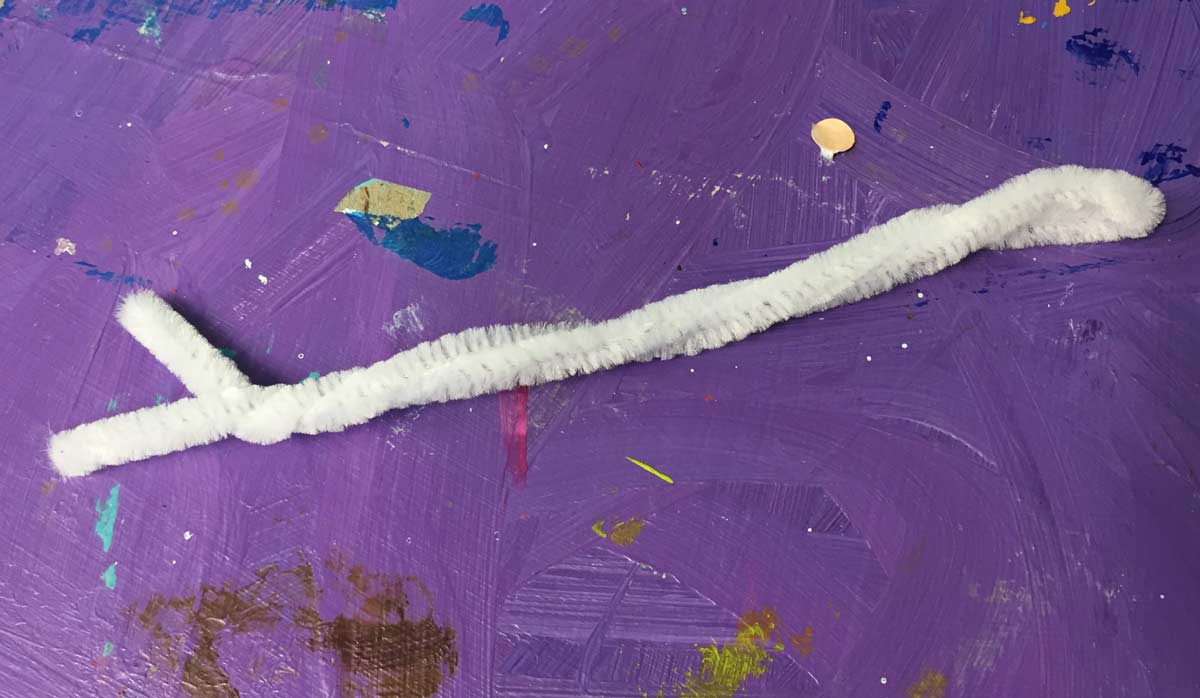
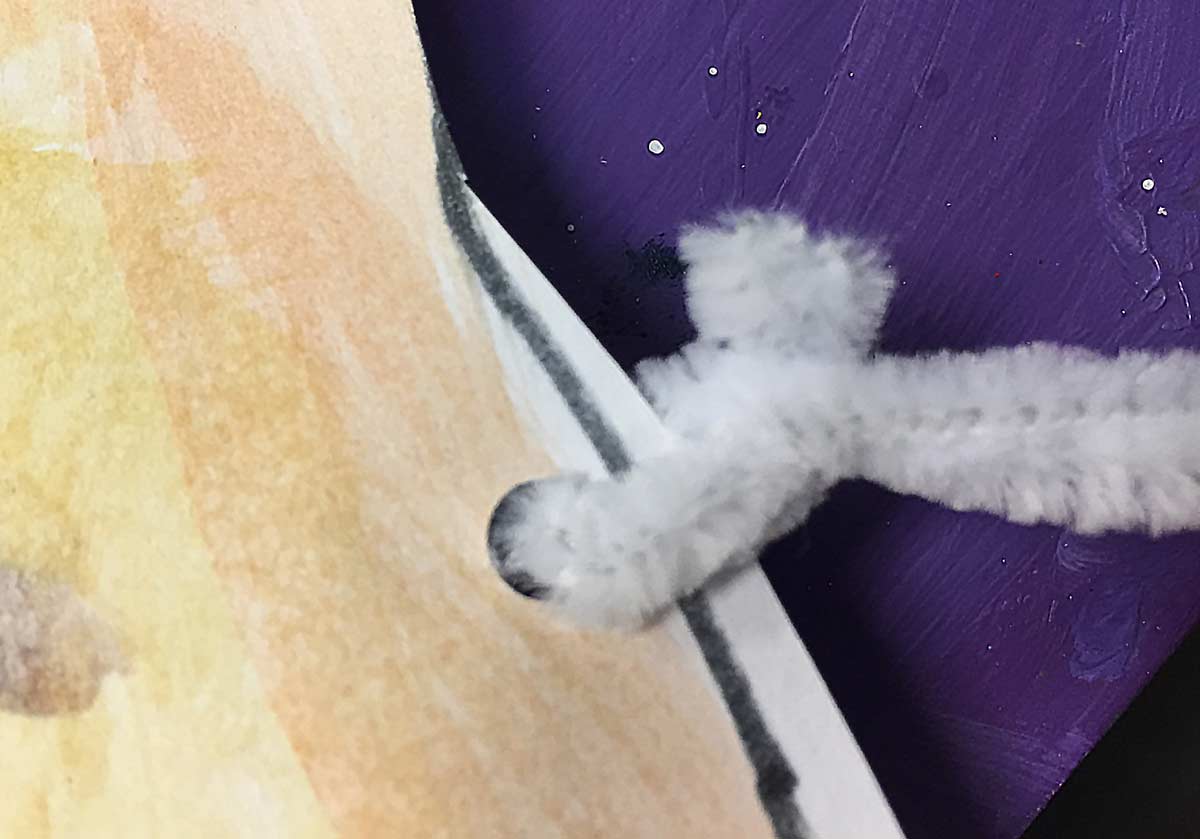
8.1 create
Follow along:
- Bend the pipe cleaner and fold it in half, with the two ends together.
- Twist it at the open end so that it stays together.
- Make a bend about 2 inches from the bend end (what was the middle) to go over the ear. Repeat for other one.
- Set these down for a minute and get out the masks – make sure everyone has the correct one.
- FROM THE BACK of the mask, push about 1 inch of the sharp end (two joined tips) through the punched hole at one side and bend it around the side. Wrap the pipe cleaner around the edge of the mask and then around itself just on the back side of the hole to secure (making a loop through the hole). Repeat for the other side with your second pipe cleaner.
- Place mask over face and bend over the ears, adjusting to fit.
If you have a helper, they can walk around while you’re demonstrating and help students.
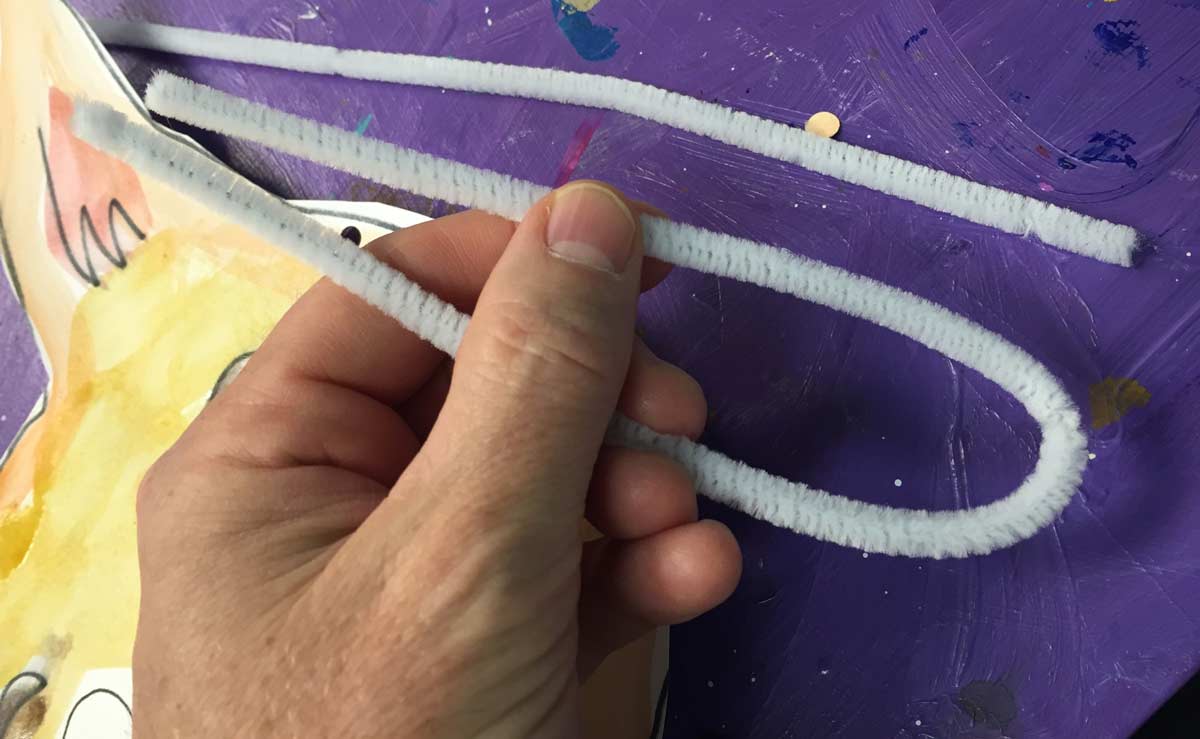
BendInHalf
TwistIt
LoopAndTwist

doubleearloops
DennasInMask
Yay! Have fun.
Use this button to jump down to the preparation section.
LEARNING TARGETS
Students know how to have fun and use their imagination
M A T E R I A L S
- Paper Towels
- Cleaning wipes
- Sink
- Waste baskets
- Well-lit spot for photos
- Camera or phone-camera
9.1 pretend
Students can also draw pictures of their animals in markers if there is extra time!
OBJECTIVES
- Practice and improvement in having fun
- Understanding how to have fun
- Accomplishment in fun times for all
- Fulfillment by making things fun
TROUBLESPOTS
Fun – This happens when artists enjoy themselves. It leads to artists believing that art is a good thing for them to keep doing.
ART WORDS
Waking Up Paints – Add a little water to dry watercolor cakes about 10 minutes before using them, and they’ll be much more fun because they’re softened up and make brighter colors.
Reference – Everything looks better with a bit of reference. Artists think it will be harder, but it actually makes things easier and more fun.
CLASSROOM
PREP
Make sure you have enough supplies for each student and have PDFs printed.
What your room needs
Here are your printable lists and room prep instructions.
Opens in new window
CLASSROOM
MATERIALS
- 11×17” Copy Paper
- 4B Pencil
- Eraser
- Markers
- Oil pastels
- Blenders (stumps)
- Paper towels
- Animal References Print
- Safety Scissors
- Hole Punch
- Masks Printed on card stock paper
- Watercolor pans
- Spray bottles
- Brushes
- Mixing trays
- Water containers
- Smocks
- Camera or phone camera