
Painting
Each lesson Plan focuses primarily on one of the 4 Cornerstones of Art:
Drawing | Painting | Color | Style
OVERVIEW
Students will finish painting their landscapes with atmospheric perspective (depth) by working their way down the canvas, top to bottom, which is also distant to close.– – –
Grades 3 – 5
Week of September 23 – 27
1 Hour & 45 Minutes

Lesson At A Glance
A brief overview of each step. Buttons jump to each section for detailed information.
7 Min – for painting – retrieve boards with paintings
10 Min – Show how to paint a signature
37 Min – Help students finish up the project
Extra – Artists’ Choice for early finishers
5 Min – Make sure there is ample time for cleaning up.
SCROLL & TEACH
LESSONPLAN
Each section is a different color. Read over once and then you can SCROLL & TEACH using any device you like. It’s designed to work best with your phone.
LEARNING TARGETS

Students know how to warm up
M A T E R I A L S
- 14″ x 17″ Sketch Paper
- Kneaded Eraser
- Soft Compressed Charcoal
- Still Life Objects
1.1 sketch
if you have students who missed, you may want to go ahead and get them set up immediately, skipping the warmup. Refer to last week’s lesson.
You can skip this Step 1 entirely, if your students need more time to paint
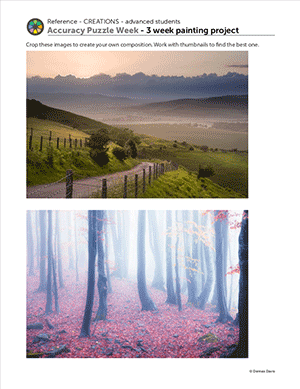
CREATIONS - tap here to open
Use the Student Instructions printout below to distribute to your Creations students. Tap the image to open the PDF in a new window.
3 Week Landscape Painting
Overview: Students will find reference, create sketches and compositions, set up a canvas, and paint a landscape using atmospheric perspective. Architectural elements can be involved as well.
STEPS 1 & 2 – Inspiration & Reference – Should take 10-20 minutes
Find a reference or use one from the provided printout. Make sure at least part of the image is something you are happy about working on.
STEP 3 – Practice drawings – Should take at least 30 minutes – up to an hour
There are 3 kinds of practice drawings. The first two are required. Detailed drawings are optional.
- Quick rough sketches – No more than a couple of minutes each. Charcoal is great for this.
- Thumbnail composition sketches – These should be very small, and only for quickly manipulating the Frame and Big Shapes to try different compositions quickly. Very much like moving cut paper or puzzle pieces around to experiment and see what works best.
- Detailed practice drawings (of important areas)
STEP 4 – Set up canvas – Should take 5 minutes
Use a canvas board, a stretched canvas, or tape a canvas sheet to a drawing board. Write your name on the back or on the tape using a bold marker.
STEP 5 – Guidelines – Can take 10 to 30 minutes
Use a canvas pencil (gray colored pencil – doesn’t mix into paints) and draw very lightly on your canvas. Make lines that will help you with accuracy, but defining the Big Shapes first, and then adding any details that you need to define where they will go.
STEP 6 – Set up paints – Should take 5 minutes
If you have time to paint at least an underpainting or the sky, you can go ahead and set up for this today (first week). If not, you should wait and find something simple and fun to sketch for the rest of this session today.
STEP 7 – Begin painting
Start with the sky (farthest away, and highest on the canvas) unless you’re doing an underpainting. You can underpaint for landscapes in two methods: 1. Put opposite colors under each area (orange under a blue sky, or purple under an orange sunset sky), or 2. change the color of your canvas from white to something warm such as red, orange, or brown. Underpainting colores should be thinned with a bit of water and they will normally be streaky, but it won’t show.
Tap images to open Creations Student Instructions and Reference Materials in new windows

Early
Finishers
Print the Artists’ Choice Expressions instructions for students who have finished their landscape
Use this button to jump down to the preparation section.
LEARNING TARGETS
Students know how to set up their work area for painting with acrylics.
M A T E R I A L S
- Brushes
- Acrylic Paints
- Painting-In-Progress
- Palette Pad
- Water Tub
- Paper Towels
- Smocks
Brushes should be nylon for springiness and durability. Round brushes are the most versatile.
Paint pigment list:
- Napthol or Pyrrol Red
- Hansa or Light Yellow
- Pthalo Green (blue shade)
- Cyan or Cerulean Blue
- Ultramarine Blue
- Dioxazine Purple
- Magenta
- Burnt Umber
- Raw Sienna
- Titanium White (professional grade only)
2.1 setup
Encourage keeping their area organized and contained. Water tubs, paint, brushes and palette should all go on the side of the painting that their dominant hand is on. Help them find their drawing board with their half-finished painting taped to it.
Use this button to jump down to the preparation section.
LEARNING TARGETS
Students know how to work with acrylics
M A T E R I A L S
- Brushes
- Acrylic Paints
- Painting-In-Progress
- Palette Pad
- Water Tub
- Paper Towels
- Smocks
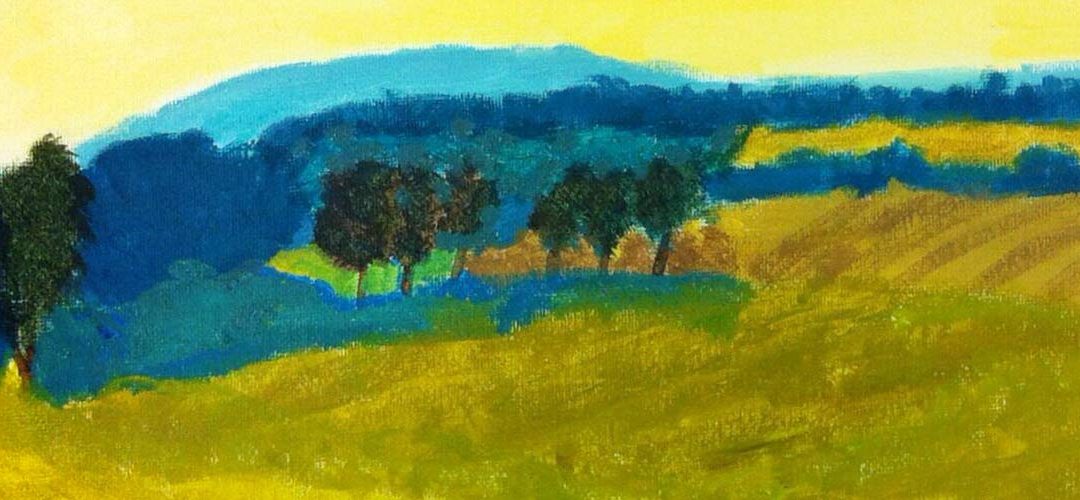
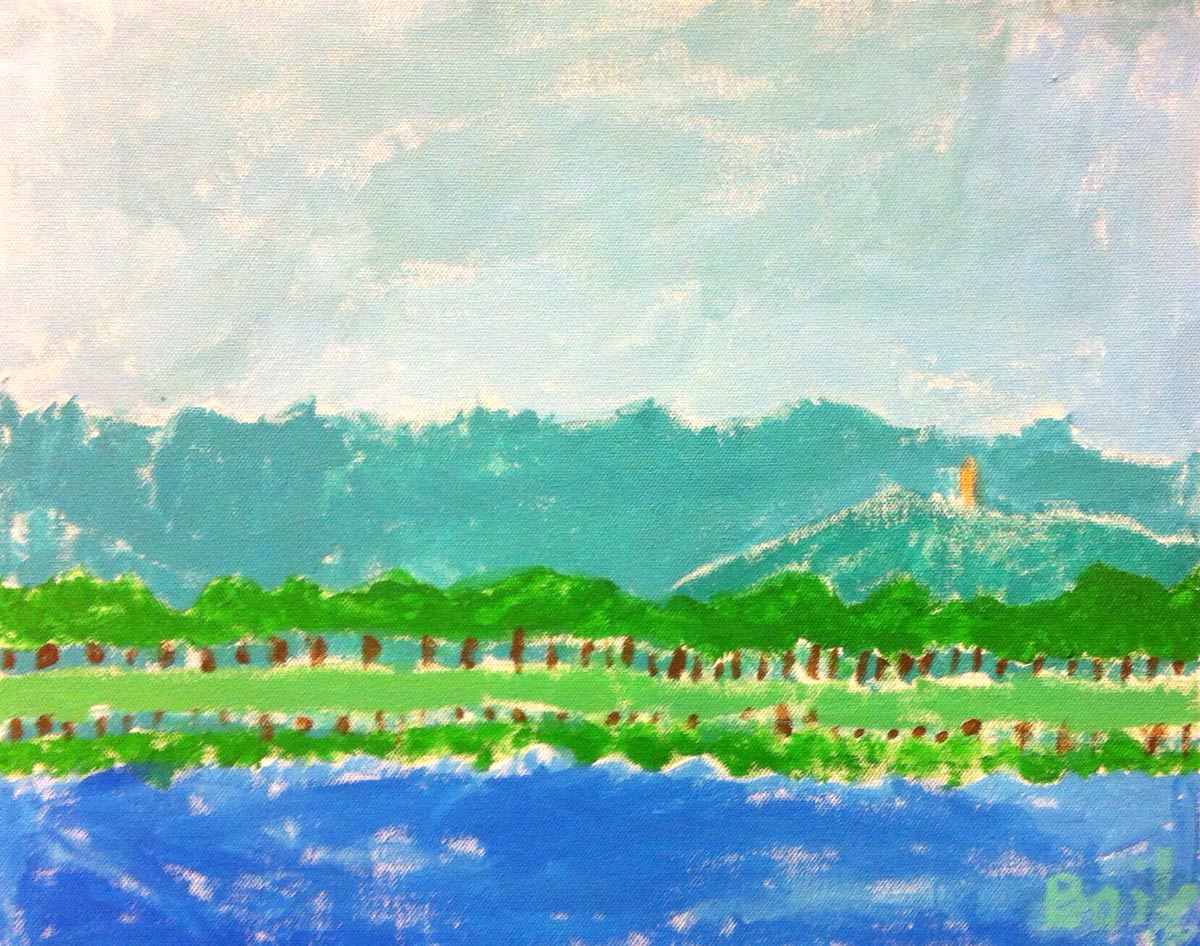
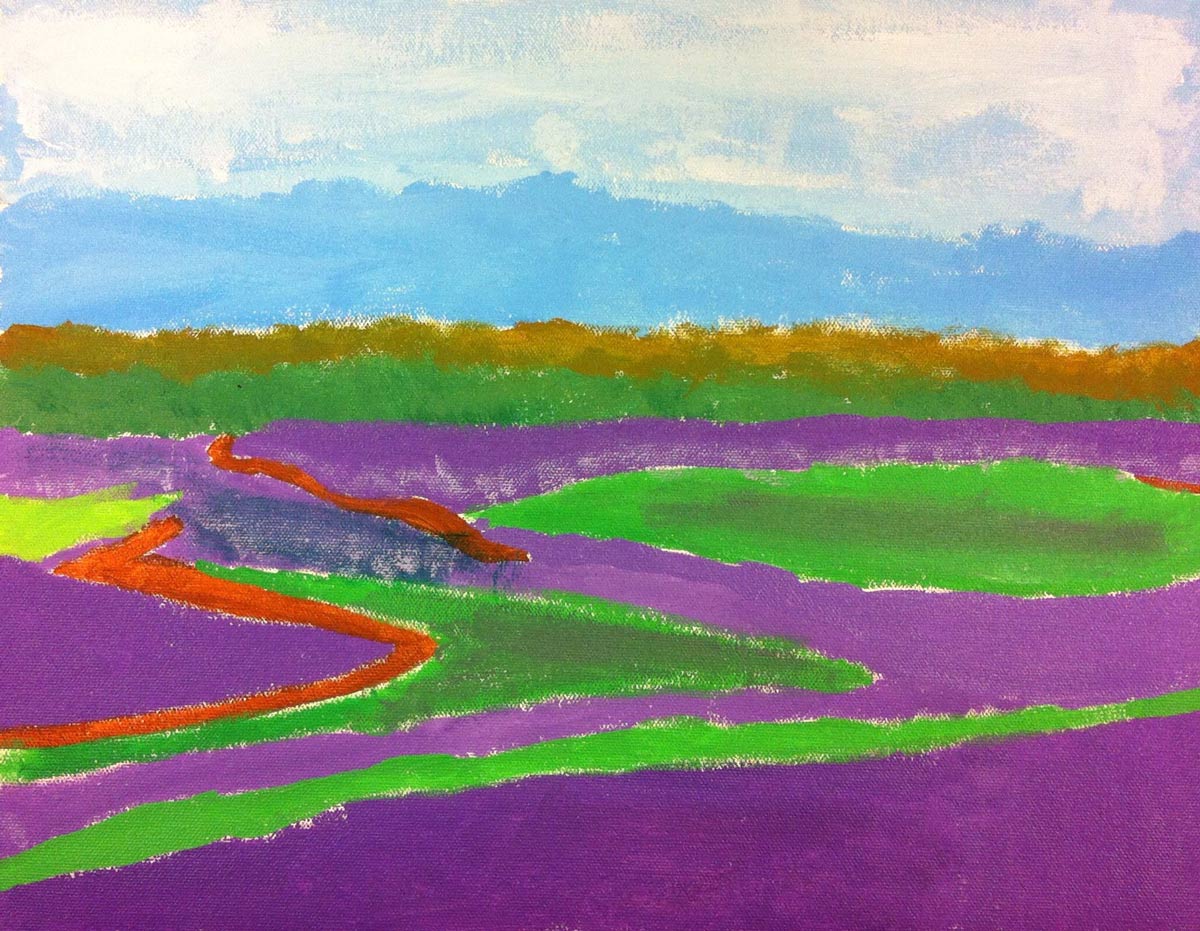
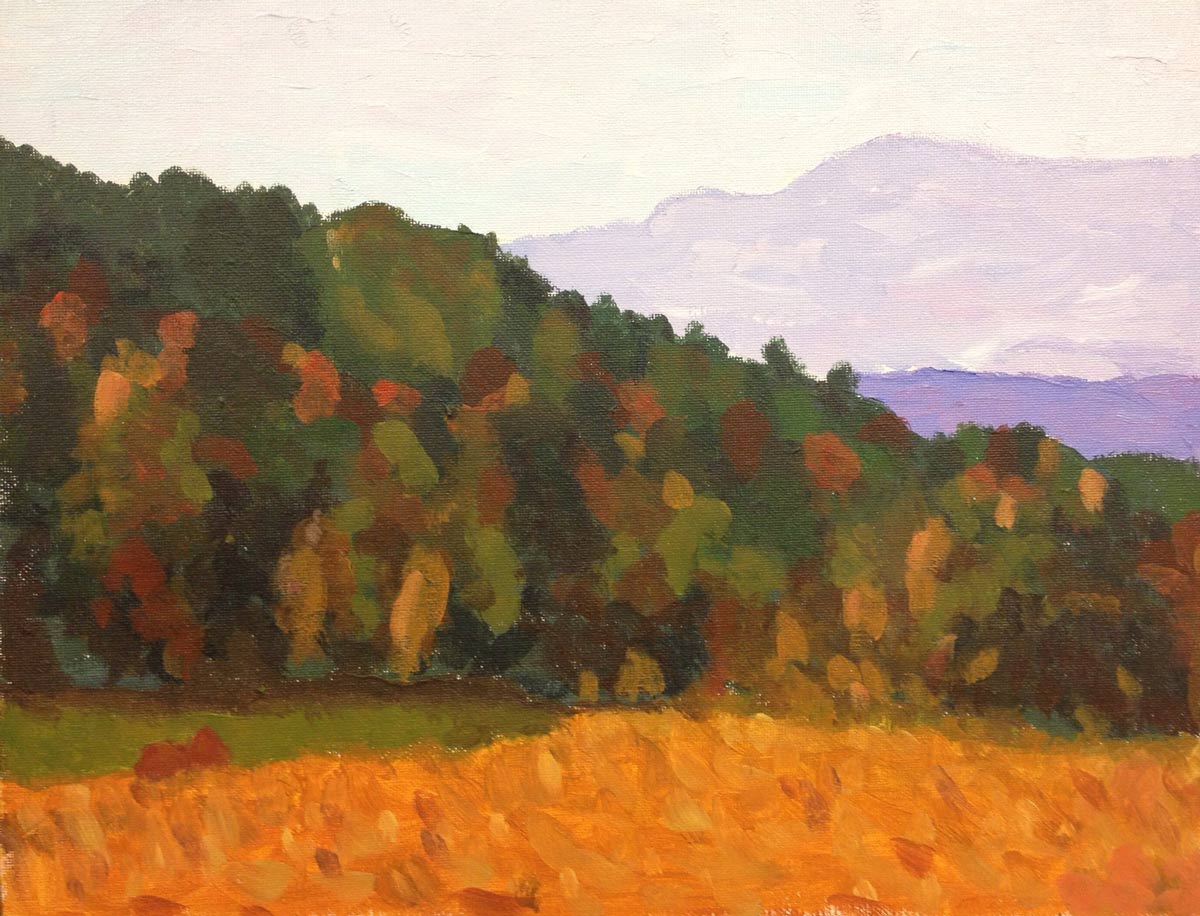
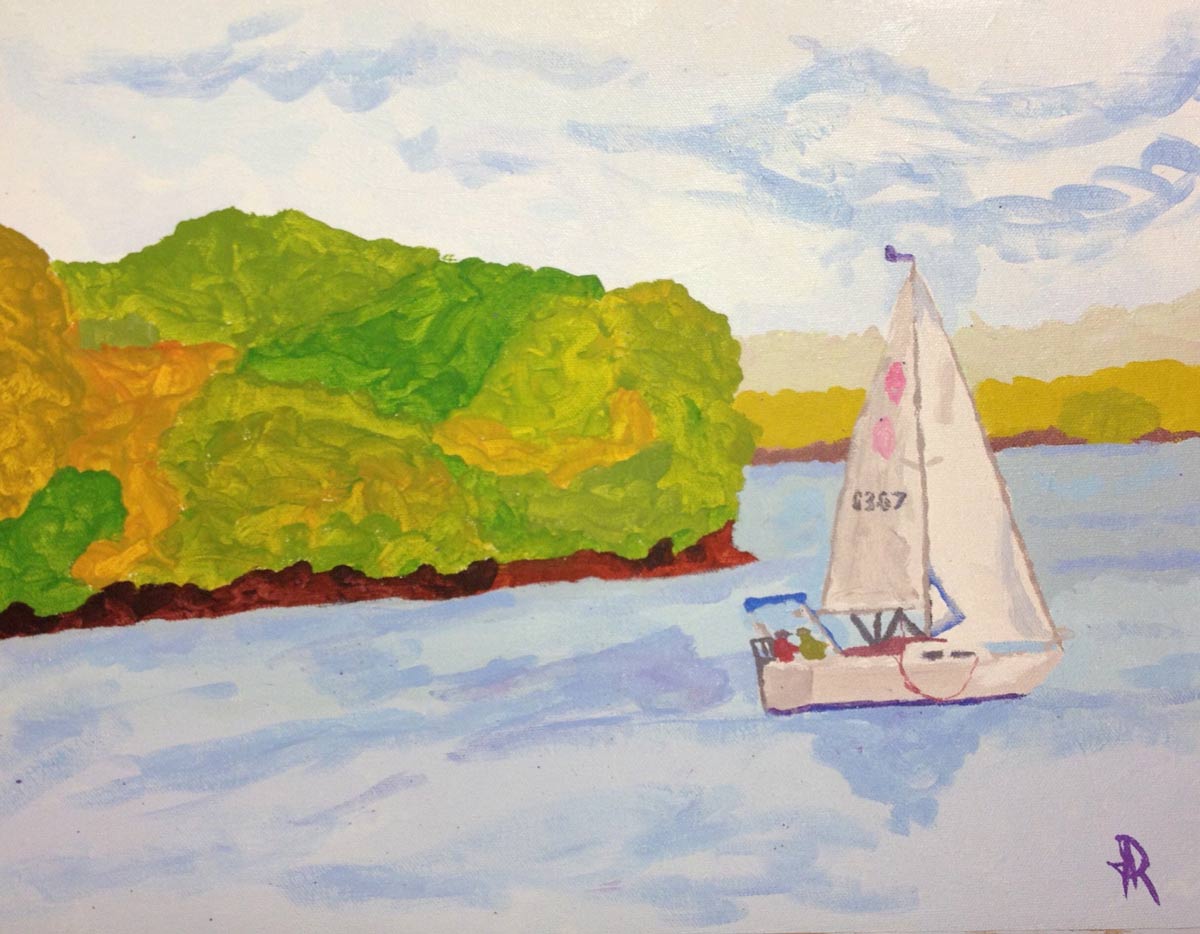
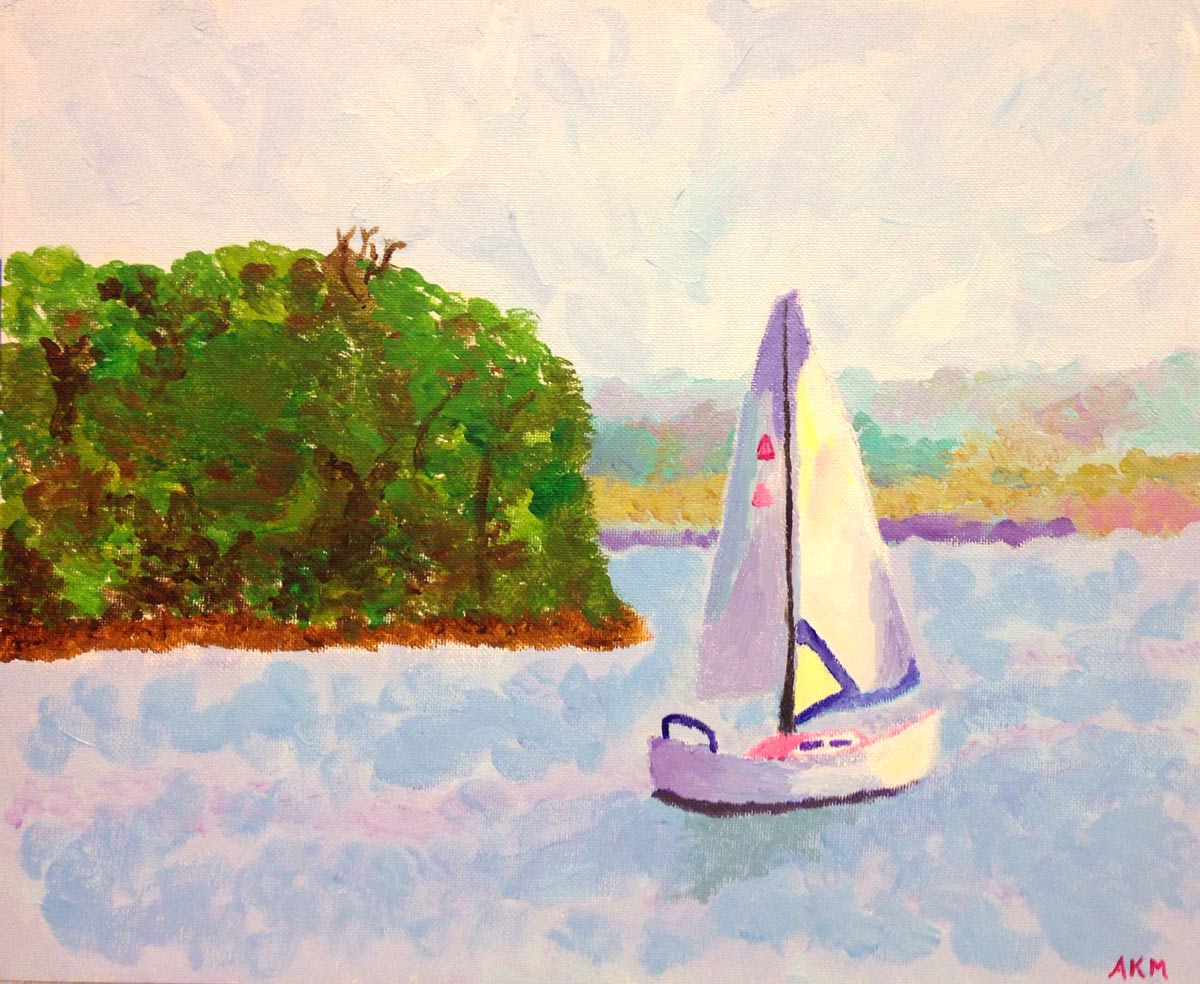
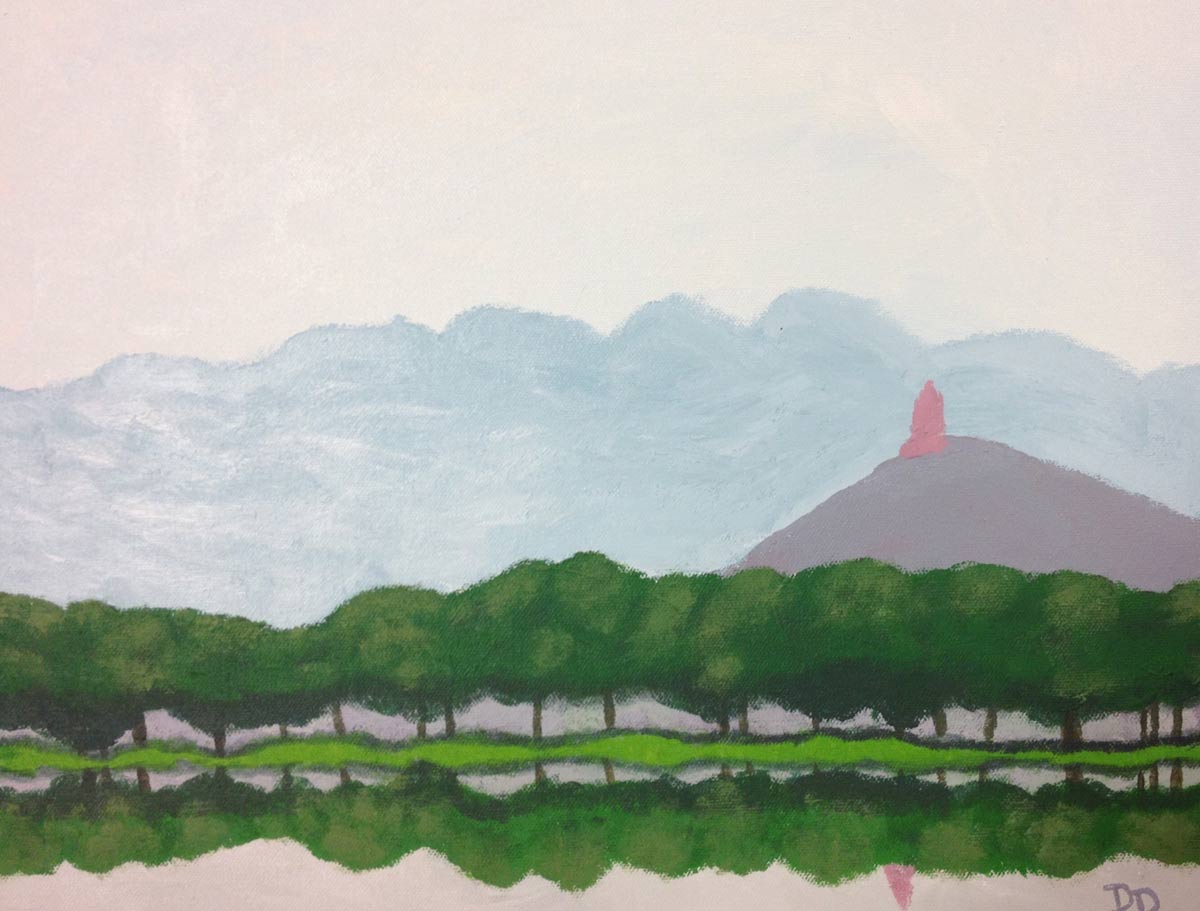
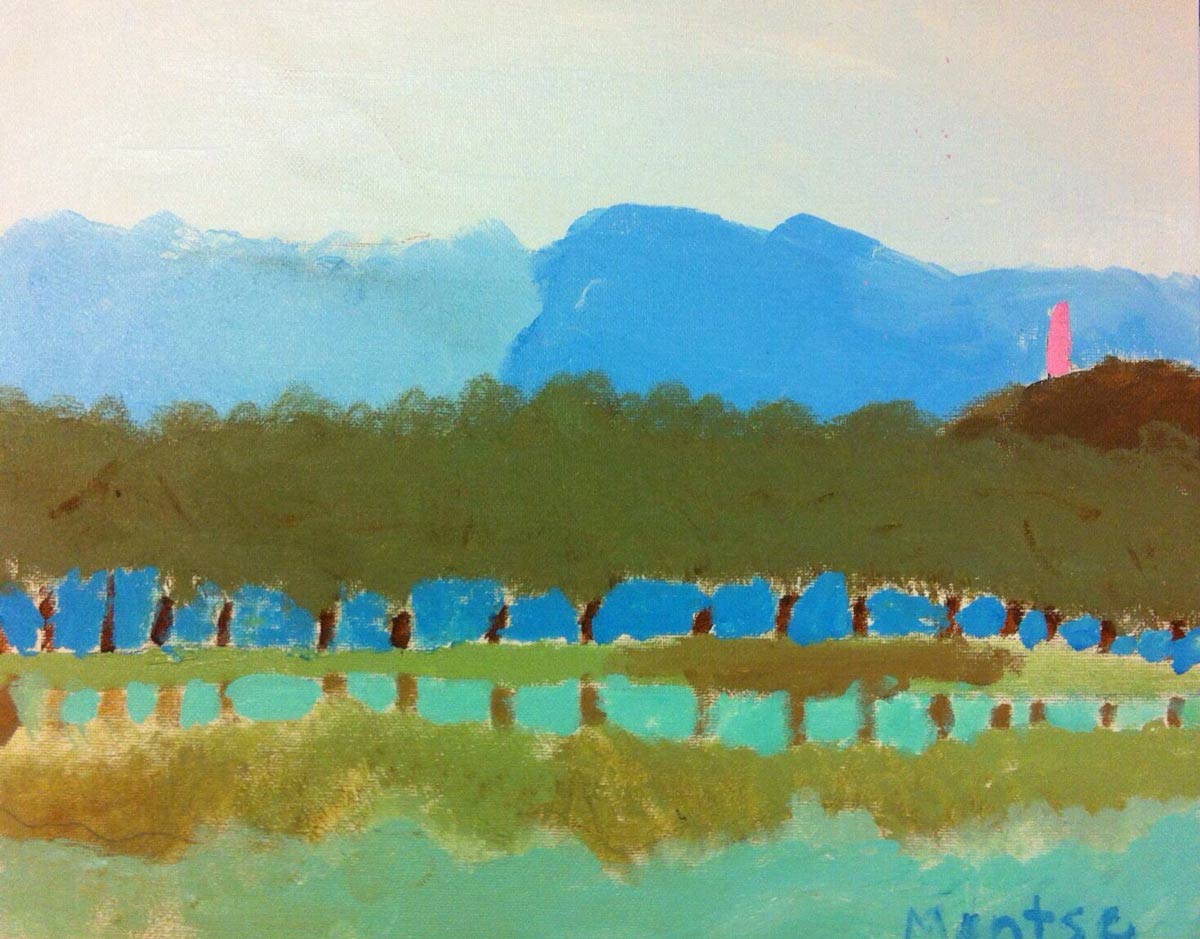
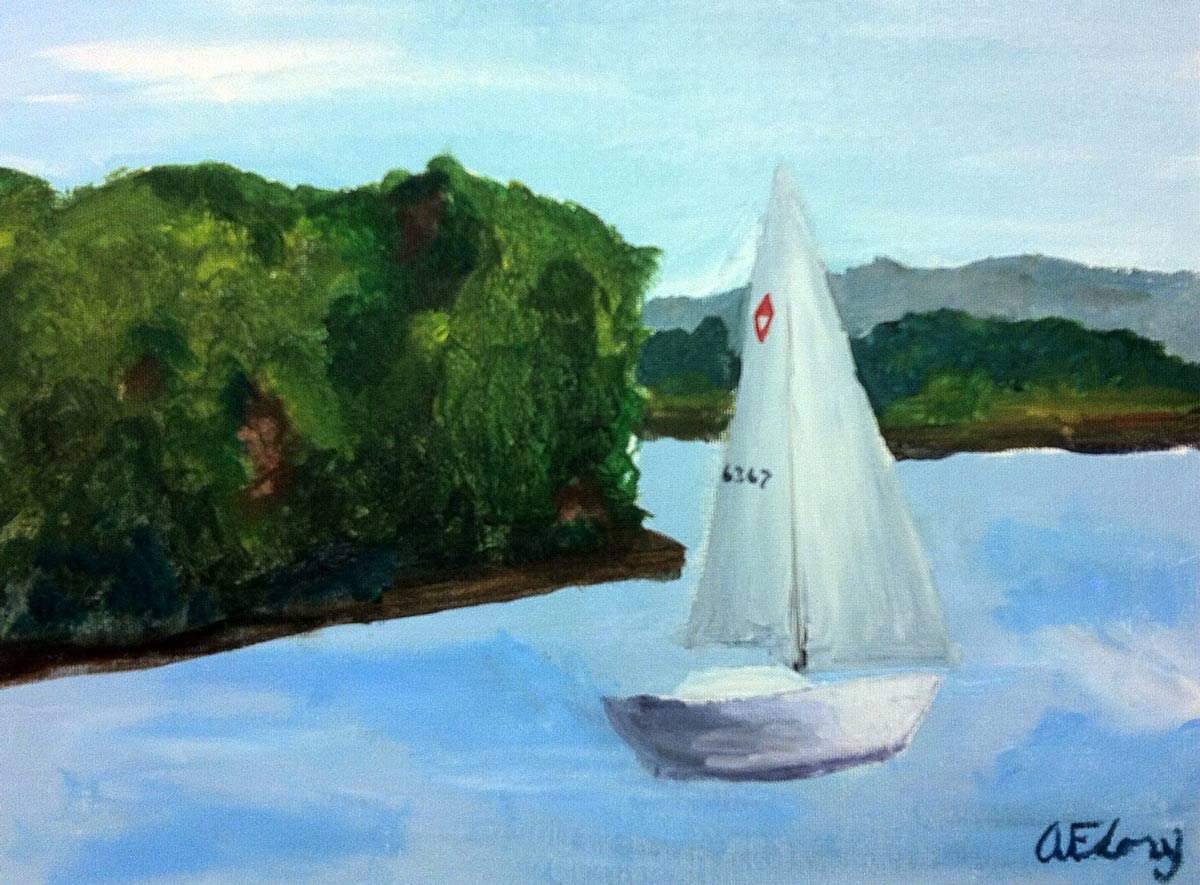
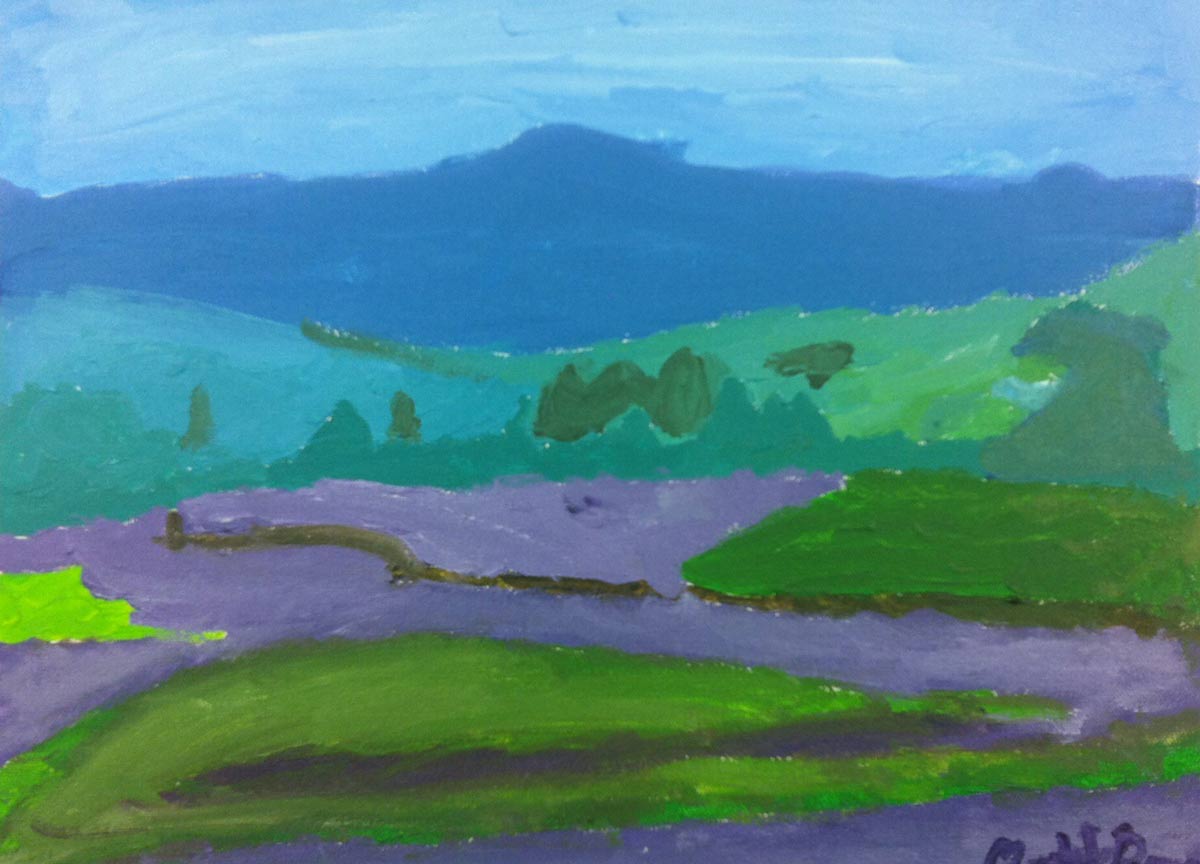
Landscape Paintings (tap any image to open viewer)


3.1 paint
Encourage students to work methodically, and use specific techniques from last week. Key areas are:
- Stay in one area and finish painting it before moving to the next area:
- top (farthest away) to bottom (closest)
- Use some sky color to mix into the first (most distant) land area
- Use some of the most distant land color in the next most distant land color. Continue using the colors like this.
- Keep your paint brush full and use a thick buttery paint technique
Make sure you don’t neglect the quiet students. Making the rounds in order helps you not skip anyone. Try to spend at least 2 minutes with each artist, even if they’re doing great. If they hide their work, be very sensitive and ask for permission to view it.
Review the landscapes on Pinterest if you can. (above)
“Enjoy working with your paint today! I’ll be coming around and helping everyone individually, so be patient. If you have a more urgent need, please ask for immediate help.”
Use this button to jump down to the preparation section.
LEARNING TARGETS
Students know how to make a signature
M A T E R I A L S
- Brushes
- Acrylic Paints
- Painting-In-Progress
- Palette Pad
- Water Tub
- Paper Towels
- Smocks
4.1 setup
D E M O setup:
- Small, yet longest bristled brush you have (a liner is great)
- Water
- Paints
- Palette
- Sample piece of canvas with colored area to paint signature onto
[icon icon=”chevron-circle-right”] Have students gather around for a quick demo on painting signatures.
Have your setup ready and make sure everyone can see. If you have a large class, call out groups to take a break and view the demo one group at a time. The others can continue painting.
4.2 PAINT
Tap the 4 arrows icon to enlarge the video to full screen.
Review the demo video and demonstrate to your students, or you can simply display the video on a larger screen for them to watch.
2. Make sure it’s light enough, or dark enough, to see, but not crazy contrast. You don’t want the signature to be the first thing someone sees!
3. Add water to make a smoothie-like consistency. Not thick like honey, and not runny like juice either
4. Dip the Tip! Use only the tip of the brush – don’t bend the bristles!
5. You must not try to get two letters out of one brush load, or you’ll end up pressing the brush harder to get more paint out of it, making a fat and un-readable letter. Dip for every single letter.
6. Paint the letters, don’t write your signature. This isn’t a pen or pencil. You have to pull a brush, because pushing it will make a big sloppy blob. Practicing is highly recommended!
7. As an alternative, If your paint is thick and wet, you can scratch your name with the back end of a thin brush or use the canvas pencil and write in the wet paint. It has to be pretty wet and thick, as well as a contrasting color to what’s underneath.
8. Don’t worry, because you can always paint over a sloppy signature and try again. or even wipe it off if you’re careful.
Use this button to jump down to the preparation section.
LEARNING TARGETS
Students know how to finish an acrylic painting
M A T E R I A L S
- Brushes
- Acrylic Paints
- Painting-In-Progress
- Palette Pad
- Water Tub
- Paper Towels
- Smocks
5.1 paint
Don’t just let them work on their own. Try to be talking and asking questions, going from student to student.
Use this button to jump down to the preparation section.
LEARNING TARGETS
Students know how to use their imagination to create art
M A T E R I A L S
- Leftover Paint & Materials
- Watercolor Paper or
- Canvas
- Dry Media if desired, such as pencil, charcoal, oil pastels
- Smocks
6.1 create
However, try not to let this become a reward for rushing through and finishing too fast.
Use this button to jump down to the preparation section.
LEARNING TARGETS
Students know the importance of cleaning up
M A T E R I A L S
- Paper Towels
- Cleaning wipes
- Sink
- Waste baskets
- Well-lit spot for photos
- Camera or phone-camera
7.1 clean
- Wash hands
- Super-wash brushes if used
- Put art supplies away
- Wipe tables & toss trash
- Remove any smocks (last)
- Check for items on floors and tables
7.2 photos
OBJECTIVES
- Practice and improvement in mixing paint and creating depth
- Understanding the steps involved in creating a painting, how depth is achieved with atmosphere, and how to sign a painting.
- Accomplishment by finishing an acrylic painting with depth
- Fulfillment in choosing reference and mixing accurate colors
TROUBLESPOTS
Not enough white in colors. Remember that colors dry darker. Encourage painters to re-work areas that are too dark.
Painting darker colors on top of lighter colors and getting a dirty brush technique
Stamping with a brush to try and get texture. This makes a pattern, which is undesirable in a painting.
ART WORDS
Depth – When a 2-dimensional work creates an illusion that some of the subject matter is far away. Depth is achieved with overlapping, perspective rules, atmospheric perspective, size, contrast, and details. The last 3 of these all decrease to make things look farther away.
Dark to light – tap for full description with graphics. Keep in mind that we will try to use thick paint and will not see much layering until the end of the painting.
Atmosphere – Or atmospheric perspective, is a term used to show that things are farther away by depicting the increasing amount of air between the viewer and the objects (such as hills in the distance). You can imagine that the air is like a series of plastic curtains, and the farther away something is, the more curtains of air are in the way, making things softer, lighter, & less detailed. Air is also the color of the sky, so adding sky-colors to the distant subject matter adds to the effect.
CLASSROOM
PREP
Print all of your PDFs from the lesson plan and cut any references apart as needed.
What your room needs
Here are your printable lists and room prep instructions.
Opens in new window
CLASSROOM
MATERIALS
- Still Life Objects
- Cheasels
- Water Tub
- Paper Towels
- Smocks
- Waste Baskets
STUDENT’S
MATERIALS
- 14 x 17” Sketch Paper
- Kneaded Eraser
- Soft Compressed Charcoal
- Brushes
- Acrylic paints
- Palette pad
- Watercolor Paper (for Artists’ Choice)
- Canvas (for Artists’ Choice)
- Dry Media (for Artists’ Choice)
PREVIEW
Week 7: Color Journal Yellows
Students learn how color changes by making 5 mixes of colors, and adding colors to each one to make a page with 25 different variations of yellows and oranges. Specific formulas are followed that correspond to the pigments used in the The Art Instructor program, and produce colors that artists need to use often.
Week 8: Many Minis
Students will work on a series of very small works each using different combinations of media. There is opportunity for lots of freedom and self-expression, and artists learn to focus on one work at a time while doing many. The small size and having several works in a row, takes the pressure off of each work, so students really enjoy themselves and create some fantastic work as a result.
Use this button to view our parent’s blog. Share the link: http://parentart.org, with your student’s parents so your they can read about the lesson each week.