
Painting
Each lesson Plan focuses primarily on one of the 4 Cornerstones of Art:
Drawing | Painting | Color | Style
OVERVIEW
In this 2 week lesson, students will learn the process of still life setup, and how to create thumbnail sketches for working on composition. This week is spent mostly drawing and getting the canvas board ready. Next week is all about the painting.– – –
Grades 3 – 5
Week of Jan 27 – 31
1 Hour & 45 Minutes
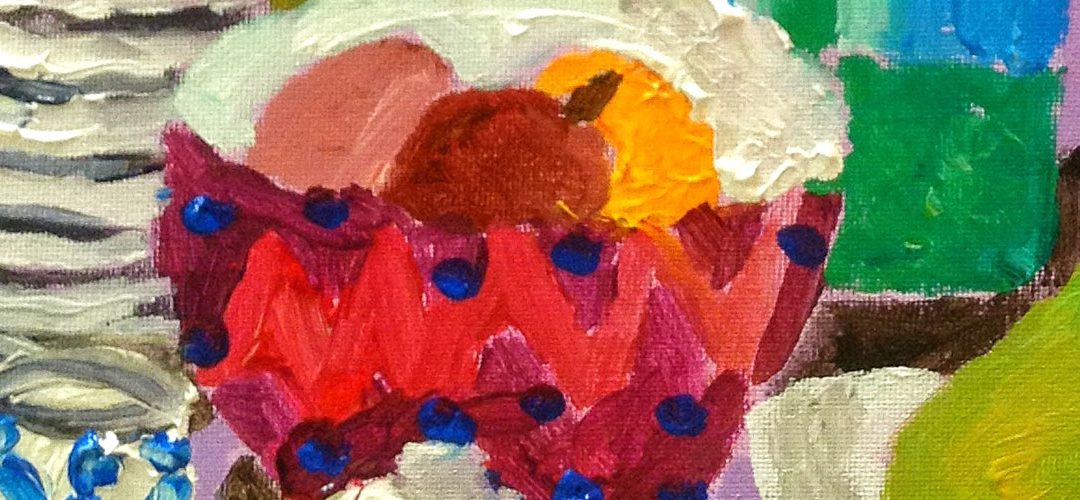
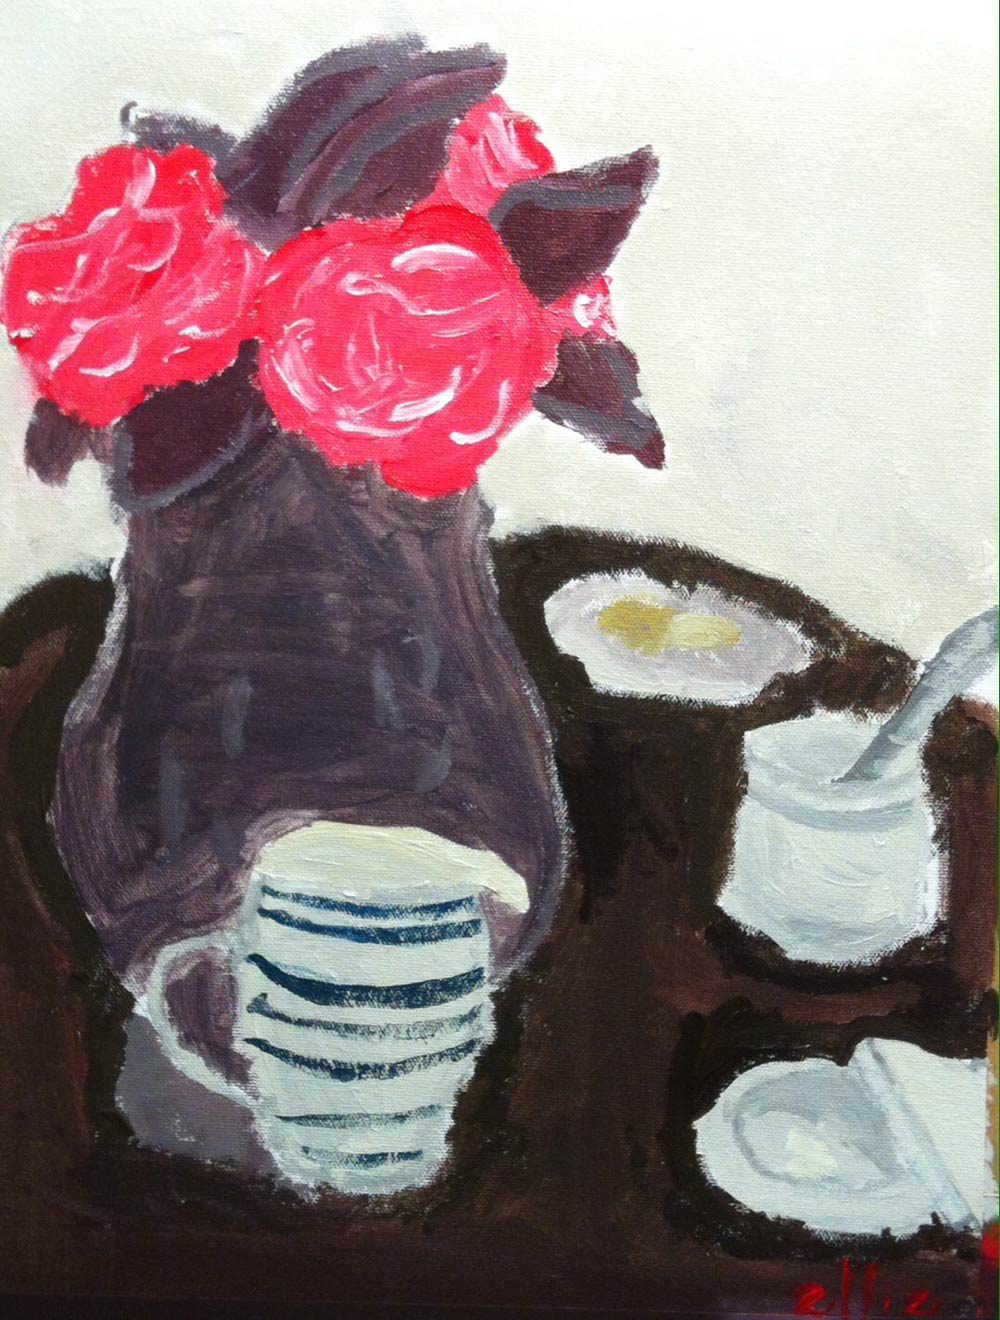
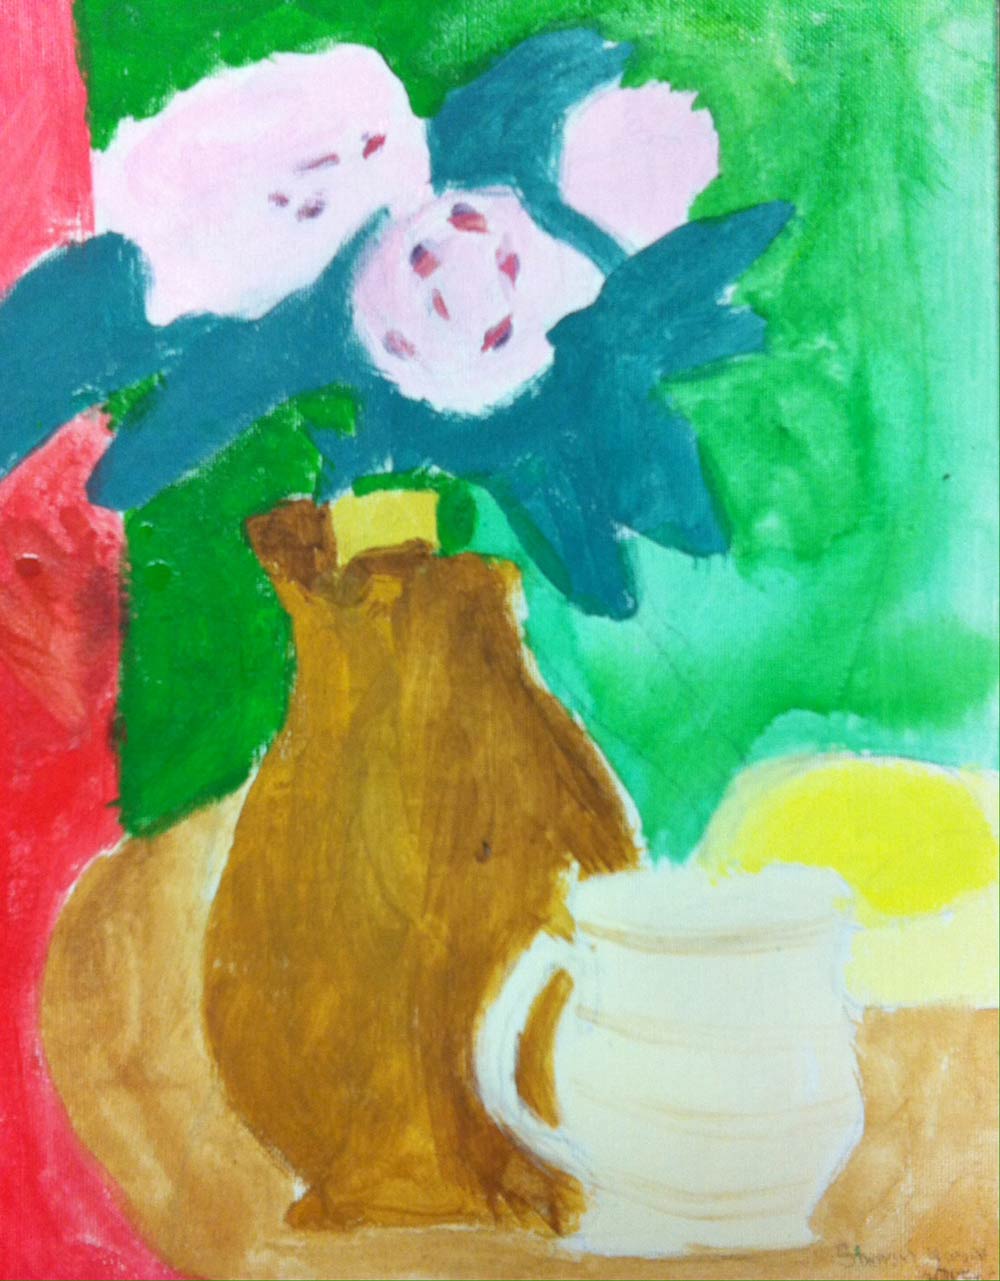
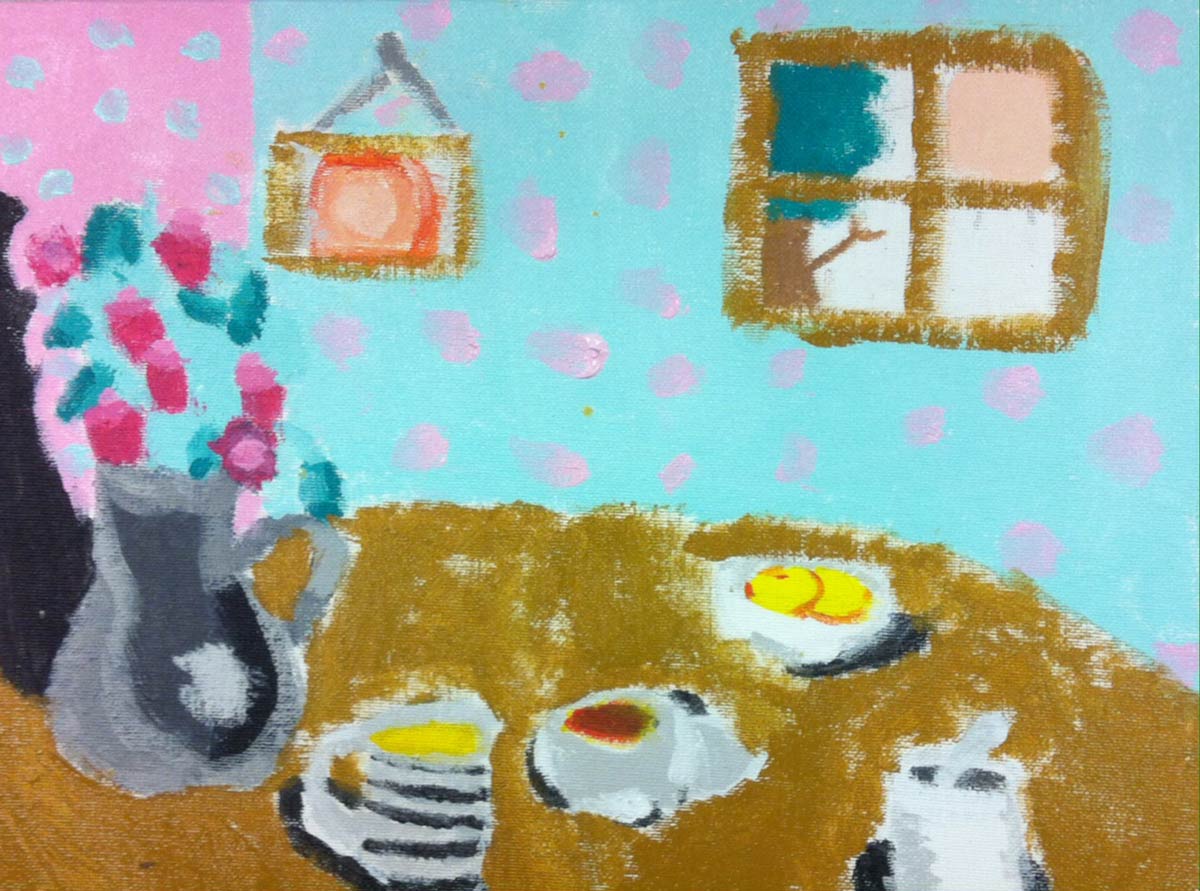
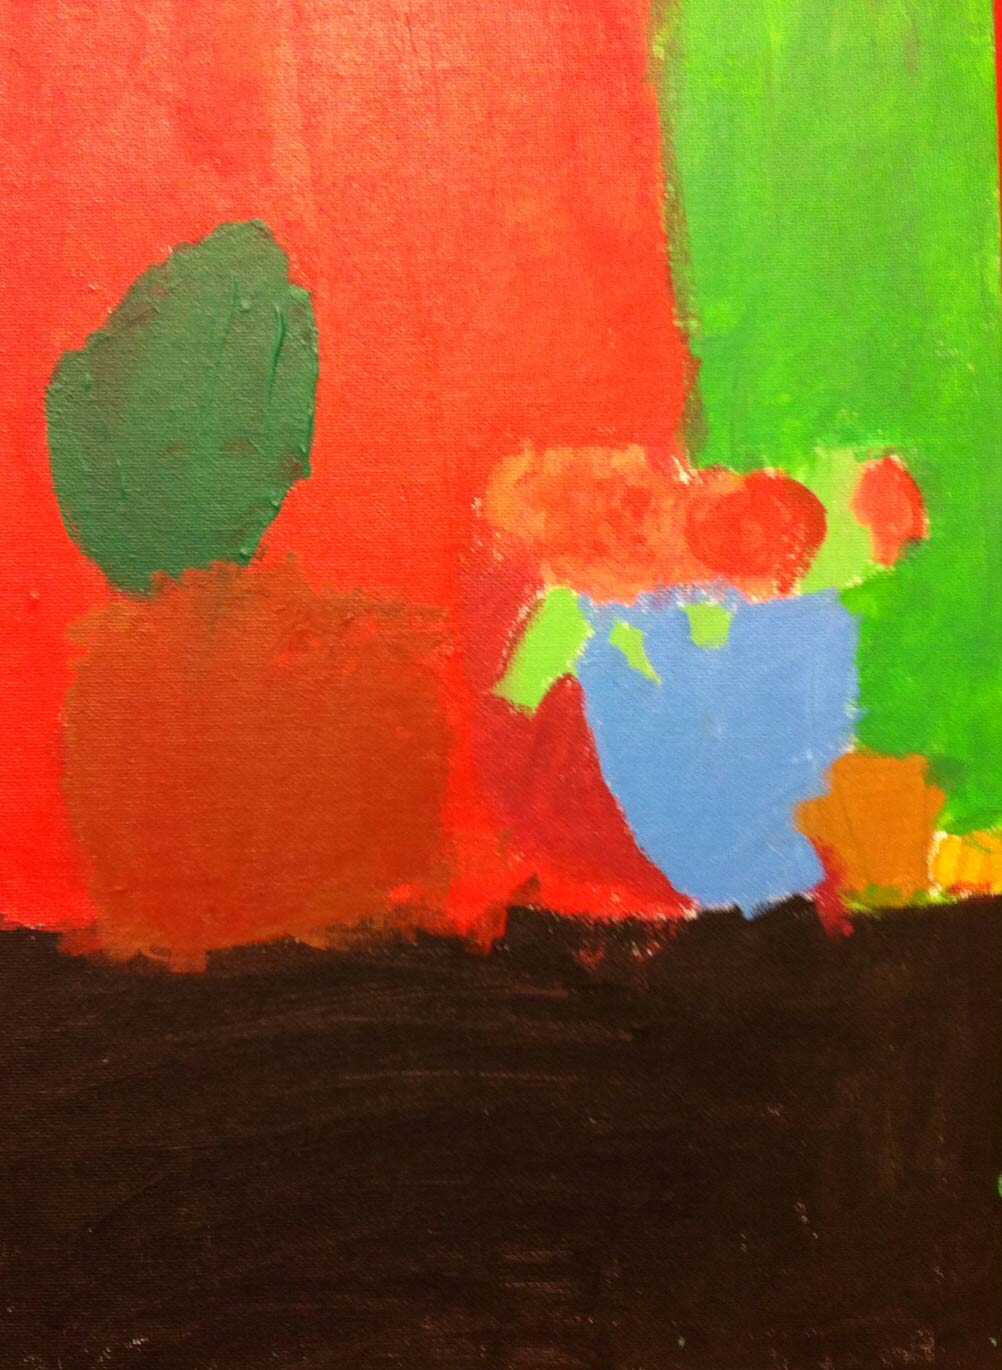
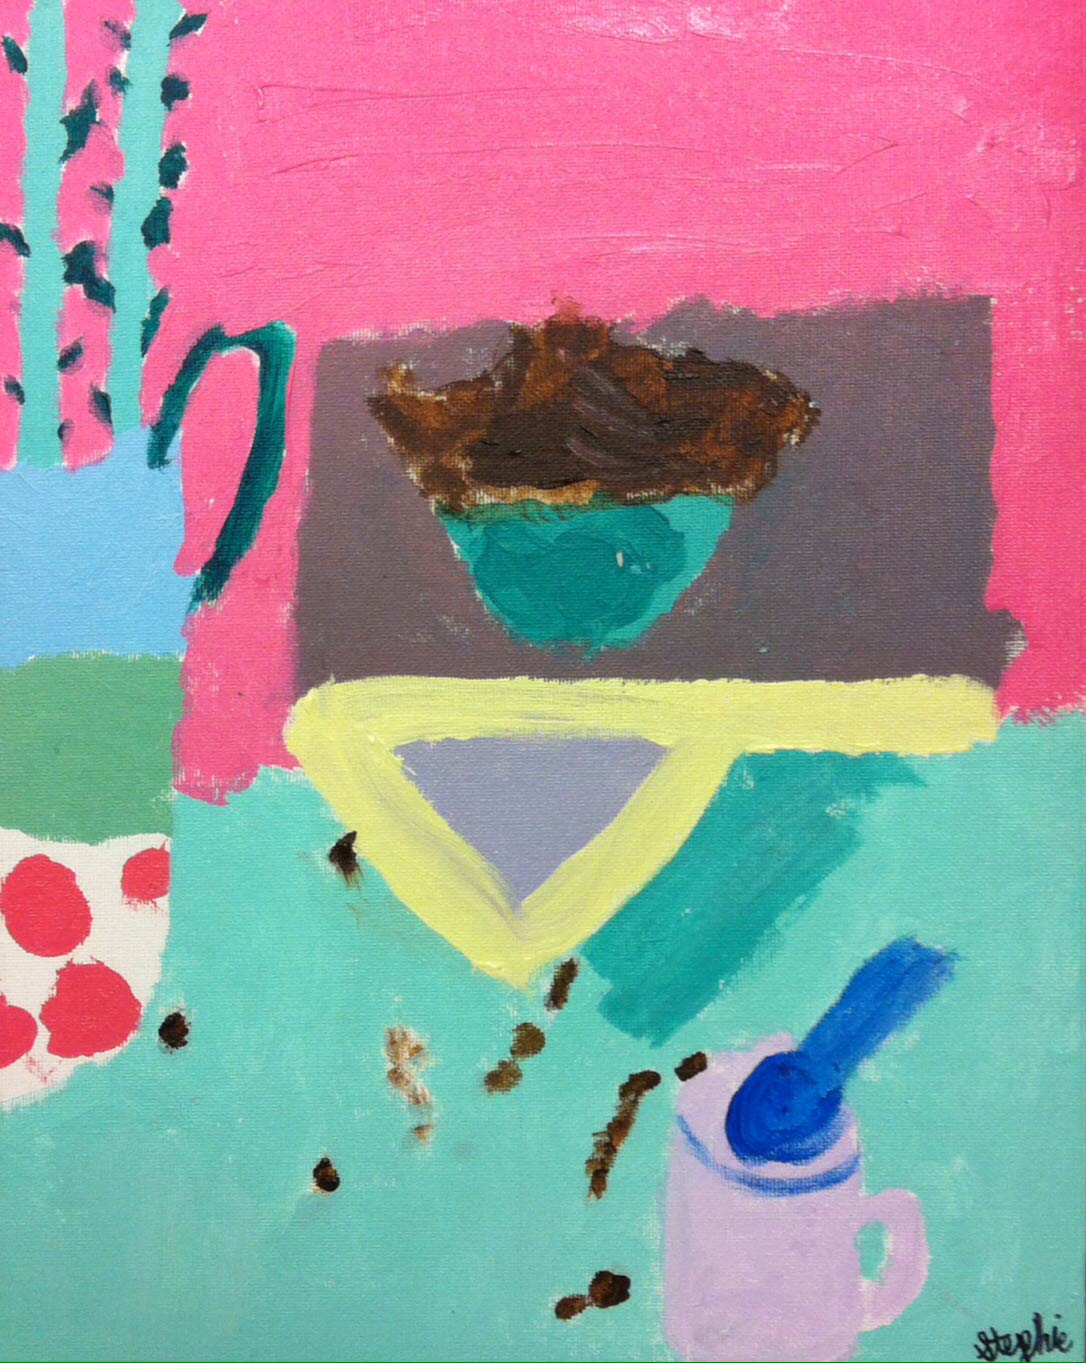
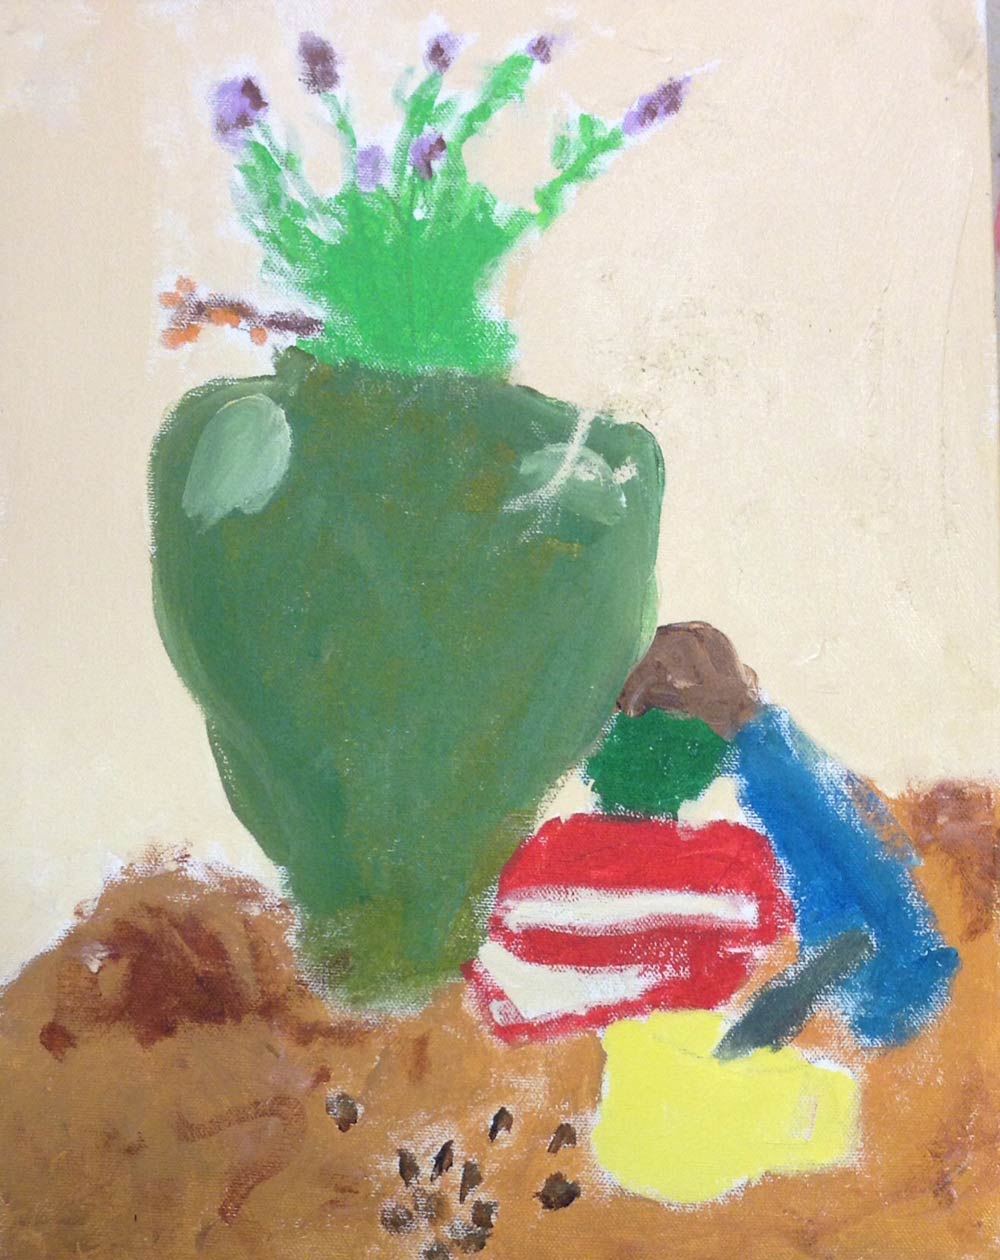
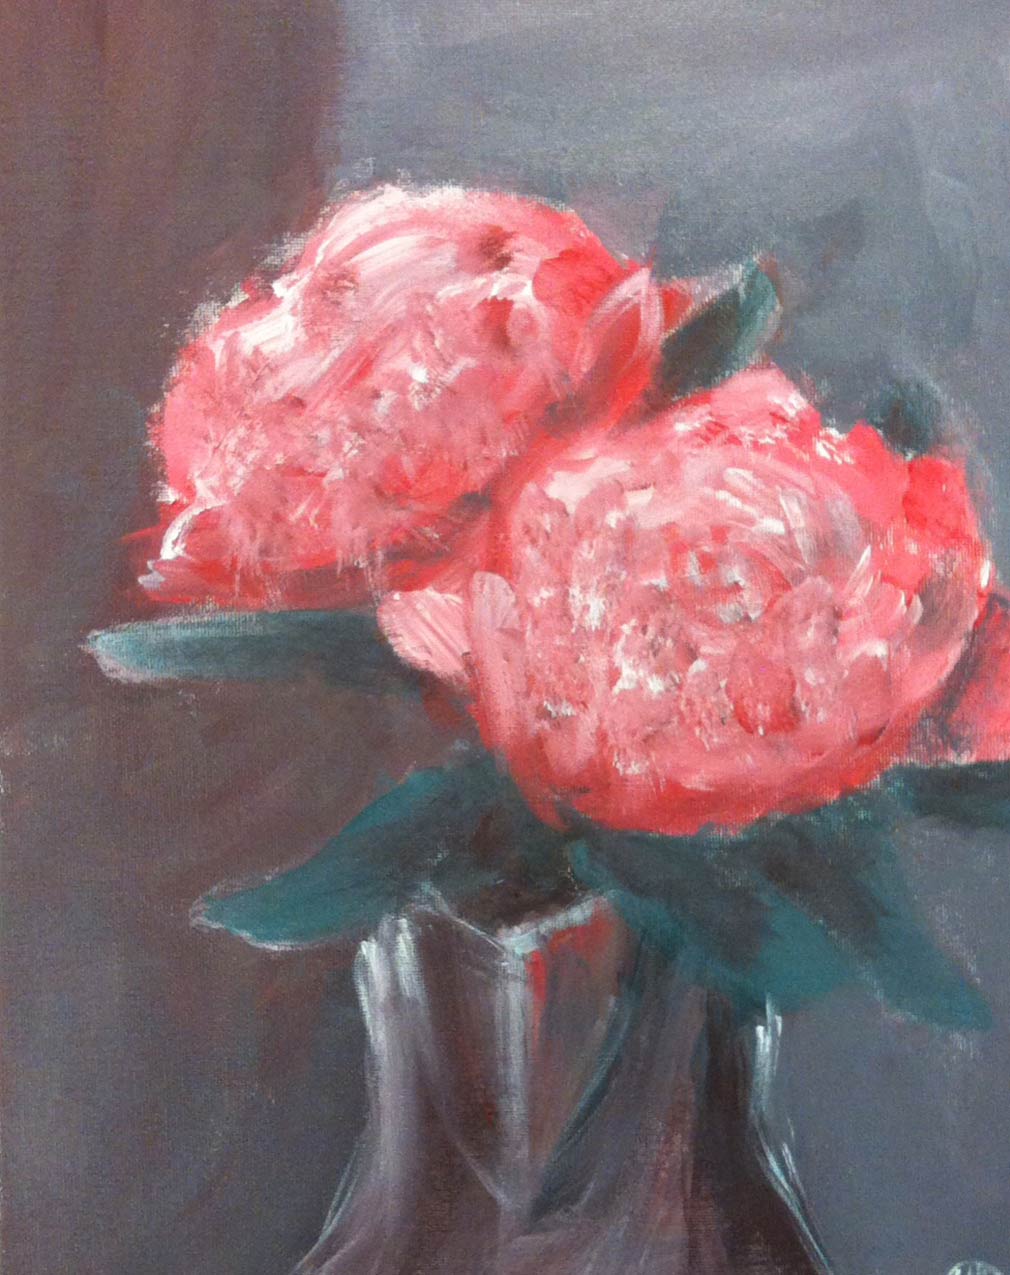
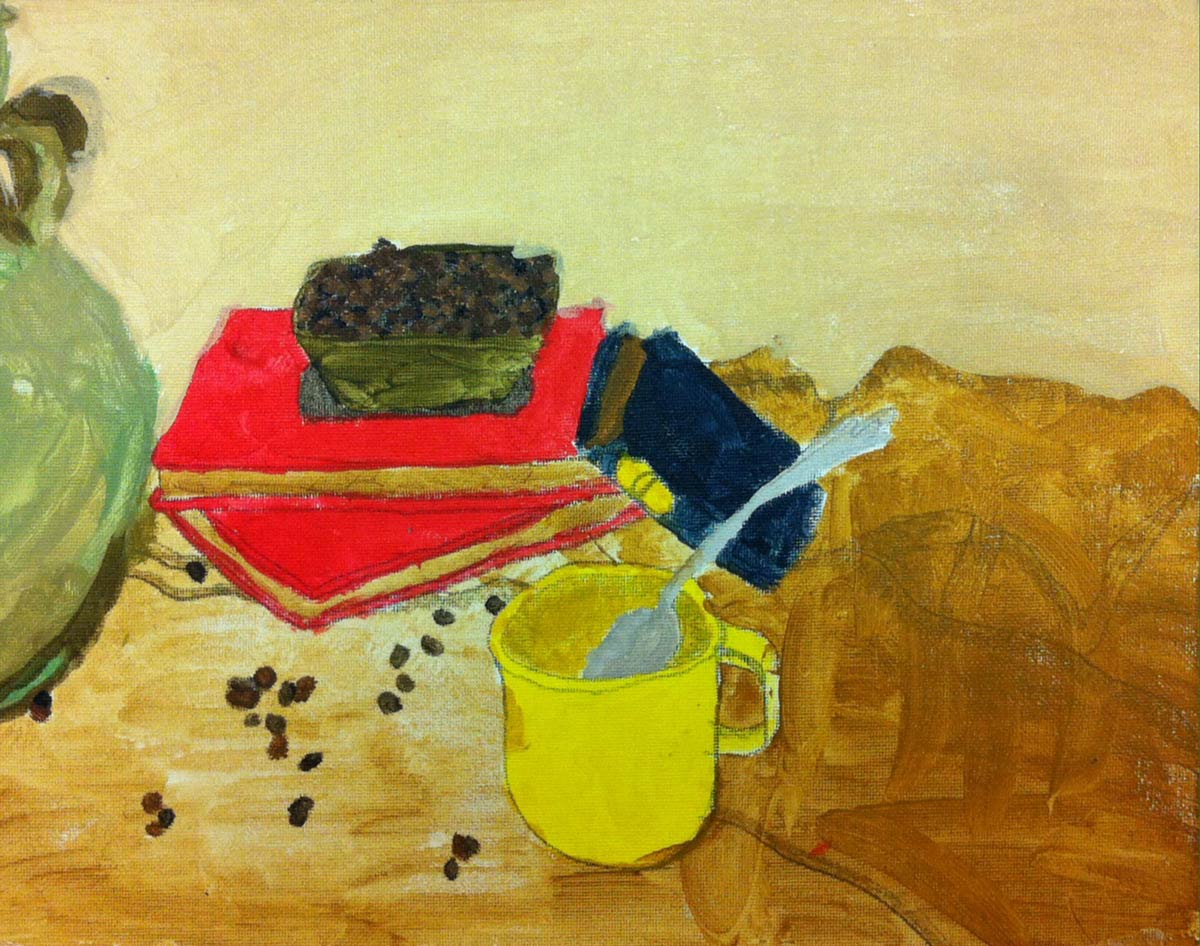
Student Work

Lesson At A Glance
Here’s a brief overview of the complete lesson. It’s also on your prep page in the Ready, Set, Go! section (below the lesson).
Colored buttons jump to each section in the full lesson plan below.
20 Minutes – Students begin by sketching still life
10 min – How to set up still life
12 min – Frame Game PDF
10 min – How to design a painting
5 min – clean up drawing materials & set up canvas
20 min – Canvas pencil – lightly at first, then darker
20 min – If time, set up & paint light wash over objects
2 Min – Leave up the still lifes
Use this button to jump down to the preparation section.
SCROLL & TEACH
LESSONPLAN
Each section is a different color. Read over once and then you can SCROLL & TEACH using any device you like. It’s designed to work well with your phone.
LEARNING TARGETS

Students know how to draw still lifes
M A T E R I A L S
- 14″ x 17″ sketch pad
- 2B pencil
- White and kneaded erasers
- Still life objects/setup
All materials are suggestions and may be modified as you see fit. We have tried many items, and these seem to allow the most versatility for the cost.
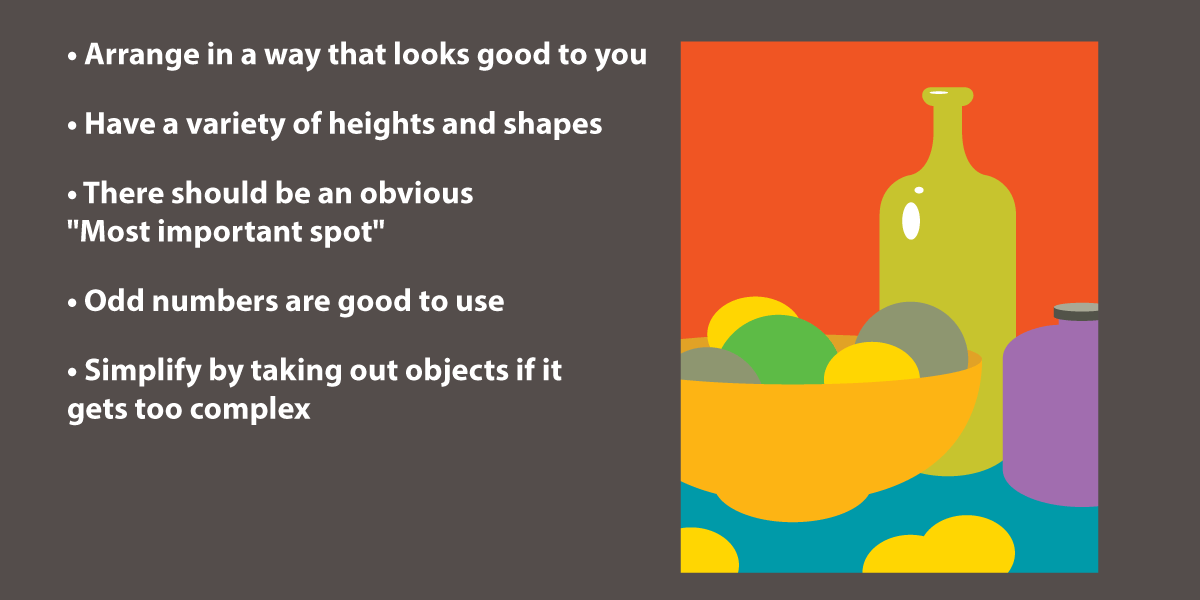
How to set up a still life (tap any image to open viewer)

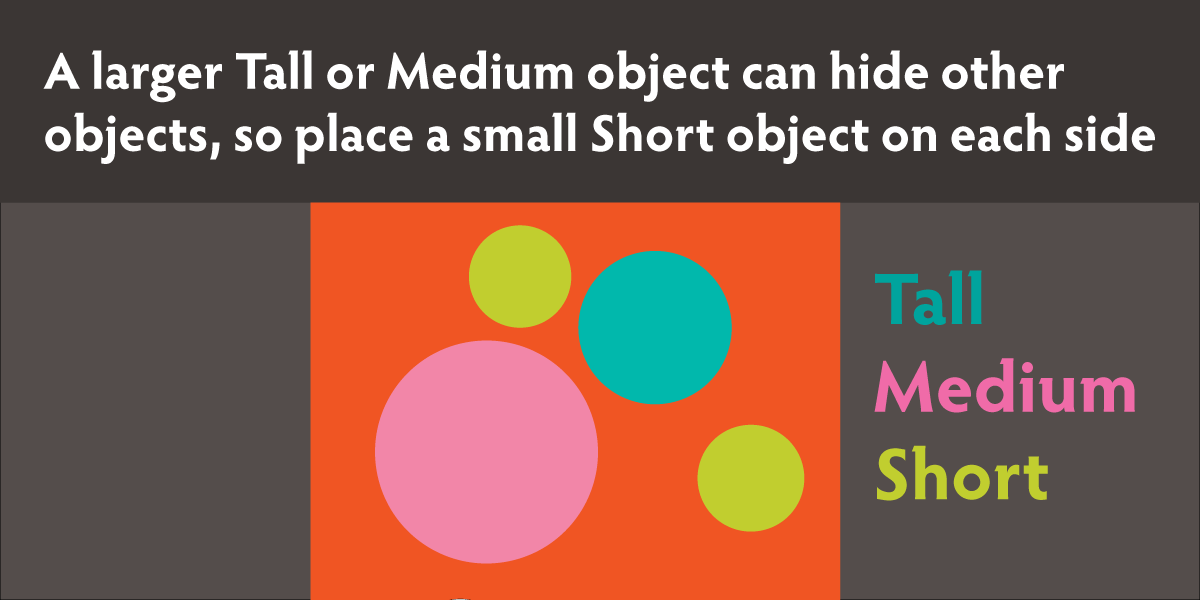
“You can choose anything you see and draw it using charcoal. Take about 10 minutes or so and enjoy the drawing process. You can draw several things or just focus on one item if you want.”

Pinterest Gallery – Still Life
Tap the icon to the left to open our special Pinboard showing examples of artwork to display to your class. See our Article for making Pinterest work on larger displays. You can also use a laptop or large tablet and gather everyone around like you’re using a book.
Advanced Student Lesson
CREATIONS - tap here to open
Our Creations lessons are for students who have completed the two years of Foundations and are ready to begin using all that they have learned to create new work. These more challenging versions of the same concepts and techniques are easily taught along-side students in the Foundations course. This allows for excellent review, and is encouraging for students to see progress from each viewpoint.
Use the Student Instructions printout below to distribute to your Creations students. Tap the image to open the PDF in a new window.
Balanced Still Life
Project from last 2 weeks is continued into this week and next week.
If a student is finished, they should either work to finish any other projects still in process, or move to a new project with full artists’ choice. If doing a new project, take care to follow the 7 steps and have a good plan. Use the 7 Steps PDF below to remind students to stay on track.
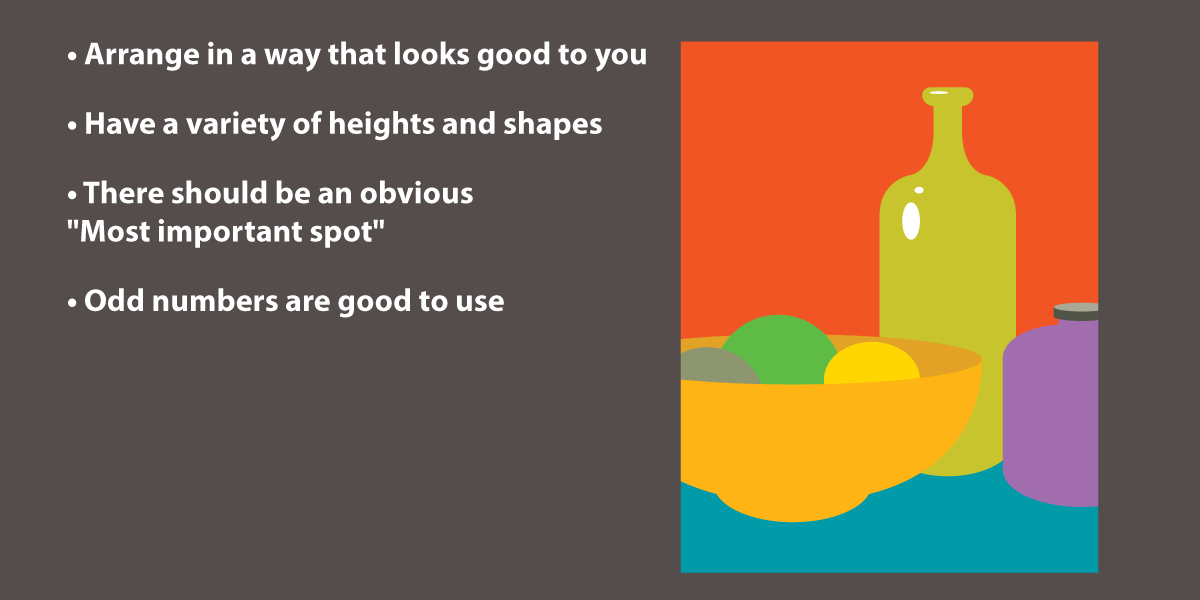
Overview: Students will use thumbnails to work out a balanced composition for a still life. They can choose to work in pencil, oil pastels, watercolor, or acrylics on paper.
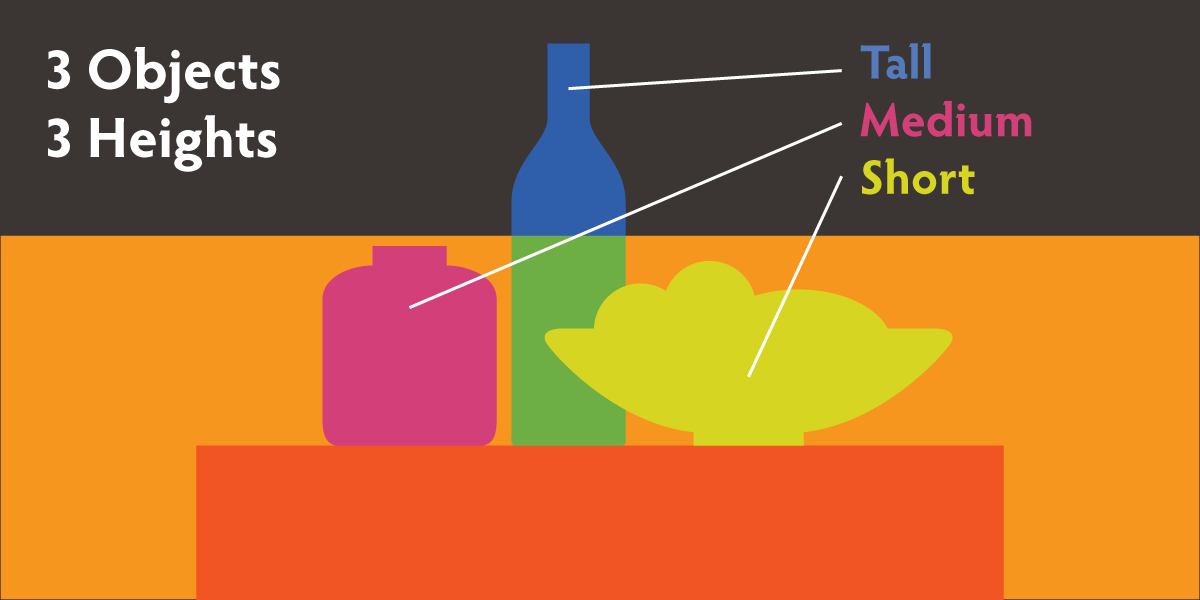
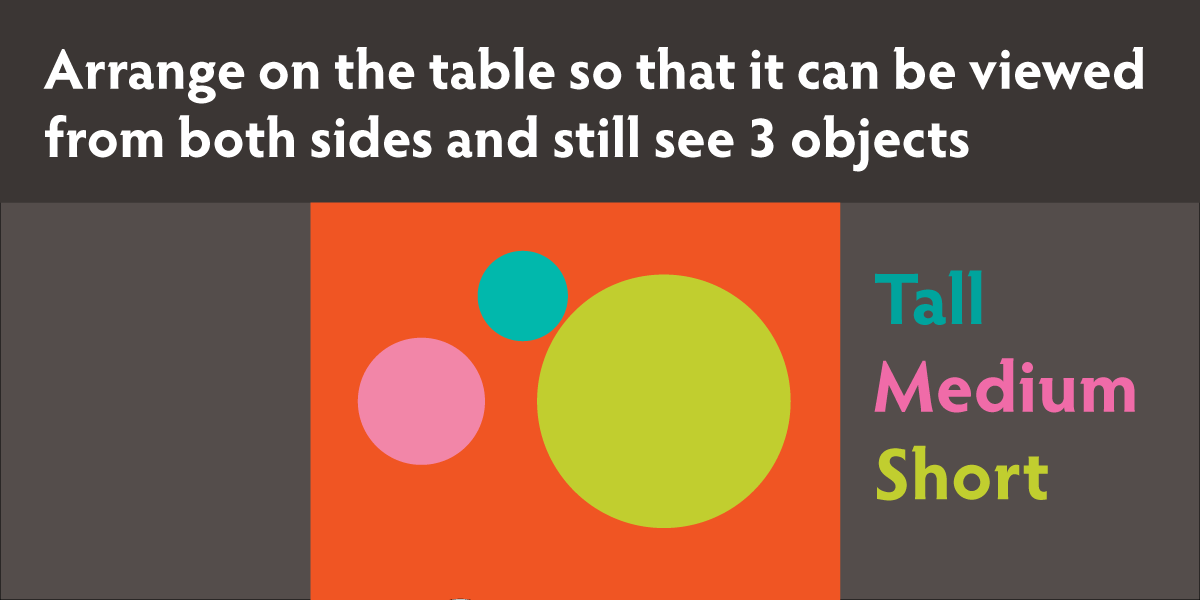
Step 1. (10 minutes) Set up objects for a still life, keeping the objects simple. At least 3 objects must be used. Select medium – and surface: either drawing paper or watercolor paper.
NOTE: Your work can be: 1) graphic-style poster with the objects isolated and arranged in any way you like, 2) surrealistic, or 3) realistic.
Step 2. (15 min) Thumbnails – Draw 3 or 4 horizontal Frames and 3 or 4 vertical ones. These should be 1 and 1/2 inches or so. Then create 6 to 8 compositions using only Big Shapes, and taking only one minute to do each idea. Take your best idea and create 1 or 2 variations of it. Choose your favorite.
Step 3. (5) Set up workspace and materials.
Step 4. Guide Lines – draw very light simplified shapes to help your accuracy and to copy the thumbnail sketch. Look at the Frame edges to make sure you’re getting the shapes the same sizes and proportions.
Step 5. Create your artwork.
The 7 Steps to Making Art
- Inspiration
- Reference
- Practice
- Set up
- Guidelines
- Self-expression
- Clean up
Tap images to open Creations Student Instructions and Reference Materials in new windows


Use this button to jump down to the preparation section.
LEARNING TARGETS
Students know how to set up still lifes
M A T E R I A L S
- Several still life items per group of 3 to 5 students
Sill Life Insights (tap any image to open viewer)


Still life Magic (tap any image to open viewer)
Every element in a still life can be changed – like magic. You can make things bigger or smaller, and move them to any place you like. All you need is a thumbnail sketch for ay idea you have.
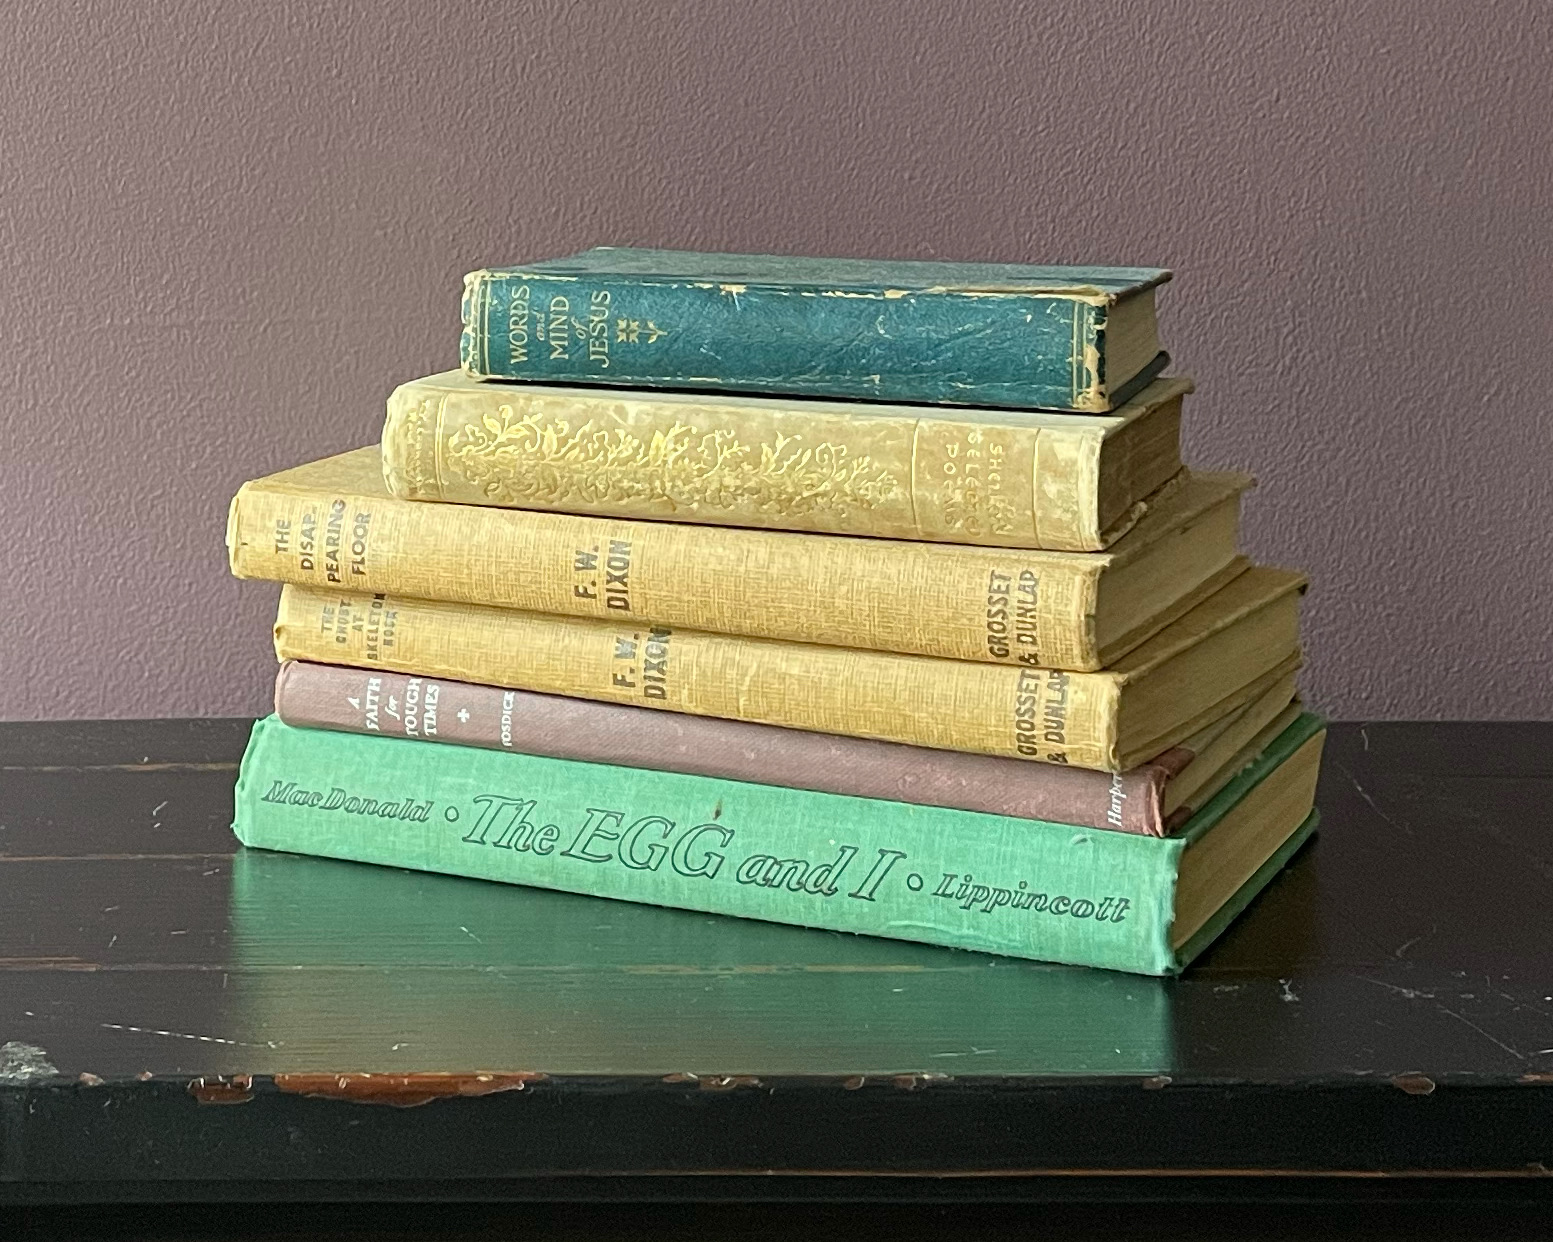
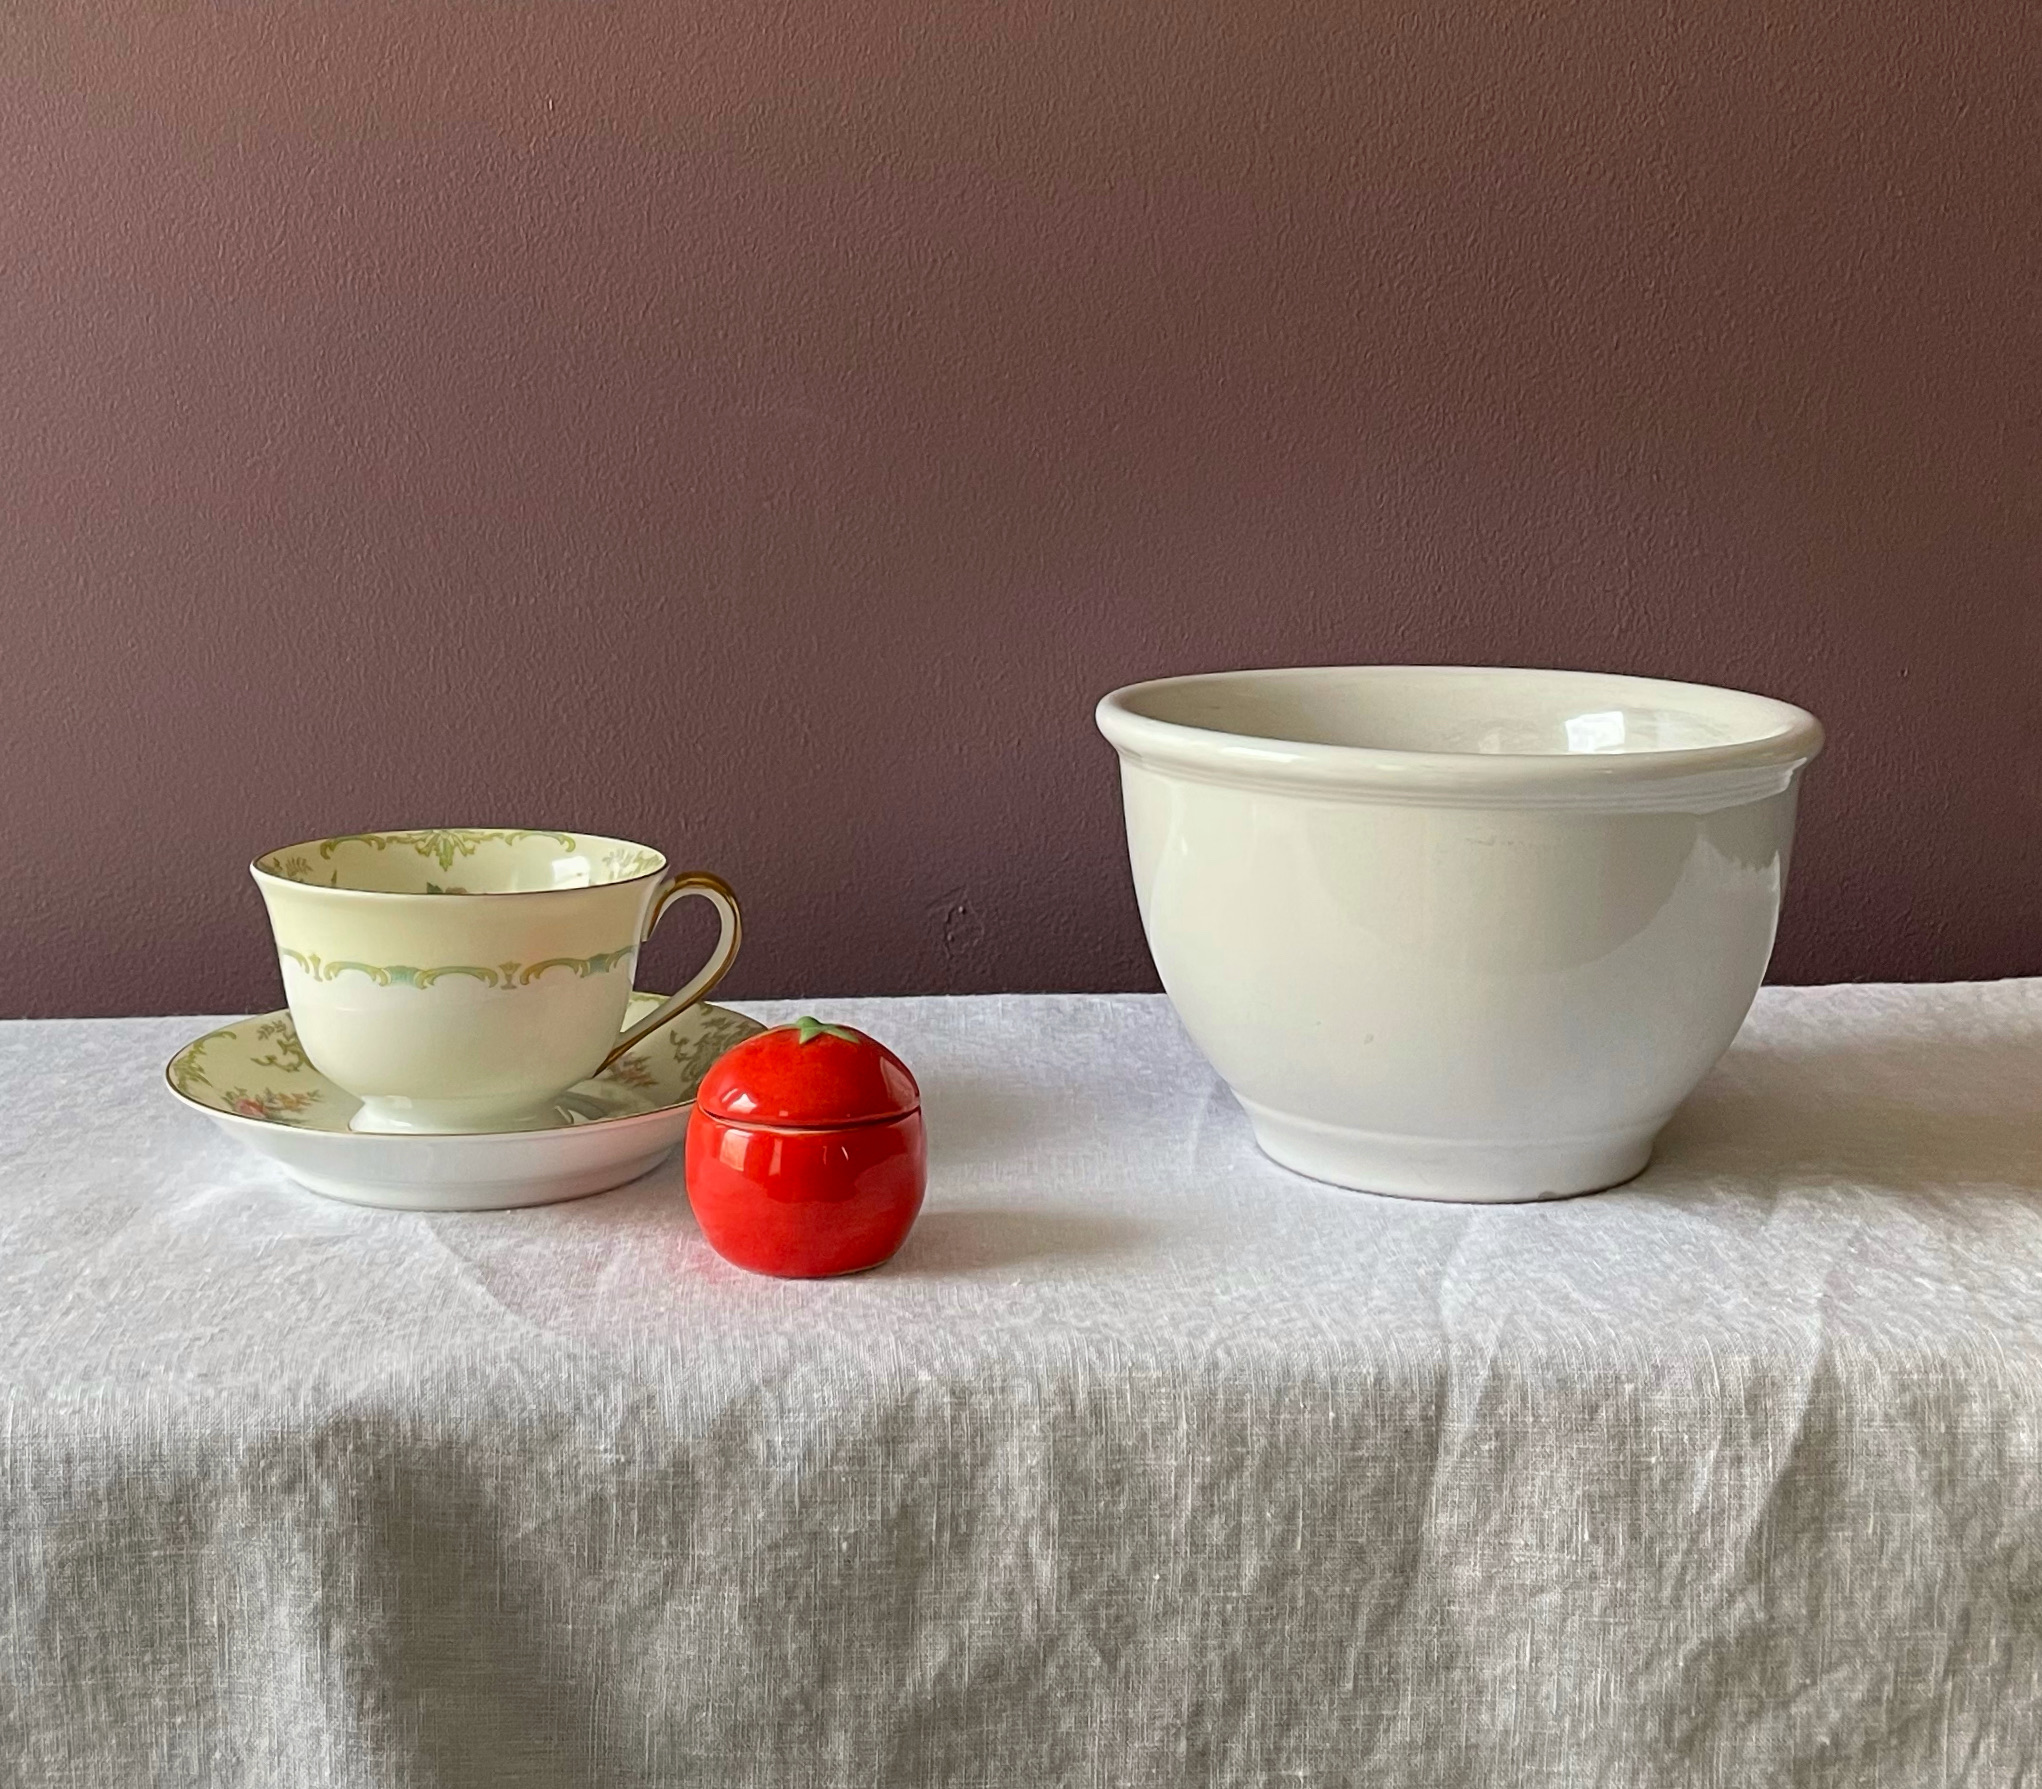
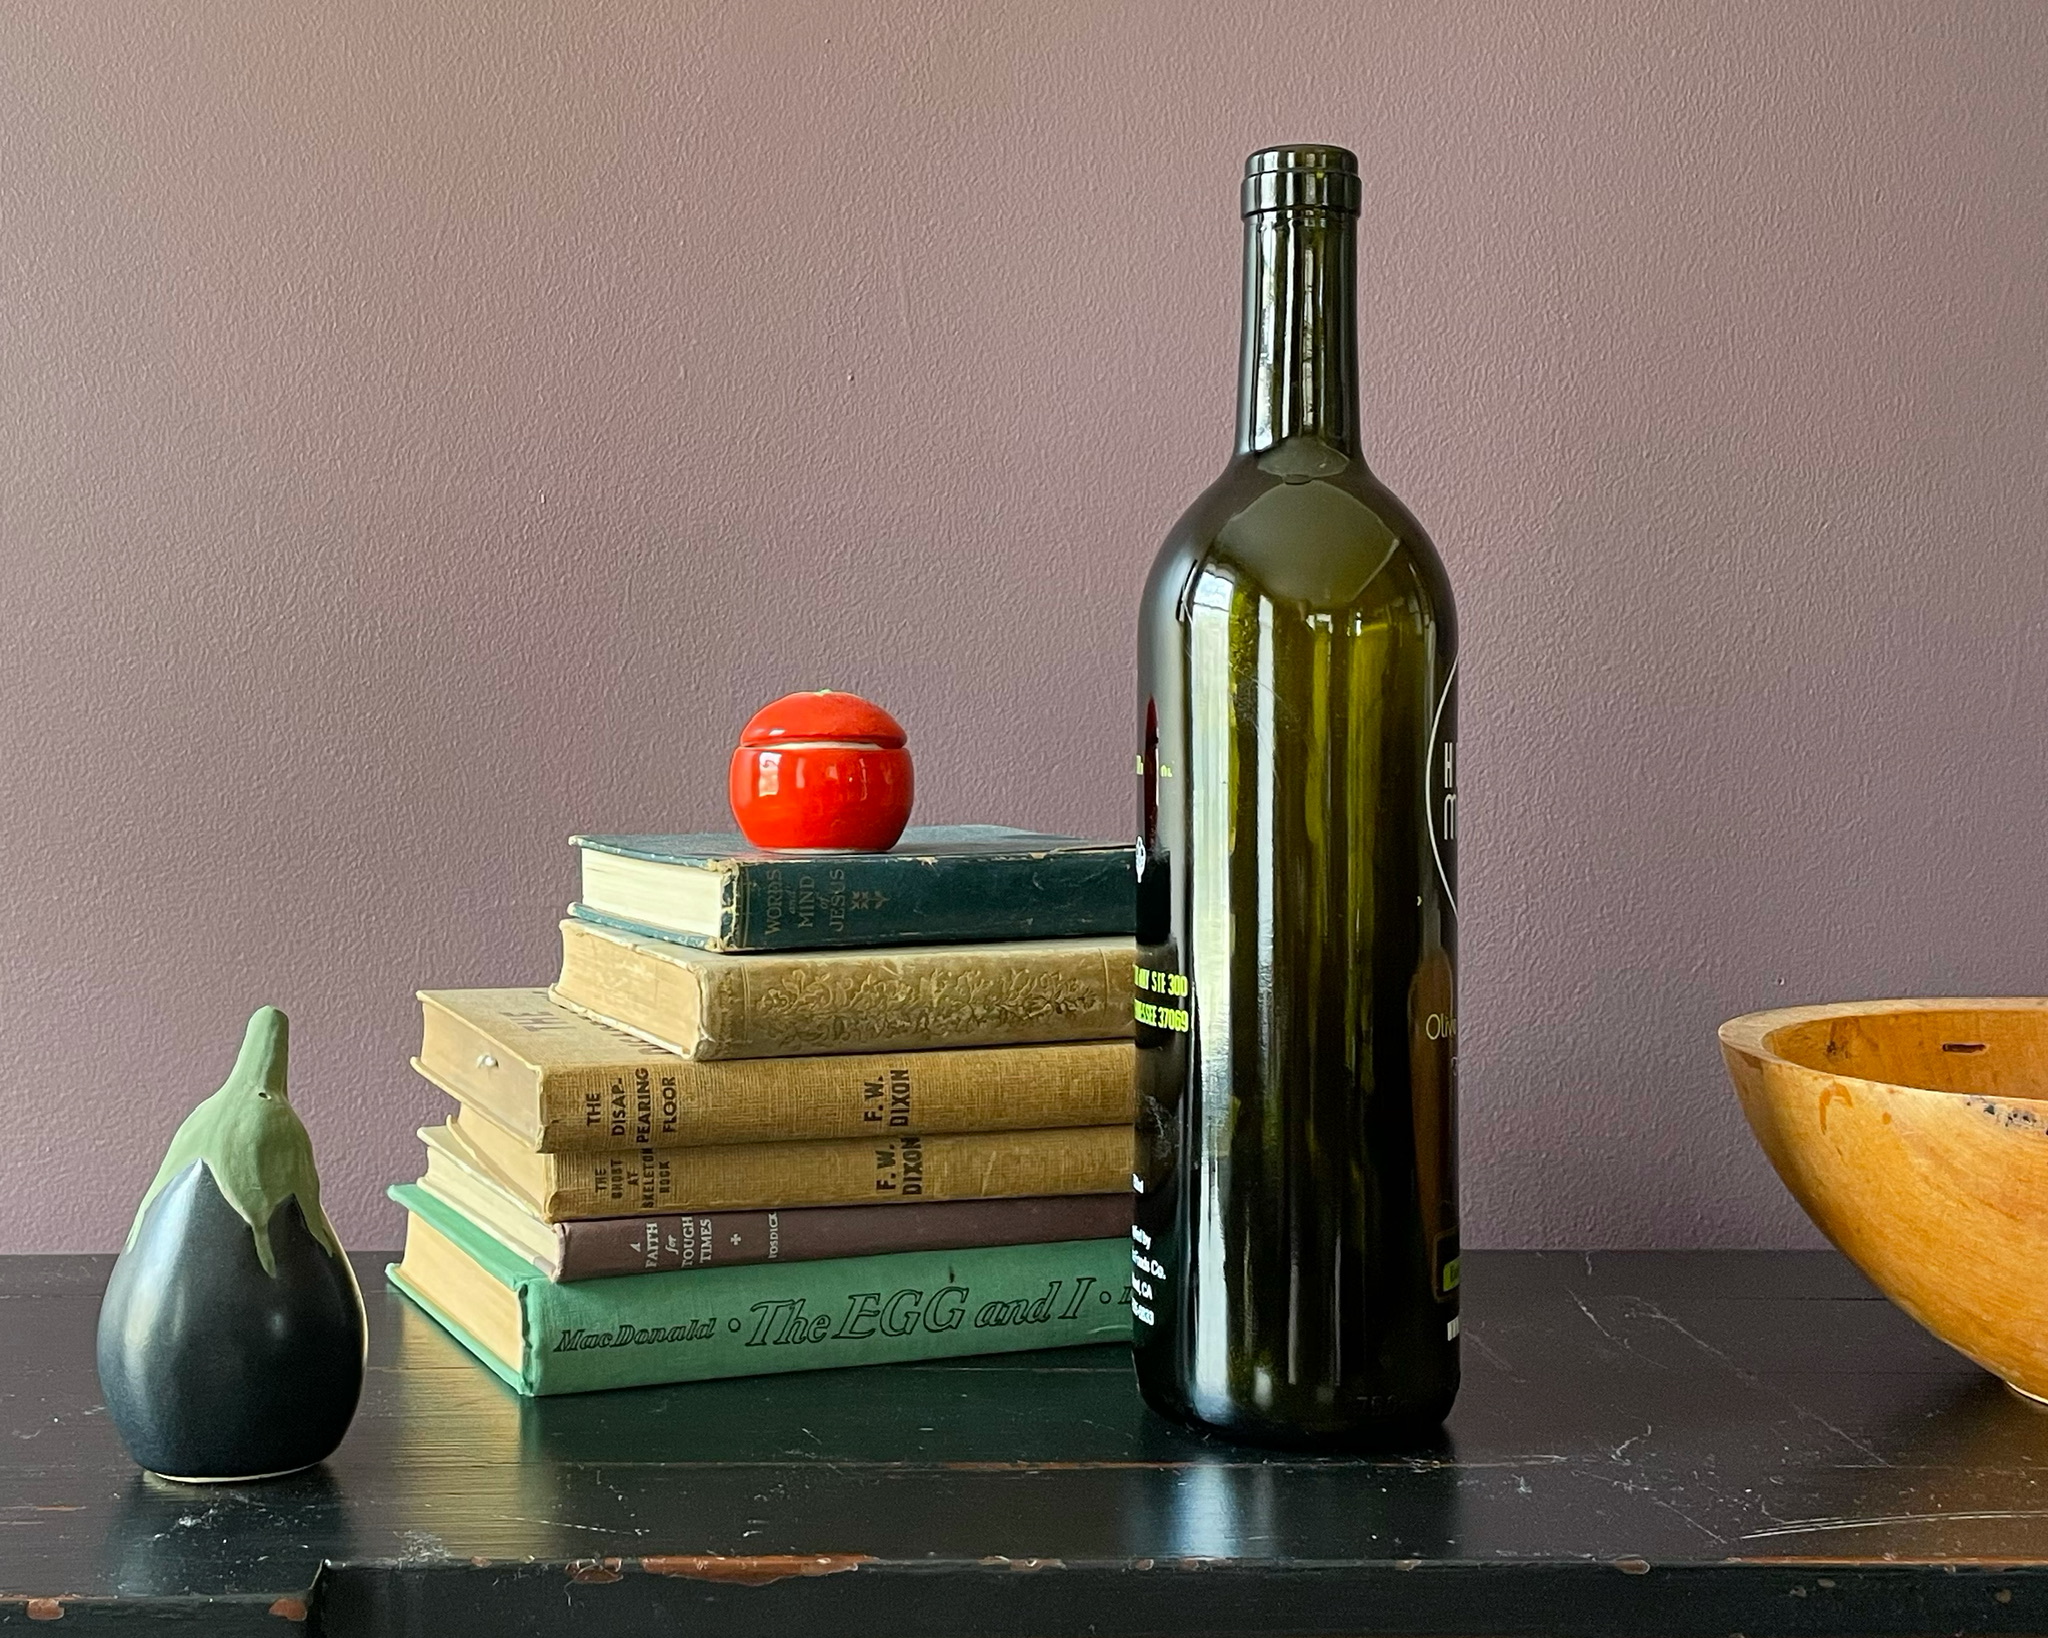
Here’s a stack of books
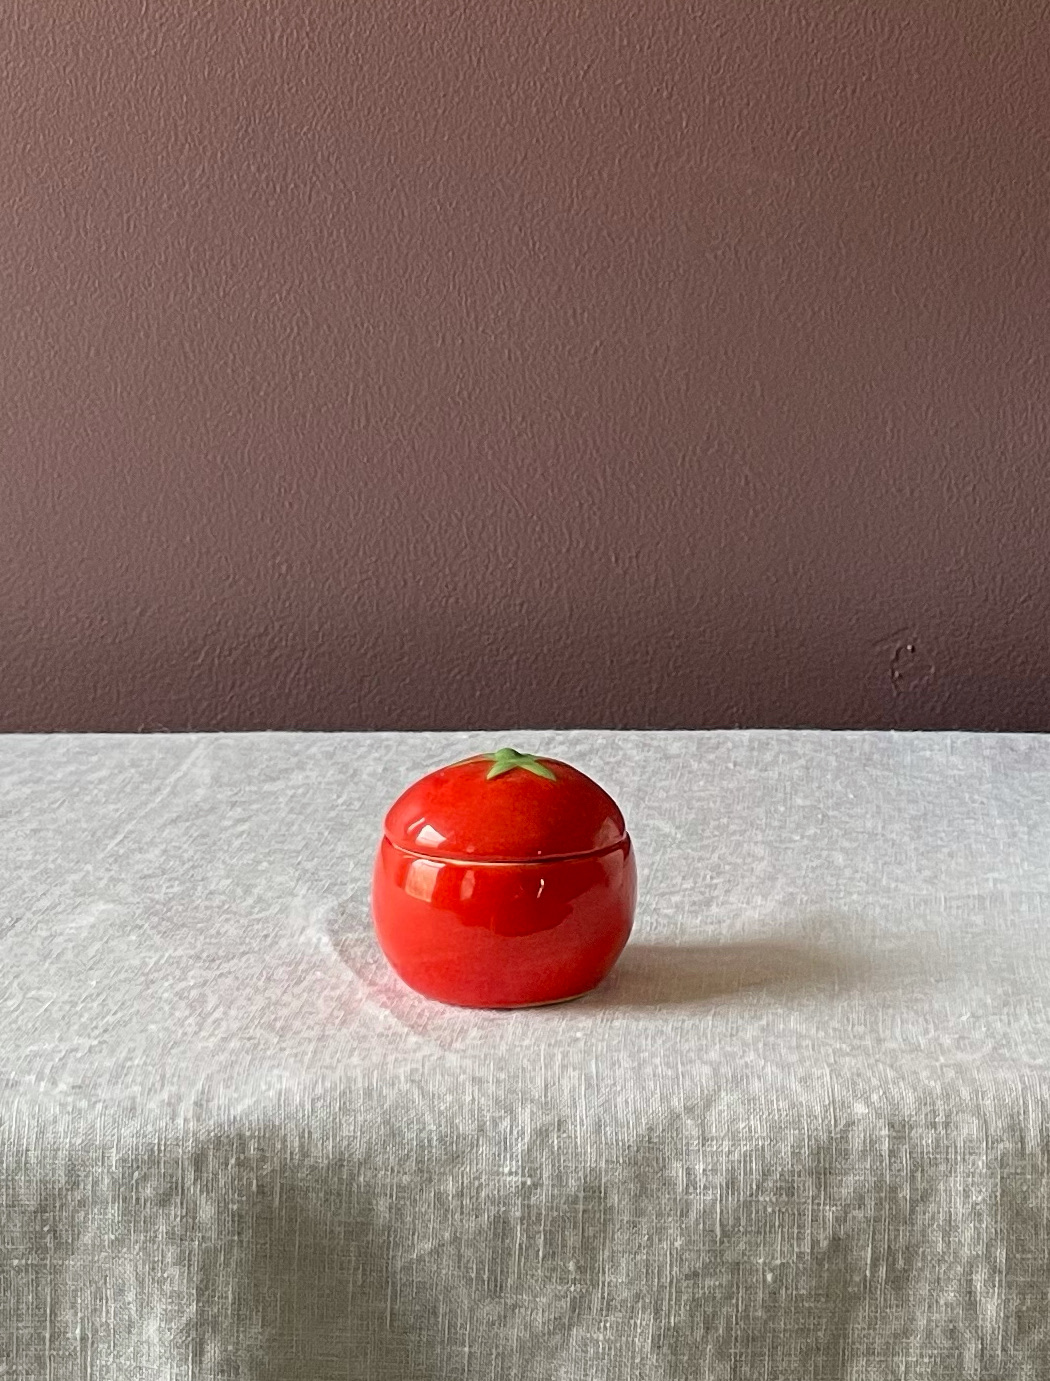
This small tomato crock looks nice.

Add the tomato to the stack of books, and it looks good.
This looks great by itself…
but adding another element might be more of what you’re looking for.
Place an element anywhere you want.
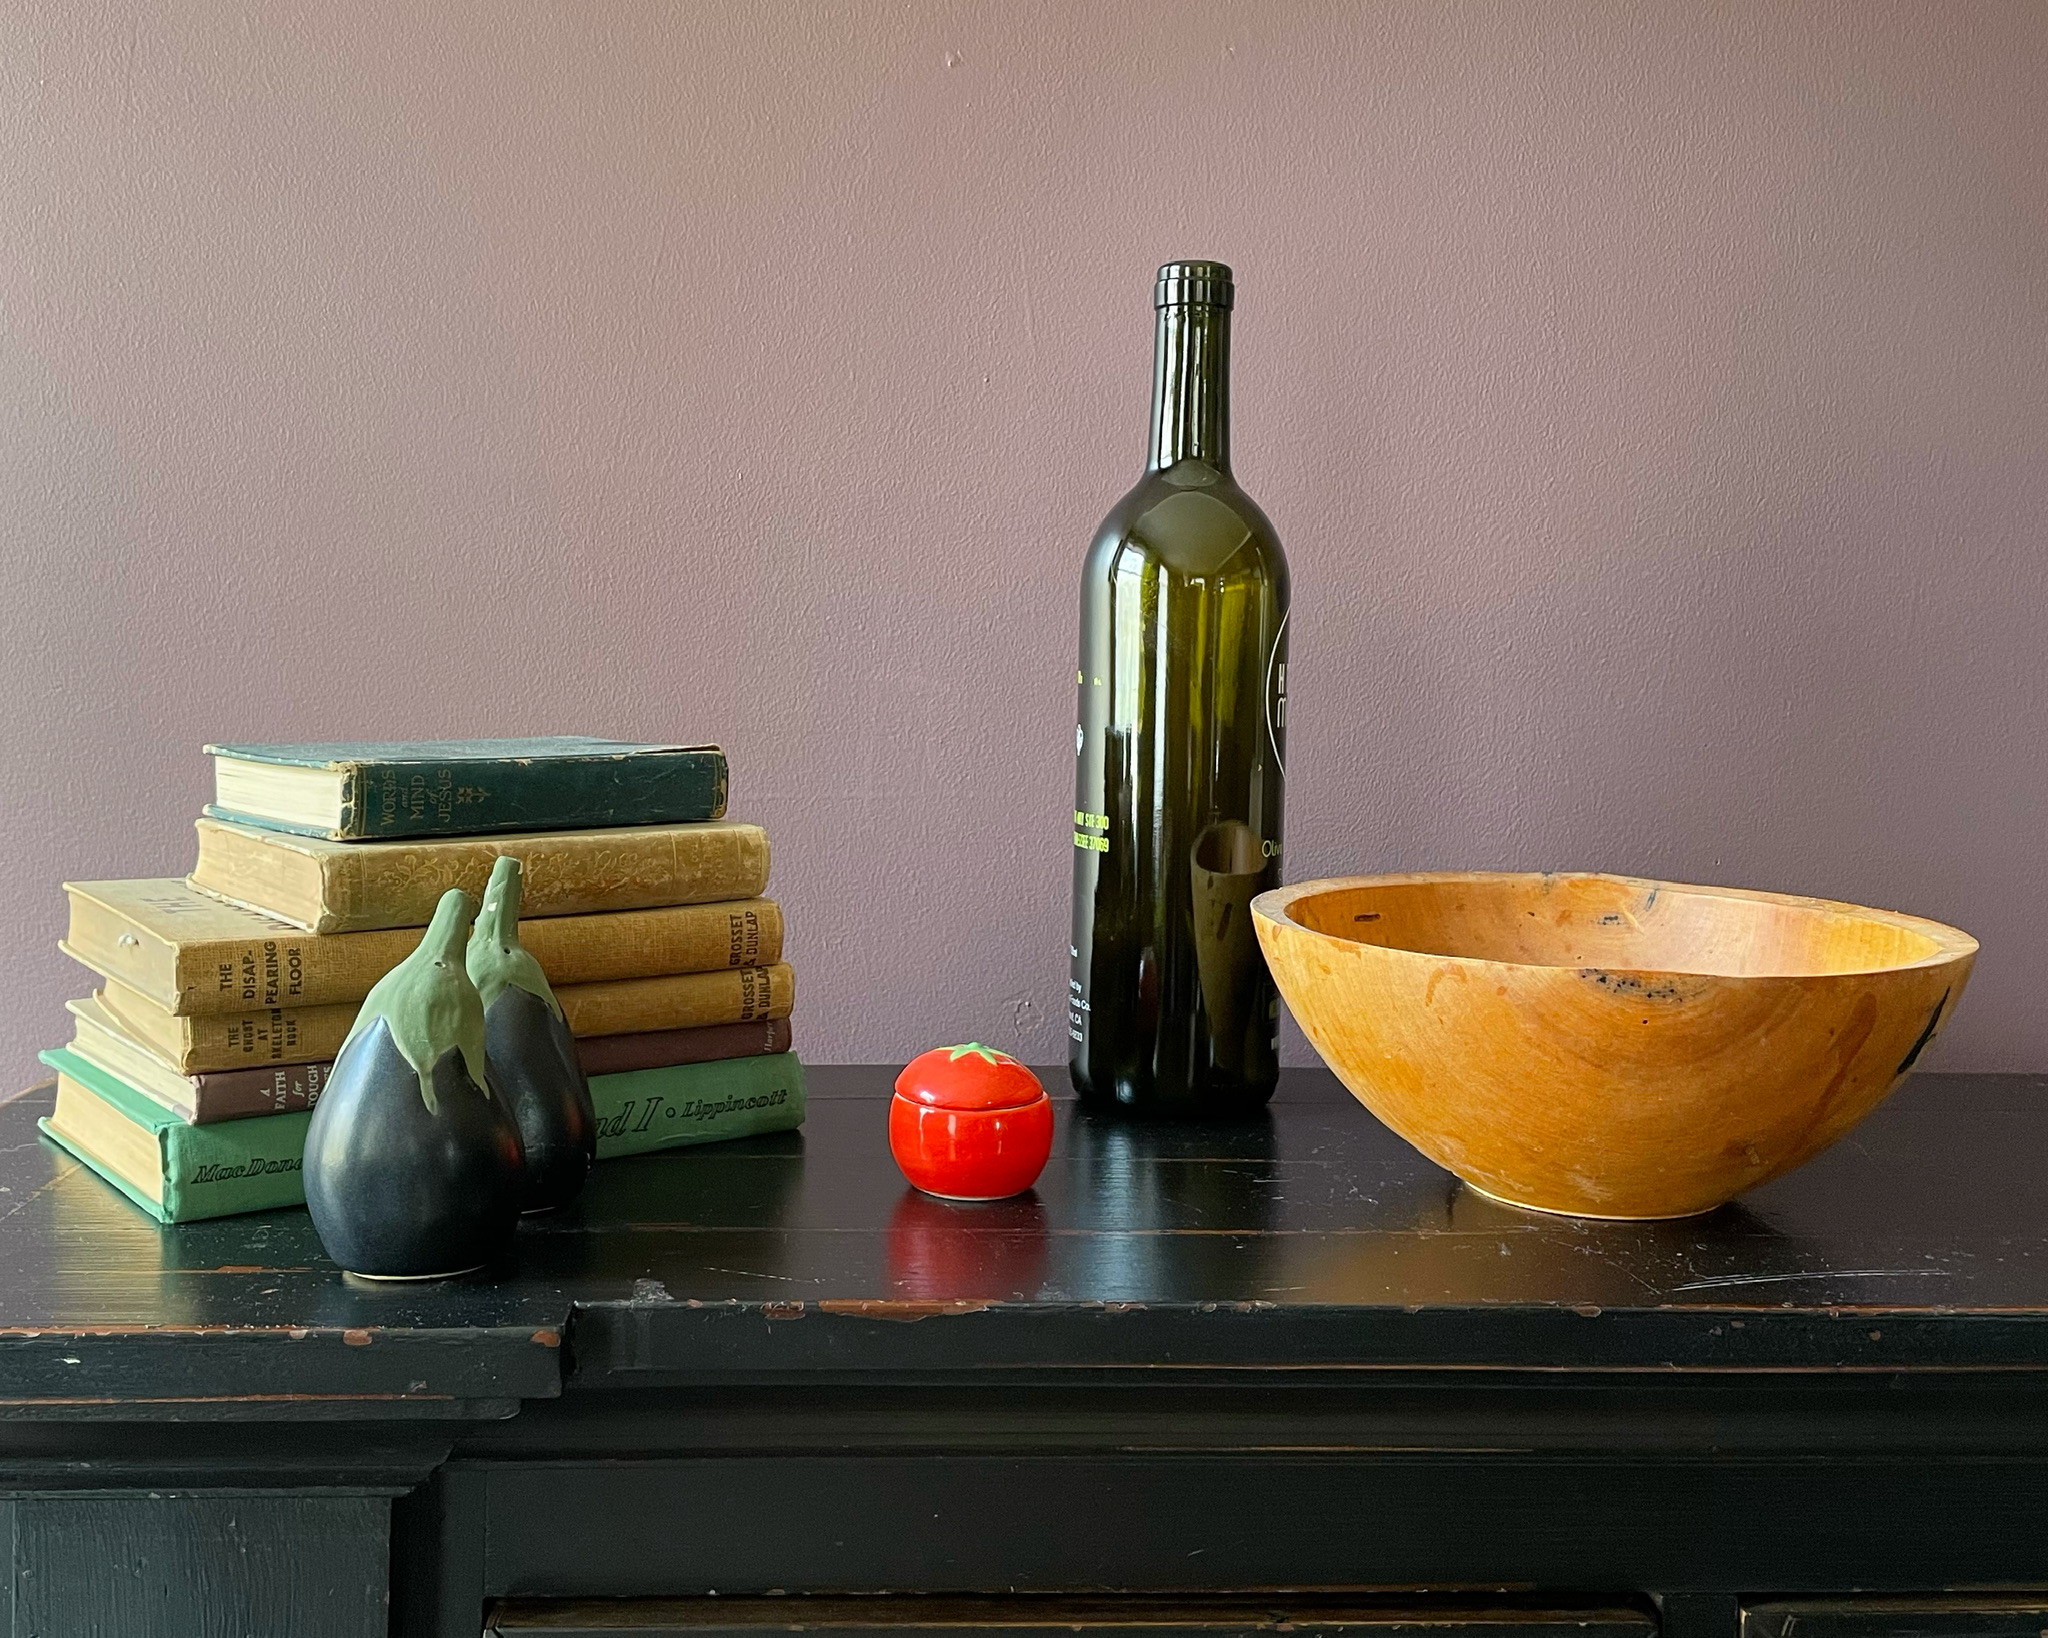
Here is a photo with a lot of nice elements
This shows the same setup with a different crop and a different composition.
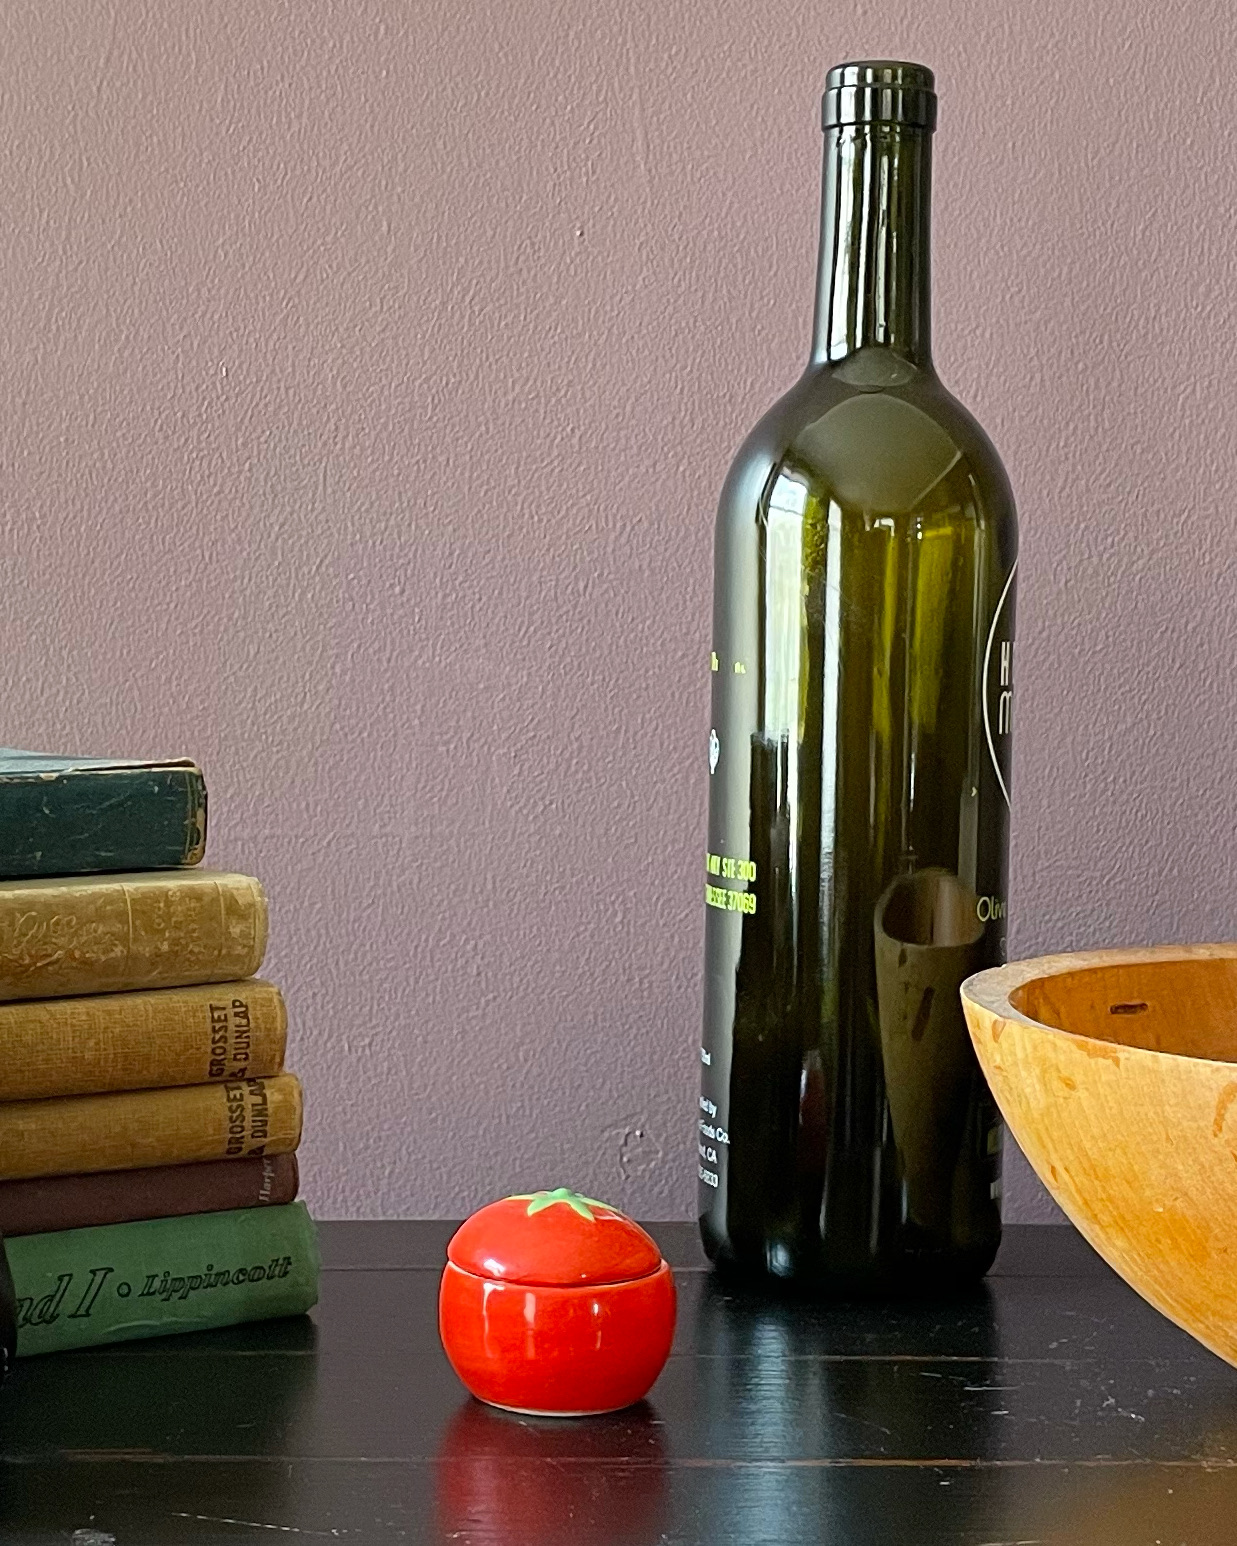
A closer look creates another composition.
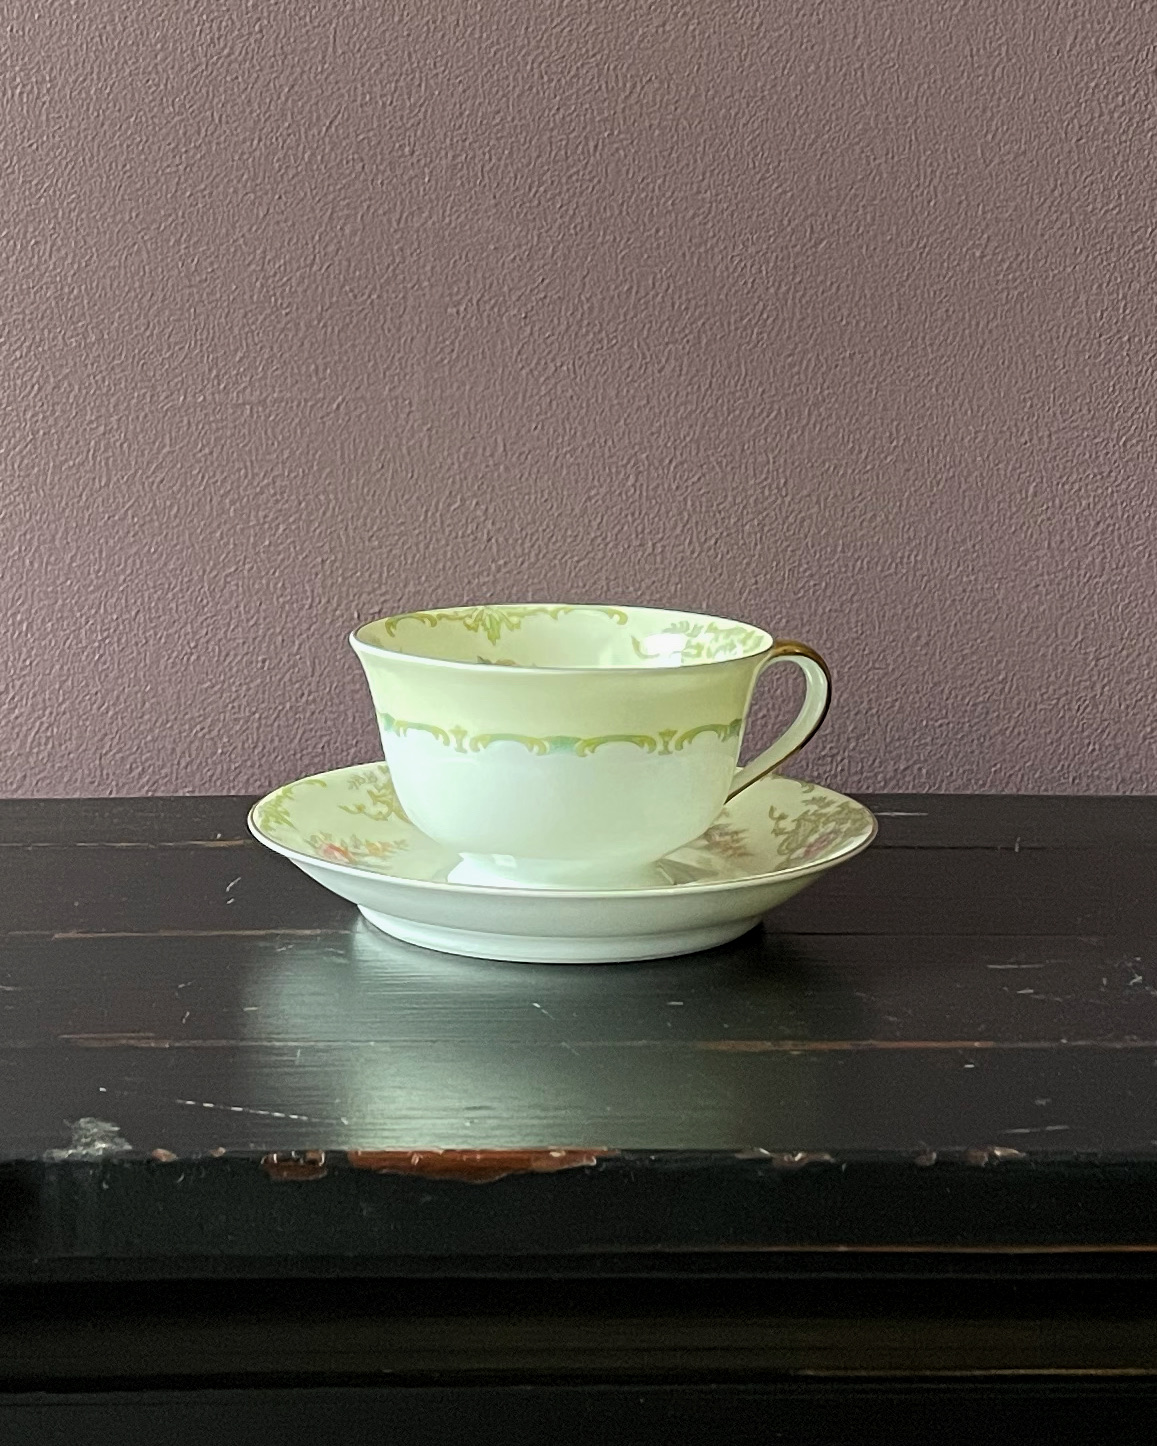
The cup has a purple-gray background. What if you don’t want that?
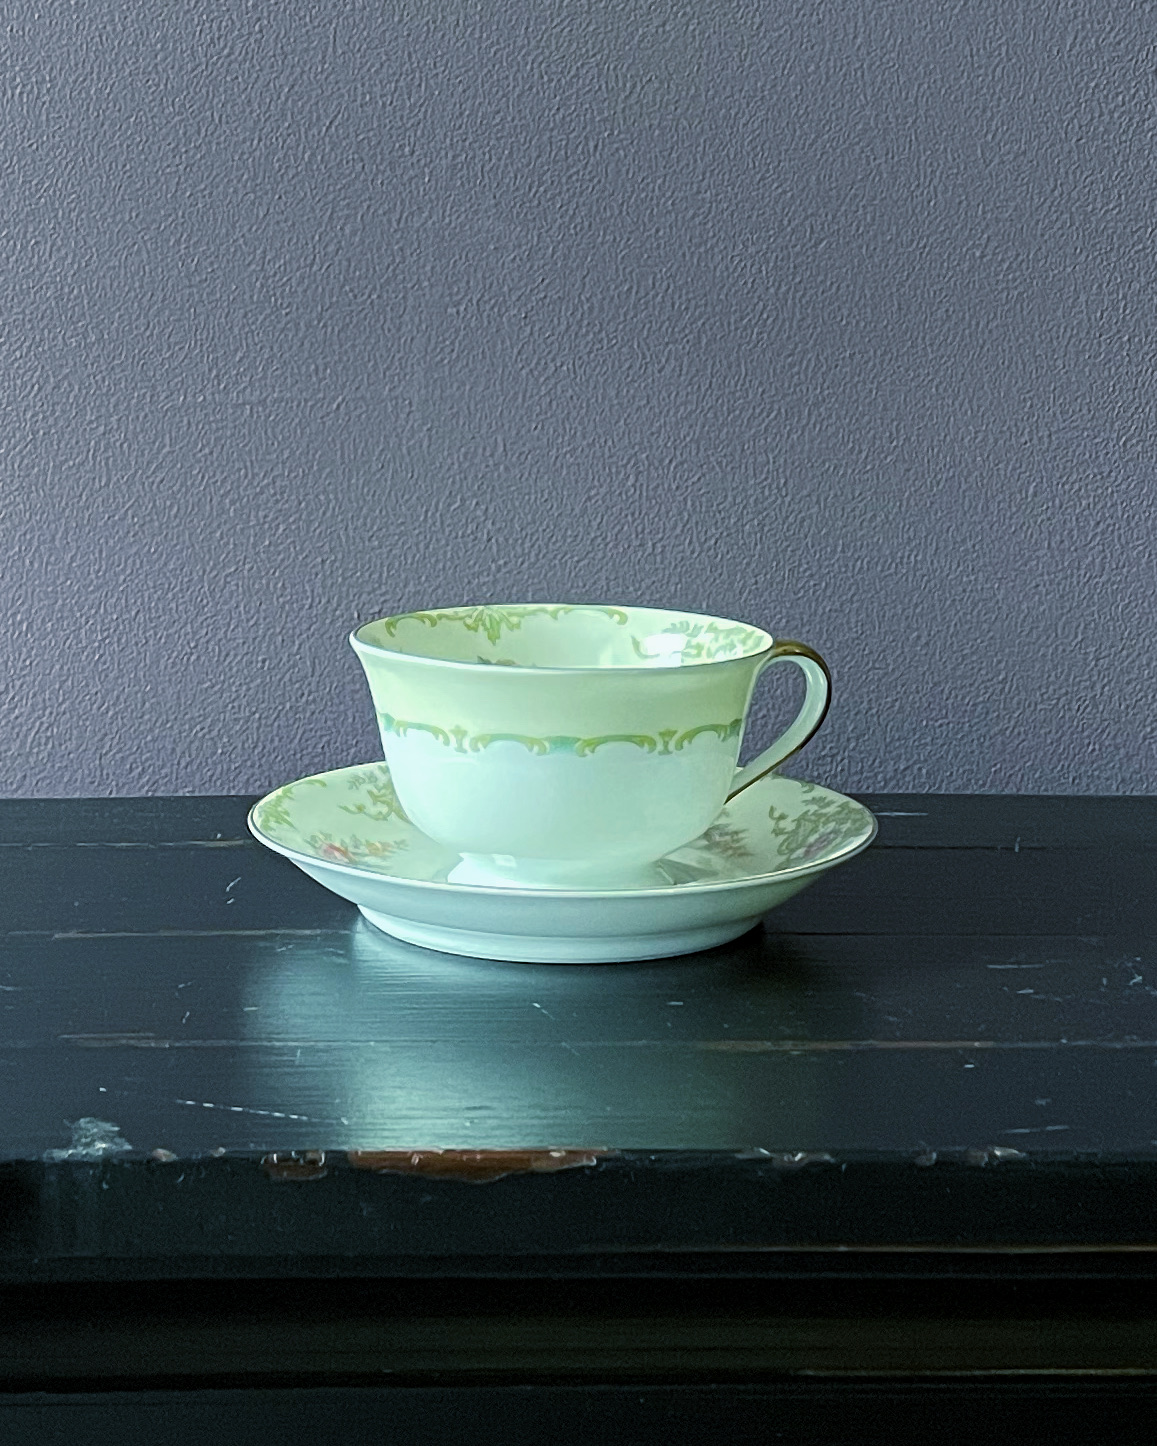
A cool background changes things a lot
Here’s a warm background
2.2 practice
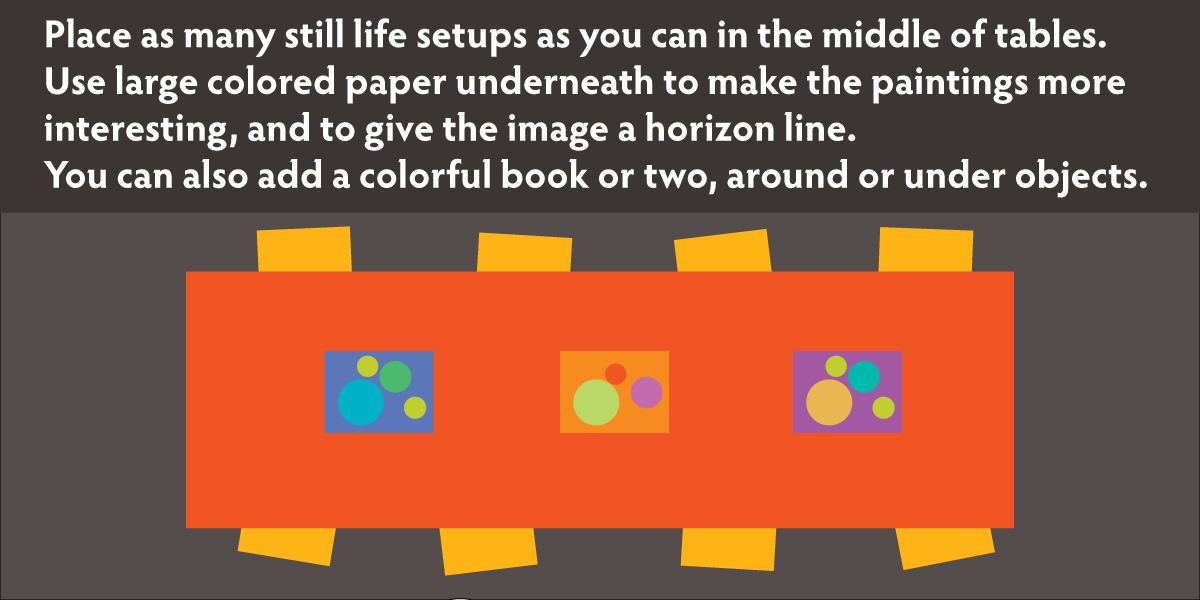
Have plenty of objects! Anything is useable, such as toys, books, garbage, boxes, art supplies, kitchen items, etc.
Student groups should organize a still life together, but not disturb the main set ups for the lesson, which will need to last for two weeks, or at least several days. These are just for practice, so afterwards the items can be put away.
If you don’t have multiple classes you can let the students add small items like a spoon to the existing still life set ups.
Use this button to jump down to the preparation section.
STEP 3. Frame Game
A game is played that helps students visualize how the Frame and Big Shapes work together 12 MinutesLEARNING TARGETS
Students know how to understand how to use the Frame and Big Shapes
M A T E R I A L S
- Game PDF printout
- 2B pencil
- Eraser
3.1 Print
CHALLENGE
Frame Game
Every student should get a game page to use.
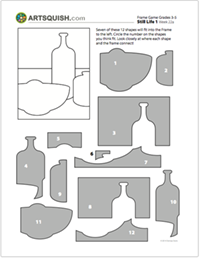
1 Page – Opens in new window
3.2 game
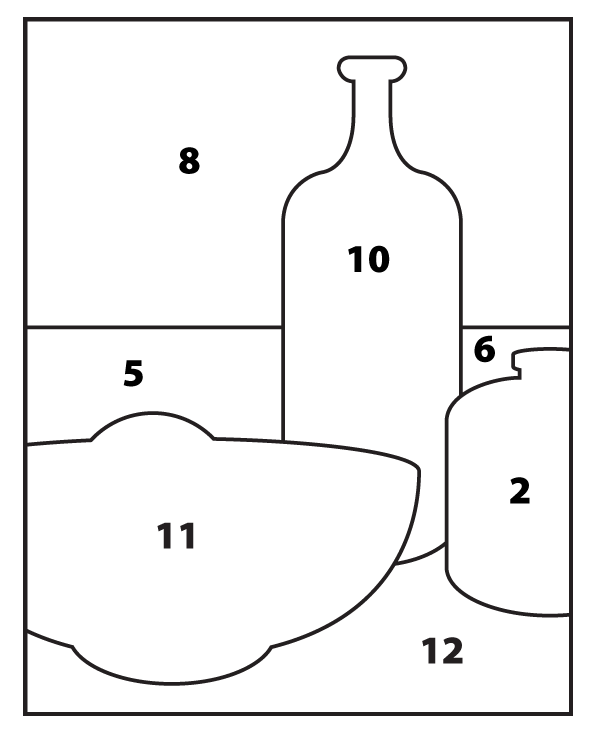
Answer Key
You can read the game instructions aloud if you want.
- Use the Frame edges and proportions to see Big Shapes more accurately
- Understand how size and proportion must be accurate for Frame and shapes together
Tell your students that the little picture is made of simple GUIDELINES. We’ll be making those later in the lesson.
Use this button to jump down to the preparation section.
LEARNING TARGETS
Students know how to create a design from a still life
M A T E R I A L S
- PDF Design your Painting printout
- 2B pencil
- White Eraser
4.1 print
worksheet
Design Your Painting
Hand out prints. Make sure each student gets one to keep. If your students keep notebooks or binders, you can 3-hole punch them ahead of time.
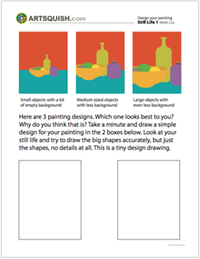
1 Page – Opens in new window
4.2 print
Reference
If you can’t make your own live setup
Make copies to choose from. Print enough so each student has a choice from several photos.

7 Pages – Opens in new window
4.3 prep
If you have live setups, tell the class how these still life setups are viewed from several directions, so there is no background. That means you have to create a background color of your own. Behind the objects, is the rest of the table, other artists and the room behind them. This is very complex and would be confusing and very time-consuming to depict. Instead, think of it as a solid wall or the air. When painting next week, they can choose to make it any color they like.
Use this button to jump down to the preparation section.
LEARNING TARGETS
Students know how to set up a canvas
M A T E R I A L S
- 10″ x 14″ (or 12″ x 16″) canvas board
- Small book or other prop like a short bit of wood
5.1 prep
Set up your canvas. Write names on the back of canvas. Prop it up with a book or a block.
Use this button to jump down to the preparation section.
STEP 6. Guide line drawings
Students will draw guide lines on their canvas boards using a colored pencil. 20 MinutesLEARNING TARGETS
Students know how to sketch on a canvas
M A T E R I A L S
- Canvas pencil (dark gray colored pencil)
- Canvas board with guidelines
- White eraser
6.1 teach
6.2 draw
Draw lightly at first so it’s easy to erase and modify. But then make bold lines once the drawing looks accurate. Remember that everything will be covered up by paint so guide lines do not include shading or small details.
Move around the room, asking permission to help and encouraging your students.

Guidelines should be lightly drawn so they can be erased and redrawn easily if needed.
6.3 draw
Use this button to jump down to the preparation section.
STEP 7. Underpainting
Artists will cover their canvas with colored washes of thinned acrylic paint. 20 MinutesLEARNING TARGETS
Students know how to create an underpainting
M A T E R I A L S
- Acrylic paints (NO WHITE)
- Palette pad or mixing plate
- Large brush
- Smock
- Water tub
- Paper towels
Brushes should be nylon for springiness and durability. Round brushes are the most versatile.
Paint pigment list:
- Napthol or Pyrrol Red
- Hansa or Light Yellow
- Pthalo Green (blue shade)
- Cyan or Cerulean Blue
- Ultramarine Blue
- Dioxazine Purple
- Magenta
- Burnt Umber
- Raw Sienna
7.1 prep
7.2 paint
TIP
Sometimes a canvas will reject the watery paint, and you’ll see white speckles appear. It can help to add some clear acrylic medium and also to scrub the paint onto the surface until it sticks.
7.3 paint
Use this button to jump down to the preparation section.
LEARNING TARGETS
Students know the importance of cleaning up.
M A T E R I A L S
- Paper Towels
- Cleaning wipes
- Sink
- Waste baskets
- Well-lit spot for photos
- Camera or phone-camera
8.1 clean
Students clean up their work area.
- Wash hands
- Super-wash brushes if used
- Put art supplies away
- Wipe tables & toss trash
- Remove any smocks (last)
- Check for items on floors and tables
8.2 photo
Try to get photos of your student’s artwork. Find a good spot for quick lighting without highlights or shadows from your hands and device. Ideally in-between two strong lights on each side.
OBJECTIVES
- Practice and improvement with drawing cylinder forms & painting values
- Understanding how an artist creates and arrives at a still life composition
- Accomplishment in finishing an original acrylic painting
- Fulfillment by choosing their own composition and color
TROUBLESPOTS
Not Following instructions – Not drawing the whole oval (the Secret Plate) at the bottom of cylinders.
Misunderstanding still life – Young students especially (8-10 year olds), may not realize that we want to draw what we see, just like a landscape scene. They may place objects into grids, or draw things that are not even visible. Gently explain how this is a scene, and that we are using our eyes to draw what we can actually see, instead of our minds to draw things we know about. Ask if a student can see what they’ve drawn in the photo reference. An example might be drawing the whole table when only one edge of the top is actually visible in the photo.
Small drawings – Younger students tend to draw objects ok on paper, but then make them smaller on canvas, not actually realizing that the canvas has a fixed size and shape. The frame is hard for them to visualize and the stress of “getting it right” makes them concentrate on the details instead of the big shapes. It helps to point out the frame on each of the photos as you go through the slide show, and also to do the extra demo in step 5, by drawing the objects too small in the frame and asking them what’s wrong. Mention Big Shapes as often as you can.
Forgetting to use the canvas pencil – Students tend to use the same pencil they have in their hand when switching from paper to canvas. The wax-based colored pencil will work better on canvas though. It erases easier if drawn lightly, and it won’t mix into the paints, changing the colors. Graphite pencils won’t erase well, and will lift off the surface and mix into paints. Bleah.
.
ART WORDS
Frame – The size and shape of your final work in the accurate proportions.
Big Shapes – The key to getting work accurate is to draw big shapes before any detail.
Guidelines – A very simple outline drawing of the biggest shapes and enough details to know where to make the final art. Guidelines should be drawn very lightly so they can be erased and modified to be more accurate it needed.
Speed drawing – a one-minute scribbly/flowing drawing that is only for figuring out big shapes and/or the expressive gestures of subjects. Using a stick of blunt charcoal or the side of a pencil lead, and holding it like a stick, will help prevent details from being drawn. It’s also helpful to use one long flowing line for the entire drawing. Draw objects like they are see-through and made of tangled wires.
• Thumbnail drawing – A very small imitation of an artwork that finds the best composition quickly. It works fast and easy because you can only work with the big shapes and how they fit into a frame.
• Study sketch – Older students will want to draw the details in close-up, of some of their objects that look the most difficult, so they can learn the structure.
CLASSROOM
PREP
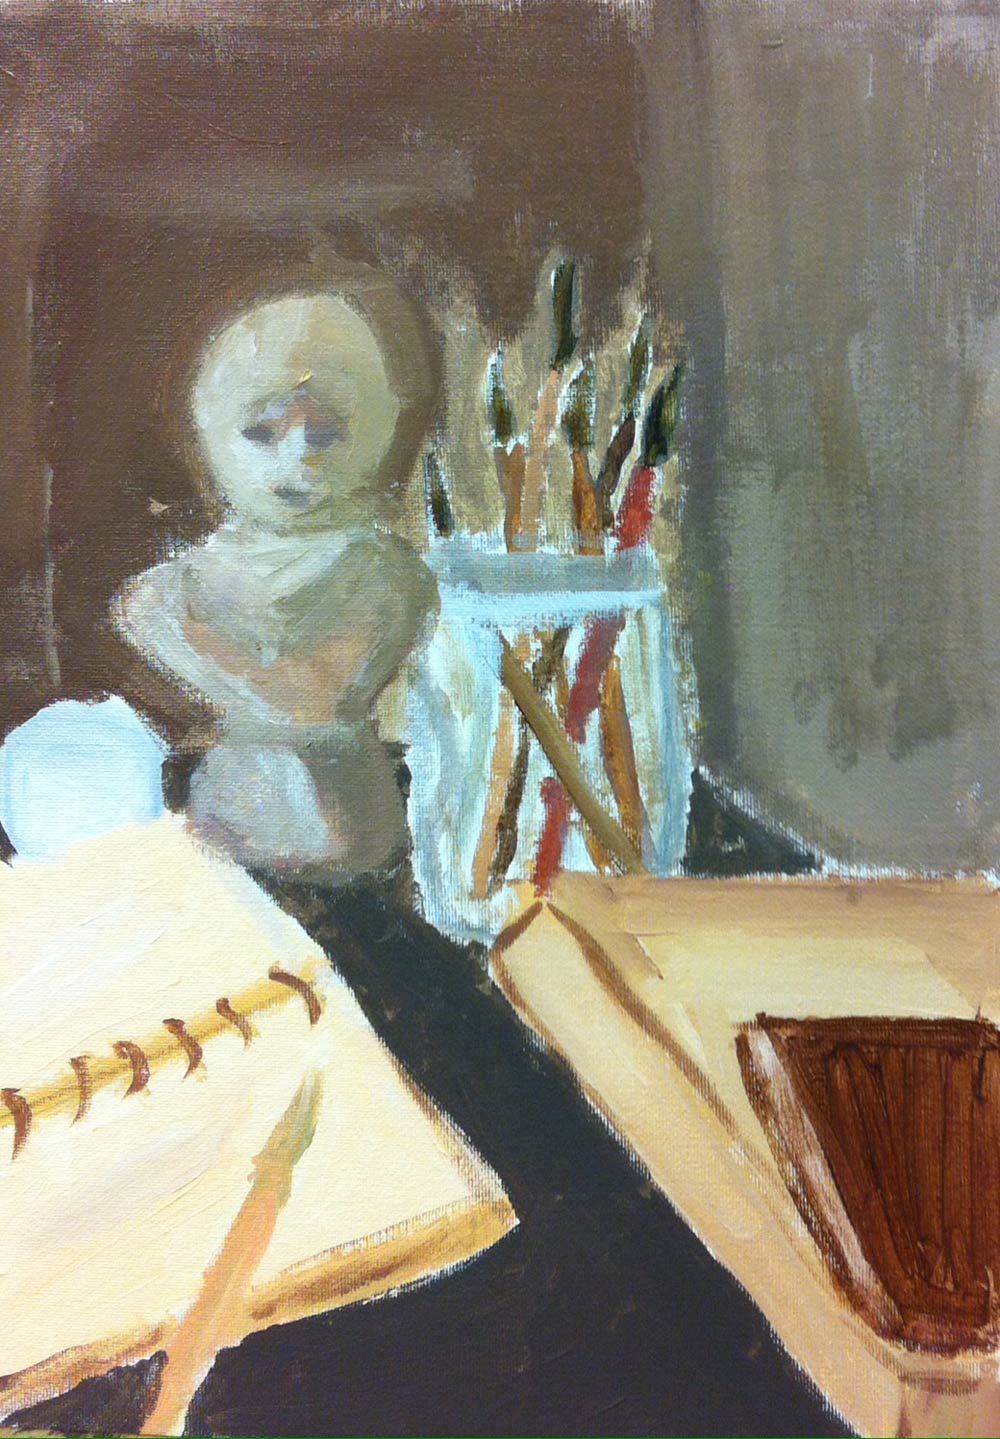
Create your own still lifes by checking out our slideshow and: • Set up several objects in a nice arrangement. Use cylinder shapes and stripes, as well as other objects. • Set up a light source and take an overview photo of the whole setup for placement reference
What your room needs
Here are your printable lists and room prep instructions.
Opens in new window
CLASSROOM
MATERIALS
- Still Life objects/ setup
- Game PDF Printout
- Small book or other prop like a short bit of wood
- Smock
- Water tub
- Paper towels
STUDENT’S
MATERIALS
- 14” x 17” Sketch Pad
- 10” x 14” (or 12” x 16”) Canvas board
- 2B Pencil
- White eraser
- Kneaded erasers
- Canvas pencil
- Acrylic paints (NO white)
- Palette pad or mixing plate
- Large brush
PREVIEW
Week 23: Still Life 2
The still life painting project continues for a second lesson. Students will spend the entire time painting and learning techniques.
Week 24: Architecture in Watercolor
Students get to paint in watercolors and use photos of architecture as reference. The pictures show flat sides instead of perspective to make it easier and a lot of fun.