
OVERVIEW
Students will create a painting of a still life with shiny colorful peppers. After underpainting, they will fill each object with local color and finish by adding shadows, then light areas, and finally highlights.– – –
Grades 3 – 5
1 Hour & 45 Minutes, or two 52-minute sessions
Lesson STANDARDS - For School Teachers and Tutorials
SUBMIT YOUR SUMMARY
Copy and paste the text below to send your abbreviated lesson plan with national standards and learning targets to your supervisors and colleagues. Or access the WORD doc by using the blue button below.
– – – – – – – – – – – – – – – – –
Week of April 6 – 10
OVERVIEW:
Students will create a painting of a still life with shiny colorful peppers. After underpainting, they will fill each object with local color and finish by adding shadows, then light areas, and finally highlights.
NATIONAL STANDARDS:
Grade 4
VA:Cr1.1.4 – Brainstorm multiple approaches to a creative art or design problem.
Grade 5
VA:Cr2.1.5 –Experiment and develop skills in multiple art-making techniques and approaches through practice.
LEARNING TARGETS:
Students know how to create a painting using mid-tones
Students know how to sketch using paint
LESSON PLAN:
1. Warmup(15 minutes)- Set up & do an underpainting
2. Practice (20 min) – Create still life in charcoal
3. Draw with Paint(17 min) – Paint guidelines on canvas
B R E A K
4. Demo (10 min)- Teach talk and demo
5. Paint (40 min) -Paint still life
6. Clean Up (I2 min) -Everyone help
Tap the Plus Icon (above right) to open STANDARDS information, including an Overview, Learning Targets and a Syllabus. Copy and paste to send to your Administrators or use the button below to download a Word document with the same information that you can add your info to and email to them as an attachment.


SCROLL & TEACH LESSON PLAN
Don’t worry about rewriting anything. Just spend a few minutes reading the lesson plan and printing out your PDFs. Then check out the READY, SET, GO! section and print your prep-page, which includes checklists and an “at a glance” outline of the lesson so you can stay on track when you’re teaching. Set out the materials from the list on your prep page and you’re ready.
That’s all you need to know. Use your smartphone to Scroll & Teach!
Art Supplies Are Needed
Our lessons are designed to work with very specific supplies (see our supplies page using the button below). We recommend ordering what you need for home delivery. However, you can try and make do with what you have on hand during the health crisis.
Lesson At A Glance
A brief overview of each step. Buttons jump to each section for detailed information.
20 Min – Create still life in charcoal, use Frame-O-Scopes
10 Min – Teach talk and demo
40 Min – Paint still life
2 Min – Everyone helps
SCROLL & TEACH
LESSONPLAN
Each section is a different color. Read over once and then you can SCROLL & TEACH using any device you like. It’s designed to work best with your phone.
LEARNING TARGETS

Students know how to create an underpainting
M A T E R I A L S
- Acrylic paints
- Brushes
- Palette pad
- Water container
- Smocks
- Paper towels
- Frame-O-Scope Printouts
- Black markers
Brushes should be nylon for springiness and durability. Round brushes are the most versatile.
Paint pigment list:
- Napthol or Pyrrol Red
- Hansa or Light Yellow
- Pthalo Green (blue shade)
- Cyan or Cerulean Blue
- Ultramarine Blue
- Dioxazine Purple
- Magenta
- Burnt Umber
- Raw Sienna
- Titanium White (professional grade only)
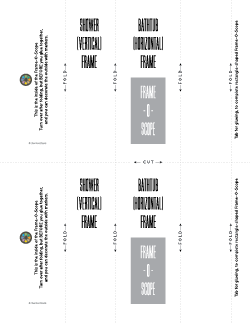
1.1 Print
Tool
Frame-O-Scopes
Print on CARD STOCK and have one for each student.
Students can fold along the lines easier if you use a dull table knife or edge of a metal ruler to score the line (pressing the paper fibers). Do this using a straight edge and with the un-serrated part of the knife. Do not cut the paper at all.
1 Page – Opens in new window
1.2 paint
As students enter, have them set up for painting right away, and tape a sheet of canvas to a board.
Students may choose to use a dark brown, or a purple for their underpainting. Have them mix their chosen color without any white at all. Use some water to mix into the paint so they can create a thin wash over the entire canvas; thin enough so it will dry quickly, but not so thin that it looks light. It should look like a medium-dark color and it will have lots of streaks. That’s ok.
- Dark Brown: about half and half of Ultramarine Blue & Burnt Umber
- Dark Purple: about half and half of Purple & Burnt Umber
- Make sure each student has their name somewhere on their work and then set aside to dry. Let them wash their brushes in the water tubs but do NOT clean up the paints and palette. We’ll be using the same dark brown in a few minutes.

Use the Opposites Color Journal and explain:
“The blue and brown are pure pigment opposites. They make each other darker and duller, and if mixed in the right amounts will create a pure black. If you take your opposites color journal and and look at just the cool colors, or just the warm colors. The circles are the shadow versions of those colors. It’s important to know how each pigment gets “shadowed” by it’s opposite. When you add just a bit of the opposite, you make a beautiful shadow version of any color. Normally, if you’ve mixed two colors together to invent a new one, then you use a tiny amount of each of their opposites to create a shadow version of that color. These opposite shadow colors always work, and look much better than simply adding dark colors, like browns or blacks. We practiced this with our opposite animal paintings, and it’s how we will paint shadows on the project we’re beginning today.”
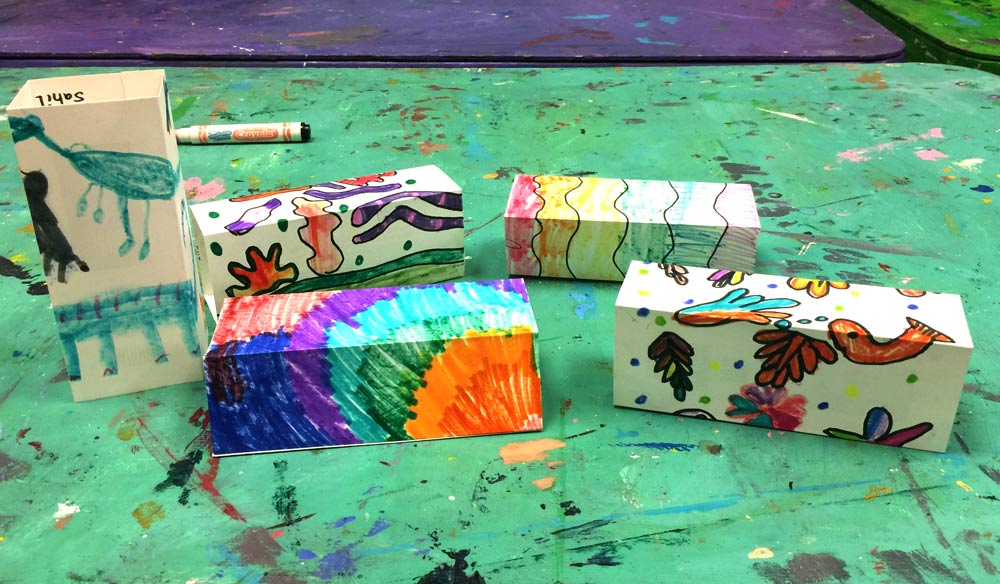
1.3 build
Let them fold the scopes and staple the tab (the tab goes on the inside and so does all the printing). Then pass out black markers and let them decorate the scope tubes in the remaining time. (Extra project: use colored markers to continue decorating the scope.)
CREATIONS - tap here to open
Use the Student Instructions printout below to distribute to your Creations students. Tap the image to open the PDF in a new window.
Mid-Tone Still Painting
Overview: Students will create a more advanced version of this project by setting up their own still life. Have other vegetables and fruit for them to choose from.
Other than setting up, the advanced students follow the same plan as the Foundations students.
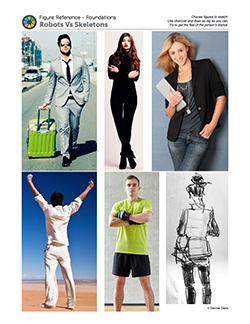
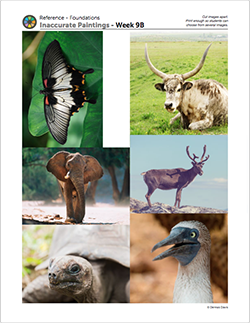
Alternatively, you can let them find reference for an animal or human using the reference below (people is from recent lesson and animals are from September), and use the same technique.
Tap images to open Creations Student Instructions and Reference Materials in new windows
LEARNING TARGETS
Students know how to practice making effective compositions
M A T E R I A L S
- Charcoal
- 14″ x 17″ Sketch Paper
- Frame-O-Scopes
2.1 Print
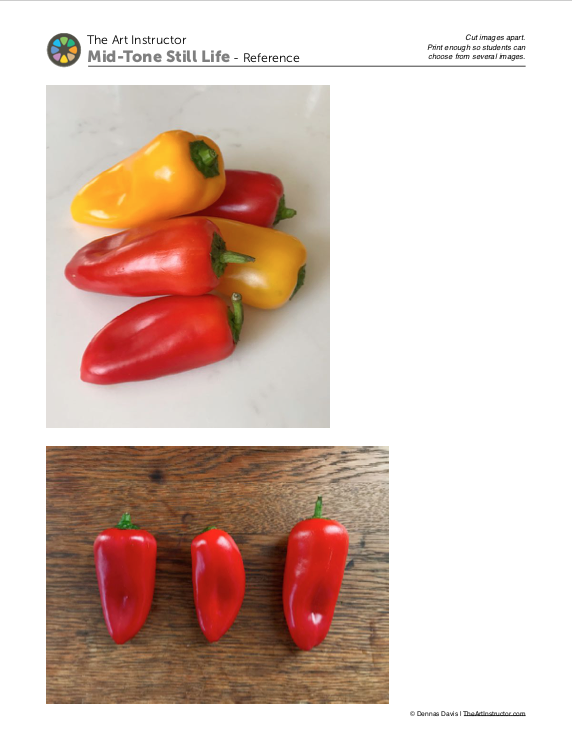
Reference
Still Life Photos
Cut images apart and print enough for each student to have one photo.
NOTE: Use this reference ONLY if you cannot make a real-life still-life with these vegetables.
4 Pages – Opens in new window
2.2 sketch
Have students open their sketch book to a clean sheet and make a page of grey. Using a stick of compressed charcoal on its side, not the end, cover the entire page with one shade of medium grey. There’s no need to go all the way to the edges. Do not let them begin drawing until you explain the composition stage using Frame-O-Scopes. While they work, begin to explain. Tell your students to put the charcoal down when they’re finished.
You will begin by figuring out your composition. Use your Frame-O-Scopes to look at your still life. The edges of the scope are just like the edges of your paper and you can make the subject smaller or larger by moving your head, and the scope, closer or farther away. You can make it vertical or horizontal. The Scope has the same proportions as an 8 1/2″ x 11″ sheet of paper, and your 12 x 16 canvas if you tape the 12″ sides but not the long 16″ sides.”
2.3 draw
Tell students that they should allow some of their vegetables to be cut off by the edges of their Frame or have them fill the frame well. The Frame is the rectangle for all the things they’re using today; the scope, the paper, AND the canvas.
You should have large objects. If there are several different things in your still life set up, do not try to fit everything you see into your painting. Use the scope to make a composition that is a smaller portion of the still life.
When you see the composition you like, then you should take note of where the edges are and begin drawing the outlines of the vegetables in charcoal on your paper. Continue to view through the scope as needed.
Then make the dark shadows. Find the shapes of these dark areas, and shade in all of your ON and OFF shadows.[/su_testimonial]
You can display the ON Shadow & OFF Shadow graphics to review by tapping the underlined words.
Continue directing them with their compositions and then teach to the class as they work:
When a number of the students begin to finish, take a break and explain the next step so they can keep going. This should help motivate the others to finish up too.
LEARNING TARGETS
Students know how to sketch using paint
M A T E R I A L S
- Acrylic paints
- Brushes
- Palette pad
- Water container
- Smocks
- Paper towels
3.1 paint
Students will need their canvases with the underpaintings from step 1.
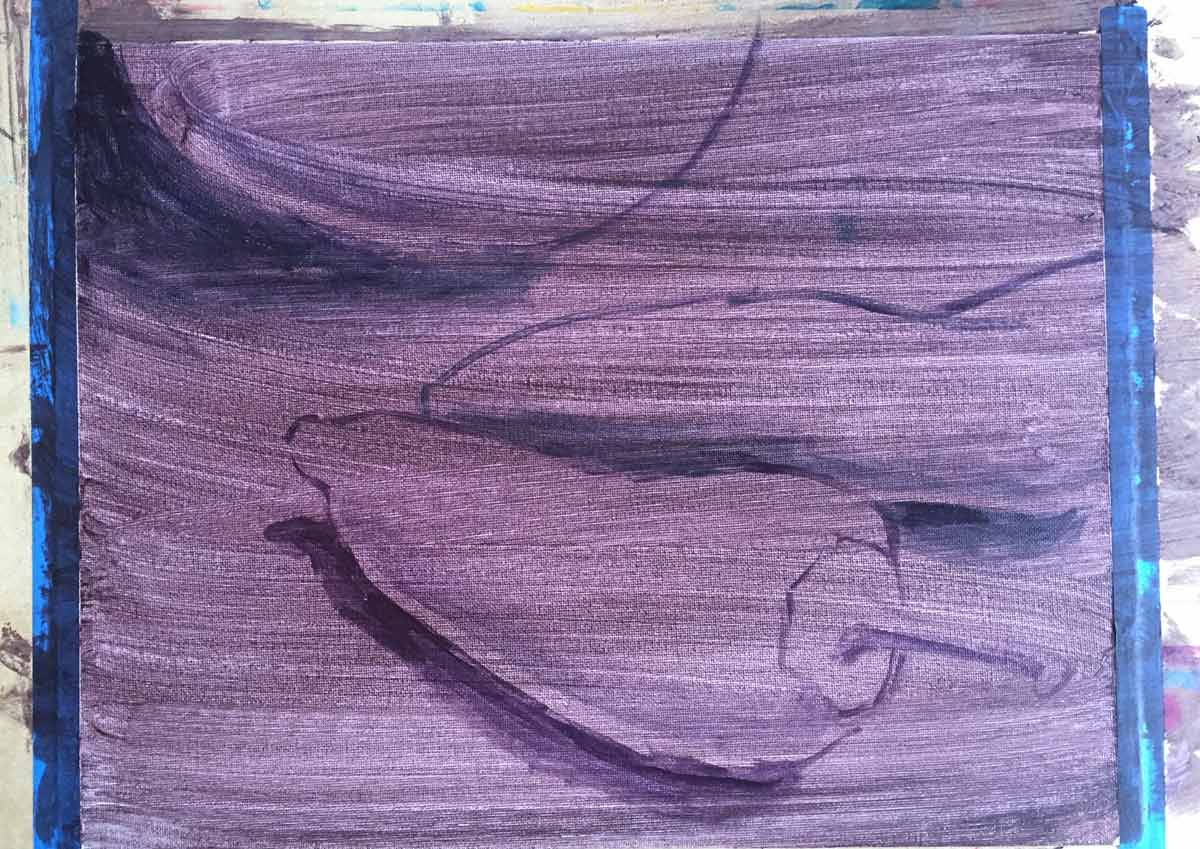
They should use their leftover paint or mix up some new dark brown or purple. Using a small brush and their dark paint, students will draw the outlines of the objects just like they did with the charcoal on paper. Then have them draw the OFF Shadow shapes with the paint, and fill them in so that they are dark. Explain carefully, that these dark areas are guides, not the actual shadows. They will be painted over, but making the underpainting even darker helps the shadows look darker.
Finally, if you have enough time they should paint the ON shadows with the small brush. If you’re short on time, you can skip this step.
Now the underpainting is finished and they’re ready to paint with color. If you are dividing this into two lessons, make sure artists’ names are on the boards or the tape.

Pinterest Gallery – Paul Cezanne
Tap the icon to the left to open our special Pinboard showing examples of artwork to display to your class. See our Article for making Pinterest work on larger displays. You can also use a laptop or large tablet and gather everyone around like you’re using a book.
BREAK
This is the end of part one if you are dividing into two, 52-minute sessions.
LEARNING TARGETS
Students know how to create a painting using mid-tones
M A T E R I A L S
- Acrylic paints
- Brushes
- Palette pad
- Water container
- Smocks
- Paper towels
4.1 demo
View the slideshow (below) to learn the technique for the demo. Or you can display the Slideshow for your students and read the captions.
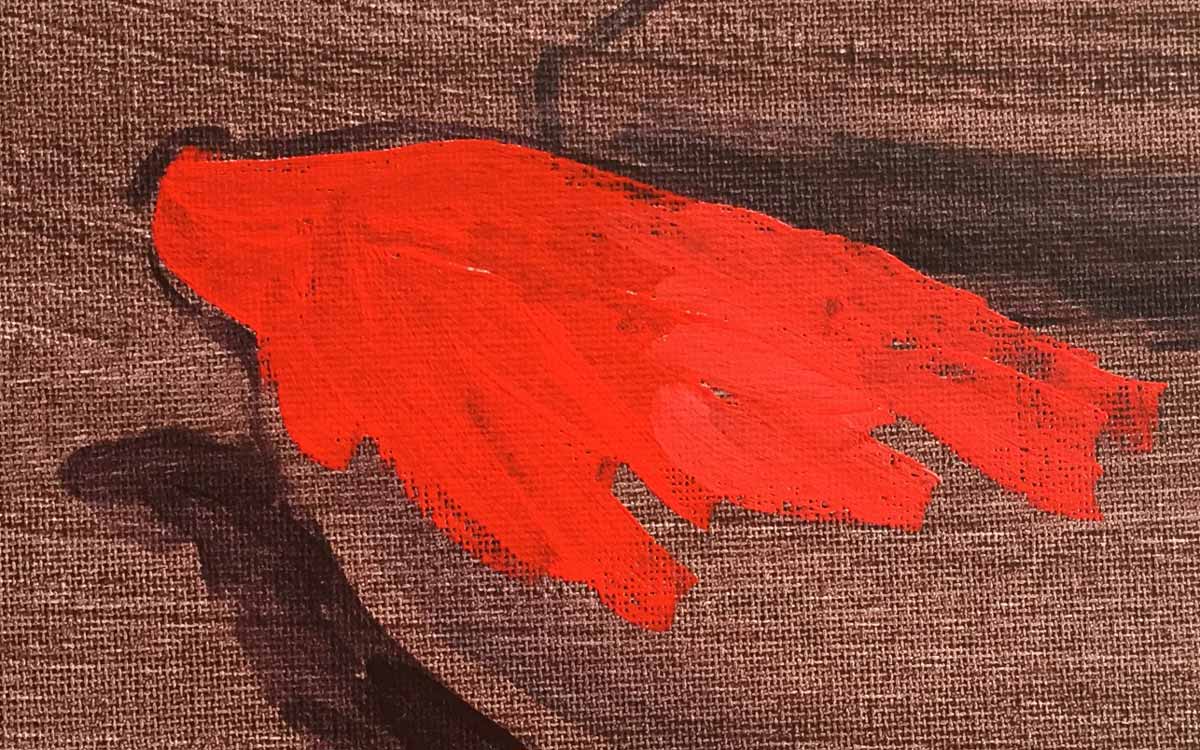
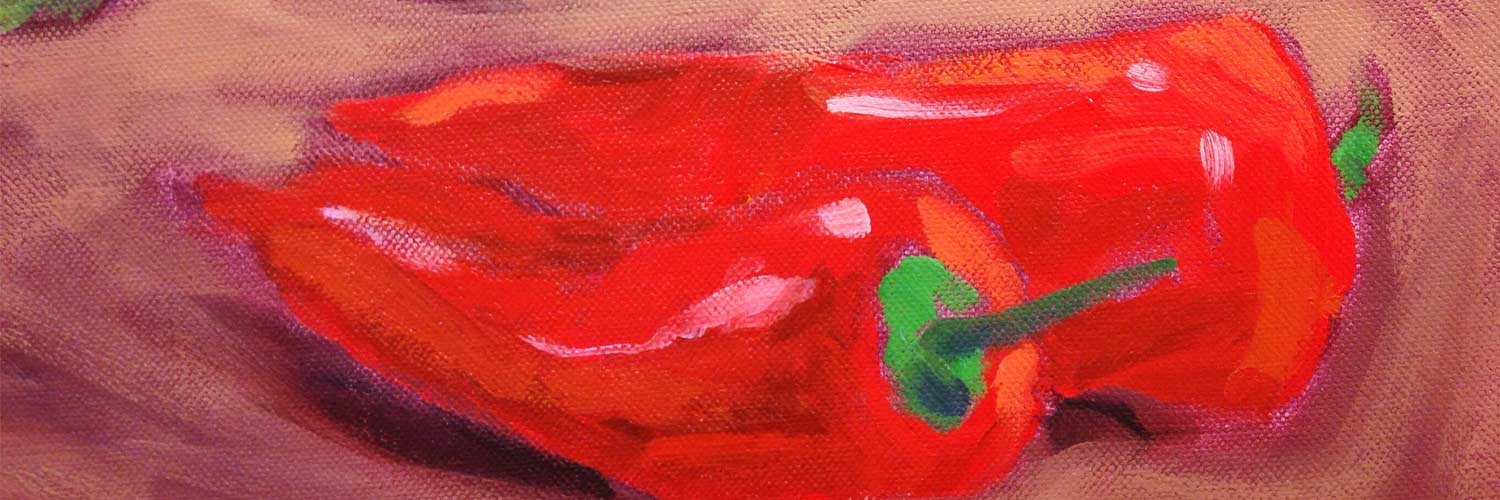
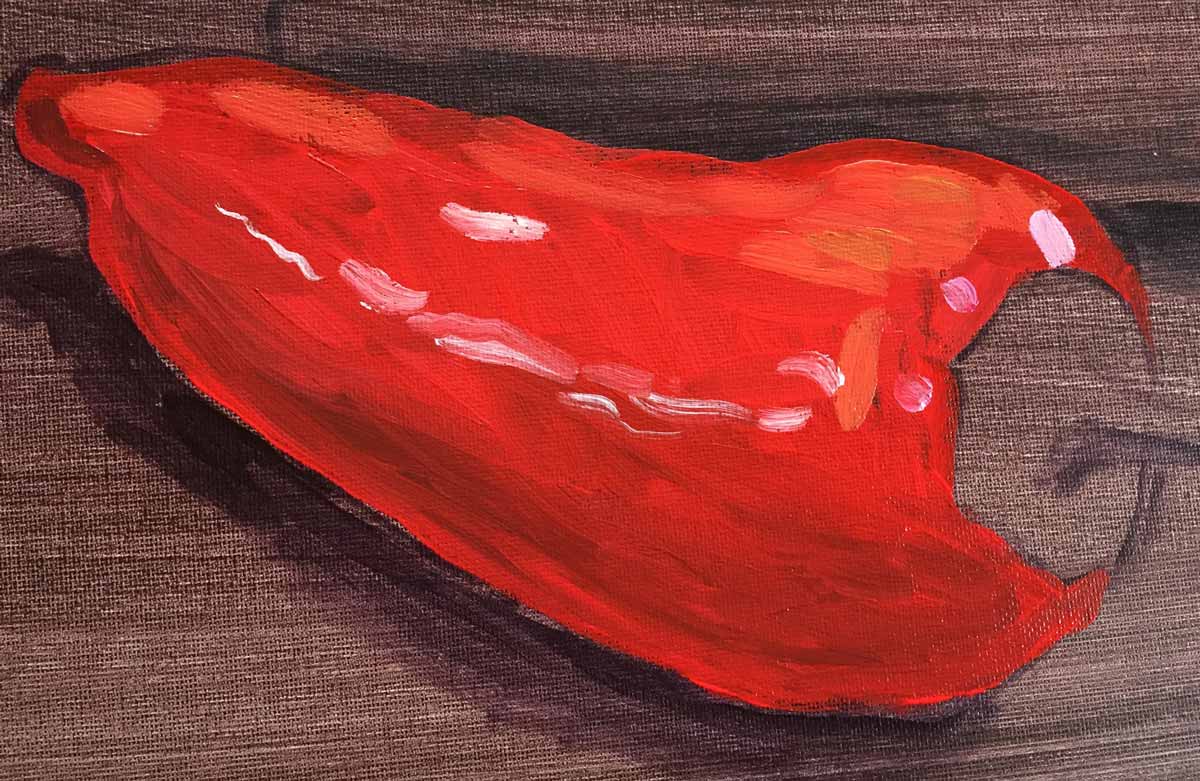
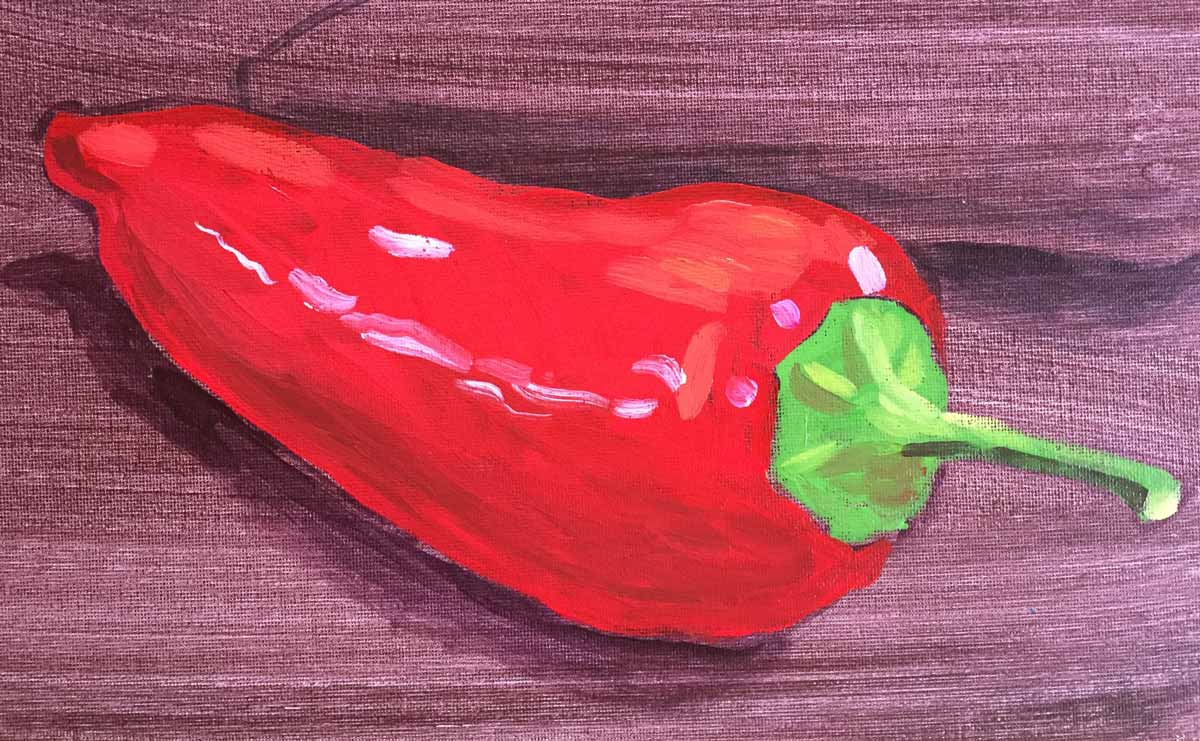
Paint the whole area in the local color. We added a touch of white for opacity, and a a touch of yellow to keep the red warm.
A flat red over the whole pepper. It’s ok to have a few streaks.

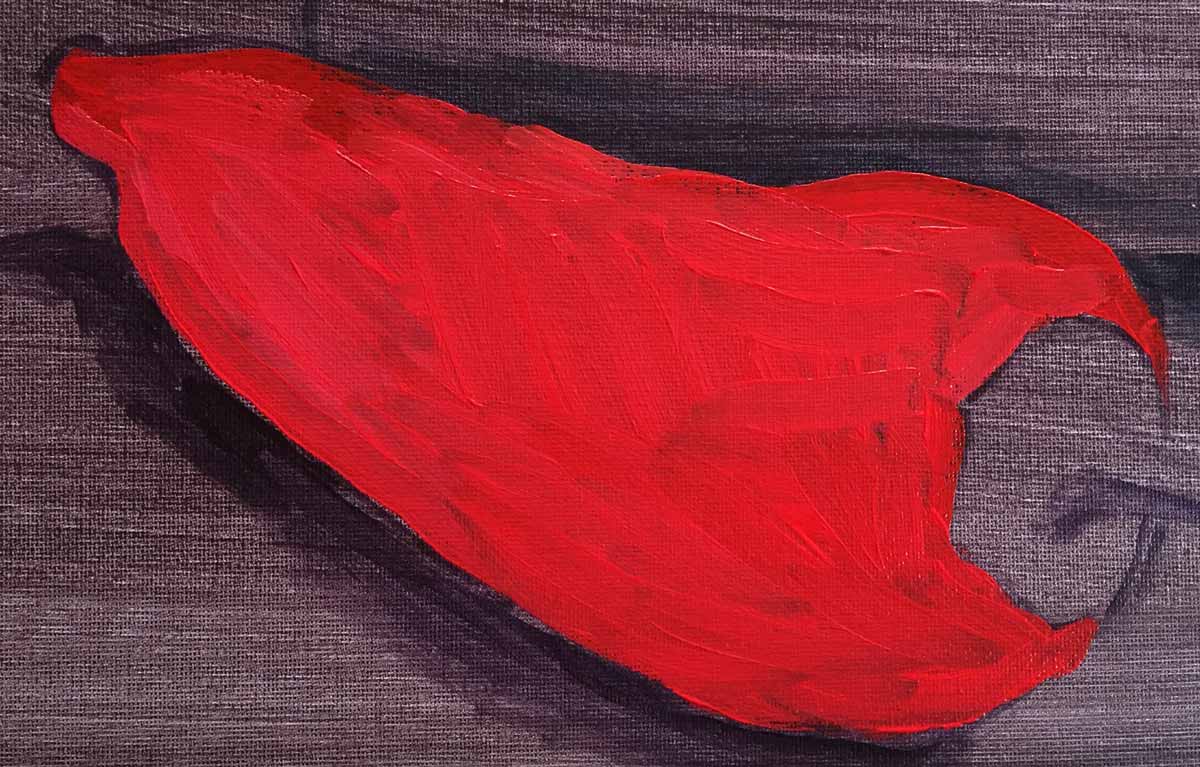
To make the shadow for the red, we added a touch of Pthalo Green. It was so strong that we had to add some red back into it.
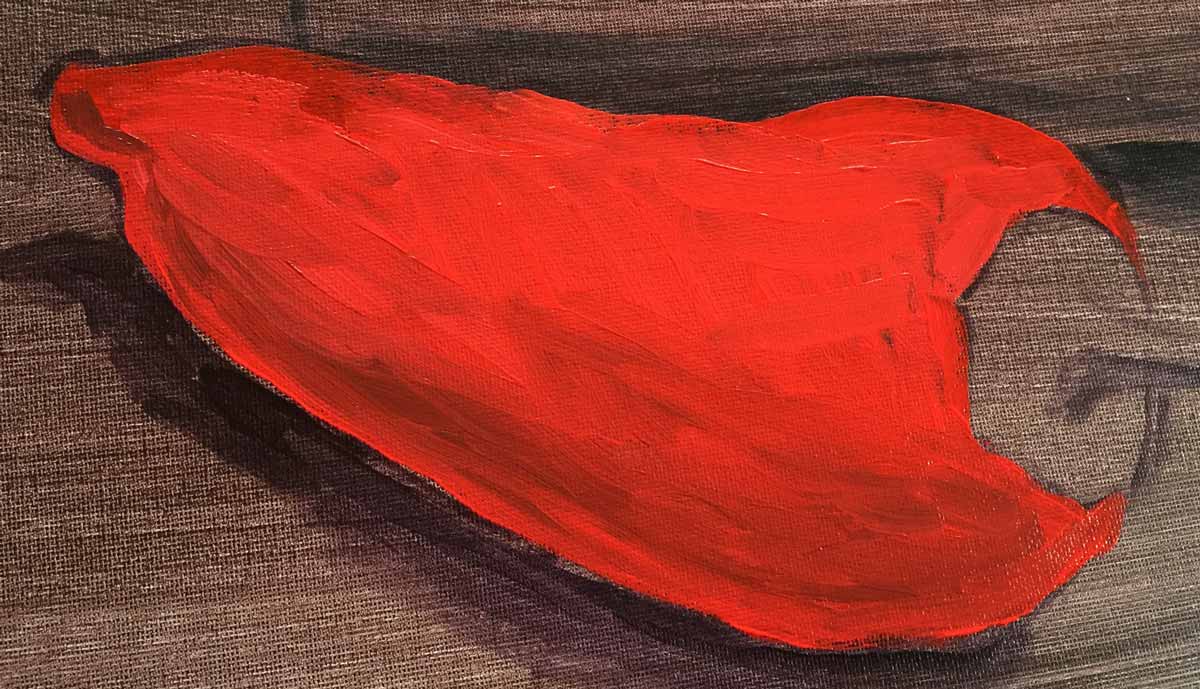
Next, the shadow is painted. Because both the shadow and the red local colors are still wet, it works to paint the dark over the light. We blended a bit, and left the bottom edge lighter for the bounced light effect.
The lighter areas of the pepper looked orange, so we made that with red, yellow, and white.
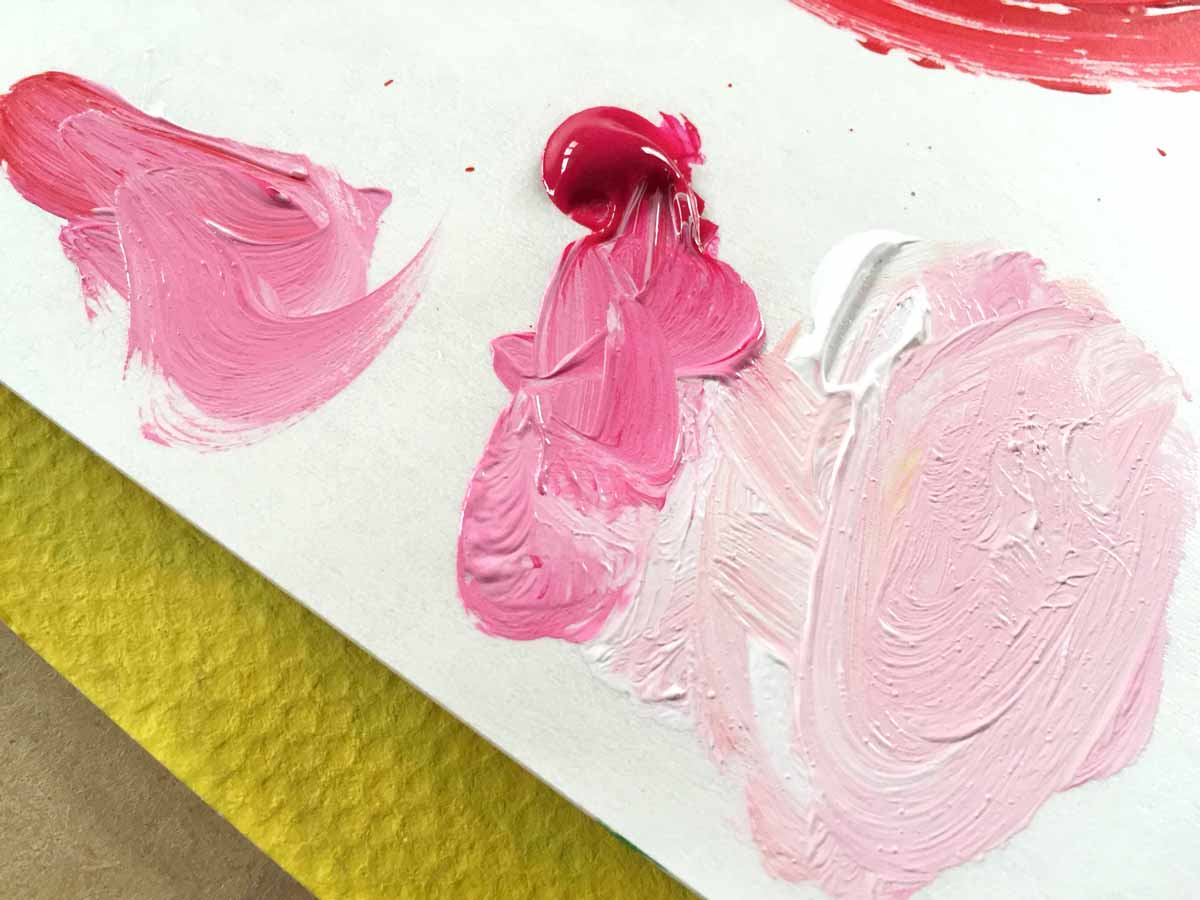
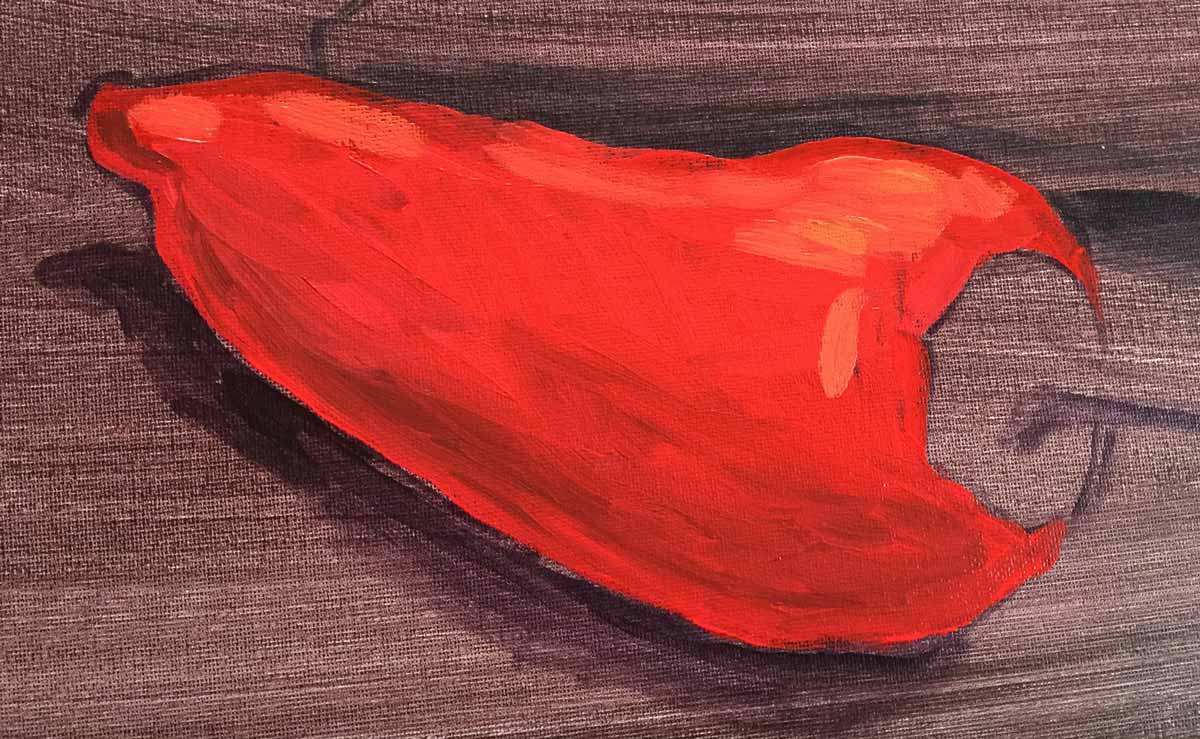
A lot of times we see magenta pink highlights on red objects so we mixed a couple of pinks.
The darker pink highlights are over on the right, while the middle has almost white highlights. We simplified what we saw by not painting all the highlights.

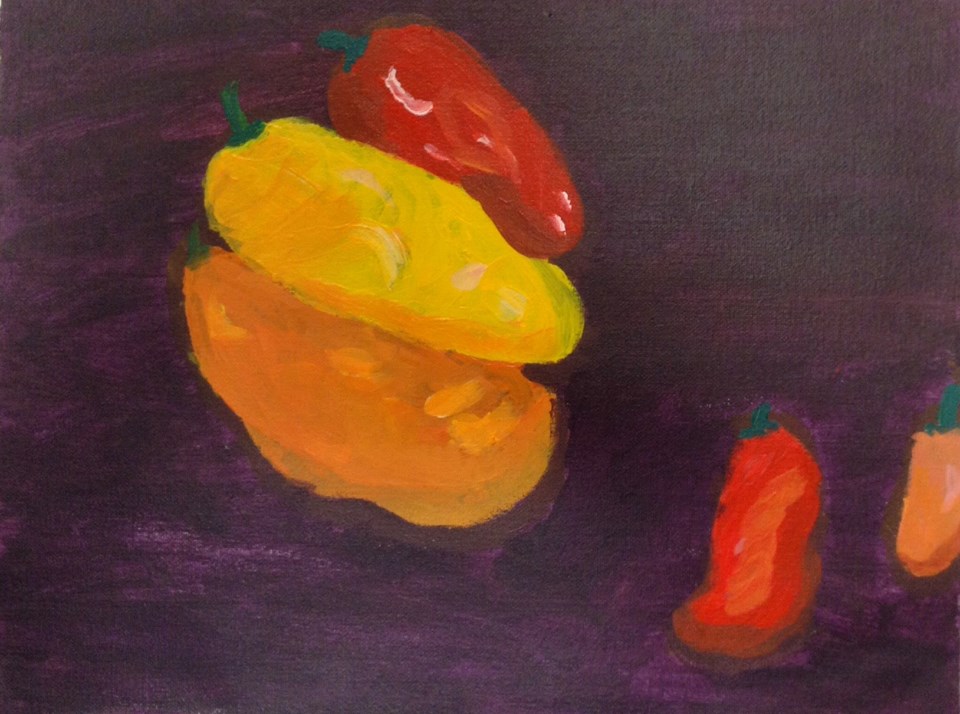
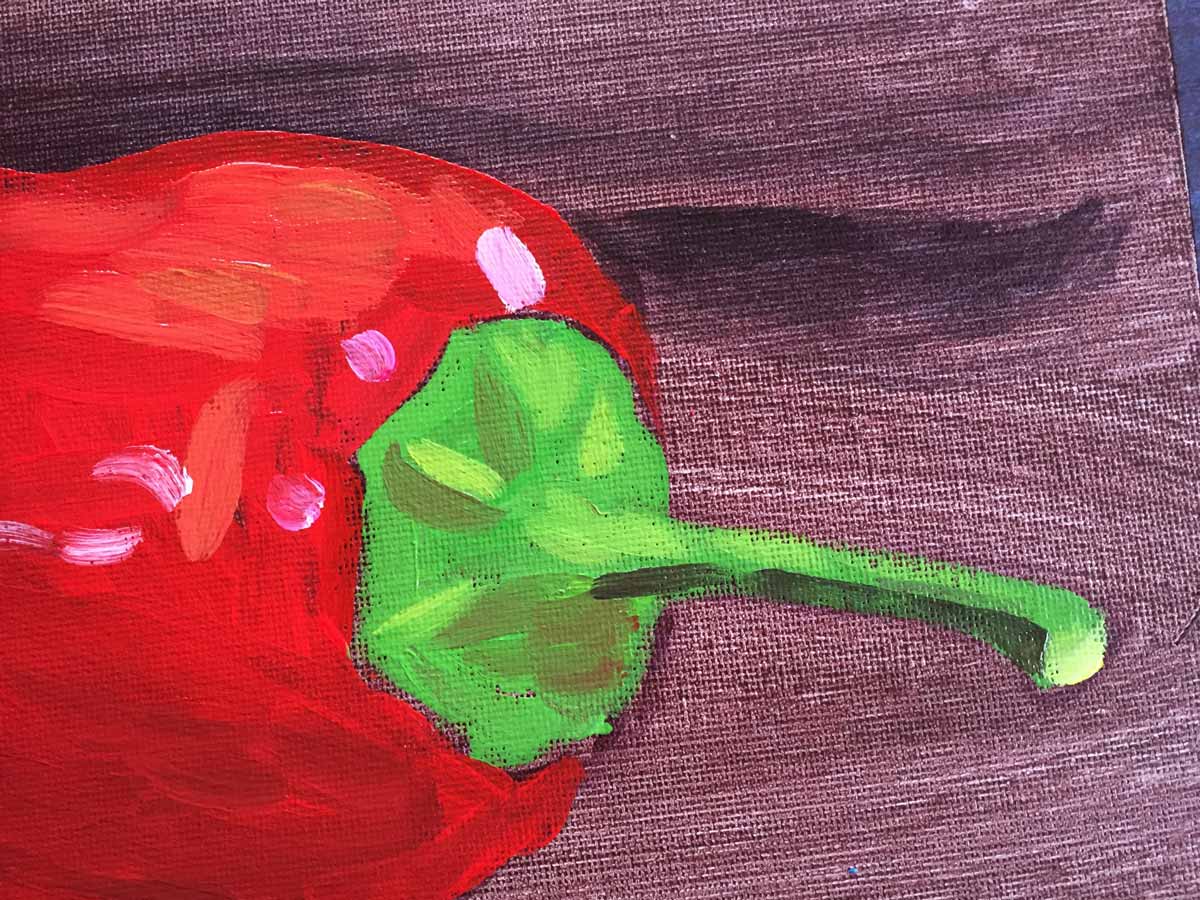
The local green was made with a lot of yellow, a touch of green, some white, and a touch of red to keep it from being too brilliant.
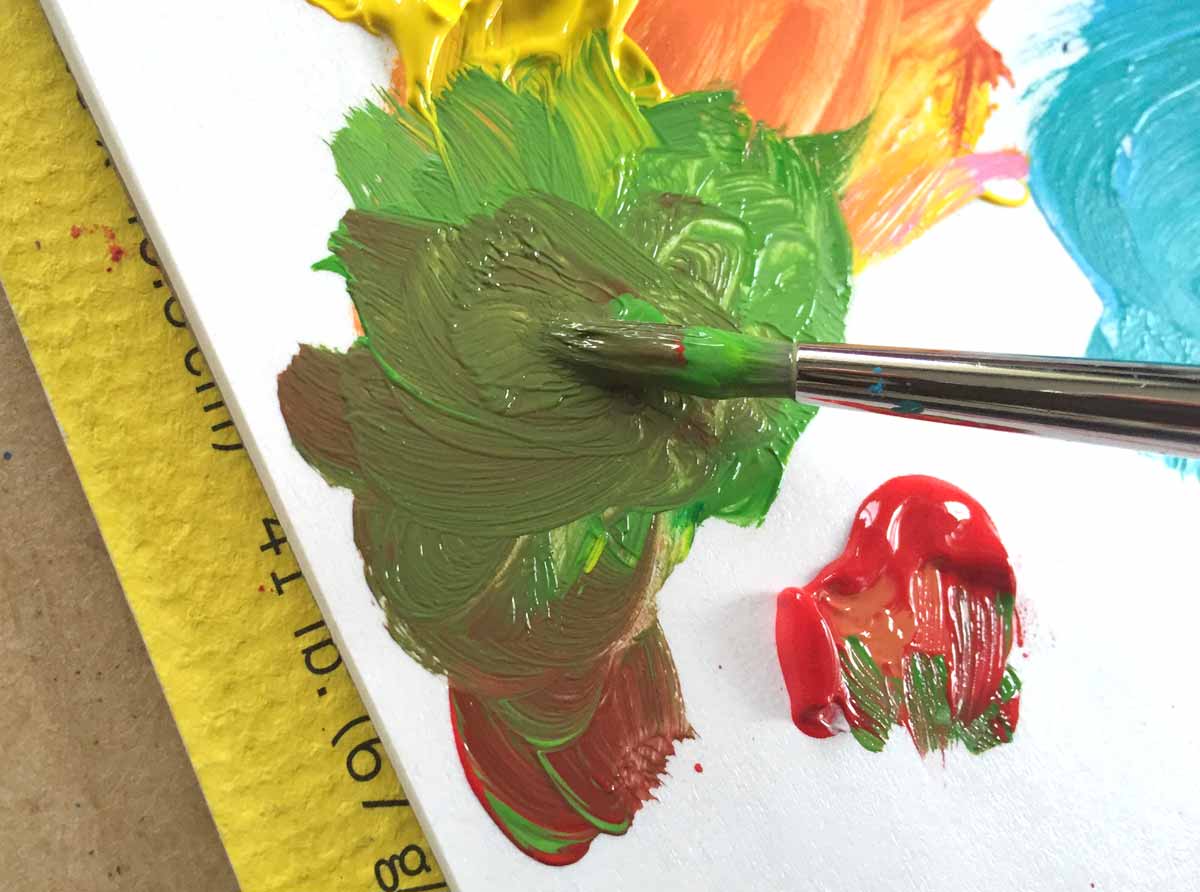
The shadow color was made by adding a bit of red. You can see how we had to mix more green back into it.
MidtoneSlide11
Shadows are painted. We had to make a darker green from scratch, using red and green with a bit of yellow.
MidtoneSlide12
Cleaning the brush, we then made a lighter green by adding yellow and white to our original local green.
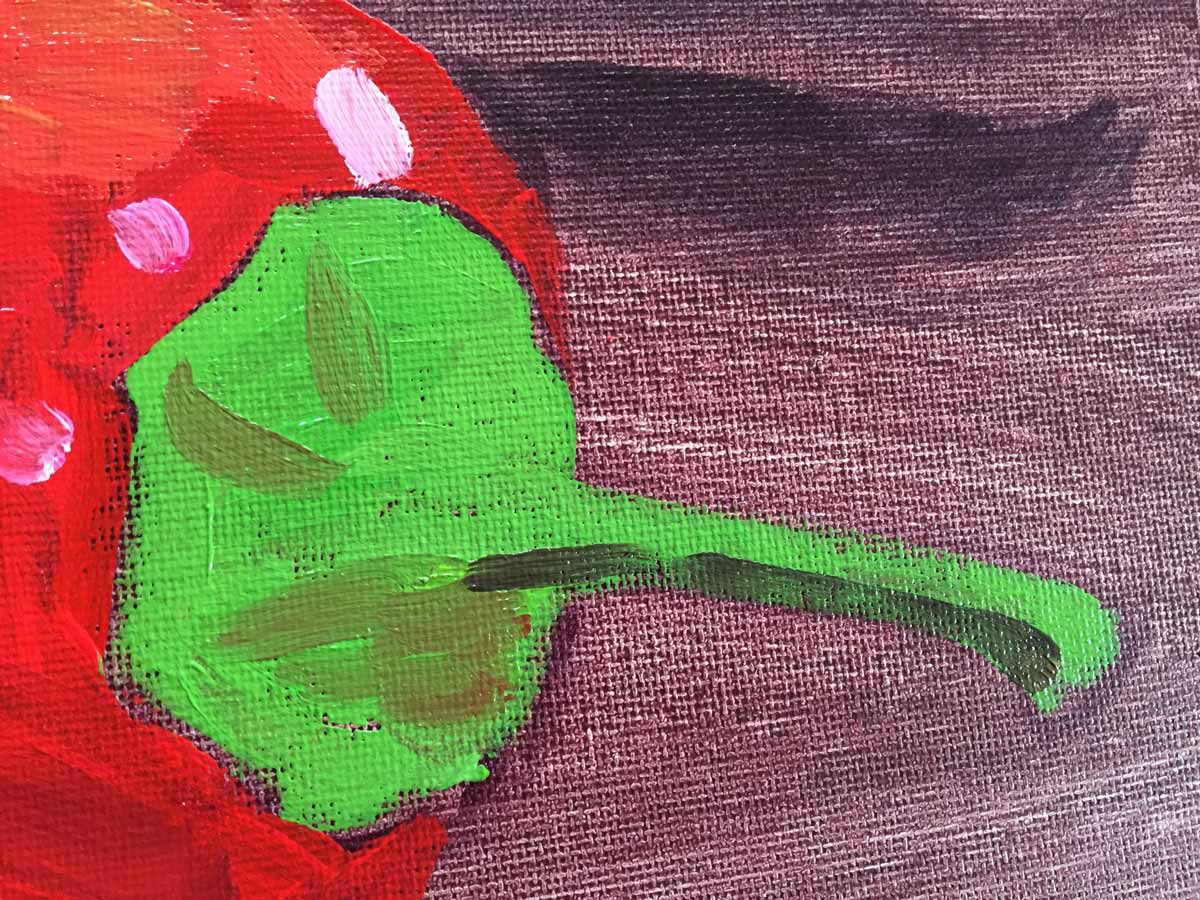
MidtoneSlide13
The first pepper is finished! On to the second one.
You can paint loosely, and let some of the underpainting show, or you can cover it up. Just don’t worry about filling every tiny bit of canvas. Dark bits showing through is much more realistic than white bits showing, which is one reason for making a dark underpainting.
Once the pepper is red, we will add the ON Shadows. So, does anyone know how to make a shadow red color? What do I add to this bright red? (Answer is green). Yes. Now green is very, very powerful as a pigment, so we will use the tiniest amount, and keep adding bits until we like it. Once we make a good shadowy color, we can paint the shadows on the pepper. You can paint into wet bright red like I’m doing, which is easiest, or you can paint over a dried local color. If you paint over dry color, make sure you don’t run out of paint and let your dark color break up into a dry-brush look. The dry-brush technique doesn’t work with dark colors painted over a lighter color. Don’t go right up to the edge with the dark though. If you leave the edge of the dark side of your object, the local color, it will look like reflected light. See how I’m doing this? Use as few strokes of the brush as you can to keep your painting lose.
Next we’ll do the light areas. Add some white and yellow to mix a lighter, orangish red. Paint the light area on top of the pepper. Finish it off with a bit of highlights. Sometimes red objects have pink highlights and sometimes they’re cream. Just look and see which you have. They are reflections of the light source, so there are not many highlights, and they are very light. Be careful to leave most of the object the original local color.
And that’s how you will paint every thing in the still life. When you’re done with the objects, you’ll paint the background with a light tan color and a darker shadowy brown for the OFF Shadows. Notice the reflected light areas within the OFF Shadows too. make the tan with yellow, red, white, and a bit of purple. For the shadows, just use a tiny bit of white with the same colors.”
LEARNING TARGETS
Students know how to create a mid-tone painting
M A T E R I A L S
- Acrylic paints
- Brushes
- Palette pad
- Water container
- Smocks
- Paper towels
5.1 paint
Use white in your colors if they are not covering up the underpainting well. It’s ok to let the underpainting show through in areas, but students need to cover the entire canvas a second time with opaque paint. Mixing glazes (underpainting) and opaque technique does not look finished.
Even a simple single color background is better than leaving it showing the tinted underpainted canvas.
Students almost always discover that they’re more happy with their painting if they have covered the entire background with an opaque color of paint.
LEARNING TARGETS
Students know the importance of cleaning up.
M A T E R I A L S
- Paper Towels
- Cleaning wipes
- Sink
- Waste baskets
- Well-lit spot for photos
- Camera or phone-camera
6.1 CLEAN
- Wash hands
- Super-wash brushes if used
- Put art supplies away
- Wipe tables & toss trash
- Remove any smocks (last)
- Check for items on floors and tables
6.2 PHOTO
6.3 CONNECT
%
Insights
This lesson provides understanding
%
Technique
This lesson shows application and movement
%
Self Expression
This lesson allows personal freedom
OBJECTIVES
- Practice and improvement mixing opposites to create shadow colors
- Understanding an easy technique for painting in acrylics
- Accomplishment in finishing a colorful still life
- Fulfillment – most students will be proud of this work
TROUBLESPOTS
Small Subject – The peppers are small objects, but a good composition usually fills a canvas. Make sure that students have their subject large enough that they’re within about 2 inches of edge and/or have objects that are cut off by the edge on each side of their composition.
Blah Backgrounds – Students tend to like the look of the underpainting after they have been looking at it for a while. The paintings look best when the area around the objects is painted with thick opaque paint instead of the brown underpainting. It’s also an easy way to say, “I’m finished!” and ask to move on to artist’s choice. Make sure you mention that the underpainting must be covered all over for the painting to be finished.
ART WORDS
ON Shadows – Shading that is ON the dark side of an object, usually with a soft edge where the light side meets the dark side.
OFF Shadows – The shadow underneath or near an object – it is made by the object but not ON it. It is also shaped like a silhouette of the object but may be stretched and/or squashed..
Local Color – The main color of an object if there were no variations, no shadows, and no light areas. For instance, if you had a wooden model of an apple, the local color would be the red color you would use to paint over the wood and turn it into a red apple. If you then made an acrylic painting of this same apple, you would mix many different variations of red, pink, orange, brownish colors and even black, but you could begin by painting it the same local color, red, that you used to paint the wooden model. Then you would add all of the other colors to make it look realistic…
Highlight – A small bright spot on an object that is a reflection of the light source and is white or almost white. On a shiny object it will have a sharp edge but on a soft object it will be fuzzy.
Reflected Light – Light that bounces off of a surface and shines back onto an object, brightening the edge of the ON shadow. Reflected light is very important for showing roundness.
CLASSROOM
PREP
Purchase produce from a grocery that has open bins for good-looking veggies and fruit. Small peppers are best for this project.
Print all of your PDFs from the lesson plan and cut any references apart as needed.
What your room needs
Here are your printable lists and room prep instructions.
Opens in new window
CLASSROOM
MATERIALS
- Frame-O-Scope Printouts
- Black Markers
- Water Container
- Paper towels
- Smocks
- Cleaning Wipes
- Sink
- Waste Baskets
- Camera or Camera-phone
STUDENT’S
MATERIALS
- Acrylic Paints
- Brushes
- Palette Pad
- Charcoal
- 14” x 17” Paper
Next Week
Supplies you’ll need to find, or order:
- Acrylic Paint
- Brushes
- Palette Paper
- Watercolor Paper
- Bucket of Water
- Paper Towels
PREVIEW
Week 33: Robots & Skeletons
April 13 – 17
Everyone should work to finish their mid-tone still life painting, and then if there is time, move into the last color journal of the year – neutrals. Some students will be finished with the journal before class is over, so there is also an exercise for early finishers.
Week 34: Finish & Color
April 20 – 24
Everyone should work to finish their mid-tone still life painting, and then if there is time, move into the last color journal of the year – neutrals. Some students will be finished with the journal before class is over, so there is also an exercise for early finishers.