
OVERVIEW
Because accuracy is not always the goal, and students need to break free from boundaries and enjoy the freedom of self-expression. We also learn about the Most Important Spot, (or emphasis).Grades 3 – 12
1 Hour & 30 Minutes to 2 Hours

SCROLL & TEACH LESSON PLAN
Don’t worry about rewriting anything. Just spend a few minutes reading the lesson plan and printing out your PDFs. Then check out the READY, SET, GO! section and print your prep-page, which includes checklists and an “at a glance” outline of the lesson so you can stay on track when you’re teaching. Set out the materials from the list on your prep page and you’re ready.
That’s all you need to know. Use your smartphone to Scroll & Teach!
Art Supplies Are Needed
Our lessons are designed to work with very specific supplies (see our supplies page using the button below). We recommend ordering what you need for home delivery. However, you can try and make do with what you have on hand during the health crisis.
Lesson At A Glance
A brief overview of each step. Buttons jump to each section for detailed information.
10 Min – Teach on inaccuracy
15 Min – Talk about emphasis & plan expressive design
5 Min – Set up for painting
5 Min – Use canvas pencil for guidelines
40 Min – Inaccurate and expressive!
2 Min – Everyone helps!
SCROLL & TEACH
LESSONPLAN
Each section is a different color. Read over once and then you can SCROLL & TEACH using any device you like. It’s designed to work best with your phone.
LEARNING TARGETS

Students know how to create both accurate and imaginative drawings.
M A T E R I A L S
- 14″ x 17″ Sketch Paper
- 2B Pencils
- White Eraser
- Stretchy Eraser
- Black Oil Pastel
- Charcoal
- Paper towels
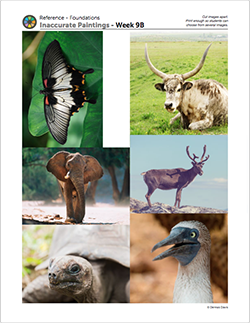
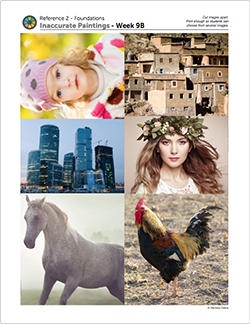
1.1 Prints
Reference
Animal Photos
Cut images apart and print enough for each student to choose from several.
1 Page – Opens in new window
1.2 animal
CREATIONS - tap here to open
Our Creations lessons are for students who have completed the two years of Foundations and are ready to begin using all that they have learned to create new work. These more challenging versions of the same concepts and techniques are easily taught along-side students in the Foundations course. This allows for excellent review, and is encouraging for students to see progress from each viewpoint.
Use the Student Instructions printout below to distribute to your Creations students. Tap the image to open the PDF in a new window.
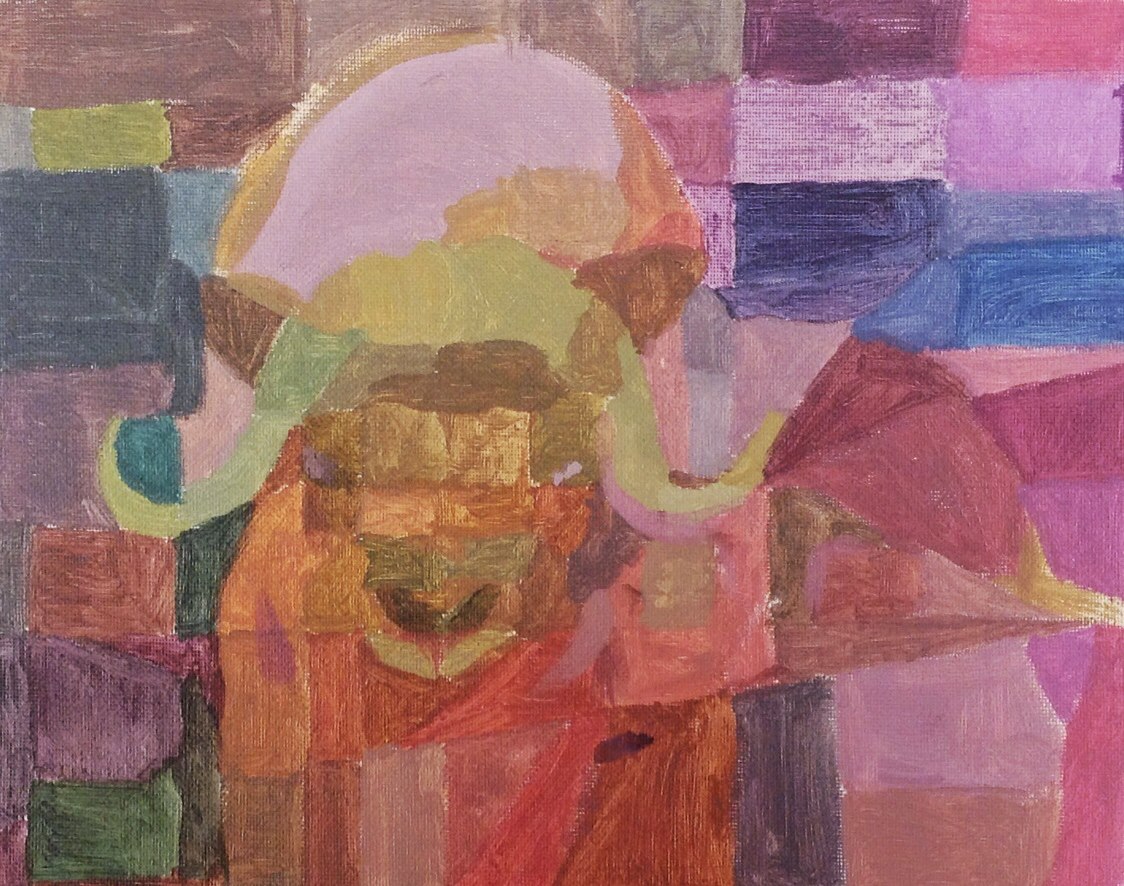
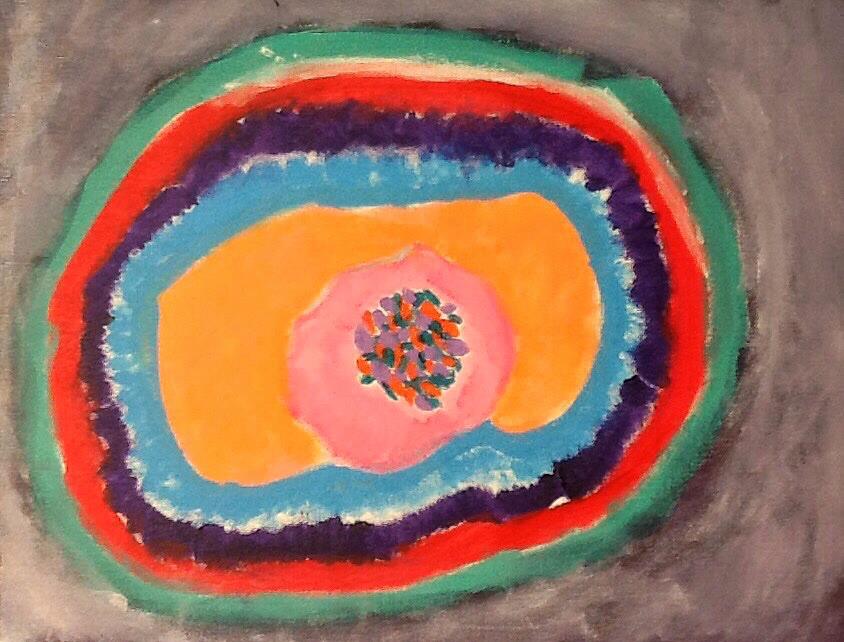
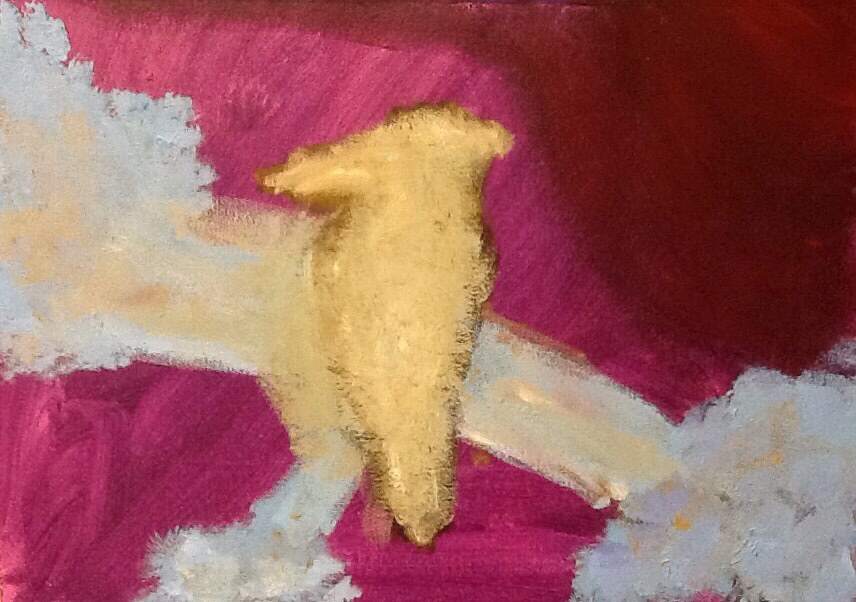
Expressive Painting
Overview: Students will use two or three reference photos and an idea to create a painting that conveys a meaning and is not based on accuracy.
Use a canvas board, a sheet of taped canvas, or a stretched canvas if available.
Step 1. (15 minutes) Choose several reference photos from a book or use the provided PDF photographs from the lesson. Use a pencil and sketchpad to create at least four small planning sketches for how you want the painting to look. 2-inch thumbnail sketches work best for this.
Step 2. (10 min) Advanced students gather together and preview the Paul Klee paintings on the Pinterest board. Discuss together.
Step 3. (10) Return to the sketch book. Look at your four sketches and think about any ideas you could add to them. Make them more interesting, more communicative, and more about you. Create one or two more thumbnail sketches, pushing your work to a higher level.
Step 4. Set up your work area to paint in acrylic. Draw guidelines with your canvas pencil. Then use the rest of the time to enjoy working on your expressive inaccurate painting.
Tap images to open Creations Student Instructions and Reference Materials in new windows

Use this button to jump down to the preparation section.
LEARNING TARGETS
Students know about inaccurate and expressive artwork.
2.1 talk
“Today we are leaving accuracy behind. Most people think drawing or painting something that looks exactly like it is, shows the most artistic talent. But a photocopier can do that. Accuracy is very important to learn and know how to acheive, but artists also need to communicate their ideas and show their technique. If a painting makes a person see the world differently or think a new thought, then it is more than an image; more than a copy of a photograph.
Enjoying yourself is an important goal for artists too. Some artwork is difficult, and there are times when it’s good to push through when you don’t feel like it. Other times, it’s just hard to work the way you usually do, and it’s good to take a break and do something different, or experimental. Some artists do experimental work a lot, and change their style often.
Every artist should take a break and do an experiment with something new every now and then.”
Use this button to jump down to the preparation section.
LEARNING TARGETS
Students know about Paul Klee and his artwork.
M A T E R I A L S
- Tablet or TV to show photos to the class
3.1 discuss
Paul Klee, German-Swiss Artist, 1879-1940
Paul Klee grew up in a very musical family. His father was a music teacher and his mother was trained to be a singer. When he was 8, Klee’s grandmother gave him a box of sidewalk chalk and this was his first introduction to fine arts.
As a young adult, he studied art at the Academy of Fine Arts in Munich. He loved to draw but struggled understanding color and felt like he would be a painter. His earlier work was colorless, using mediums like ink and etchings. Klee traveled to Tunisia and saw the color and the light. He fell in love with color and his artistic style change forever.
One of his famous quotes is: “Art does not reproduce what we see; rather, it makes us see.”
There was a childlike look of his work that was inaccurate, yet full of meaning, many times political and satiric. His style was unique and he used many different media and ideas. Color was very important to him.

Pinterest Gallery
Use This Link or tap the icon to the left to open our special Pinboard showing examples of artwork to display to your class.
Use this button to jump down to the preparation section.
LEARNING TARGETS
Students know how to identify emphasis in artwork.
M A T E R I A L S
- 14″ x 17″ Sketch Paper
- 2B Pencils
- 4B Pencils
- White eraser
- References
4.1 prints
reference
More References
References to inspire students to create inaccurate paintings.
Hand out reference prints. Set all of the images out on a table or counter, and let groups of students come choose what they want.
Include the first set of animal reference photos along with these new ones.
1 Page – Opens in new window
4.2 choose
Have everyone come choose another reference or two. Have more than twice as many photos as you have students, for kids to choose from. Talk while they’re looking and returning to their seats.
Explain the concept of emphasis. We refer to this as The Most Important Spot, because it’s a concrete statement as opposed to the abstract idea of emphasis. It’s good to also mention the official term emphasis (especially with older students), since this is one of the 6 elements of good composition.
“Take a minute to choose one or two reference photos.
The more you get away from realism, the more you need to have a plan. One of the things I want you to think about today is the most important spot on your work. Every work of art needs to have a most important spot. Artist call this emphasis, and it’s one of the elements of good composition. You’ll also do well to have two more spots: a seond spot that is important, but not quite as important as the most important spot, and finally a third spot is only a little bit important. That’s first, second and third spots of importance. Head back to your seat and begin changing your picture to be expressive, inaccurate, and way cooler than the original. Think about what colors you can use to make it look good and yet be completely different. Can you use bold lines? Paint the big shapes in fun colors and patterns you like?
There are lots of directions you can go in, but if you don’t begin with a reference, you simply have too many choices and it’s overwhelming. No reference at all means you have everything ever seen or imagined to choose from. It’s too much. Even a lot of photos can be too much.
What if you had an entire room full of amazing photos to look at? You’d spend all your painting time looking at them. So you have to learn to limit your choices. We have only 12 photos, and only a couple minutes to choose.
You can add some ideas that are not even in the photo, or from another photo. This is where you get to use your imagination, but I don’t want you to work entirely from your imagination. You are combining the real and the imagined.
Where will your Most Important Spot be?”
4.3 sketch
BREAK
This is the end of part one if you are dividing into two, 52-minute sessions.
Use this button to jump down to the preparation section.
LEARNING TARGETS
Students know how to set up their work area for painting with acrylics.
M A T E R I A L S
- Acrylic paints
- Brushes
- Palette pad
- Water container
- Smocks
- Paper towels
- Canvas Pad
- Blue Painter’s Tape
- Drawing board
Brushes should be nylon for springiness and durability. Round brushes are the most versatile.
Paint pigment list:
- Napthol or Pyrrol Red
- Hansa or Light Yellow
- Pthalo Green (blue shade)
- Cyan or Cerulean Blue
- Ultramarine Blue
- Dioxazine Purple
- Magenta
- Burnt Umber
- Raw Sienna
- Titanium White (professional grade only)
5.1 setup
Prepare for painting. Have water containers filled with water, smocks for students, and paper towels ready.
Students will be painting for the rest of class. If you’ve been using the lessons, by now they should understand the setup routine. Remind them of the steps and help out where needed. Students will be painting on a canvas sheet so they will their board and tape.


Canvas Pad
This is a pad of real canvas with gesso. Don’t use “canvas paper”, which is just paper with a textured surface.

Angle
Tear off sheets at a 45 degree angle, pulling from the outside corner.

Gesso
The back is not primed with gesso, and should be recognizable by specks of color, and a slightly off-white color that is not as shiny. Never try to paint on the back!

Measure
Use a long piece of tape and make sure it’s half on the canvas and half on the board.

Pinch
Pinch with both hands close together to tear the painter’s tape.

Done
Finished set up with 2 pieces of tape pressed securely.

Pencil
This is a canvas pencil. A colored pencil in dark brown/gray to mimic graphite.
Use this button to jump down to the preparation section.
LEARNING TARGETS
Students know how to draw guidelines before painting.
M A T E R I A L S
- Drawing board with canvas
- Grey Canvas pencil (colored pencil)
6.1 Draw
Use this button to jump down to the preparation section.
LEARNING TARGETS
Students know how to create an expressive painting.
M A T E R I A L S
- Acrylic paints
- Brushes
- Palette pad
- Water container
- Smocks
- Paper towels
7.1 paint
Tell students to be inaccurate and expressive! Use plenty of paint to be expressive and bold. Think about your colors. Use black only as your last color. Remember, to make black you mix dark brown and dark blue.
Walk around and help students when needed. This can be a challenging painting for those who like to create artwork that is realistic. Encourage those students and remind them of the importance of experimenting with new styles. Have a lot of fun!
Use this button to jump down to the preparation section.
LEARNING TARGETS
Students know the importance of cleaning up.
M A T E R I A L S
- Paper Towels
- Cleaning wipes
- Sink
- Waste baskets
- Well-lit spot for photos
- Camera or phone-camera
8.1 clean
Students clean up their work area.
- Wash hands
- Super-wash brushes if used
- Put art supplies away
- Wipe tables & toss trash
- Remove any smocks (last)
- Check for items on floors and tables
8.2 photo
8.3 connect
%
Insights
This lesson provides understanding
%
Technique
This lesson shows application and movement
%
Self Expression
This lesson allows personal freedom
OBJECTIVES
- Practice and improvement using shading
- Understanding how shadows are formed and used in artwork
- Accomplishment in drawing an animal with shading
- Fulfillment by choosing the animal they want to draw & paint
TROUBLESPOTS
Toy playing – When a student has a lot of freedom they can sometimes stop doing art, and start playing with their art materials like they are toys, instead of high-quality art media. Say, “if you’re not focused on creating something new and special, then you are playing with toys. These are materials are not toys. There’s nothing wrong with playing or with toys. But right now we’re in art class, so I want you to focus on creating something special.” An example would be dumping out large blobs of paint and mixing all the colors together and using it like playing in the mud. Or drawing the same simple thing over and over as fast as possible.
A sassy student may be playing yet try to engage you in the argument that what they’re doing is very special, and creative. They know it’s not, but this is a test of your boundaries and leadership skills. Instead of arguing, simply smile and say as pleasantly and with as much respect as possible, that because you’re the teacher, you get to decide what is appropriate or not, and that’s not appropriate. That is the end of the discussion.
ART WORDS
CLASSROOM
PREP
What your room needs
Here are your printable lists and room prep instructions.
Opens in new window
CLASSROOM
MATERIALS
- Paper towels
- Tablet or TV to show photos to class
- References
- Water container
- Smocks
- Drawing board
STUDENT’S
MATERIALS
- 14″ x 17″ Sketch Paper
- 2B Pencils
- White eraser
- Black oil pastel
- Charcoal
- 4B Pencils
- Acrylic paints
- Brushes
- Palette pad
- Canvas pad
- Blue painters’ tape
- Canvas pencil (colored pencil)