
OVERVIEW
Young artists will have a blast learning how printmaking works and creating their own sets of images. Stations make it easy and keeps everyone moving as they draw ideas, make printing plates from styrofoam, then add ink, and print them onto paper. Then they start over again.– – –
Grades K – 2
Week of February 10 – 14
1 Hour & 30 Minutes, or two 45-minute sessions
STANDARDS For This Lesson
SUBMIT YOUR SUMMARY
Copy and paste the text below to send your abbreviated lesson plan with national standards and learning targets to your supervisors and colleagues. Or access the WORD doc by using the blue button below.
– – – – – – – – – – – – – – – – –
Week of February 10 – 14
OVERVIEW:
Young artists will have a blast learning how printmaking works and creating their own sets of images. Stations make it easy and keeps everyone moving as they draw ideas, make printing plates from styrofoam, ink and print them onto paper, and then start over again.
NATIONAL STANDARDS:
Grade K
VA:Cr1.1.K –Engage in exploration and imaginative play with materials.
Grade 1
VA:Cr1.1.1 –Engage collaboratively in exploration and imaginative play with materials.
Grade 2
VA:Cr1.2.2 –Make art or design with various materials and tools to explore personal interests, questions, and curiosity.
LEARNING TARGETS:
Students know the art of printmaking
Students know how to successfully make prints
LESSON PLAN:
1. Warmup (20 minutes)- Trace print plates
and draw ideas
2. Intro (10 min) – Show slide show
3. Plate Making (15) – Transfer image
– – – – –
Break – end of part one if dividing into 2
sessions
4. Set Up (10) – for Printmaking
5. Make Prints (30) – use 4 stations
6. Clean Up (5) – Everyone helps
Tap the Plus Icon (above right) to open STANDARDS information, including an Overview, Learning Targets and a Syllabus. Copy and paste to send to your Administrators or use the button below to download a Word document with the same information that you can add your info to and email to them as an attachment.

SCROLL & TEACH LESSON PLAN
Don’t worry about rewriting anything. Just spend a few minutes reading the lesson plan and printing out your PDFs. Then check out the READY, SET, GO! section and print your prep-page, which includes checklists and an “at a glance” outline of the lesson so you can stay on track when you’re teaching. Set out the materials from the list on your prep page and you’re ready.
That’s all you need to know. Use your smartphone to Scroll & Teach!
Lesson At A Glance
A brief overview of each step. Buttons jump to each section for detailed information.
10 Min – Show slideshow
10 Min – Set up for printmaking
30 Min – Use 4 Stations
5 Min – Everyone helps
SCROLL & TEACH
LESSONPLAN
Each section is a different color. Read over once and then you can SCROLL & TEACH using any device you like. It’s designed to work best with your phone.
LEARNING TARGETS

Students know how to draw a simple line art design.
M A T E R I A L S
- 8.5″ x 11″ Copy Paper
- 4B or Ebony pencil (very dark and soft lead)
- Eraser
- Scissors
1.1 greet
Kneel down so that you are on their level. Bending over emphasizes the differences in your height, while kneeling makes them feel more important.
Divide your time into 2 parts, and in the first 10 minutes or so, let students draw anything. While they work, show examples of prints from our Gallery slideshow, and talk about how simple the line and pattern is.
1.2 draw
A simple drawing is very important today! Only use lines, with no shading.
Students will need at least 3 sheets of regular sized copy paper with 1 rectangle traced on each of them. You can do this before-hand, or make them as needed by having a printing plate ready. We like to trace more as they need them so the kids see you do it, and make the connection to the printing plate. Students will draw images inside the rectangles. See the slide show in STEP 2 for more information on preparing the plates and papers.
Important: Do not let them do any lettering or writing, because it will be hard for them to understand that it must be inscribed backwards onto the printing plate, and it would be illegible due to the thick lines.
Use this list of suggestions or have some photo references available if you like.
- animals
- house or building
- flower
- cartoon idea
Have students draw simple line art with no shading. You can use some very simple patterns, but make sure that any lines or dots are not too close together.
1.3 choose
Have each child choose their favorite drawing that they’ll use to make prints with.
1.4 name
Make sure they put their name on the drawing but just outside the rectangle – pretty close to it though. This is important because a lot of the paper will be cut off in a moment.
Collect the favorite drawings for transfering onto plates. The others can be set aside to take home later.
LEARNING TARGETS
Students know the art of printmaking
M A T E R I A L S
- 11x 17″ copy paper
- Ball point pens (one for each student)
- Scissors
- Printing ink
- Roller for ink
- Roller for printing (dry)
- Glass or mirror tile
2.1 demo
Look at the slide show carefully and learn the entire process well. You should make a print from start to finish for everyone to watch.
While you show the students how prints are made, have your helper transfer each student’s image onto a plate using the side of an Ebony pencil and burnishing gently as shown in the slides. The pencil drawing should go face down on the plate. You’ll want to cut it to reduce the size of the paper, but be careful to not cut off the students’ names.
Hold the plate and paper carefully so the paper doesn’t slip around while you work. You can use a little bit of painter’s tape to secure the paper as well. As you burnish with the pencil, be careful not to damage the styrofoam plate. Any indention such as a pinch, scrape, or poke, will become part of the final image on the printed piece.
When you’re done, the light burnishing will transfer a lighter version of the image backwards onto the styrofoam surface. It should be dark enough so that the kids can see to trace over the lines.
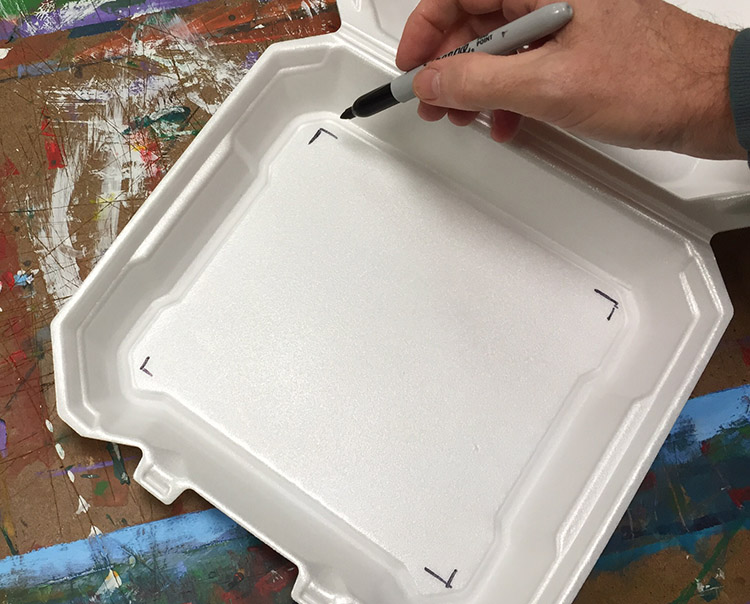
Use the bottom of a take out tray. You can mark where to cut
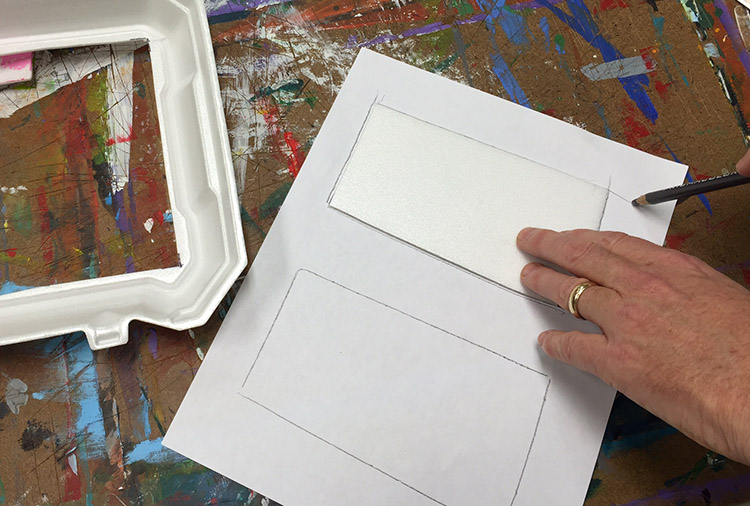
Trace rectangles for the students to draw in
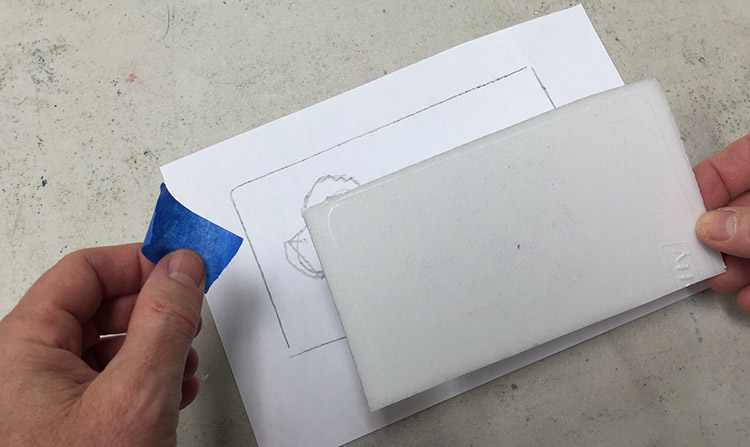
Place the Plate over the drawing
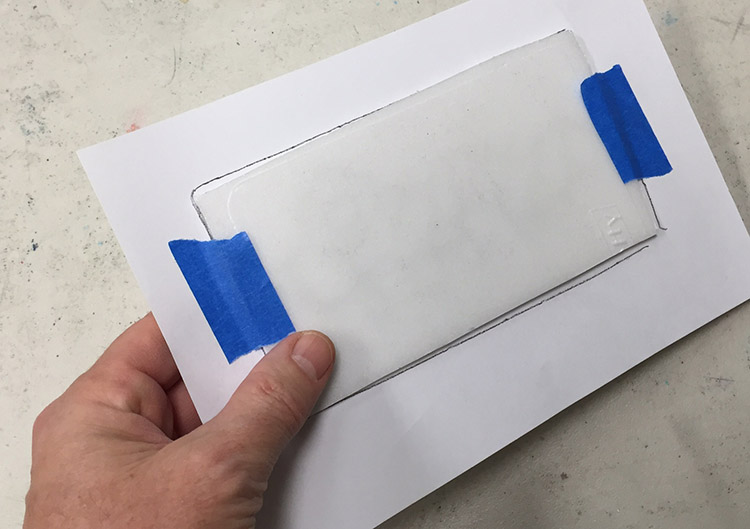
Line up the plate with the drawing, and secure it over the drawing with some tape
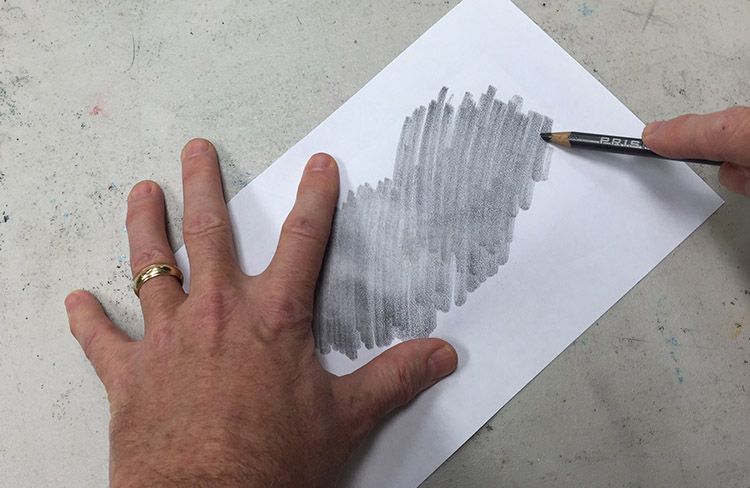
Burnish the back (teacher does this part) with a pencil on it’s side
The drawing will lightly transfer to the plate surface!
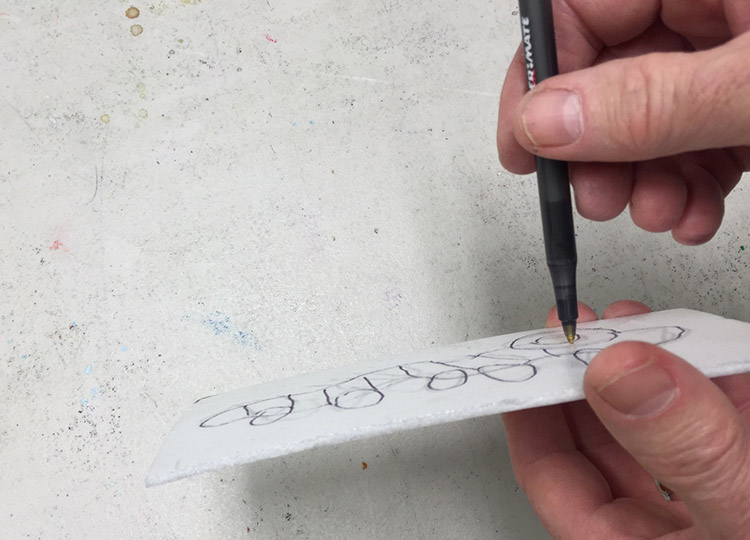
Make sure the initial drawing is gentle and that the pen is held straight up. This is held up so you can see the angle. Don’t press hard!
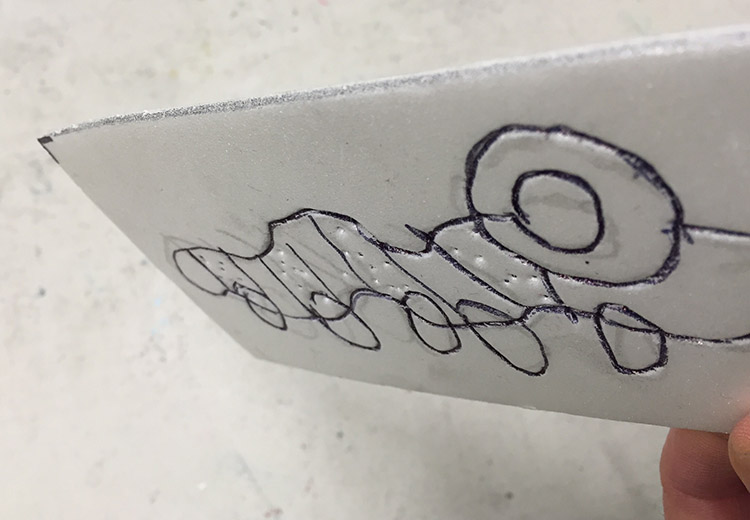
Here’s how it should look when finished.
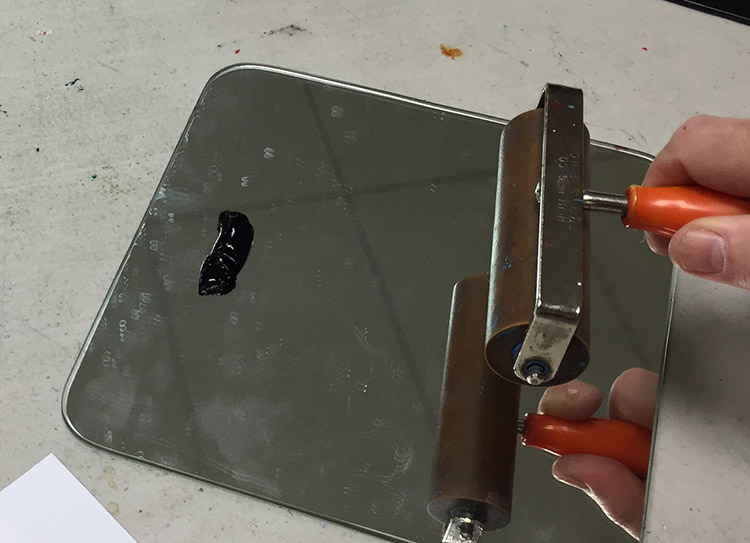
Put a small amount of printing ink onto your ink block (mirror tile is used here)
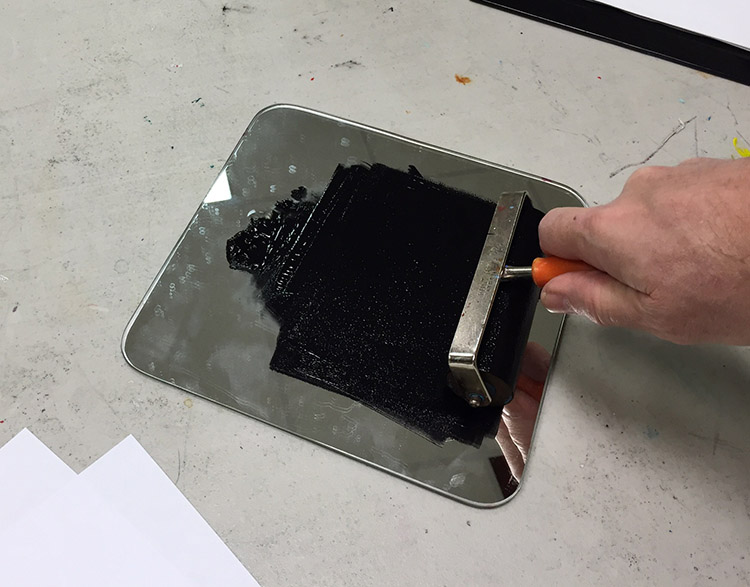
Spread well and evenly to create a thin layer on the roller
Ink the plate firmly, and go over several times to get good coverage. Check it for consistency.
Co
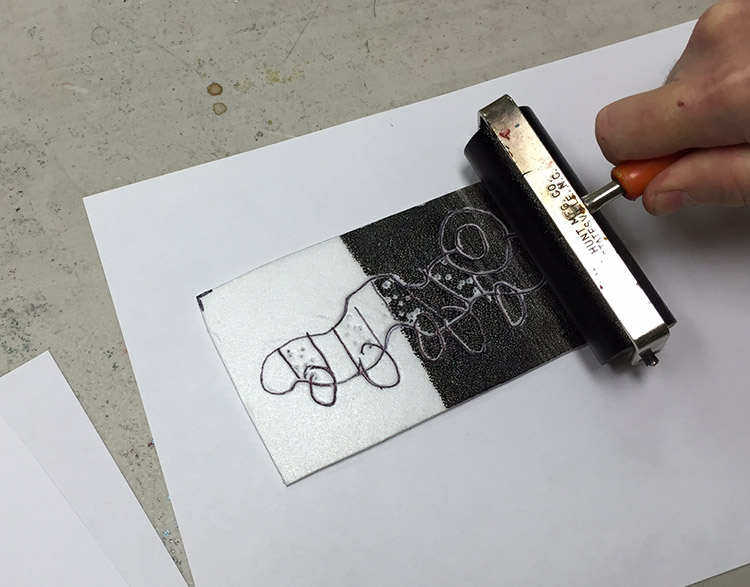
Set the paper onto the wet plate. Be careful not to slide or smear the paper
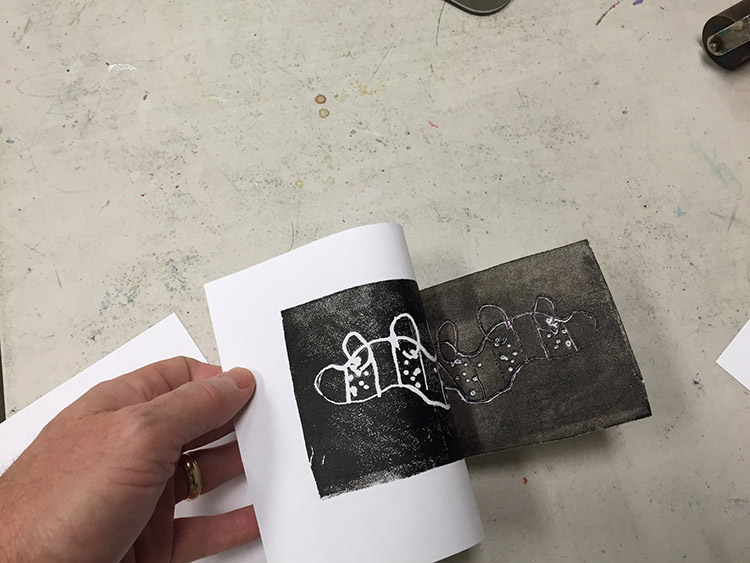
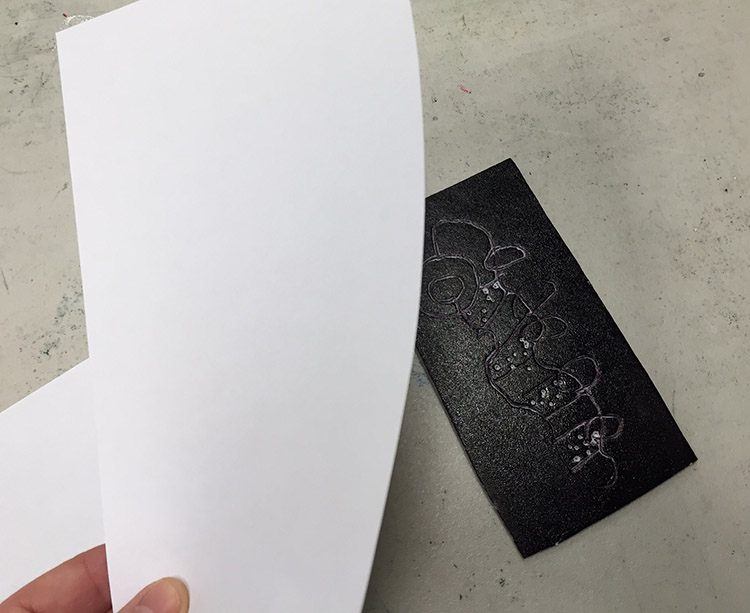
Press firmly all over. Then carefully peel the paper away to reveal a print!
Here are the steps. (Do a dry run while you speak)
- Transfer – We’ll transfer your drawing to the printing plate. Let a grown-up do this part for you.
- Trace – You’ll trace the lines in the foam plate using a ball point pen held STRAIGHT UP! Be careful not to press very hard. Point the pen up to the ceiling.
- Ink – Add printing ink to the plate with a roller. You’ll do this part with some help.
- Paper – Place a piece of paper over the inked plate, but be careful to not let it move at all once it touches the ink.
- Print – Roll over the paper with a dry roller to make your print”
2.2 practice
It’s not the way we usually do it, so we need to practice.
STEP 3. Plate Making
Students will prep their plates for printmaking by "etching" with a penLEARNING TARGETS
Students know how to prep their plates for printmaking
M A T E R I A L S
- Styrofoam plates
- ballpoint pens
- Extra copy paper
- Extra markers
3.1 trace
If you didn’t get it done during the last step, ask a helper to transfer their drawings to the printing plate. Have an ebony pencil and tape ready.
Students then use the ice skater method to very gently trace over the lines. Remind them over and over to keep their pen straight up and draw gently on the surface.
The plate must be etched – a thin groove is pressed into the styrofoam – but not gouged. A heavy gouge in the plate will create a huge jagged chunk of ink instead of lines
Make sure names are on back of printing plates – use a sharpie!
Now, listen very carefully! Your plate is made of styrofoam, and works really well, but it is also very fragile. That means it can be damaged easily if you’re not gentle and careful with it.
Do not press on it, bend it, or scrape it, or you will make marks that will show on your printed artwork.”
BREAK
This is the end of part one if you are dividing into two, 52-minute sessions.
LEARNING TARGETS
Students know how to set up their work area for printmaking.
M A T E R I A L S
- Smock
- Styrofoam plate with traced lines
- Water tub
- Paper towels
- Printing Ink
- Inking surface (Glass or mirror tile)
- Inking rollers
- Dry pressing rollers
- White or colored copy paper or Printing Paper
- Pencils
4.1 setup
Make sure students are wearing smocks with their sleeves rolled up. Ink can get messy!
• Make a station for rolling ink and applying to the plates.
• Make another station with a stack of copy paper for setting the paper and rolling a dry roller over it to create the prints.
• Make a final station or two, for writing names on prints with a pencil and have enough room or another station to set prints around to dry.
Do not stack prints!
LEARNING TARGETS
Students know how to successfully make prints
M A T E R I A L S
- Smock
- Styrofoam plate with traced lines
- Water tub
- Paper towels
- Printing Ink
- Inking surface (Glass or mirror tile)
- Rollers – ink and dry
- Printing Papers
- Pencils
5.1 print
Use stations and have artists go around a station table or path. They’ll rotate through and make several prints from the one plate. Be patient and wait your turn! You can clean up and change the printing ink color in the middle if you want to make this more interesting and you have enough time.
Help students through these stations, giving instructions often.
Stations:
- Inking: Squeeze a bit of ink onto the palette or glass and spread with the roller. Roll the ink around to get a thin layer of ink all over the roller (too thick of a coverage will fill the lines in, so keep it thin). Place print with the etched side up, and roller the ink all over it. Make sure to get good coverage and go over it several times until you don’t see any light areas (except the lines).
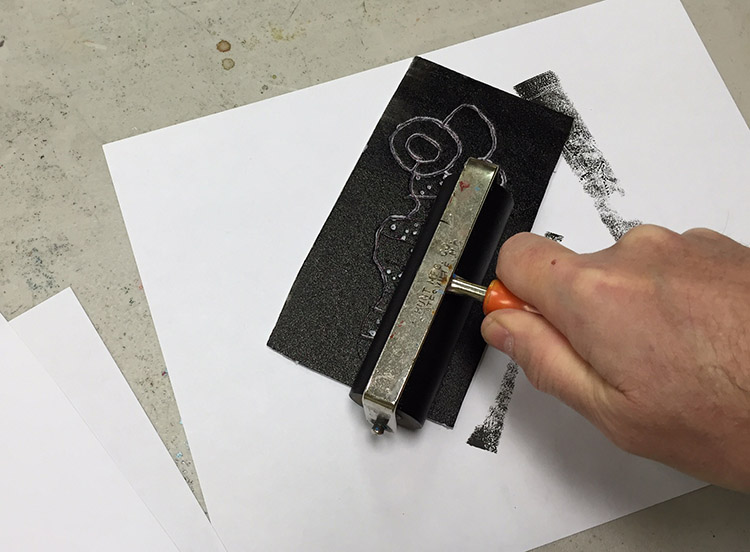
- Printing: Place paper on the inked plate but do not move it once it touches or it will smear. It’s ok if it goes on crooked – that’s why we use larger paper. Use the dry roller to press and roll all over the paper. The ink will stick to the paper. Carry them to the next station still stuck together.
- NOTE: Please press very hard. You will need to help kids, because they will not have enough strength to press hard enough. You can let them roll some and you roll some.
- Name & Number: Carefully peel the paper off the print and set it down face up. Wipe your hands off with a paper towel. Use the pencil to write very small. Write the number sign and the number of your print right under the print edge on the left. If it’s your first print, put “#1”. Sign your name right under the print on the right side.
- Drying: Carry your print to the drying area and make sure you don’t touch any other prints. Go back to 3 to get your plate, and take it to Station one and start over for a new print.
LEARNING TARGETS
Students know the importance of cleaning up.
M A T E R I A L S
- Paper Towels
- Cleaning wipes
- Sink
- Waste baskets
- Well-lit spot for photos
- Camera or phone-camera
6.1 clean
6.2 photo
Take photos of artwork!
6.3 connect
%
Insights
This lesson provides understanding
%
Technique
This lesson shows application and movement
%
Self Expression
This lesson allows personal freedom
OBJECTIVES
- Practice and improvement using tools and drawing with lines
- Understanding how printing works
- Accomplishment in creating several prints
- Fulfillment by creating a line drawing and seeing it multiply!
TROUBLESPOTS
Harming the plate – Styrofoam printing plates are fragile. Make sure you explain how gentle and careful to be. Any dent, press, or fingernail scrape will become a part of the final print.
Smudges – Ink gets on fingertips and can transfer to everything! Keep a lot of paper towels handy.
Pressing too hard or angled – Make sure the kids are gentle and hold their pen in a vertical position for inscribing the printing plate. We call it the “ice skater” method.
Idle hands – Have markers and paper ready for any lulls in the activity today while you help make things work. Having a helper is important today.
ART WORDS
Print – A transfer of paint or ink from a printing plate to a surface, most often paper. A plate will only create one color in a print, which will have areas of solid ink, and areas that are not inked. Multiple plates can create more colors on one
Printing Plate – An object that transfers an image in ink onto another object. Many things may be used as a plate, to create prints. We call very small plates, stamps. Plates can be made in several ways. Here are some common plate methods: 1) Adding raised areas, such as glueing yarn or sticks to another surface; 2) Removing areas to leave a raised surface, such as carving in wood, metal, styrofoam, or linoleum; 3) Ink etching, which is drawing right into a layer of ink and makes a single print; 4) Mono-print, which is using wet paint to transfer an image from a smooth surface, usually to a paper surface.
Edition – A series of prints is called an edition. When an artist sets a certain number of prints they intend to make and then destroys the plate, they have created a limited edition. Mono-prints can only be made one time.
CLASSROOM
PREP
Print all of your PDFs from the lesson plan and cut any references apart as needed.
What your room needs
Here are your printable lists and room prep instructions.
Opens in new window
CLASSROOM
MATERIALS
- 8.5” x 11” Copy Paper
- 4B Pencil
- Ebony Pencil
- Eraser
- Scissors
- Ball Point Pen
- Printing Ink
- Roller for Ink
Roller for Printing - Glass or Mirror tile
- Styrofoam plates
- Markers
- Smock
Water tub
Paper towels - Printing Ink
- Paper towels
PREVIEW
Week 26: Snakes & Spirals
February 17 – 21
Students will have fun making bouncy spiral snakes with their own designs by drawing on our printed pdf snake templates. Then everyone is introduced to clay with playdoh for a warmup, before moving into an 3D project of an animal that they’ll be able to take home next week.
Week 27: Artists’ Choice Day
Feb 24 – 28
Stations are set up around the room and young artists have lots of opportunities to create and explore new ideas. It’s a very fulfilling day of project fun!