
Style
Each lesson Plan focuses primarily on one of the 4 Cornerstones of Art:
Drawing | Painting | Color | Style
OVERVIEW
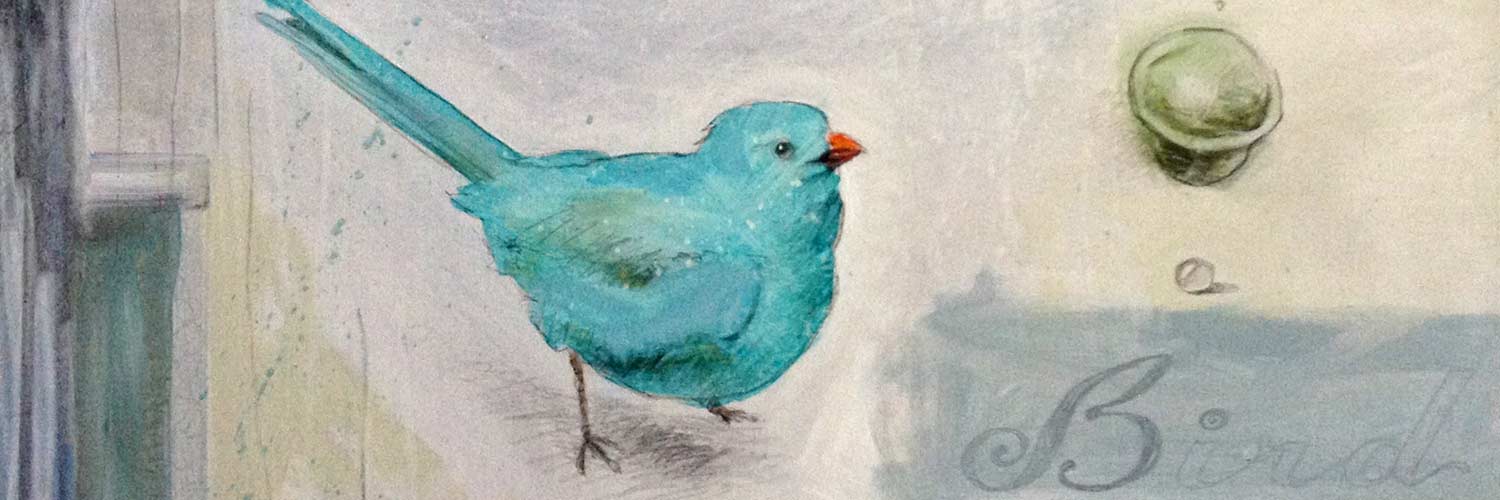
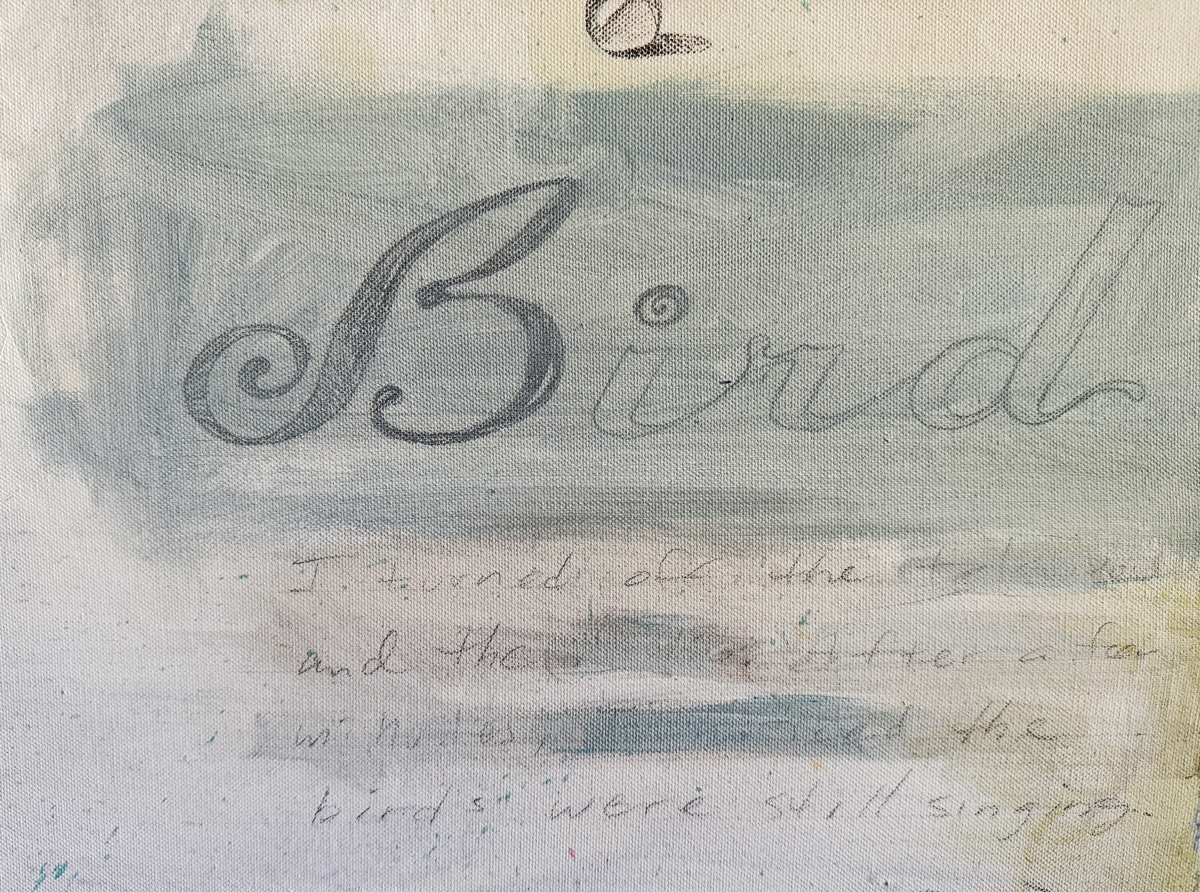
Combining a sketch, writing, thinking, and painting, all on one canvas, this technique appeals to everyone. Students will draw and sketch on the canvas with their colored pencil (other colors may be used if available, but we use a dark gray that mimics graphite.) Anything can be drawn or written, just like in the page of a journal or sketch book. Washes of color are added for a soft visual effect. This lesson will continue and be finished next week.– – –
Grades 3 – 5
Week of April 27 – May 1
1 Hour & 45 Minutes

Lesson At A Glance
A brief overview of each step. Buttons jump to each section for detailed information.
10 Min – Get ready for painting, don’t get paints out yet
12 Min – Visualize and collect reference.
25 Min – Students enjoy building sketches on their work
22 Min – Add color without using white
5 Min – Super wash brushes and throw away palette paper!
SCROLL & TEACH
LESSONPLAN
Each section is a different color. Read over once and then you can SCROLL & TEACH using any device you like. It’s designed to work best with your phone.
LEARNING TARGETS

Students know how to discuss and plan for creating artwork
M A T E R I A L S
- TV or Ipad for displaying images
- Pencil (2B is fine)
- Any paper to write ideas
All materials are suggestions and may be modified as you see fit. We have tried many items, and these seem to allow the most versatility for the cost.
Below is a Prismacolor Dark Gray Pencil. We put a dab of color on ours to more easily distinguish from other pencils. Tap the image to enlarge.

1.1 discuss
Ask Questions First
Ask what they like to do as artists. See if they can come up with a list of their favorite ideas. They will use their ideas for paintings that can have a message. Let them express their individual likes and dislikes for…
- Subject matter
- Medium
- Techniques
Make sure you use the teacher talk below to go over all the aspects of this project. It is very different in many ways, than what we usually do.
Most kids like to break the rules. You can also say that today we are going to “break some rules and not do much planning. This project incorporates spontaneity into the creative process”.
The main things about this project are that it combines sketching with painting, and relies on spontaneity.
Technique is different for this project.
Almost all of the paint is see-through, using translucent colors. That means the sketching and hatch shading is extremely important. Instead of guidelines, the canvas pencil is used to create the main part of the artwork. Then color is added in layers, much like watercolor, but on a canvas.
At the end, some white can be mixed into the colors to create a few opaque areas, changing the composition by covering or partially covering areas that need to fall back, and highlighting areas that need to be more important.
The principles of Design are used all through the process instead of at the beginning. In this way, the painting is more like an abstract work. You change the elements to improve the composition as you go.
“Today we’re going to begin a Journal Painting, which is very much like an artists journal, where we simply create things without planning, and fill our pages by tapping into our own personal experiences. The big difference is that we’ll do this on a larger canvas. This means the canvas can have different things going on in different areas.
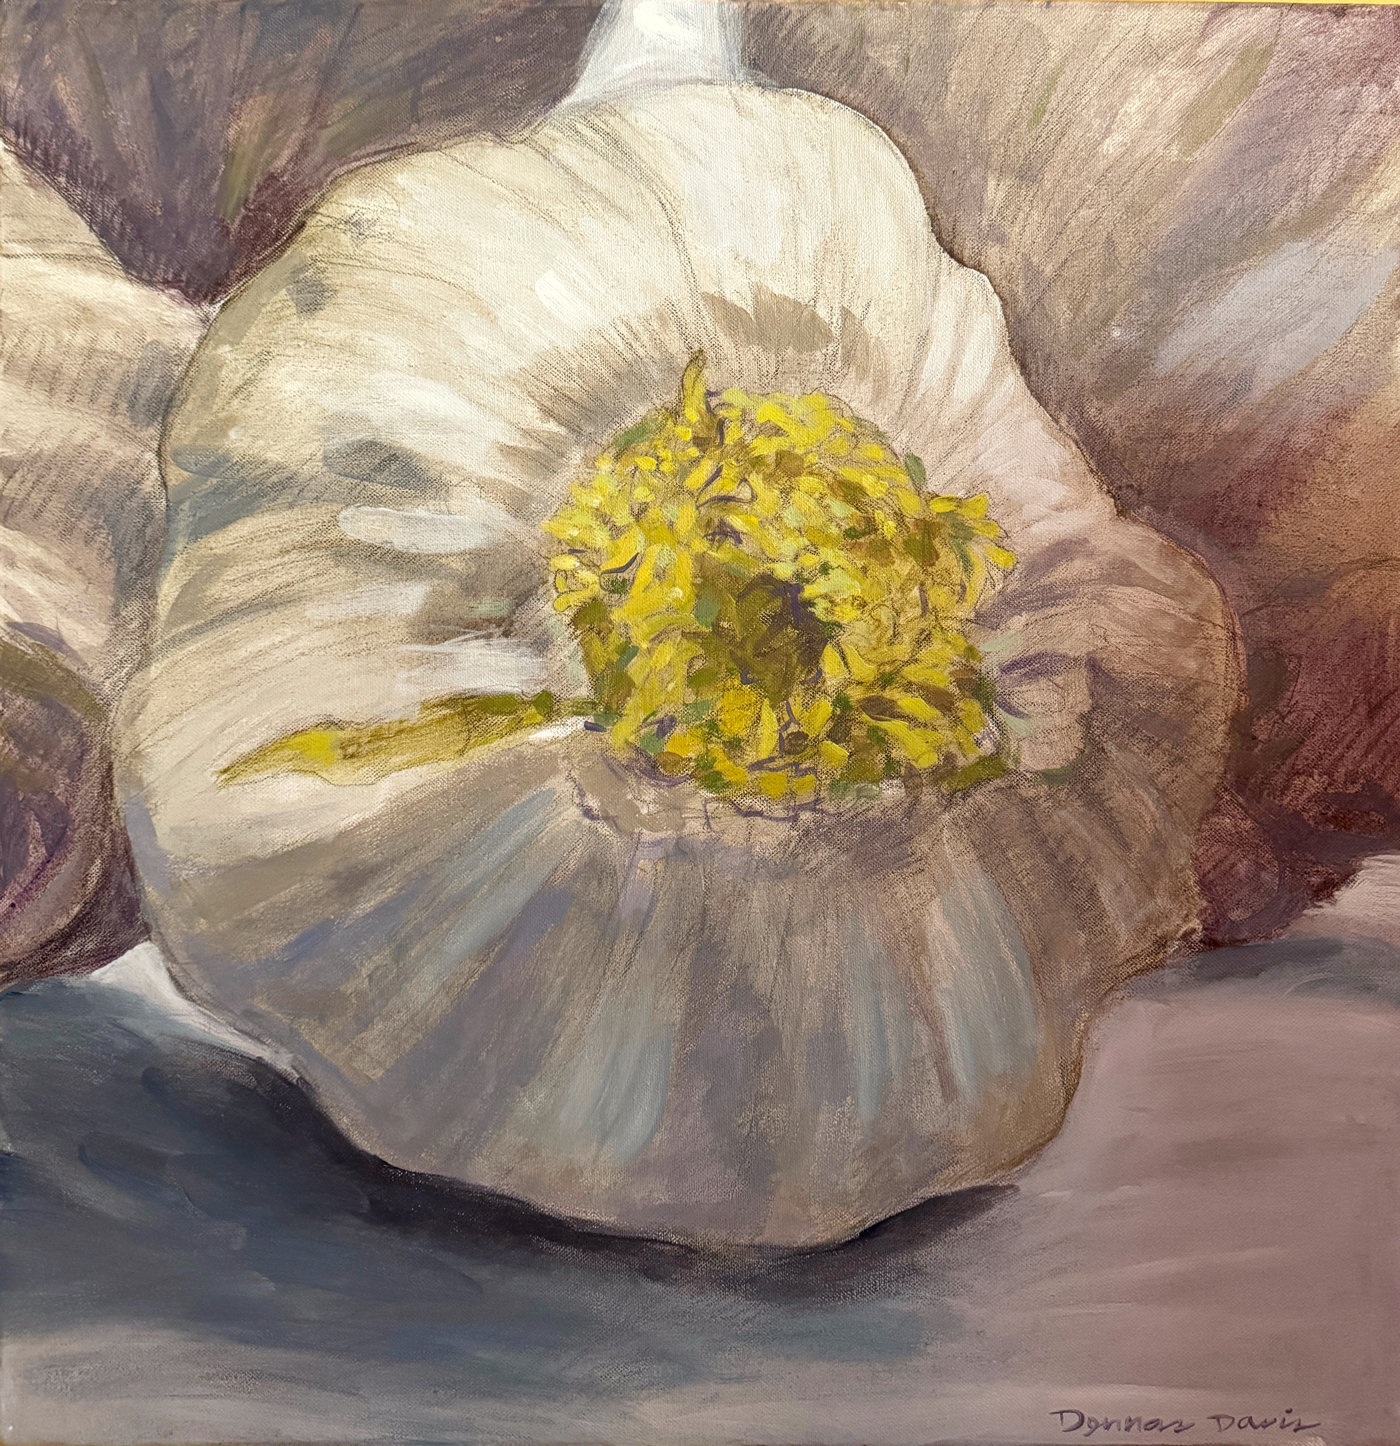
You can have a central image that dominates the painting, just like a regular traditional painting. However, this painting style can really be fun to add more than one kind of image. You can have still life combined with nature. You can have 2, 3 or even up to 5 or 6 different drawings on the canvas. Just think about keeping one thing as the most important spot!
You’ll build the structure of your painting slowly, adding ideas, drawings, or even writing – all using your canvas pencil. Then you’ll add a bunch of layers over your structure, one at a time.
Here is an important difference between this kind of painting and other paintings. You don’t have a composition already figured out! This means you’ll need to be making decisions for improving your composition on each layer.
Our layers will include:
- Original ideas layer in canvas pencil, with drawings and possibly writing too. You can even make a diagram about an idea you have.
- Pencil shading layer. Make a lot of hatch shading with the canvas pencil, to give the images a sketched look. Make shadows with dark areas and leave light areas mostly open.
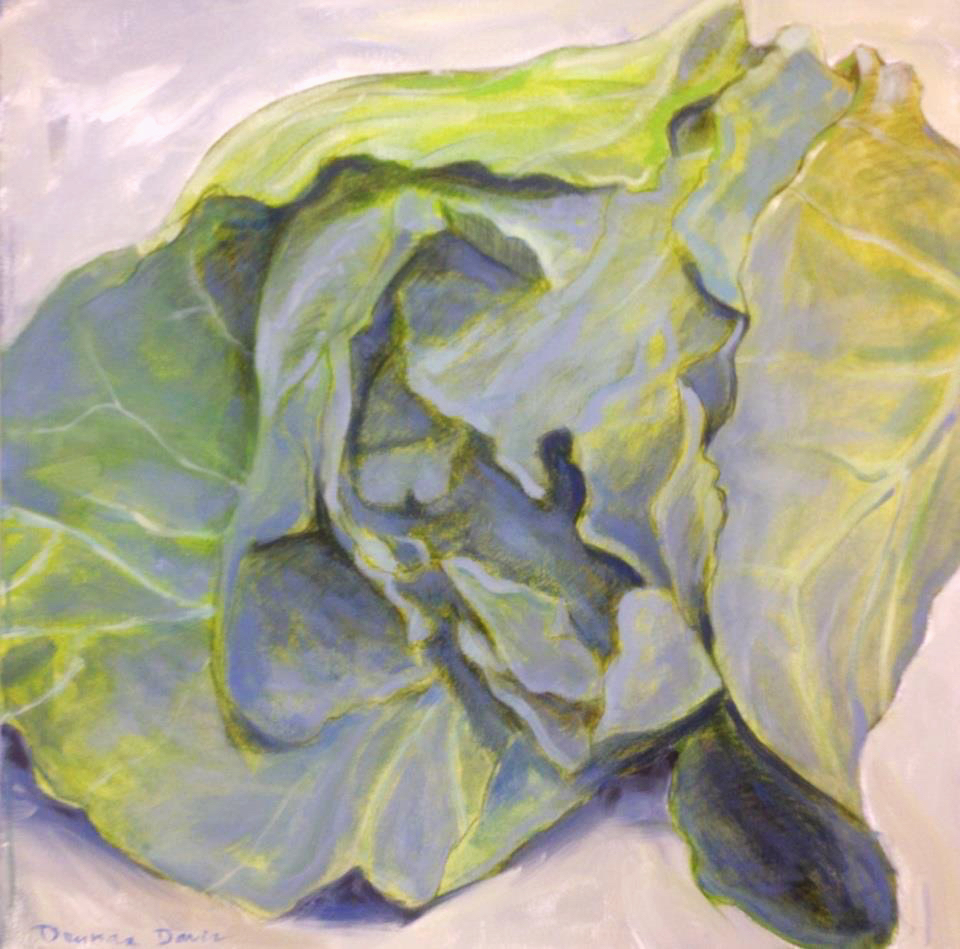
- Watered colors layers – NO white (like watercolor, but on canvas instead of paper). Light and brilliant colors that are translucent, allow the drawings to show through.
- More watered colors layers. It is really good to just play with your color. I’ll show you several techniques in a few minutes.
- Careful semi-opaque layers – WITH white. Use white to transform some areas with a creamy look, a little like the glazing on a donut. It’s not completely opaque, so you still need to water down the paint. Be careful to use sparingly so you don’t obliterate all your previous work!
- Oil Pastel layer. Use light colors mostly. blend white into them, or just use them for some line work. It’s up to you if you want to add this layer.
We’re going to look at some examples. As we do, notice how delicate the pencil is. The reason for that is colored pencil or even a graphite pencil (which we should not use today) is very soft, without reaching anywhere near the powerful black and darks that can be achieved with paint. Paint can overpower the pencil easily. That means you have to be careful to use light colors at first, and keep the entire piece fairly soft in the painting stage. Make sure you can see the pencil work. As you get near the end, you can then add slightly darker areas for contrast as needed. Try to make the entire painting very light and delicate.”
1.2 Display
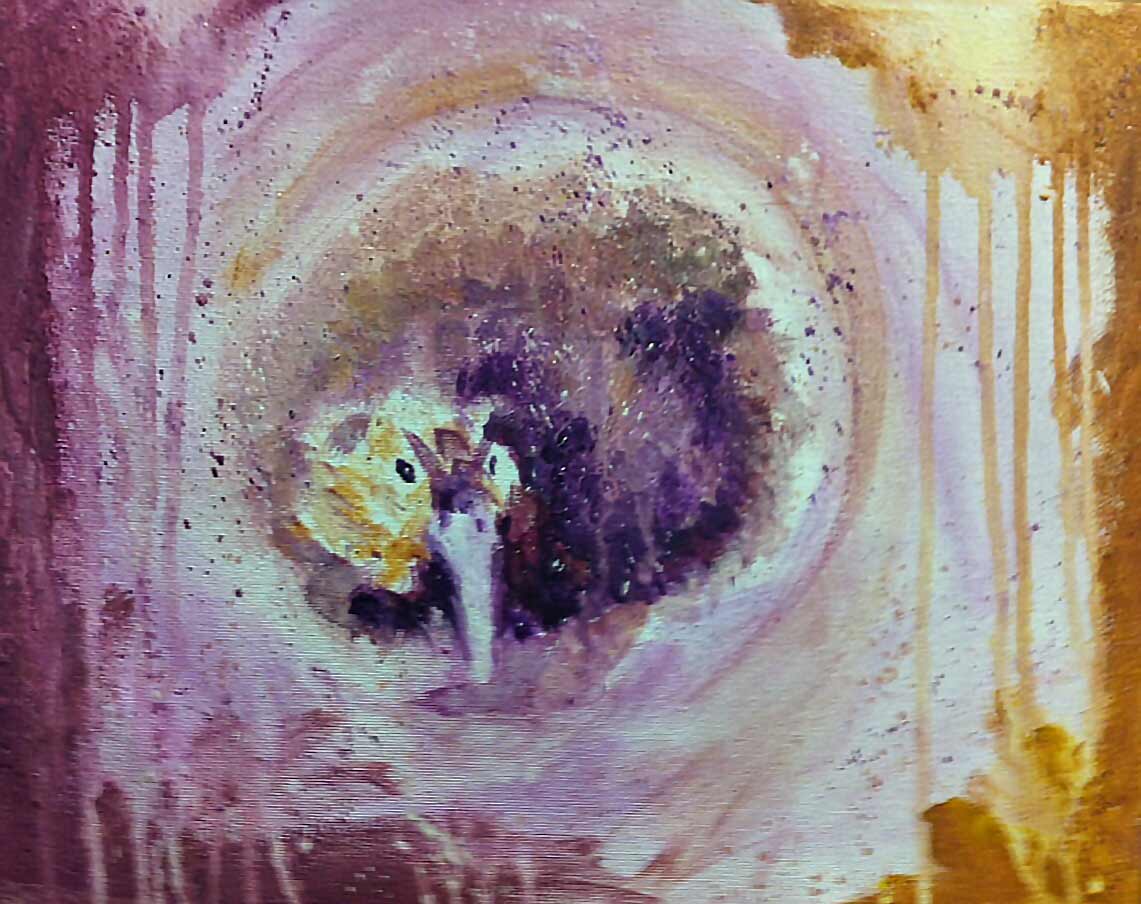
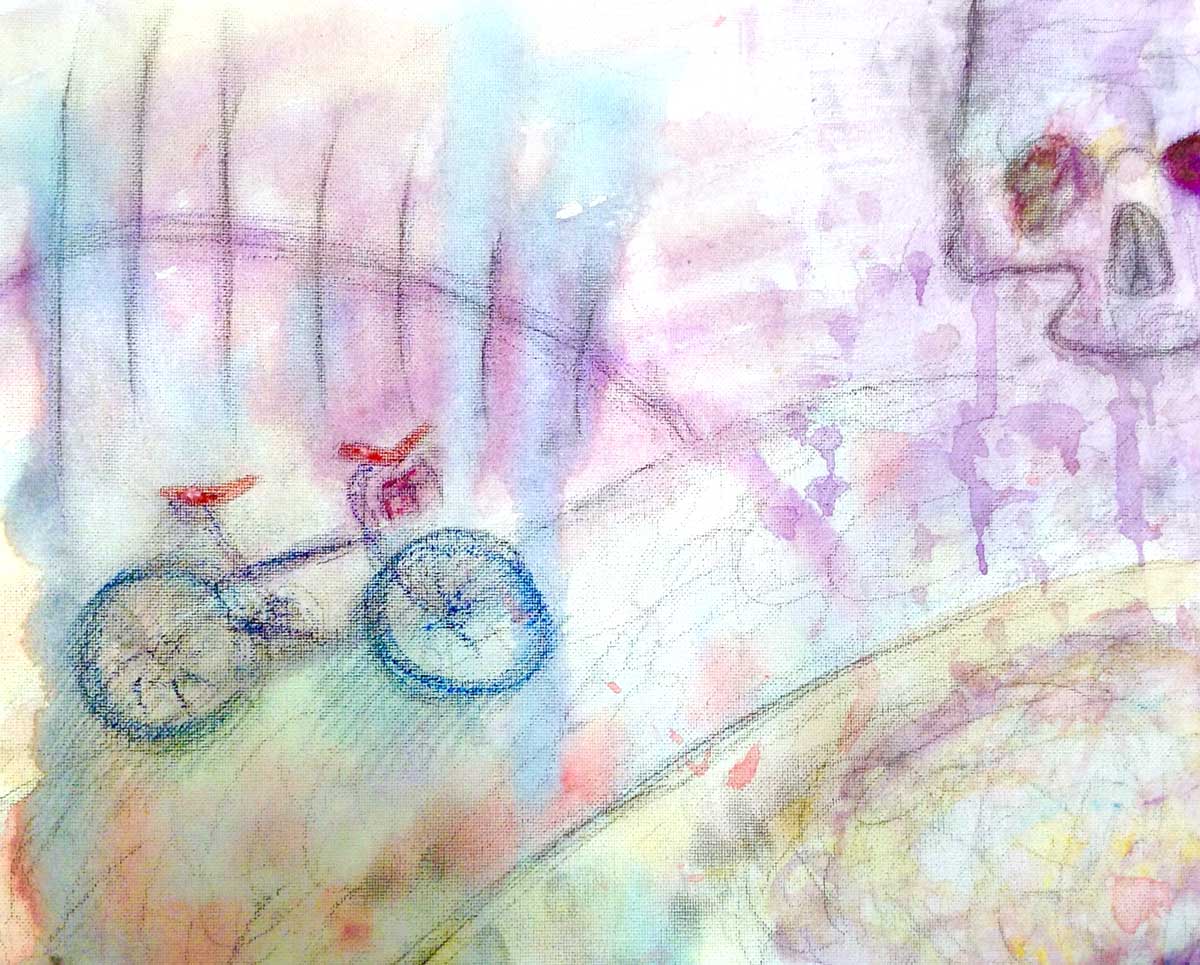
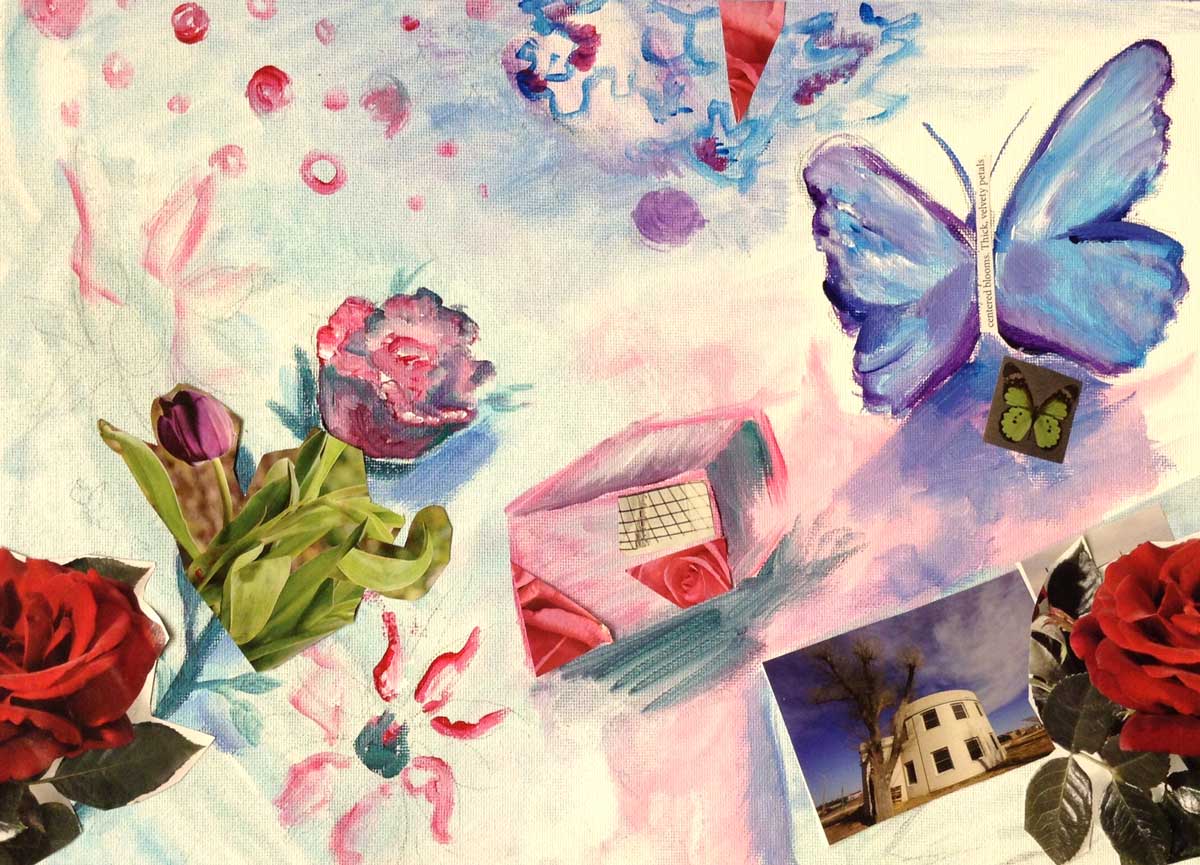
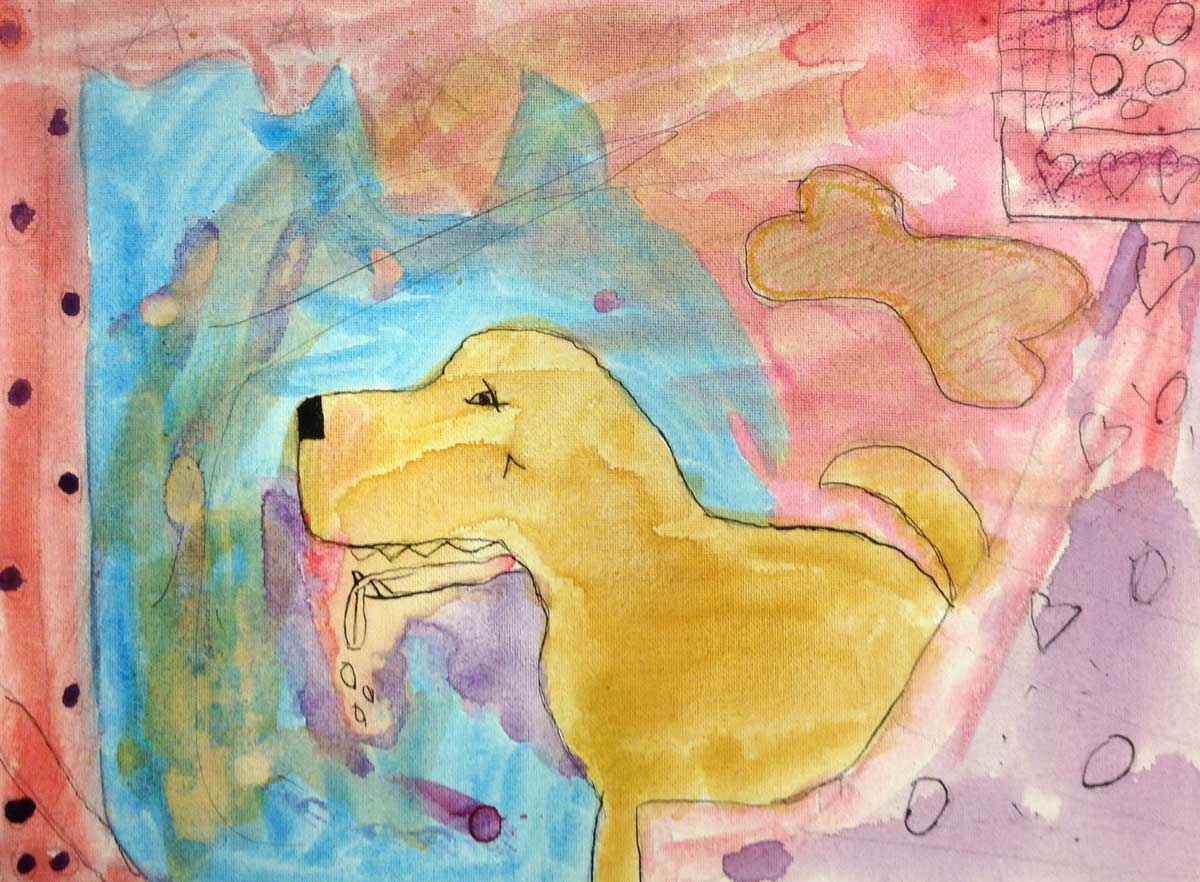
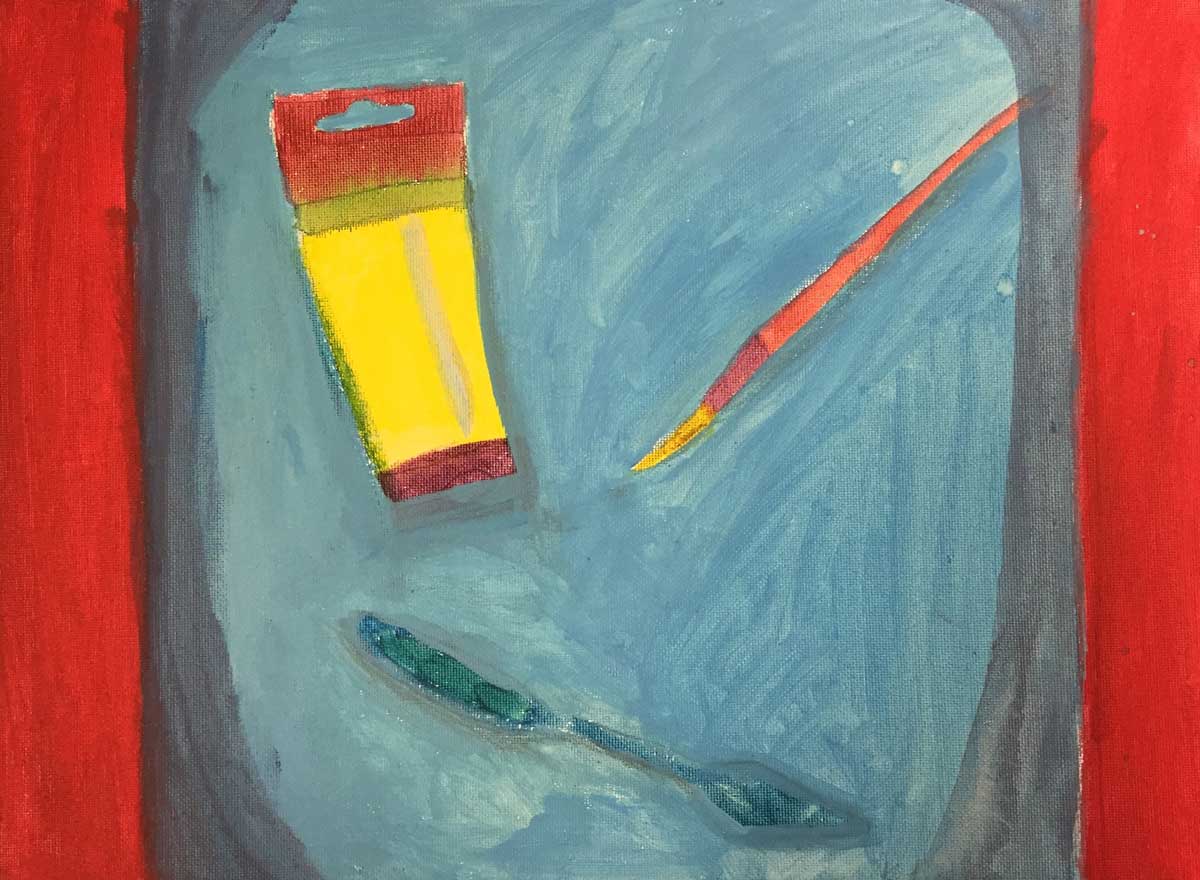
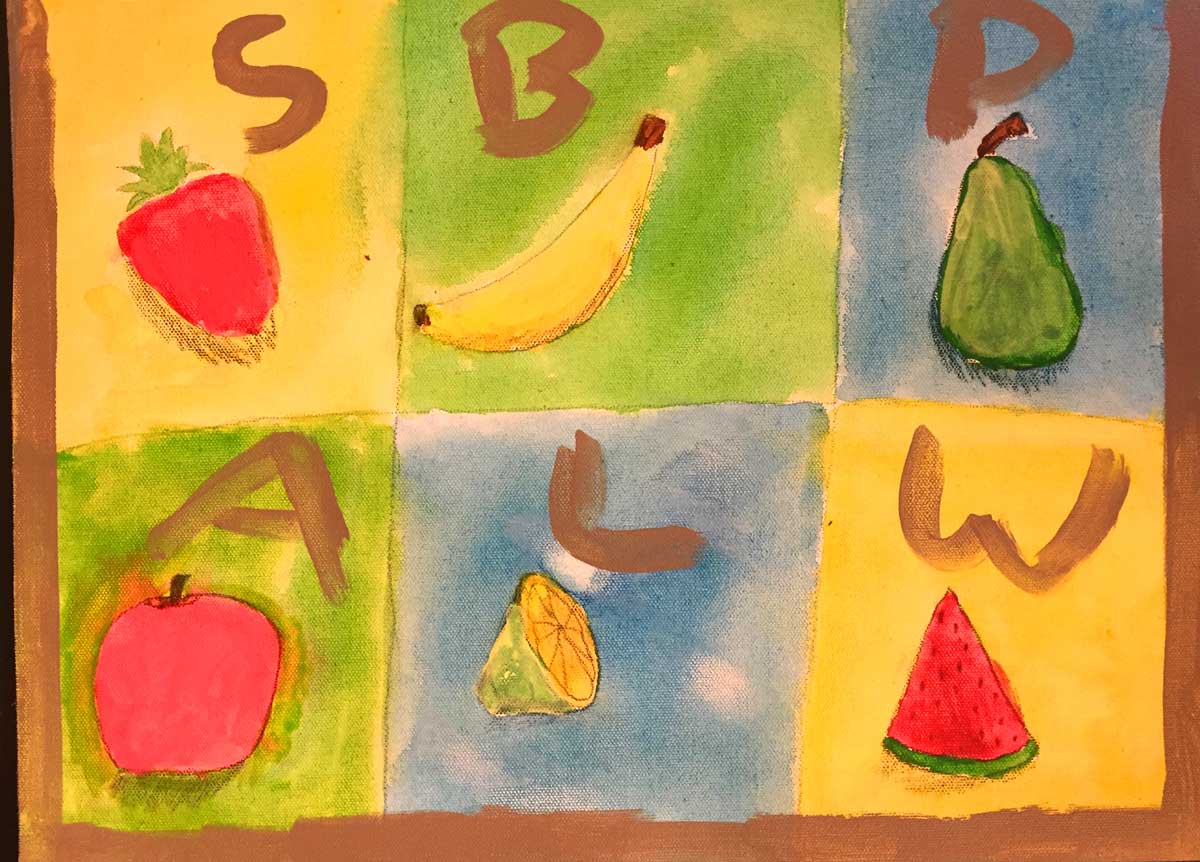
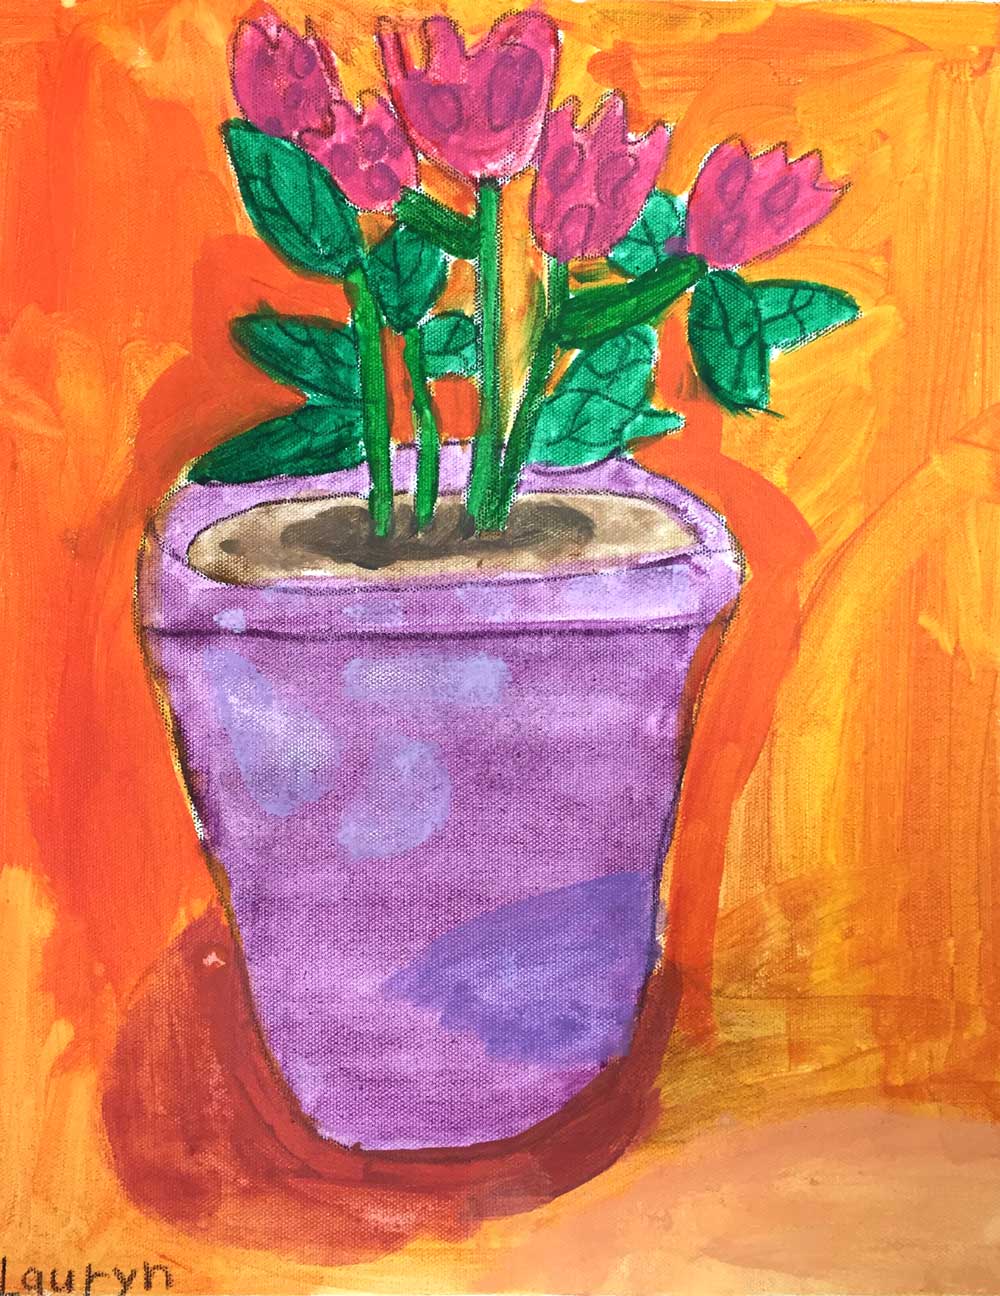
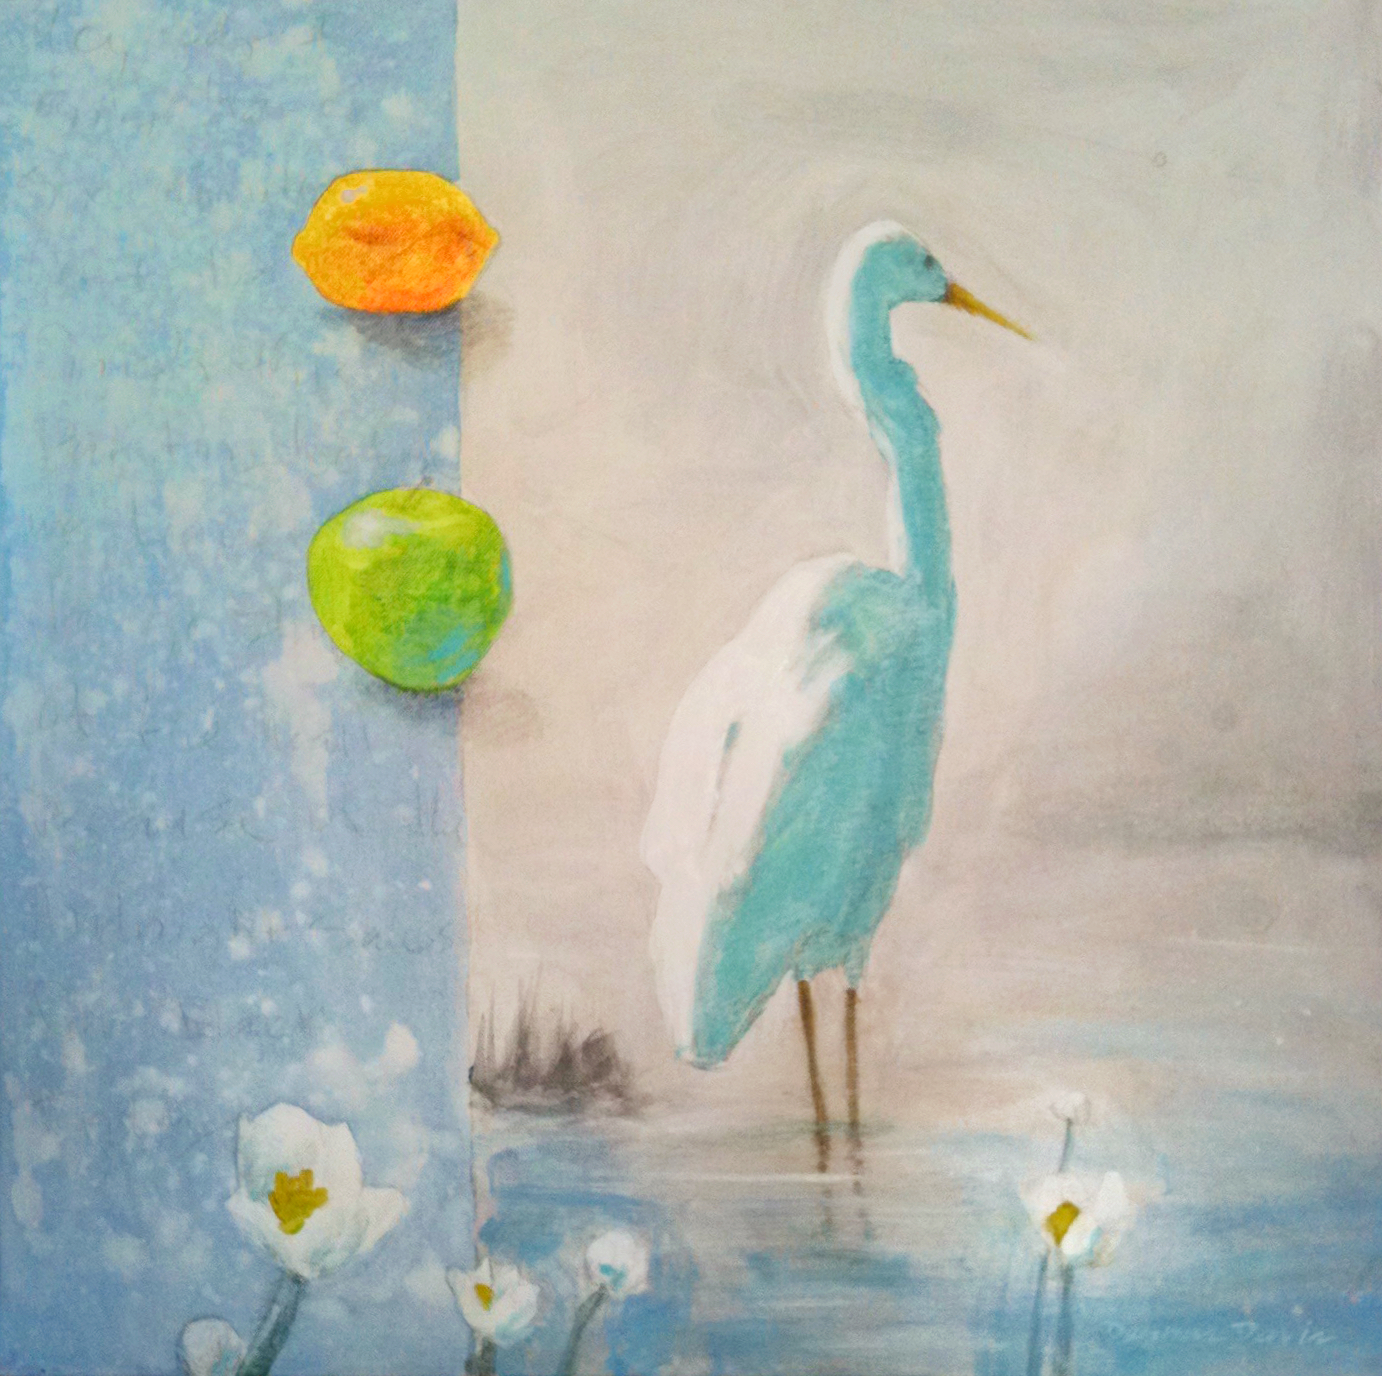
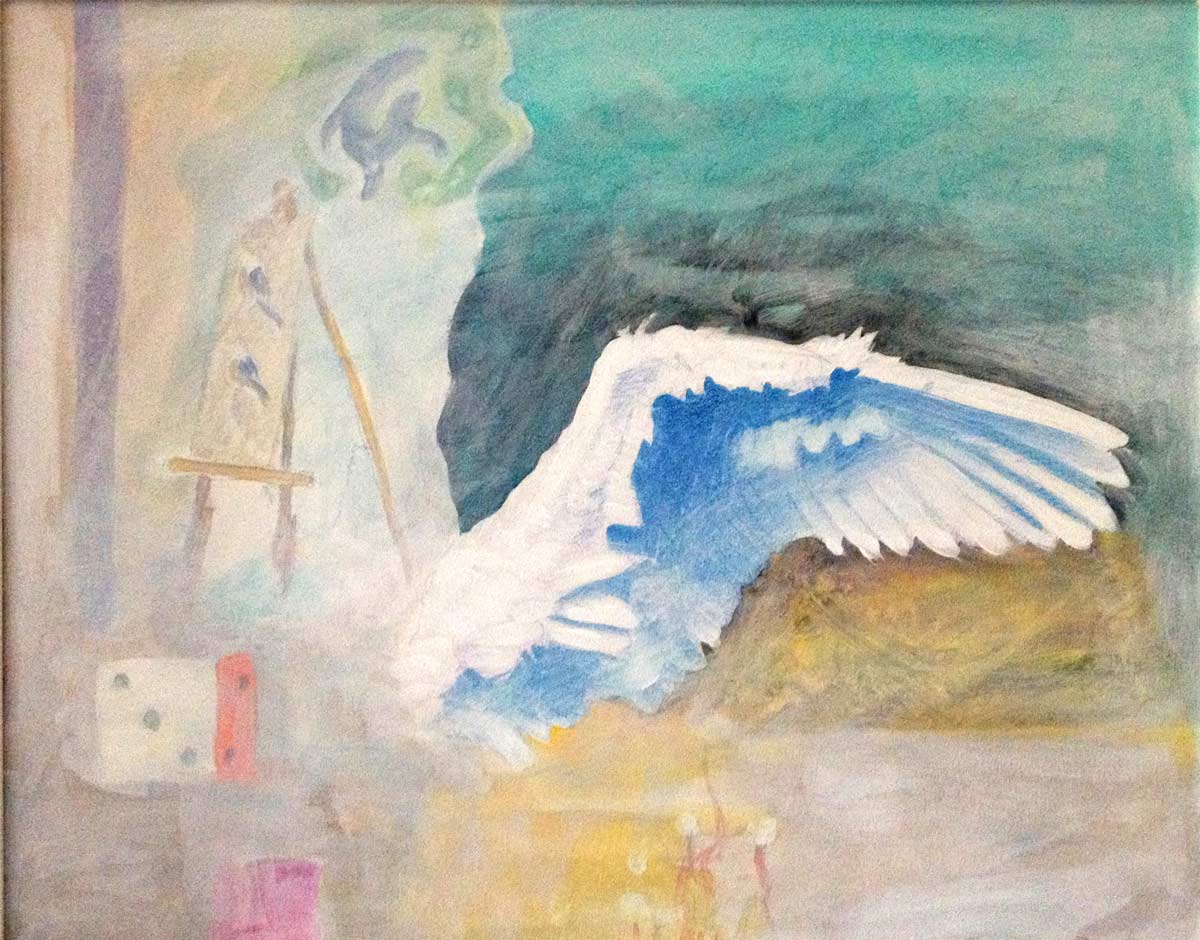
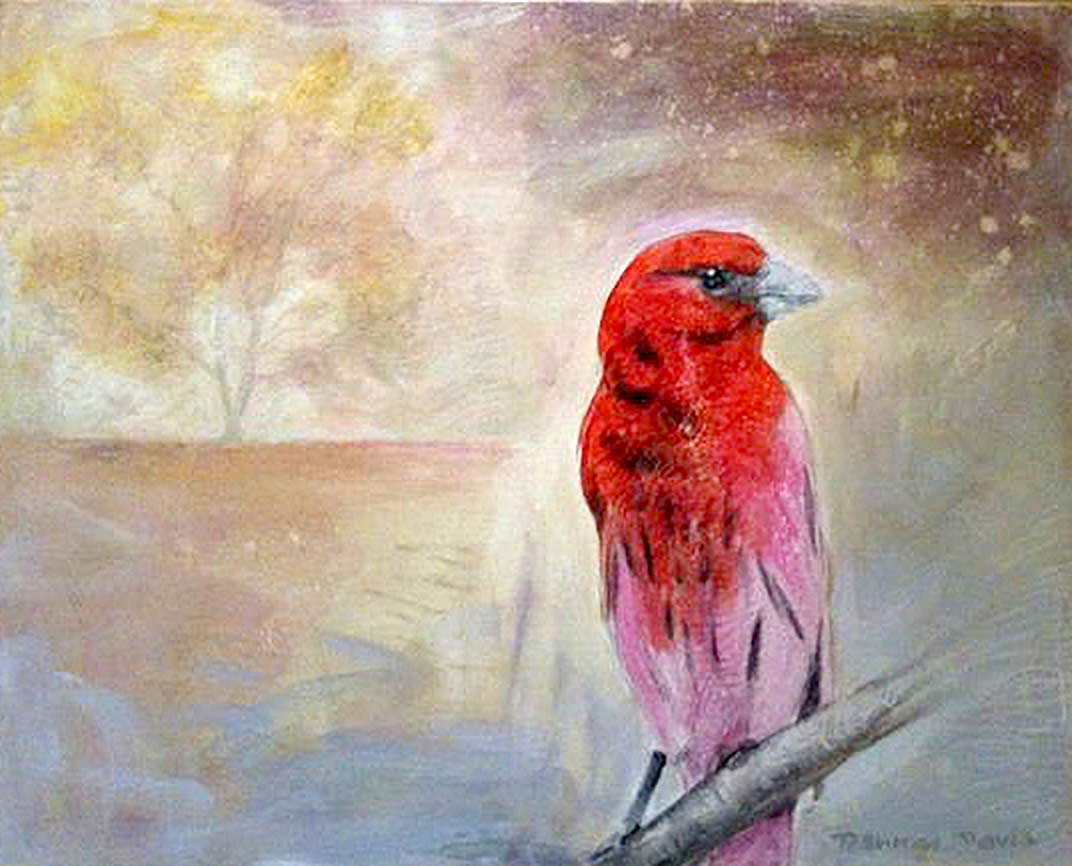
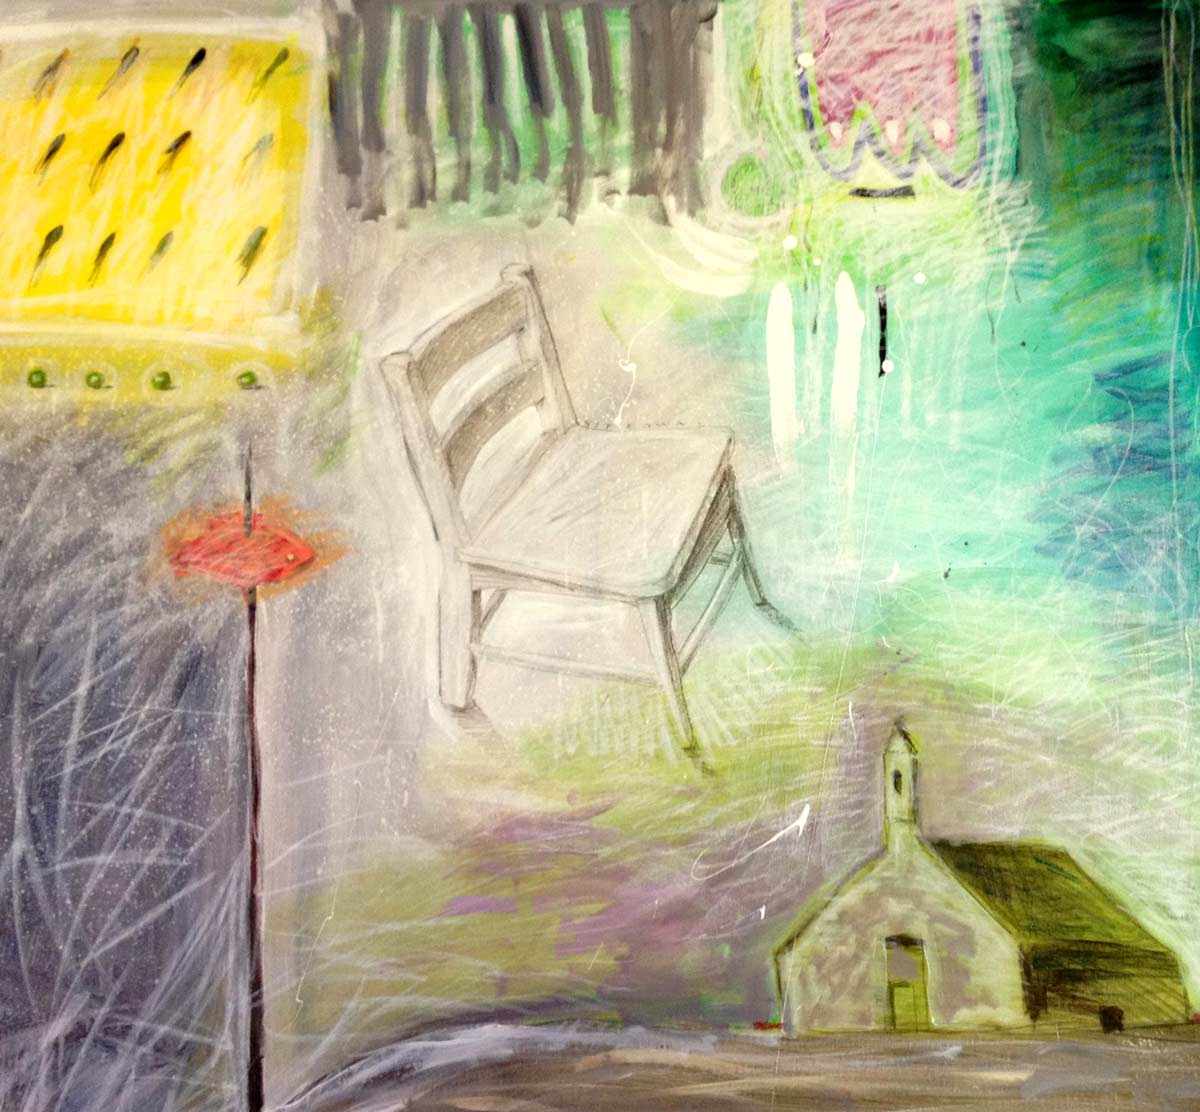
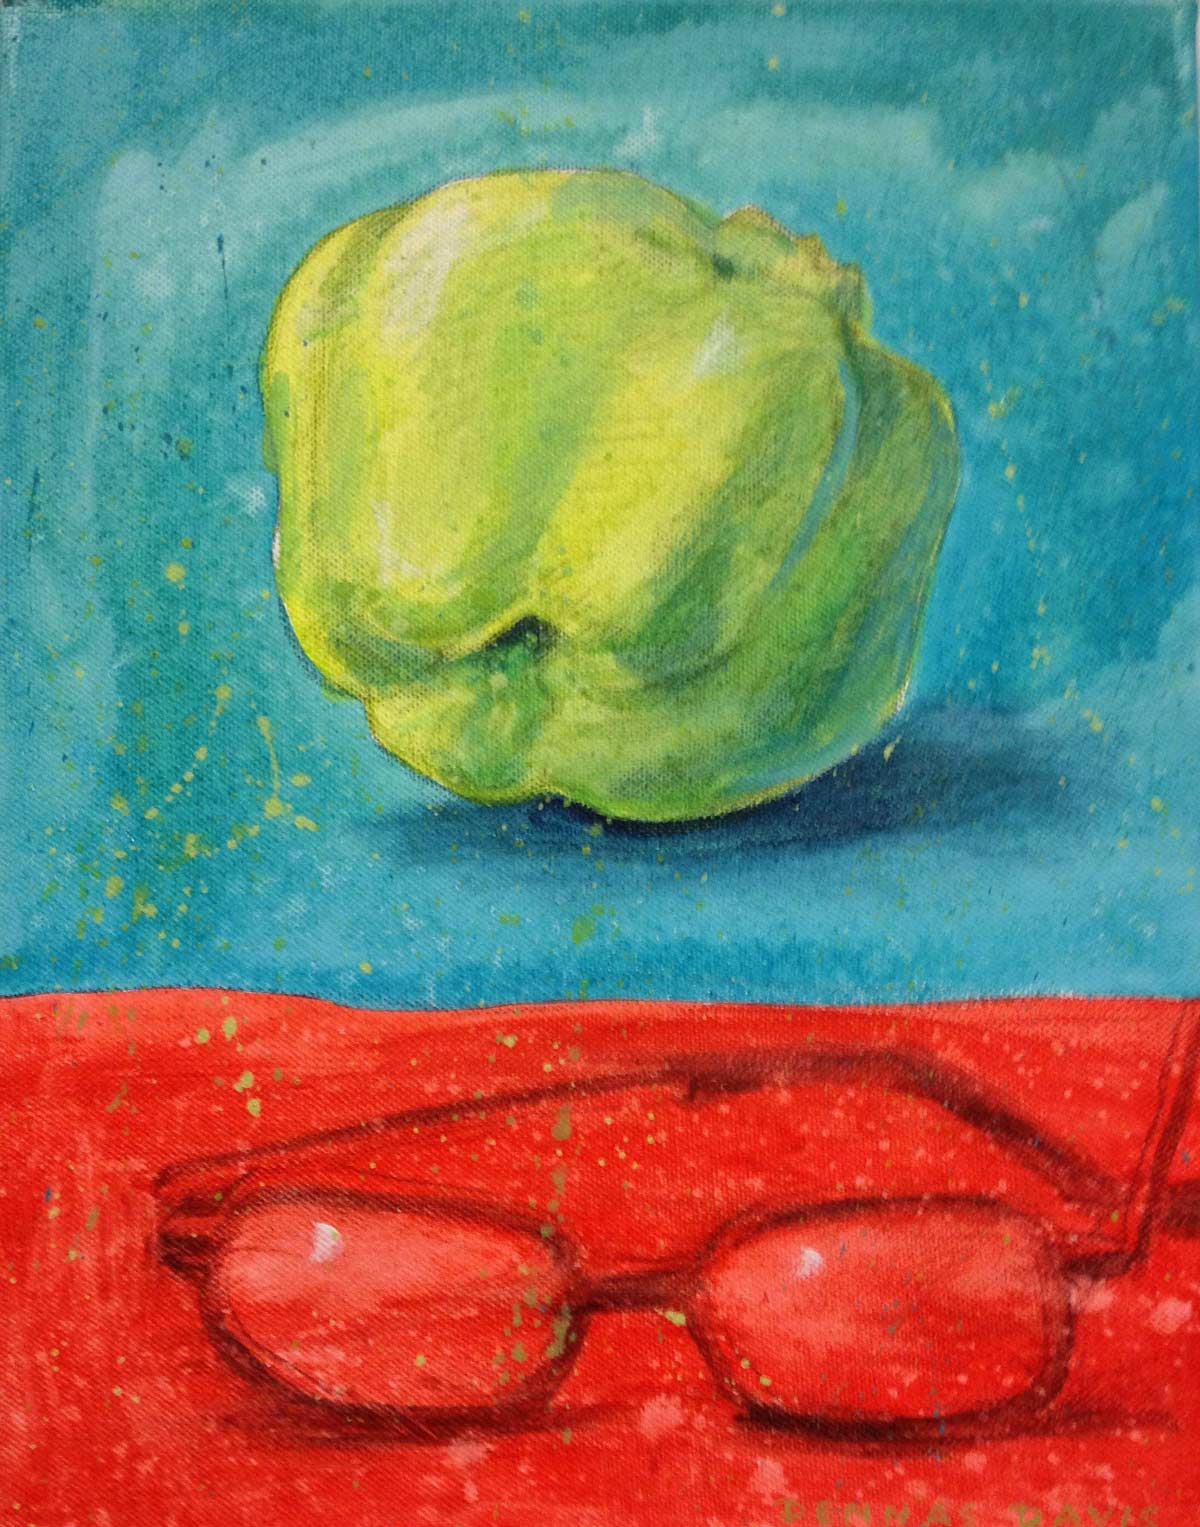
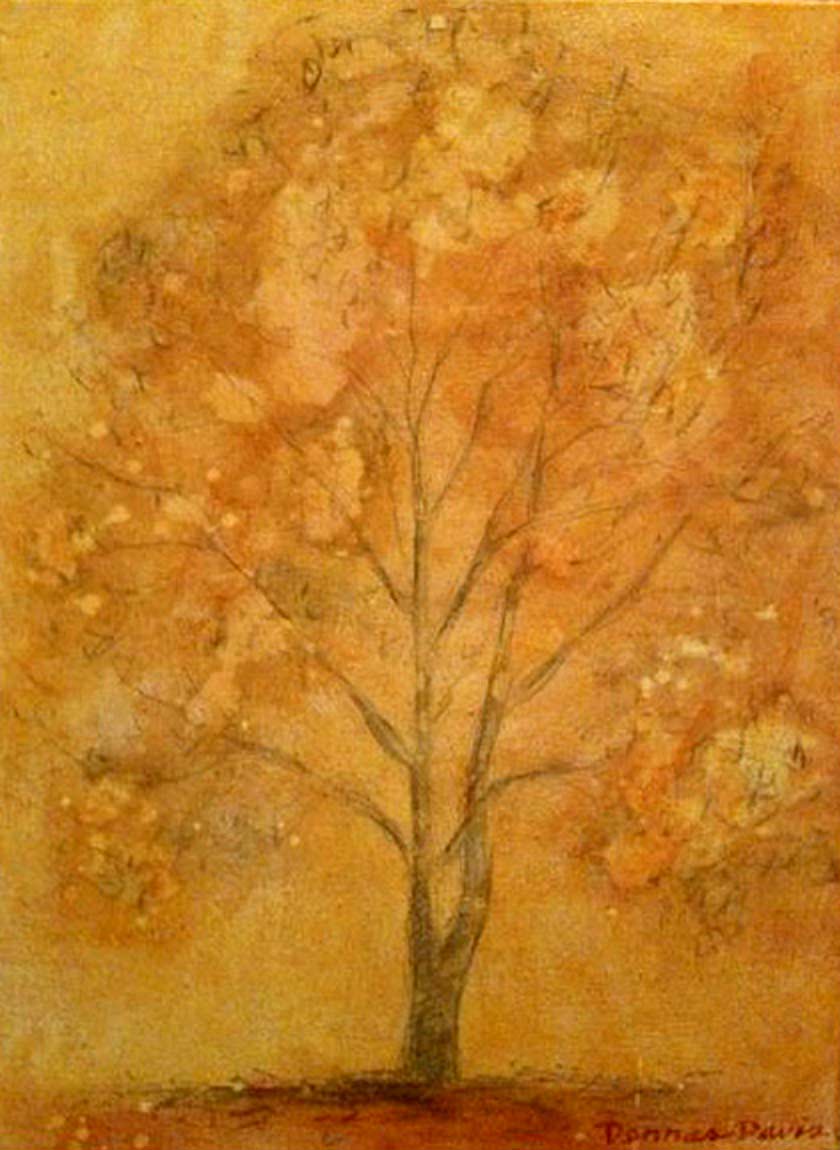
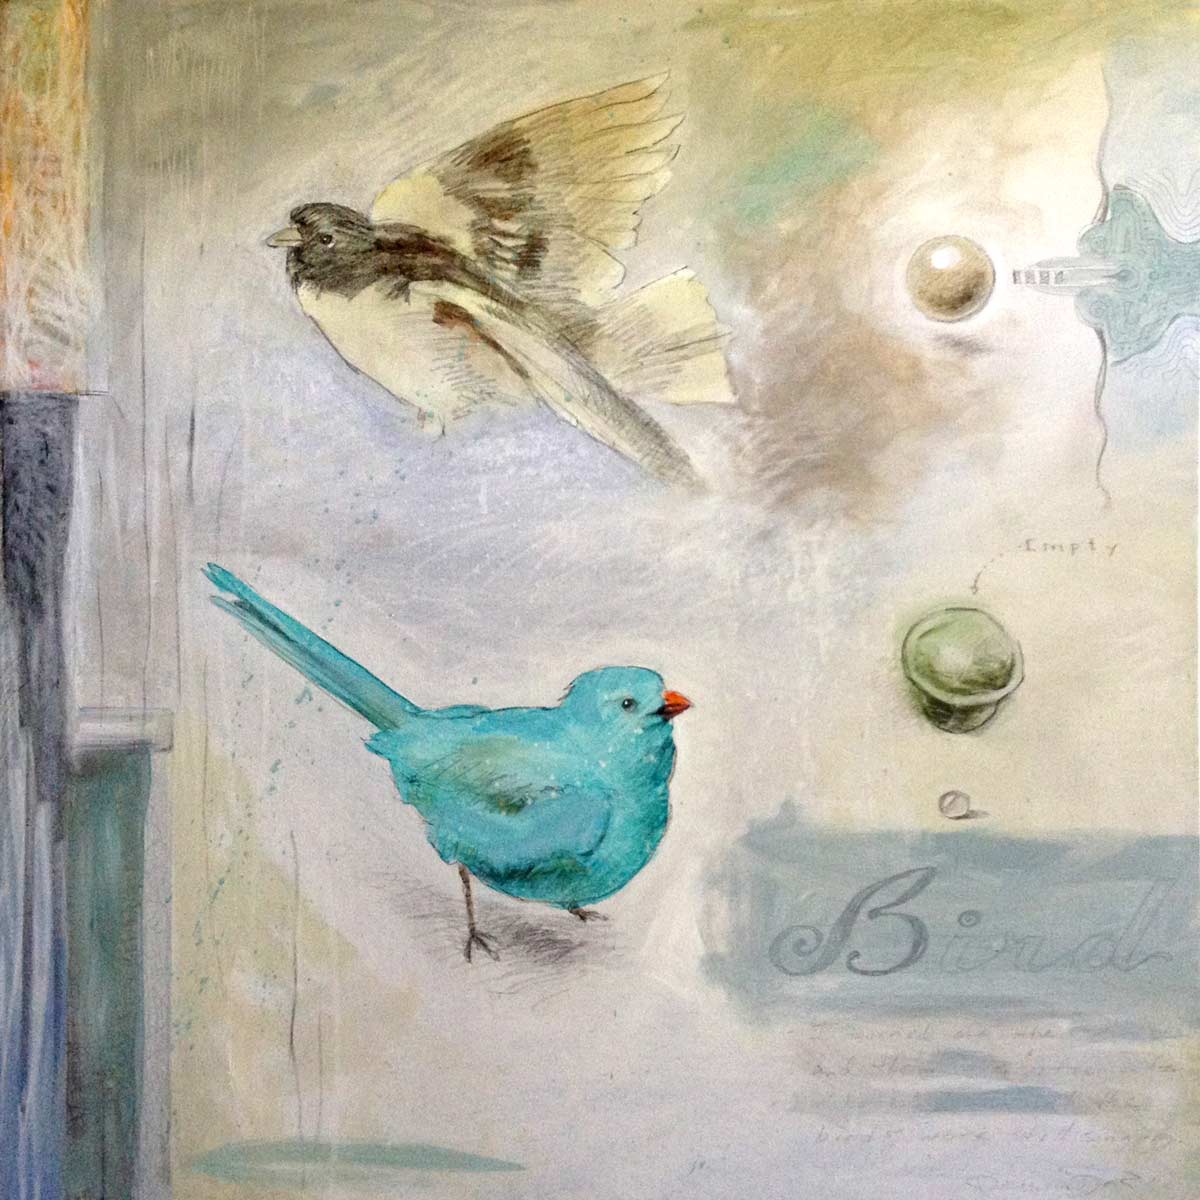
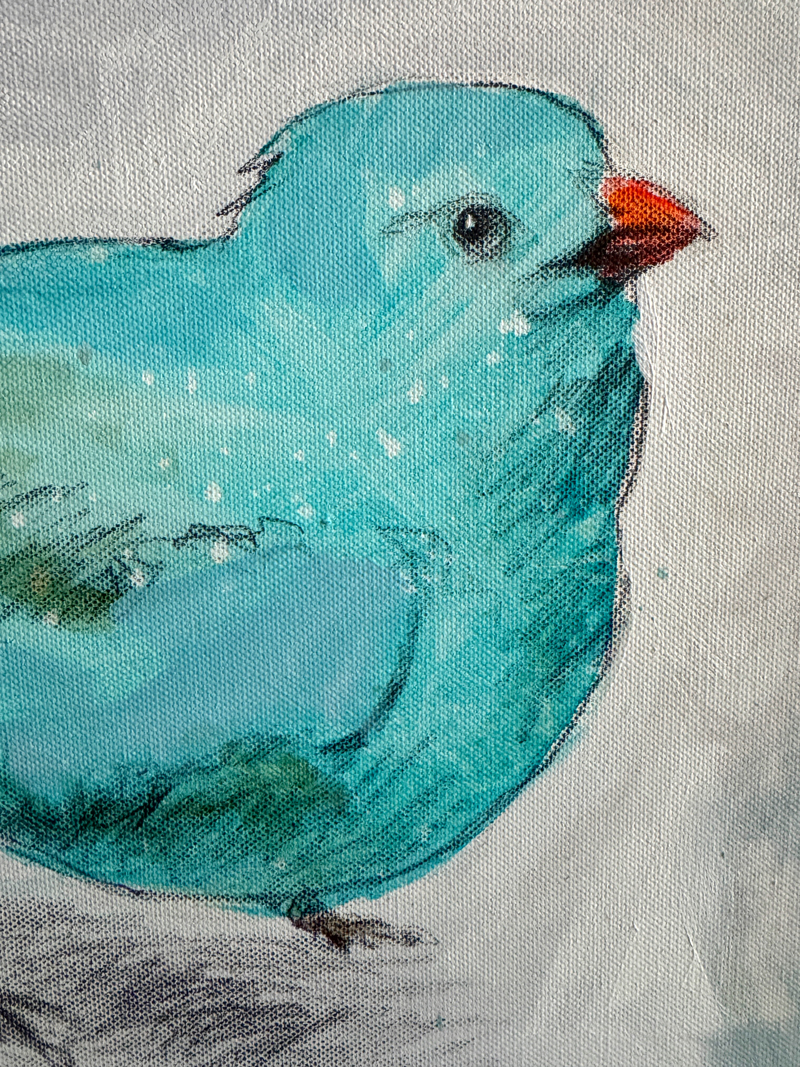
Display the gallery below.
Talk about these topics specifically as you look at the work:
- Sketching in a small journal book – this is an important activity for artists!
- Fonts and lettering
- Notes and poetry incorporated into artwork
- Collage and mixed media (this is up to you, as the teacher if you want to use collage).
- Reference and its importance
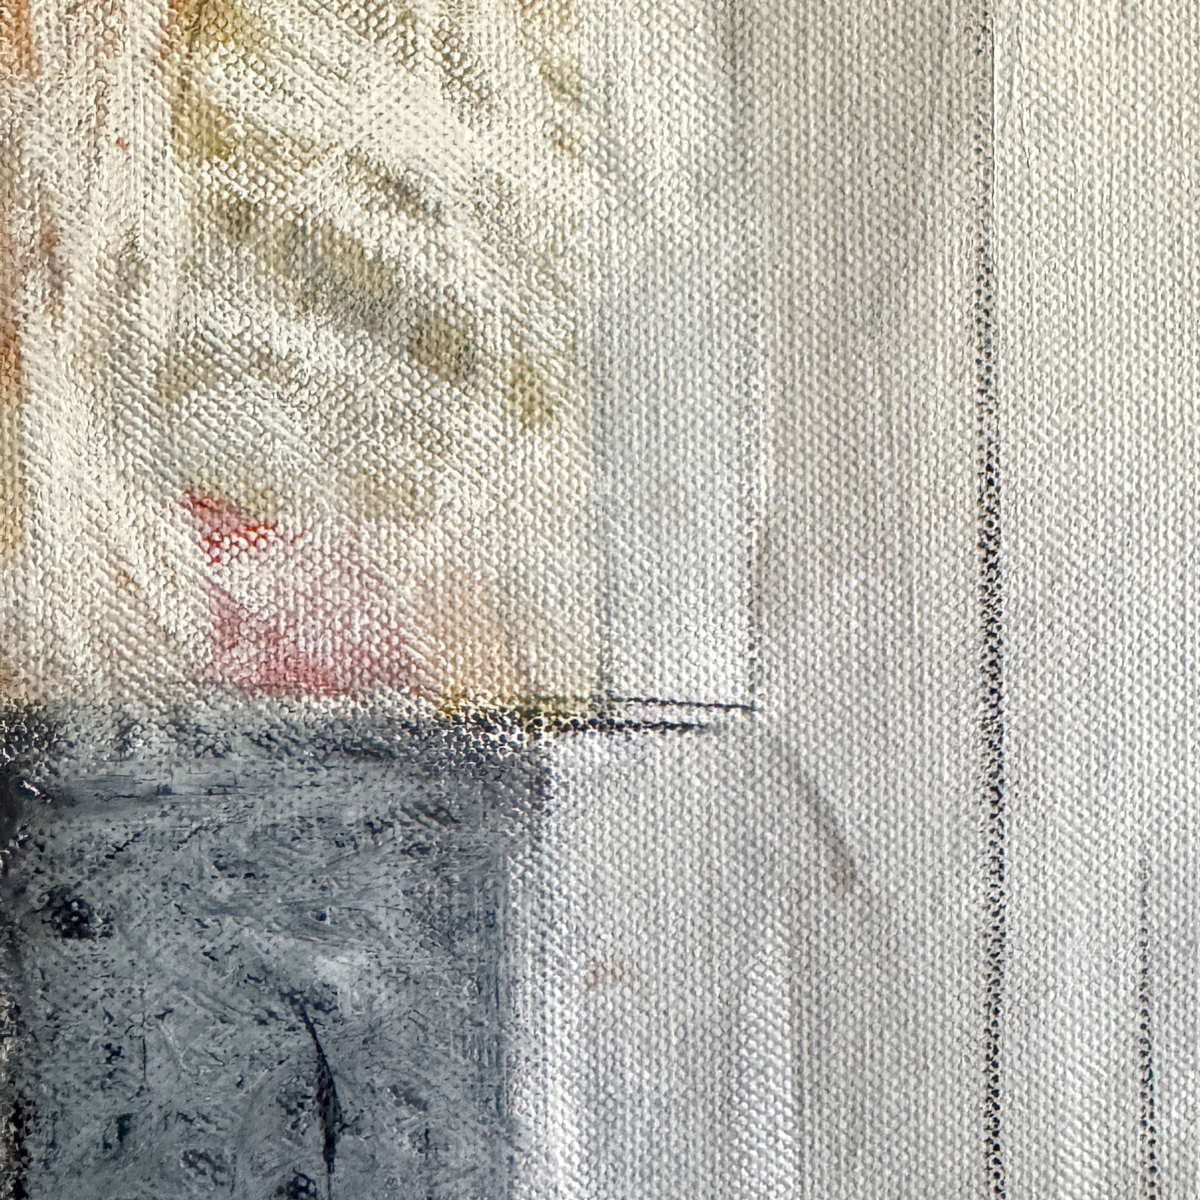
- Light & transparent colors – drawings show through
- Hatch shading in the drawings in very important
- Layers of media, and partially covering up some elements
- Color Splitting (using variations of colors)
- Having fun and exploring on the canvas
There are no photo references included today, because it’s good to have a large selection of reference and real life objects to choose from. You should always be developing and adding to a library with picture books and photos that have been cut from magazines, cards, catalogs, and calendars. Arrange photos in group categories for easy searching.
This is a project where students will want to search for reference and print from the internet. You should decide ahead of time if you want to allow cultural icons (cartoons and movie heroes) to be allowed as subject matter. Don’t let students search or even to watch you search. There is no controlling what will appear even if you have safety protections in place.
CREATIONS - tap here to open
Our Creations lessons are for students who have completed the two years of Foundations and are ready to begin using all that they have learned to create new work. These more challenging versions of the same concepts and techniques are easily taught along-side students in the Foundations course. This allows for excellent review, and is encouraging for students to see progress from each viewpoint.
Use the Student Instructions printout below to distribute to your Creations students. Tap the image to open the PDF in a new window.
Journal Painting
Overview: Students who have done this project before, can bring a new level of skill and understanding to it. Working on a larger canvas is encouraged if possible.
Alternatively, the same basic direction can be done on watercolor paper and using watercolor technique over regular graphite pencil drawings.
Students can follow along or get started on their project. It will closely follow the Foundations project.
Tap images to open Creations Student Instructions and Reference Materials in new windows

Use this button to jump down to the preparation section.
LEARNING TARGETS
Students know how to set up their work area for painting with acrylics.
M A T E R I A L S
- Acrylic paints
- Brushes
- Palette pad
- Water container
- Smocks
- Paper towels
- Canvas – stretched, taped to a board, or a canvas board
- Canvas Pencil (a dark gray colored pencil, such as warm gray 90% Prismacolor Scholar series pencil) the pencil is described in the demo video
Brushes should be nylon for springiness and durability. Round brushes are the most versatile.
Paint pigment list:
- Napthol or Pyrrol Red
- Hansa or Light Yellow
- Pthalo Green (blue shade)
- Cyan or Cerulean Blue
- Ultramarine Blue
- Dioxazine Purple
- Magenta
- Burnt Umber
- Raw Sienna
- NO WHITE TODAY
2.1 paint
Students set up their work area, including having water tubs filled.
Do Not Use White Paint Today!

Use this button to jump down to the preparation section.
LEARNING TARGETS
Students know how to create mixed media artwork.
M A T E R I A L S
- TV or Ipad to watch video
3.1 prepare
You can learn from the video (below) or play it on a display for your students to watch. The video has two parts. We’re doing the first part this week, and the second part, using the white mixed into paints, next week. The Sketching Stage is not covered in the video.
Stage 1: Sketching. Everyone should know a bit about this but review these steps.
- Visualize first
- Find reference
- Practice Sketch in sketchbook
- Sketch on canvas using HATCH shading
- Visualize next part and repeat until drawings are done
- Lettering can be used but needs good baselines and letter references
- Optional collage elements may be applied in part one
Make a sketch on the canvas, using hatch shading. You can have this done before hand if you want. Discuss how the pencil sketch is a part of the painting. It looks finished, and shows through in the final art. Also, talk about how the canvas can have drawings from several different reference sources, or just one. Drawing is a big part of this technique, which Dennas calls a “journal” painting, because can look similar to a page in an artist’s journal. You can even write some notes, or make some nice lettering. (If it comes up, discourage bubble lettering and cartooning).
Talk about doing good shading technique, and how hatch shading works very well. (The hatch shading demo is helpful if you have not seen it).
Stage 2: Painting Glaze Stage. This is the first half of the video demo.
- Visualize colors
- Mix colors on palette – Do not use tube colors and do not use white just yet!
- Water down until syrupy, not runny
- Paint light and transparent colors, allowing sketches to show
3.2 DEMO
Show how you use layers and different subjects to create an art journal. If your students are not proficient with hatch shading yet, also show them how that works or display the video below.
Journal Video: 9 minutes
Tap the 4 arrows icon to enlarge the video to full screen.
Shading Video: 6 minutes
Tap the 4 arrows icon to enlarge the video to full screen.
“Paint on the canvas using light and bright colors with water to make it thin and syrupy. It’s almost like watercolor, but not quite. It will be very much like the backgrounds we made with the peppers paintings, only lighter and more vibrant colors.
This is important: Do not use white paint at all for the first layers of paint.
As you paint, you’ll notice that this is a lot like painting the peppers we did recently, in that one mixed color is filling in the whole local color of an object. All of the shading is done with the pencil, and shows through the light, watery paint. You can add layers of paint to make stronger and darker areas. Be careful though, that you do not overwhelm the delicate drawings.
When this stage is finished, we will continue to the final stages next week, where you can add opaque and slightly translucent layers. You’ll use white paint mixed into your colors for this. The white is opaque, and it will totally cover your drawings if you use too much of it, so it must be thinned down a lot, or painted in areas you don’t mind covering up.”
Use this button to jump down to the preparation section.
LEARNING TARGETS
Students know how to sketch on canvas
M A T E R I A L S
- 14″ x 17″ Sketch Paper (if needed for practice)
- Canvas
- Canvas Pencil
- White Eraser
4.1 visualize
Students begin by visualizing what they want.
Encourage your student and help individuals as needed by asking questions and giving your honest responses.
4.2 Collect
Students should find reference material.
It’s great to get several things collected, but you can also move from the first reference to sketching, and then go look for the next reference.
4.3 sketch
Students start adding sketches – and shading.
Sketches can be practiced first or drawn right on the canvas. Because it’s a journal, the canvas should be approached as a work in progress. Everything can be changed as you go. Unlike a regular canvas, it’s not as important to have a great subject or reference as it is to do great sketching technique and create a good composition.
If your student doesn’t seem very into the project, ask them what would make them more excited about it. Ask them what their favorite thing to draw is. Get them to incorporate it into their work, and if it’s a silly cartoon character or favorite game, try asking them how they could make that more interesting than just another picture of the characters or game scenes.
Be aware that there are students who will not shade. This project allows non-painters to express their drawing abilities.
If you tape sheets of canvas to drawing boards, or use canvas boards, the surface is great for pencil sketching. However, stretched canvas has air behind it, which doesn’t support the pencil very well. Set stretched canvases on a table, with a book underneath that fits inside the wooden frame it’s been stretched on. That will give the surface a firm base to draw on.
Use this button to jump down to the preparation section.
LEARNING TARGETS
Students know how to build a composition
M A T E R I A L S
- 14″ x 17″ Sketch Paper (if needed for practice)
- Canvas
- Canvas Pencil
- White Eraser
5.1 Art
Assist students as they enjoy adding sketches to their work.
Follow these steps:
- Visualize first
- Find reference
- Practice Sketch in sketchbook if needed
- Sketch on canvas
- Visualize next part and repeat until drawings are done
- Lettering can be used but you need to make baselines with rulers and use fonts for reference
- Optional collage elements may be applied in part one
A second layer of shadows and values, with hatch shading should be added.
5.2 compose
Students need to evaluate and make changes, to improve composition as they work. Remind students often, to stop and think about the Principles of Design, which has 3 methods, and 3 goals, that make artwork look better.
Display this graphic on the screen and review as needed.

Use this button to jump down to the preparation section.
LEARNING TARGETS
Students know how to add color to their canvas
M A T E R I A L S
- Acrylic paints
- Brushes
- Palette pad
- Water container
- Smocks
- Paper towels
- Clear acrylic medium if possible (makes the paint more translucent but still syrupy and smooth)
6.1 paint
Encourage students to add color – but without using white
- Visualize colors
- Mix colors on palette
- Water them down until syrupy, not runny
- Paint light and transparent colors, allowing sketches to show
As your student works, be on the lookout for strong colors and dark thick paint. If you can catch them early, then they can add water right on the canvas and lighten it right up. If there is too much water, they can just add more color later, but encourage them to find a good middle ground where the color is visible, but doesn’t overpower.
Do Not Use White Paint Today!
TIPS
1) Try not to have runny paint, that looks more like watercolor. It should be a little thicker so that it sticks to the canvas.
2) Keep areas of cool colors together, and then use warm color to make things stand out. Or the other way around. Mixing both cool and warm colors will create neutral grays and browns. Bright colors will pop out of white, gray or brown areas too.
Use this button to jump down to the preparation section.
LEARNING TARGETS
Students know the importance of cleaning up.
M A T E R I A L S
- Paper Towels
- Cleaning wipes
- Sink
- Waste baskets
- Well-lit spot for photos
- Camera or phone-camera
7.1 CLEAN
- Wash hands
- Super-wash brushes if used
- Put art supplies away
- Wipe tables & toss trash
- Remove any smocks (last)
- Check for items on floors and tables
7.2 PHOTO
OBJECTIVES
- Practice and improvement using acrylic paints and composition
- Understanding how to combine elements and media in new ways
- Accomplishment in creating a sketch/painting combination work
- Fulfillment by choice of subjects and personal expression
TROUBLESPOTS
Trouble beginning Some students may be overwhelmed with the amount of choice. Whenever this happens, use the “3-ideas-pick-one” method. Tell the student to write down and/or sketch 3 ideas in 3 minutes. Afterwards, they must choose one and get started. Sometimes it’s easier to choose what you don’t want. If they can’t choose, give 2 minutes to pick one or you’ll pick for them. You may find if you choose one, they will then choose a different one, but it works!
Another thing to try is to emphasize that this painting is about playing around with ideas and changing things along the way. Anything that comes to mind can simply be drawn on the canvas. If you don’t like it, erase or cover up with paint later. You can even cover with collage elements!
Paints not sticking to the canvas. Please read this part. Cheaper gesso is used these days on canvases, and sometimes it actually resists water-based paints when thinned down. If student’s paint is beading up a little, making holes in the color, it means the acrylic paint does not adhere very well. One solution if you see this happening is to use a little more of the paint and less water. A much better but more expensive trick is to add clear acrylic medium if you have some, which thickens the paint but keeps it transluscent and light. Finally, another quick method is to scrub the paint onto the surface to make it stick better, but that can be hard on a brush. Sometimes re-gessoing the canvas is the only way to make a badly primed canvas behave properly.
The canvas pad we use works well. It seems that the cheap stretched canvases are the worst. Hover or tap the underlined “canvas pad” and you can see what we use, and tap the photo to purchase.
ART WORDS
CLASSROOM
PREP
Read this lesson very thoroughly! There are many things included that will make this project turn out better.
If you have cheap stretched canvases, test for watered-down paint adherence, and if there’s a problem, re-gesso the surfaces. See the Troubleshooting section directly above.
Make sure you have canvas pencils on hand. See the MATERIALS section of STEP 1 for details.
Have lots of reference materials available. Magazines, Calendars, Photo books (coffee-table books), and a way to print from searching on the internet if you can. (do not allow students to watch while you search).
Print all of your PDFs from the lesson plan and cut any references apart as needed.
What your room needs
Here are your printable lists and room prep instructions.
Opens in new window
CLASSROOM
MATERIALS
- 8.5″ x 11″ copy paper
- 8.5″ x 11″ card stock
- 11″ x 17″ copy paper
- Rulers
- Scissors
- Box cutter (teacher only)
- Large Drawing boards with clips
- Water containers
- Spray bottles
- Water droppers
- Paper towels
- Smocks
STUDENT’S
MATERIALS
- 14″ x 17″ Sketch Paper
- 11″ x 15″ watercolor paper
- 2B Pencil
- 4B pencil
- Ebony pencil
- Black Sharpie
- Markers
- India ink
- Ink dip pen with metal nib (not too sharp a point)
- Soft compressed charcoal sticks (not pencils)
- Canvas pencil (dark gray colored pencil)
- White erasers
- Kneaded erasers
- Acrylic paints
- Oil pastels
- Blender sticks (stumps)
- Sandpaper boards (to clean blenders)
- Paper palette pad, or disposable trays/plates
- 11″ x 14″ Canvas (loose or from real canvas pad)
- Canvas boards (optional)
- Tape – blue painter’s tape
- Brushes – All sizes
PREVIEW
Week 35: Finish Journal Painting
Several techniques are used to complete the journal paintings, including adding oil pastels to the final surface if desired. Early finishers get to do some Artists’ choice.